Custom Event Listeners
Introduction
A custom event listener is used to pass data to a target function or circuit whenever its URL is invoked by the end user. You cannot associate an event occurrence in a component with a custom event listener. Any event listener that you create in Catalyst will be a custom event listener, as the component event listener is present by default.
Let’s understand the behavior of a customer event listener in a logical sequence:
- When you create a custom event listener, a URL will be generated for it. The same URL will be used for all the event’s rules. You can include this URL in your application’s code or use it however you need.
- You can associate each rule of a custom event listener with a different target function or circuit. You can also send different data in the request body of the event listener’s URL for every rule. That is, an event listener’s URL invocation can be configured to trigger different functions or circuits and send different data for each rule every time.
- You can also associate multiple rules to the same target function or circuit, and send different data to the same function or circuit every time. This enables you to use the same function or circuit for different needs.
- To identify which rule needs to be triggered when a custom event listener’s URL is invoked, the rules contain a variable called the rule identifier. When a rule is created in a custom event listener, you will need to provide a unique value as its identifier. This rule identifier is associated with only that rule, which in turn associates the target functions or circuits with the rule.
- Since a custom event listener has the same URL for all its rules, you can indicate which rule must be invoked, by passing the rule identifier value in the request body of the URL. The request body is in the JSON (application/JSON format, and therefore must contain this information as a key-value pair with the key as rule_identifier. You can also pass more information in the request body based on your needs.
- The URL can only be invoked using the HTTP POST method, as other methods do not support the inclusion of form data within the message body of the request.
- When the event listener’s URL is invoked, Catalyst matches the rule identifier specified in the body of the request with a rule of that event listener configured in the console. When the match is a success, Catalyst triggers that rule and passes the event data to the functions or circuits associated with that rule. The event data can then be processed in the target circuit or event function, to carry out the required task. If there is no successful match, it will be a failed event.
Let’s understand the functioning of a custom event listener better with an example:
Assume you create a custom event listener in our Catalyst project. The URL of the event listener will be automatically generated. Now you create a rule (rule_1) in it and provide the value for the rule identifier as ID1. This rule executes the target function Func when triggered. Now you create a second rule (rule_2) whose rule identifier is ID2 and it executes the same function Func when triggered. That is, both rule_1 and rule_2 have the same invocation URL and they execute the same function. Now, you use this URL in the application’s logic in two different places.
Usage 1: The user submits data through a form (Form 1) in the client’s homepage and the URL is invoked. You specify the rule identifier as ID1 in the form data of the URL’s body.
Usage 2: The user submits data in a different form (Form 2), and the same URL is invoked. You specify the rule identifier as ID2 in the form data of the URL’s body.
Catalyst event listener will be listening for the invocation of this URL. When a user submits data through Form 1, the URL is invoked. The body of the HTTP request would contain the form data which includes the rule identifier as shown below:
{
	"data": "Sample data from Form 1",
	"rule_identifier": "ID1"
}
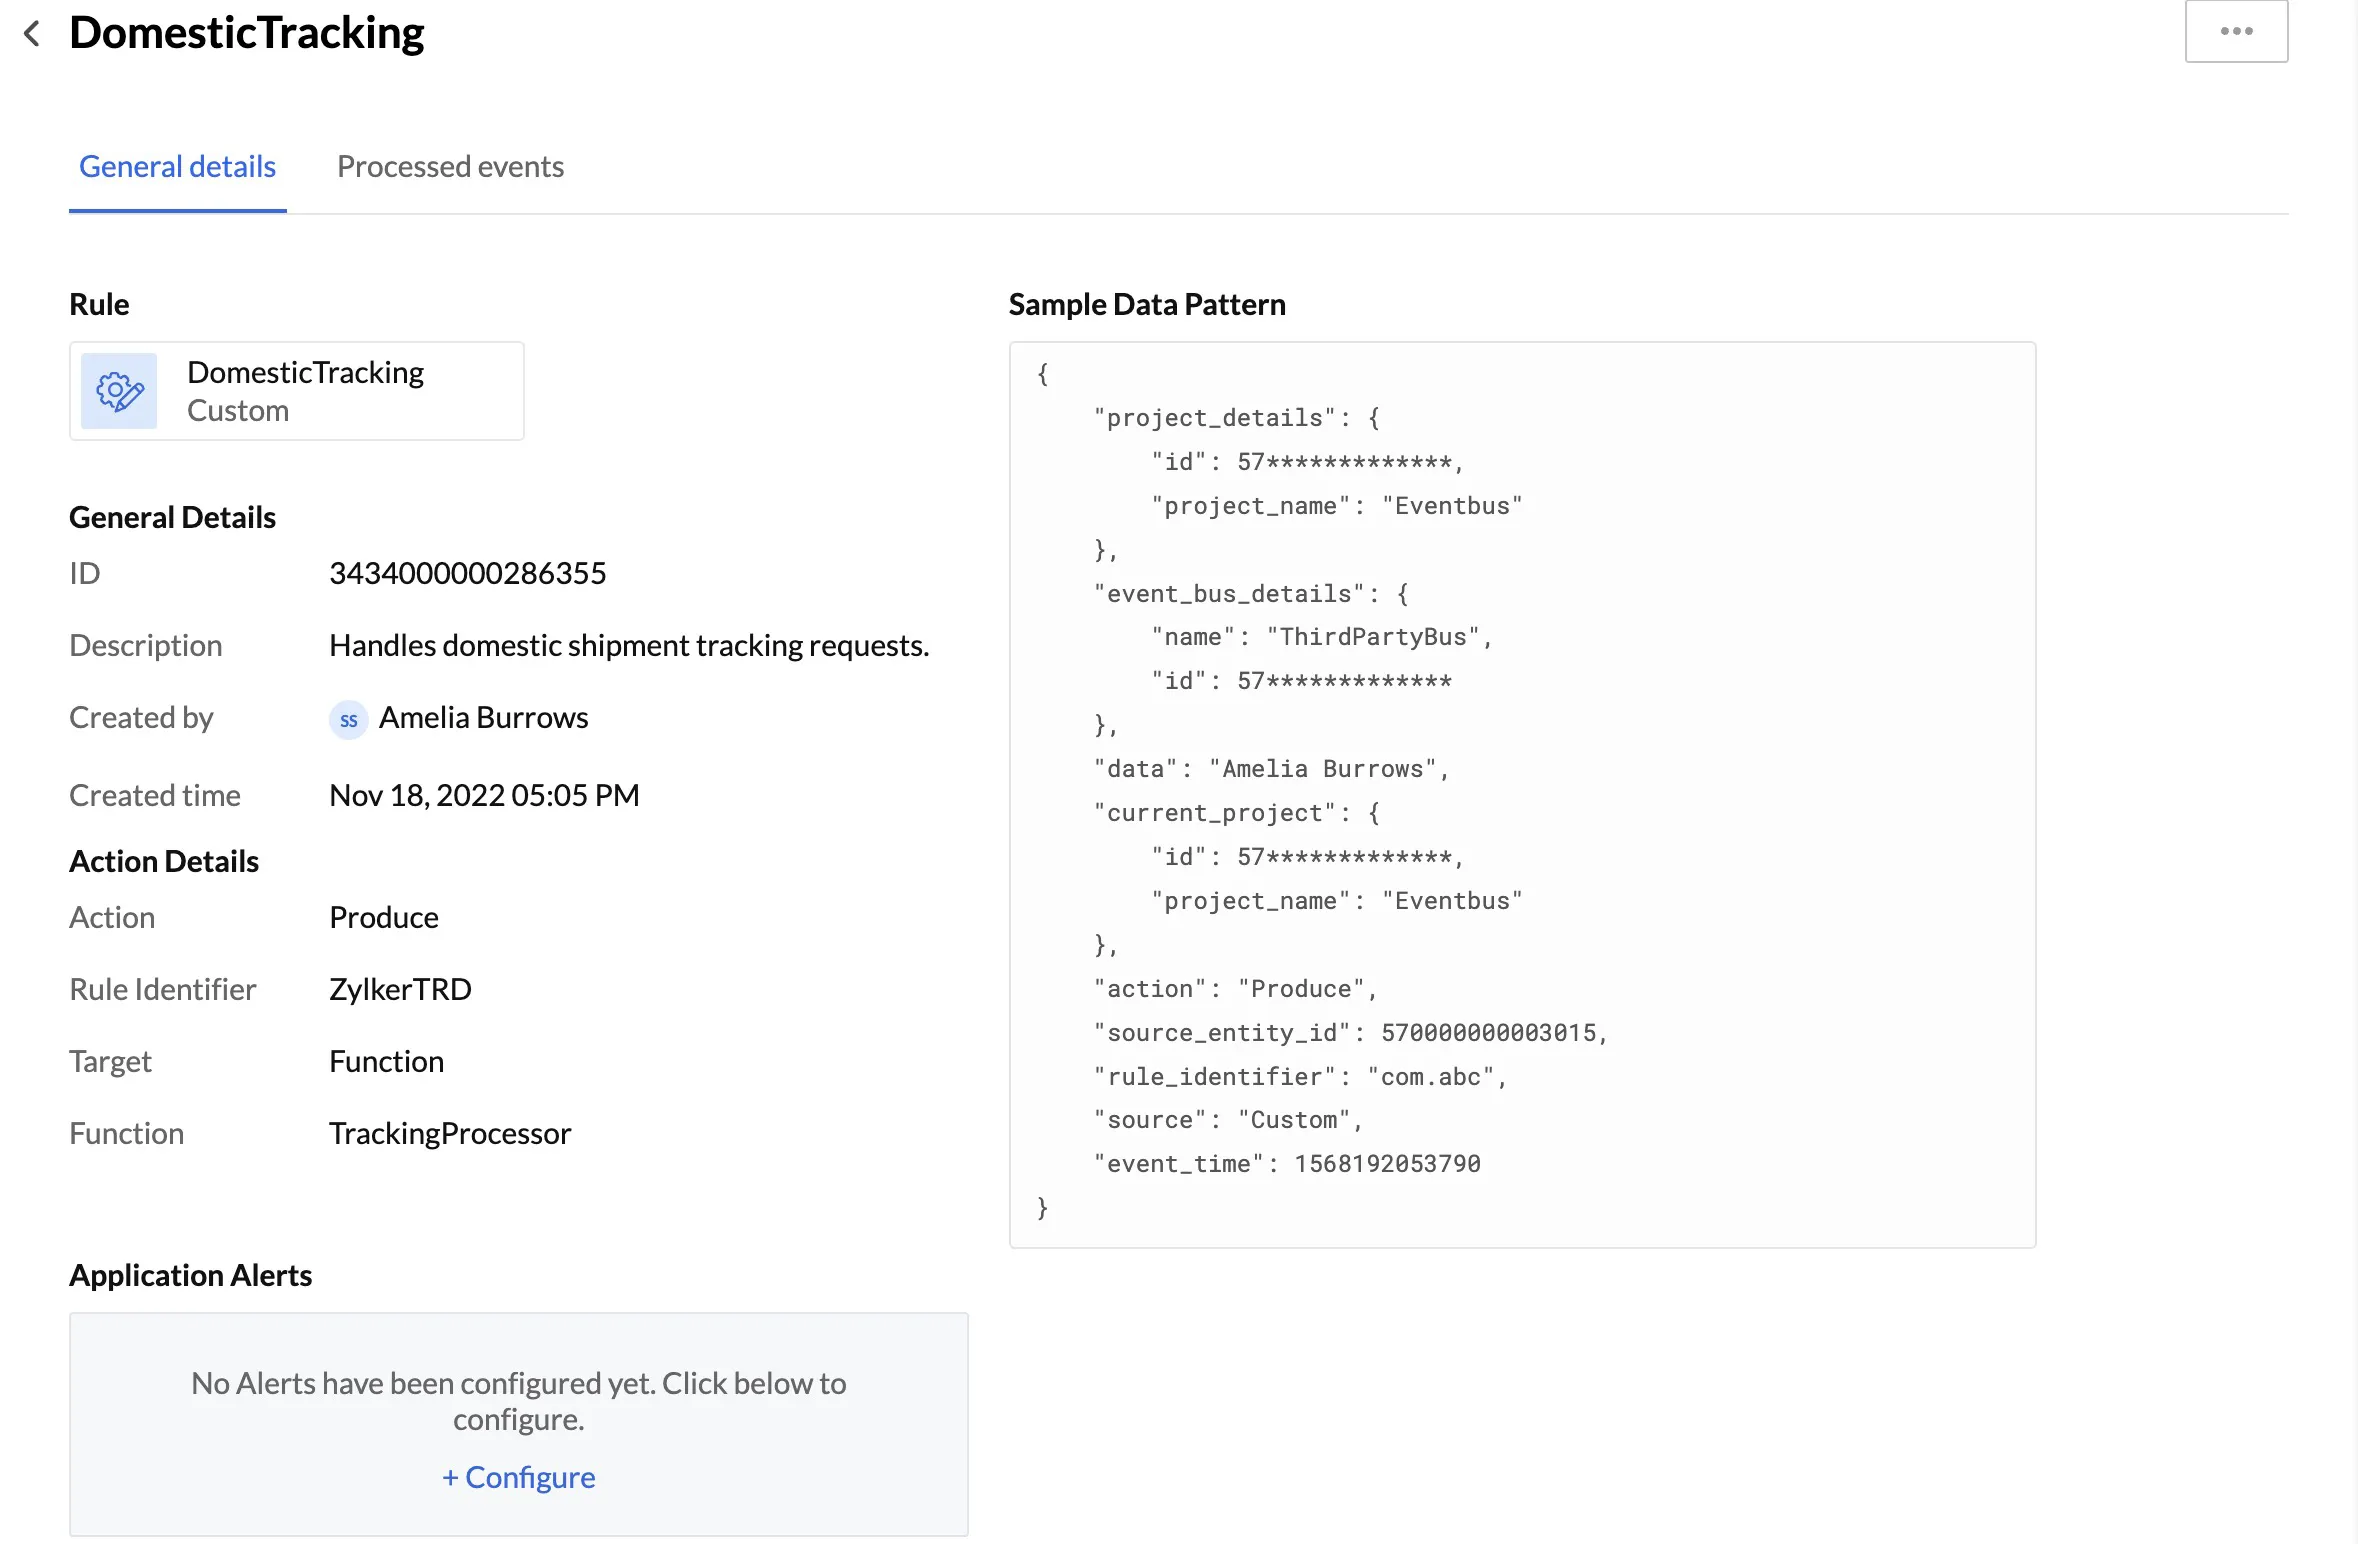
When Catalyst captures this event, it will match the rule identifier ID1 to rule_1 configured in the project. When the match is a success, it triggers the function Func. It will then pass the event data to the function in the following sample data pattern:
{
    "project_details": {
        "id": 57*************,
        "project_name": "Eventbus"
    },
    "event_bus_details": {
        "name": "ThirdPartyBus",
        "id": 13*************
    },
    "data": "Sample data 1",
    "current_project": {
        "id": 57*************,
        "project_name": "Eventbus"
    },
    "action": "Produce",
    "source_entity_id": 570000000003015,
    "rule_identifier": "com.abc",
    "source": "Custom",
    "event_time": 1568192053790
}
If a user submits data through Form 2, the same URL will be invoked with the value of the rule_identifier in the request body as ID2. When Catalyst captures this event and associates ID2 with rule_2, relevant data is passed to Func. The data pattern is the same for the rules of all custom event listeners.
Let’s now create a custom event listener and configure it.
Create a Custom Event Listener
To create a custom event listener:
- Click Create Event Listener from the Event Listeners section in Amplify, in the Catalyst console.

- Enter a name and a description for the custom event listener. Select Custom Events as the type.
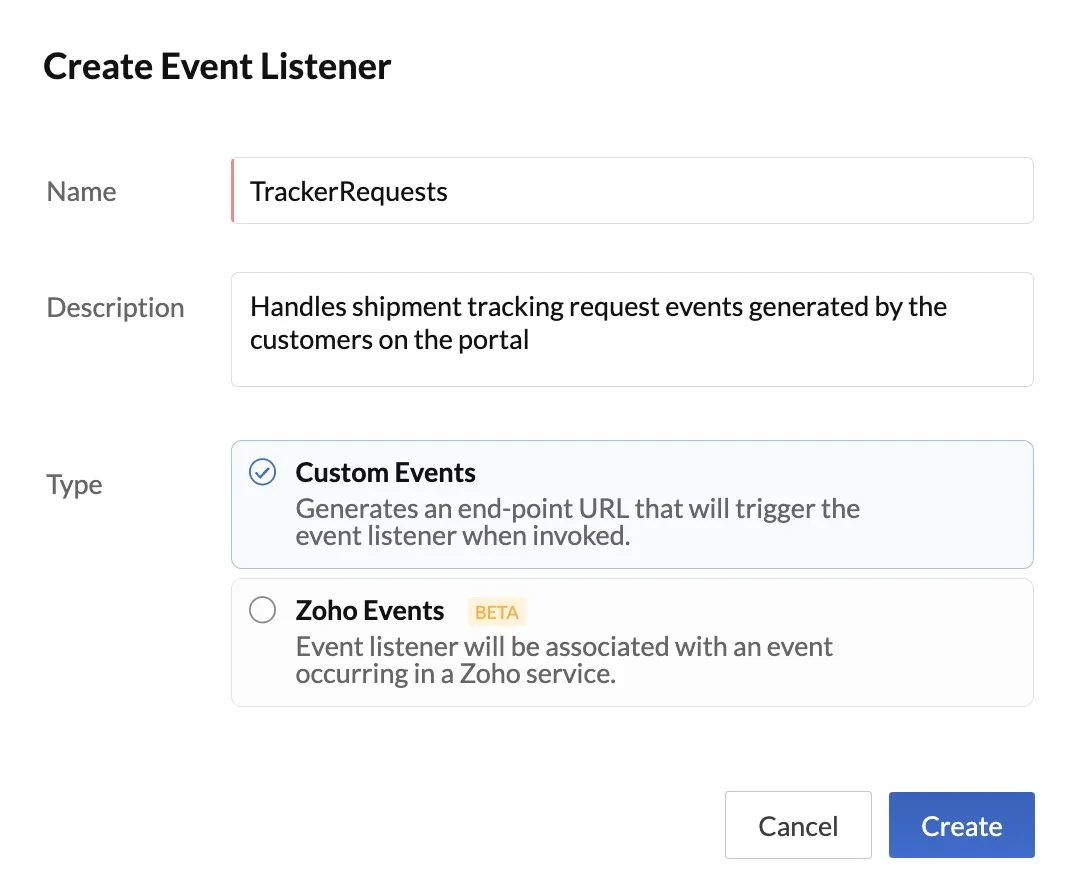
- Click Create.
The custom event listener will be created and displayed in the Event Listeners page with its ID and the same performance statistics as the component event listener.
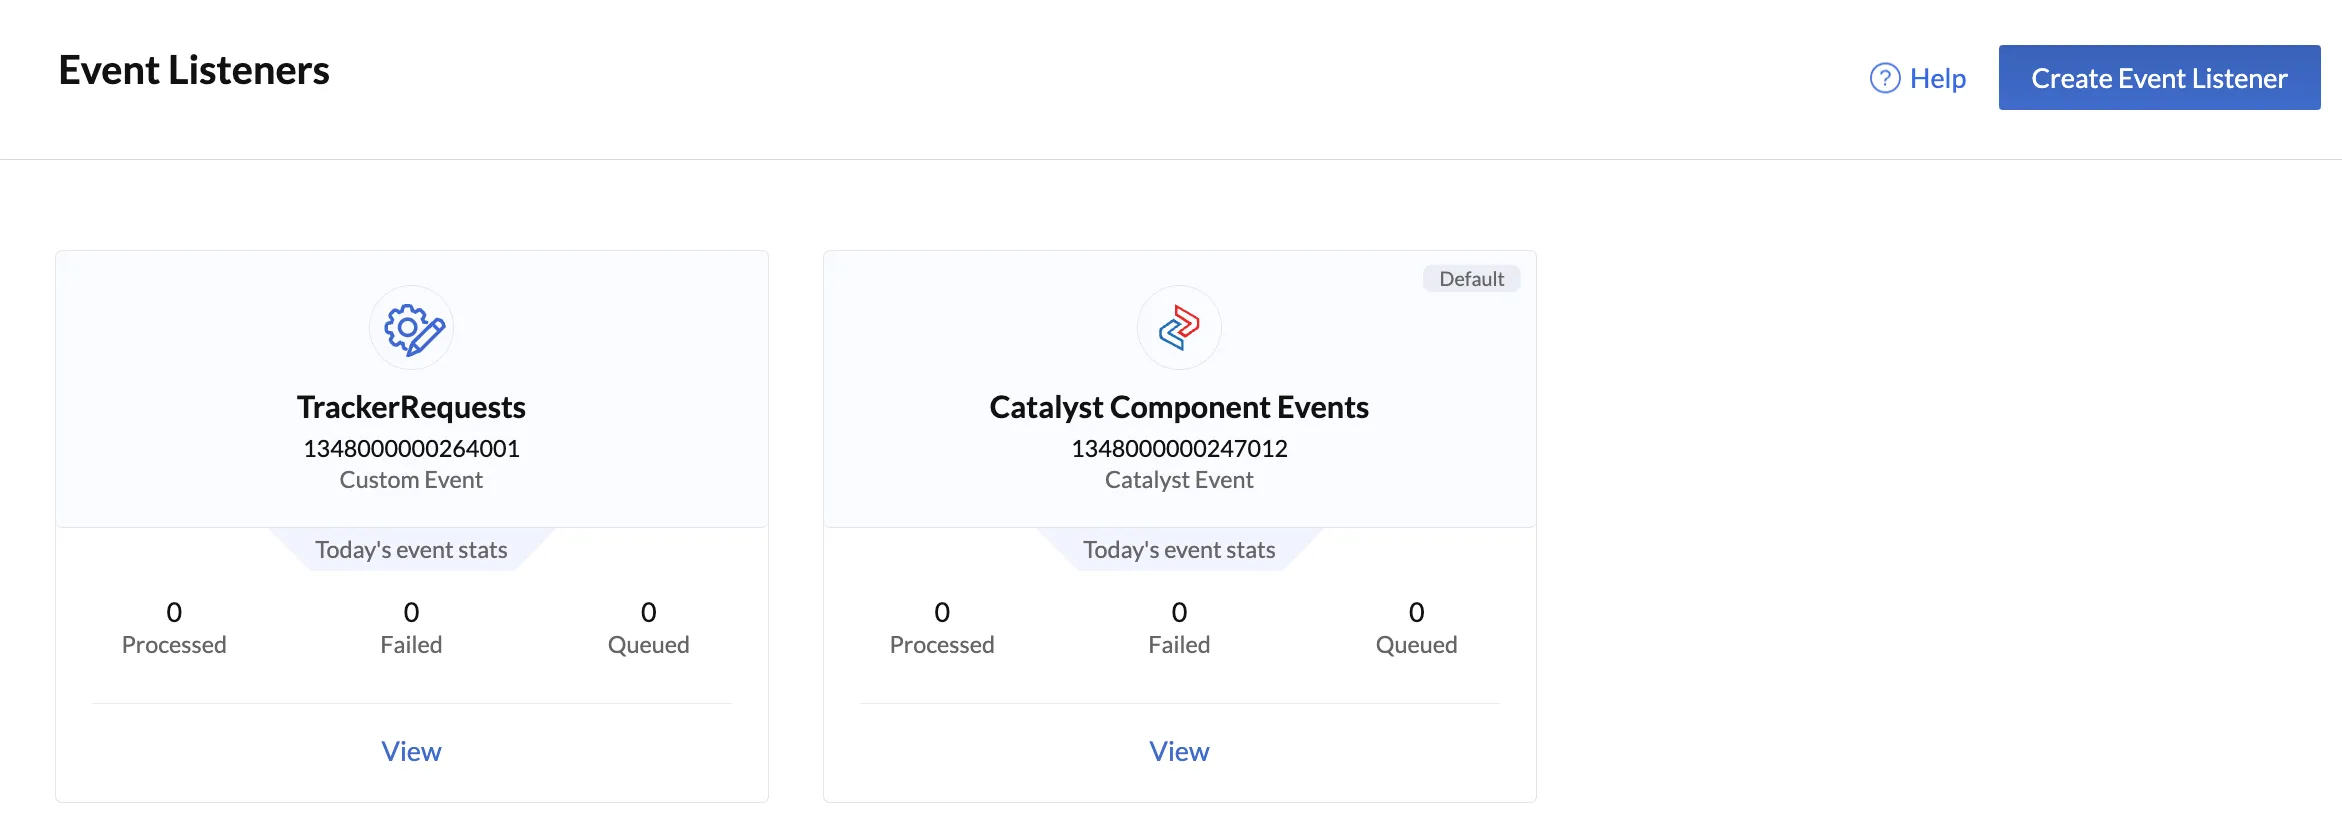
You can view the details of an event listener by clicking on View on its tile. You can also access the URL of the event listener from this page.
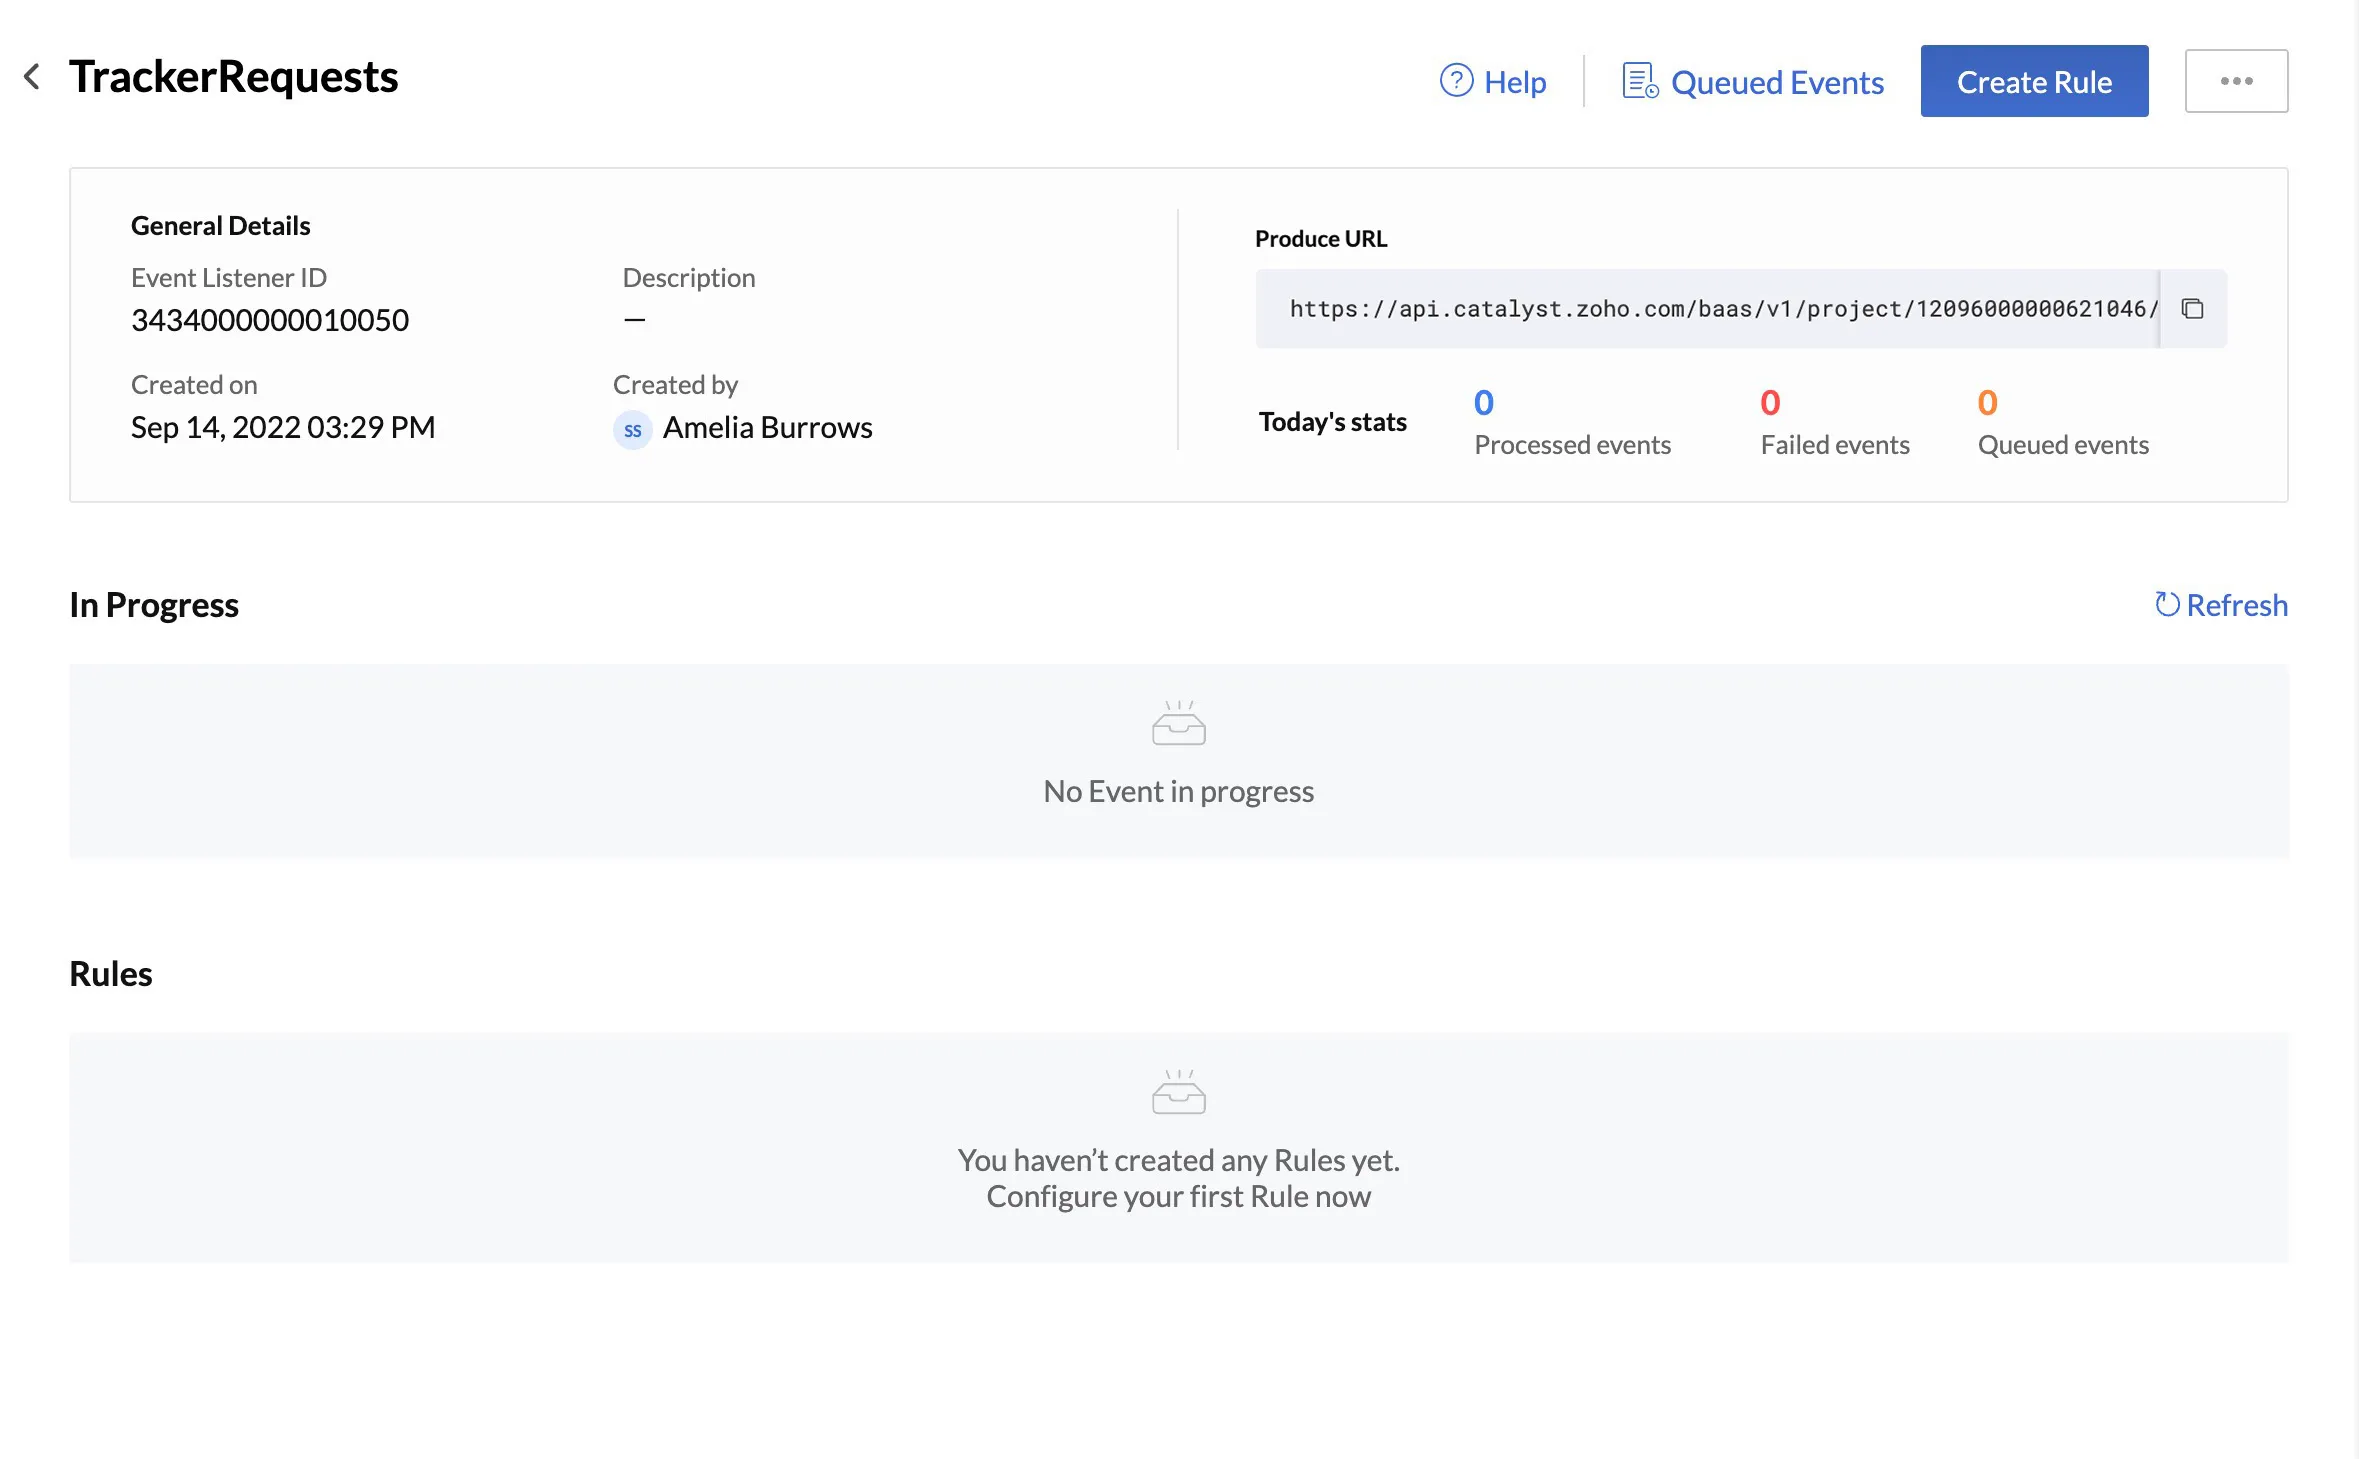
The URL of a custom event listener is of the following format:
https://api.catalyst.zoho.com/baas/v1/project/project_id/event-bus/event_listener_id_/produce?ZCFKEY=_zcf_keywith the values of Project ID, Event Listener ID, and a unique ZCF Key filled in.
Create a Rule in the Custom Event Listener
To create a custom event listener:
-
Click on the custom event listener from the Event Listeners page to open it.
-
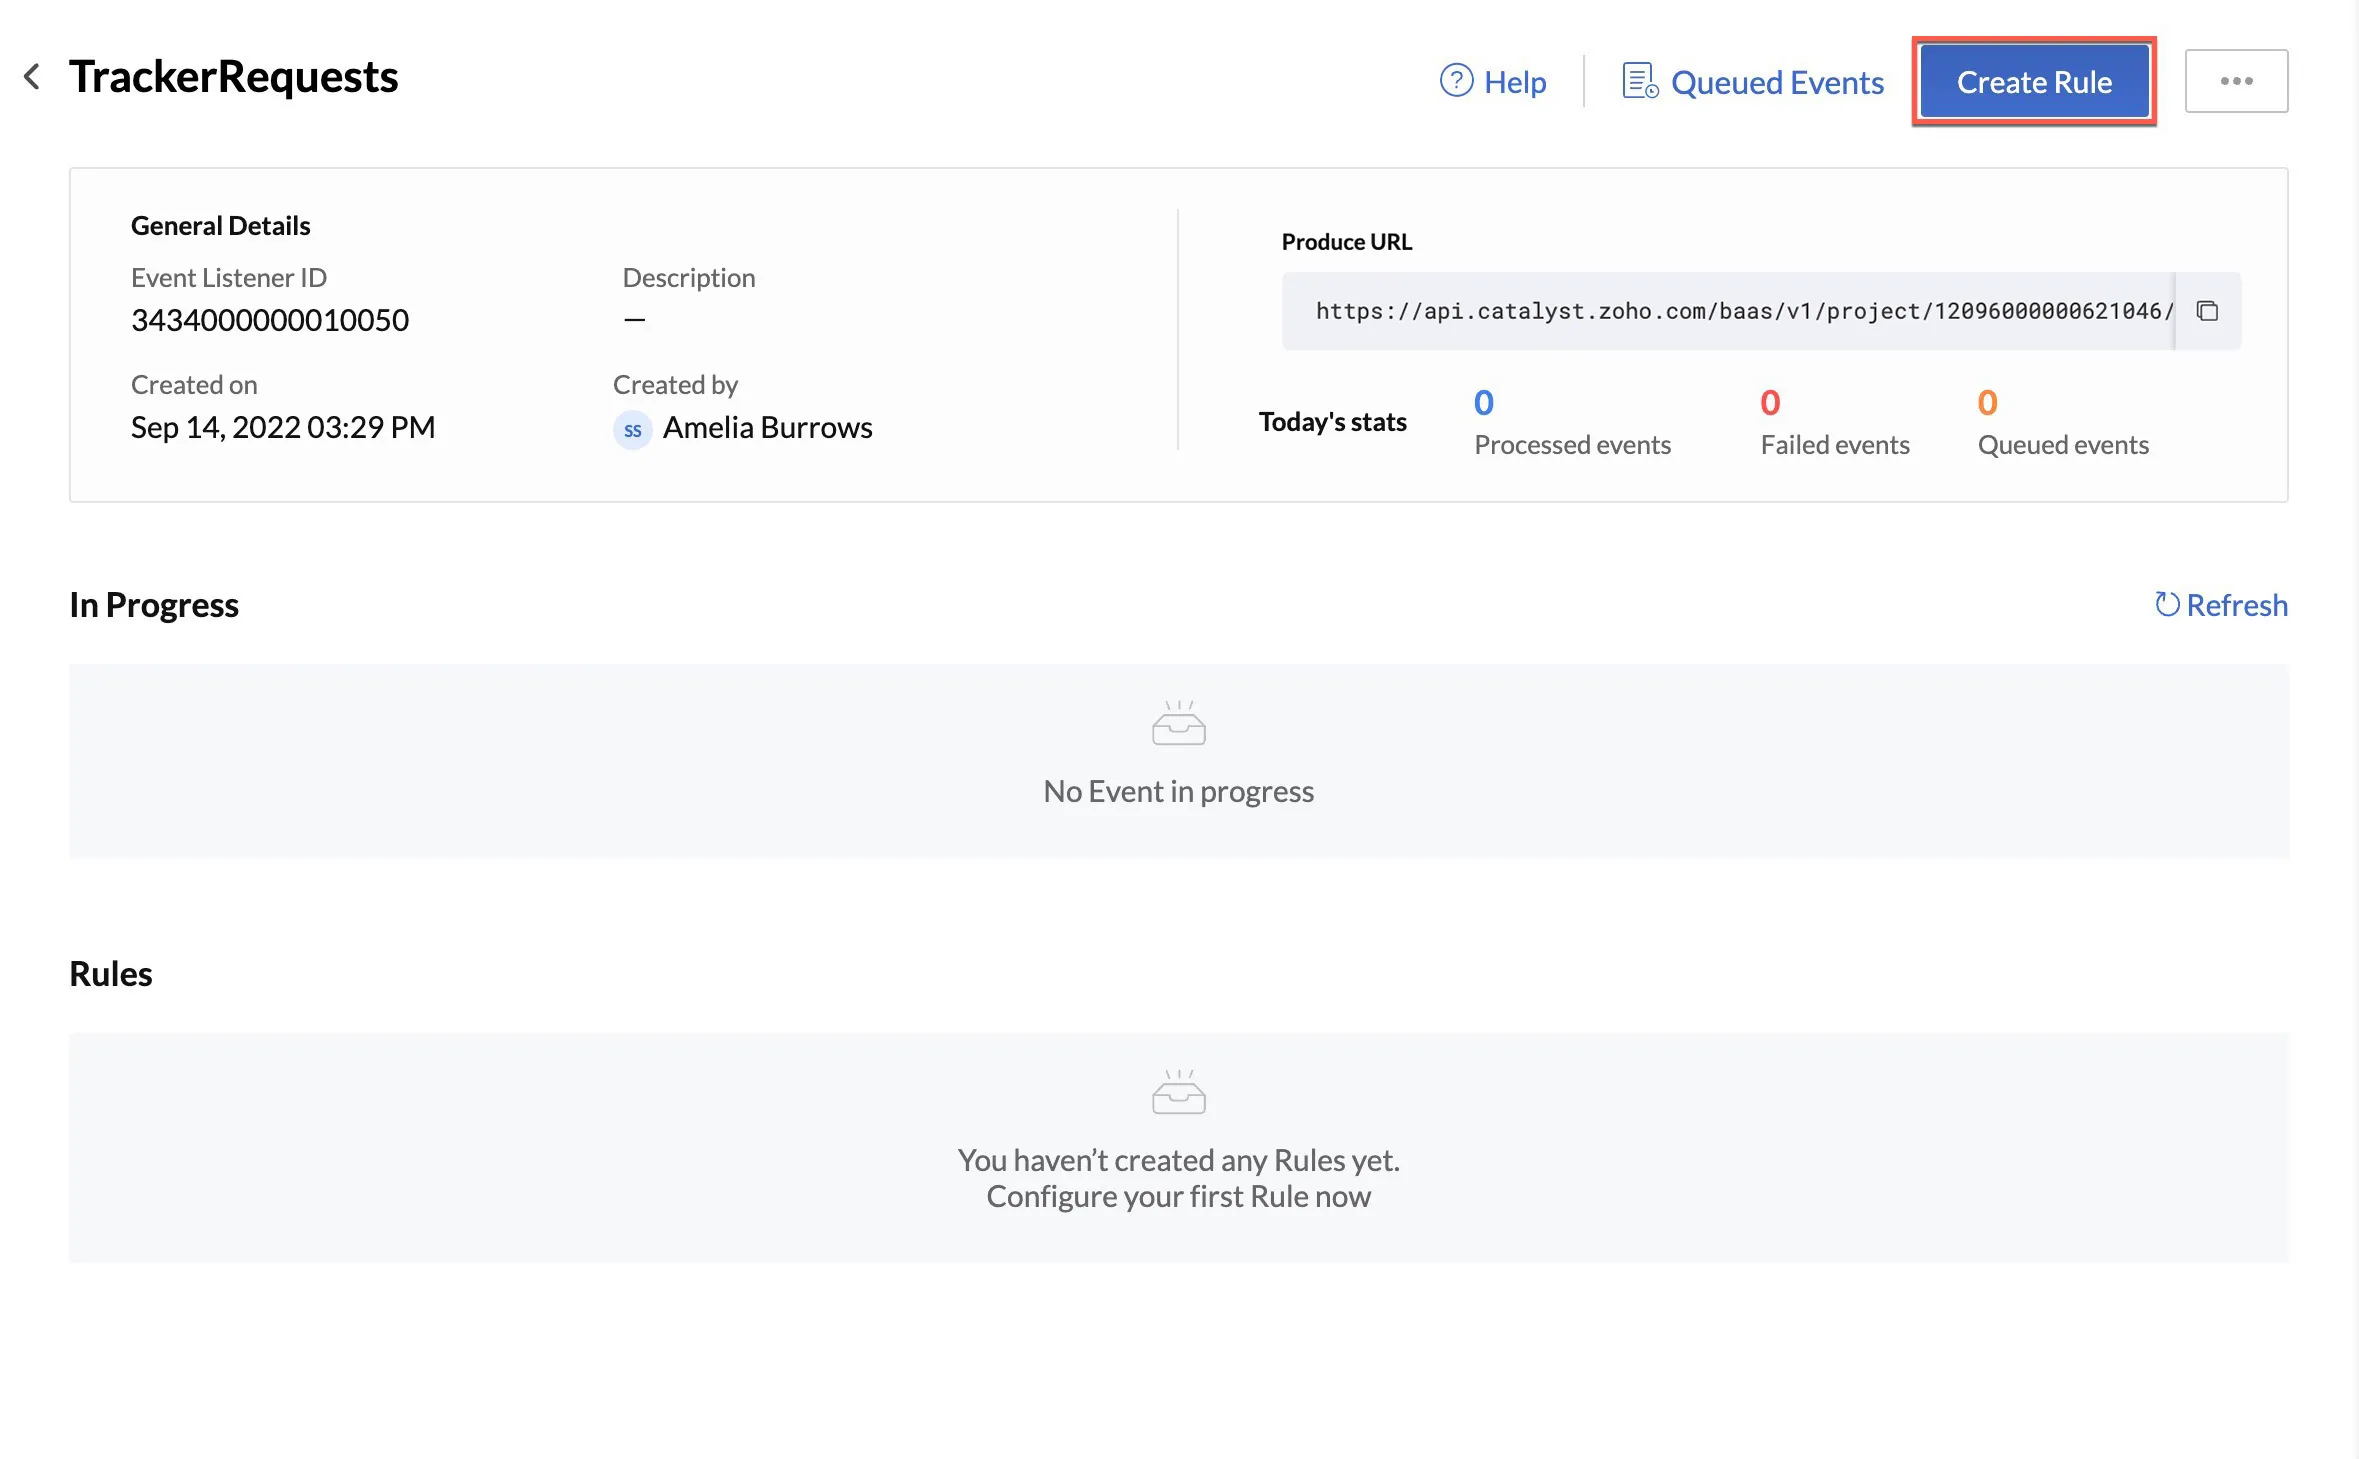
Click Create Rule.
- Enter a name, description, and a rule identifier for the rule.
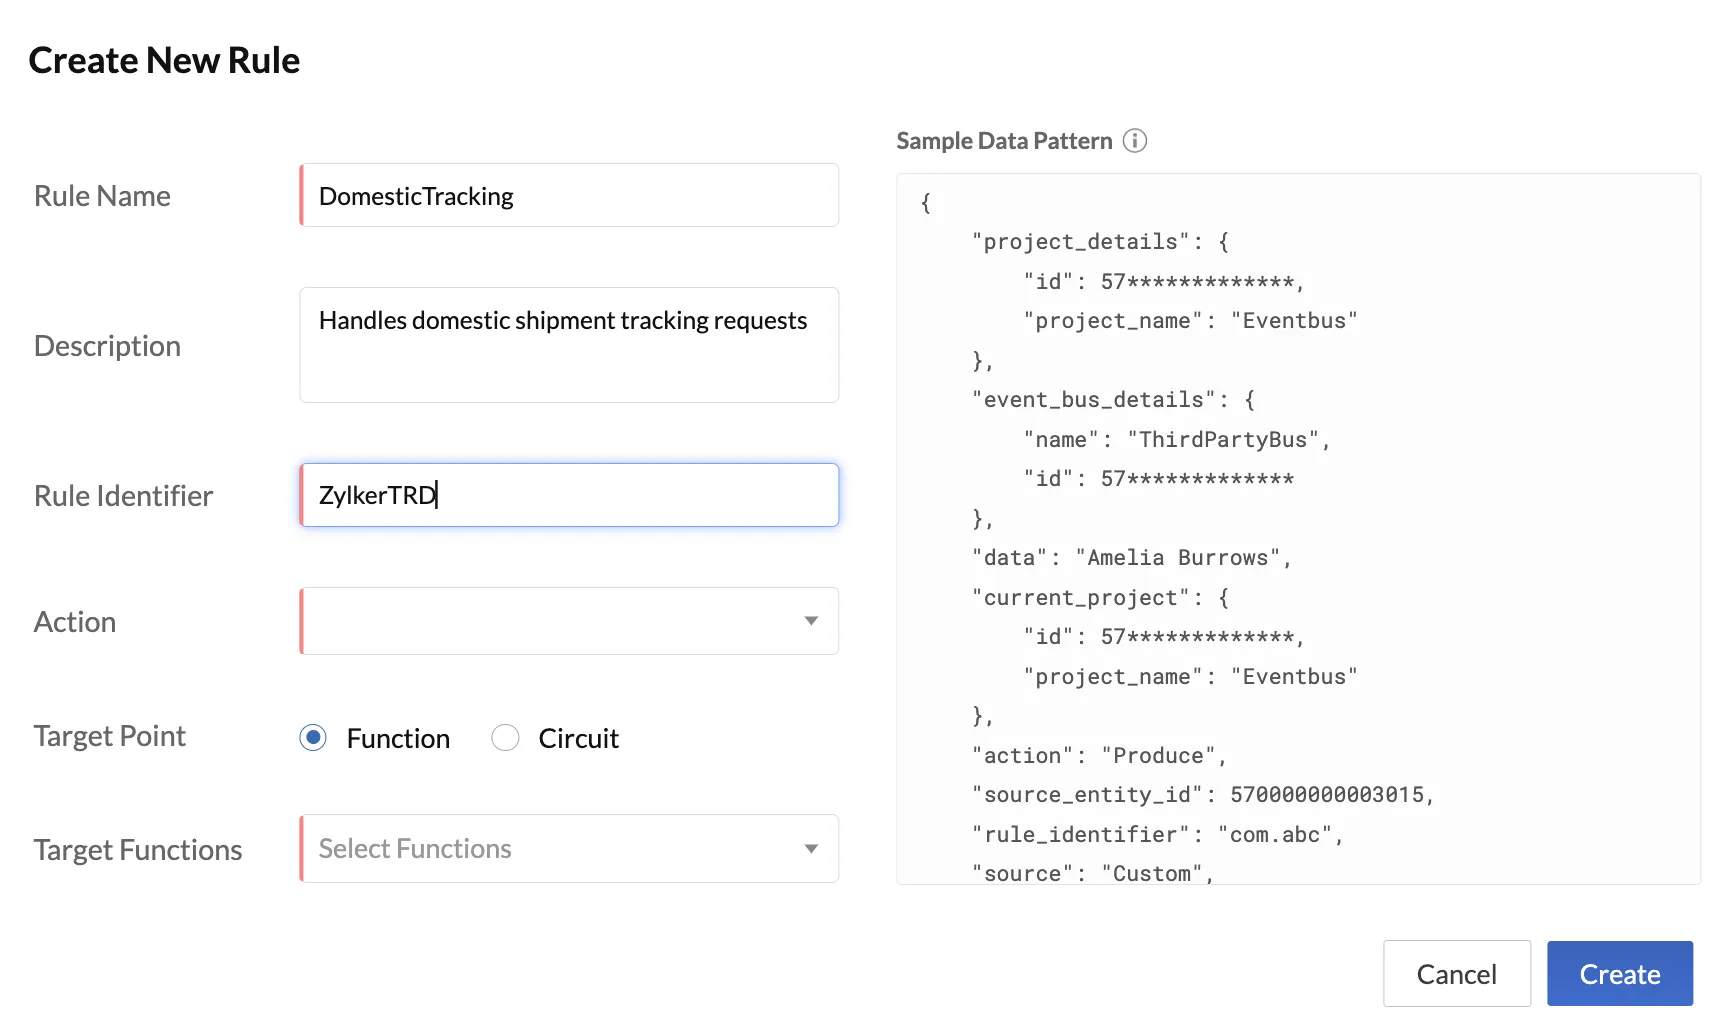
The page displays the sample structure of data that will be passed to the target function or circuit.
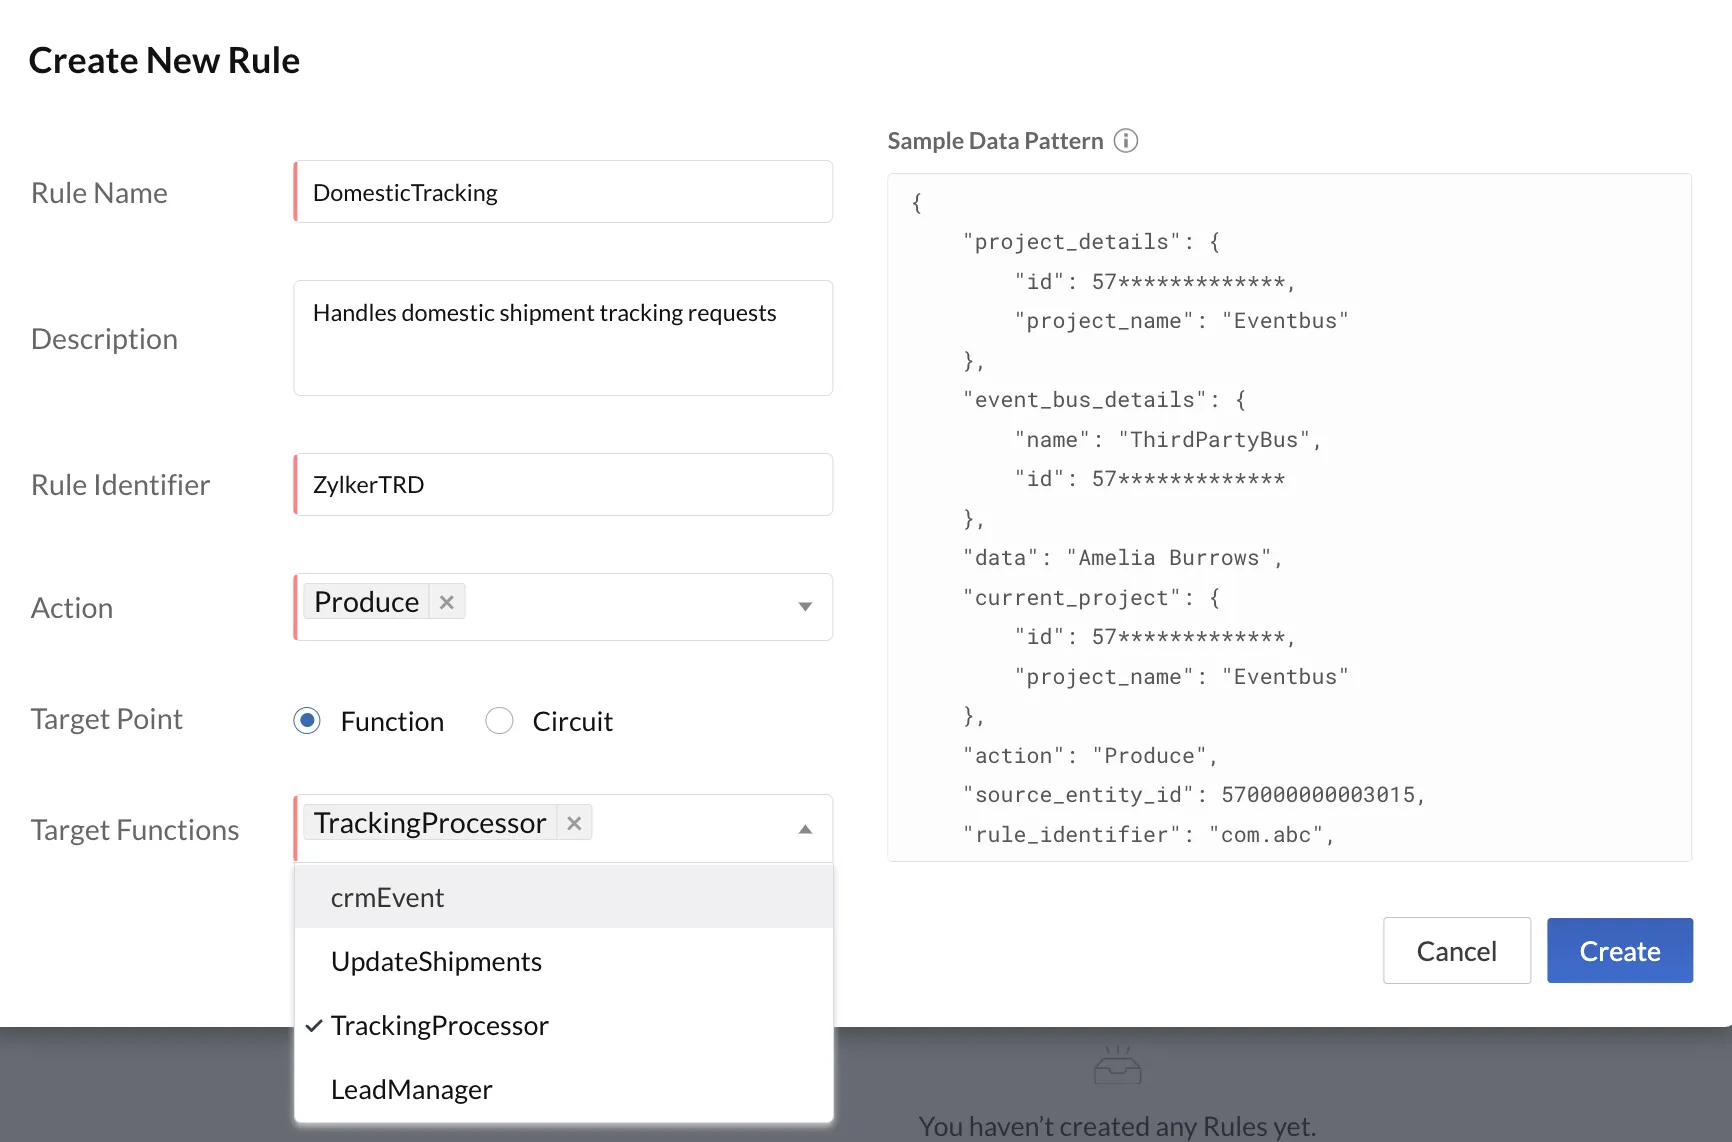
- Choose Function or Circuit as your Target Point:
-
If you choose to trigger Functions:
Select the action and the target event function from the dropdown list. You can currently only select Produce to enable passing data to the target function. You can select multiple target functions.
-
If you choose to trigger a Circuit:
Select the target circuit from the drop-down list. You can currently only select Produce to enable passing data to the target circuit. You can select multiple target circuits.

-
If you choose an event function as your target, the drop-down will only list event functions.
-
If you choose a circuit as your target, the drop-down will list all the circuits you had previously created.
-
If you have not created an event function or a circuit prior to configuring your event listener, click Create New in the drop-down and you will be directed to the respective component section to create your event function or circuit.
- Click Create.
The rule will be created in the custom event listener. It will be listed in the event listener’s page with its details. The source of a custom event listener is always “custom”.
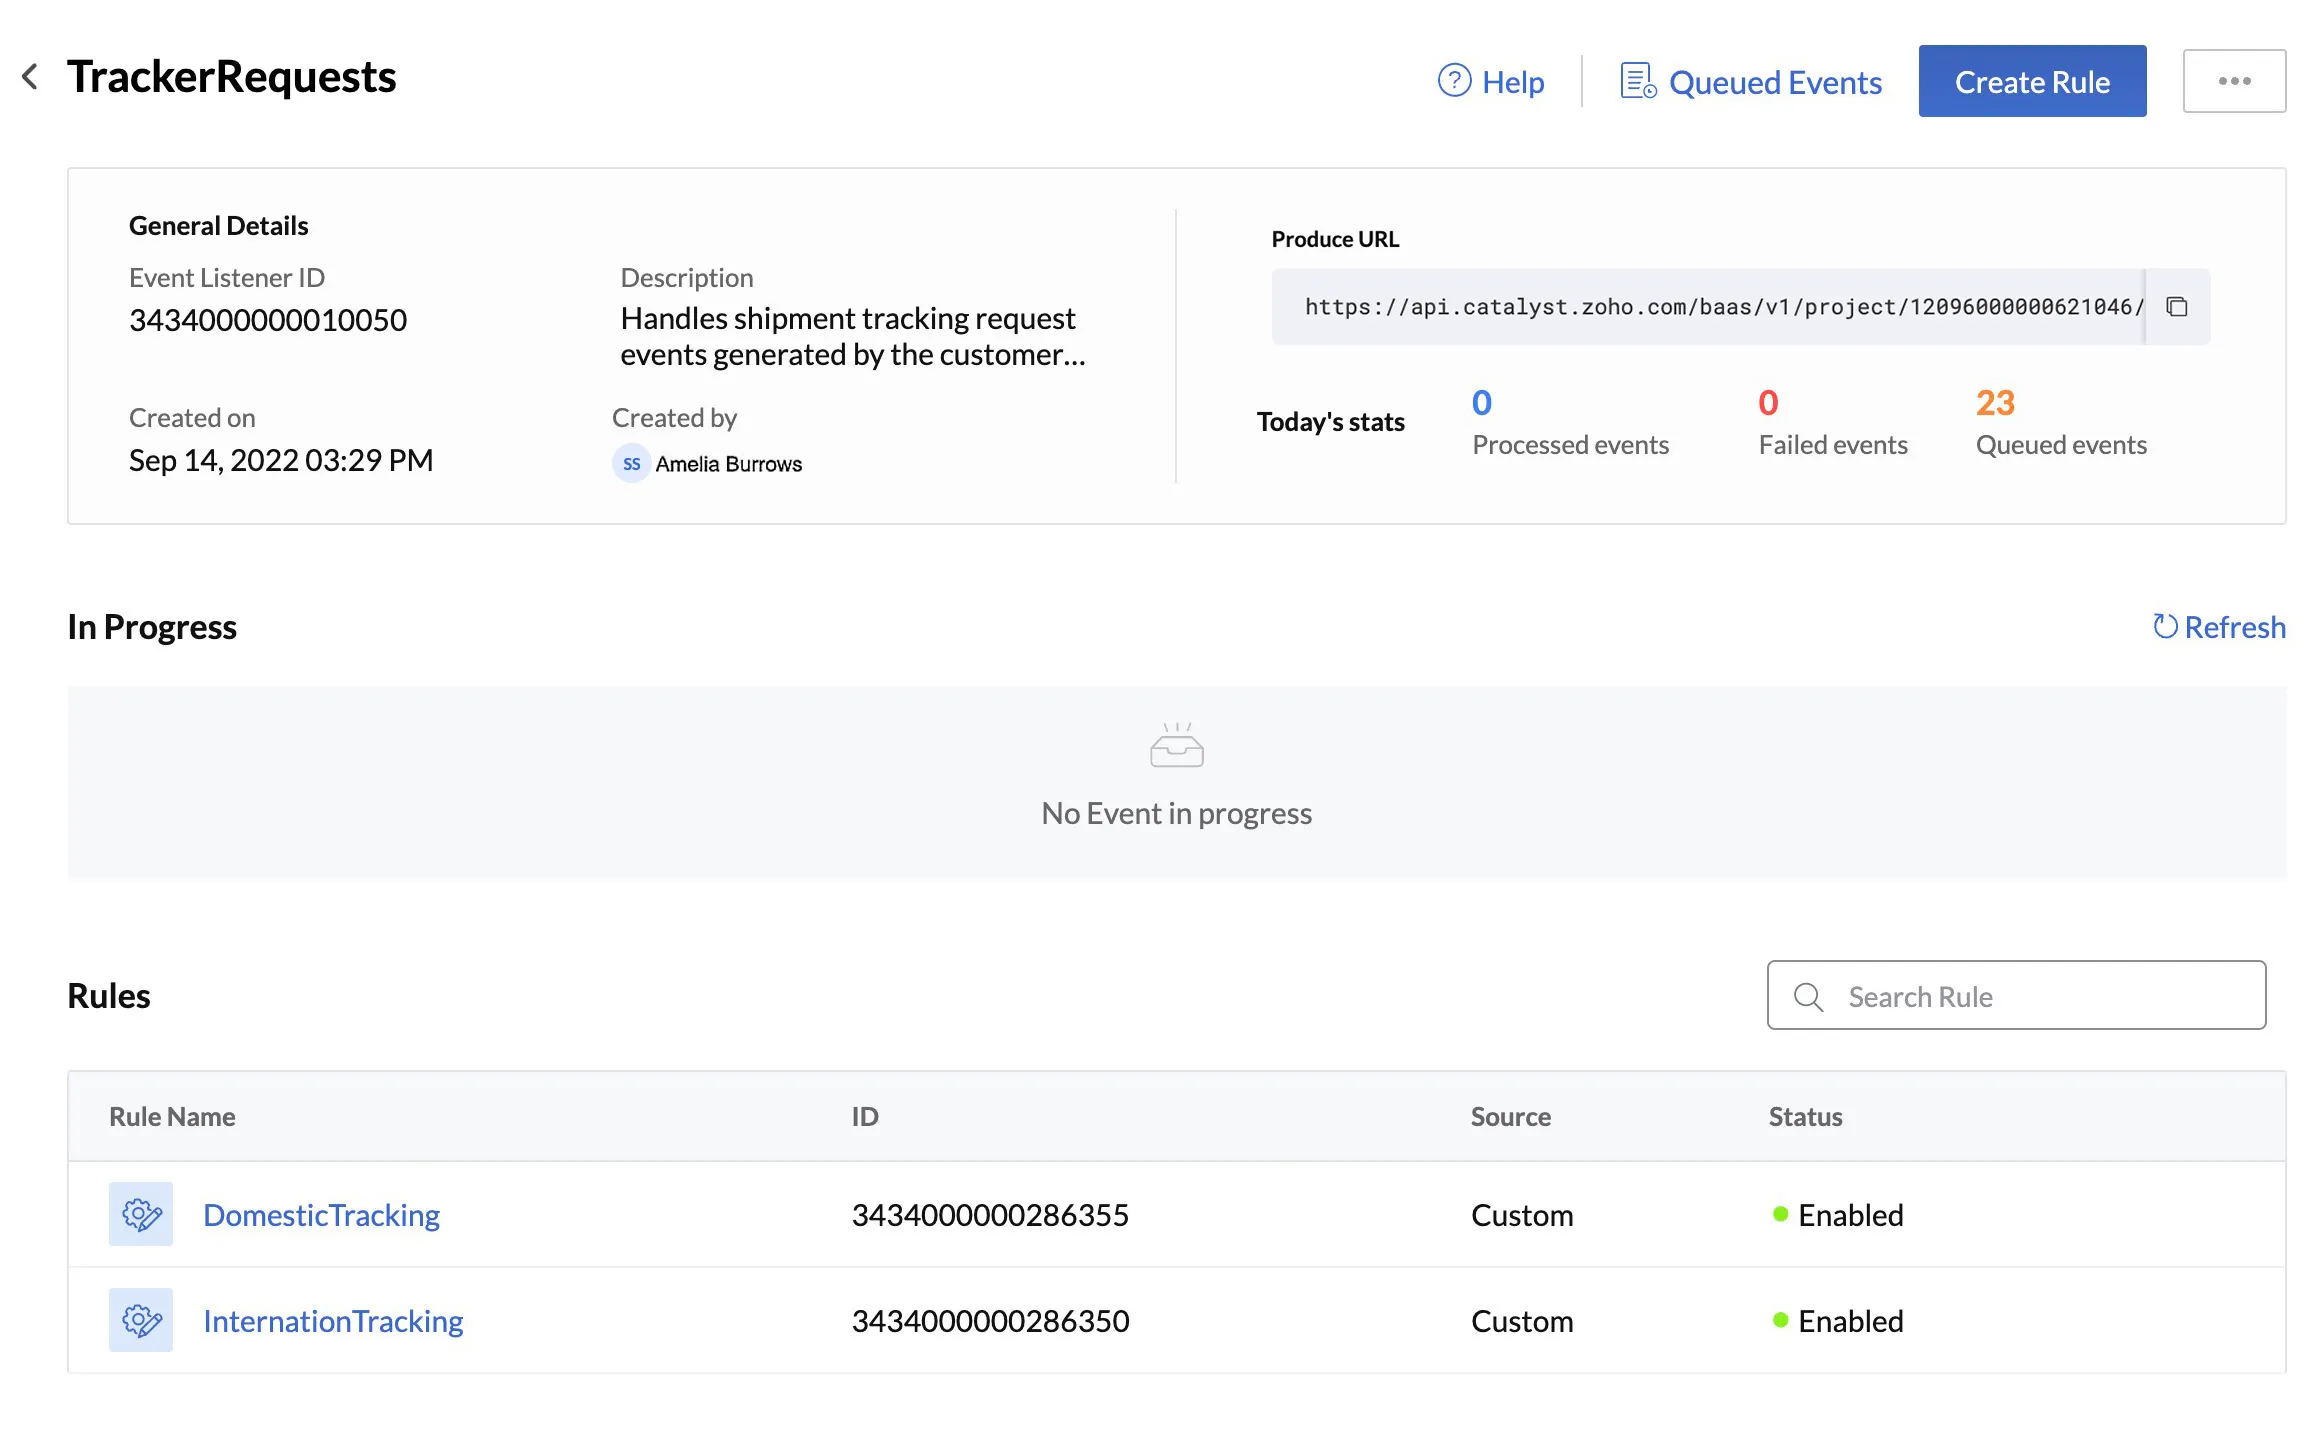
Click on a rule’s name in the list to view the details of the rule and its data pattern.
Before we discuss managing the rules of your event listeners or processed events, let’s quickly go over editing and deleting a custom event listener.
Edit a Custom Event Listener
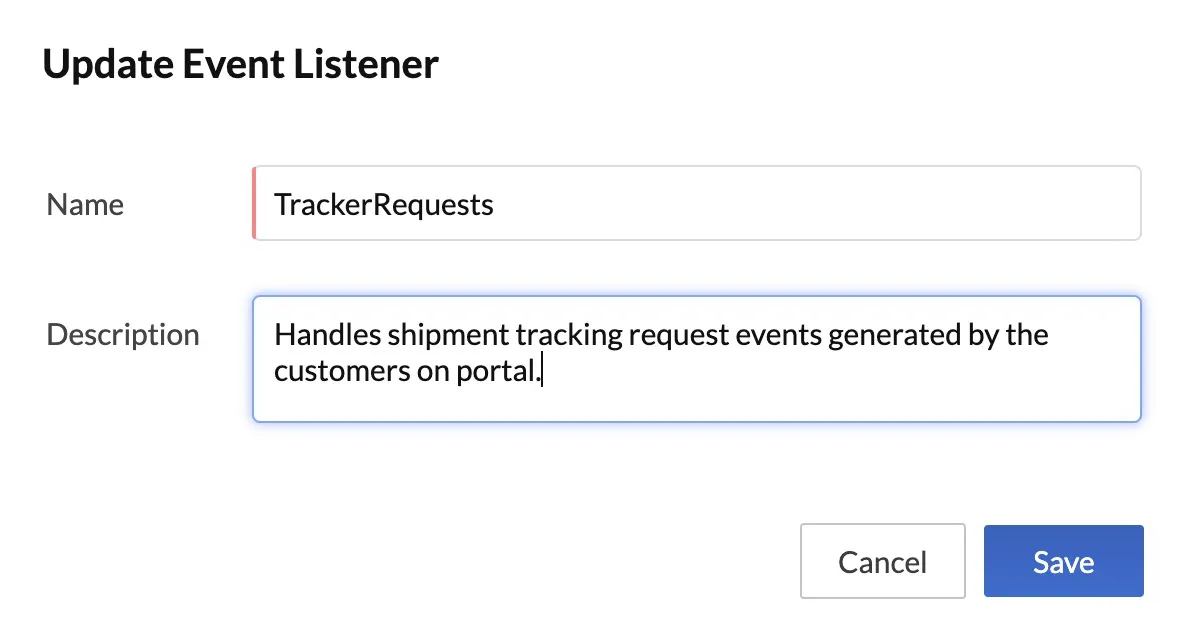
You can rename a custom event listener or edit its description in the following way:
- Open the custom event listener from the Event Listeners page.
- Click the ellipsis menu on the top of the page, then click Edit.
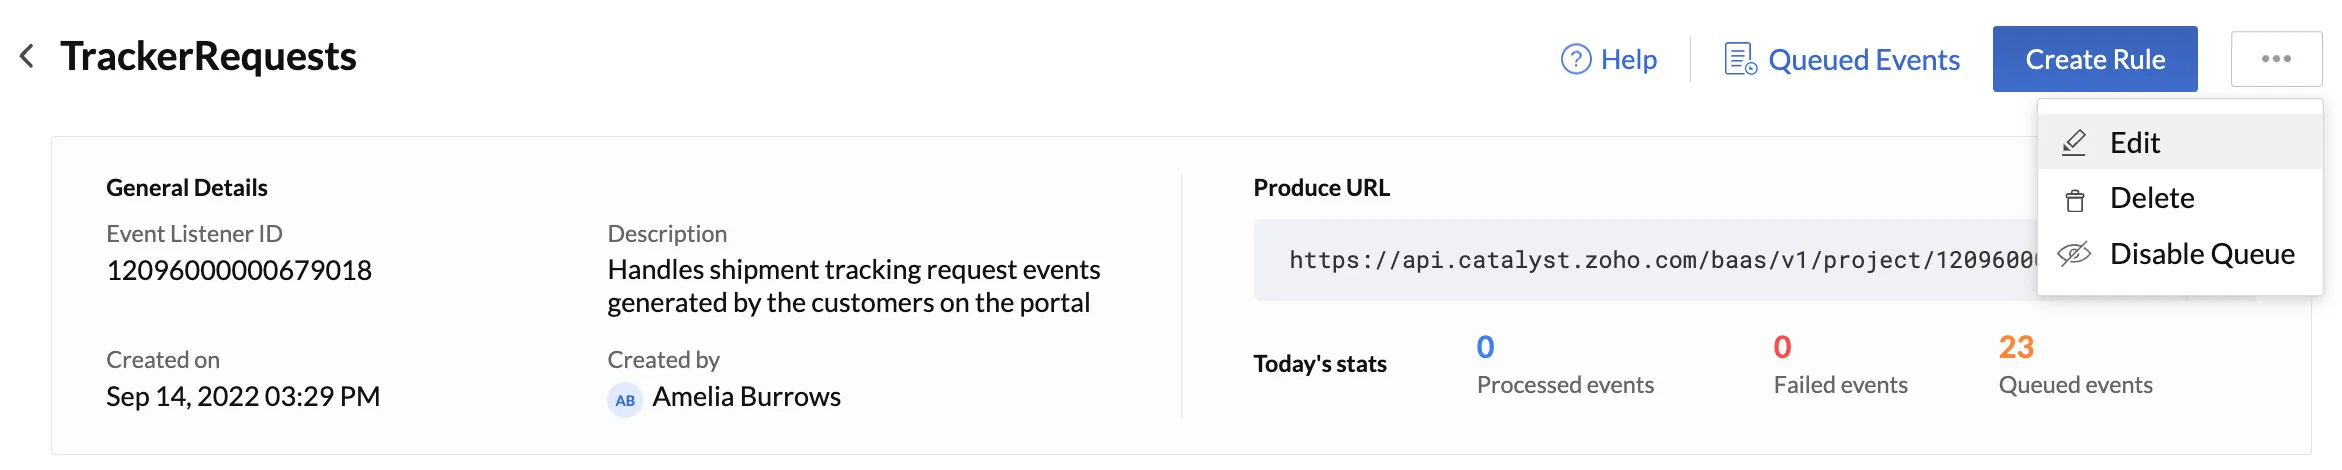
- Update the details of the event listener, then click Save.
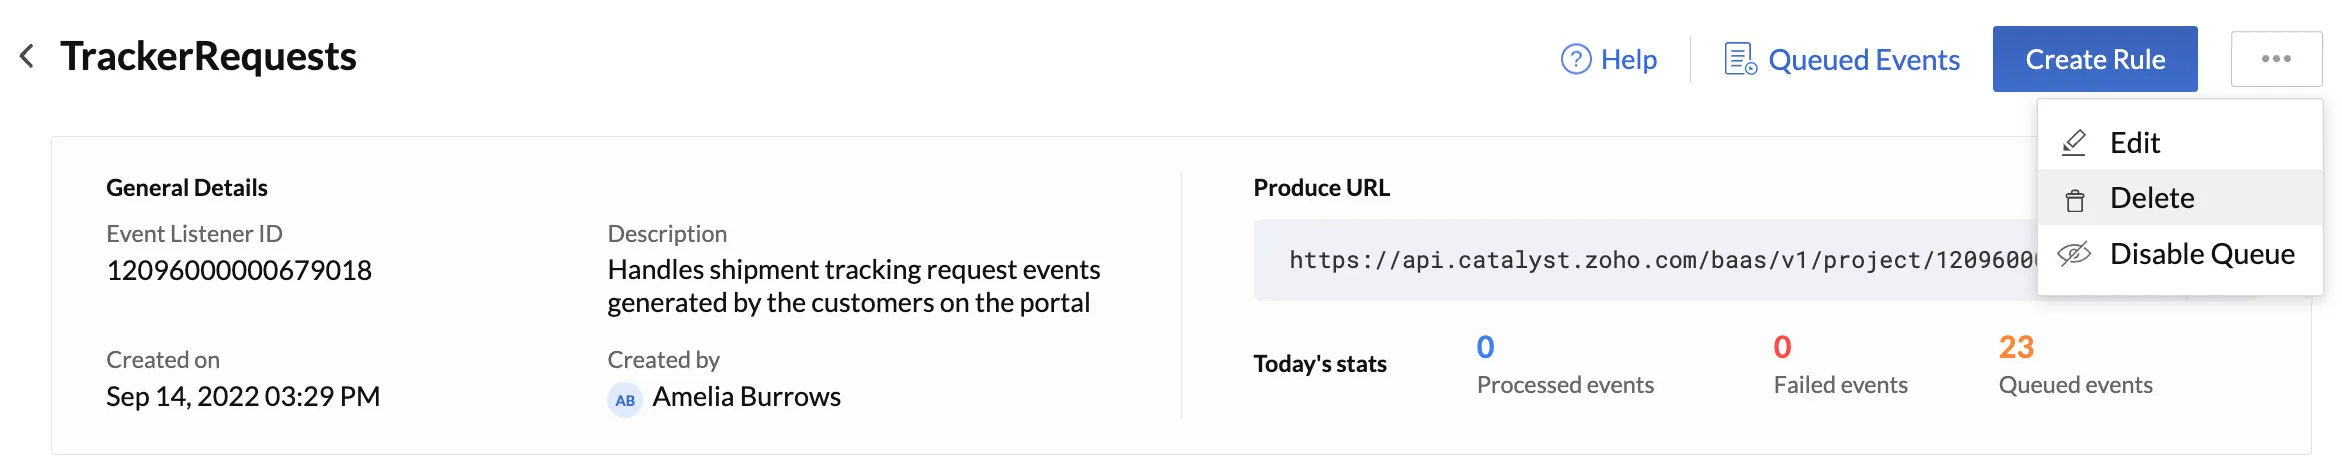
Delete a Custom Event Listener
To delete a custom event listener:
- Open the custom event listener from the Event Listeners page.
- Click the ellipsis menu on the top of the page, then click Delete.
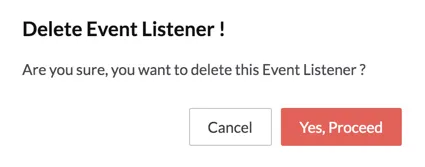
- Click Yes, Proceed in the confirmation pop-up.
Last Updated 2025-11-19 20:37:41 +0530 IST
Yes
No
Send your feedback to us