Setup Embedded Authentication
To enable and configure Embedded Authentication type:
-
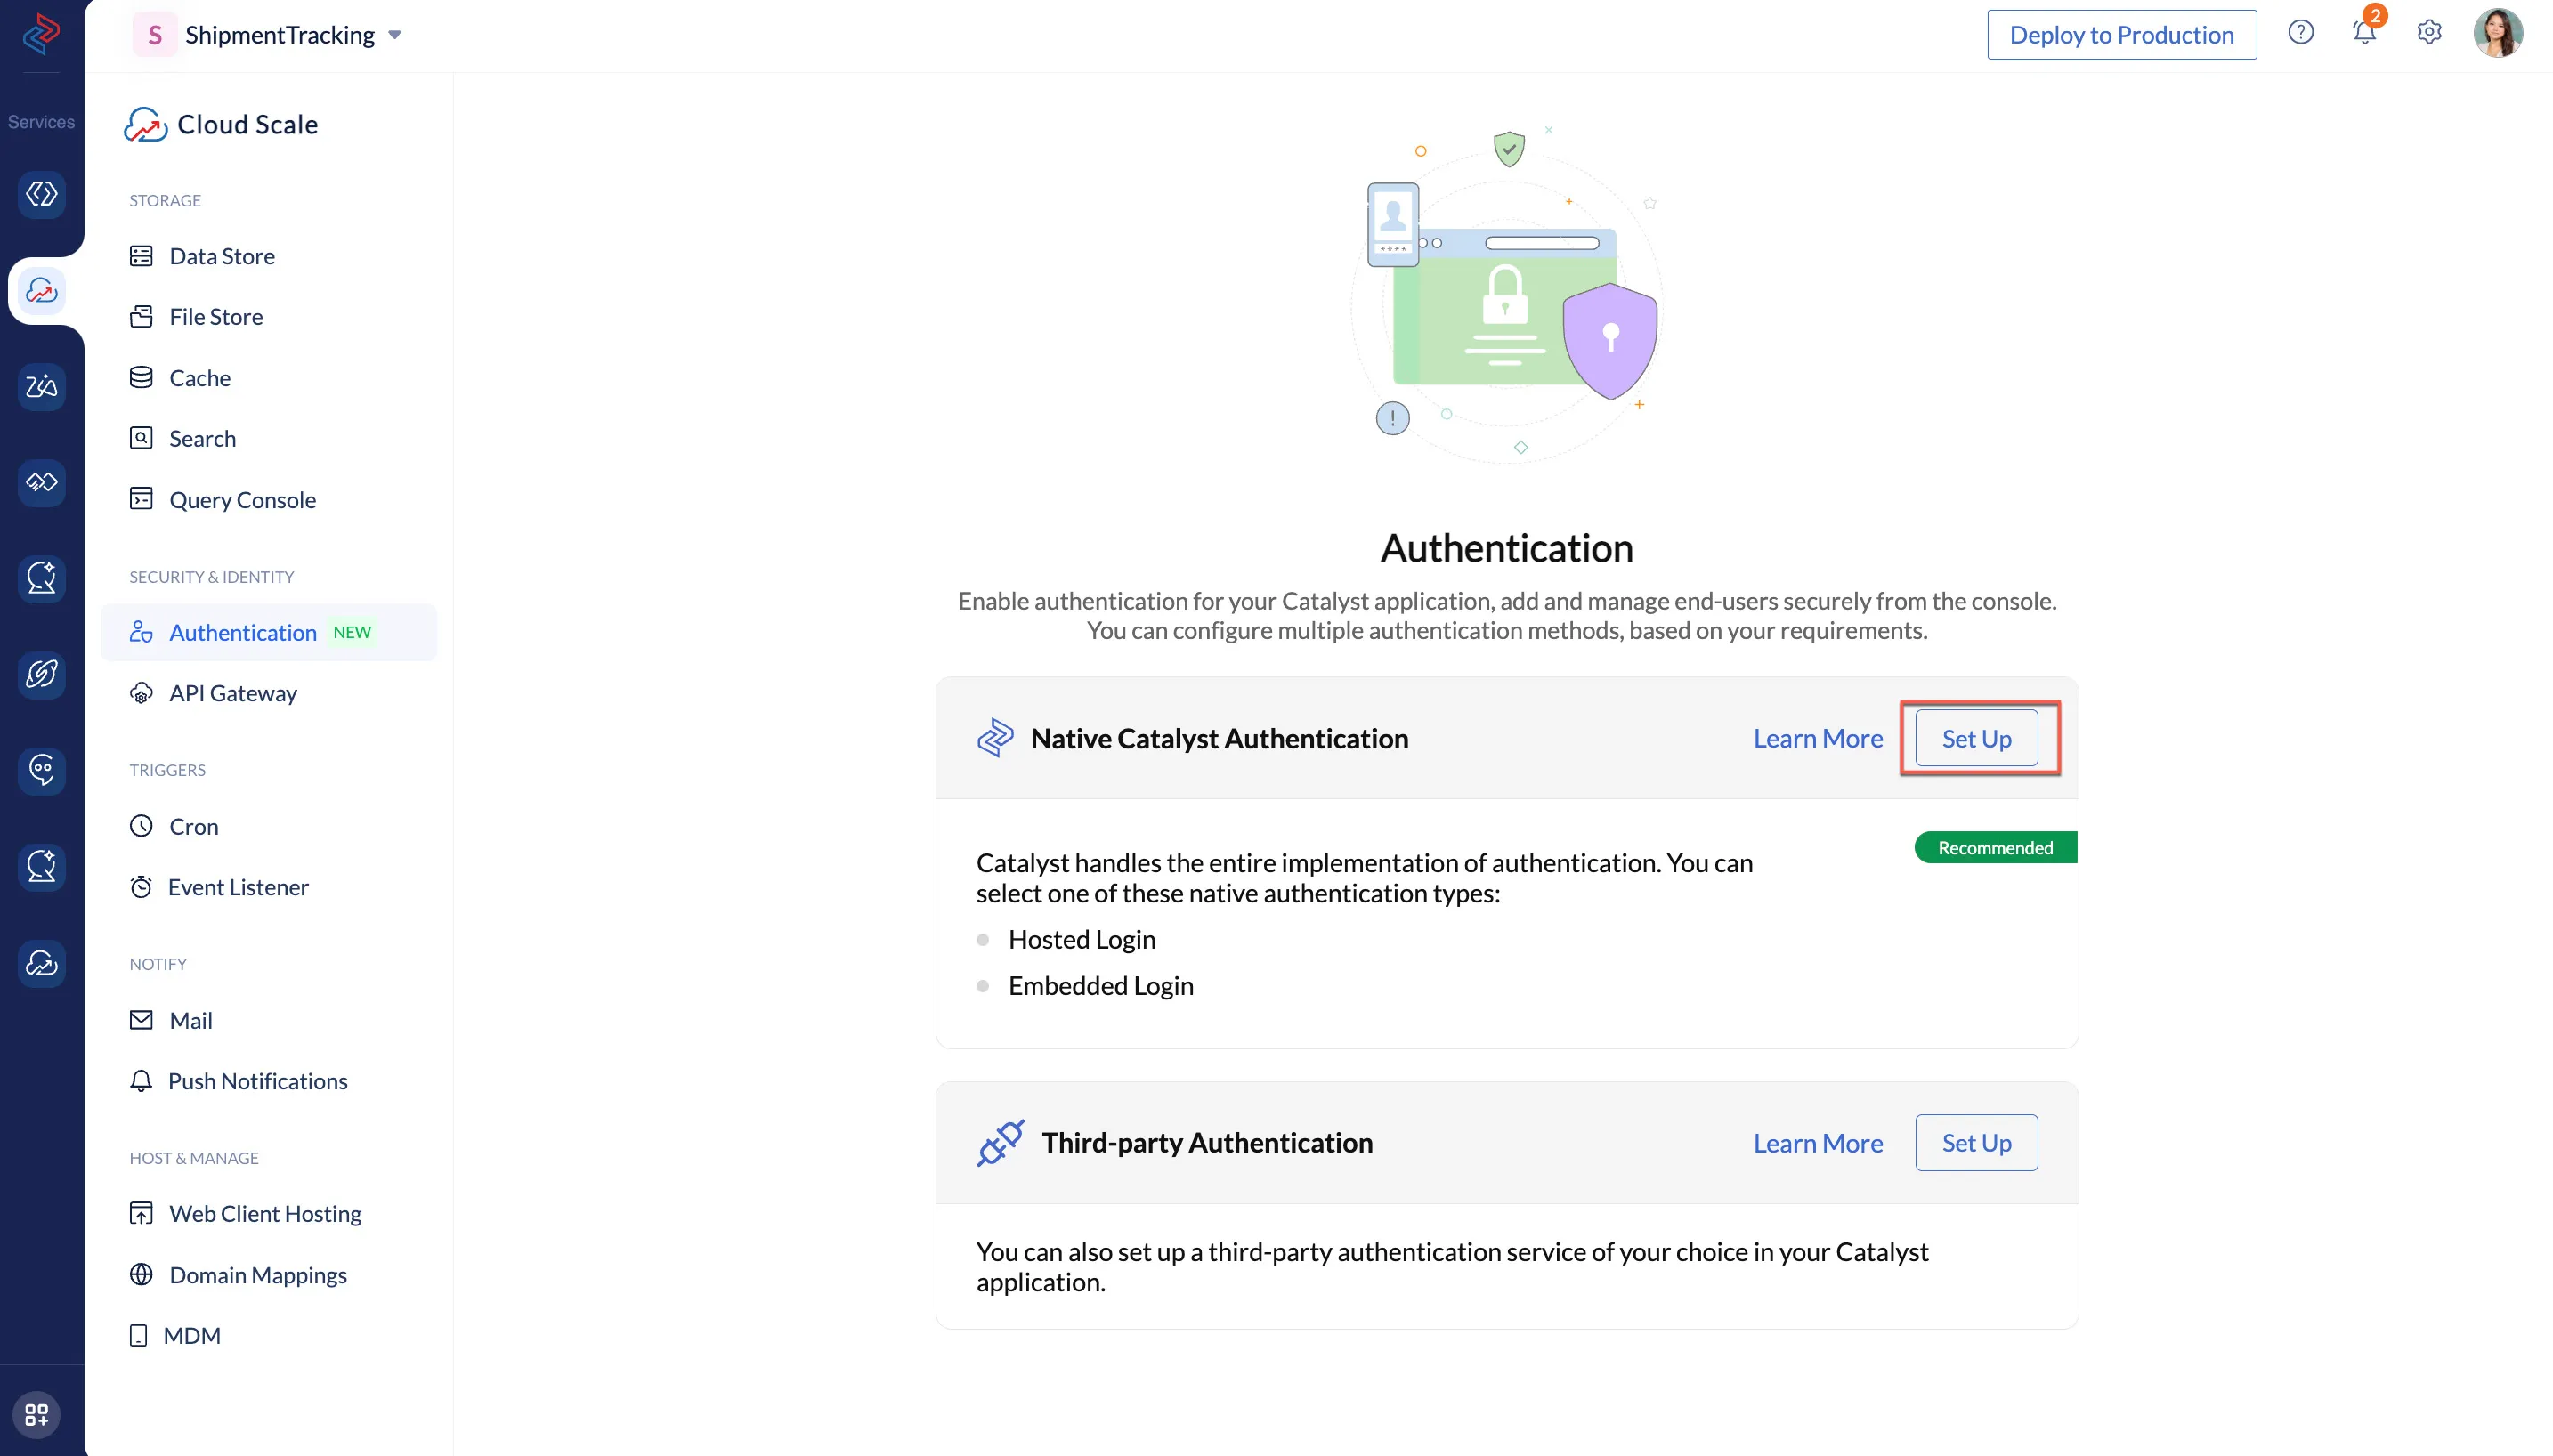
Navigate to Authentication in Cloud Scale section of the Catalyst console, and click the Set Up option present in the Native Catalyst Authentication section.
-
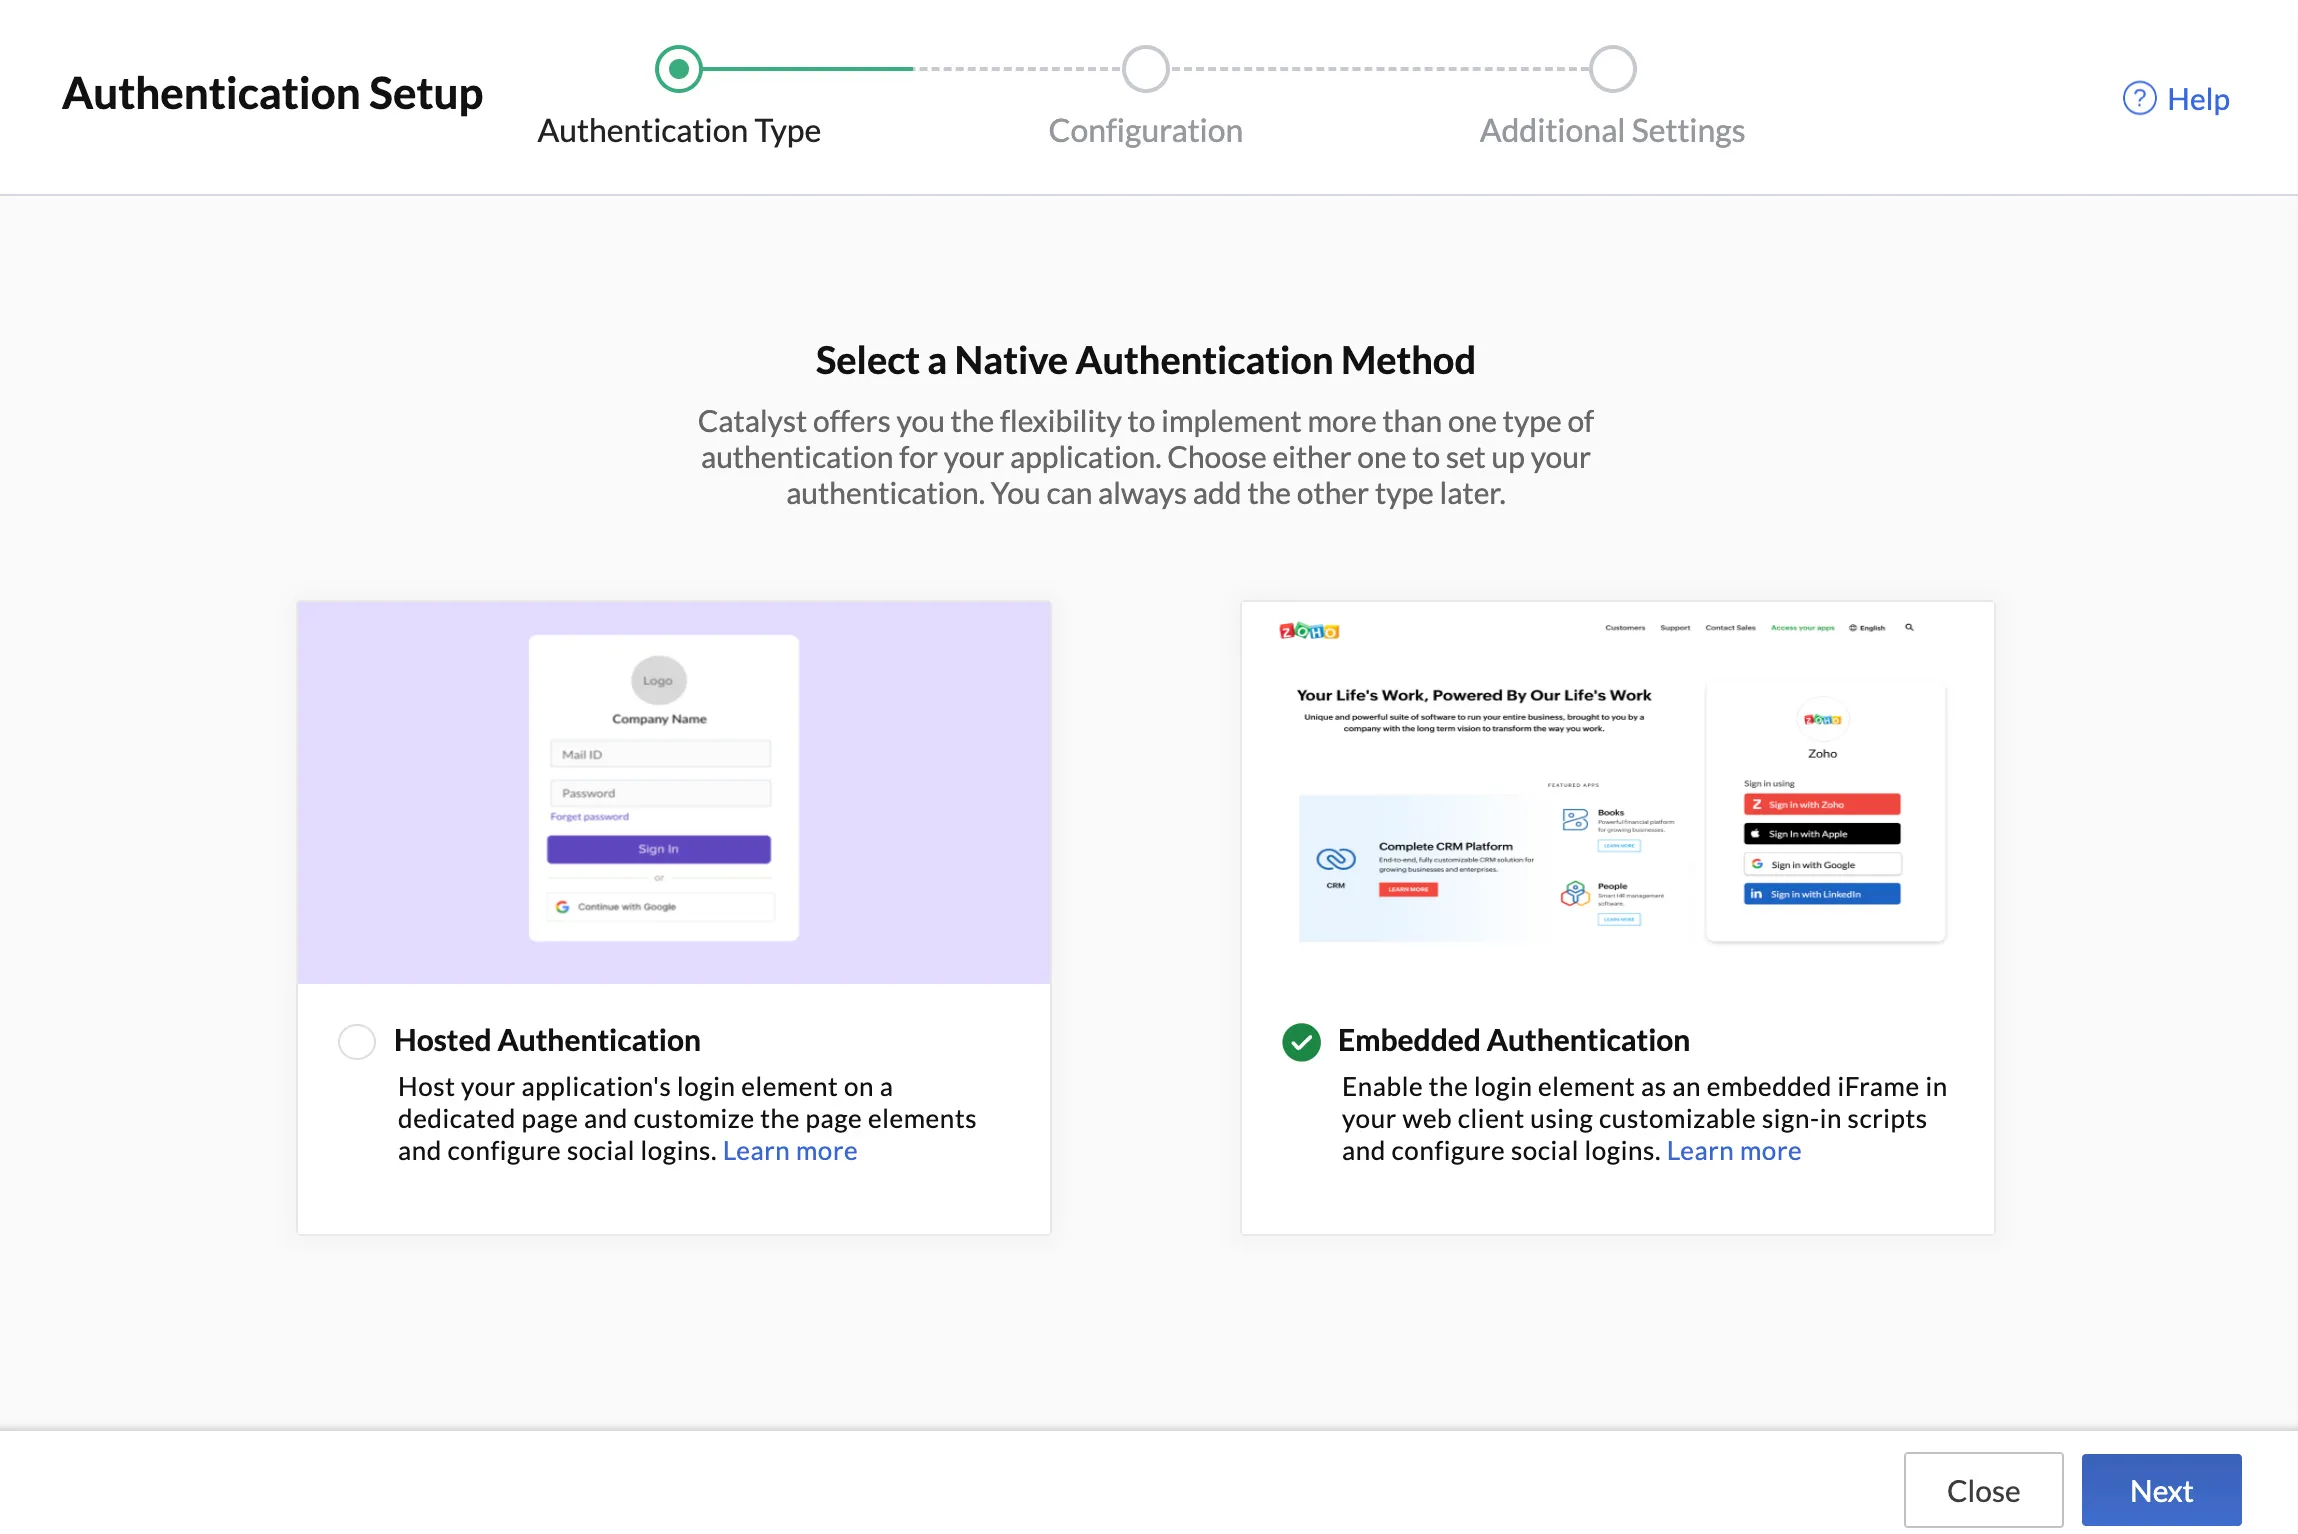
Select Embedded Authentication as the type of native authentication method, and click Next.
-
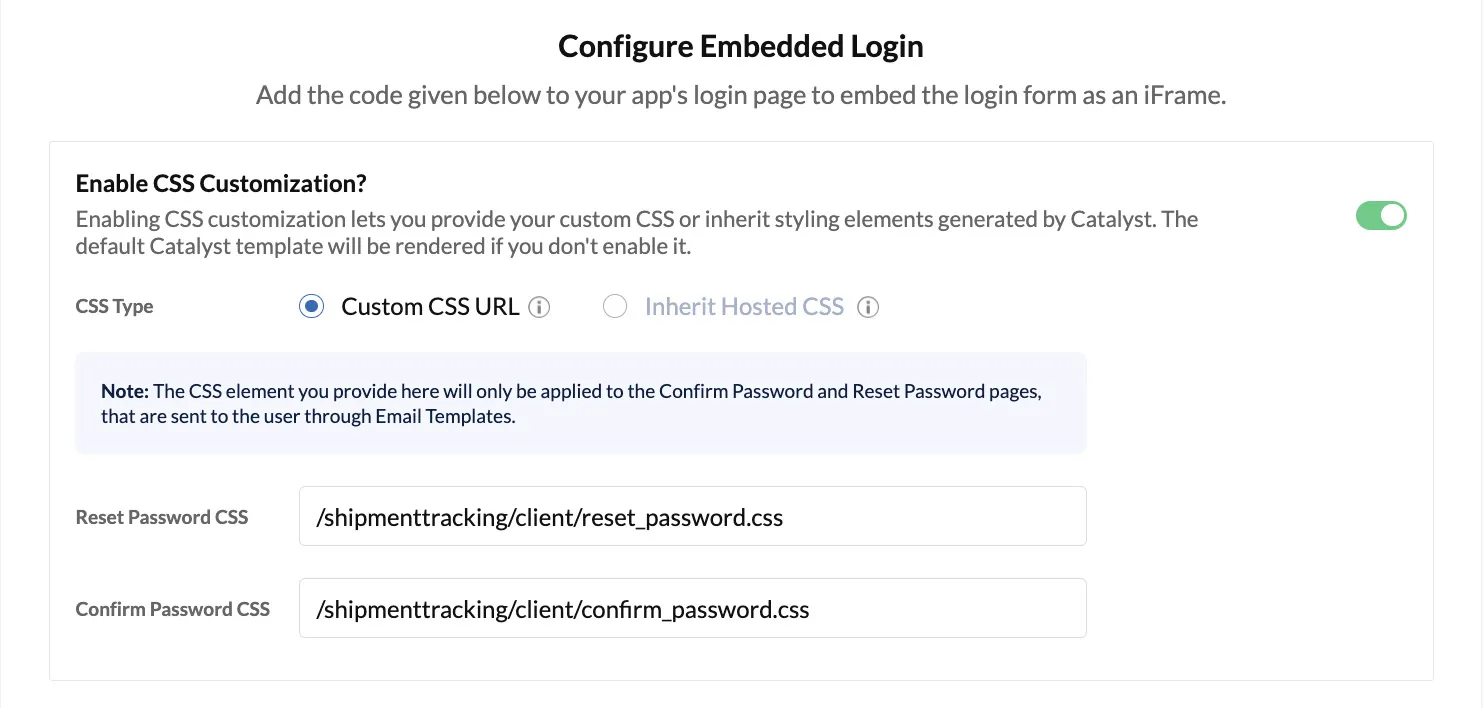
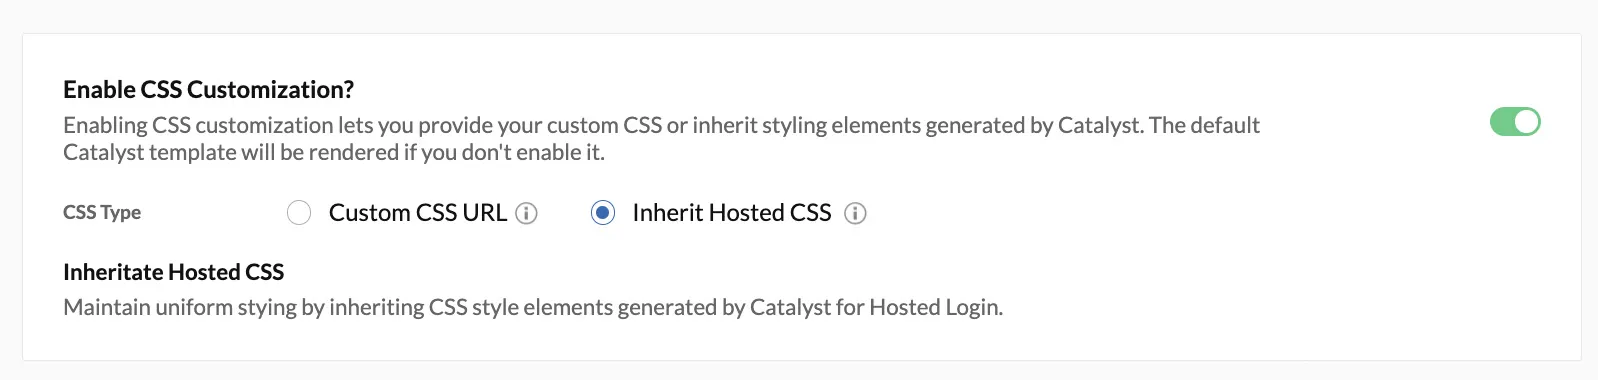
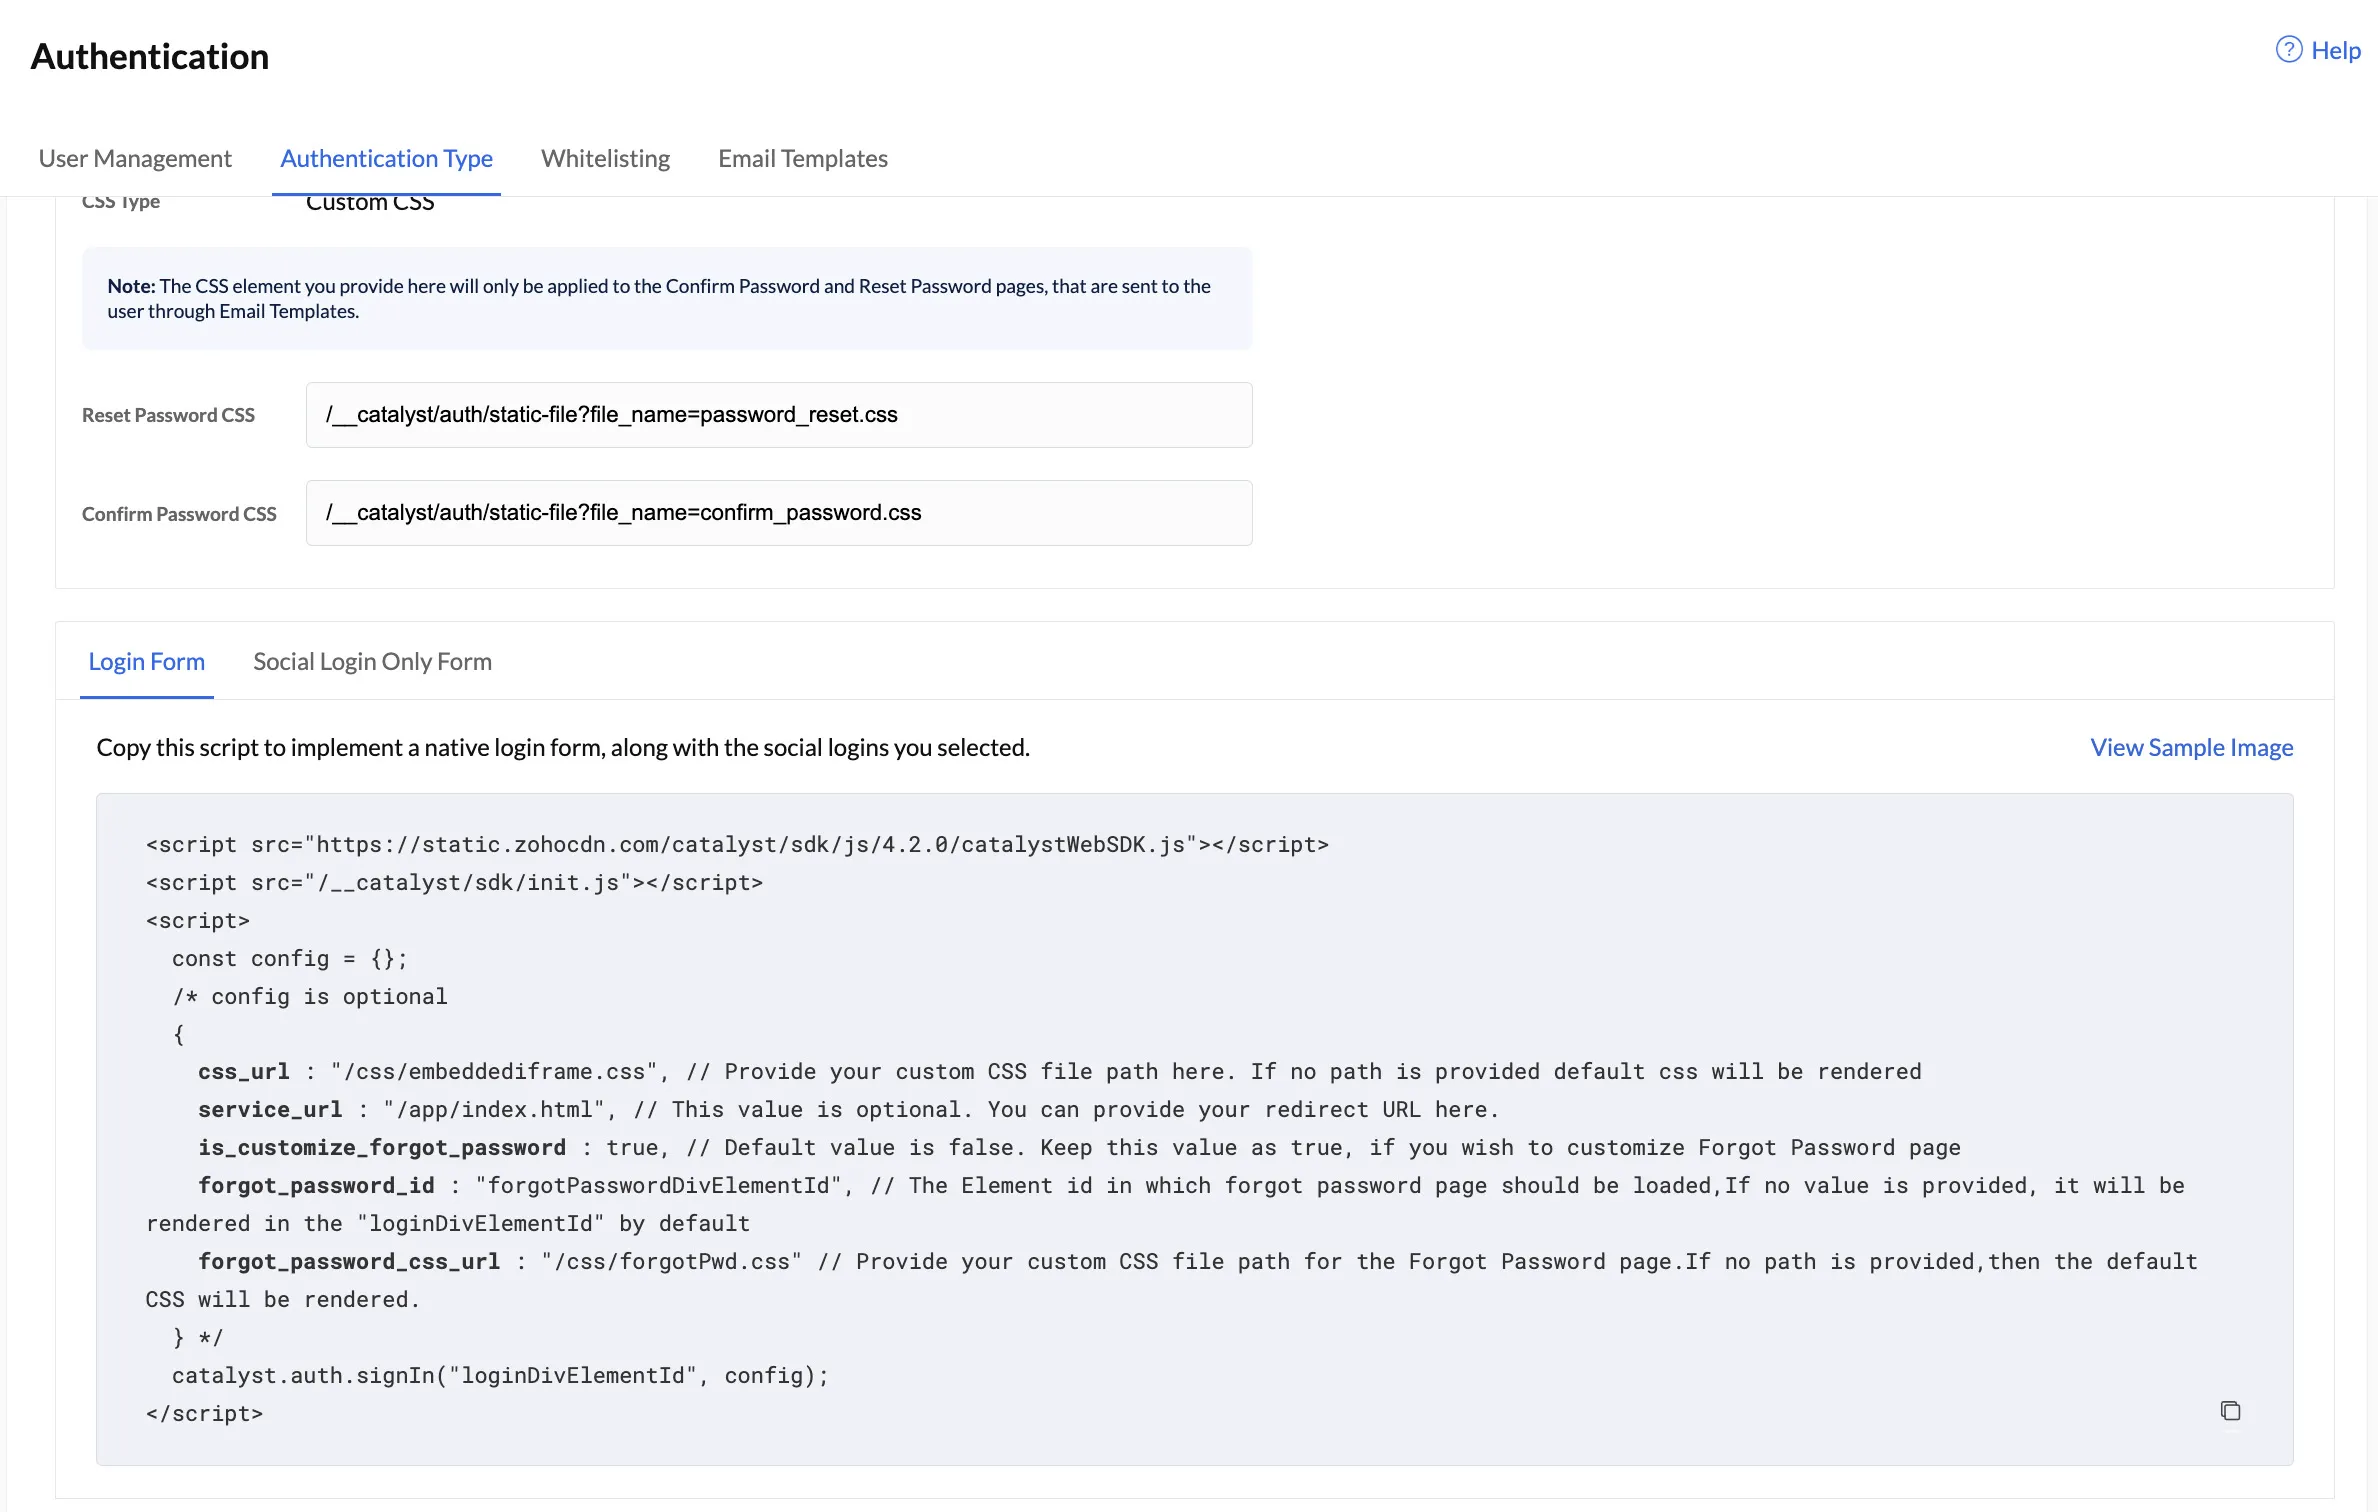
Enable CSS Customization
- If you wish to provide a custom CSS for your Confirm Password and Reset Password elements:
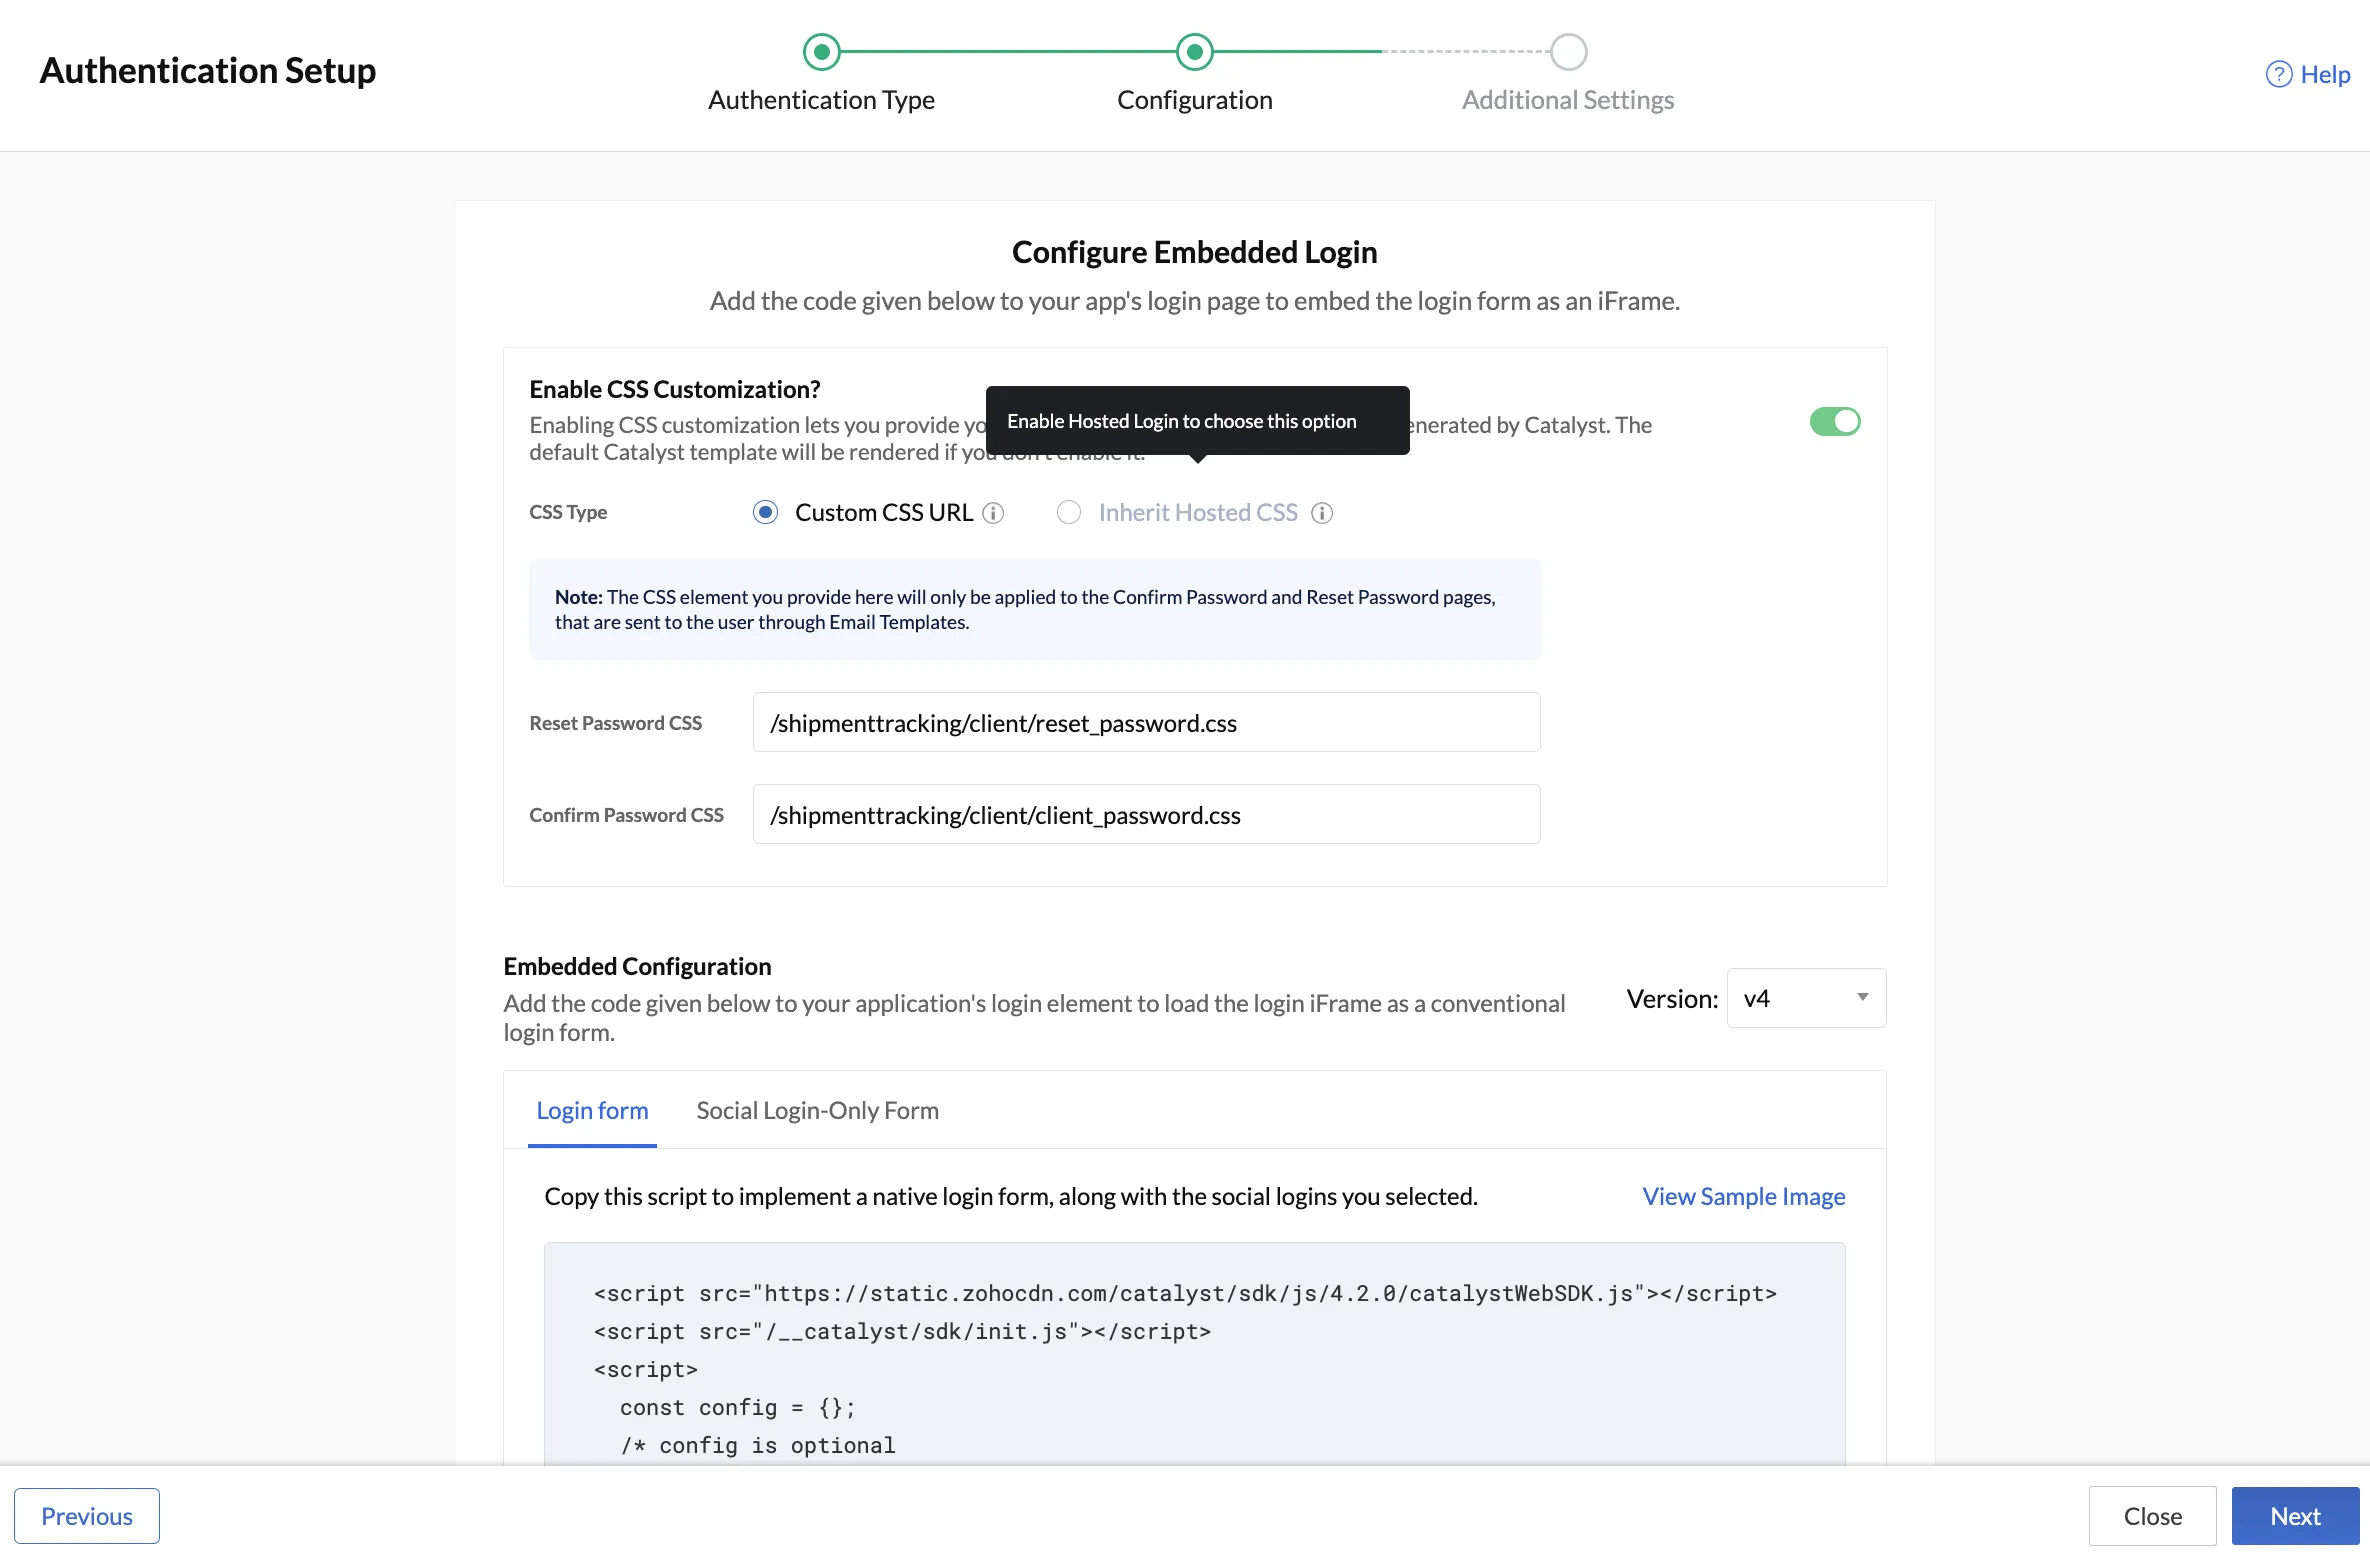
- Provide the file path of where you have stored the required CSS files in your project directory.
- Provide the file path of where you have stored the required CSS files in your project directory.
- If you are using Embedded Authentication along with Hosted Login, you can inherit styling elements from Hosted Login:
- If you wish to provide a custom CSS for your Confirm Password and Reset Password elements:
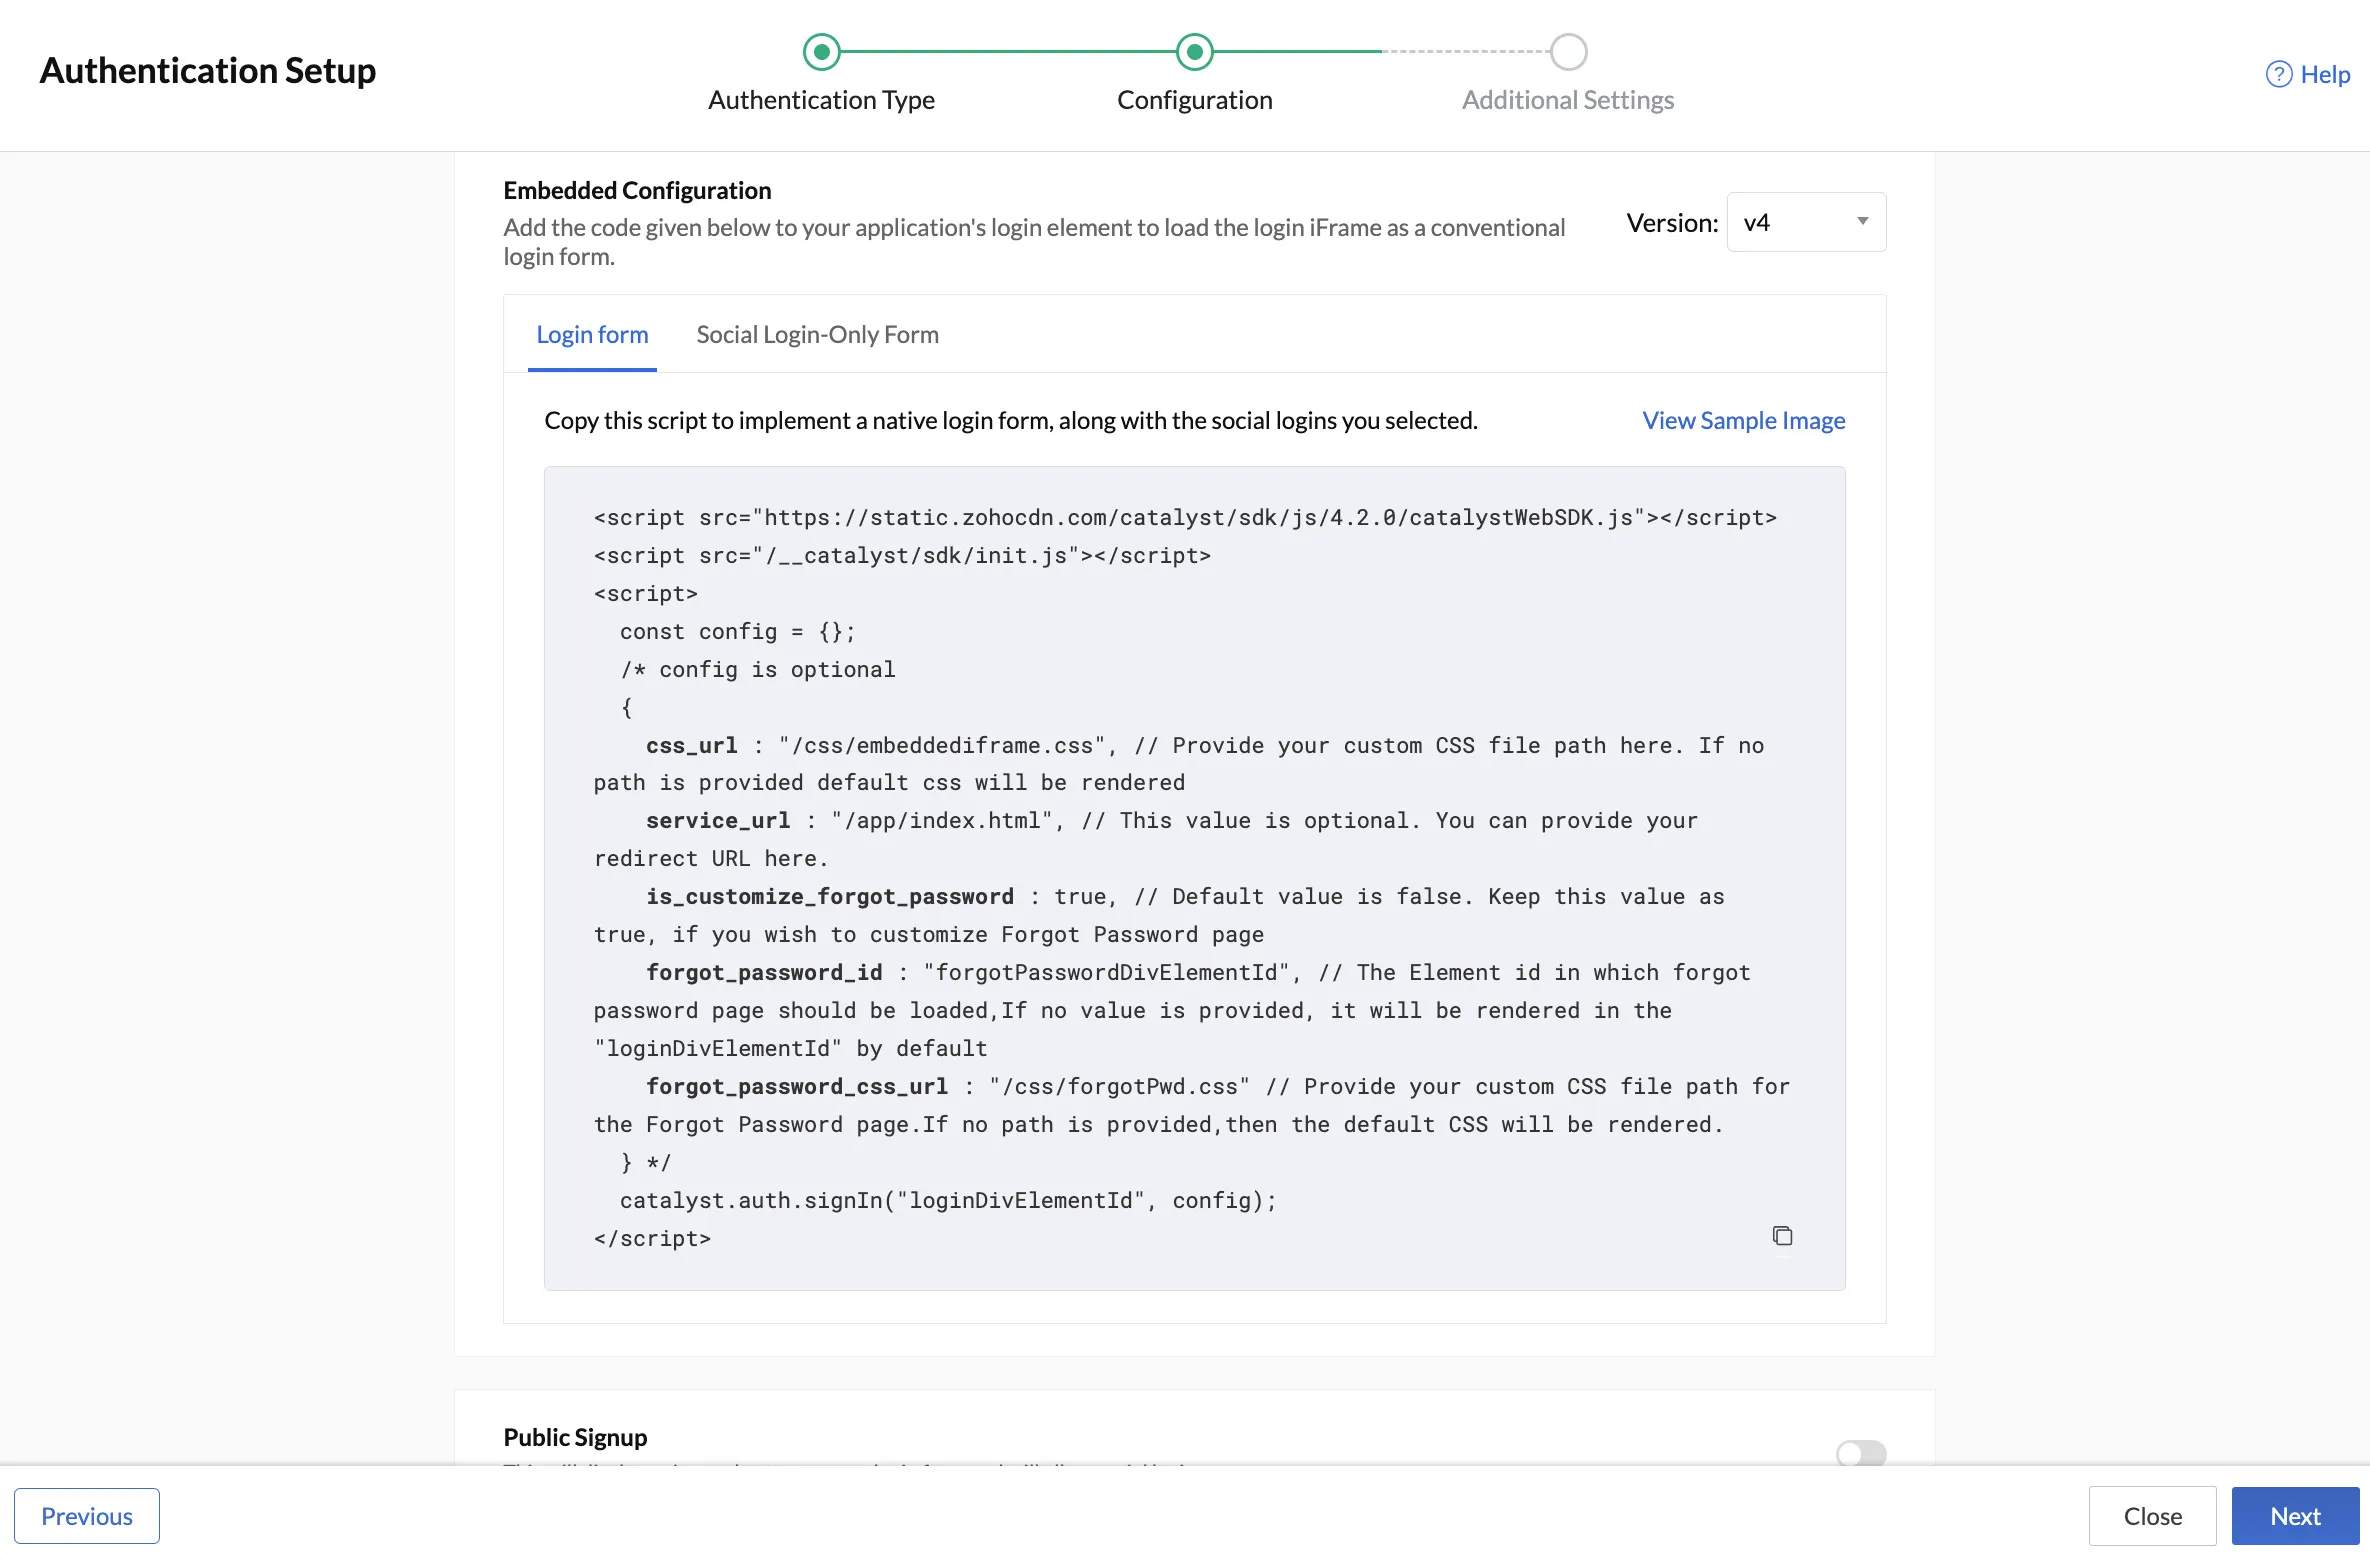
- Choose how you wish your login element to be:
- To load the login element as a conventional login form:
Click the Login Form option in the Configuration step. Copy the script and paste it in the HTML file of your web client that contains the index of your application.
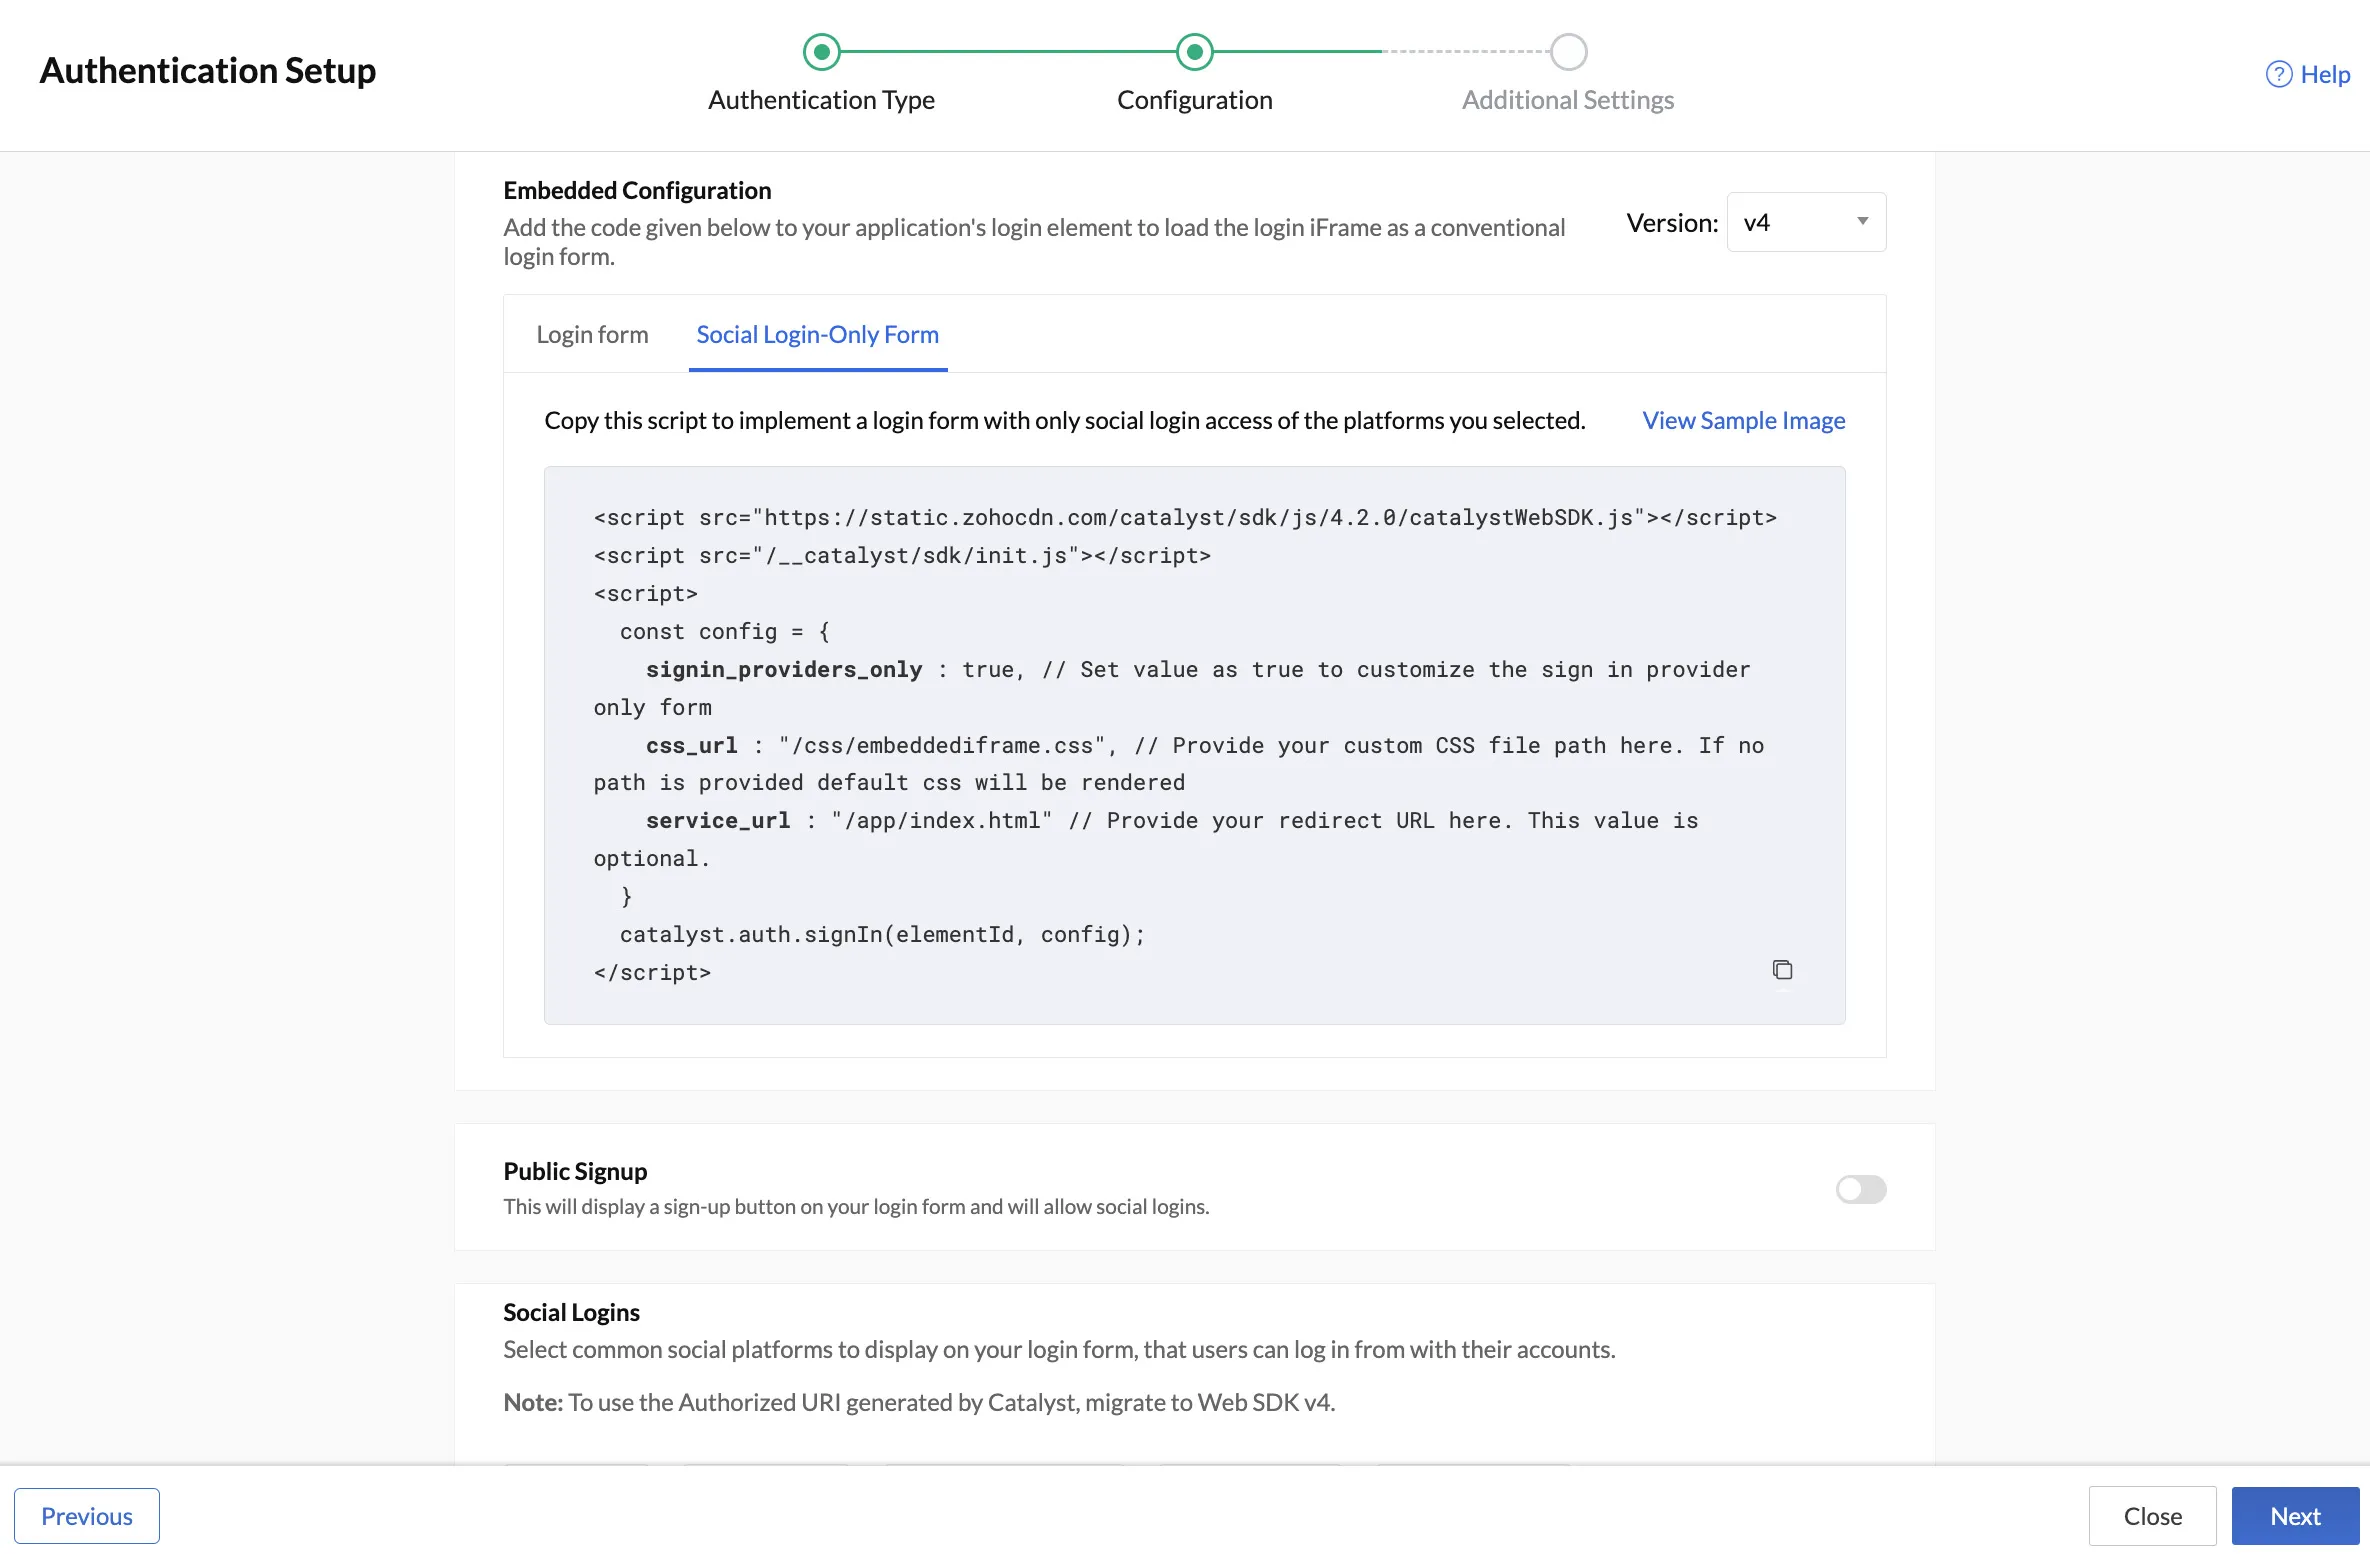
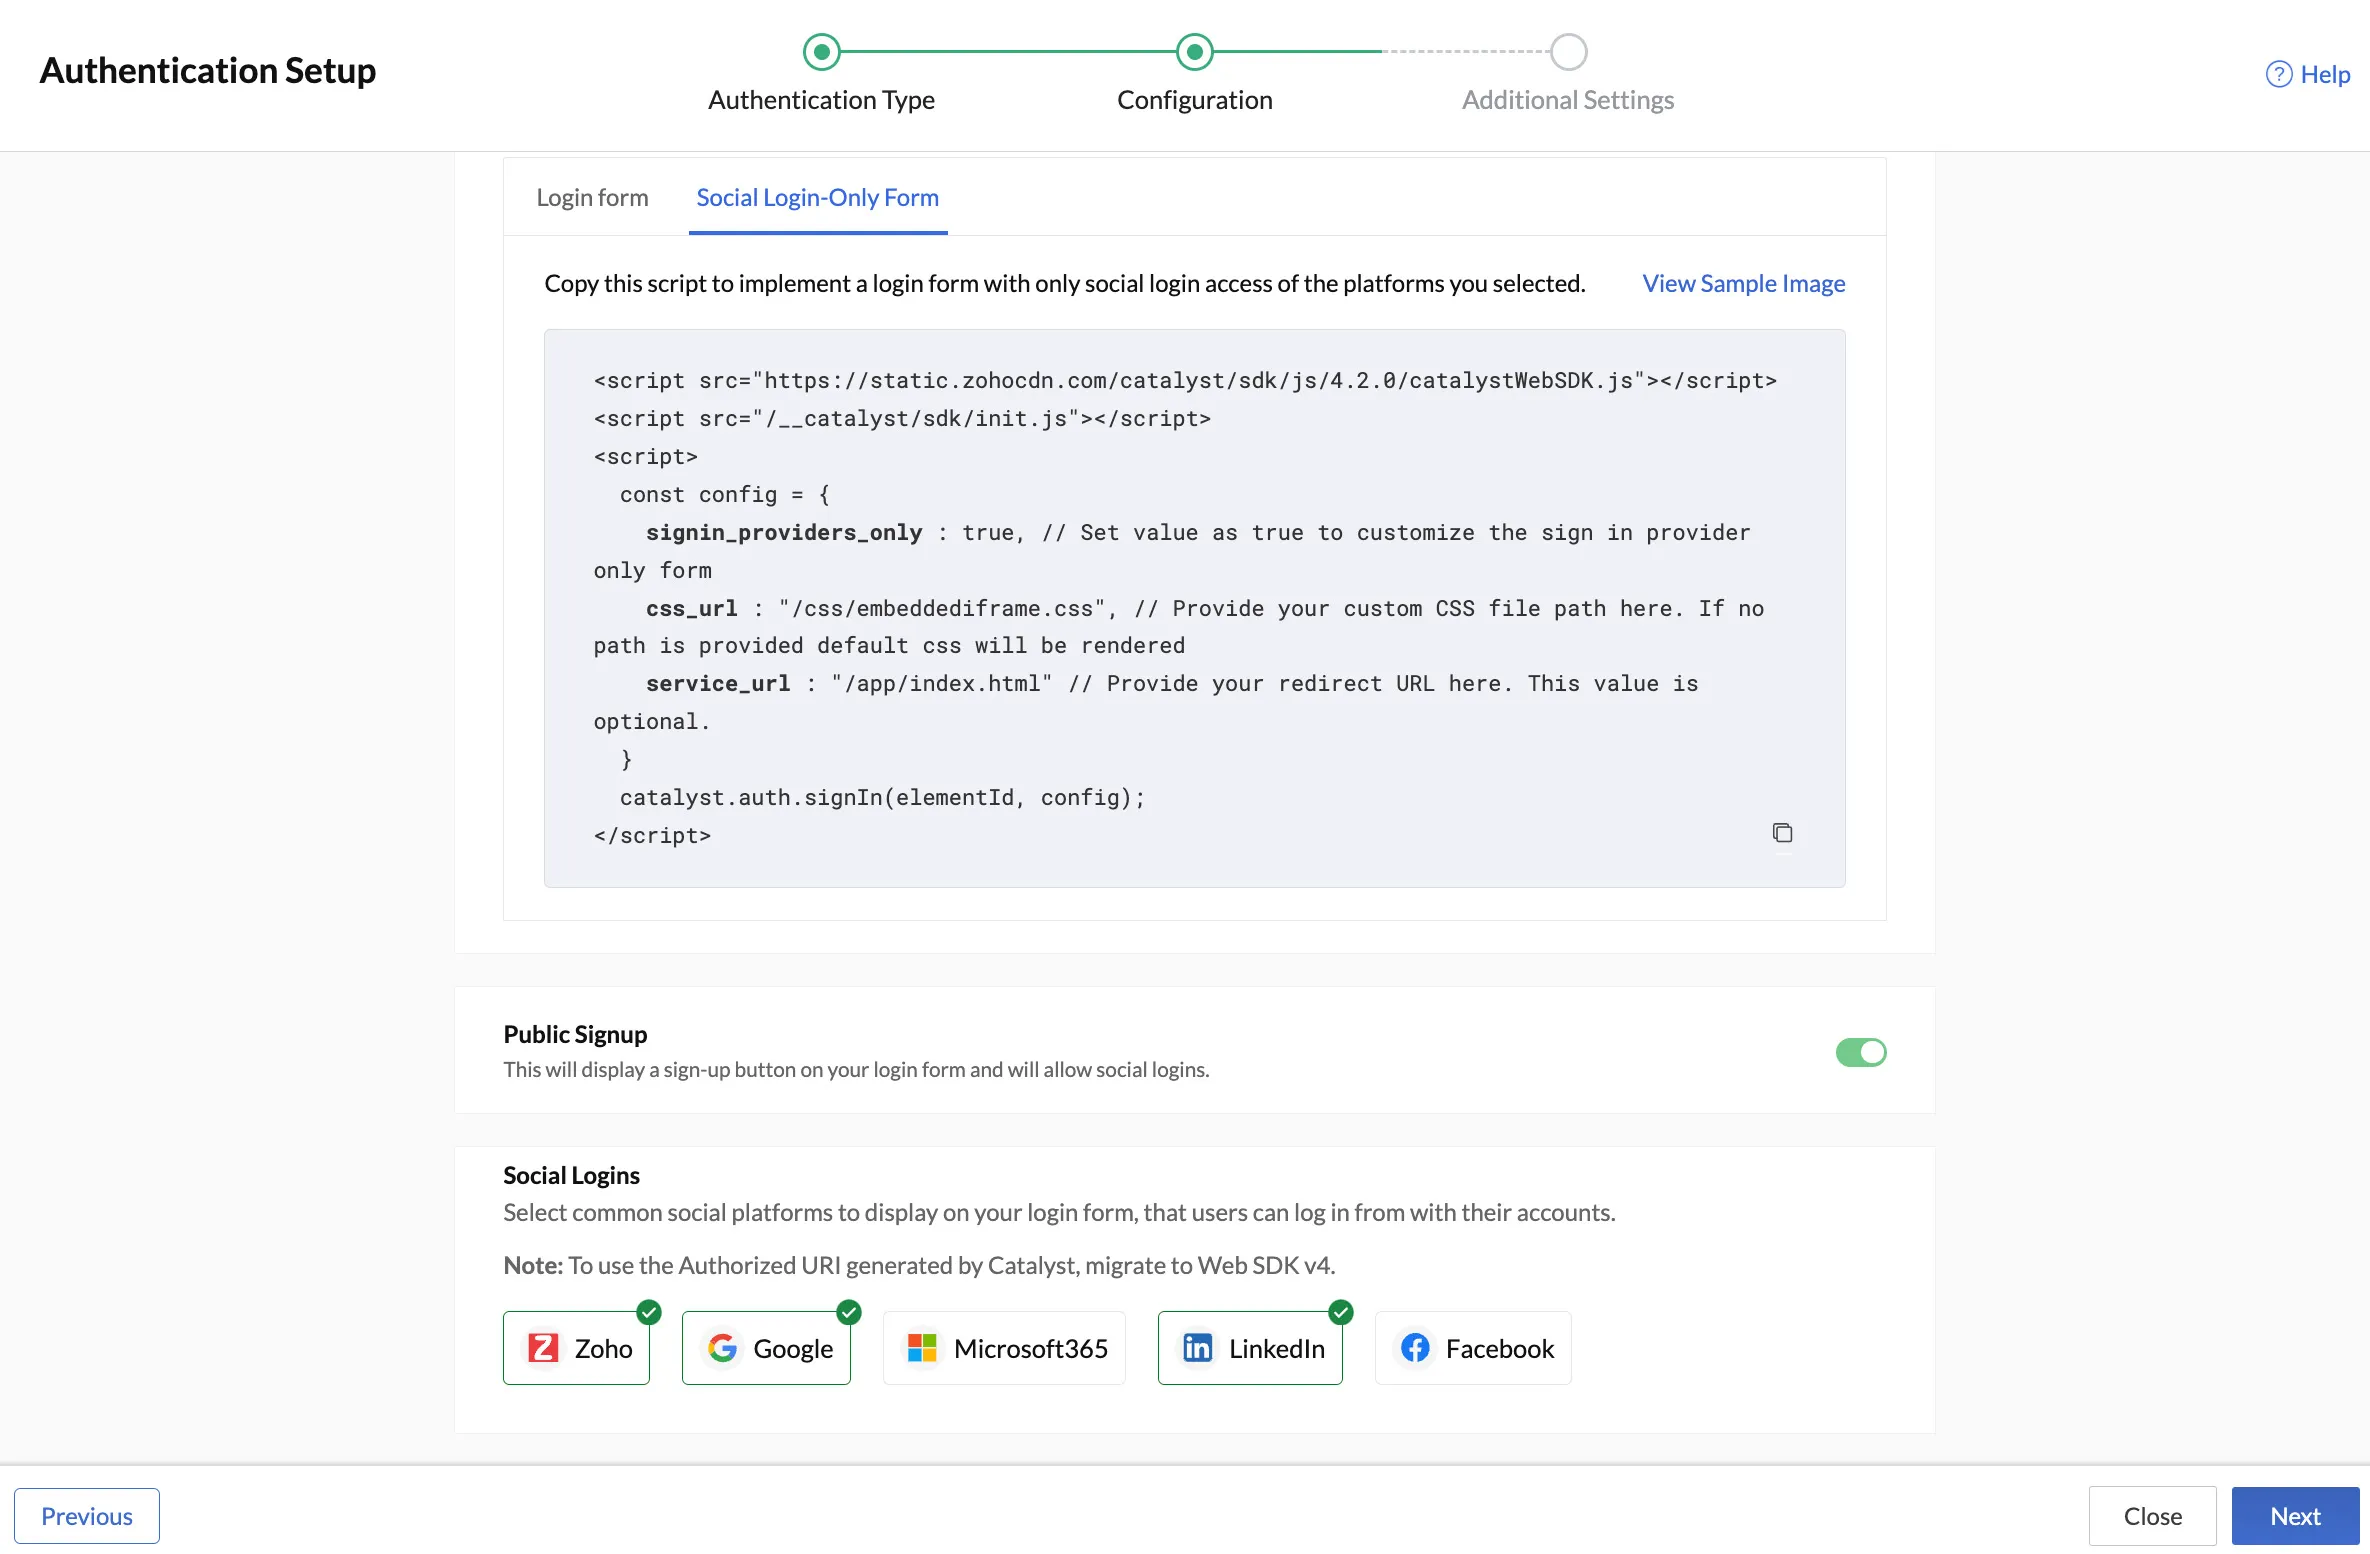
- To load the login element with only the Social Logins or IdP sign in options:
Click the Social Login-Only Form option in the Configuration step. Copy the script and paste it in the HTML file of your web client that contains the index of your application.
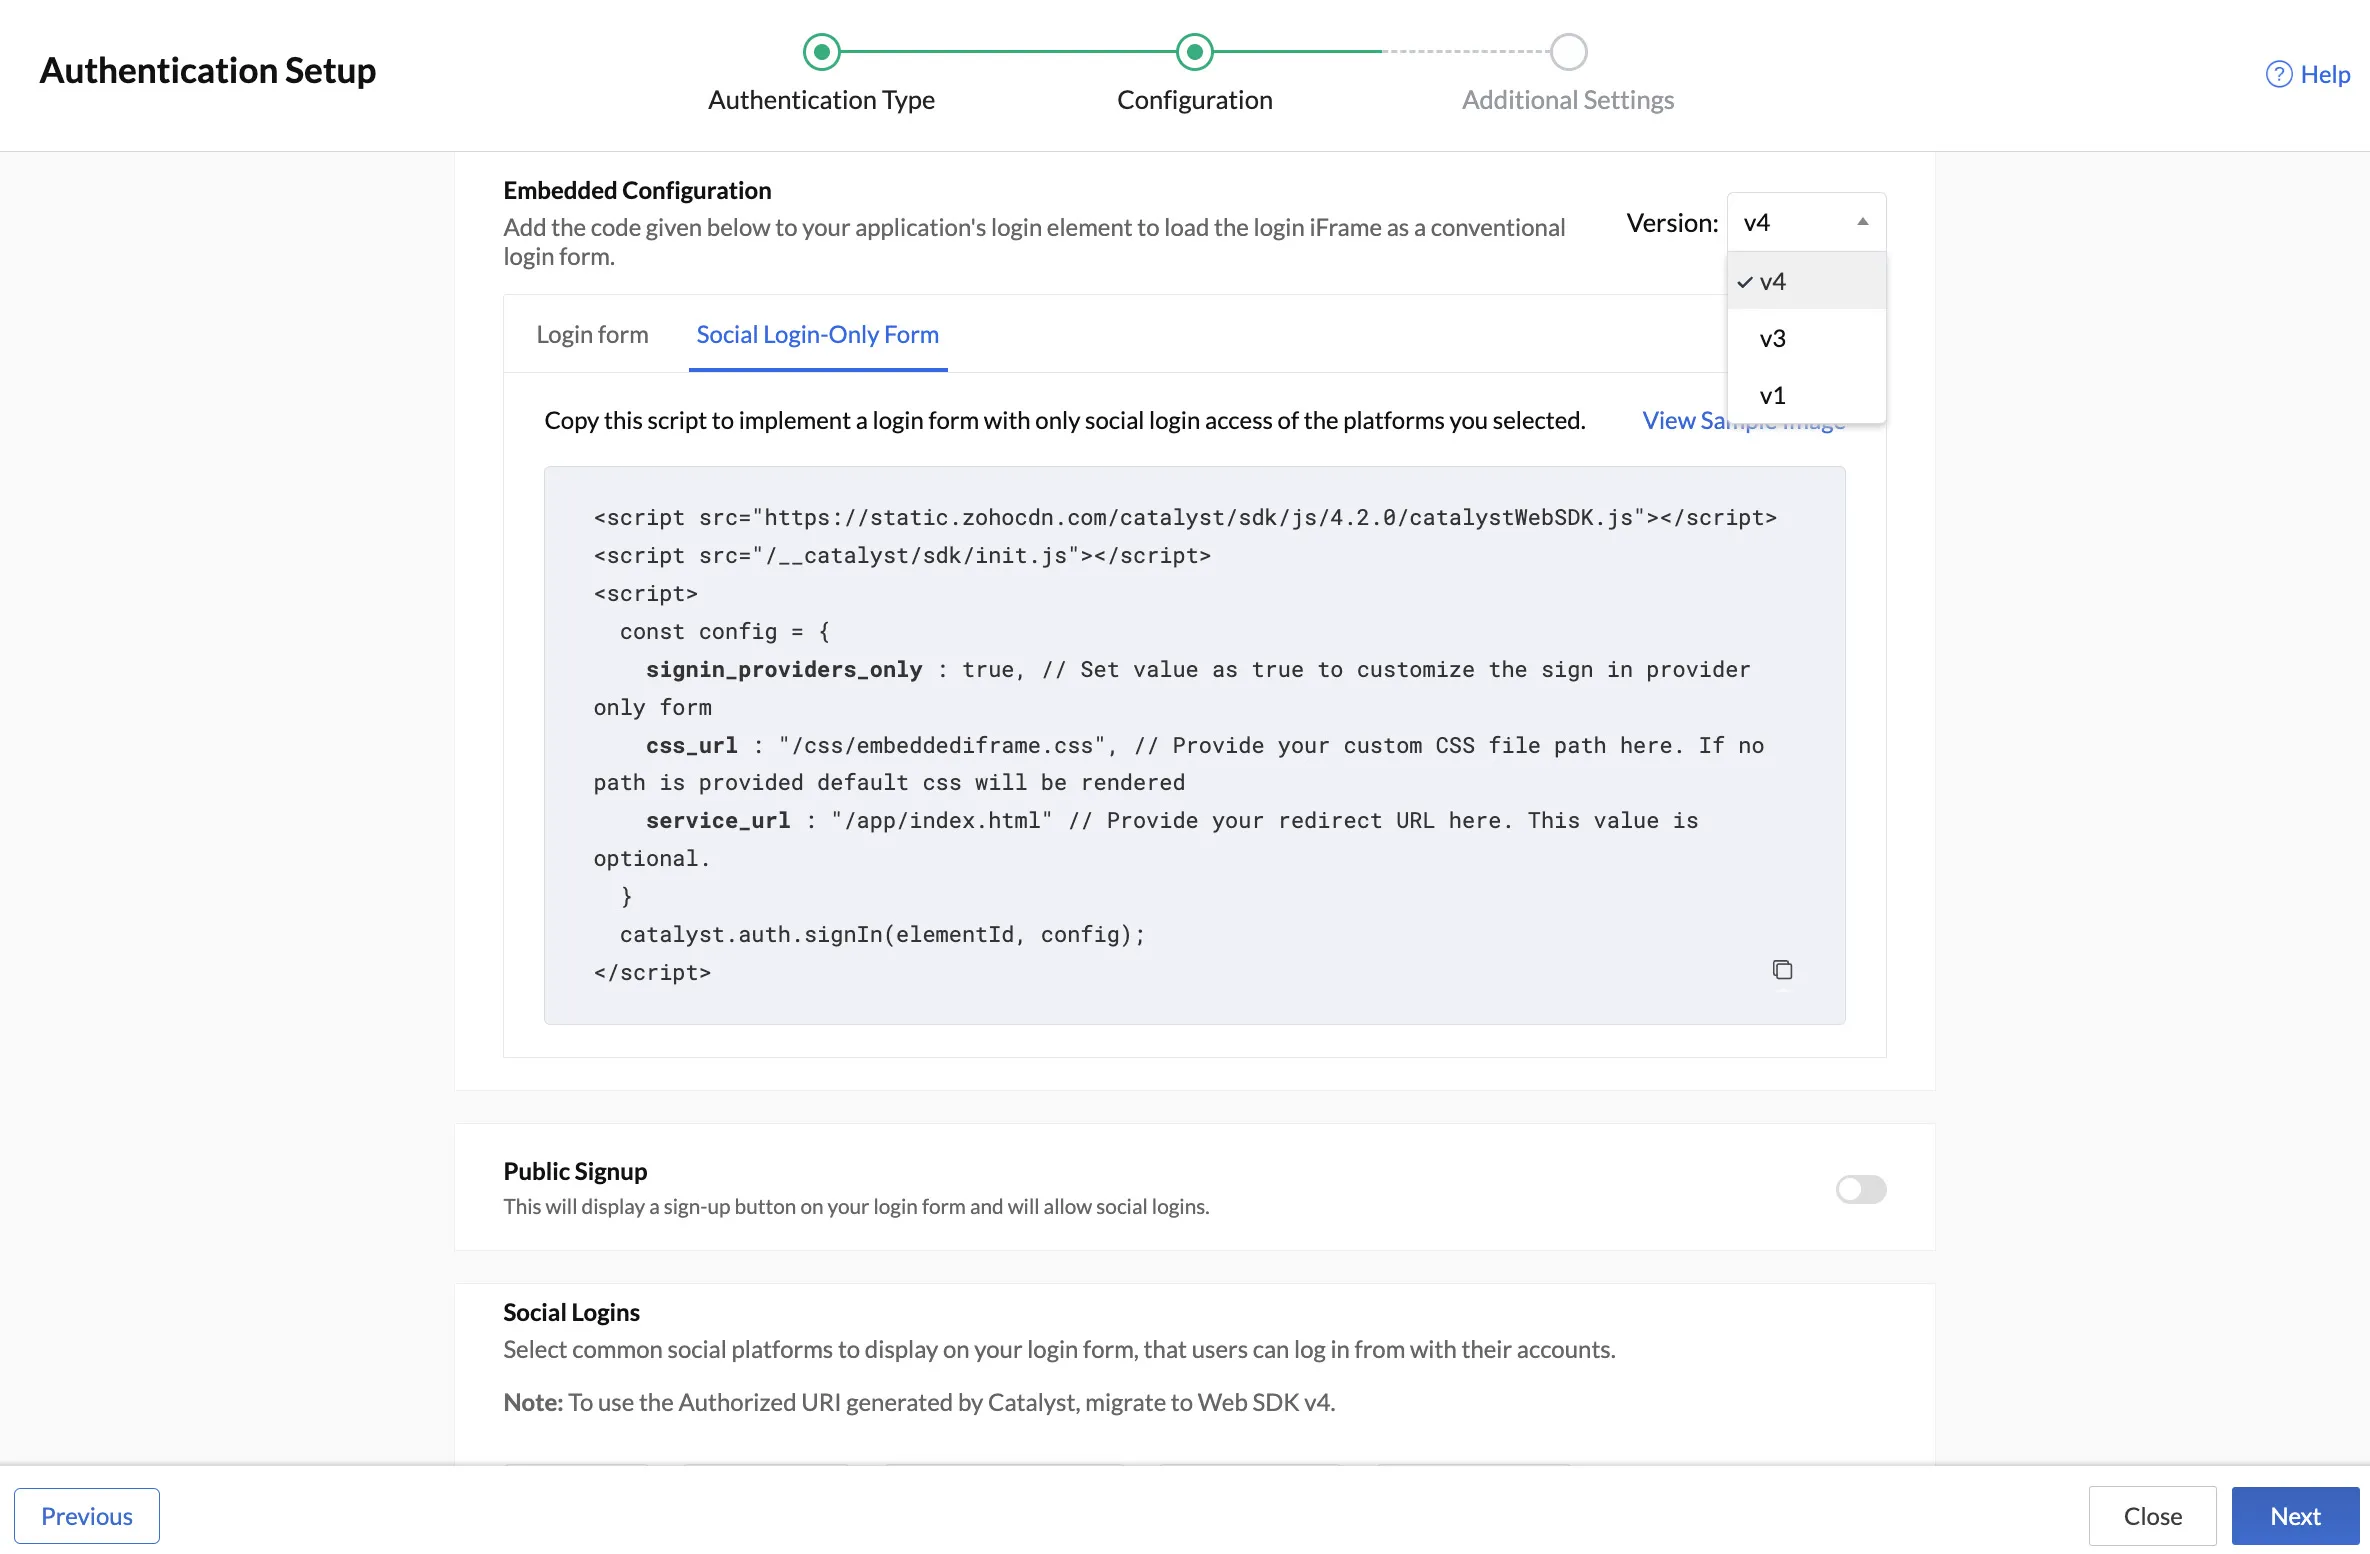
You can access earlier versions of embedded authentication, by clicking and choosing from the Version drop-down. However, ensure that you implement the latest version as this would include upgraded security definitions and enhancements.
- Enable Public Signup if you wish new users to sign up to your application. You can find out more about this from the Public Signup help page.
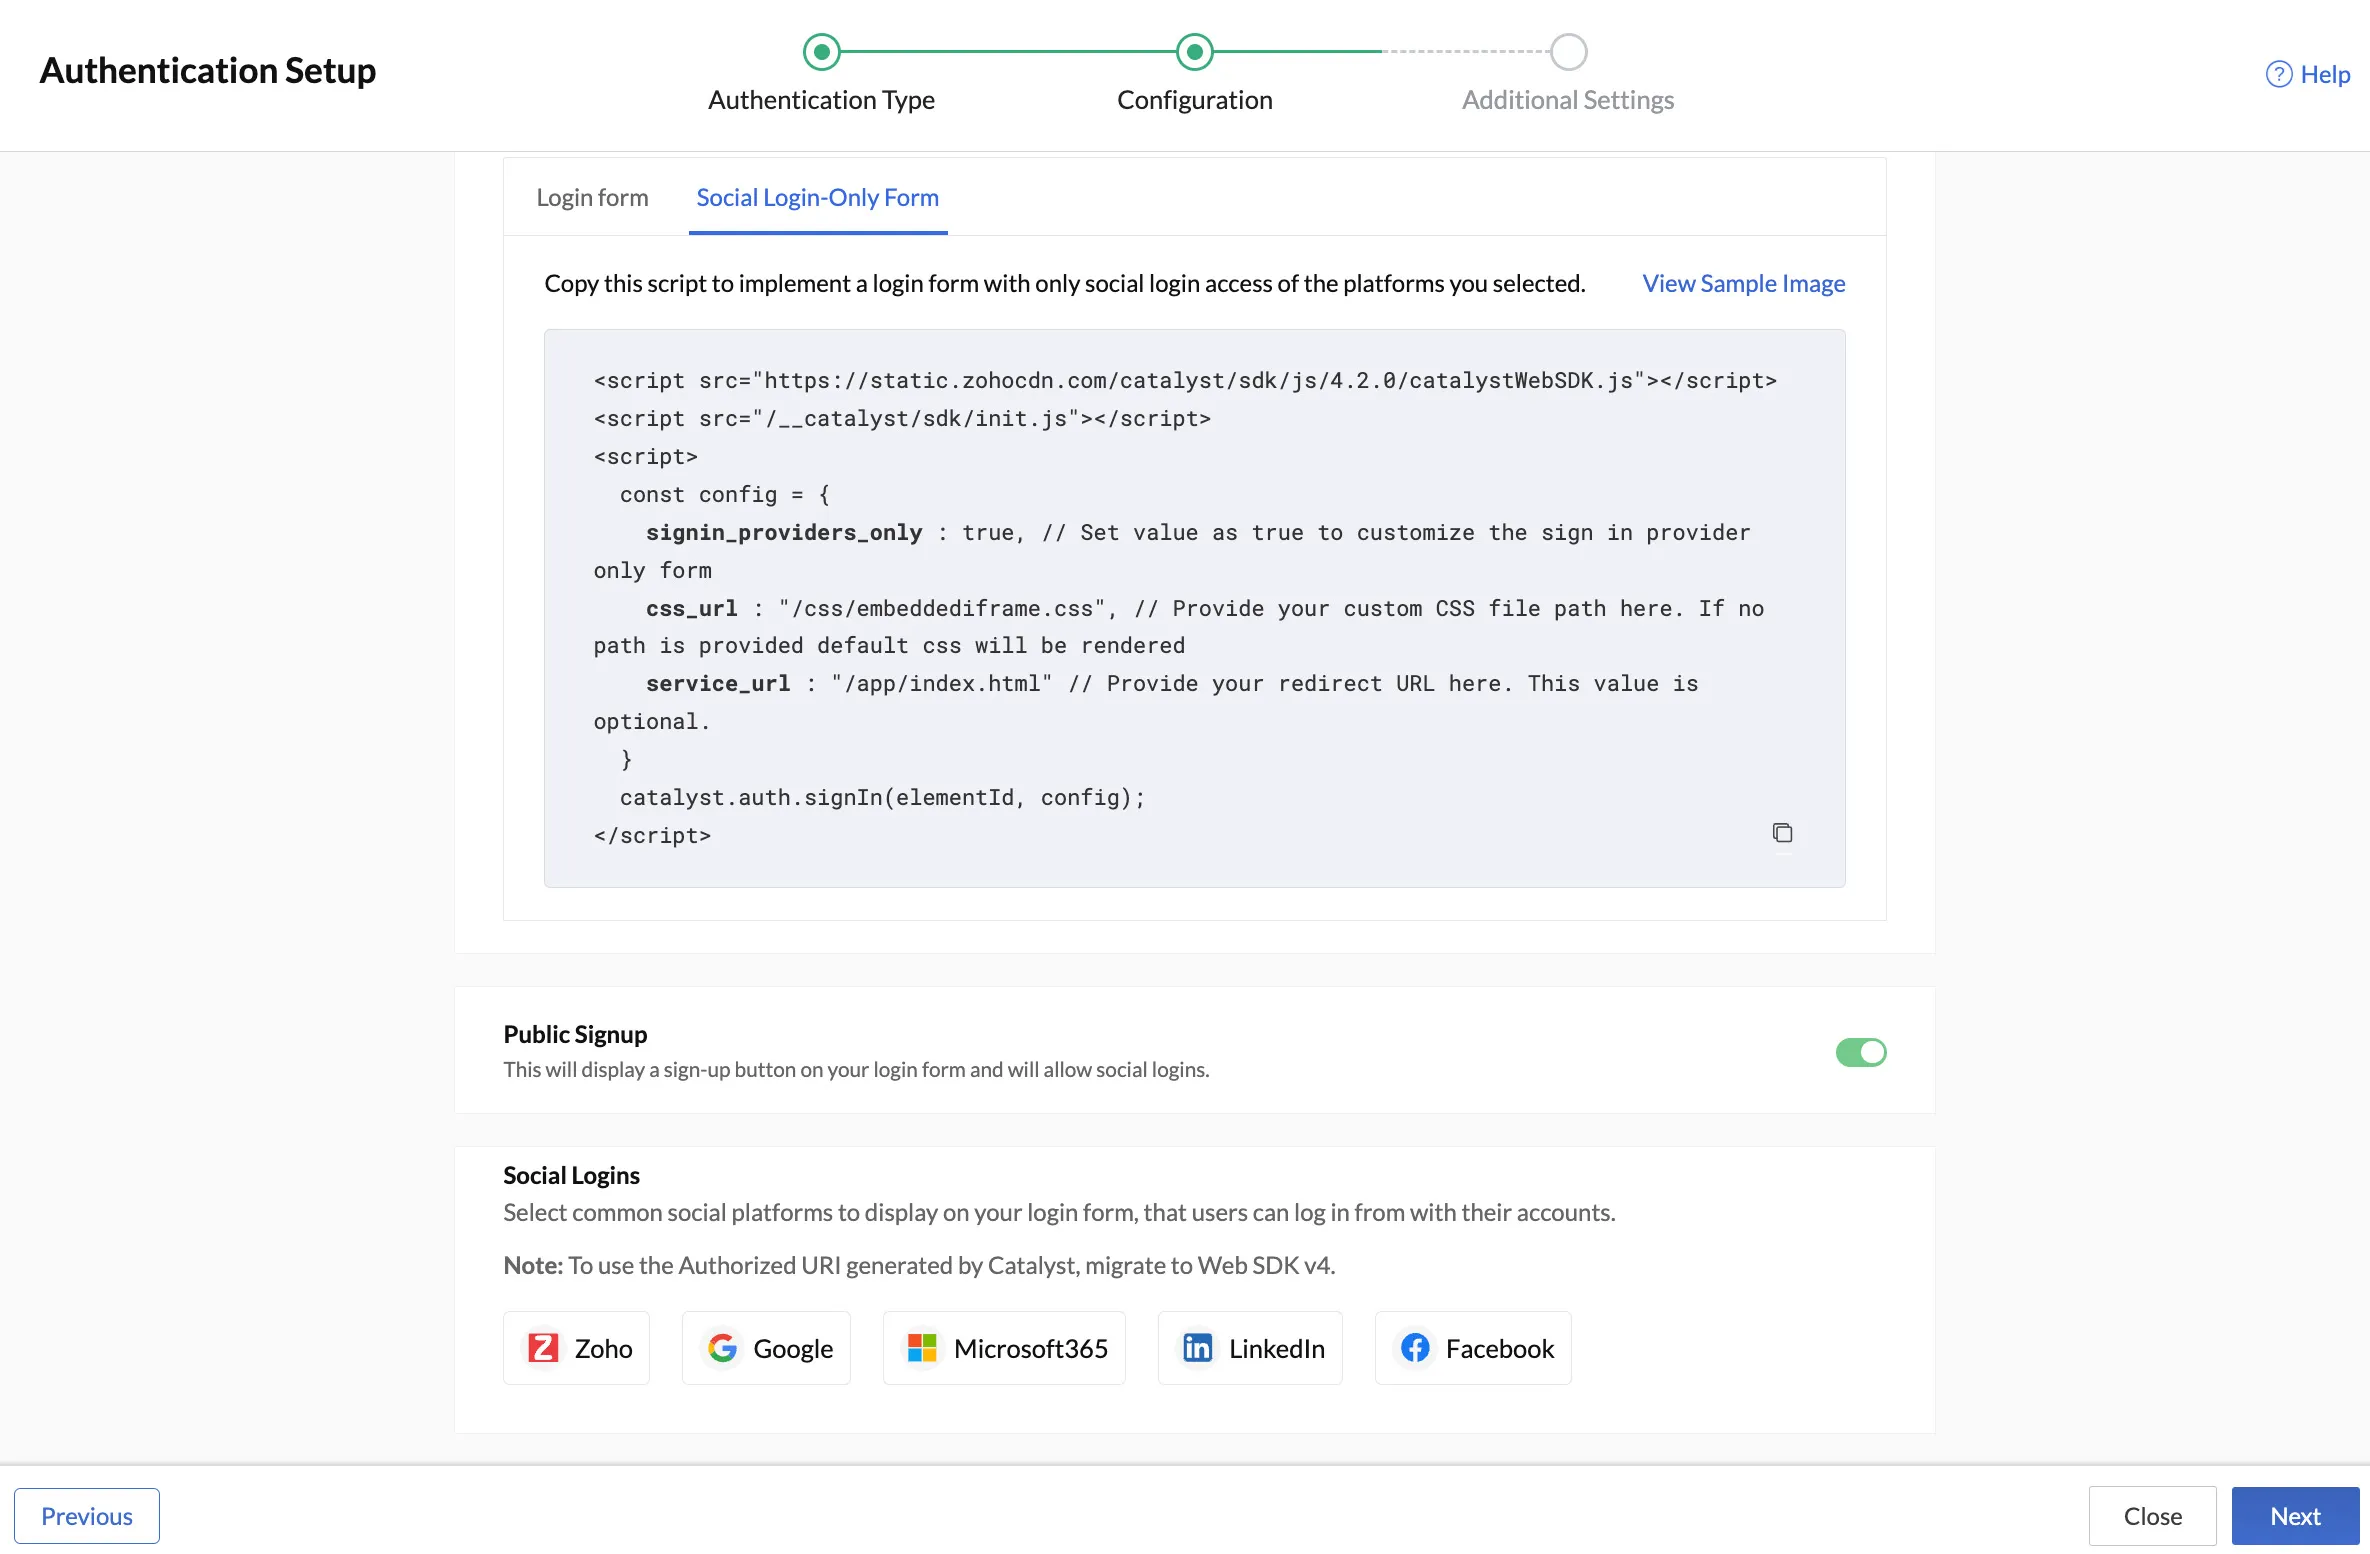
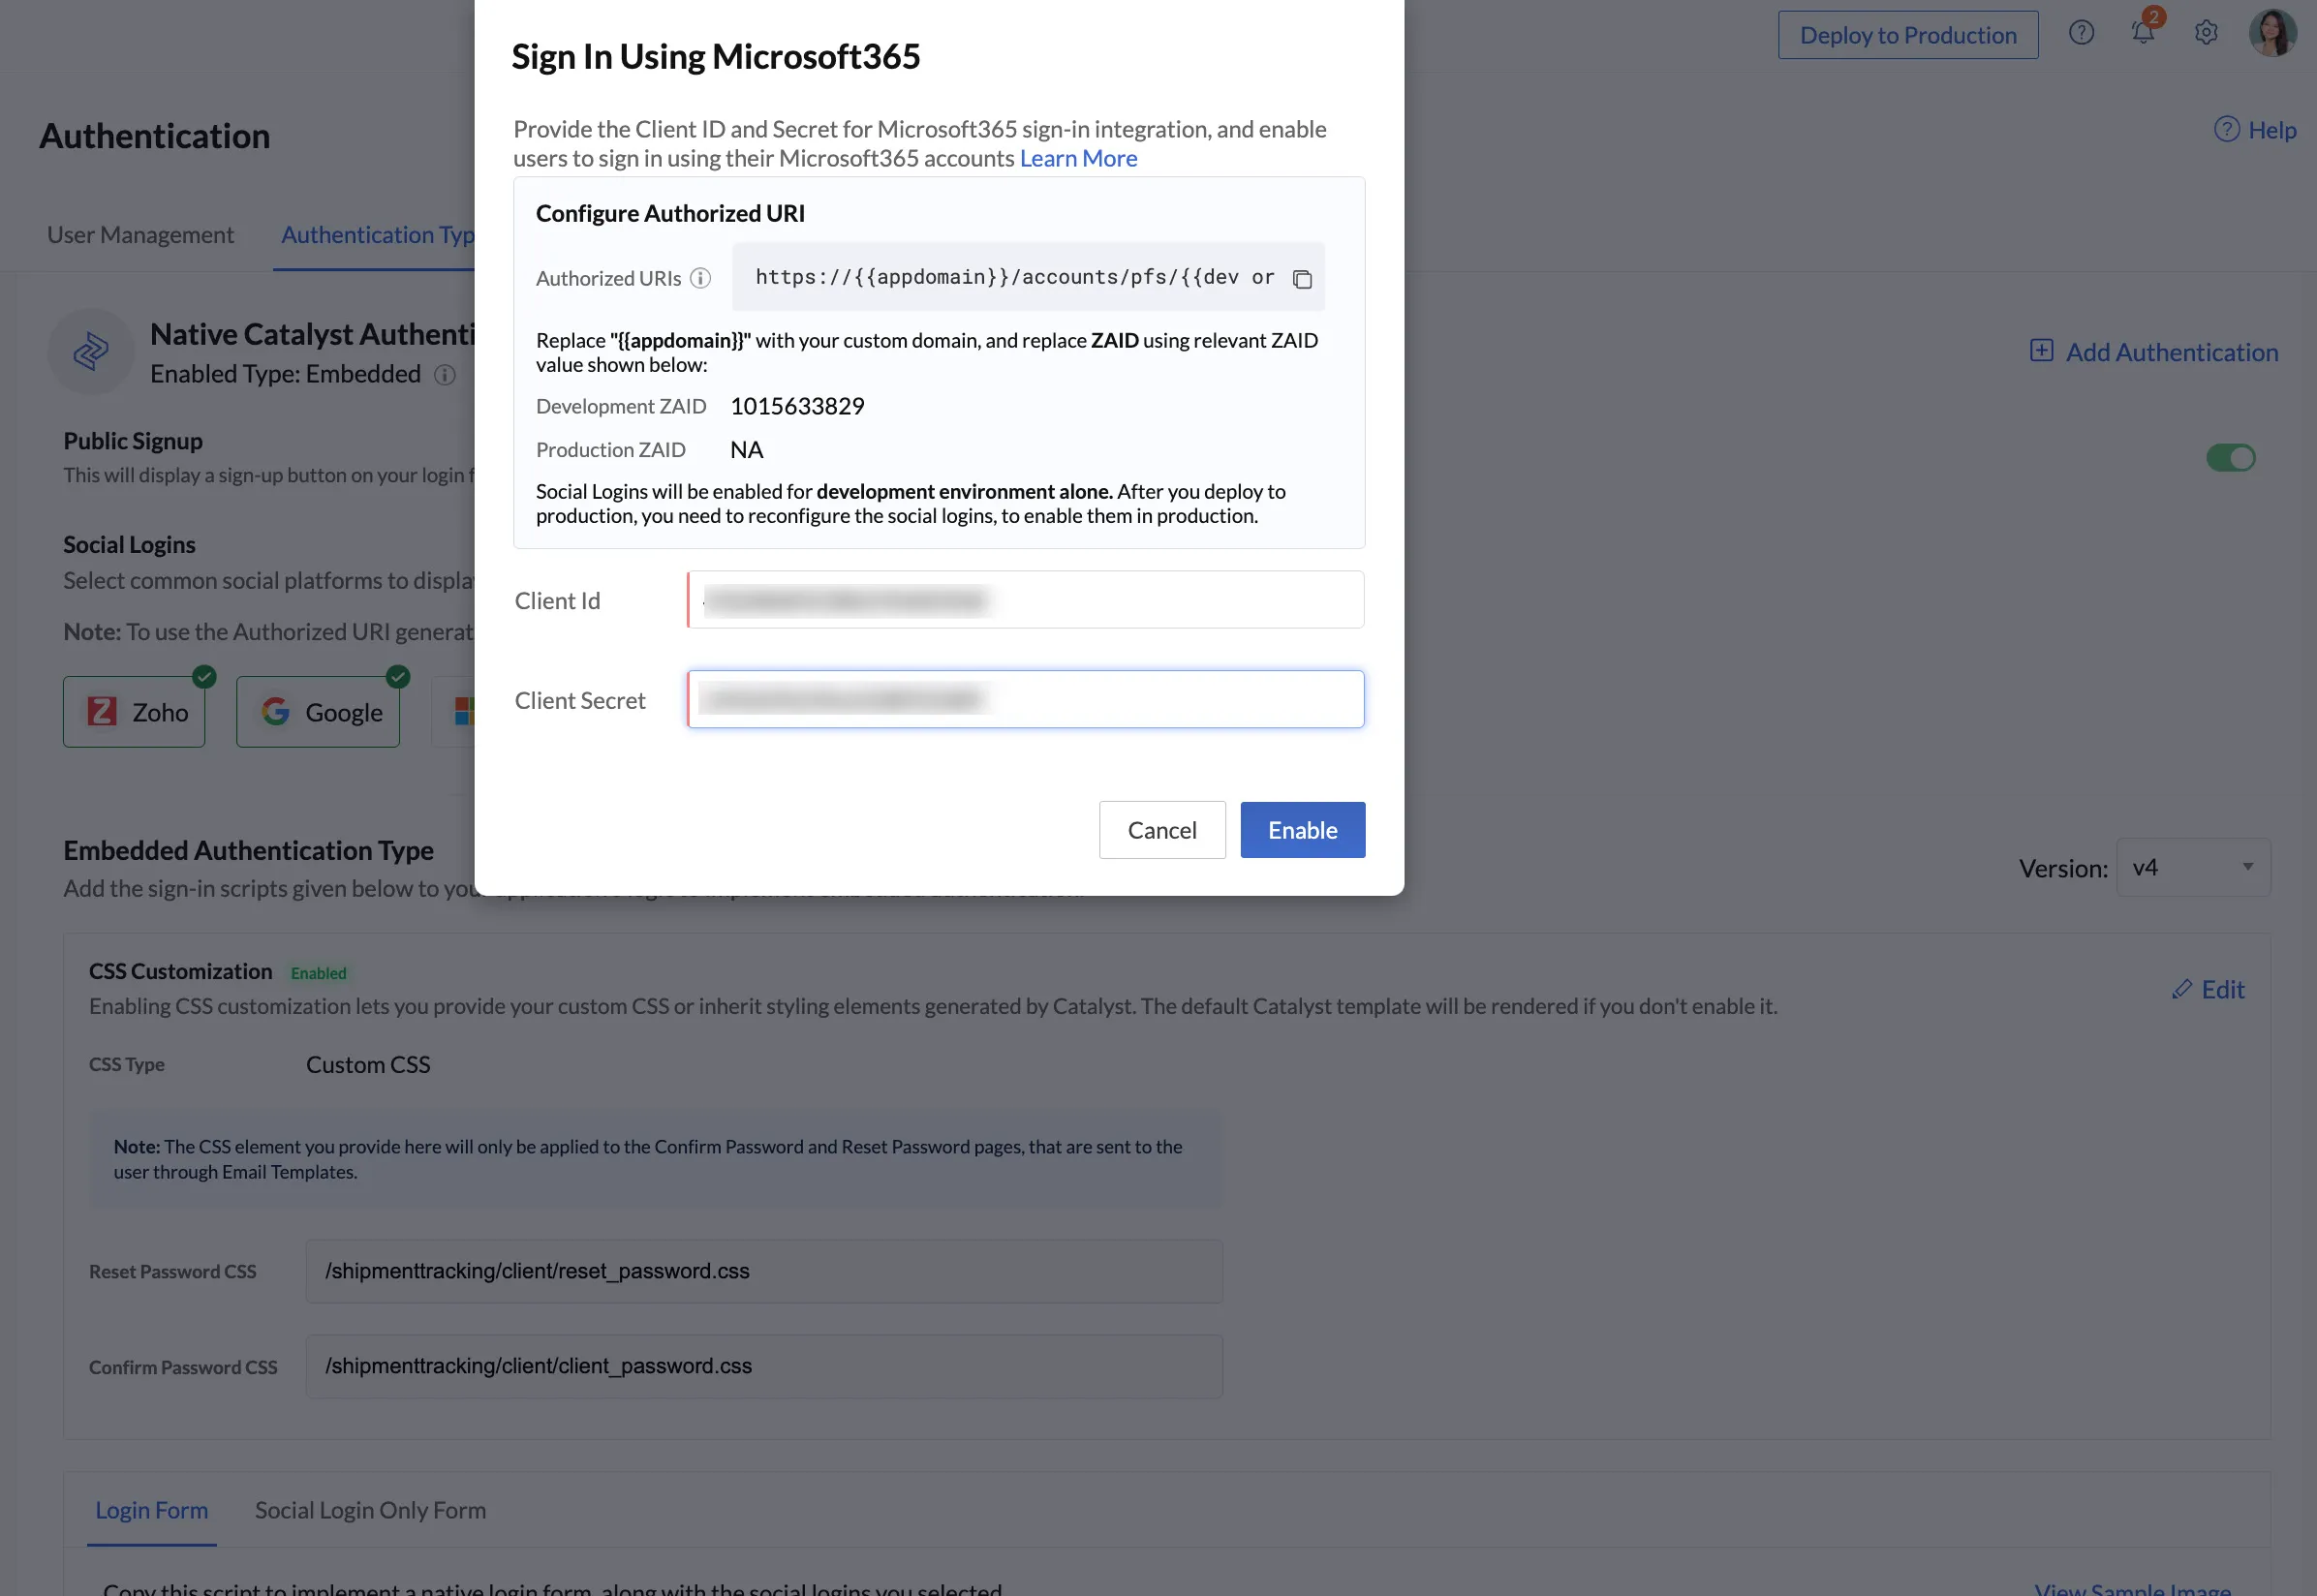
- You can select the Social Logins and enable them to allow your users to use them and sign up for your applications. You can learn about configuring each social login in detail from the Social Logins help section.
-
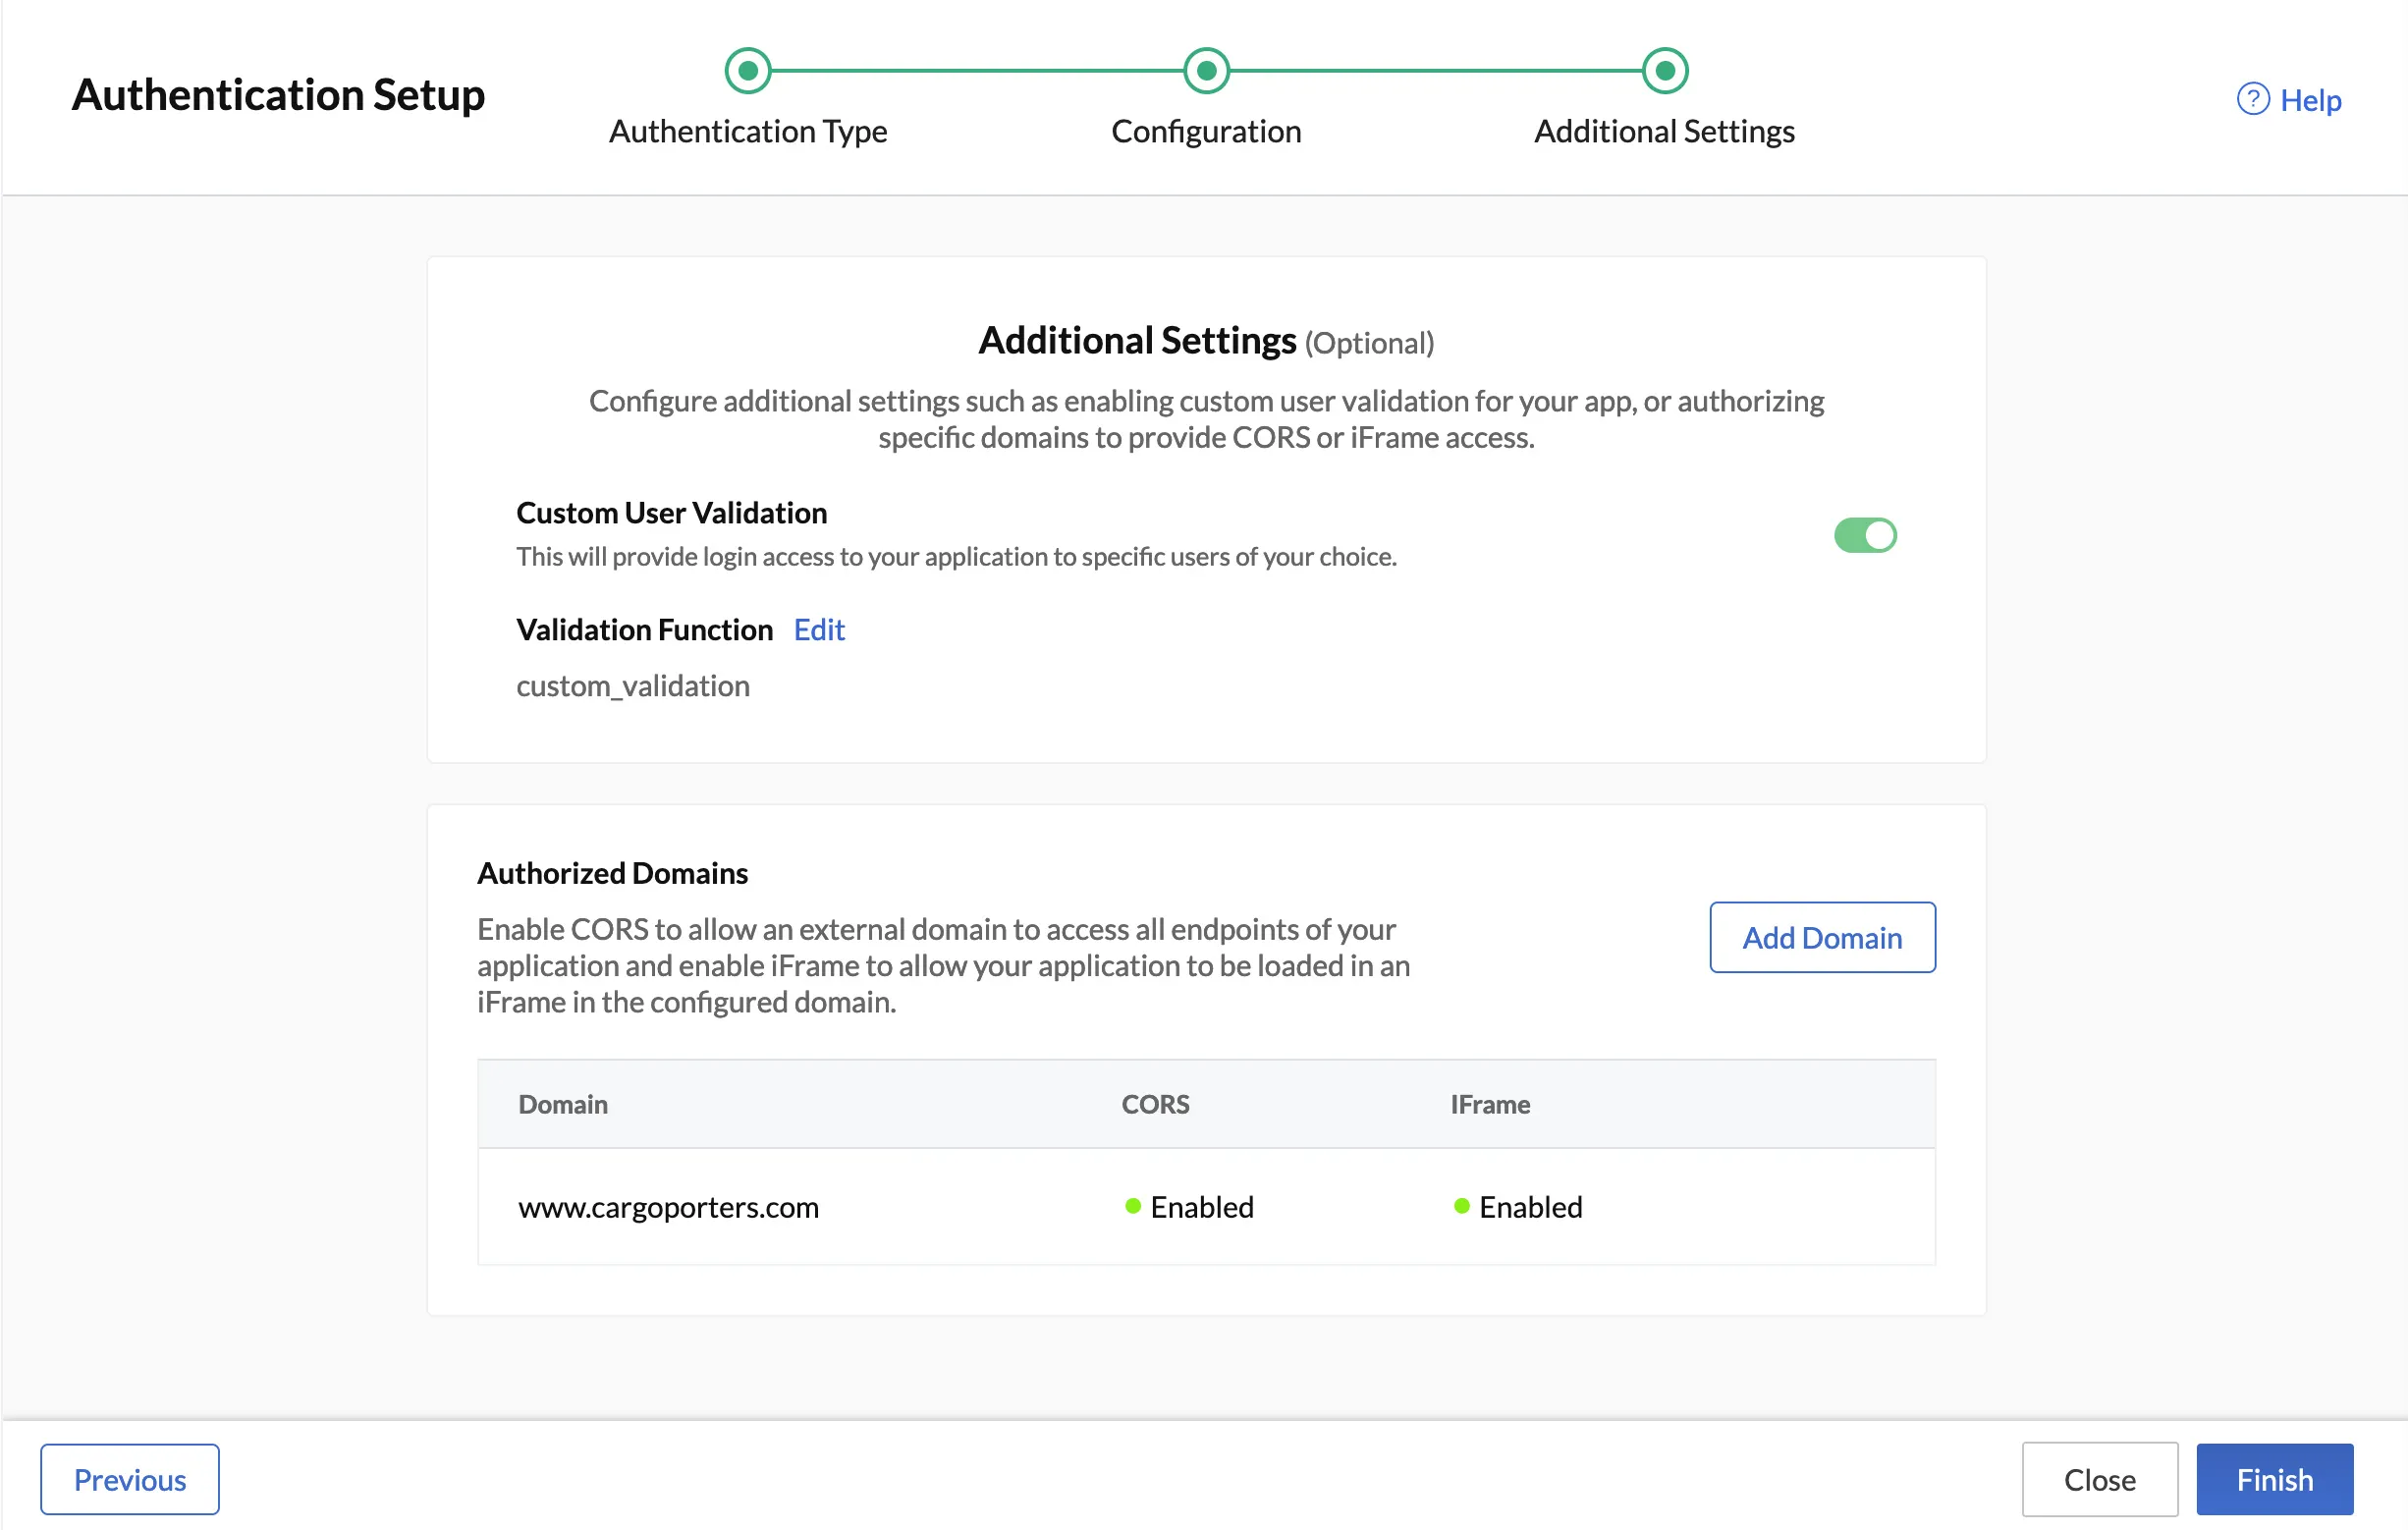
Click Next to save your configurations, and proceed to the Addional Settings section. You can choose to include an additional authentication step by enabling the Custom User Validation option. This option allows you to validate your end-users using a custom logic that you code in a Basic I/O function. You can find out how to set this up in the Whitelisting help document. You can use the Authorized Domains section to authorize external domains to have CORS and iFrame access to your application. You can find out how to set up authorized domains in the Authorized Domain help section.
-
Click Finish to enable the Embedded Authentication type.
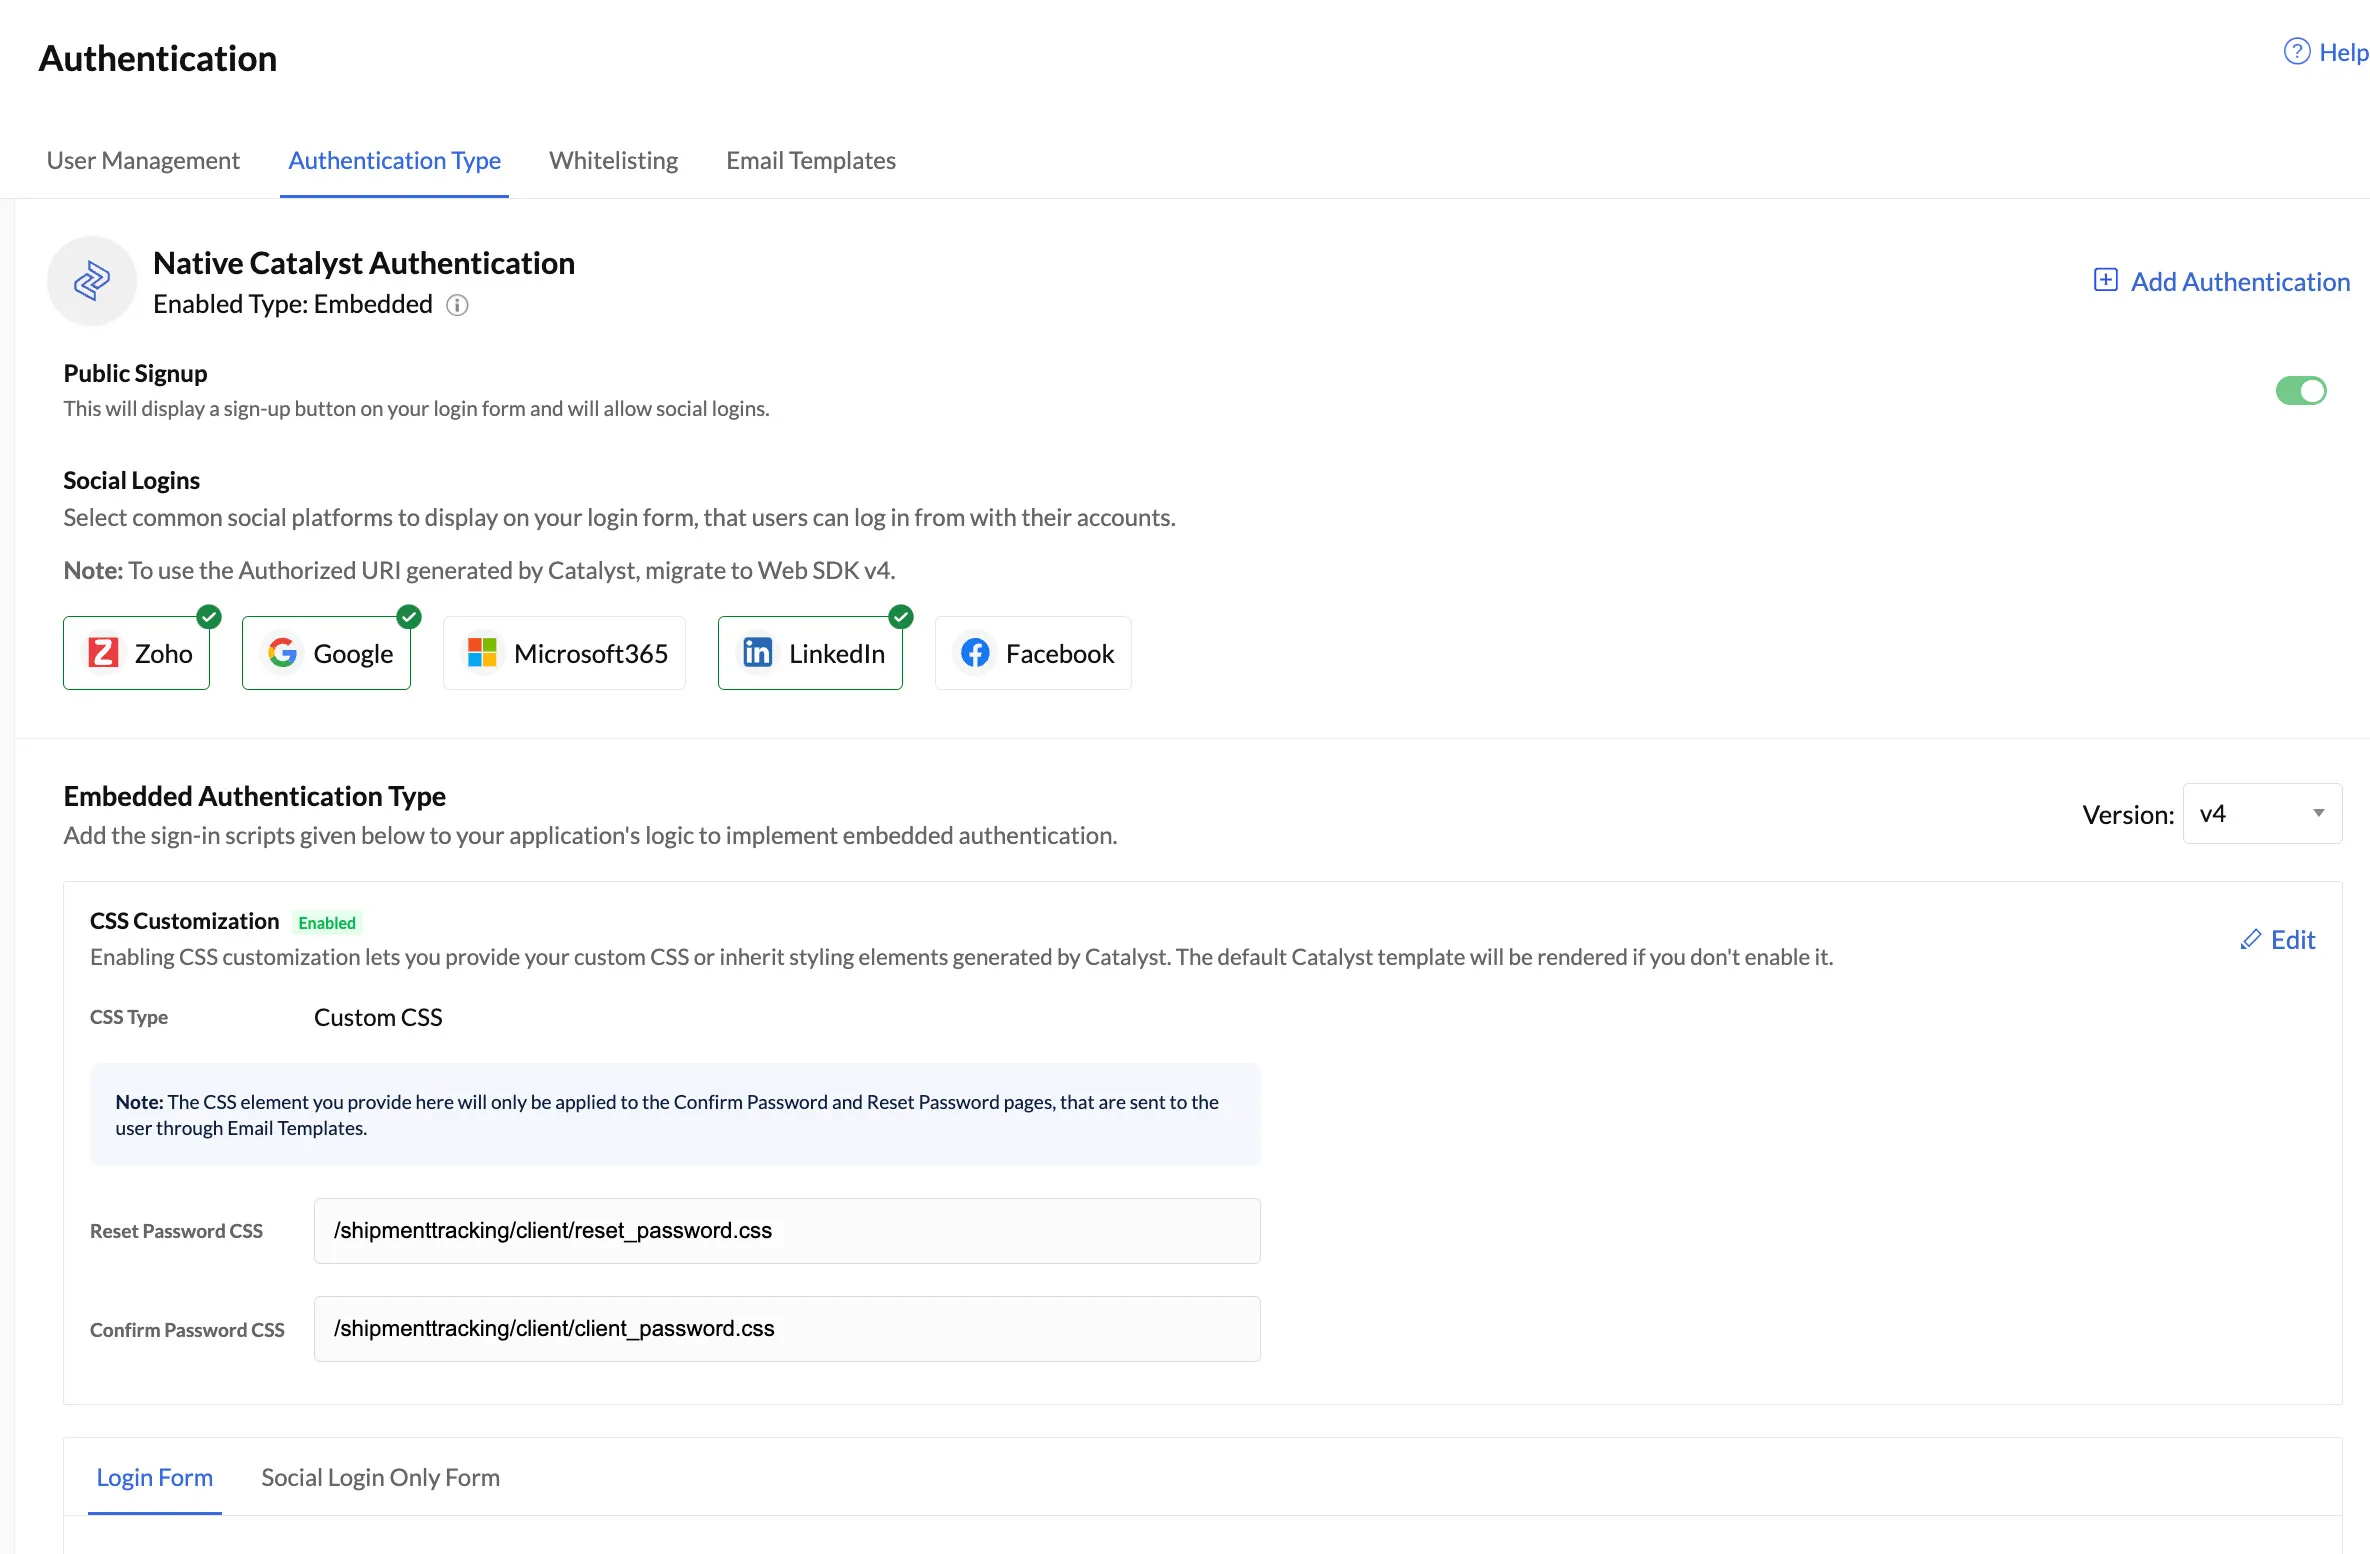
You will now be able to view the authentication that you have set up in the Authentication Type section of Authentication.
In this section, you can edit your Social Logins configurations by clicking the required Social Login tile and providing your new OAuth credentials.
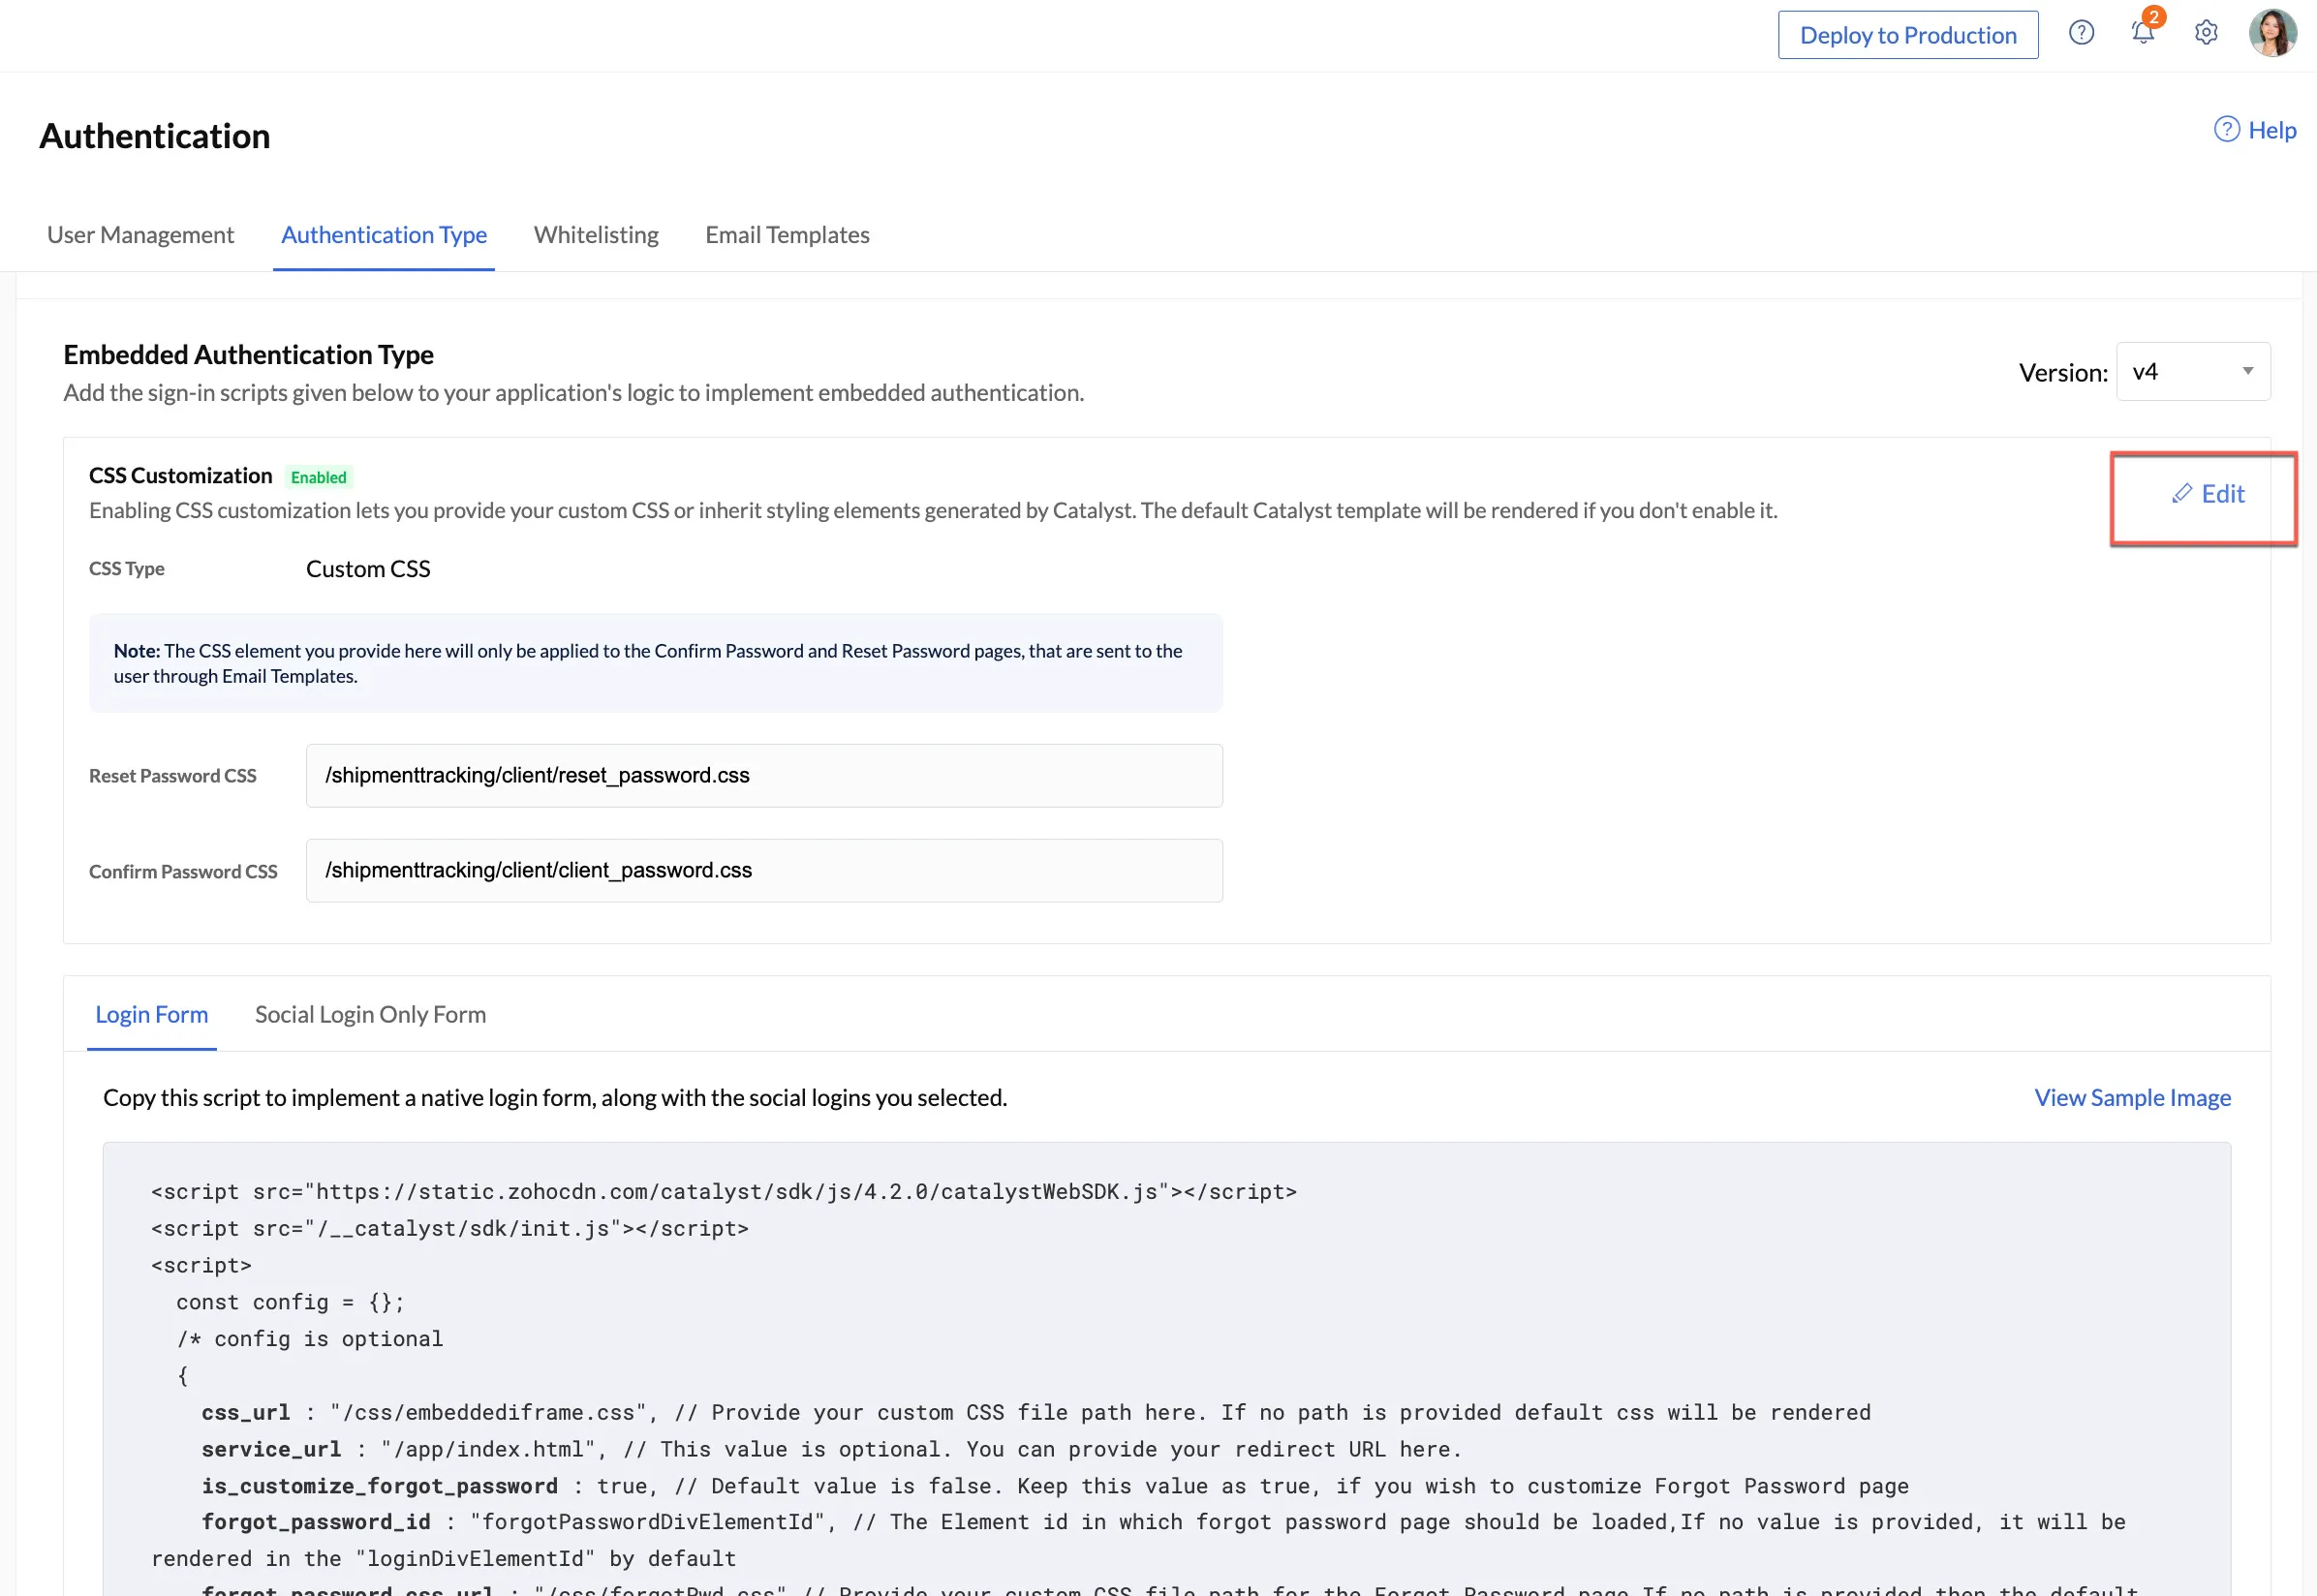
You can also edit your CSS Customization configurations:
-
Click the Edit button.
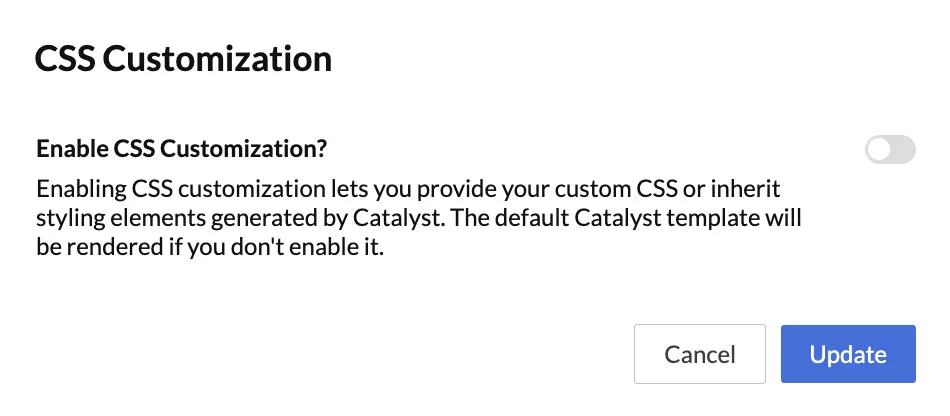
-
You can provide new custom CSS files, choose to inherit the styling you applied when you set up Hosted Authentication type, or even disable the customization.
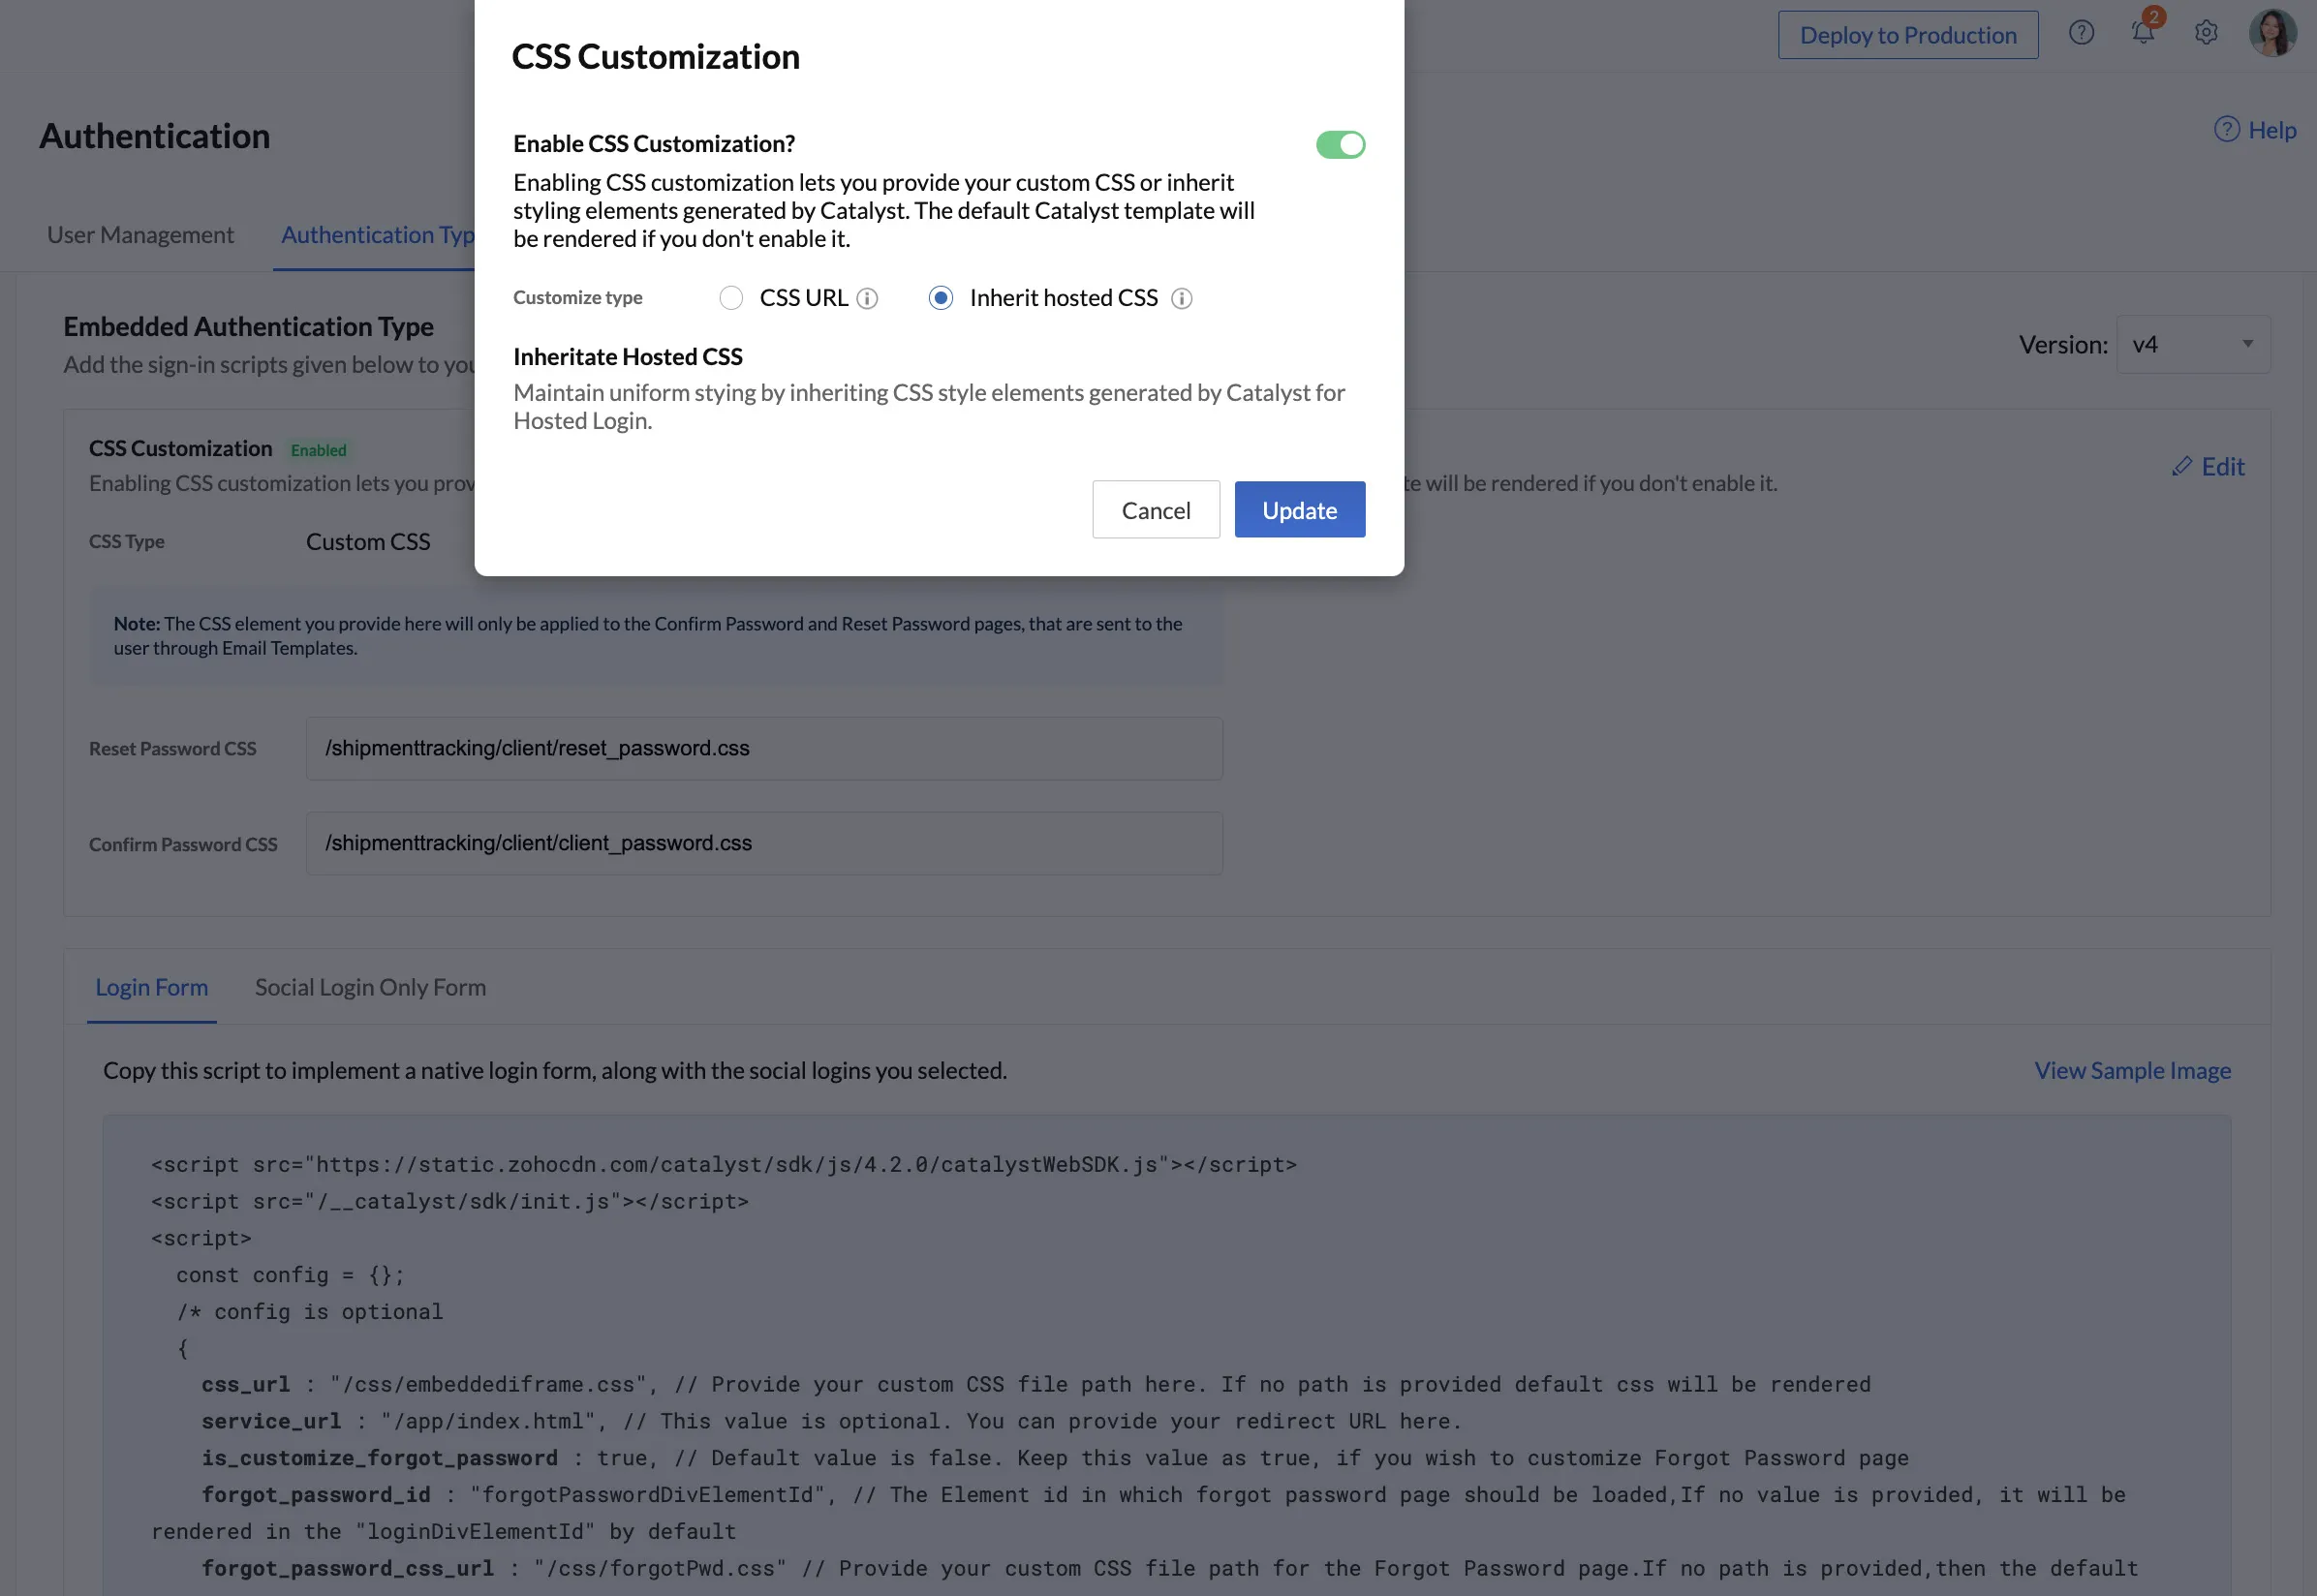
-
Click Update.
Your preferences will be rendered.
You can also access the login scripts for embedded authentication at anytime from this section.
Last Updated 2025-02-19 15:51:40 +0530 IST
Yes
No
Send your feedback to us