Implementation
The Implementation section explains the process of configuring the DNS settings of your domain and mapping it with your Catalyst application in detail.
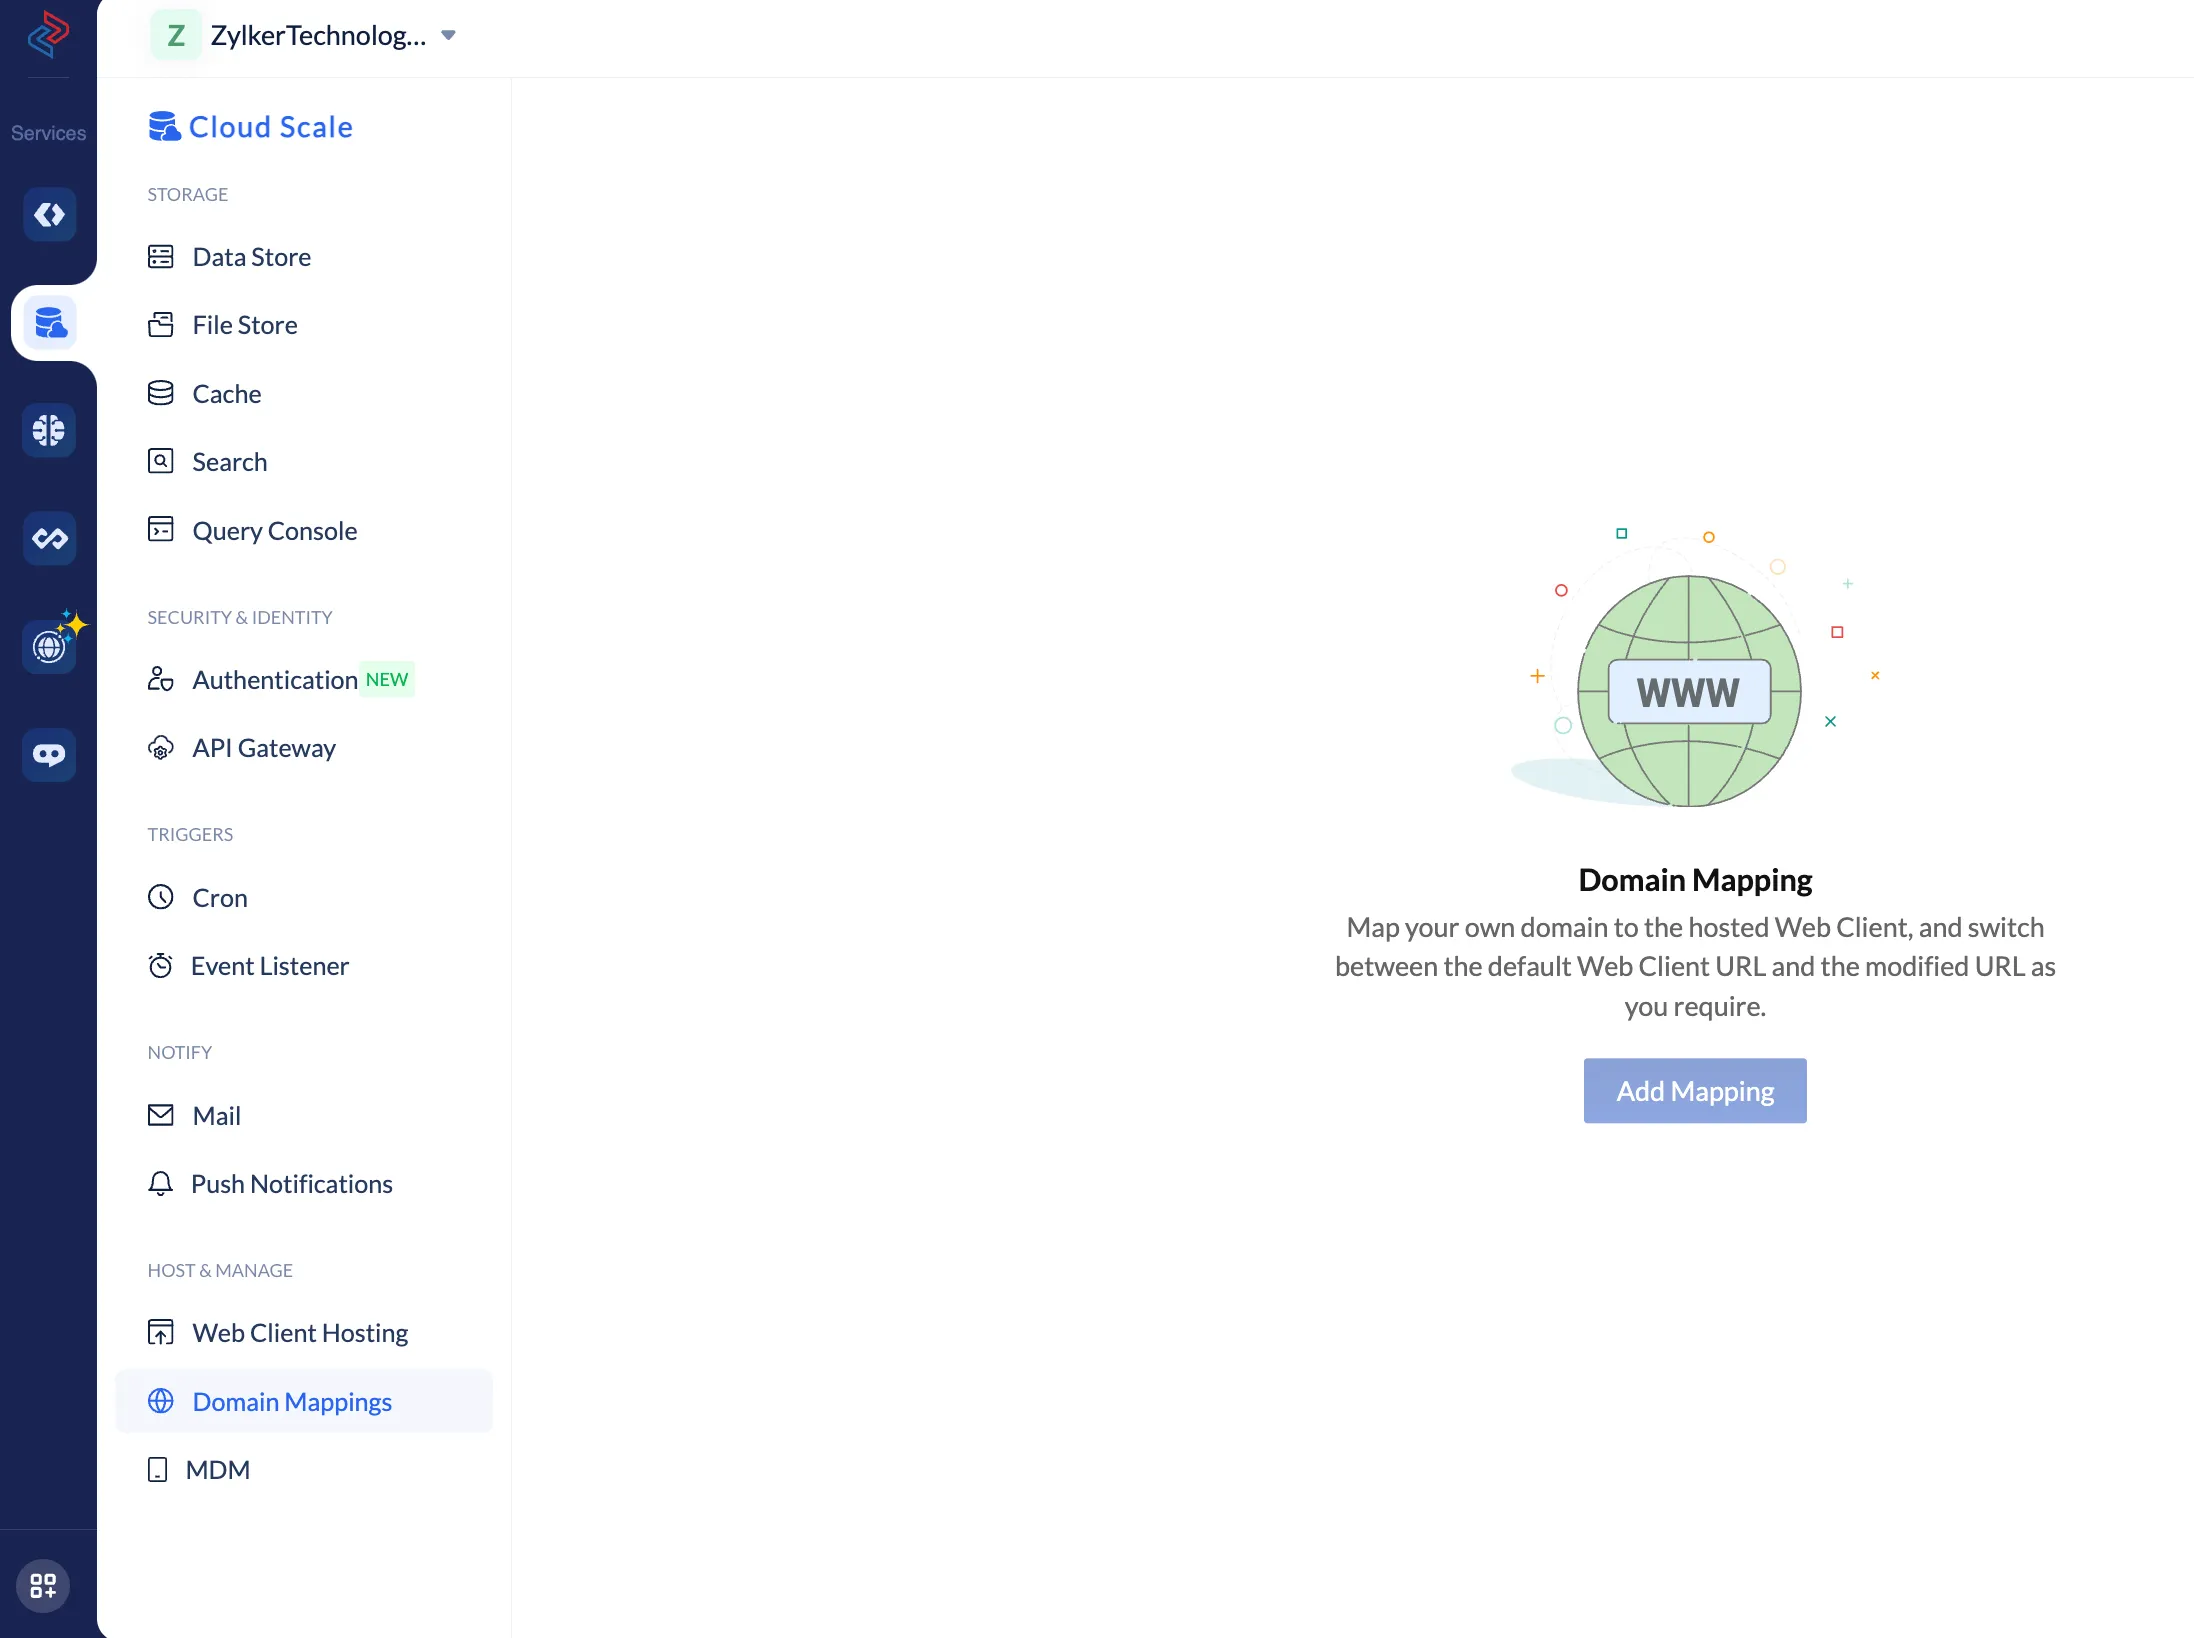
Add a Domain Mapping
The steps involved in mapping your domain with Catalyst are:
1. Create a CNAME record in your domain’s DNS configuration and map the entry with Catalyst
As mentioned in the introduction, the domain that you want to map with a Catalyst application must already be hosted live in your domain provider’s hosting site. Some commonly used domain hosting services include Bluehost, GoDaddy, Google Domains, Hostgator, Hostinger, DreamHost, and more.
When you host your domain, your domain provider will give you access to an administrative console where you can configure and manage your domain. You must create a CNAME record for your domain and associate the entry with Catalyst using your provider’s administrative console.
The consoles may vary depending on the domain provider, but you must follow these basic steps to create and map a CNAME record with Catalyst:
- Your subdomain’s value as the Host Name/Alias/CNAME.
For example, if your domain address is “portal.zylker.com”, you must add “portal” as the Host Name/Alias/CNAME value.
If the domain is “www.zylker.com”, you can add “www” as the Host Name/Alias/CNAME value.
- “catalyst.cs.zohohost.com” as the Destination/Points Tovalue.
- Save the changes.
The changes might take some time to be reflected on the DNS server, based on the DNS register and the domain provider that you are using.
2. Add the domain in the Catalyst console for your project
After the changes are reflected in your DNS configuration, you can begin with adding a domain mapping for your Catalyst application in the following way:
-
Switch to the production environment, then navigate to Domain Mappings under Host and Manage in your Catalyst Cloud Scale console for the specific Catalyst project.
-
Click Add Mapping.
-
Enter the domain URL in the pop-up window.
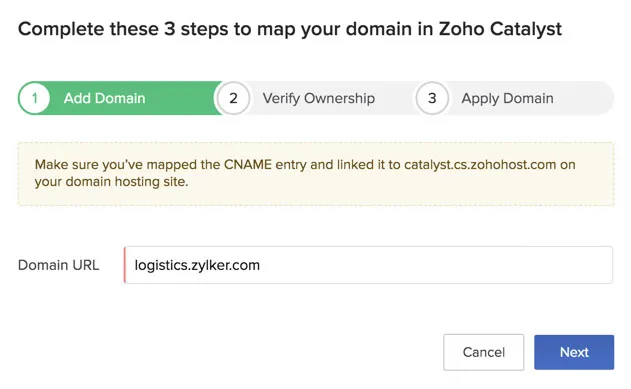
- Click Next.
Catalyst will now generate a unique hash key value for the specific mapping as mentioned earlier. This value, along with the URL of the Catalyst hosting site, will be displayed in the next stage of the pop-up window.
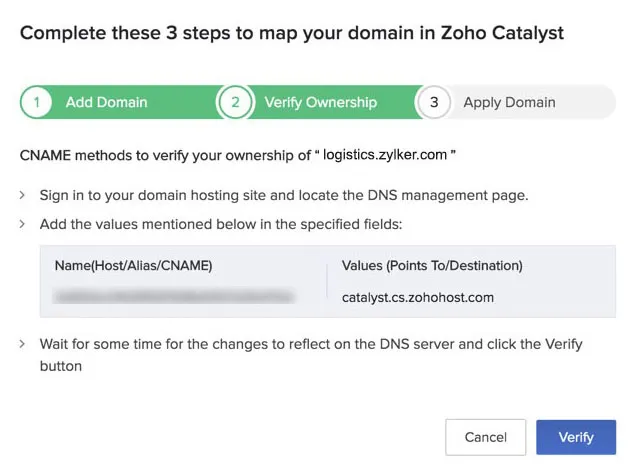
3. Create another CNAME record and add the hash key value generated by Catalyst
You must now create another CNAME record in your DNS configuration to add the hash key value generated by Catalyst in it:
-
Open your domain provider’s administrative console again.
-
Go to the DNS Configuration/DNS Settings/Manage DNS section of your hosted domain.
-
Create a new CNAME record for your domain and add the following values:
- hash_key.subdomain as Host Name/Alias/CNAME
For example, if the hash key generated by Catalyst is “c12to00001x11pl1234h9e33w44h6789”, and the subdomain is “portal”, you must enter the Host Name as “c12to00001x11pl1234h9e33w44h6789.portal”.
Note: Ensure that you specify the subdomain, since Catalyst currently does not support base domains to be mapped directly with an application URL.- “catalyst.cs.zohohost.com” as the Destination/Points To value.
- hash_key.subdomain as Host Name/Alias/CNAME
-
Save the changes.
The changes might take some time to be reflected on the DNS server. Once the changes are reflected, this will verify your ownership of the domain in Catalyst.
You can then click Verify in the pop-up window in Domain Mappings to proceed to the next step.
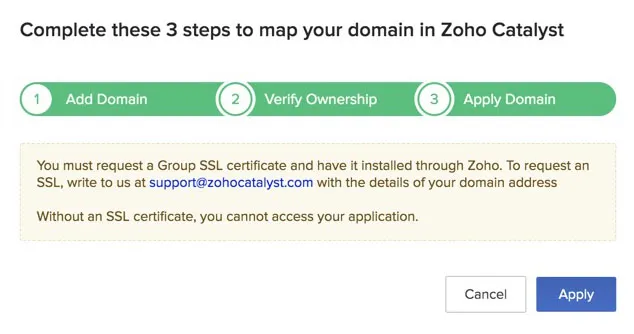
4. Request a Group SSL certificate from Catalyst and install it through Zoho
You must now request a Group SSL certificate from Catalyst for your domain and have it installed through Zoho. Catalyst provides this security certificate for your domain free of charge. This is a mandatory procedure, as your Catalyst application will not be accessible at that domain without an SSL certificate from Zoho. Even if you already have an SSL certificate enabled for your domain, you must use only Zoho’s SSL certificate for the domain to be mapped successfully.
To obtain a Group SSL certificate, you must write to Catalyst support at support@zohocatalyst.com with the details of your domain address. Catalyst will provide the certificate and activate it within 48 hours. You can then install it for your domain. Catalyst will auto-renew the SSL certificate each time automatically before it expires.
5. Apply the configurations and enable the domain mapping for your application
After you install the Group SSL certificate for your domain, you can apply the configurations for the domain mapping in the pop-up window by clicking Apply.
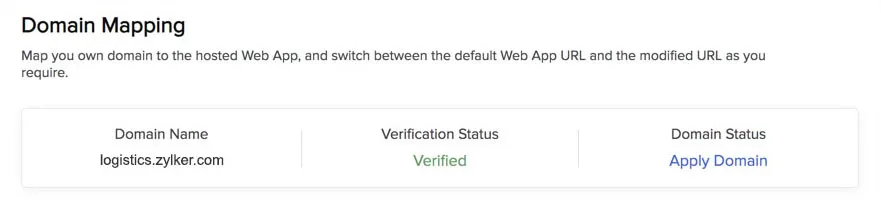
If all the steps have been processed successfully, the domain mapping will be live. All the domains you configure for your Catalyst application will be listed in the Domain Mappings page.

You can close the pop-up window at any time during the process and the configurations you made so far will be saved automatically. Verification Status and Domain Status will display the current status of your domain.
If you close the pop-up window before requesting the SSL certificate, you can click the Apply Domain button under Domain Status after installing the certificate.
Disable a Domain Mapping
You can choose to disable a domain mapping temporarily or for a limited period of time. This will make your Catalyst application available only at the default URL endpoint.
The unique mapping associated with the particular application will still be available in Catalyst even when it is disabled. Therefore, you will still not be able to associate the domain with a different Catalyst application when it is disabled. This also allows you to instantly re-enable the mapping any time you require, without needing to configure it all over again.
To disable a domain mapping for your Catalyst application, click the disable icon for the domain.
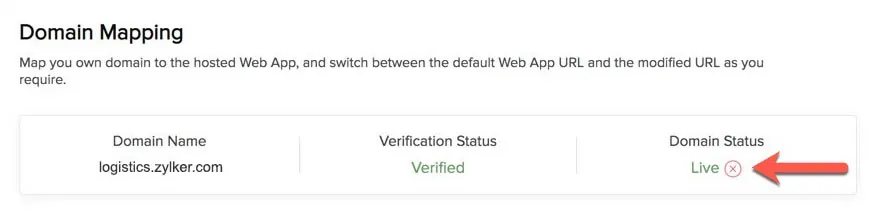
The mapping will then be disabled. You can re-enable it by clicking the Apply Domain button under Domain Status. This will change the status to “Live” again.
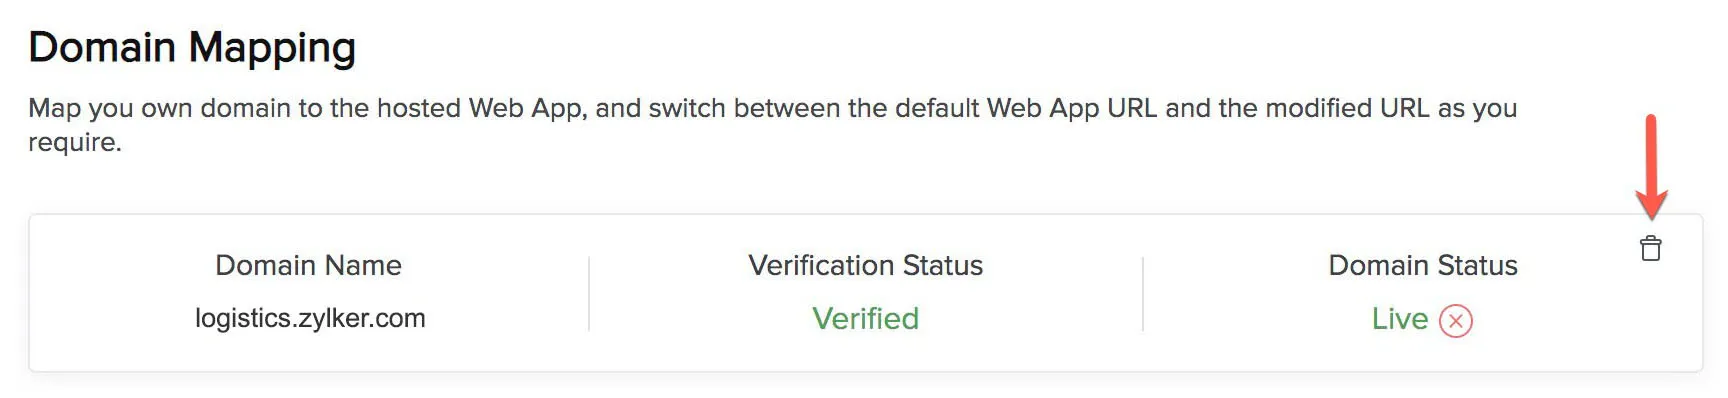
Delete a Domain Mapping
You can delete a domain mapping from Catalyst and permanently disassociate the domain from that particular Catalyst application. This will delete the records that Catalyst maintains of the unique association, and allow you to map that domain with a different Catalyst application if needed.
To delete a domain mapping of your Catalyst application:
- Click the delete icon for the domain in the Domain Mappings page.
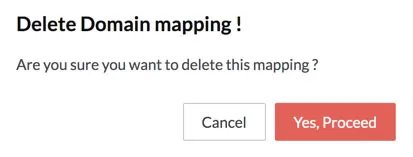
You will now have to re-configure the mapping to associate the domain with the application again.
Last Updated 2025-07-01 17:41:58 +0530 IST
Yes
No
Send your feedback to us