Implementation
The implementation section is a step-by-step procedure guide to configure API Gateway from the Catalyst web console. You can learn about working with API Gateway from the CLI from the CLI help documentation.
Enable API Gateway
You must enable API Gateway for your project before you access it for the first time. As discussed earlier, when you enable the API Gateway for your Catalyst application, the configurations in Security Rules are automatically disabled. The functions and the web client hosted in your Catalyst project will immediately become inaccessible until you create APIs for them. You should therefore proceed with caution.
Ensure that you create APIs for all your functions and web client immediately after enabling API Gateway. You must also ensure that the end users do not access them in the meantime. You can learn about disabling API Gateway from this section.
To enable API Gateway for your Catalyst application from the console:
- Navigate to API Gateway under Security & Identity in the Catalyst Cloud Scale console and Click Enable Now.

- Click Proceed in the confirmation window.
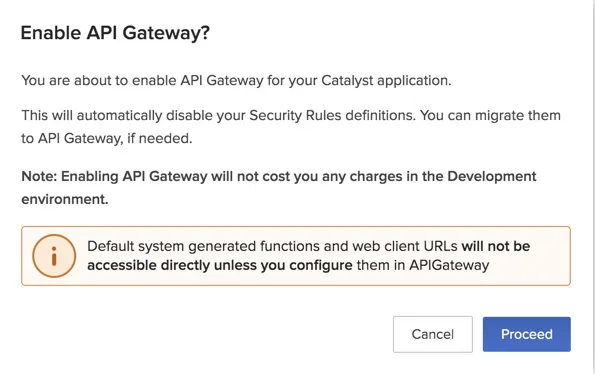
You will receive a notification in the console once API Gateway is enabled for your Catalyst project.
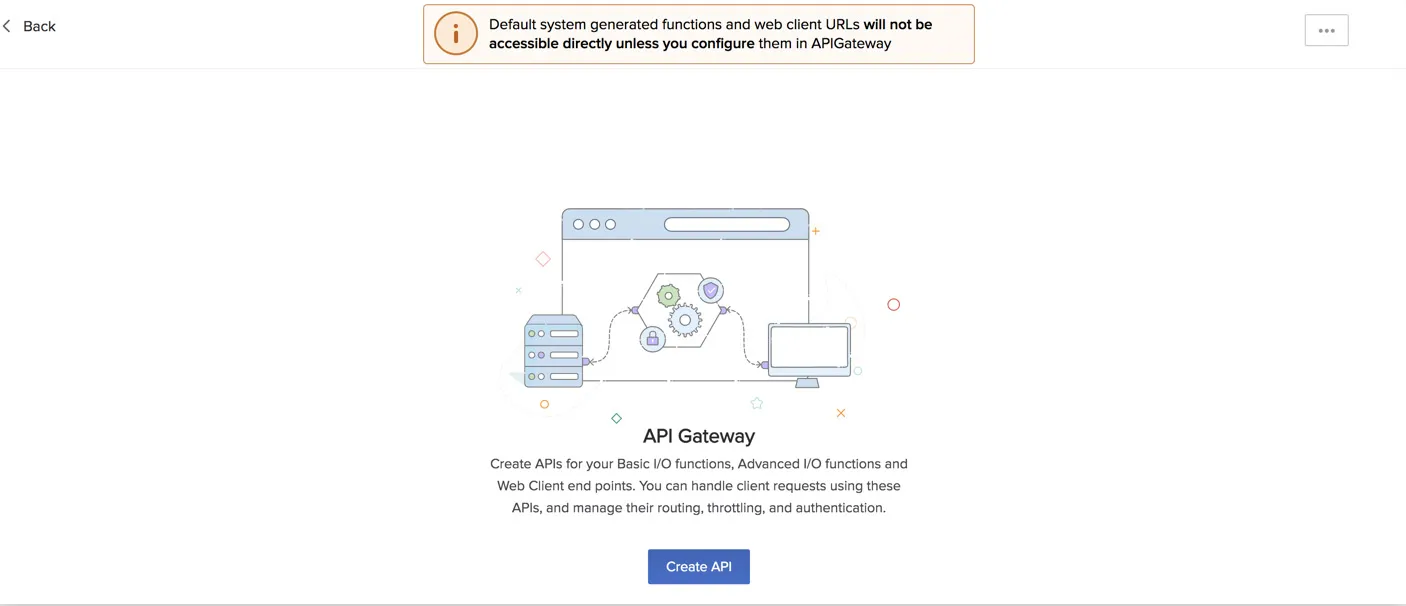
Create an API
Before you begin, you must ensure that you have hosted at least one function or the web client in your Catalyst project, to create an API for it.
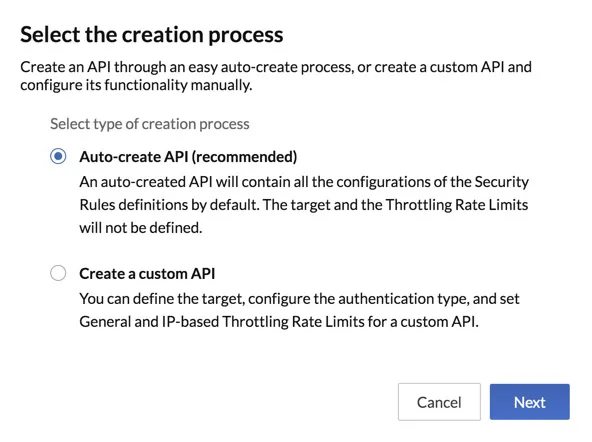
Auto-Create
You can only use auto-create to create APIs automatically when you enable API Gateway for your project for the first time. If you have already created a custom API, you will not be able to access auto-create.
Refer to this section for protocols to be followed when migrating definitions from Security Rules.
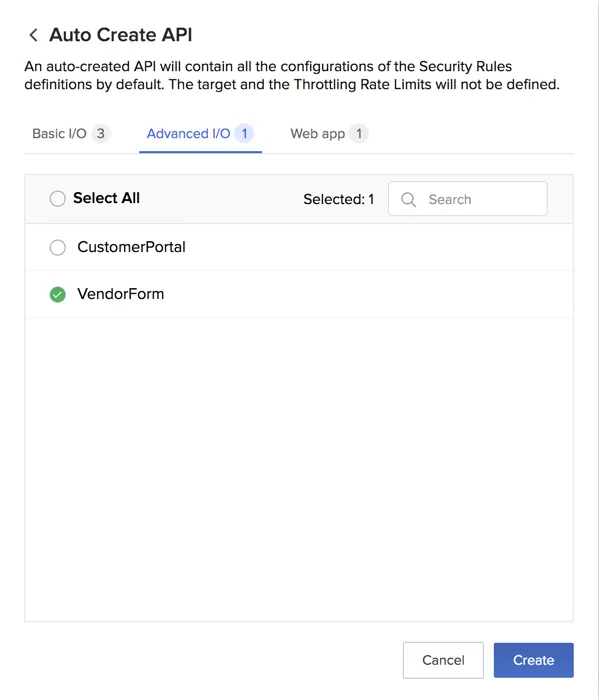
To create APIs for your functions or the web client using auto-create:
- Click Create API after you enable API Gateway in the Catalyst console.
- Select Auto-create API and click Next.
- All your Basic I/O and Advanced I/O functions, and the web client are selected by default.
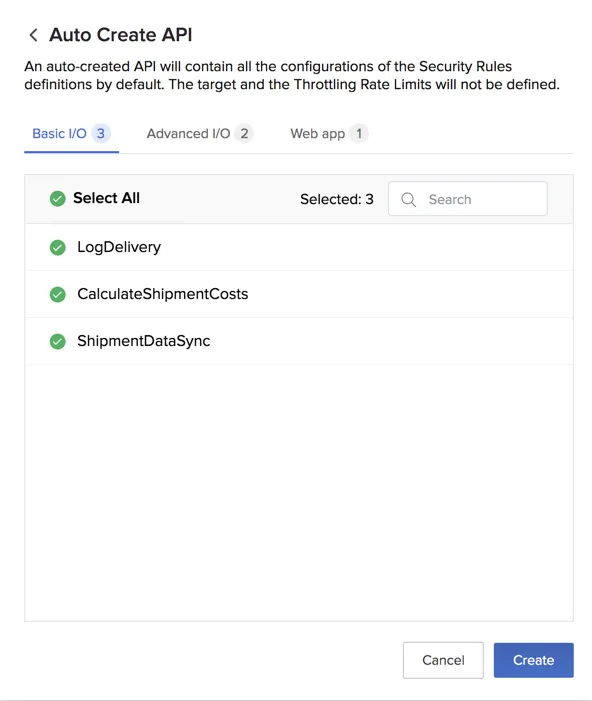
Unselect the services that you don’t want to create APIs for and click Create.
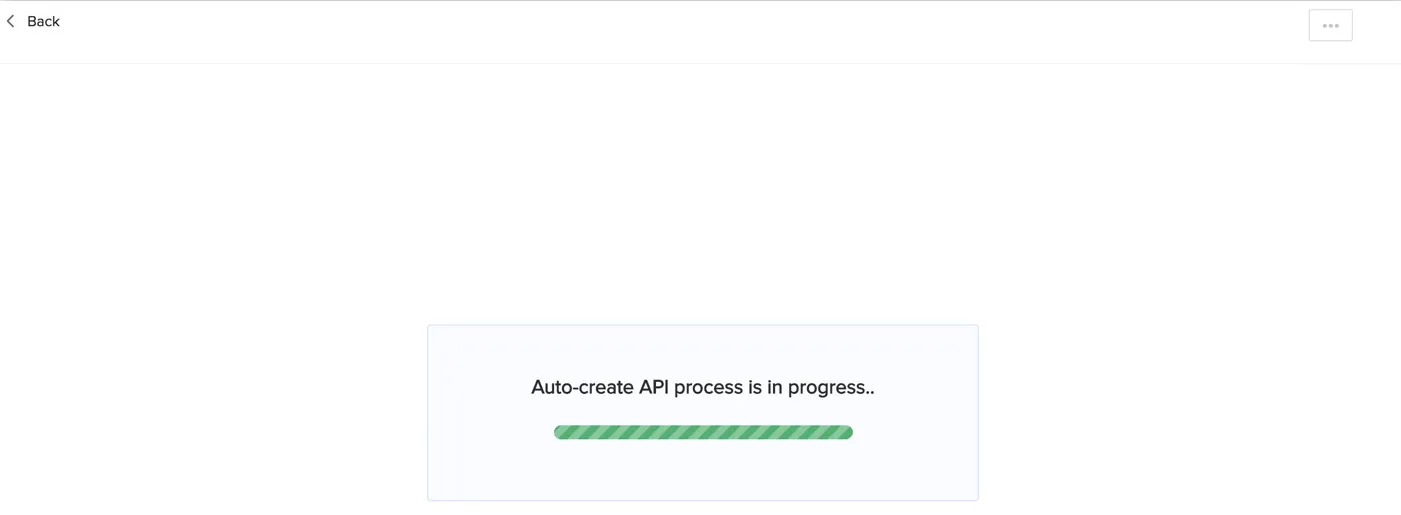
Catalyst will initiate the API creation process.
Once the APIs are created, you will receive a notification in your console. The APIs will be listed in the API Gateway page.
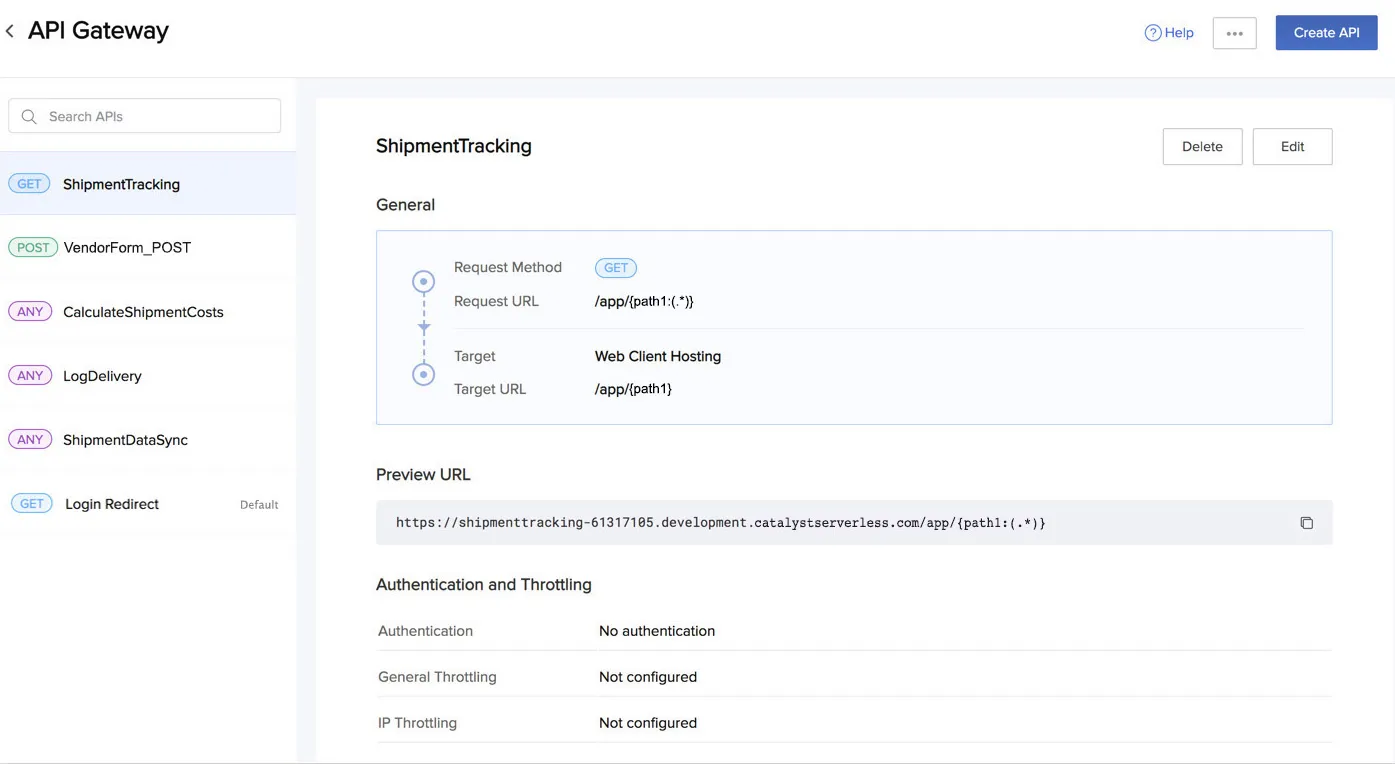
You can edit the default values set for these APIs, and individually configure them based on your requirements.
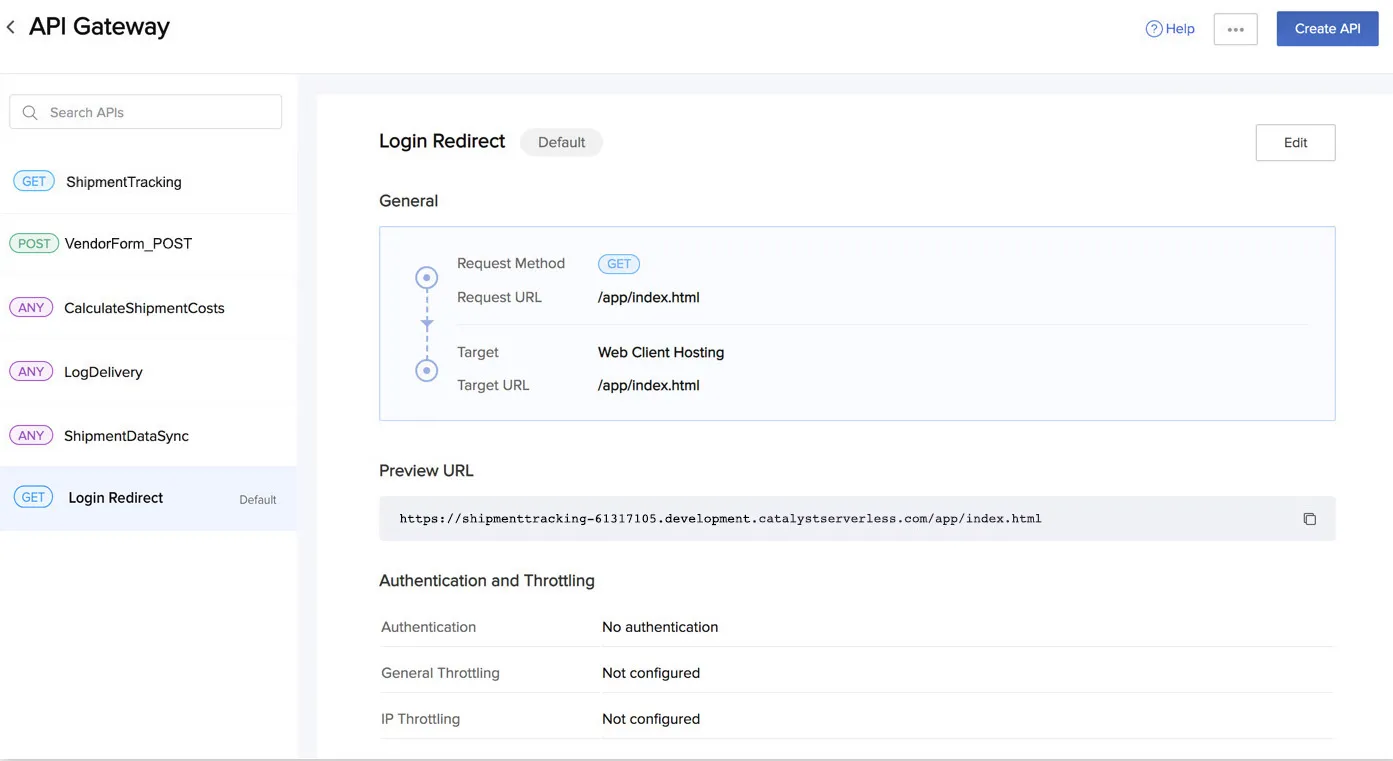
As discussed in this section, the default Login Redirect API is also created for the web client hosted in the project.
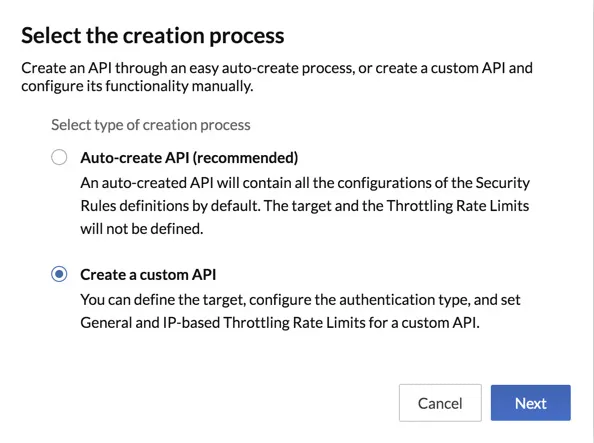
Create a Custom API
You can create a custom API either immediately after enabling API Gateway or at any time after using auto-create.
To create a custom API for your functions or the web client:
- Click Create API from the API Gateway page.

You can also create it by selecting Create a custom API in the pop-up box after enabling API Gateway and clicking Next.
This will open the Create API window.
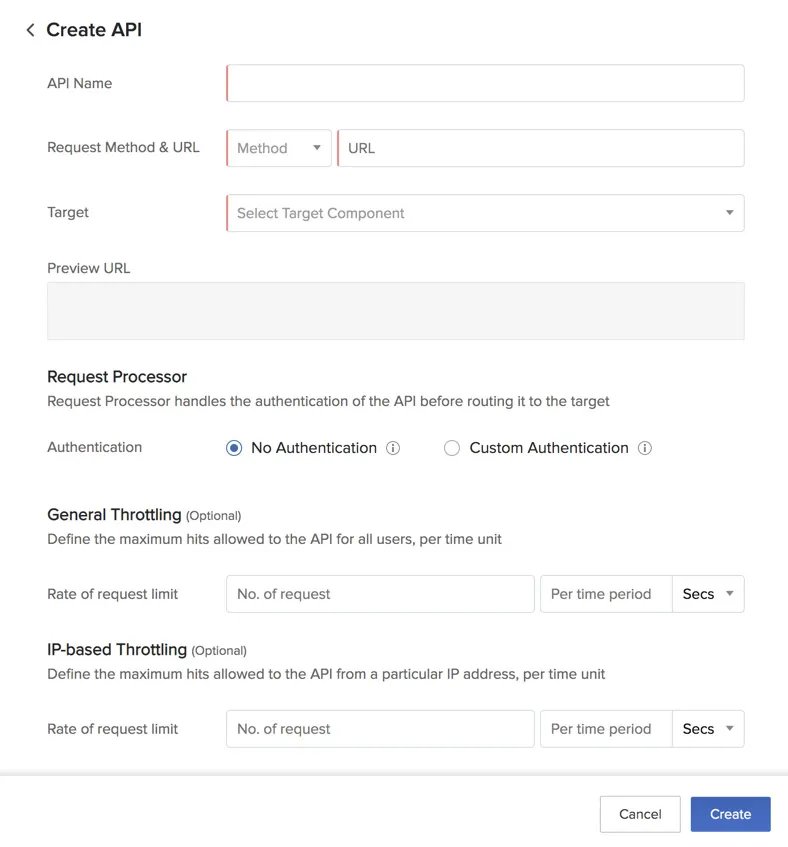
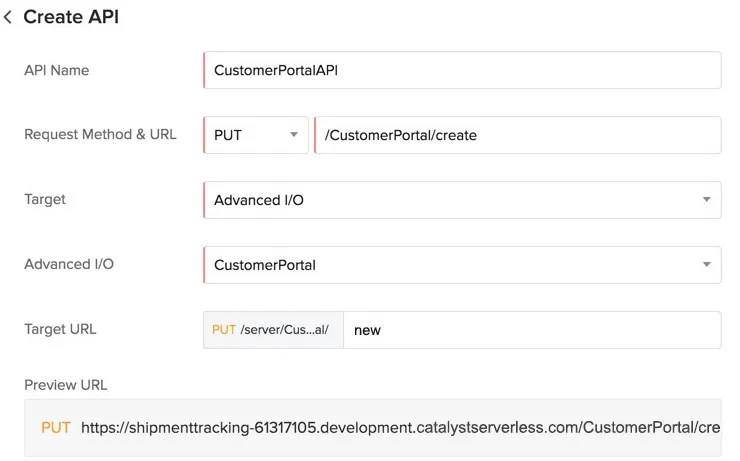
- Enter a unique name for the API. Select a request method and enter the request URL.
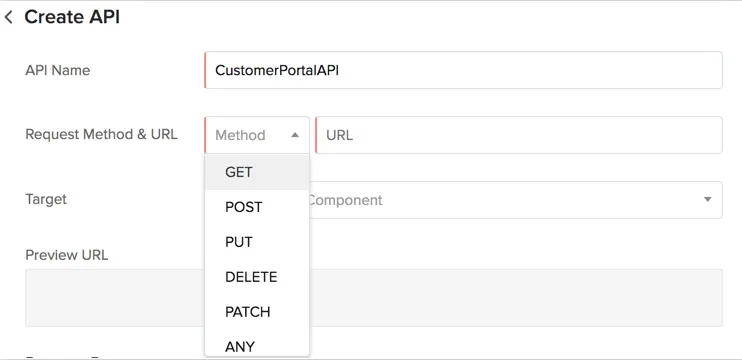
* You can only select the GET method for a web client.
* The combination of the request URL and the request method should be unique. You will not be able to create more than one API for a specific combination of request URL and request method.
Select the target component and then select the specific function or web client.
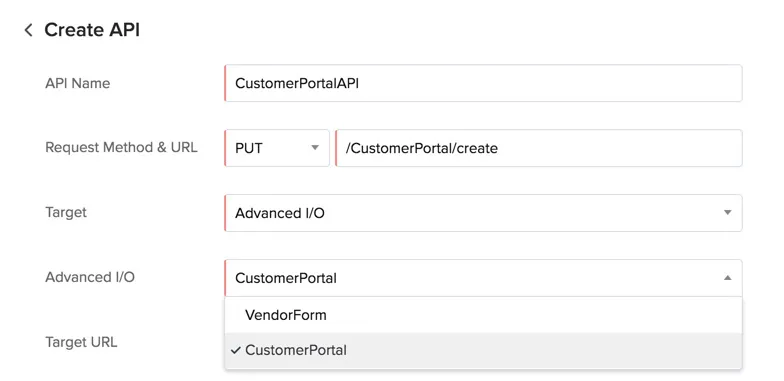
If you selected an Advanced I/O function or a web client, you can append a route to the default target URL. A preview of the request URL will also be displayed.
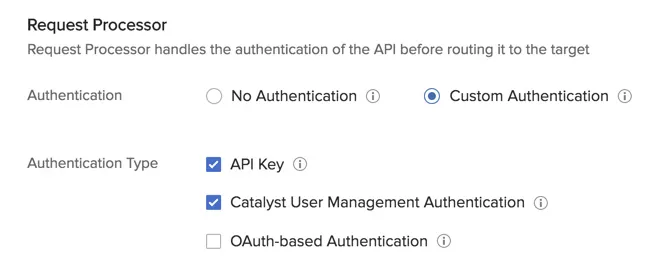
Select the authentication methods if you require authentication. You can select any or all of these methods, and implement any one of them while providing the request URL.
Configure the throttling limits for the API. You can configure either or both of the throttling methods.
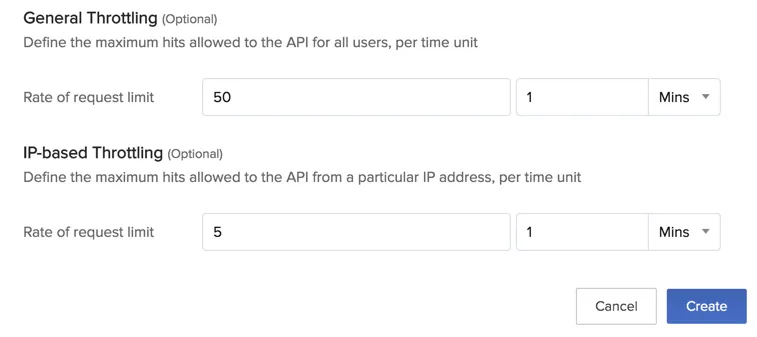
3. Click Create.
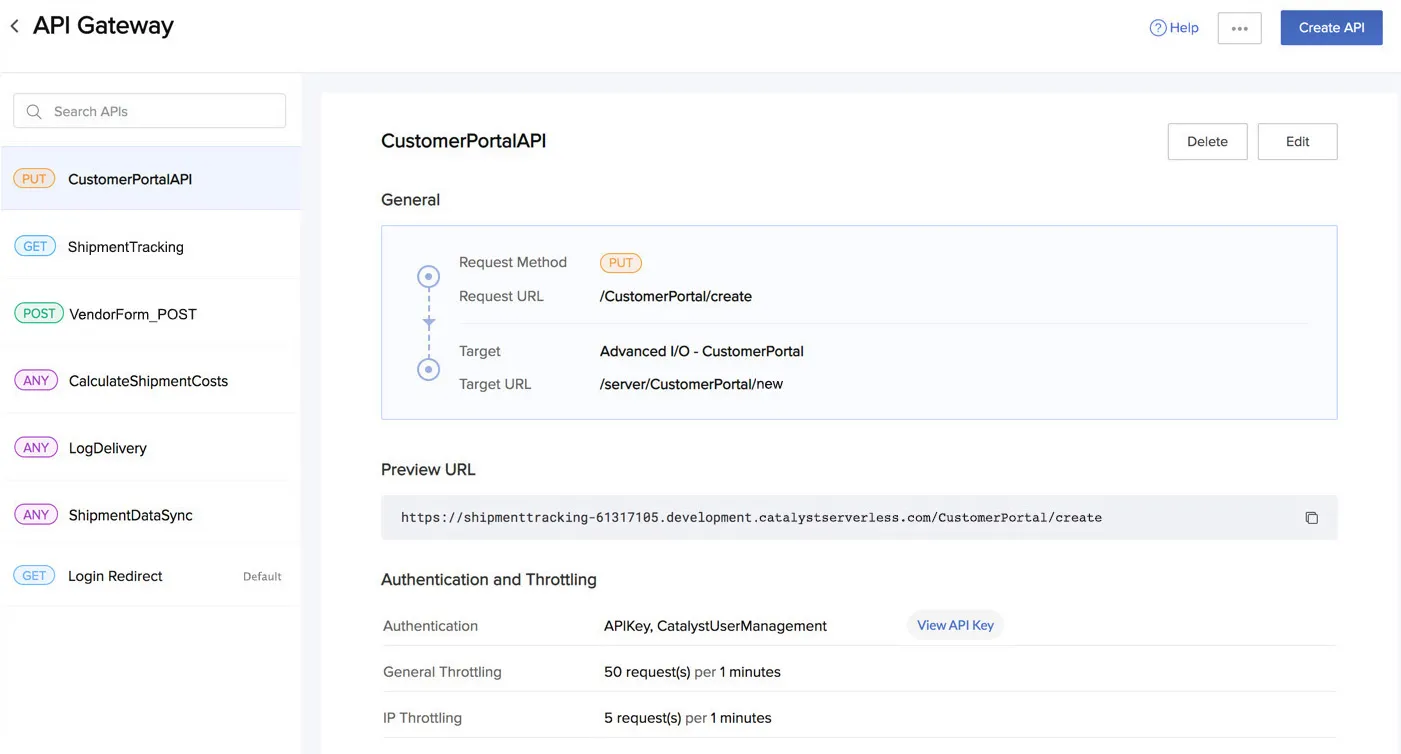
The API will be created and listed in the API Gateway page.
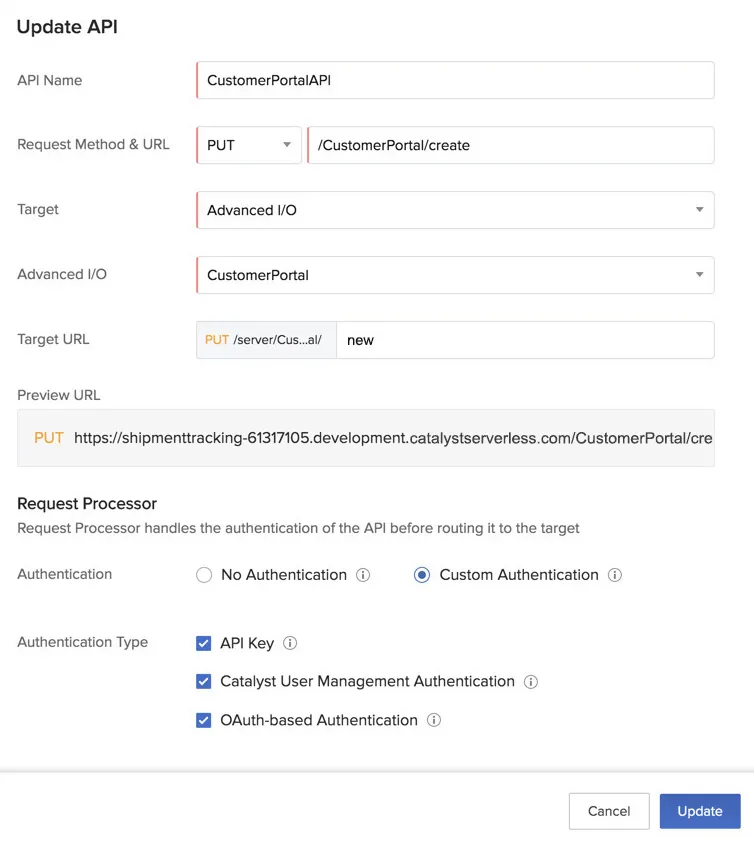
Edit an API
You can edit an auto-created or a custom API at any time and modify its definitions in the following way:
- Click Edit for the API.
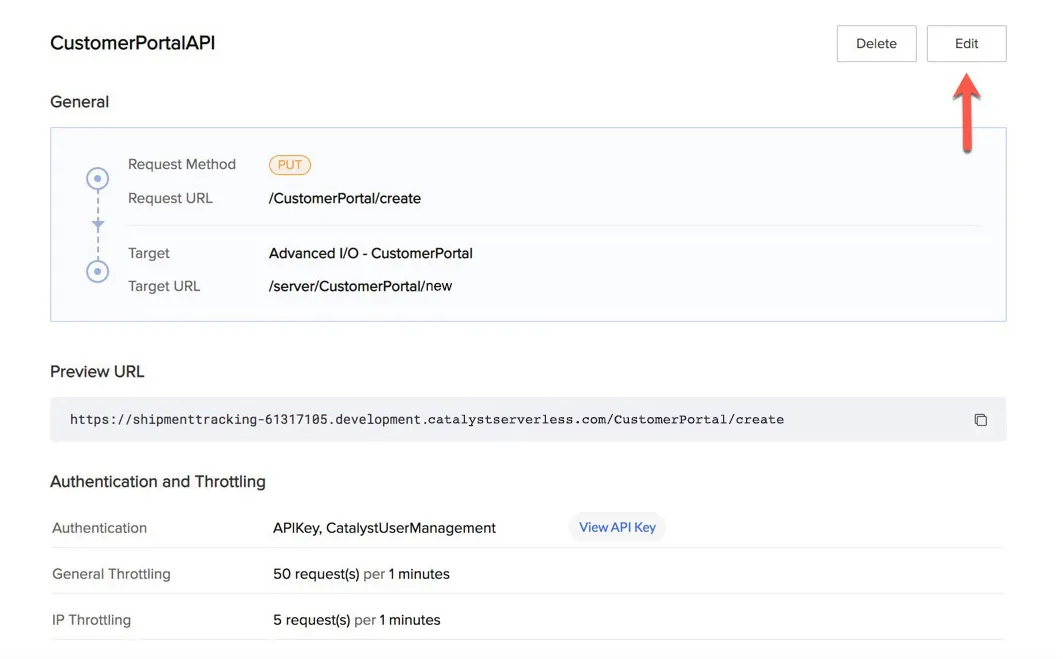
- Modify the required values and click Update.
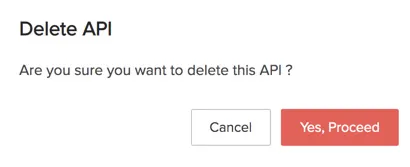
Delete an API
You can delete an API in the following way:
- Click Delete for the API.
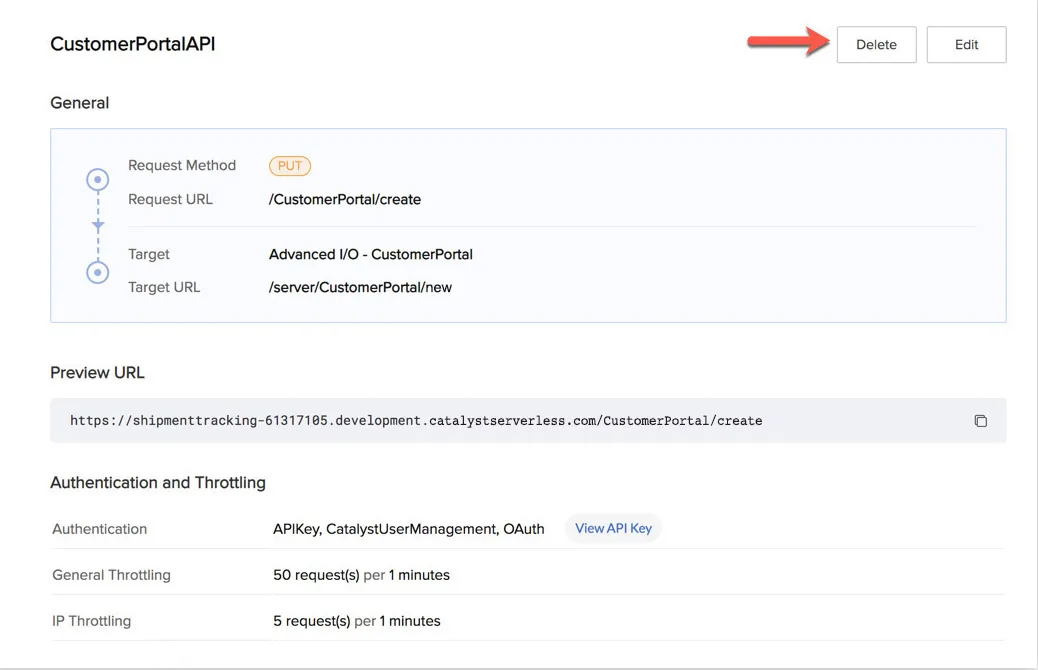
- Click Yes, Proceed in the confirmation box.
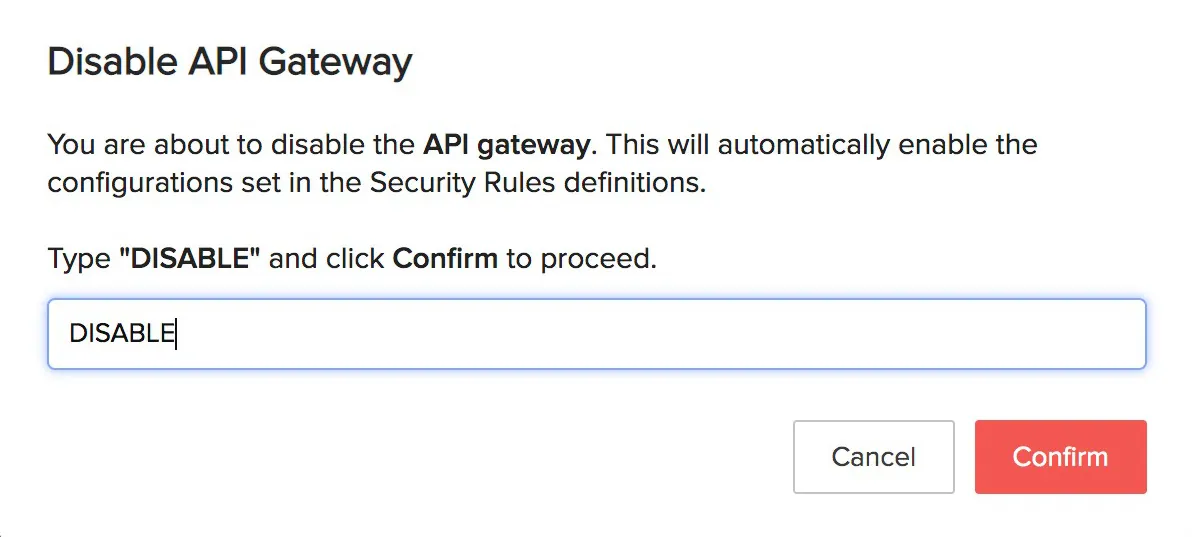
Disable API Gateway
You can disable API Gateway at any time and switch to the definitions configured in the Security Rules. If you re-enable API Gateway after disabling it, all the APIs that you had created will still be available and will immediately be re-enabled when API Gateway is re-enabled. You will not have to create the same APIs again.
To disable API Gateway:
- Click the ellipsis icon on the API Gateway page and click Disable.

- Type “DISABLE” in the text box and click Confirm.
The API Gateway will now be disabled and Security Rules will immediately be automatically enabled.
Last Updated 2025-07-01 17:41:58 +0530 IST
Yes
No
Send your feedback to us