Implementation
To use the Job Scheduling service in the Early Access mode, email us at support@zohocatalyst.com.
You can create, configure, modify, and delete cron jobs from the console. The implementation section covers steps to work with cron from the console.
Create a Cron
To create a Catalyst cron in your project from the console:
-
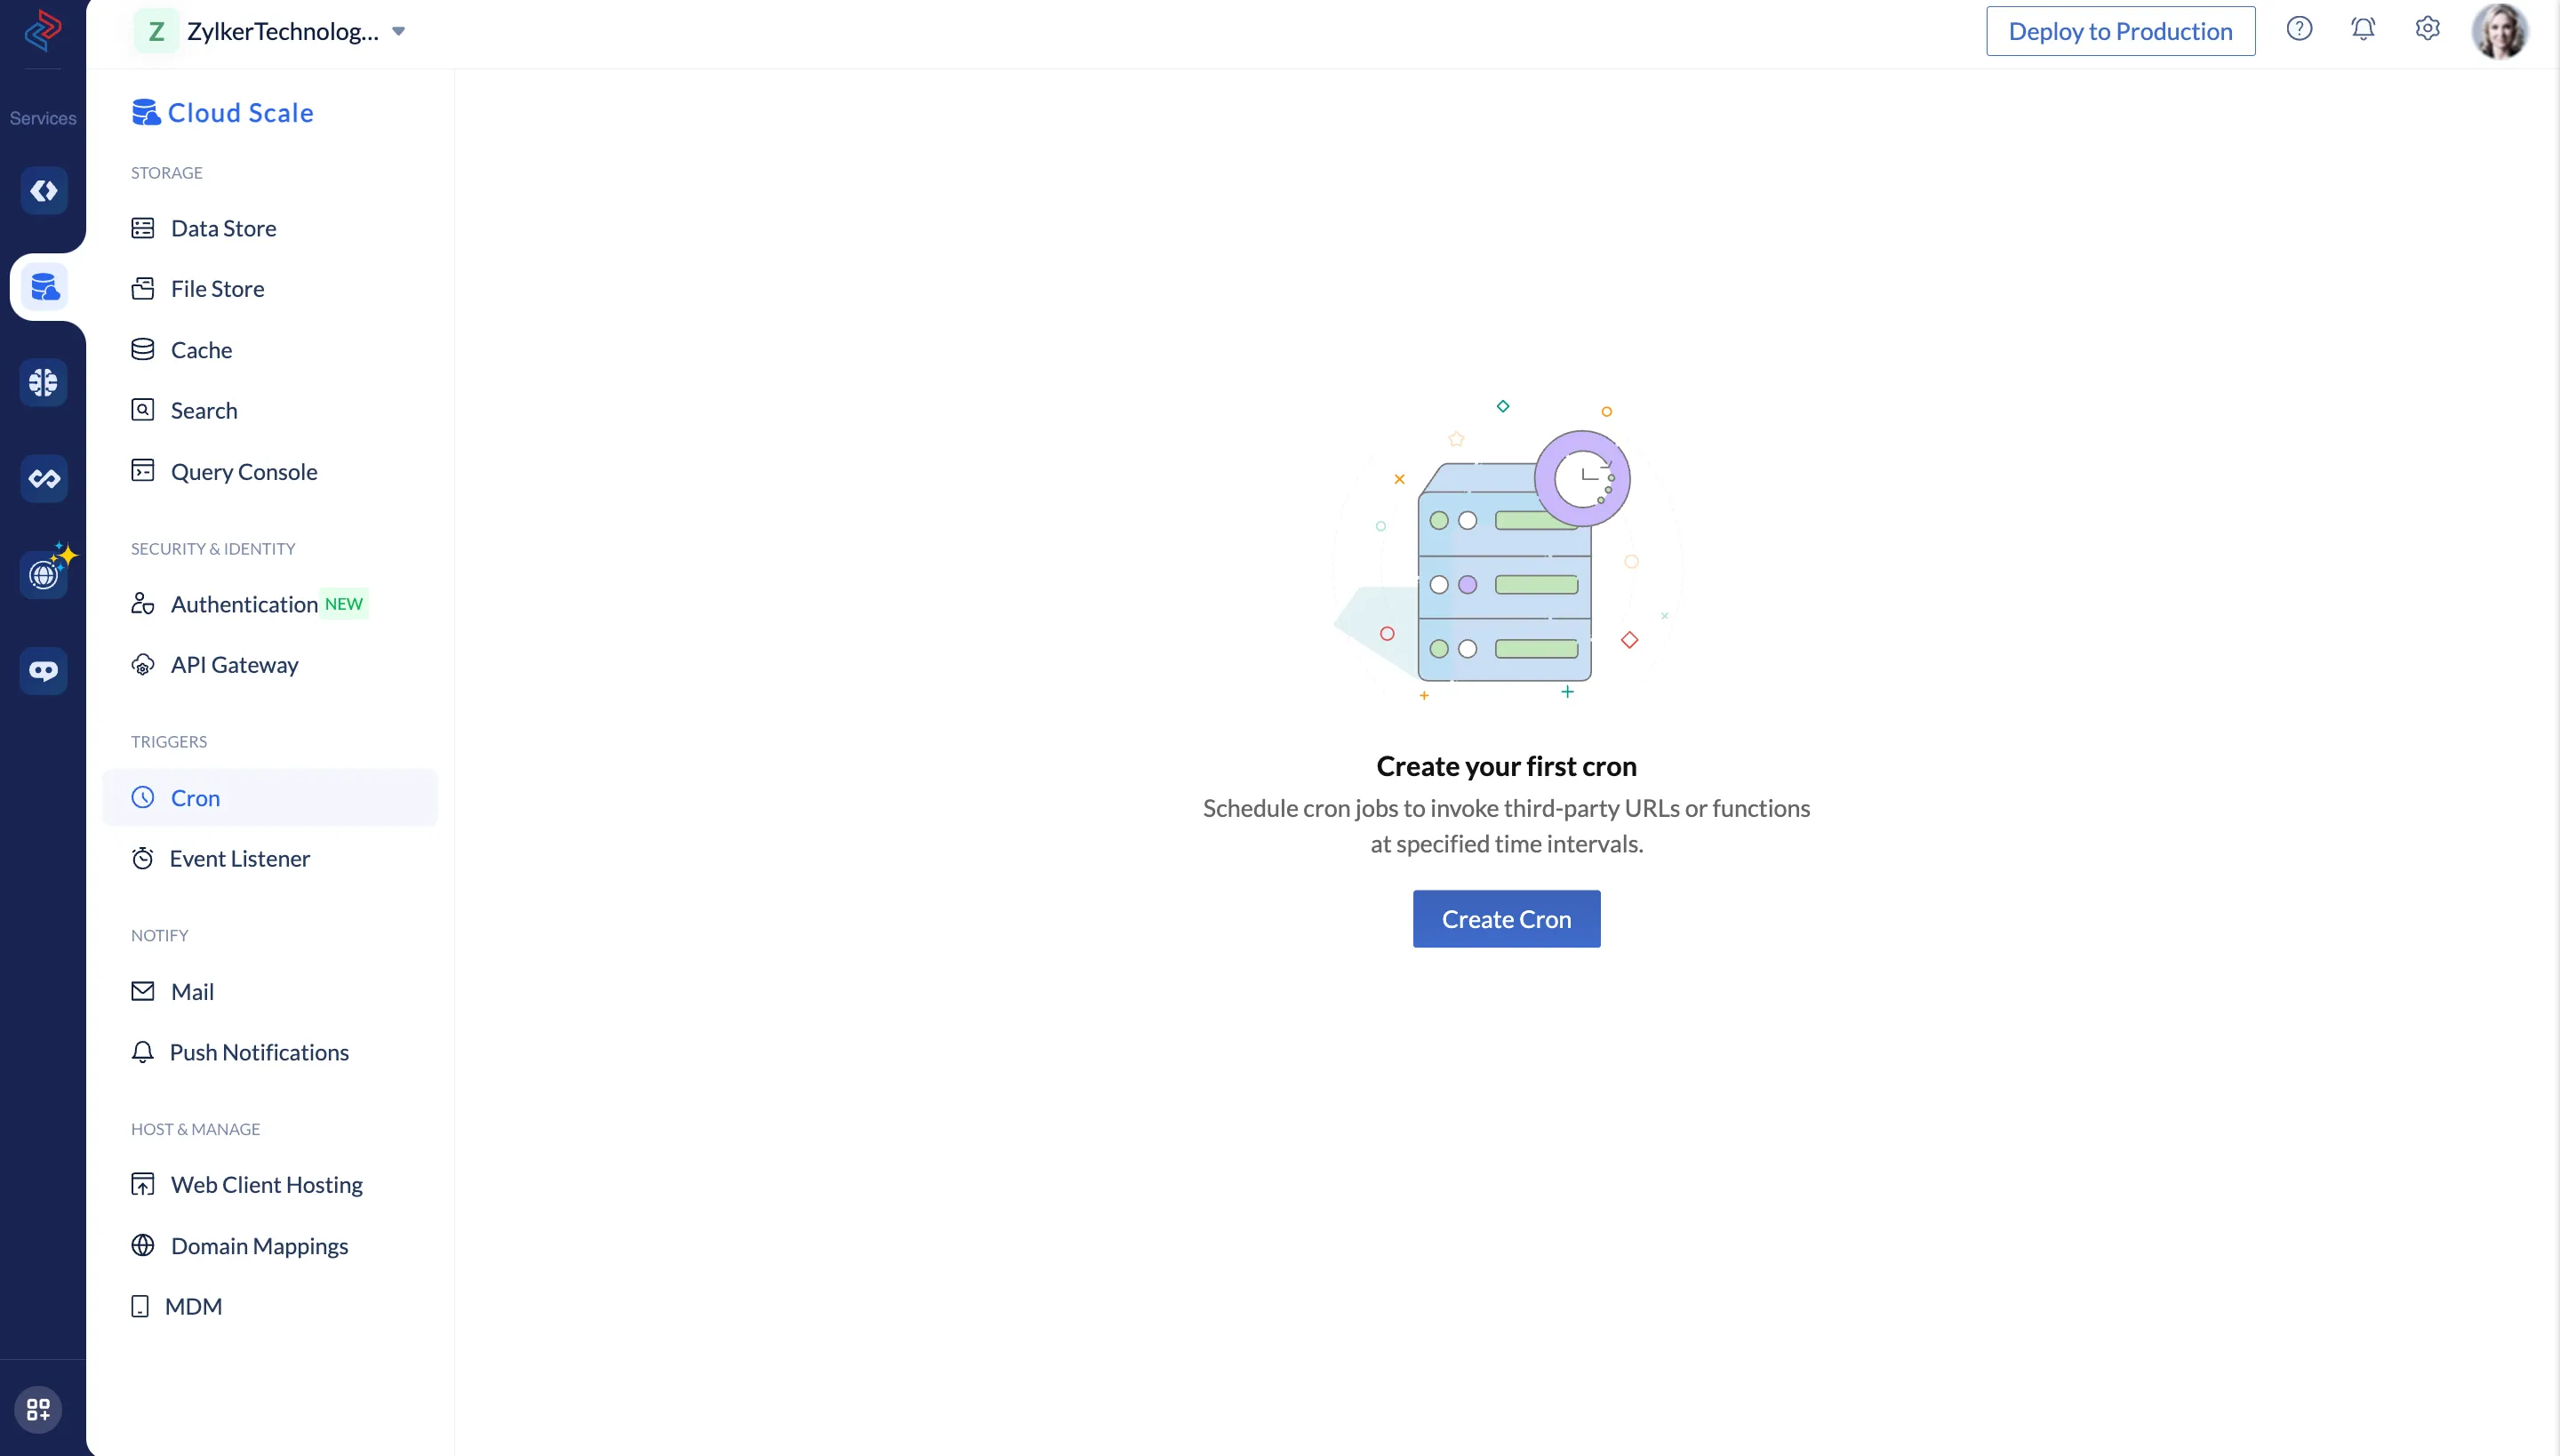
Navigate to Cron under the Triggers section in the Catalyst Cloud Scale console.
-
Click Create Cron.
-
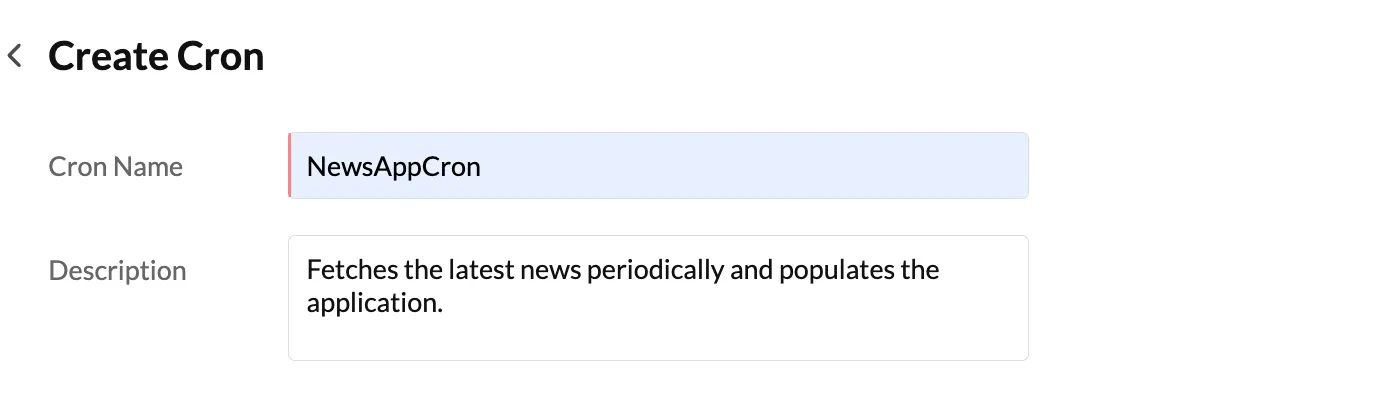
Enter the cron’s name and an optional description in the Create Cron section.
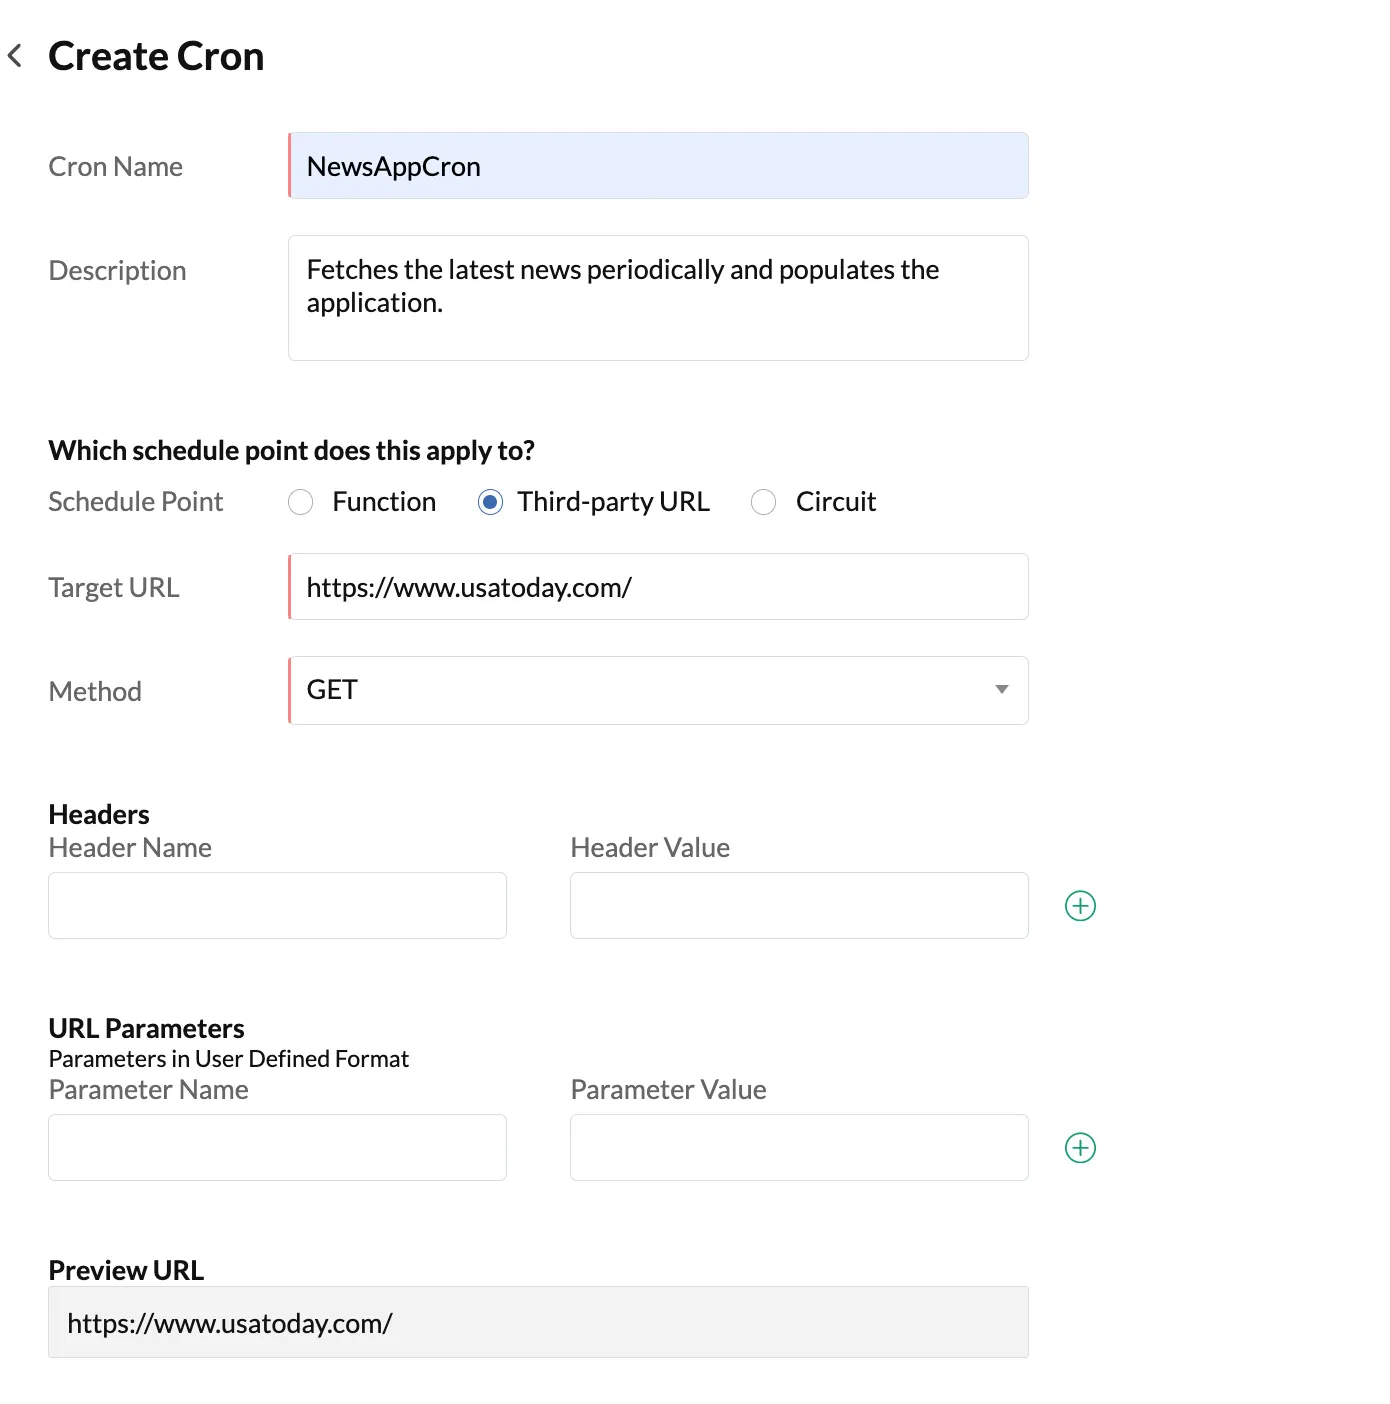
Third-party URL
If you choose to invoke a third-party URL for the cron:
-
Enter the Target URL.
-
Select the HTTP request method to invoke the URL with, from the drop-down list.
-
Enter the Header Name and Header Value. To add more headers, click (+) and add the next header. To delete a header, click (-).
-
Add URL parameters to be passed, if needed, by entering their names and values. To add more parameters, click (+) and add the next parameter. To delete a parameter, click (-).
-
To include an optional request body, enter the form data that you want to be passed in the HTTP message body.
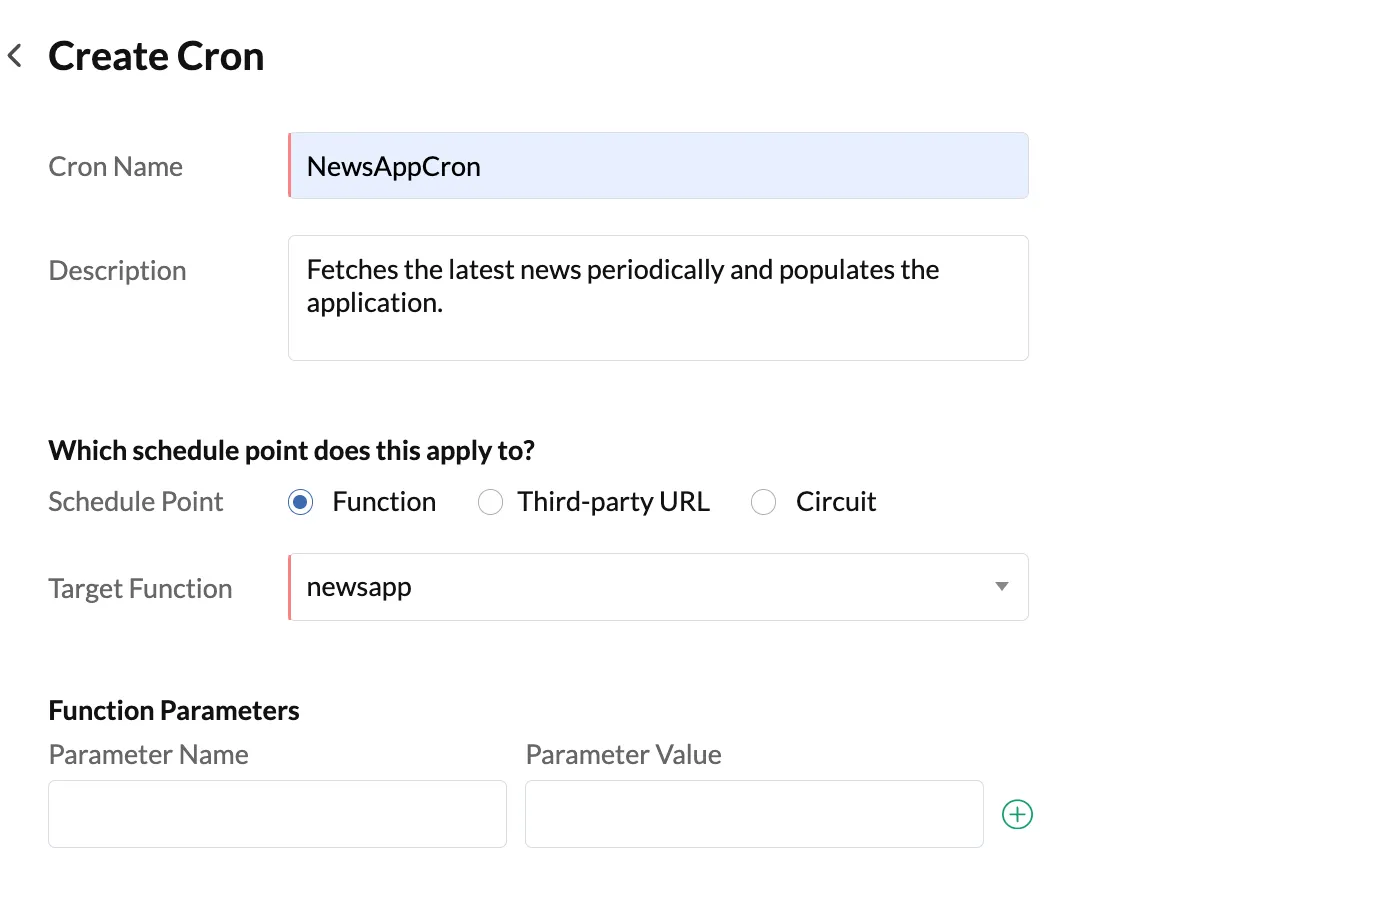
Function
If you choose to call a function for the cron:
-
Select the Target Function from the drop-down list. The list will only display the cron functions configured in your project, and not other types of functions.
-
Add function parameters to be passed, if needed, by entering their names and values.
-
To add more parameters, click (+) and add the next parameter. To delete a parameter, click (-).
Circuit
If you choose to trigger a circuit:
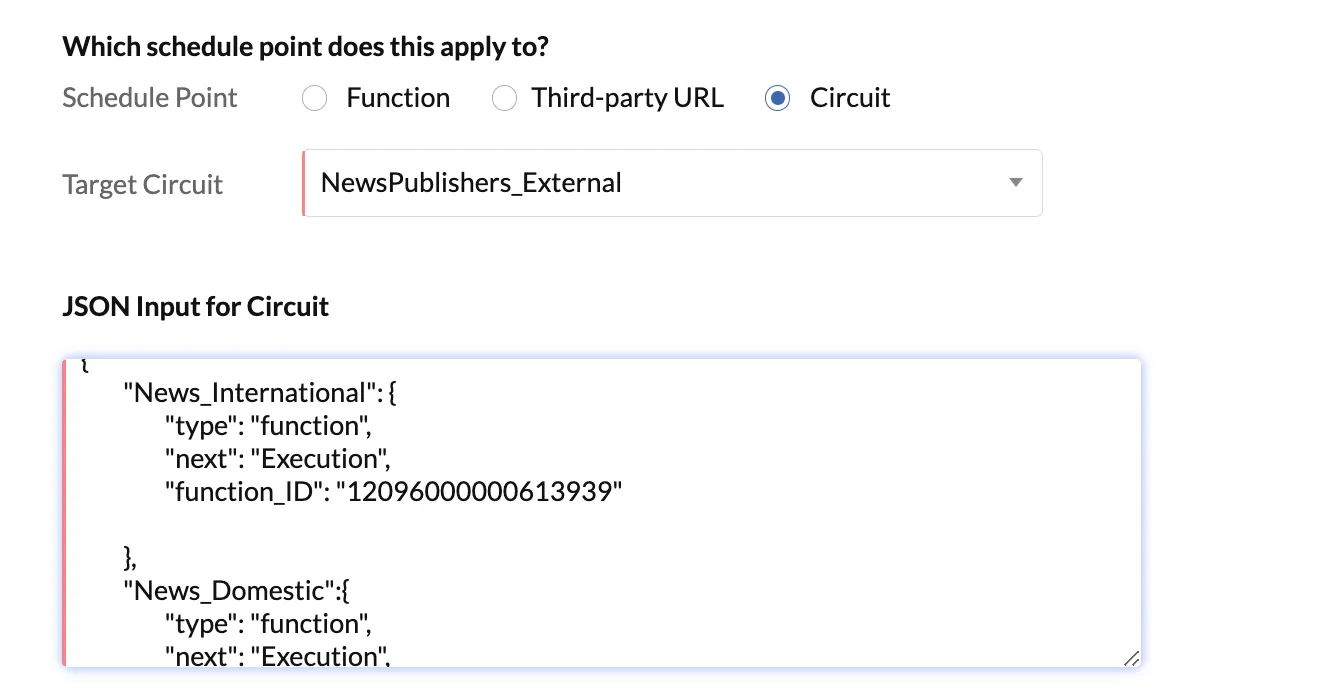
- Select the Target Circuit from the drop-down. The list will display all the circuits you have configured in the Serverless section of the console.
- Pass the input to the associated circuit as JSON key-value pairs in the JSON Input for Circuit section.
- Select the Schedule Type of the cron as One Time or Recursive.
One-time execution

-
Select the schedule date the cron must be executed on, from the calendar.
-
Configure the hour, minute, and second from their drop-down lists.
-
Choose the time zone of the execution. The cron will be executed on the configured time in that time zone.
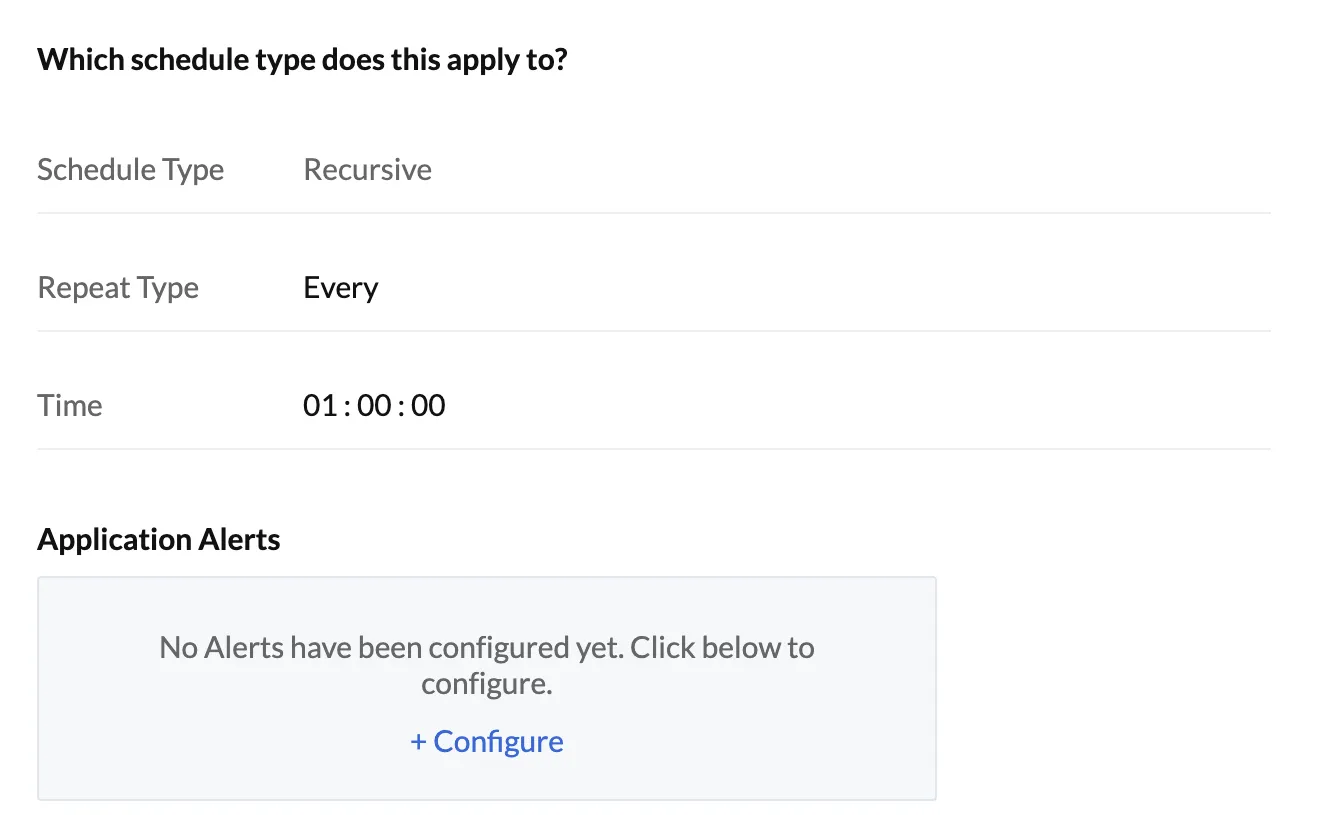
Recursive
-
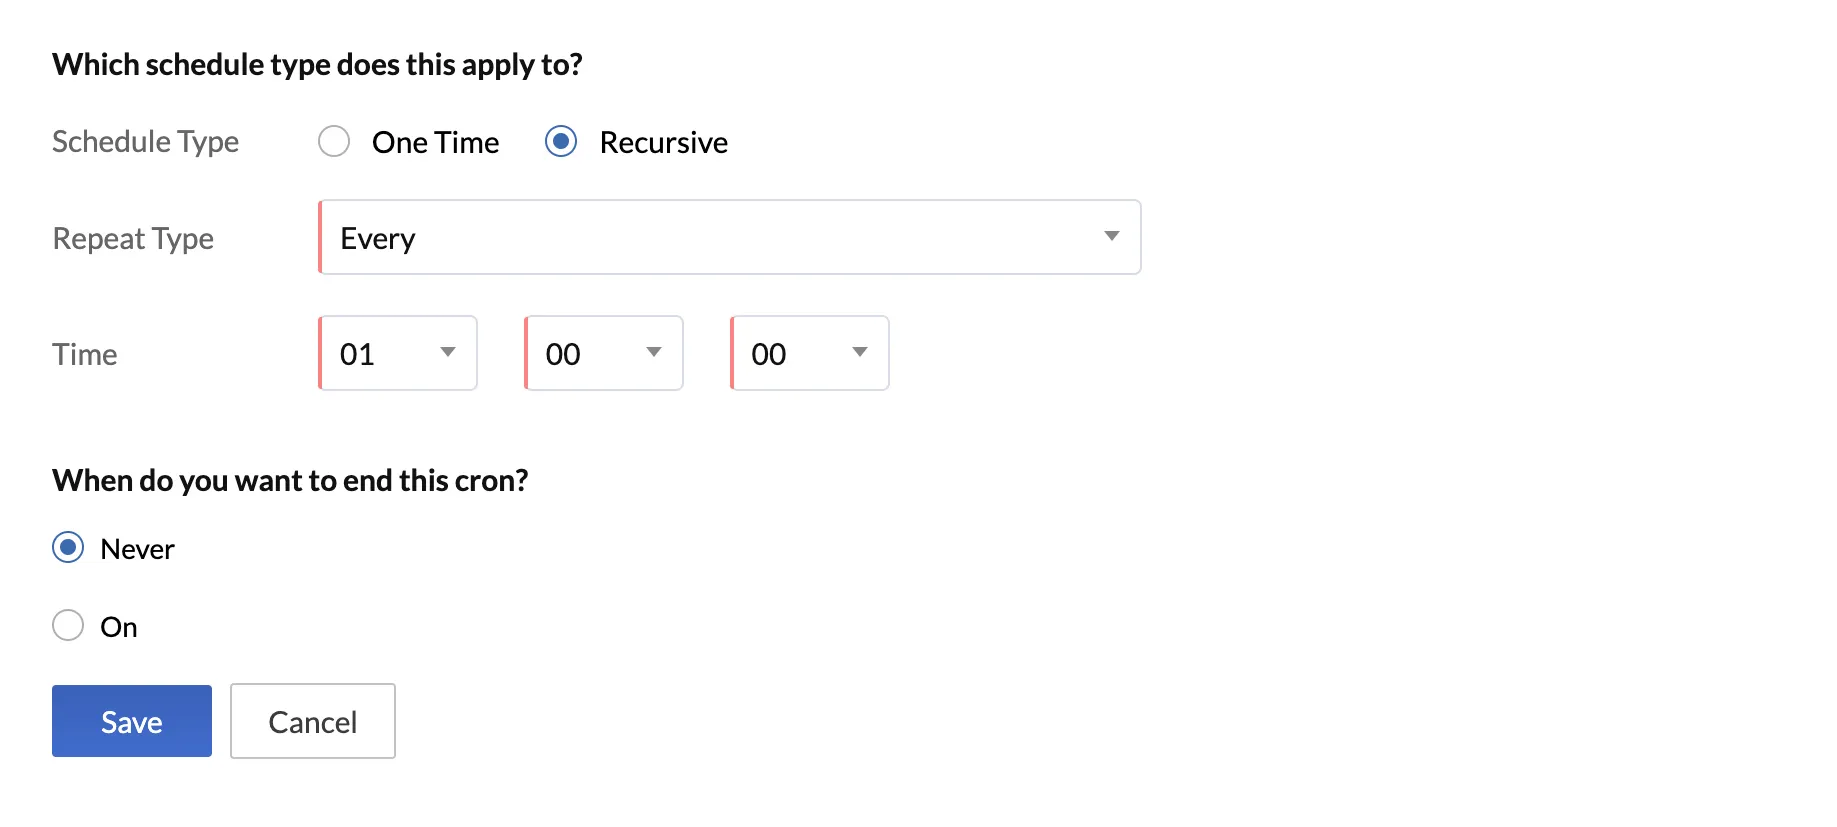
Select the Repeat Type for a recursive cron from the drop-down list as Every, Daily, Monthly, or Yearly.

-
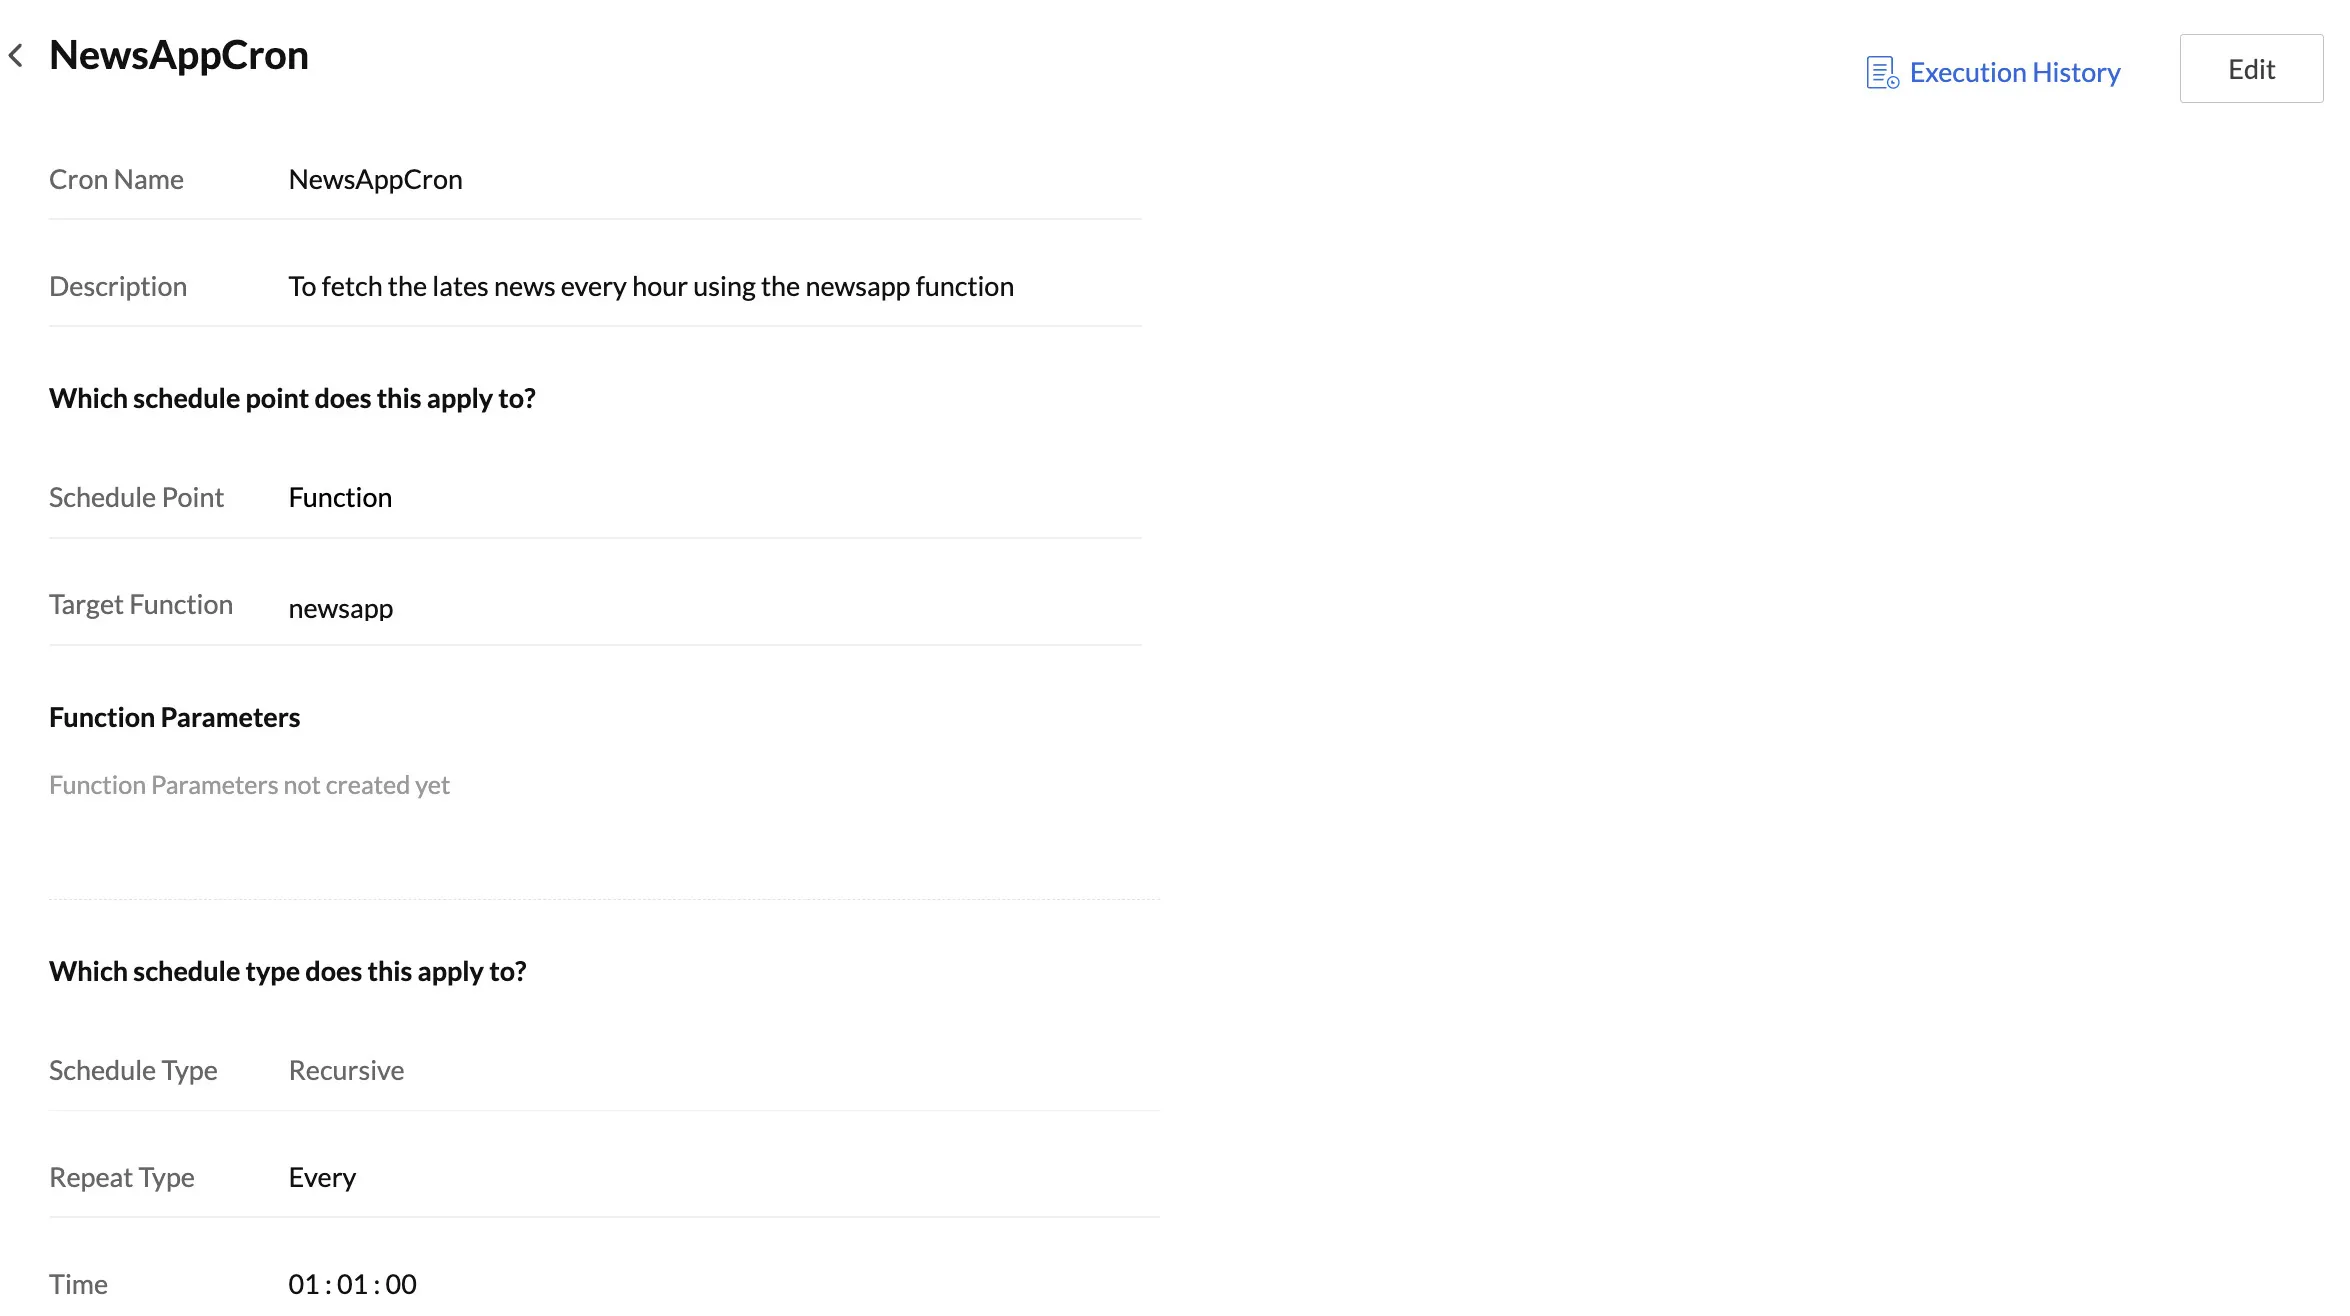
If you select the Repeat Type as Every, configure the hours, minutes, and seconds of the time from the drop-down lists to specify the frequency. The cron will be executed once every specified time interval. For example, in the screenshot below, the cron will be executed once every hour.
-
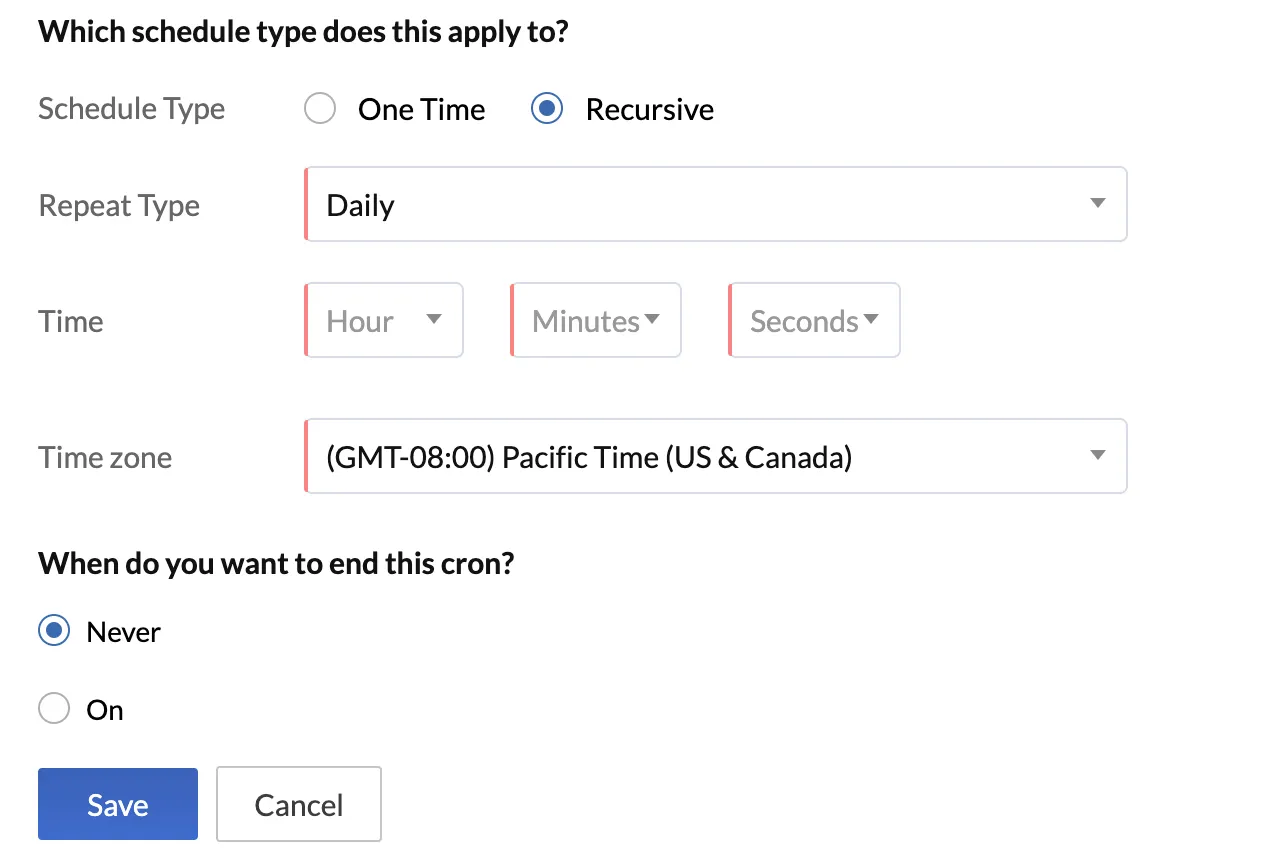
If you select the Repeat Type as Daily, configure the hours, minutes, and seconds of the time period for the cron to execute. The cron will be executed everyday at the specified time.
-
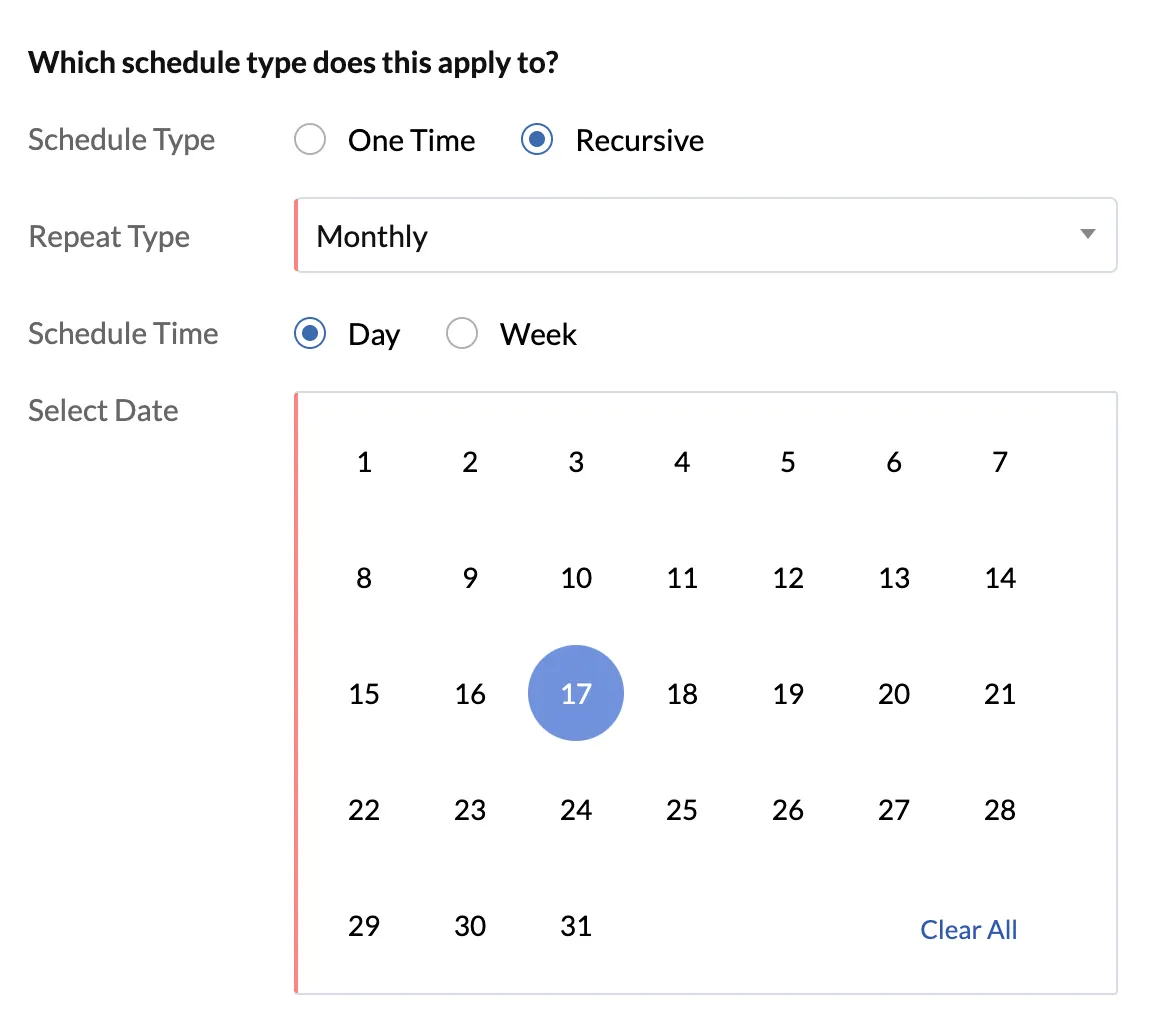
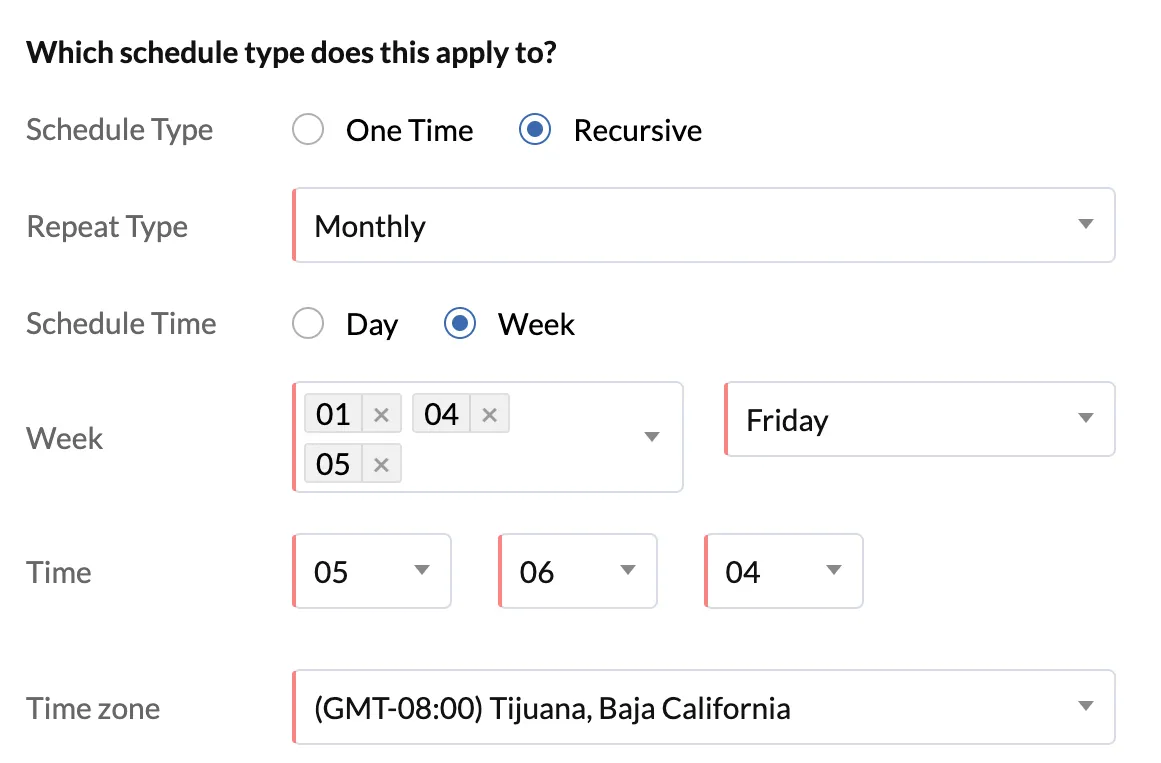
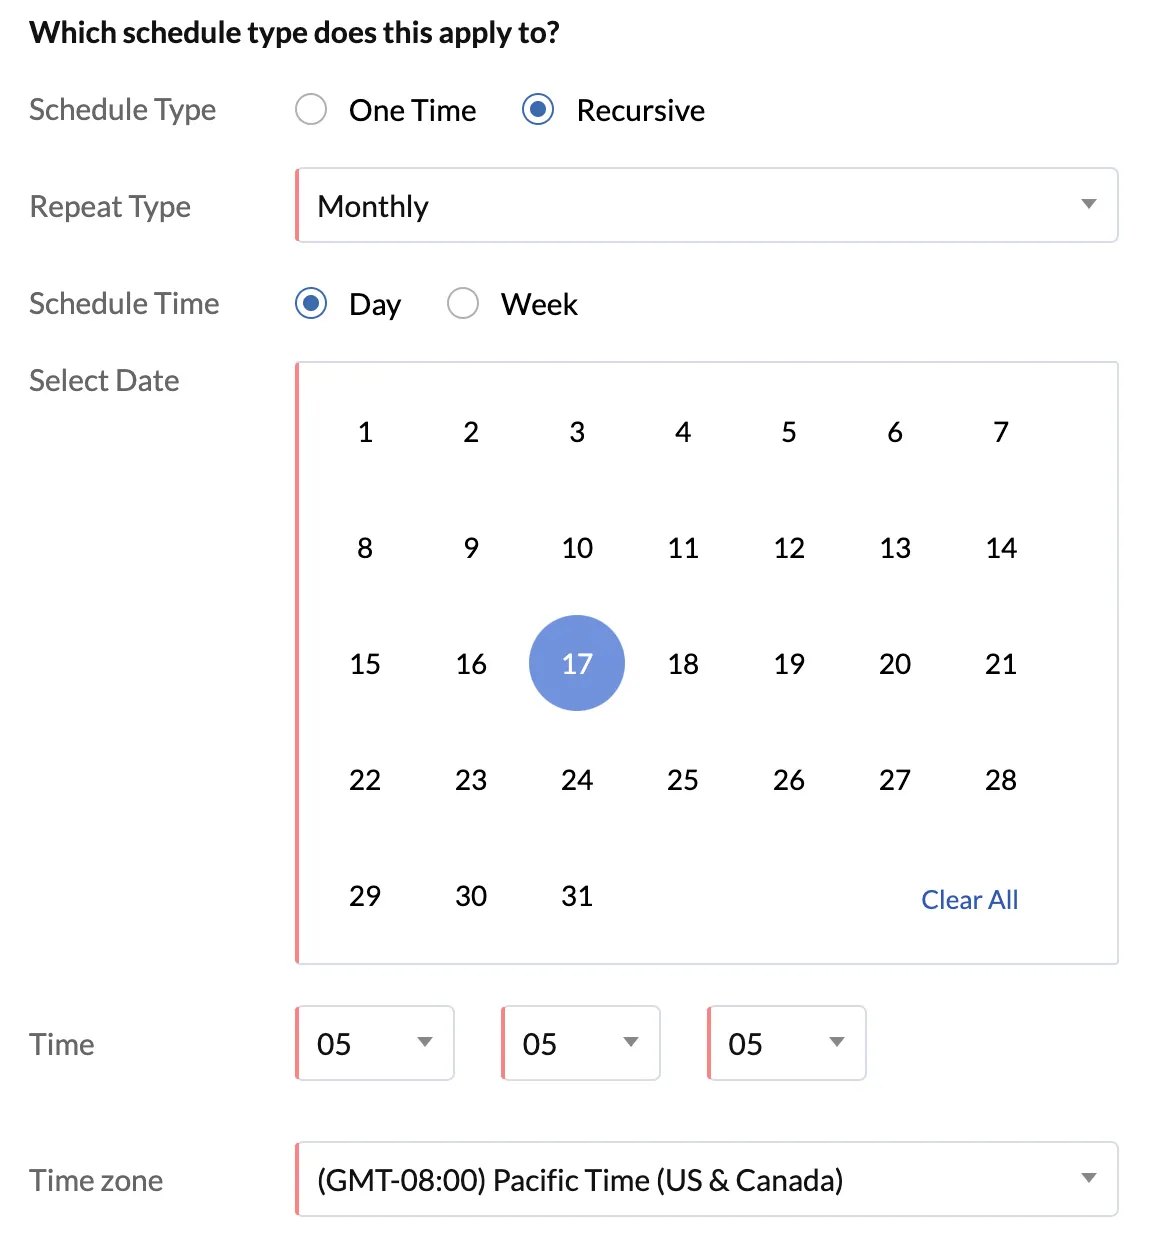
If you select the Repeat Type as Monthly, you can choose to schedule the cron’s execution by the date of the month or by the week of the month, to be executed on a specified day.
-
Select Day if you want to schedule the cron’s execution by the date of the month. Click on all the dates of the month the cron must be executed on, from the calendar.
-
Select Week if you want to schedule the cron’s execution by the week of the month. Click the Select Week tab and choose the week from the drop-down list. Click the Select Day tab and select the day the cron should be executed on from the drop-down list.
-
After you select the days, configure the time for the cron to be executed on from the Hours, Minutes, and Seconds drop-down lists.
-
If you select the Repeat Type as Yearly, select all the months the cron must be executed on, from the Months drop-down list.
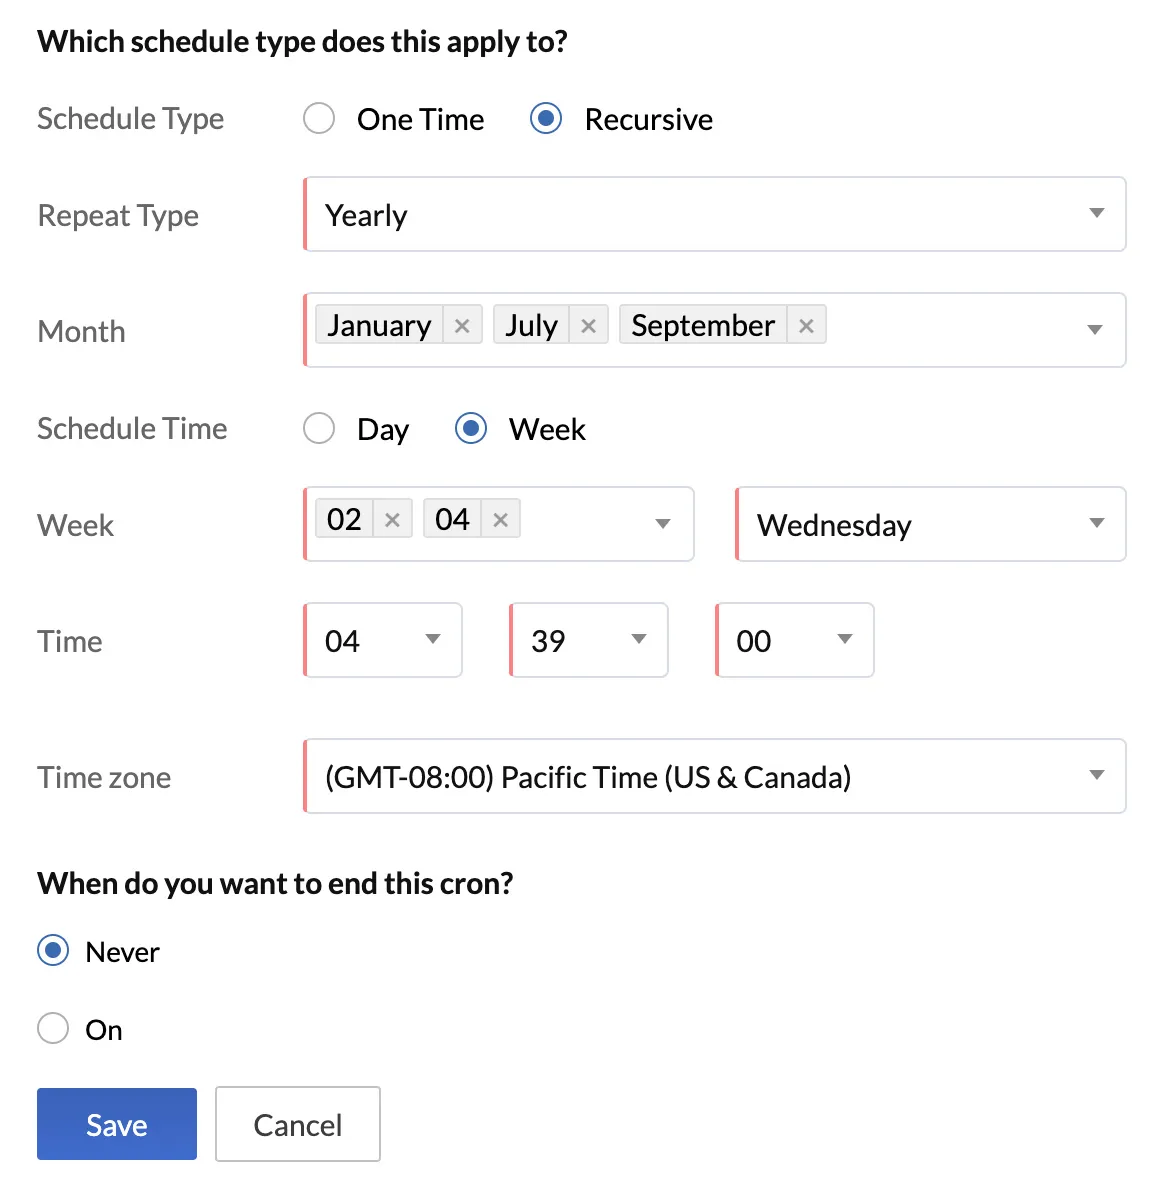
After you select the months, you can schedule the cron’s execution by the date of the month or by the week of the month, as mentioned in the previous step. You can then configure the time in the same way as the previous step.
-
- After you configure all the details, click Save.
Catalyst will now display the cron job in the Cron page along with its details. A unique Cron ID is automatically created for a cron when it is created, and displayed in the details. You can refer to a cron by its ID in your application code.

You can click on a cron to view further details about it.
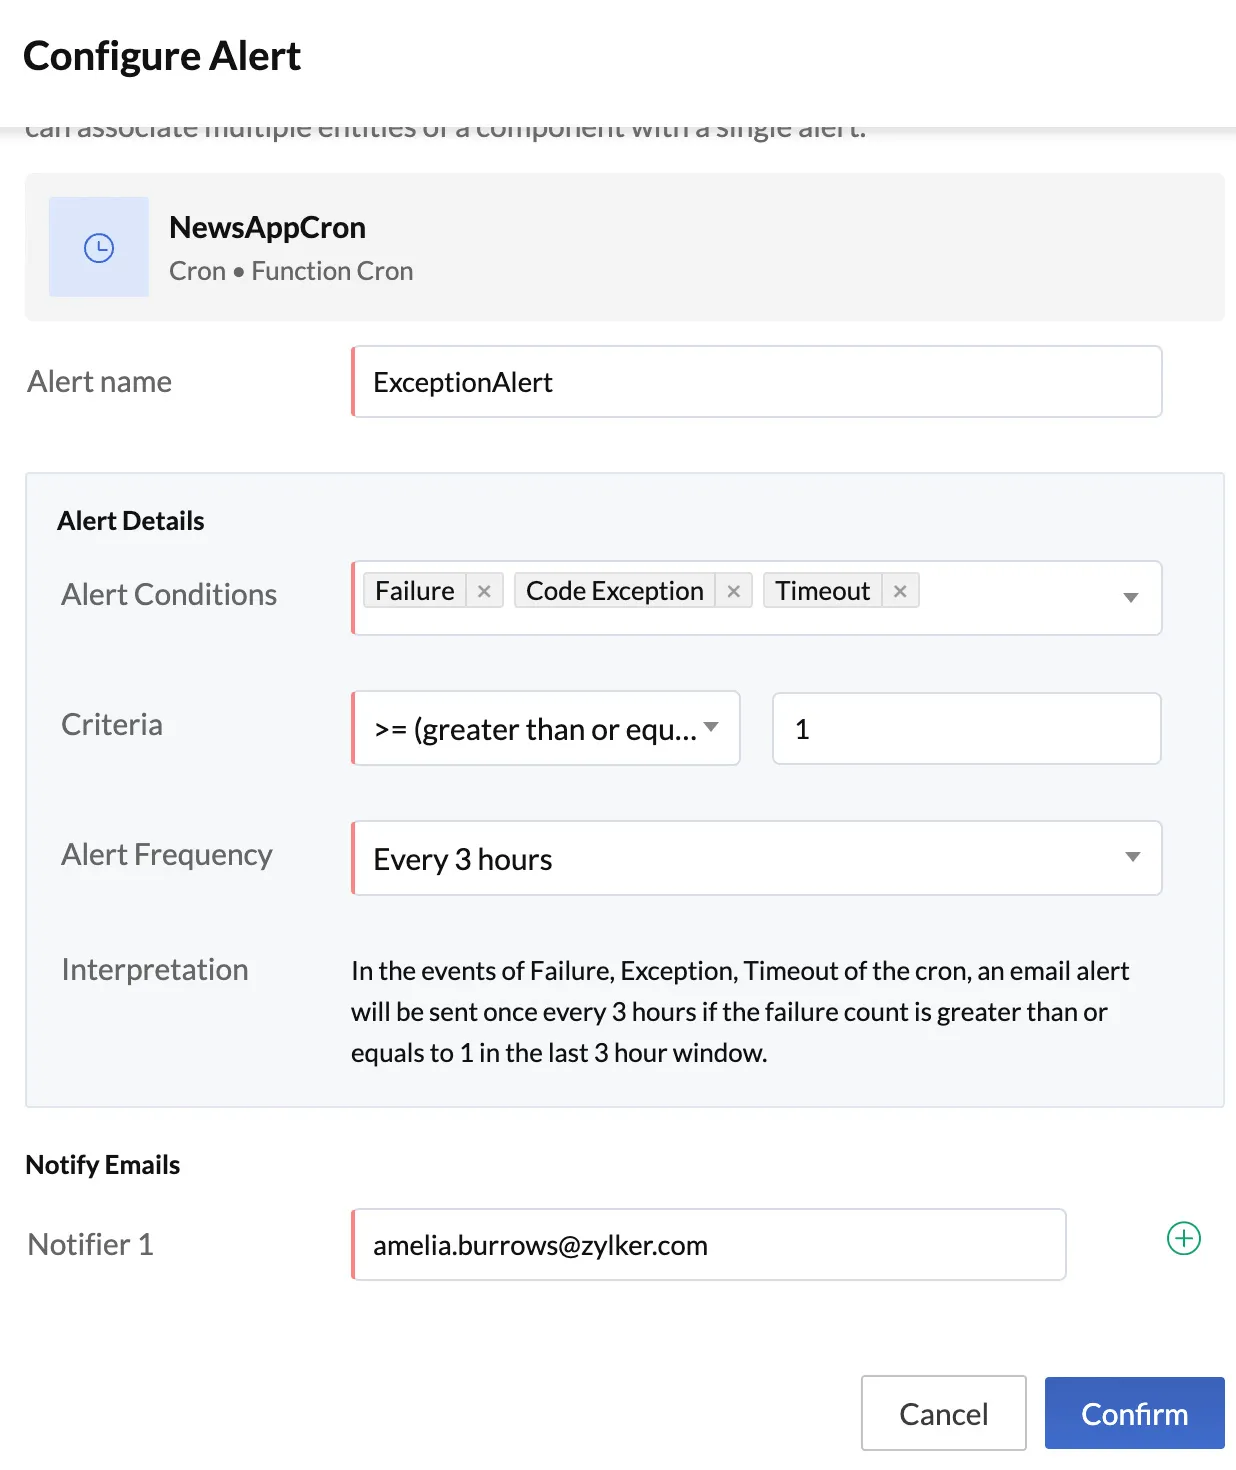
Configuring Alerts in Cron
You can configure application alerts for the events where your cron may encounter a failure, code exception, or time out. You can configure email alerts from the cron console without having to navigate to the Application Alerts component.
-
Click +Configure in the cron’s details section to create an alert.
-
Click Confirm once you configure the application alert. You can refer to the Application Alerts help page for details.
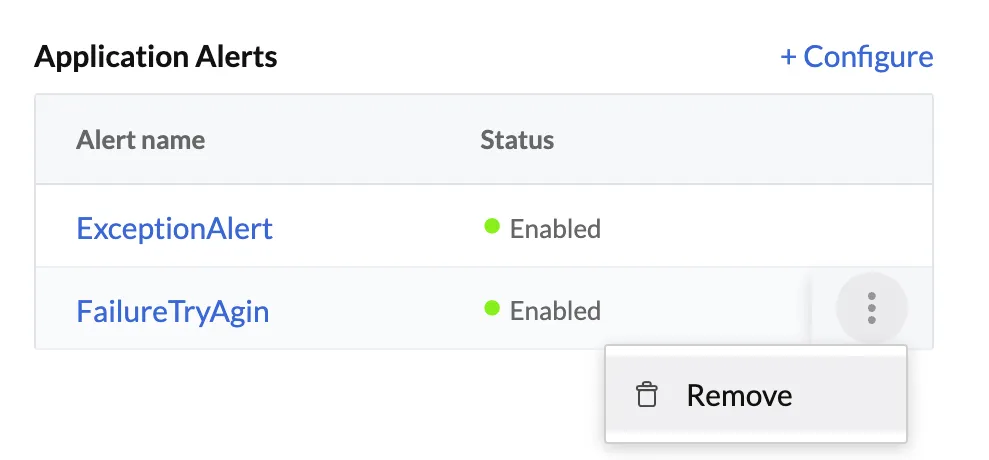
-
You can also delete the application alert by clicking the ellipsis icon beside the alert status and clicking Remove.
Enable or Disable a Cron
You can temporarily enable or disable a cron job using the toggle switch under the Status column. If you disable a cron, Catalyst will not trigger its execution until you manually enable it again.

Cron Execution History
You can view the history and details of a cron’s execution from its Execution History. Click the icon under the History column for a cron to open its execution history.

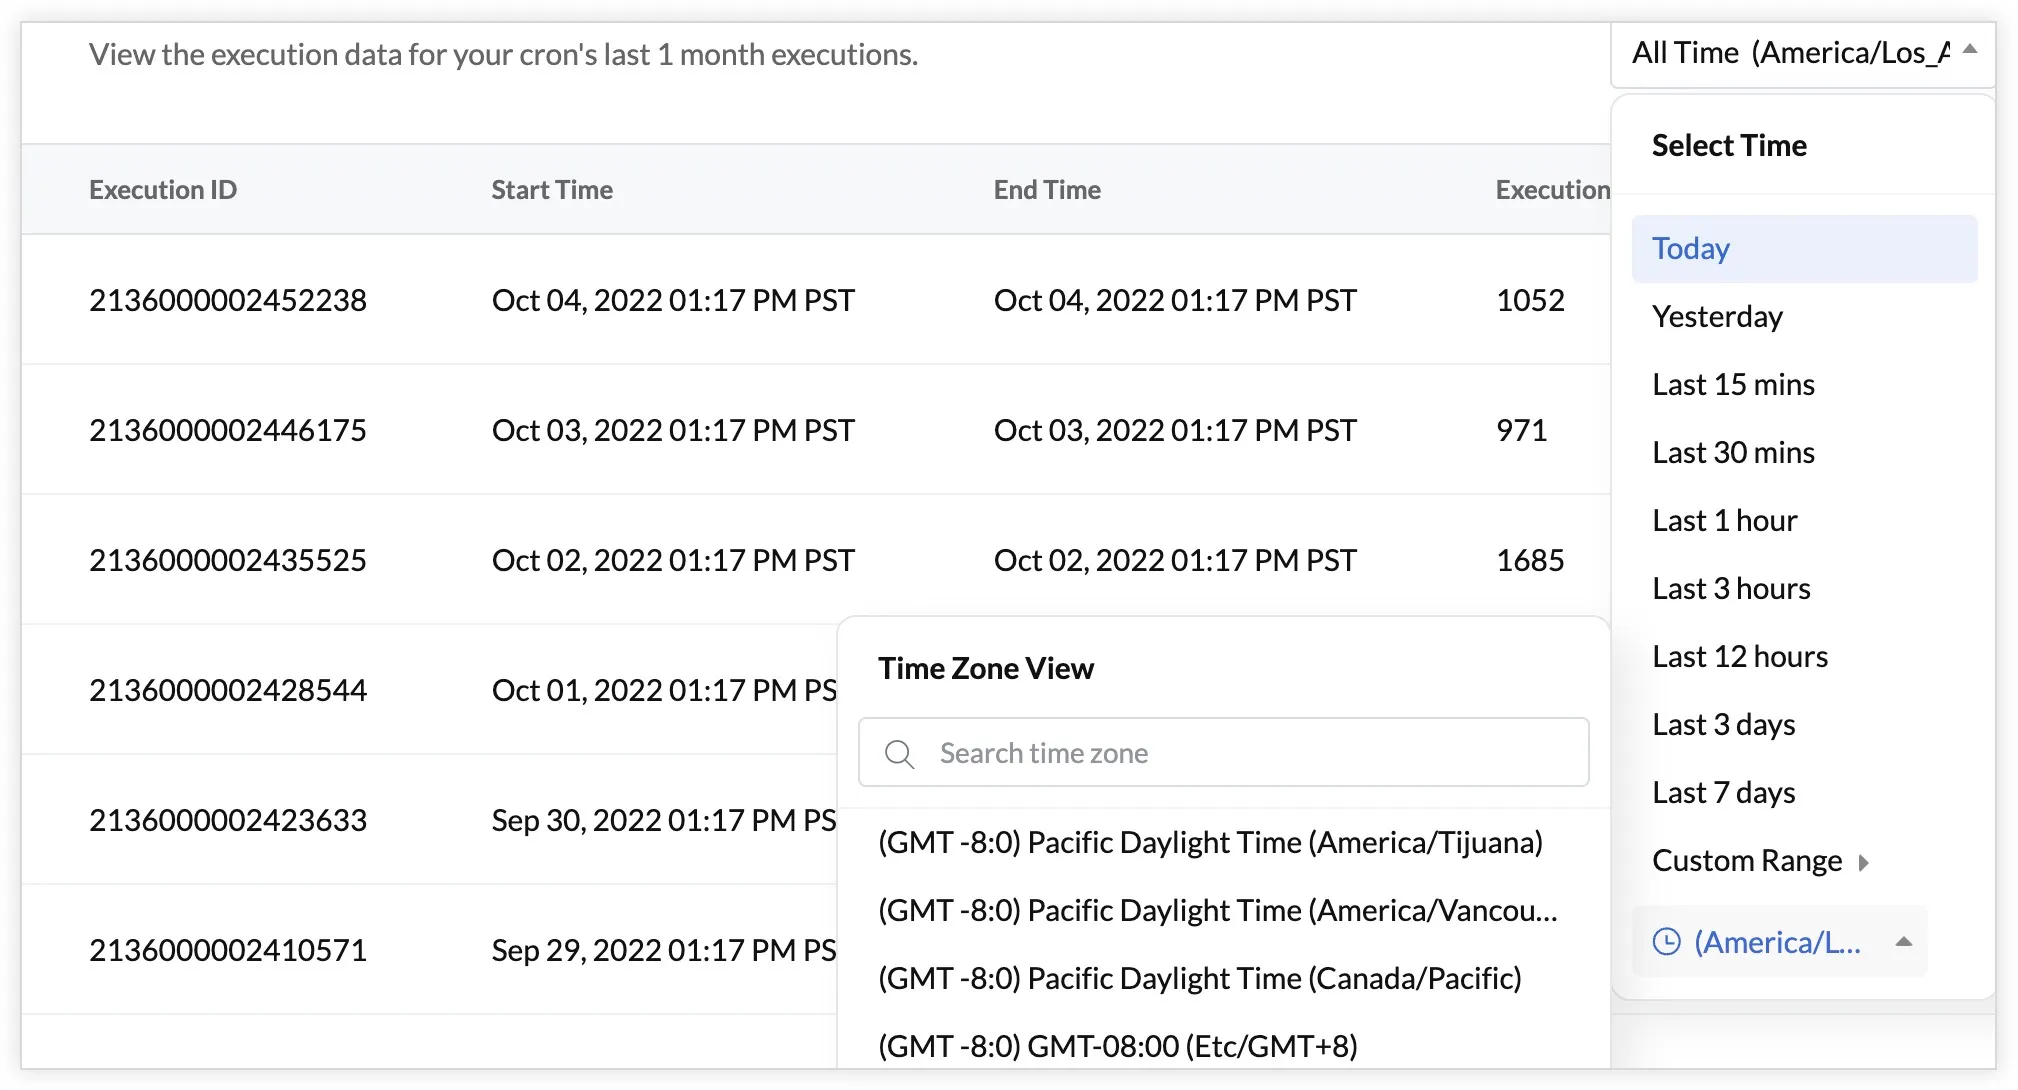
Catalyst displays the execution log of all cron job executions in your project. This contains detailed information about the cron job, such as the Execution ID, the start and end time, the execution time, the executive status, and links to Catalyst Logs.

You can click View Logs to check detailed logs about the corresponding cron function’s execution.
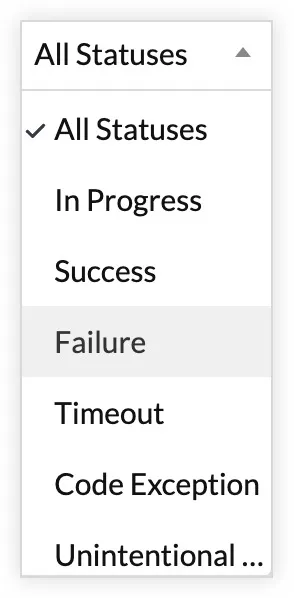
You can also filter and view the execution history based on the status of the cron job.
You can select a specific time and also the time zone of the cron execution to view its particular execution history.
Edit a Cron
To edit a configured cron:
-
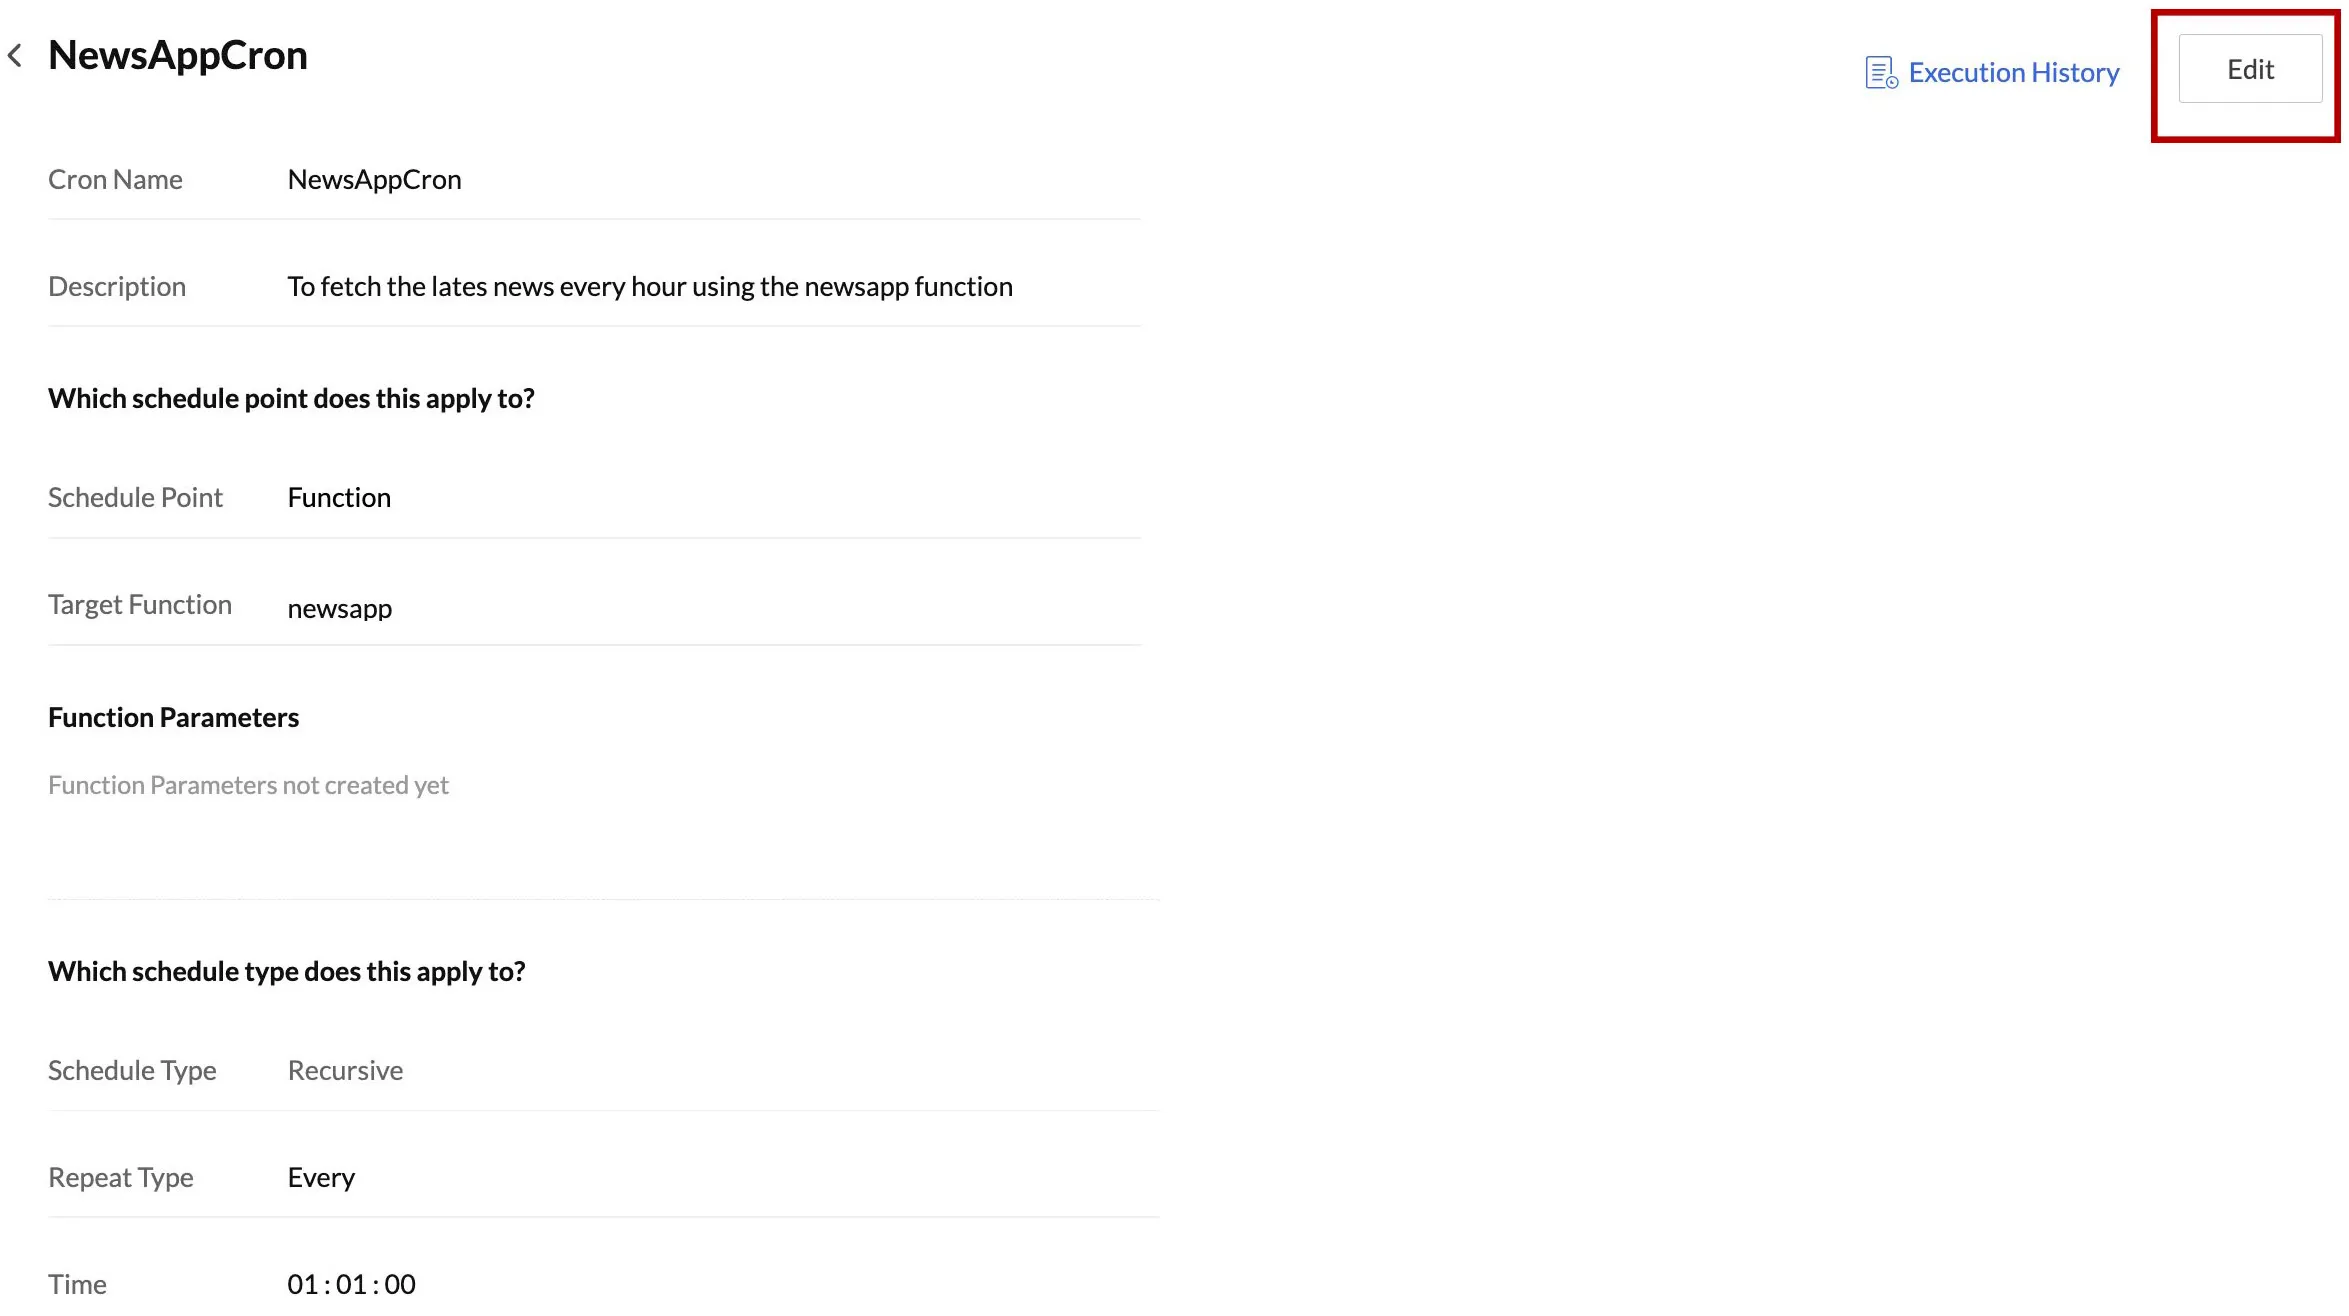
Open the cron that needs to be edited from the Cron page.
-
Click Edit in its details page.
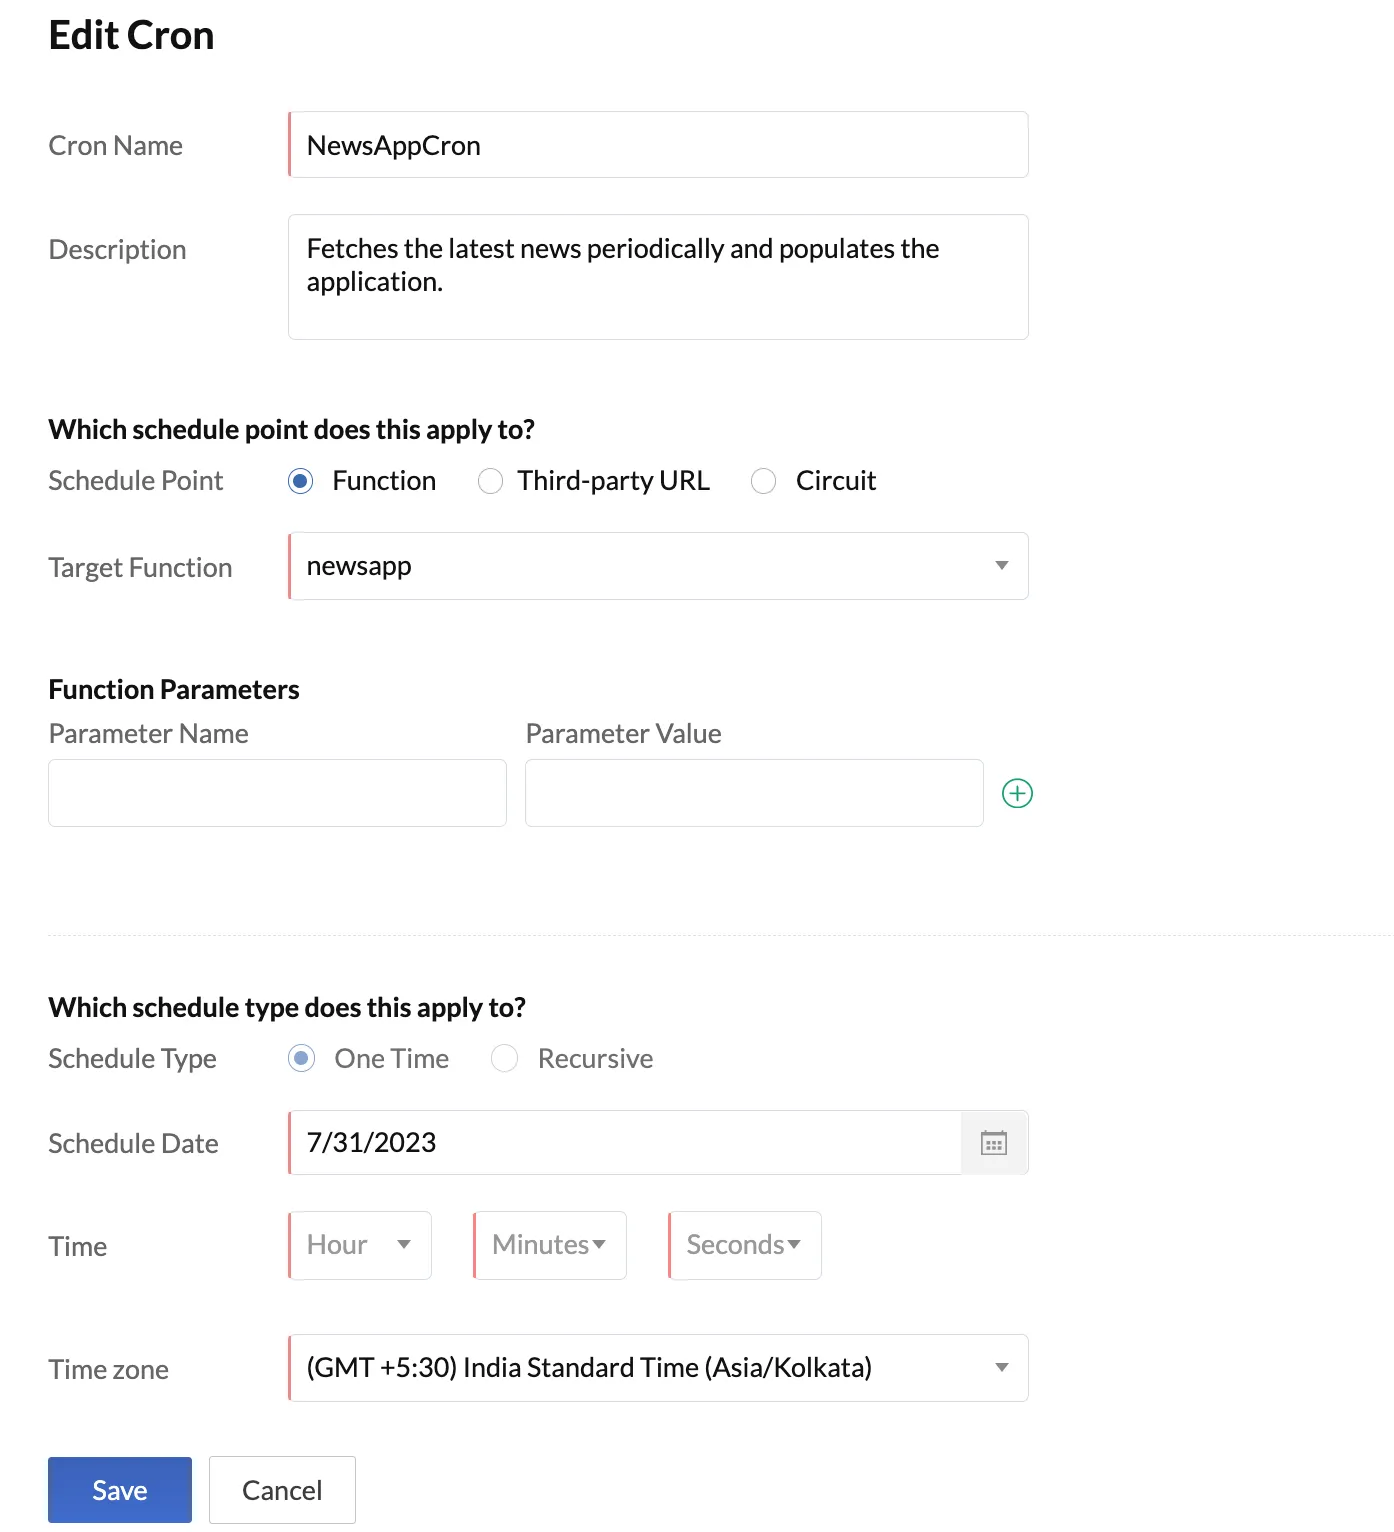
-
Make the necessary changes, then click Save.
Delete a Cron
To delete a cron permanently:
-
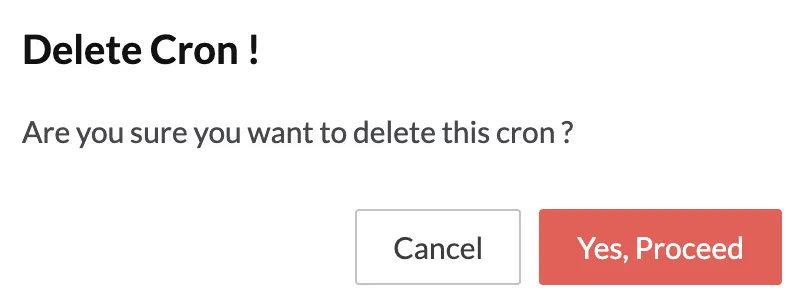
Click the ellipsis icon for the cron that needs to be deleted, then click Delete.

-
Click Yes, Proceed to confirm the delete.
Last Updated 2025-07-01 17:41:58 +0530 IST
Yes
No
Send your feedback to us