Implementation
The steps for working with Crashes in your mobile application can be described as follows:
- Enable Crashes for your Catalyst project that hosts the Android or iOS mobile application.
- Design a privacy policy to obtain user consent to push the app crash reports to the server.
- Obtain ZA Key from the Catalyst console to use in your mobile application’s source.
- Integrate Crashes into your Android or iOS application’s source.
- Monitor crash reports from the Catalyst console.
Let’s look at each step in detail.
Enable Crashes
You must enable Crashes for your project before you access it for the first time, in the following way:
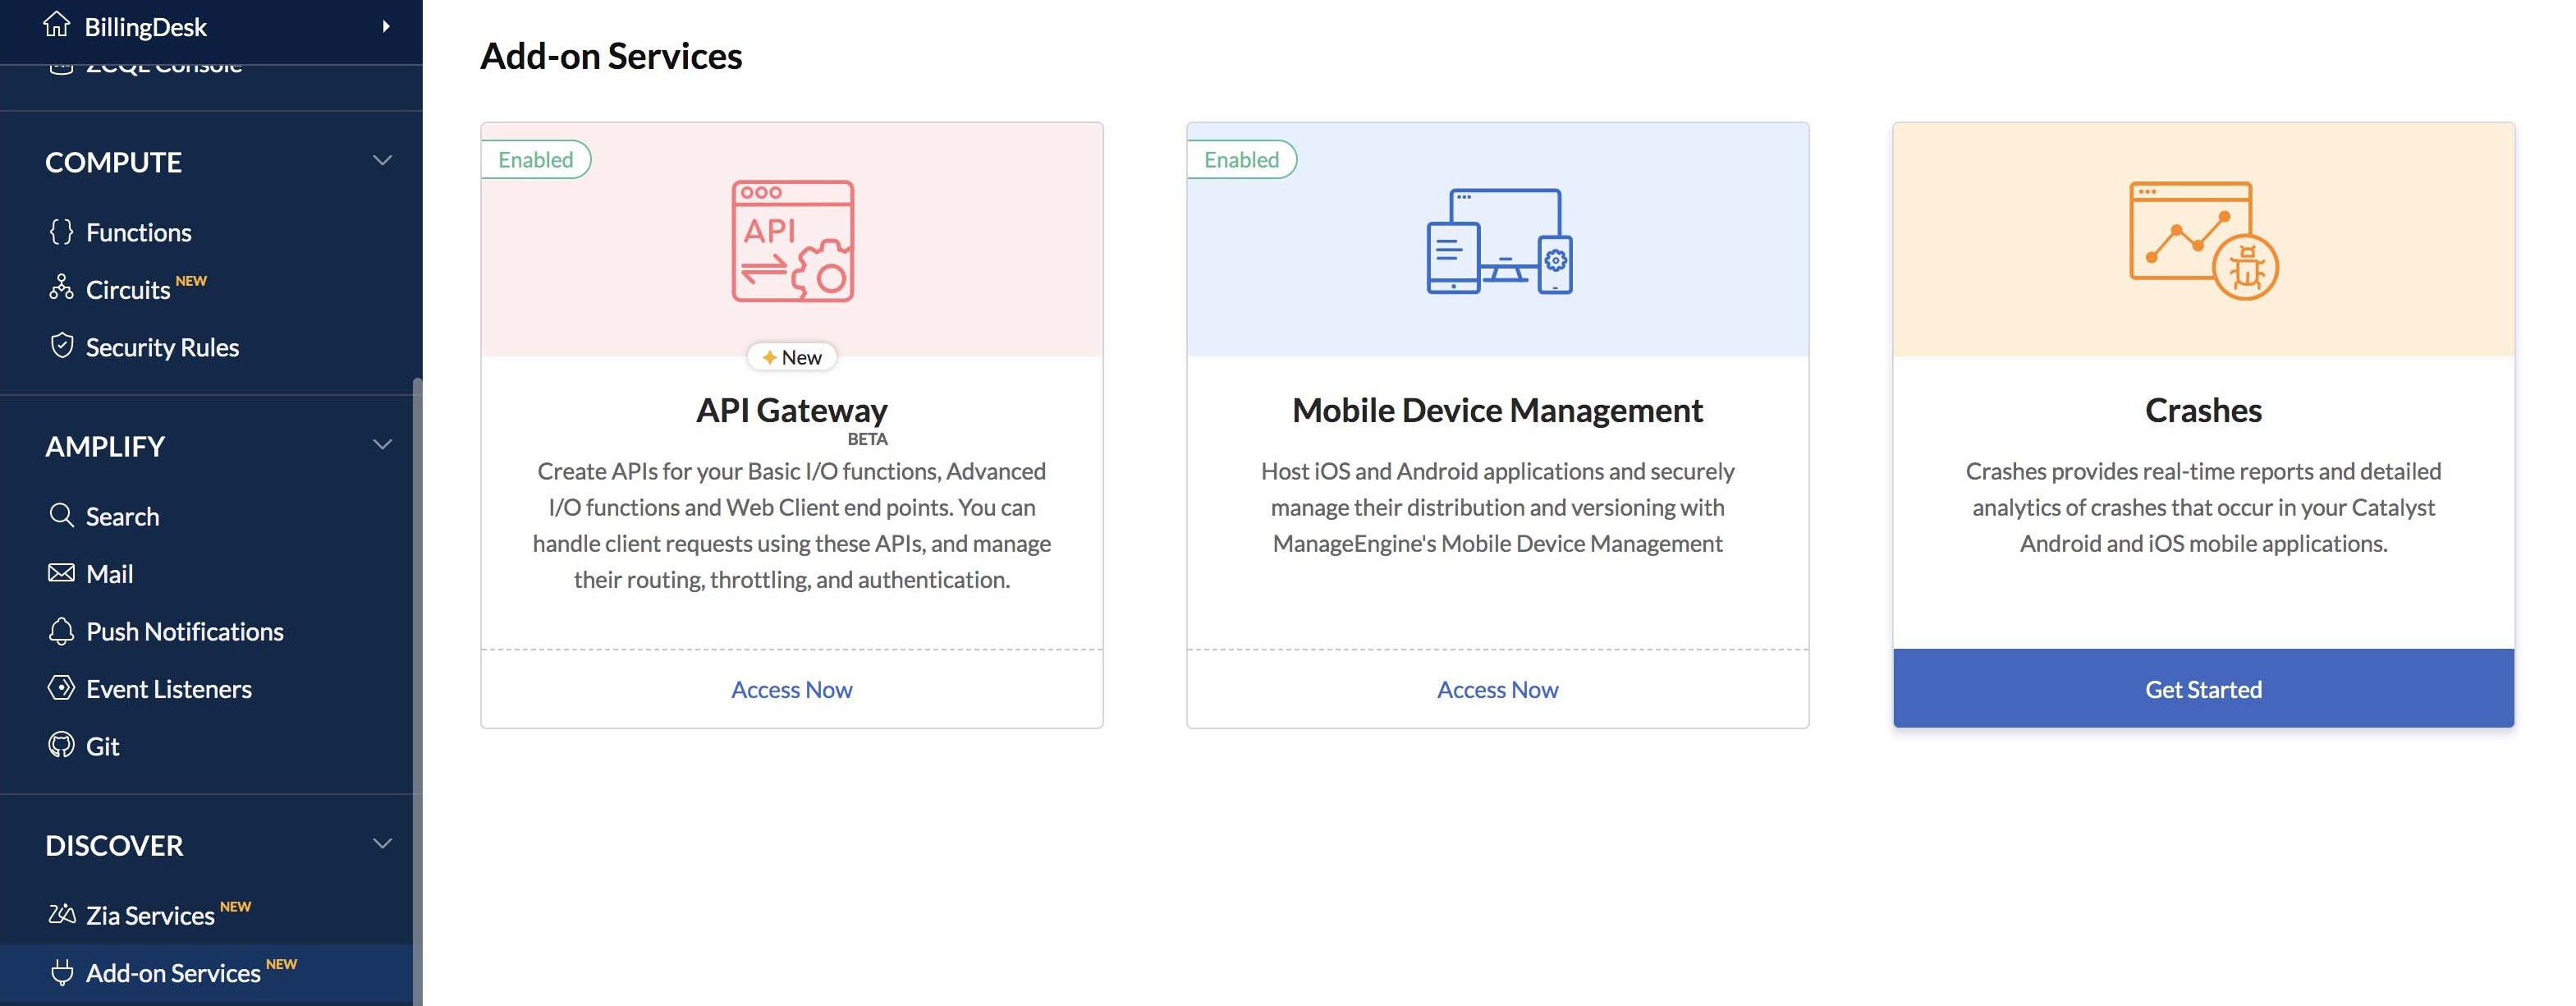
- Navigate to Add-on Services under Develop in the console, then click Get Started on the Crashes window.
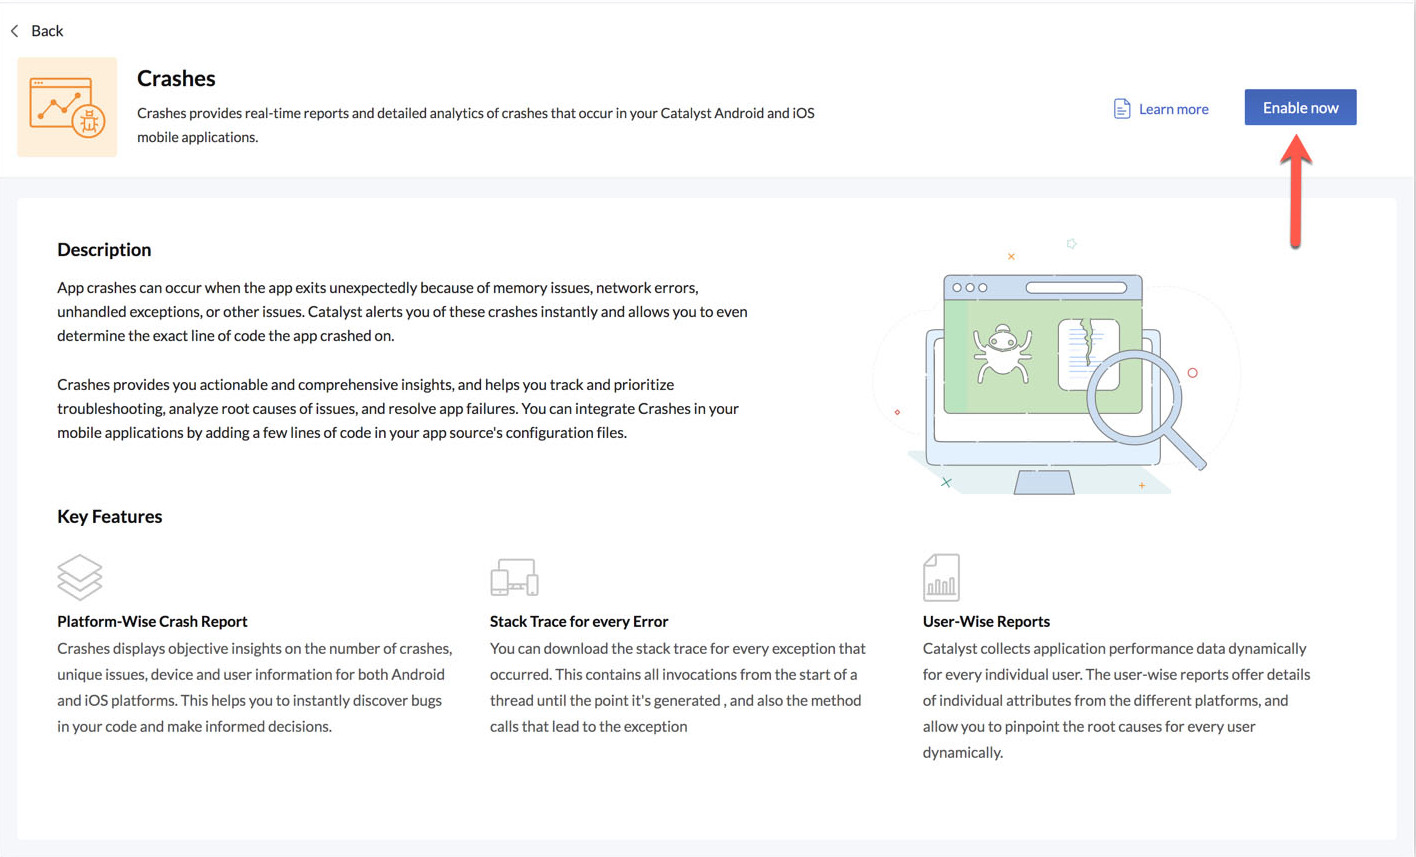
- Click Enable Now in the Crashes feature page.
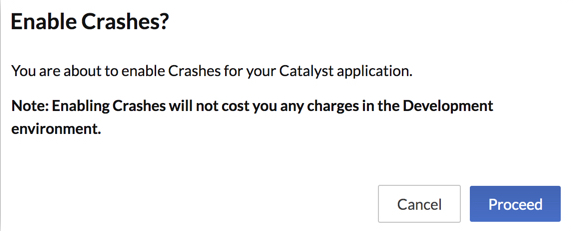
- Click Proceed in the confirmation pop-up window.
Crashes is now enabled for your Catalyst project and you will be able to view the Crashes page.
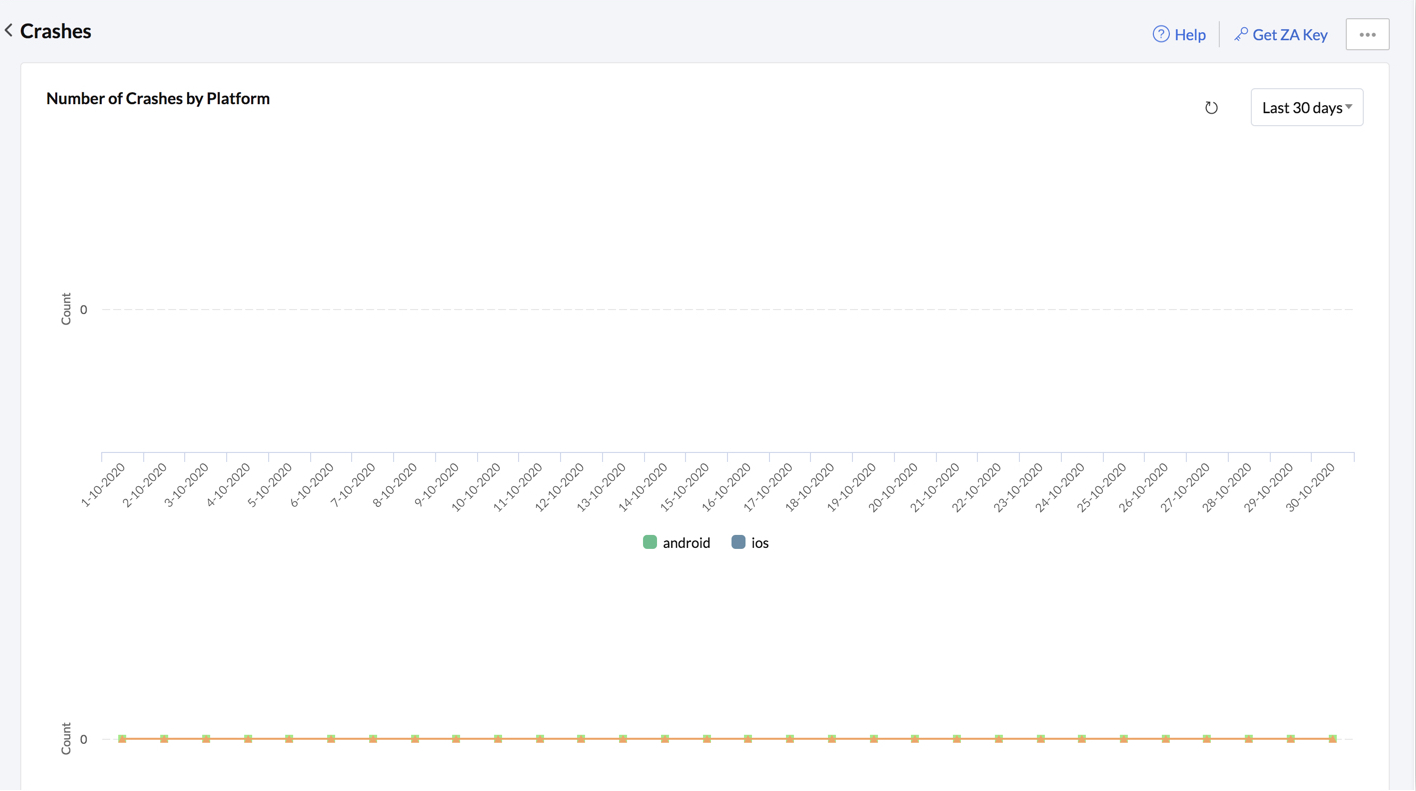
The data will be populated after you integrate Crashes in your mobile app.
Obtain User Consent to Push Crash Reports
Catalyst implements Crashlytics to enable crash reports for your mobile applications. According to the Crashlytics Terms of Services, it collects personal data such as device information, location data, usage data, and other data to help it create crash reports. Crashlytics therefore makes it mandatory for a mobile application to maintain a privacy policy statement which can be accessed within the app at any time and to obtain explicit consent from the end user for pushing device and usage information to the server. This comes under the scope of various data protection regulations and privacy laws like GDPR and PIPEDA .
You can enable a pop-up window to appear in your app containing a crash message and a call-to-action button to obtain permission from the user to push the crash report to the server.
Obtain ZA Key from the Catalyst console
ZA Key is an authentication key generated for your project specifically for Crashes. You must use the ZA Key to integrate Crashes with your Android and iOS app. This will allow the app crash reports from user devices to be pushed to the server.
To obtain the ZA Key from the Catalyst console for your project:
- Navigate to Add-on Services under Discover in the Catalyst console, and click Access Now in the Crashes window.
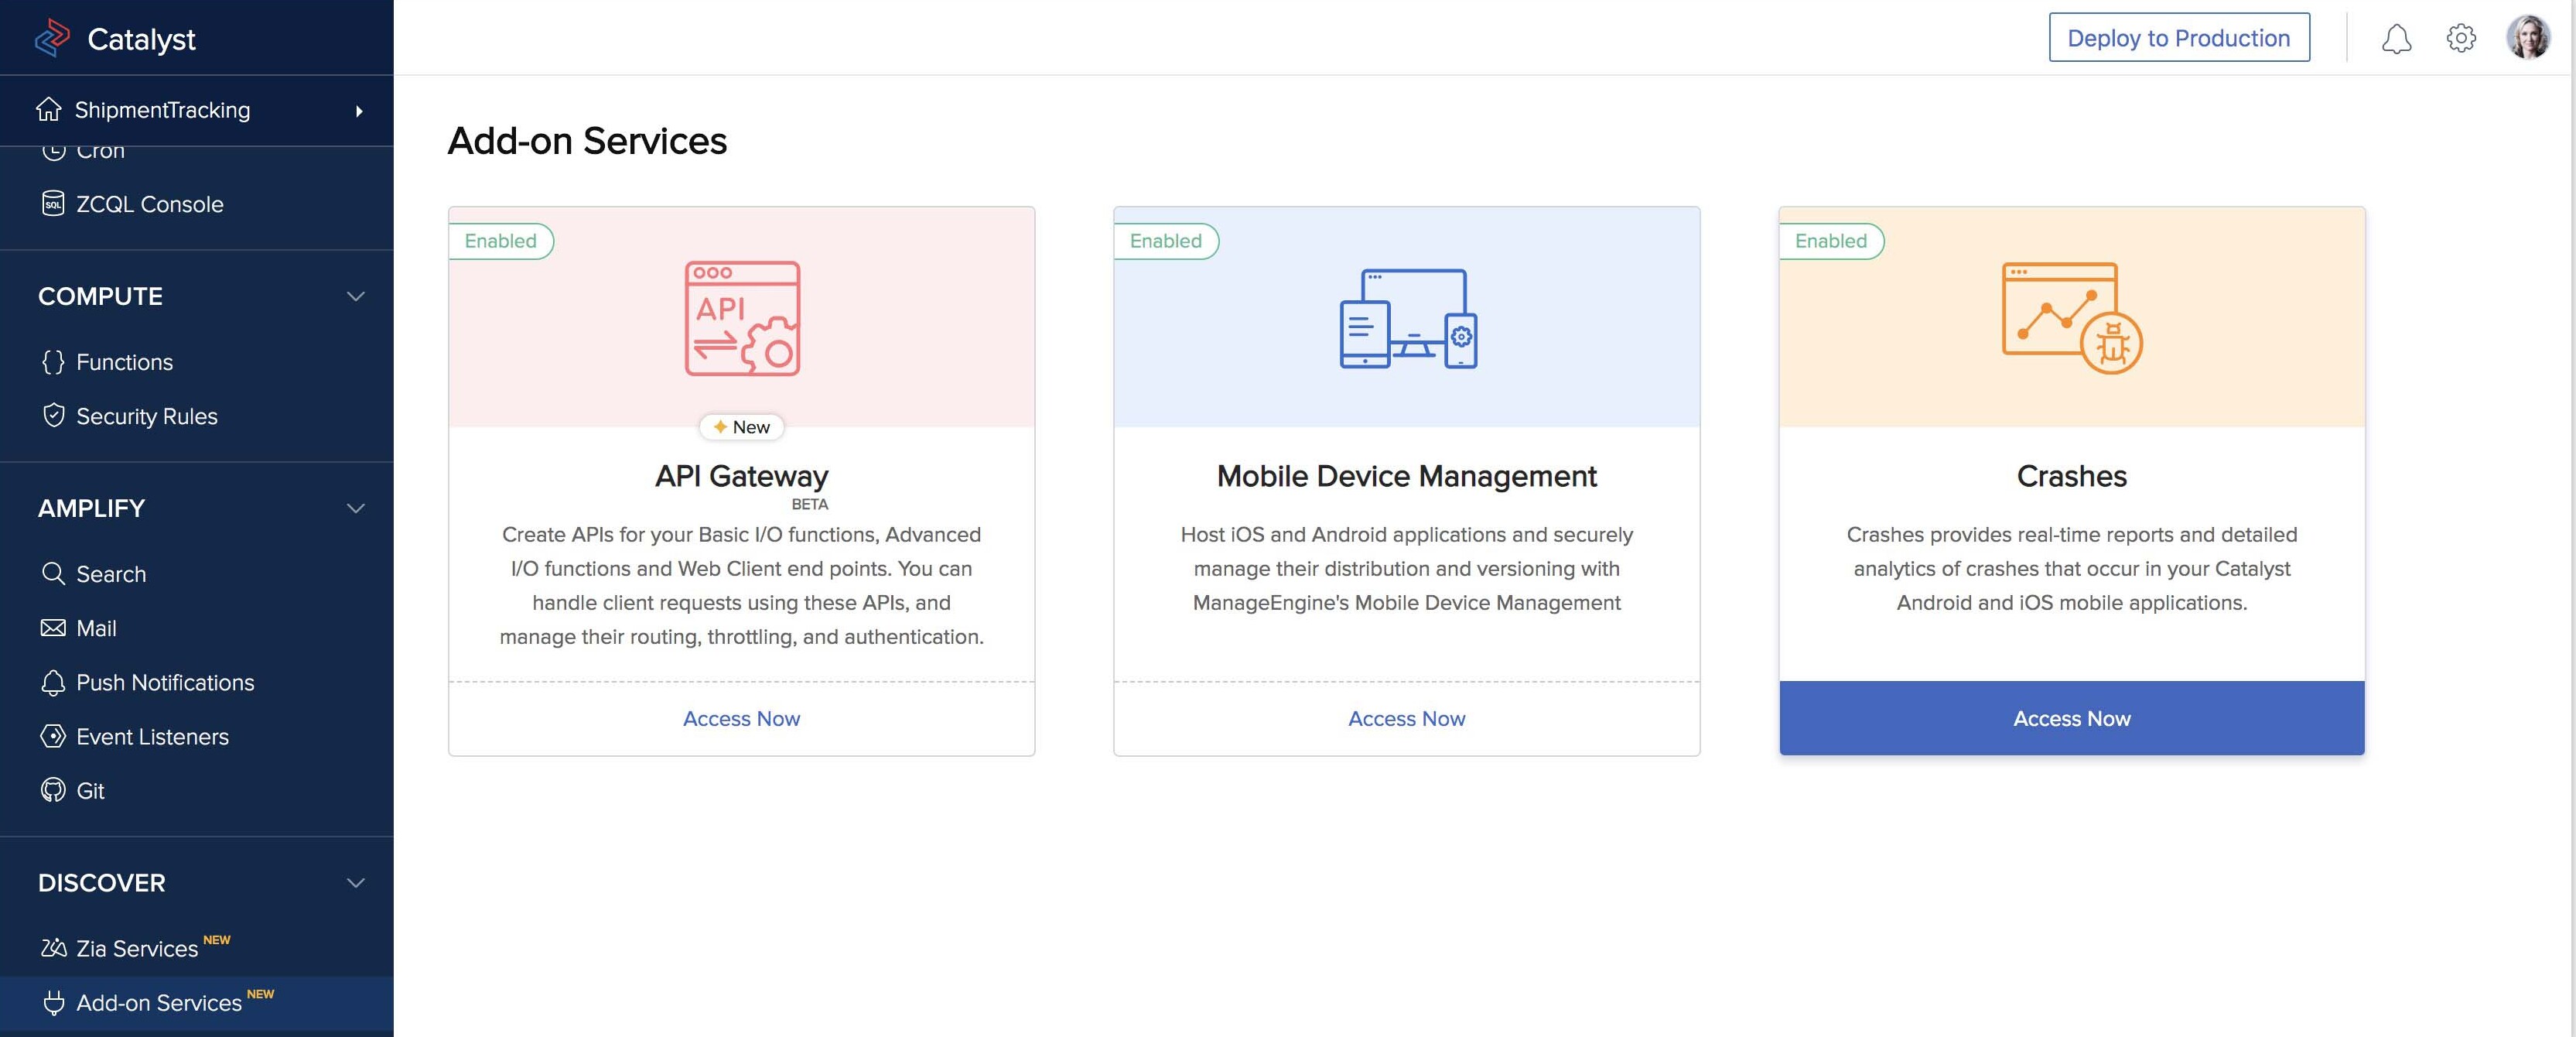
- Click Get ZA Key in the Crashes page.

- Copy the ZA Key from the pop-up window.

Integrate Crashes in an Android App
When you download the Android SDK from Catalyst with the required dependencies and build your Android app , it will have a file structure as shown below. To integrate Crashes in your Android app, you must configure the build.gradle and the MainActivity.java files in your app’s source.
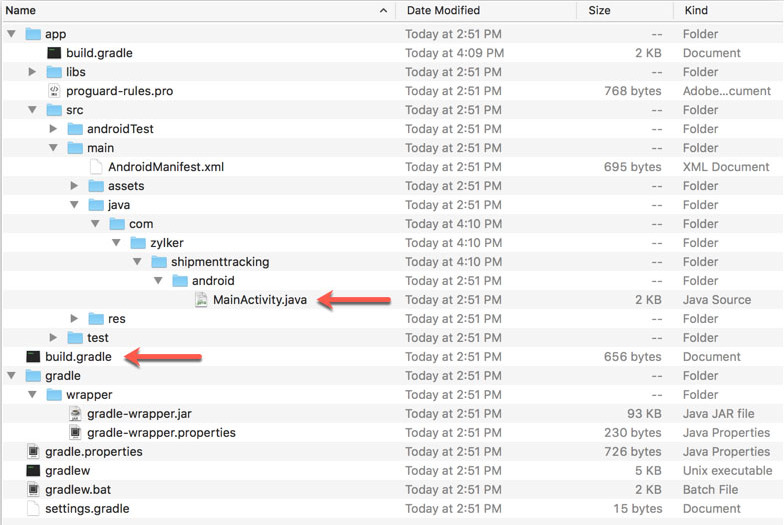
build.gradle
You will need to use the ZA Key that you obtained in the previous step, in build.gradle.
Insert the ZA Key as the value for apiToken on lines 32 and 36 in the zanalytics section, in the build.gradle file.

You must change the value of mode to “1”, when you deploy your application to Production .

MainActivity.java
Enable the CatalystUtil.initAnalytics(getApplication()); statement on line 16 that is commented out in the MainActivity class, in the MainActivity.java file.
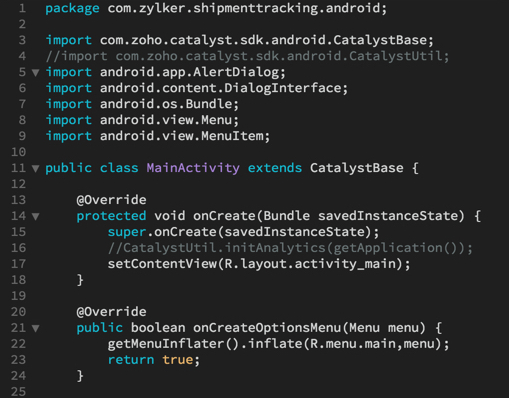
Similarly, enable the package import statement on line 4 that is commented out.
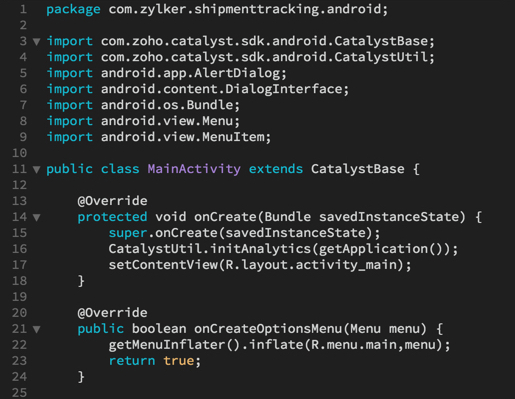
Crashes is now integrated in your Android app.
Integrate Crashes in an iOS App
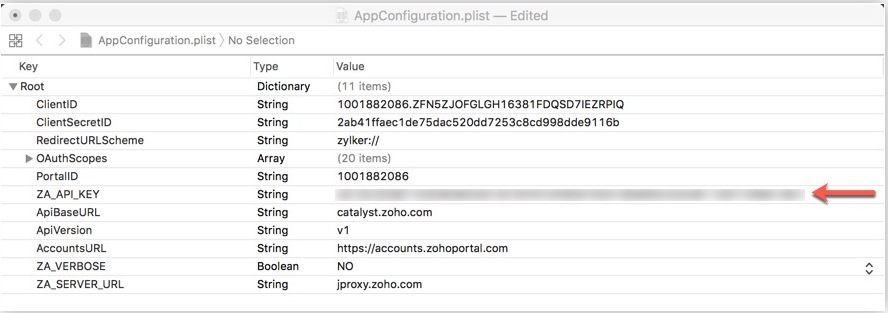
When you download the iOS SDK from Catalyst with the required dependencies, set up your Xcode project, and build your iOS app , it will have a file structure as shown below. To integrate crashes in your iOS app, you must configure the AppConfiguration.plist file in your app’s source.

You will need to use the ZA Key in AppConfiguration.plist, to integrate Crashes with your iOS app.
Insert the API Key as the value for ZA_API_KEY, in the AppConfiguration.plist file.
-
If you used Xcode to build your application, navigate to the main .xcodeproj file of the project.
-
Click Build Phases and expand the Run Script collapsible item in it.
-
Enable the statements that are commented out.
-
Save your project.
These steps must be followed only if there are issues while debugging the project.
Crashes is now integrated in your iOS app.
Access Crashes Reports
Once you have integrated Crashes in your mobile application, you can view crash reports each time your app crashes in a user’s device.
Navigate to Crashes in Add-on Services in the console. The Crashes page in the console displays statistics about your app crashes in the form of graphs.
The first graph displays information about the number of crashes by platform, based on the dates of the crashes.
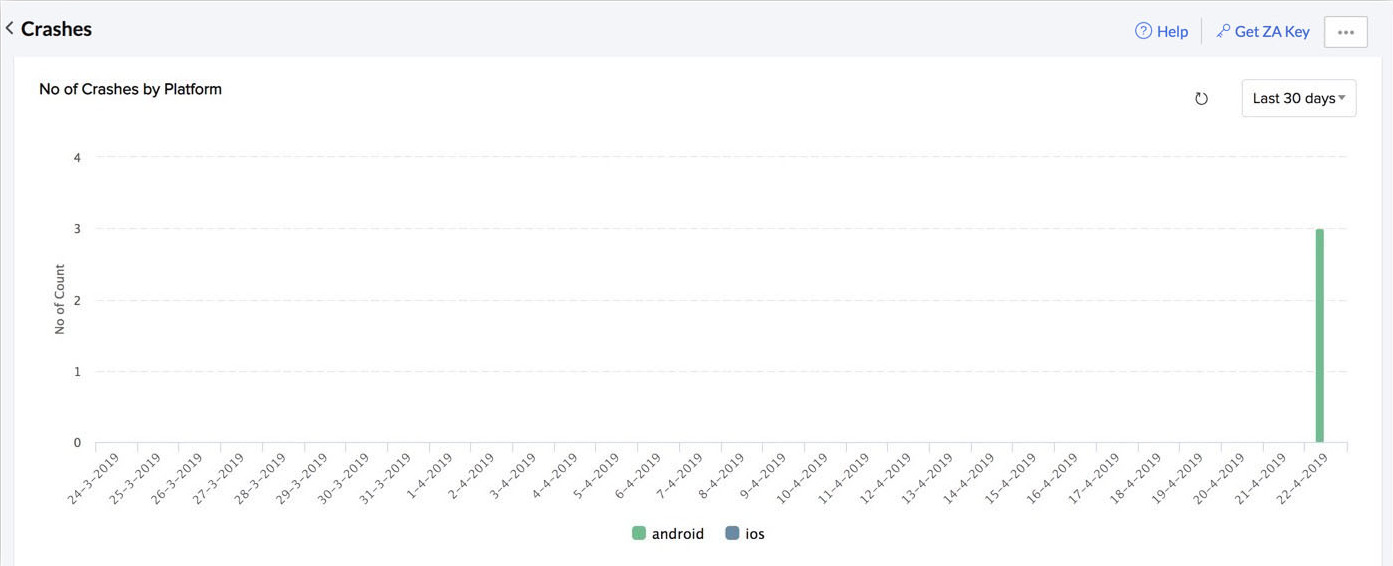
Crashes that occurred in Android devices and iOS devices are displayed individually.
You can also view the graph for the time period that you require. Click the drop-down list in the top right corner of the graph and select the time period from the list.
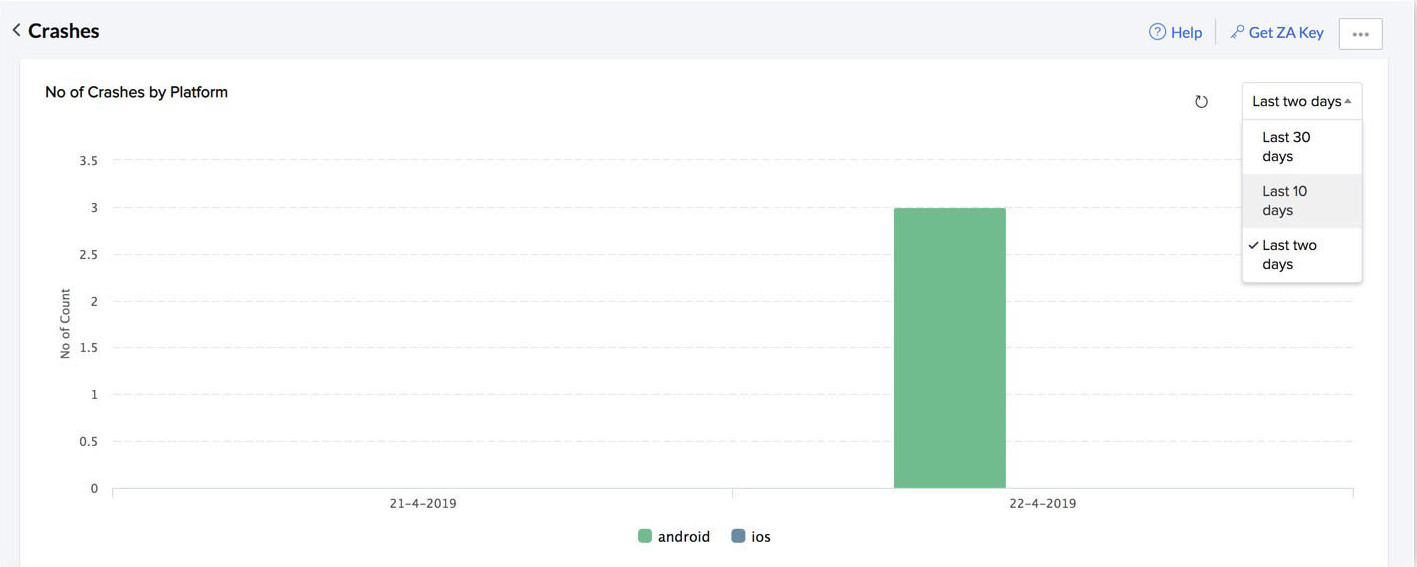
Your graph will display information based on the time period you select.
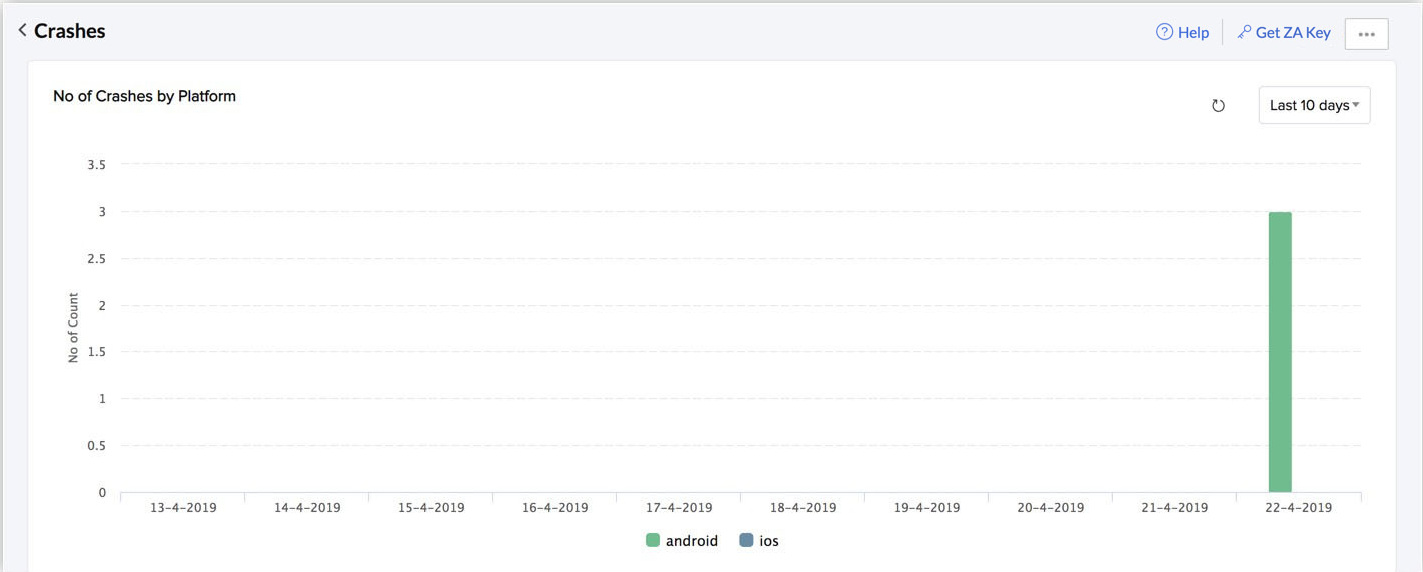
You can hover over the bars to access tooltip information.
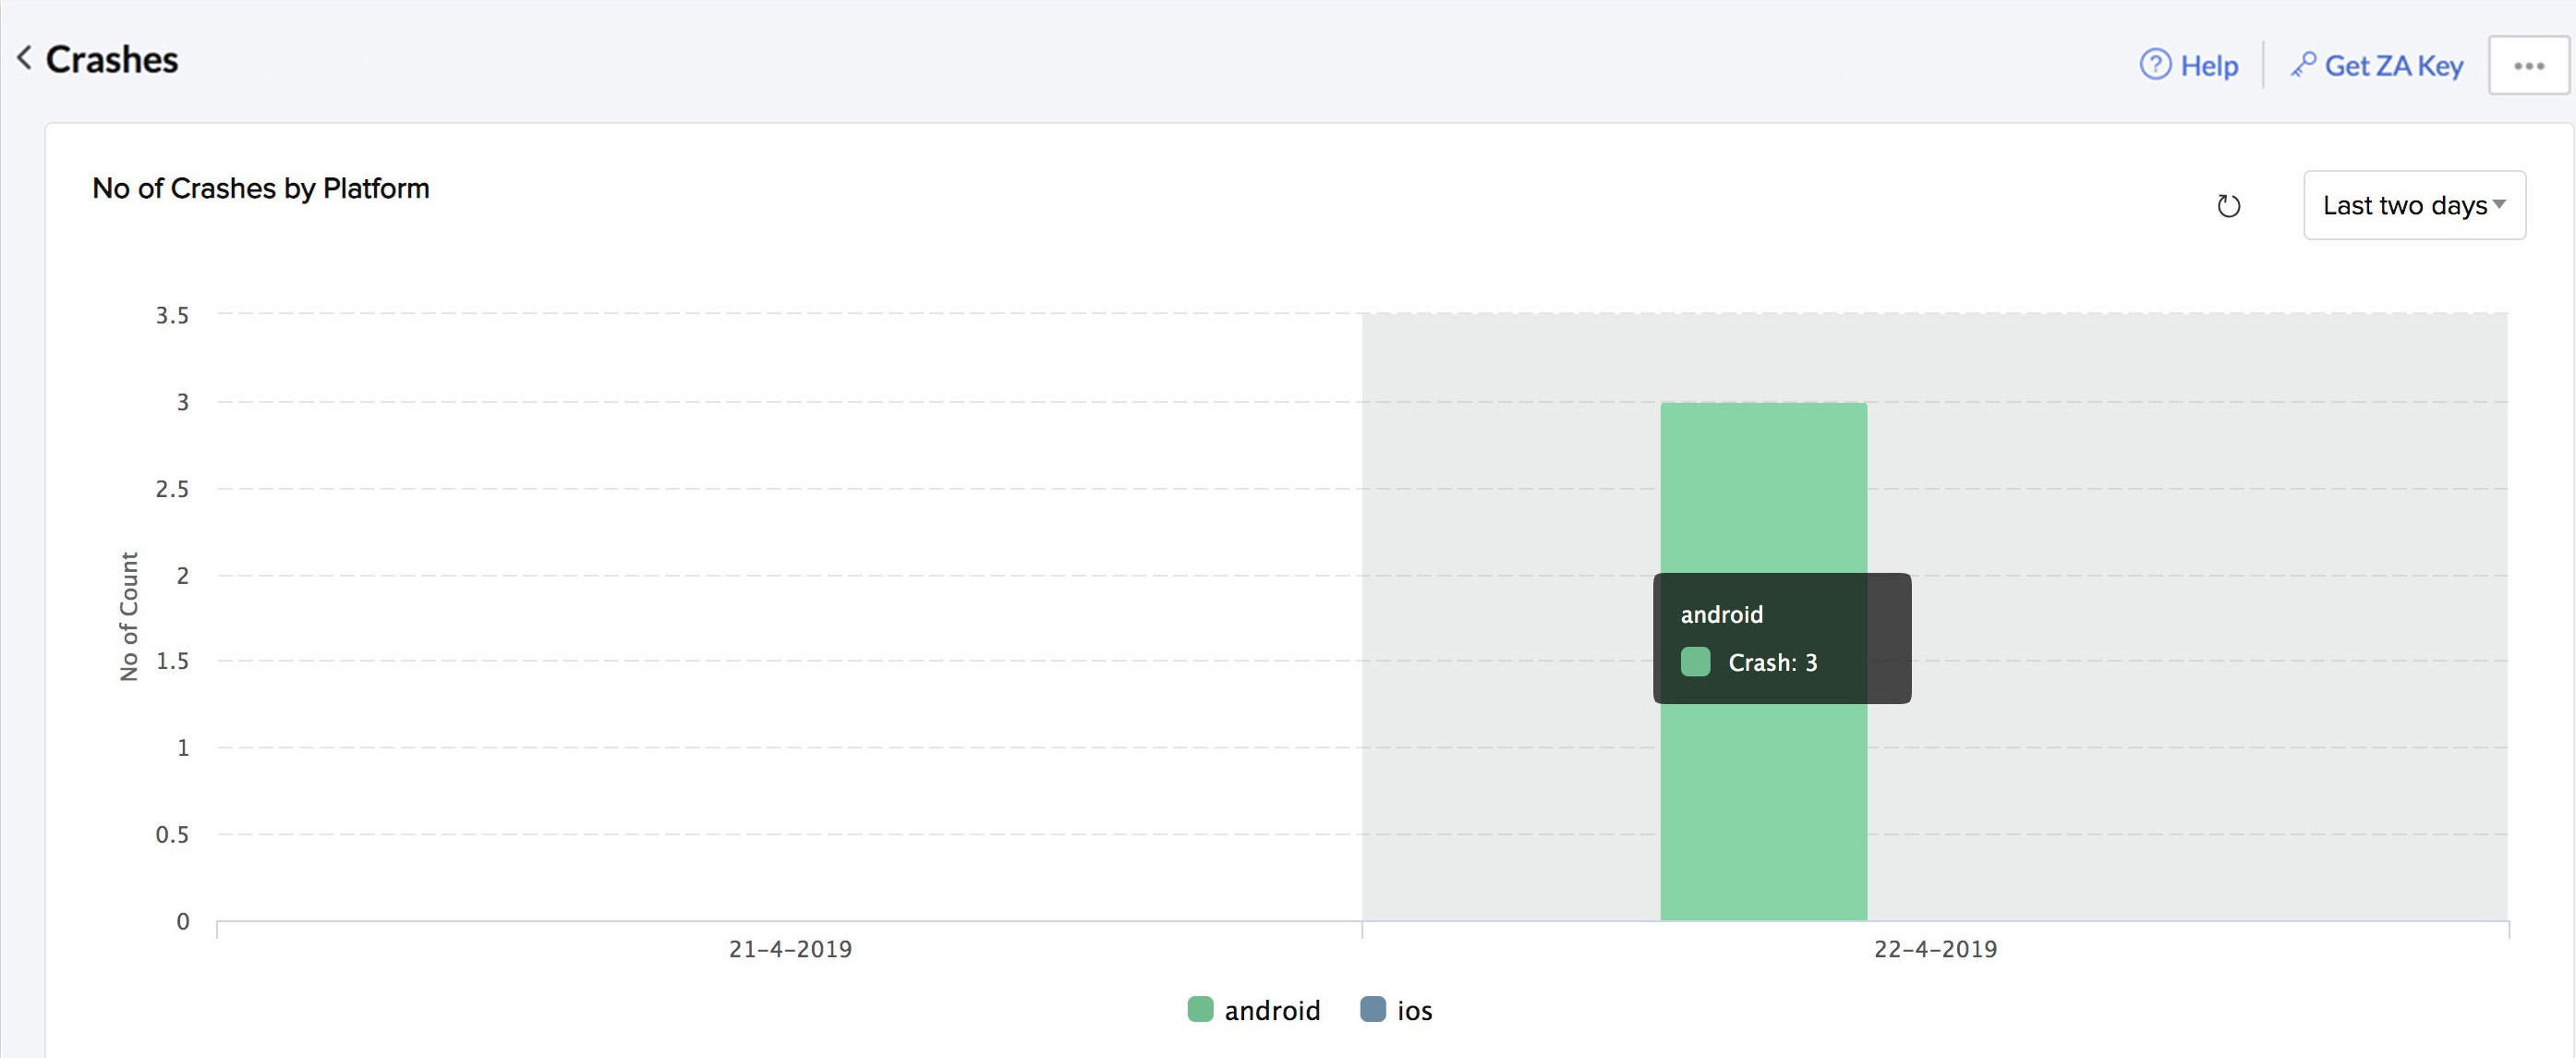
To refresh the graph, click the refresh icon on the top right corner of the graph.
The second graph displays consolidated information about the number of crashes, unique issues, devices, and users, based on the dates of the crash occurrences.
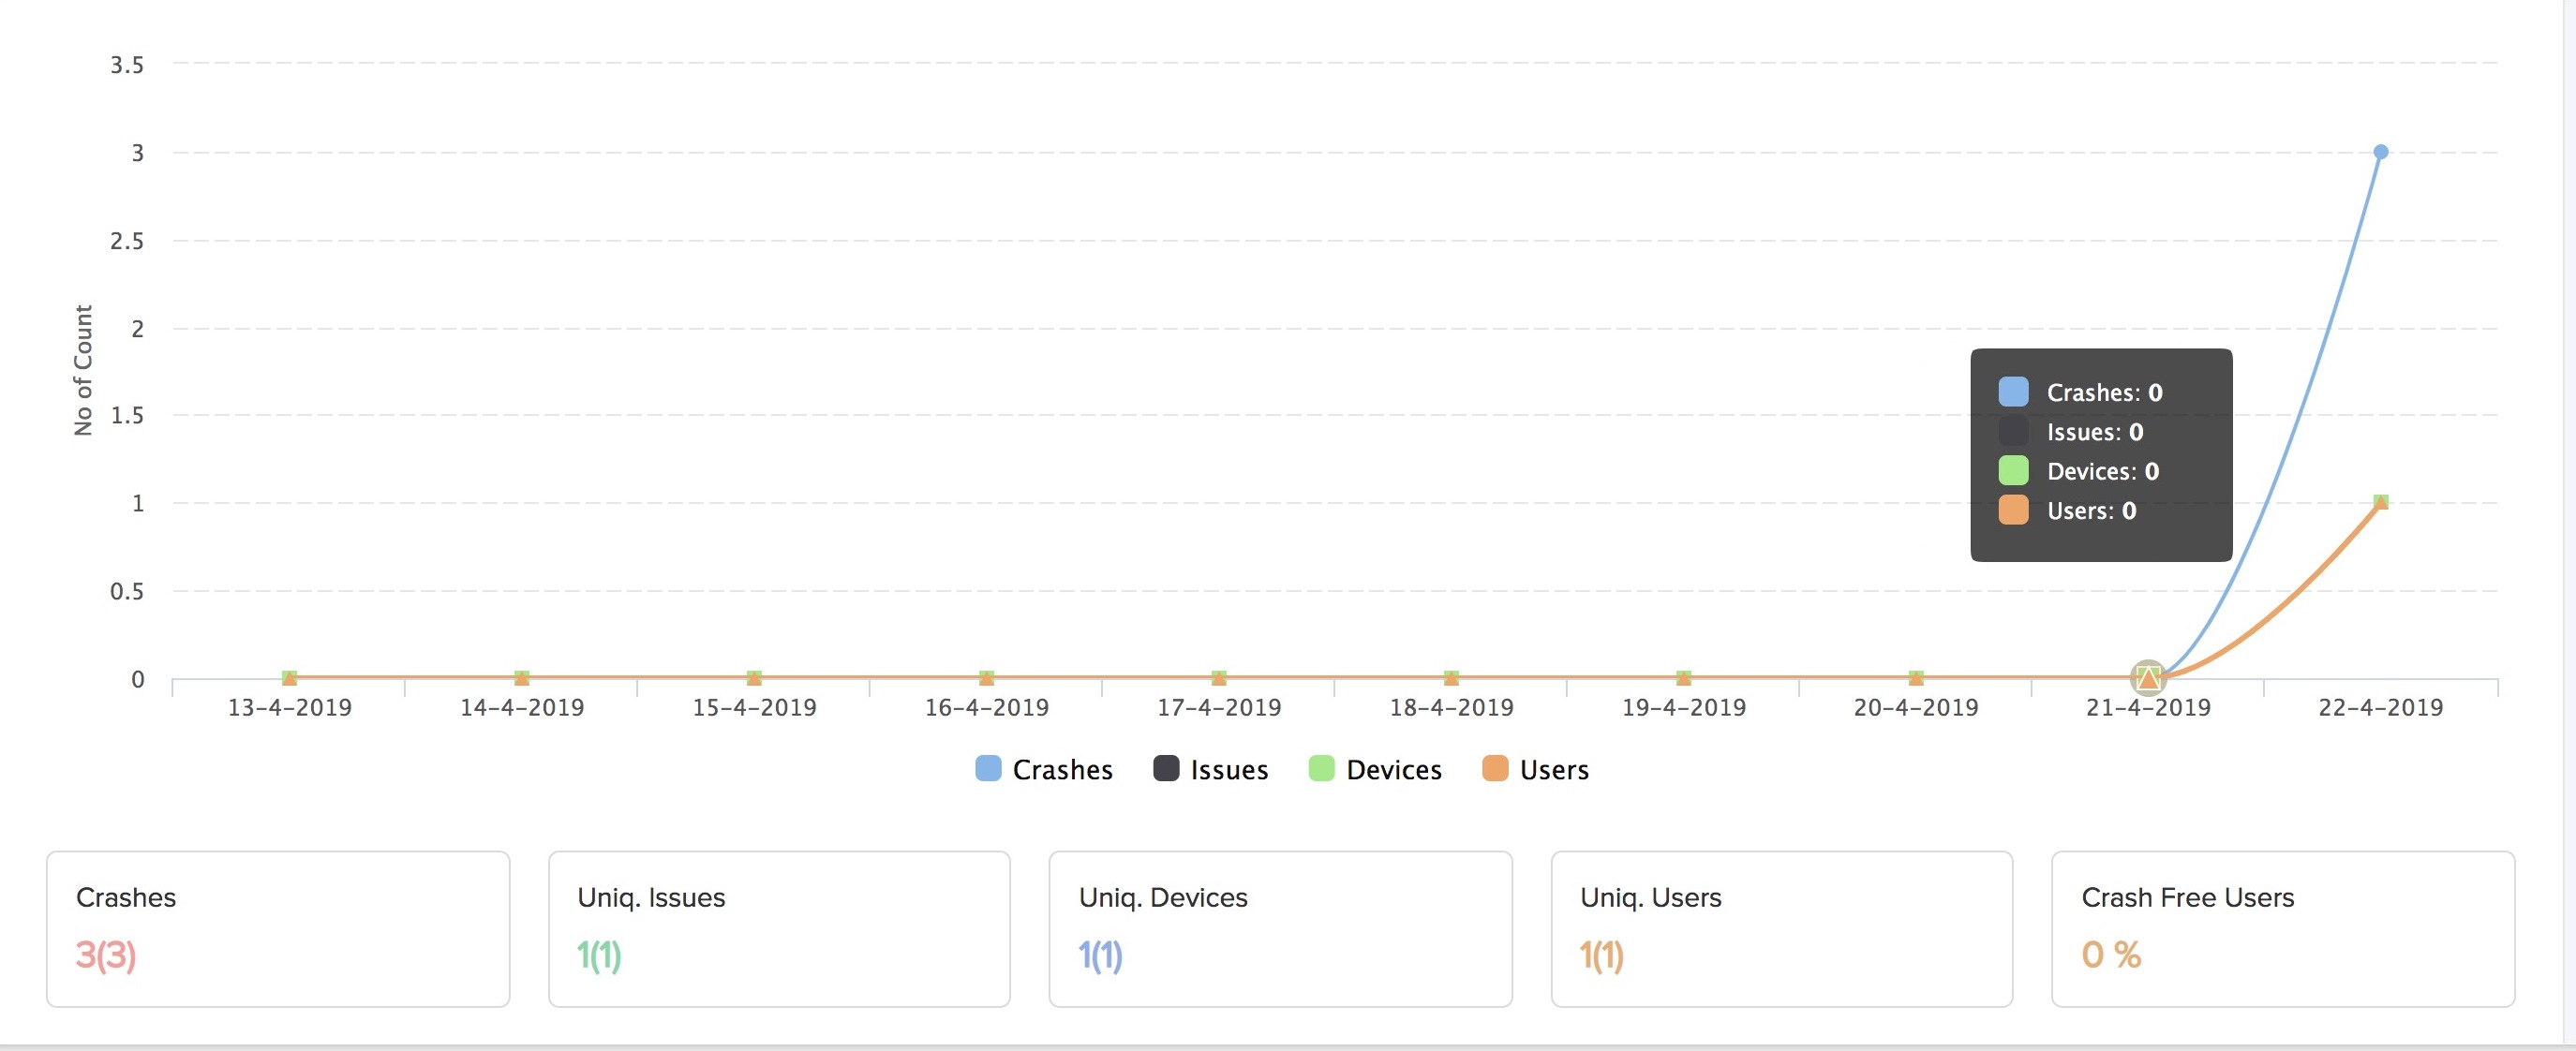
When you change the graph’s view to the required time period from the drop-down list near the first graph, the second graph will also display information based on the time period you select.
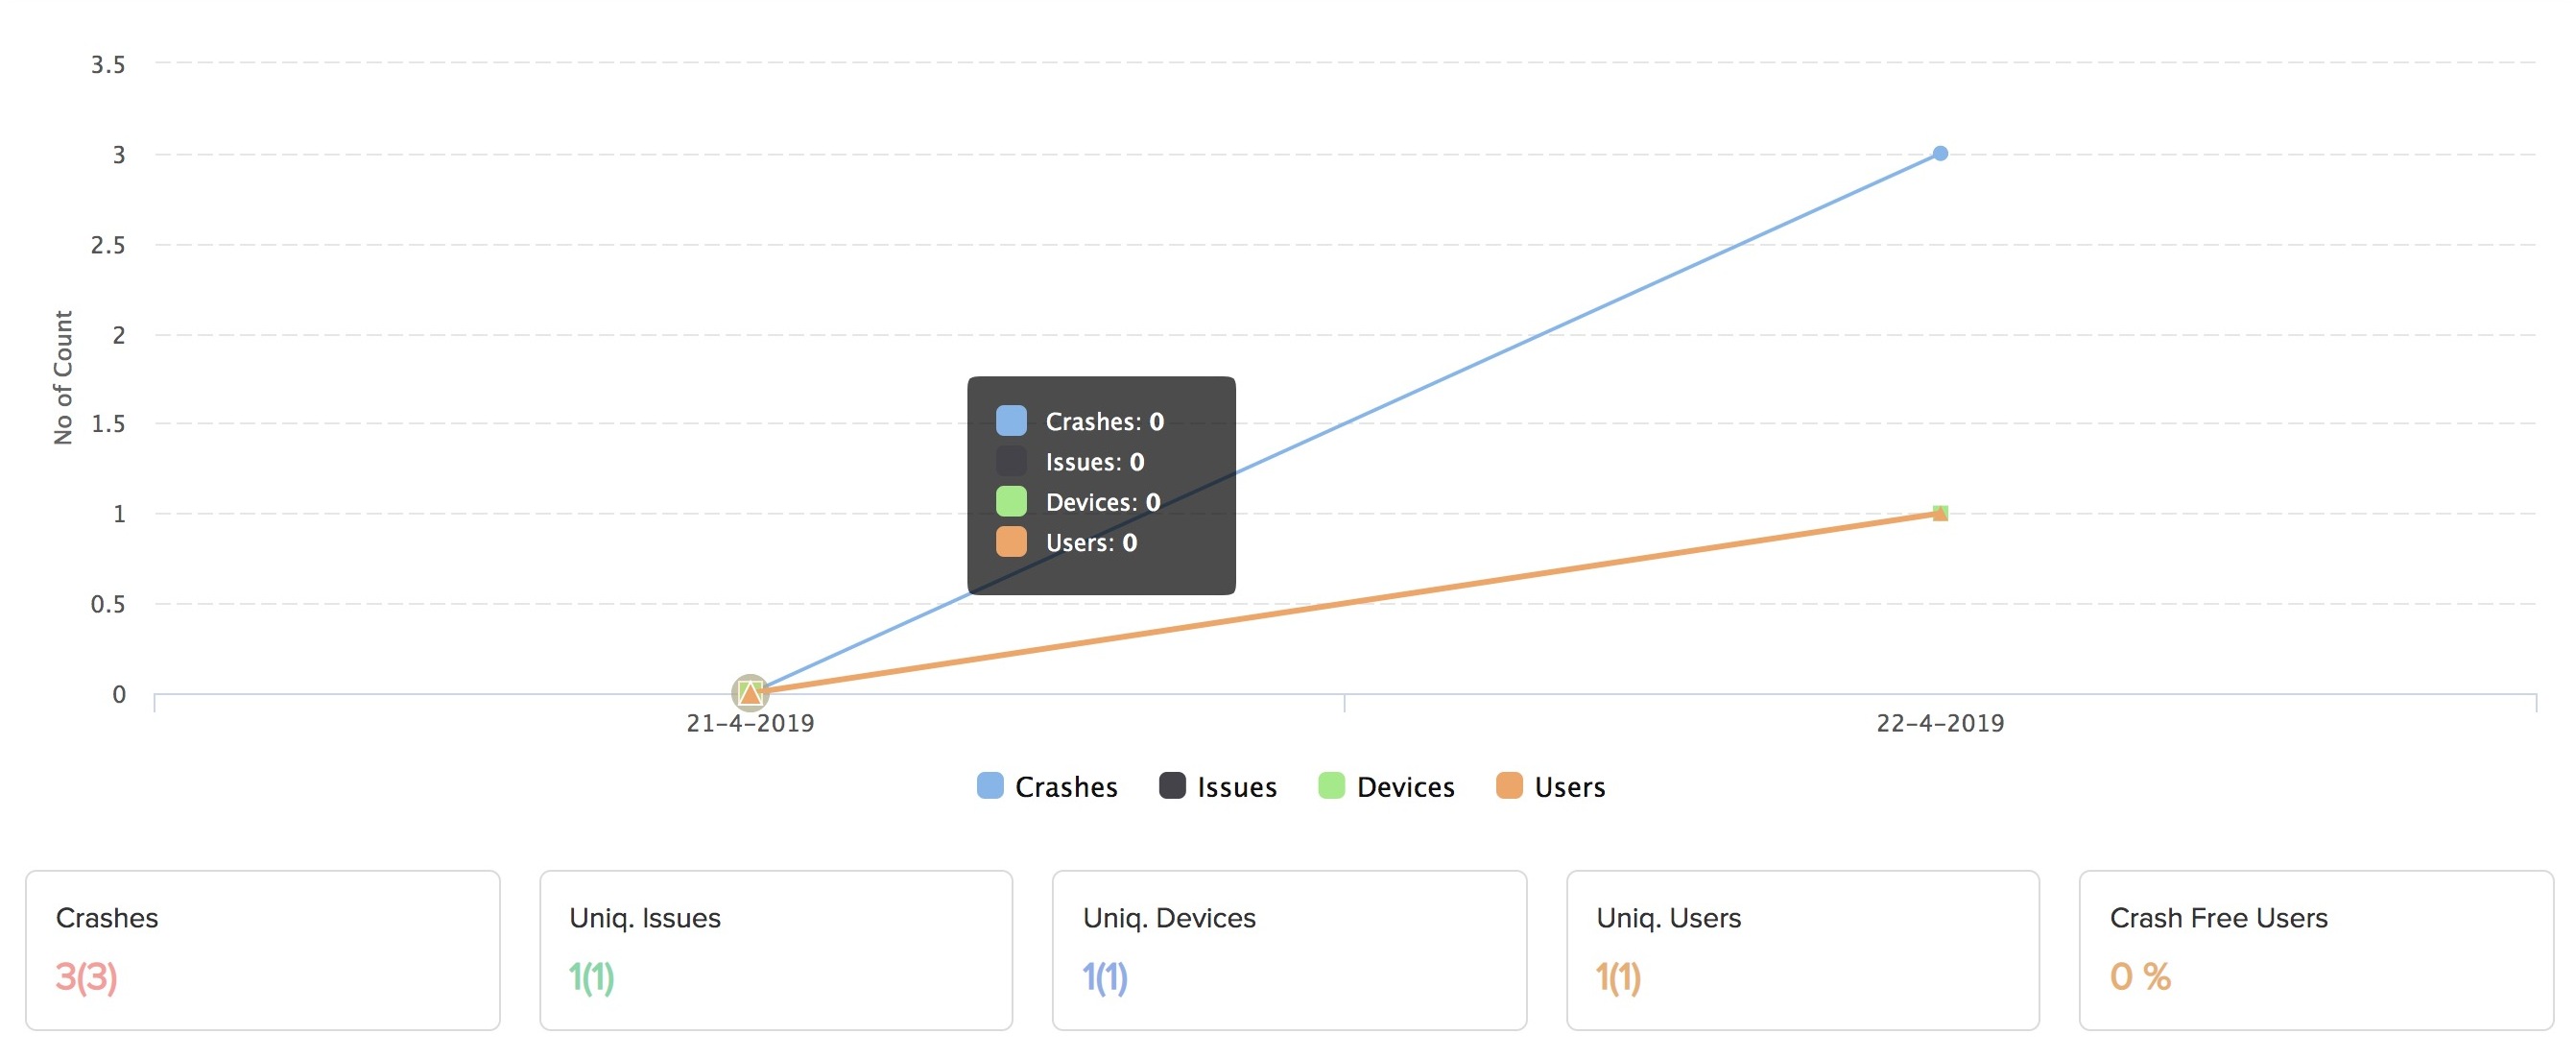
Below the graph, you can find the following statistics:
- Crashes: The number of total crash instances in both Android and iOS apps
- Unique Issues: The number of specific issues that caused crashes in both Android and iOS apps
- Unique Devices: The total number of specific devices the crashes occurred in for all unique issues and platforms
- Unique Users: The total number of users of both Android and iOS apps that experienced the crashes for all unique issues and devices
- Crash Free Users: Percentage of the users of both Android and iOS apps that have not experienced any crashes
The Issues section below the graphs lists out all the exact exceptions that caused the crashes. It specifies the name of the activity that caused the exception, the name of the file where the exception occurred, and the line number of the code in the file.

The Issues section also displays other relevant information such as the platform, app version, the number of crash instances, the number of users who experienced the crashes, and the number of devices the crashes occurred. You can search for an exception using the search bar.
When you click on an exception from the list in the Issues section, you will be navigated to the exception’s details page. The exception’s details page provides specific details of the particular exception.
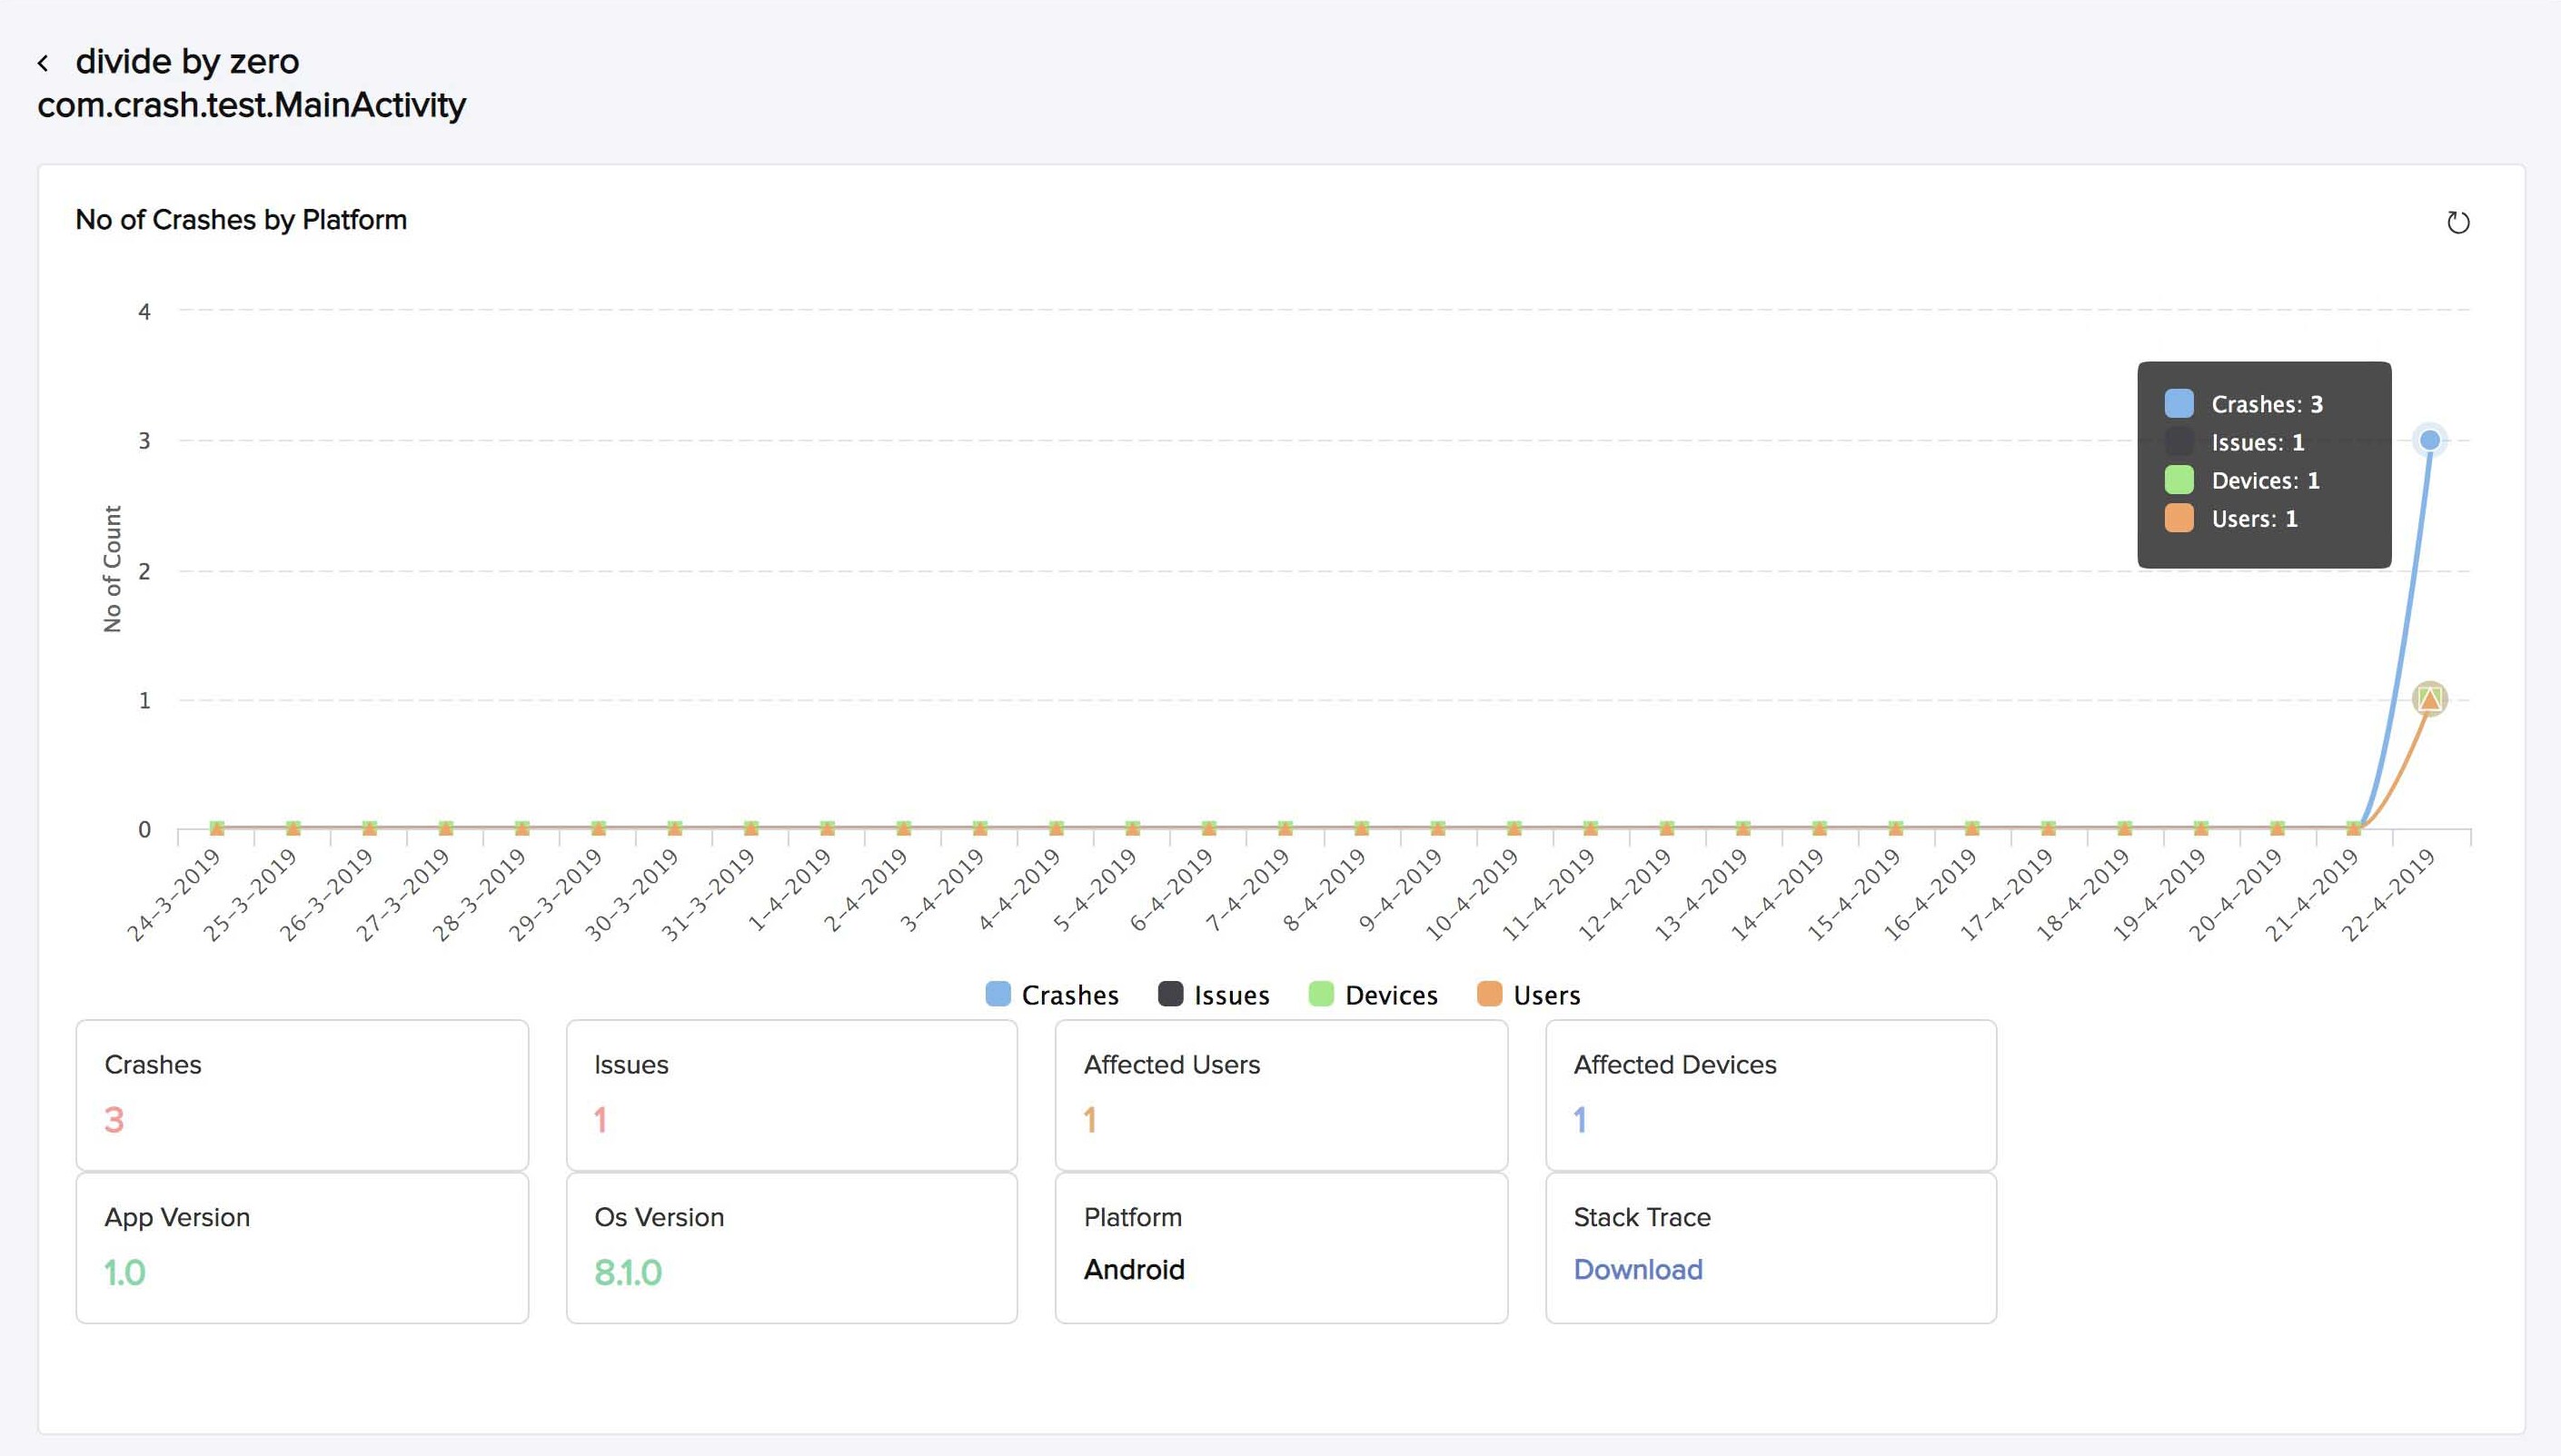
The Number of Crashes by Platform graph provides details like the number of crashes, issues, affected devices, and affected users for the particular exception. This section also displays information such as the app version, OS version, and the platform where the exception occurred.
You can also download the stack trace of the crash, which provides information about the method calls that lead to the exception, along with the file names and the line numbers where the calls occurred. For more information on analyzing a stack trace, refer to the official Android documentation and the official iOS documentation .
The exception’s details page also displays the Number of Crashes by Devices and the Number of Crashes by OS in pie diagram formats. You can hover over the pie diagrams to access the tool tip information.
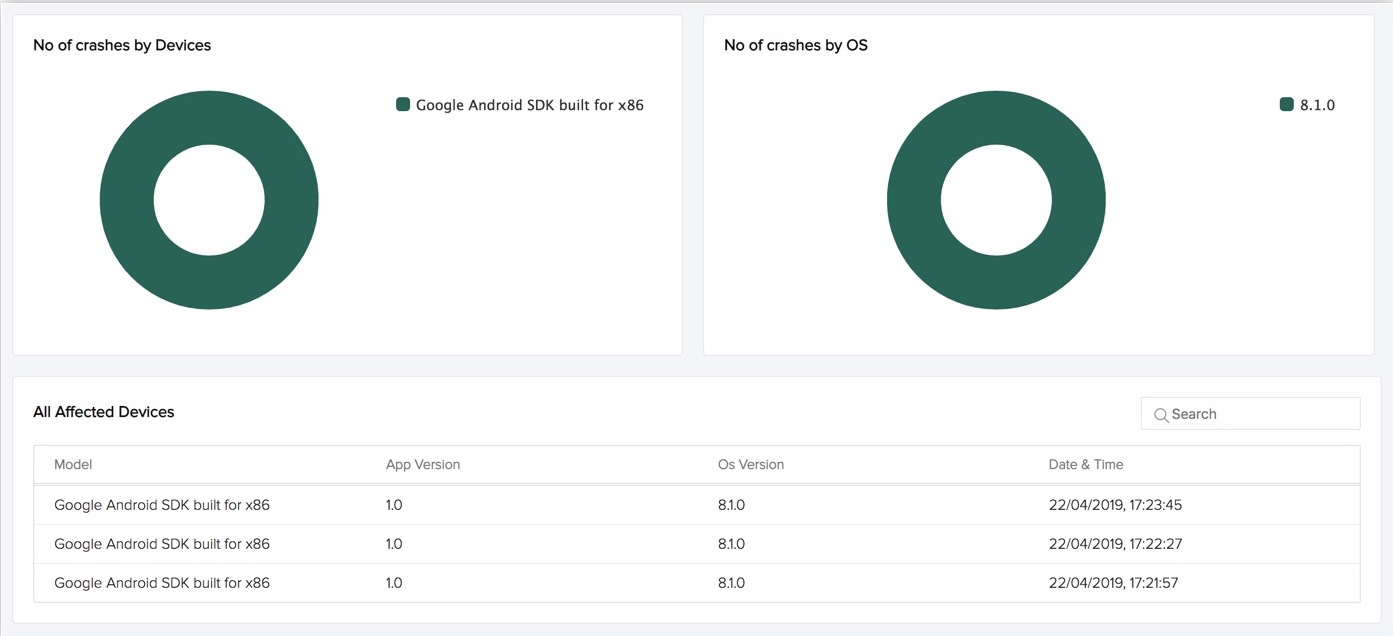
You can also find a list of all the devices that experienced the crashes in the All Affected Devices section. It shows information such as the device model, app version, OS version, and the date and time of crash. You can search for an affected device using the search bar in the section.
Disable Crashes
You can disable Crashes for your Catalyst project any time you require, from the console. When Crashes is disabled, app crash information will not be pushed to the server from the user devices for your Android or iOS app.
To disable Crashes for your Catalyst project:
- Click the ellipsis icon on the top of the Crashes page, and click Disable.

- Type “DISABLE” in the confirmation pop-up window and click Confirm.
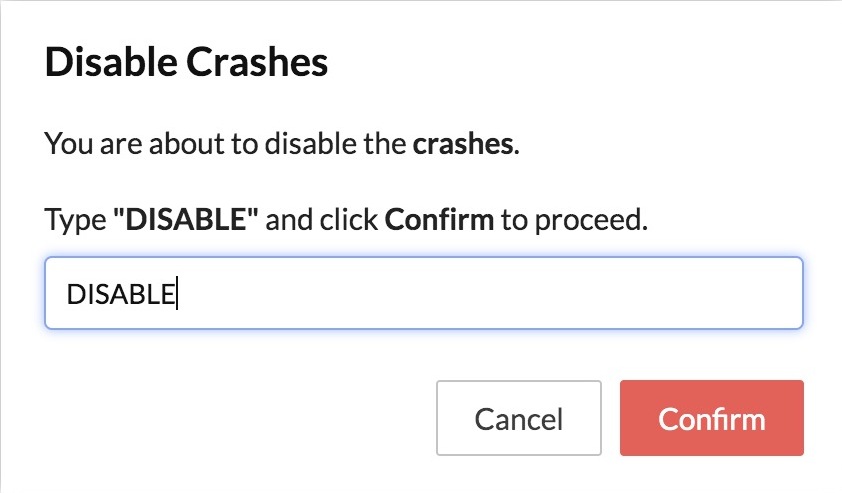
Crashes will be disabled and you will be navigated to the Crashes feature page. You can enable it again in the same way as discussed earlier .
Yes
No
Send your feedback to us