Set Up Client
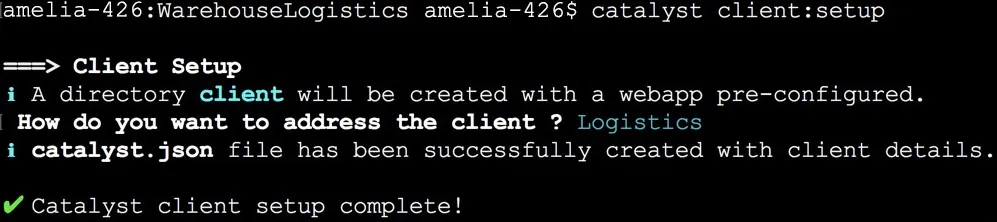
You can setup the client component from the CLI by navigating to your project directory and executing the following command:
The procedure is the same as initializing the client directory during the project initialization. The CLI will prompt you to provide a name for the client component of your project. Enter a name and press Enter .

The client directory will now be created in the project’s directory and the catalyst.json file will be updated with its information.
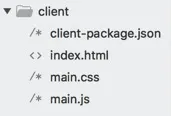
The client directory will be set up with an index.html, a main.css, and a main.js file, along with the client-package.json configuration file. You can learn about the client directory structure in detail from the Project Directory Structure help page.
- You can add any number of sub-folders and files in the client’s directory like HTML files, JavaScript files, logo images, and more. However, the configuration files and dependencies need to be in the client directory’s root.
- You can also pull a hosted web client from the console to your local system using the catalyst pull command.
After you build and test the client component, you can either host it through Web Client Hosting in the Catalyst console or deploy the client from the CLI to the remote console.
Last Updated 2025-02-19 15:51:40 +0530 IST
Yes
No
Send your feedback to us