Initialize the Client
Introduction
Catalyst enables you to develop three types of native client applications that can be hosted on Web Client Hosting:
- Angular Applications
- React Applications
- Basic Client Applications
Catalyst provides ready-to-use templates for Angular and React client apps. When you initialize these apps, Catalyst will handle the entire setup procedure and prompt you to install the required dependencies. The Angular and React applications will be created in your project directory in their boilerplate structure.
The basic client app is a simple version of the Catalyst client that will be created in its own standard structure. The installation procedures will differ for all three types of client apps.
-
You can add any number of sub-folders and files in the client’s directory like HTML files, JavaScript files, logo images, and more. However, the configuration files and dependencies need to be in the client directory’s root.
-
You can also pull a hosted web client from the console to your local system using the catalyst pull command.
-
Web client hosting is suitable for basic and simple web applications. You can explore our robust frontend development service, Slate, that lets you seamlessly deploy web applications in a variety of popular JavaScript frameworks like Next.js, Angular, React, Vue, and more. Slate also provides automated deployments from GitHub, GitLab, or Bitbucket, and offers a host of other advanced features.
If you initialize the client directory for your project, Catalyst will initiate its setup process after the functions initialization.
Select one of the client types to initialize for your project from the options, then press Enter.

Angular Applications
Angular is a front-end application design framework and development platform for creating efficient and sophisticated single-page apps. Angular follows a component-based architecture where the app is decoupled into individual, reusable functional and logical entities. The building blocks of Angular such as the components, templates, directives, dependency injections are combined into modules, that together form an Angular application. You can learn more from the official Angular documentation .
It is recommended that you have Angular CLI installed in your local machine for developing Angular client applications. This CLI handles the installation and configuration of the required dependencies automatically, and enables easy development and testing of client applications. Catalyst will automatically initiate its installation during the client initialization process.
Catalyst also provides a plugin for the Angular app, zcatalyst-cli-plugin-angular , which is installed when the Angular app is initialized. This plugin, compatible with the latest LTS version of Angular, handles several operations involved in the development and testing of the Angular app internally. This eases and quickens your application building task, and enables you to focus on the app’s functionality instead of its setup and maintenance.
If you select Angular Web App from the options while initializing the client, Catalyst will initiate the standard setup procedure for Angular applications. The app will be created in the latest LTS version.
- The CLI will prompt you to provide a name for the client component of your project. Provide a name for the client and press Enter .

- If Angular CLI is not already installed in your system, Catalyst will automatically initiate a temporary installation of its LTS version. It will also install a Catalyst-specific schematics package that is required to generate an Angular app.
Enter “Y” to confirm the installation of the required packages when prompted, then press Enter .
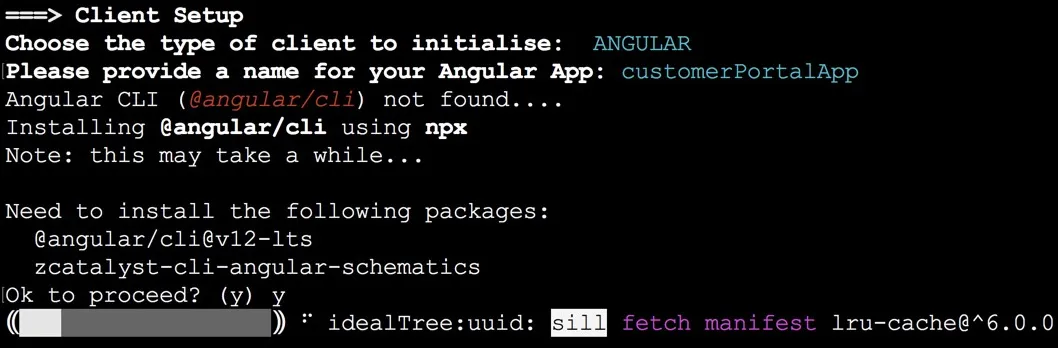
If the required packages already exist in your local system, the setup will skip to the next step.
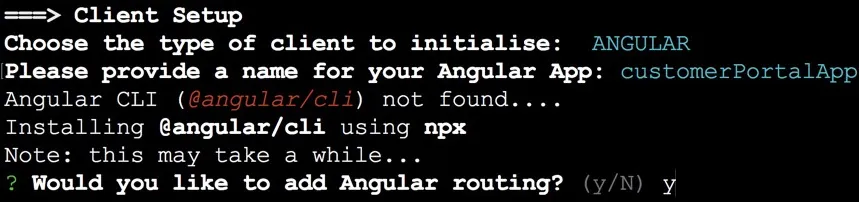
- You can enable Angular routing to handle navigation between the different views you create. Enter “Y”, then press Enter when prompted.
- You can style Angular components with any of the supported stylesheet formats as shown below. Select a stylesheet format for your app, then press Enter .
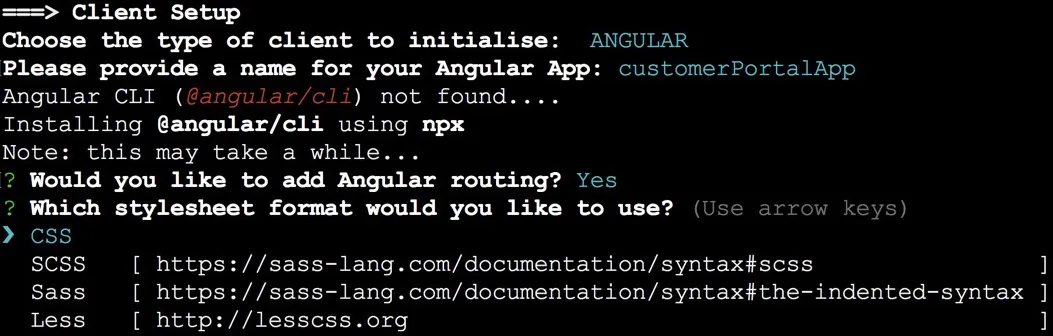
The routing and stylesheet prompts fall under the default set up procedures of Angular applications.
Catalyst will then initiate the installation of the Angular application files, configuration files, and dependencies in their boilerplate structures. The node modules required for the development of the app are also installed through NPM.
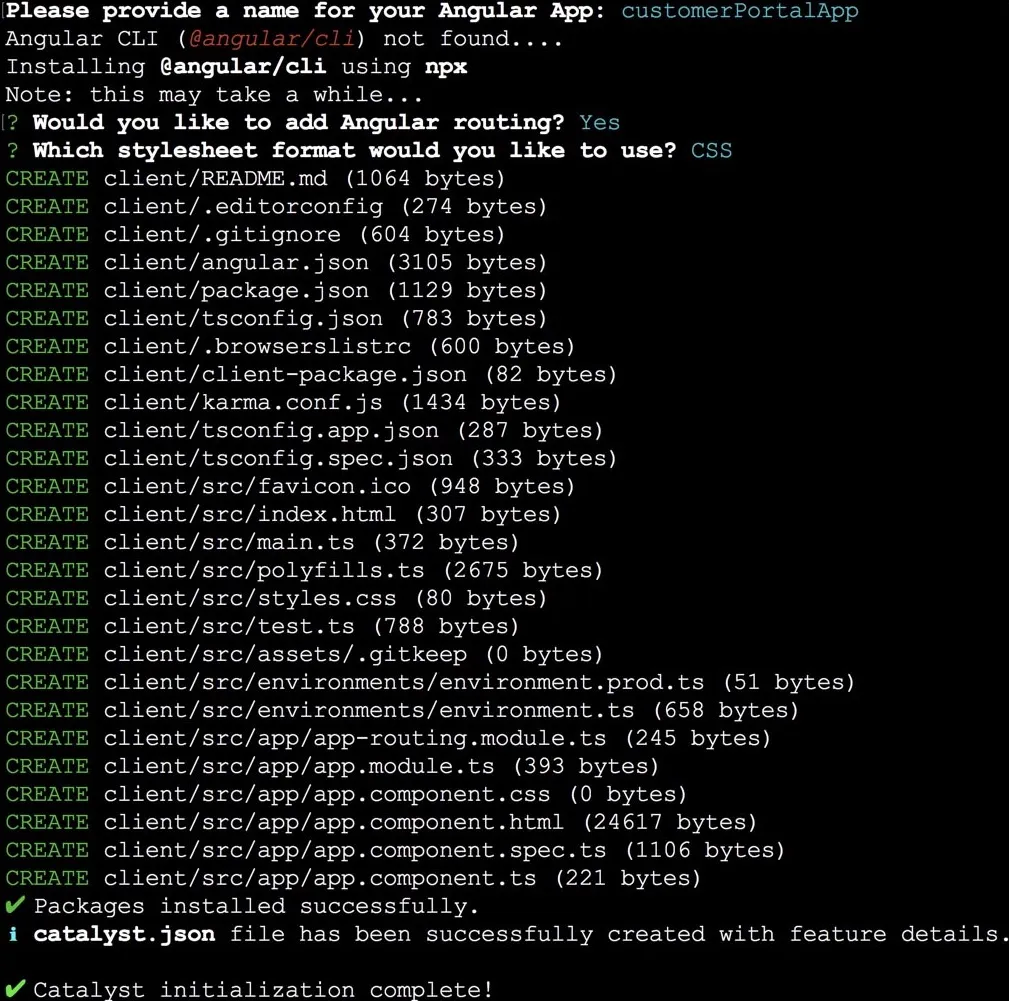
The Angular client’s directory is now set up with the standard application files, environment files, the plugin file, stylesheets, index.html , and TypeScript classes as shown below. The required node modules, JSON configuration files, and dependencies, including client-package.json specific to Catalyst, will also be present in the directory.
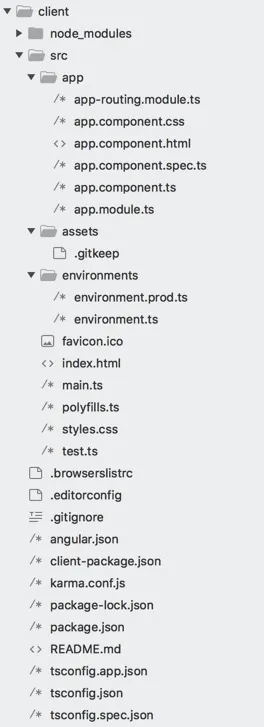
After these packages are installed, the catalyst.json configuration file will be updated with the client package details, including the path to the plugin file specified earlier. You can learn more about the Catalyst configuration files and the client directory from the Project Directory Structure help page .
You can learn about testing and deploying an Angular app from the Catalyst CLI from the Serve Resources and Deploy Resources help pages.
React Applications
React is a front-end JavaScript library that enables you to build interactive applications and user interfaces. Its component-based architecture efficiently manages and renders the states in your application upon build. React provides ease and flexibility in developing single page client applications, and offers reusability of its components. You can learn more from the official React documentation .
Catalyst provides a plugin for the React app, zcatalyst-cli-plugin-react , which is installed when the React app is initialized. This plugin contains certain node modules and library files that handle several operations involved in the development and testing of the React app internally. This allows for a faster and efficient application building process.
When you initialize a React app, Catalyst will automatically facilitate its creation and configuration through the Yarn package manager by default. If you don’t have Yarn installed in your local machine, the React app will be set up using NPM. Catalyst enables the handling of all configuration tasks such as linking and resolving packages, and installing dependencies, through the package manager automatically.
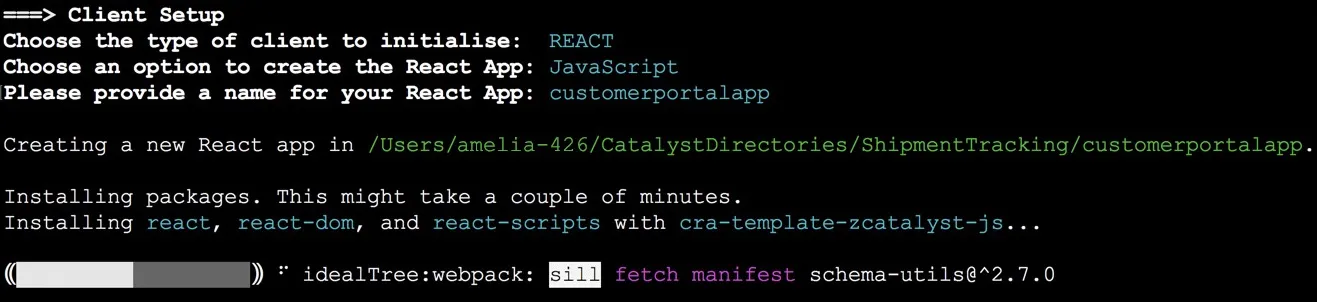
If you select React Web App from the options while initializing the client, Catalyst will initiate the standard setup procedure for React applications.
-
You can create the React app with the standard JavaScript template or a TypeScript template. TypeScript is a typed superset of JavaScript that gets transpiled to plain JavaScript during compilation. Catalyst provides you with these options during the initialization to make the set up procedure easier and quicker.
Select JavaScript or TypeScript from the options.

-
The CLI will prompt you to provide a name for the client component of your project. Provide a name for the client and press Enter.

This will initiate the installation of the necessary React packages such as react , react-dom , and react-scripts through a Catalyst-specific CRA template . This base template will execute the create-react-app command.
The package manager will then initialize a git repository for the React app, and install template dependencies.
After the initialization is complete, you can find the React application files created in their boilerplate structures in your project directory.

The React app directory structure will contain the application source files, public files, configuration files, node modules, and other dependencies including client-package.json specific to Catalyst as shown below.
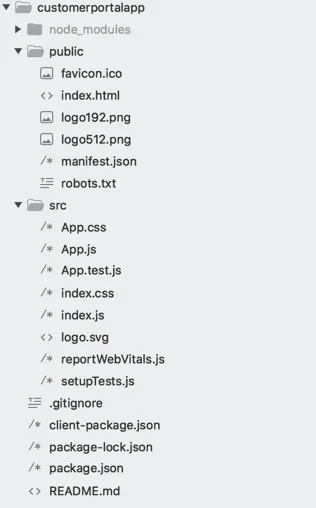
After these packages are installed, the catalyst.json configuration file will be updated with the client package details, including the path to the plugin file specified earlier. You can learn more about the Catalyst configuration files and the client directory from the Project Directory Structure help page .
When you serve or deploy the React app, a build folder will be created in this directory which will contain all the compiled files as per the standards of React.js.
Basic Client Applications
The basic client application is a simple version of the Catalyst client that is created without any external frameworks or libraries. You can create simple, functional web client applications by choosing the Basic Web App option during the client initialization.
The CLI will then prompt you to provide a name for the client component of your project. Provide a name for the client and press Enter .

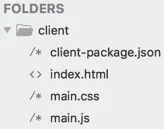
The client directory will now be created in the project’s directory and the catalyst.json file will be updated with its information.

The basic client’s directory will be set up with the main index.html file, main.css, main.js , and the client-package.json configuration. You can learn about the client directory structure in detail from the Project Directory Structure help page.
You can serve the client through a localhost to test it, and then deploy it to the cloud, or host it from the console directly.
Last Updated 2025-12-09 21:51:15 +0530 IST
Yes
No
Send your feedback to us