Implementation
This implementation section acts as a step-by-step procedure guide to working with Zia AutoML. As discussed earlier, you can configure and train your model from the Catalyst console. Refer to the SDKand API documentation sections for implementing AutoML in your application.
Access AutoML
To access AutoML in your Catalyst console:
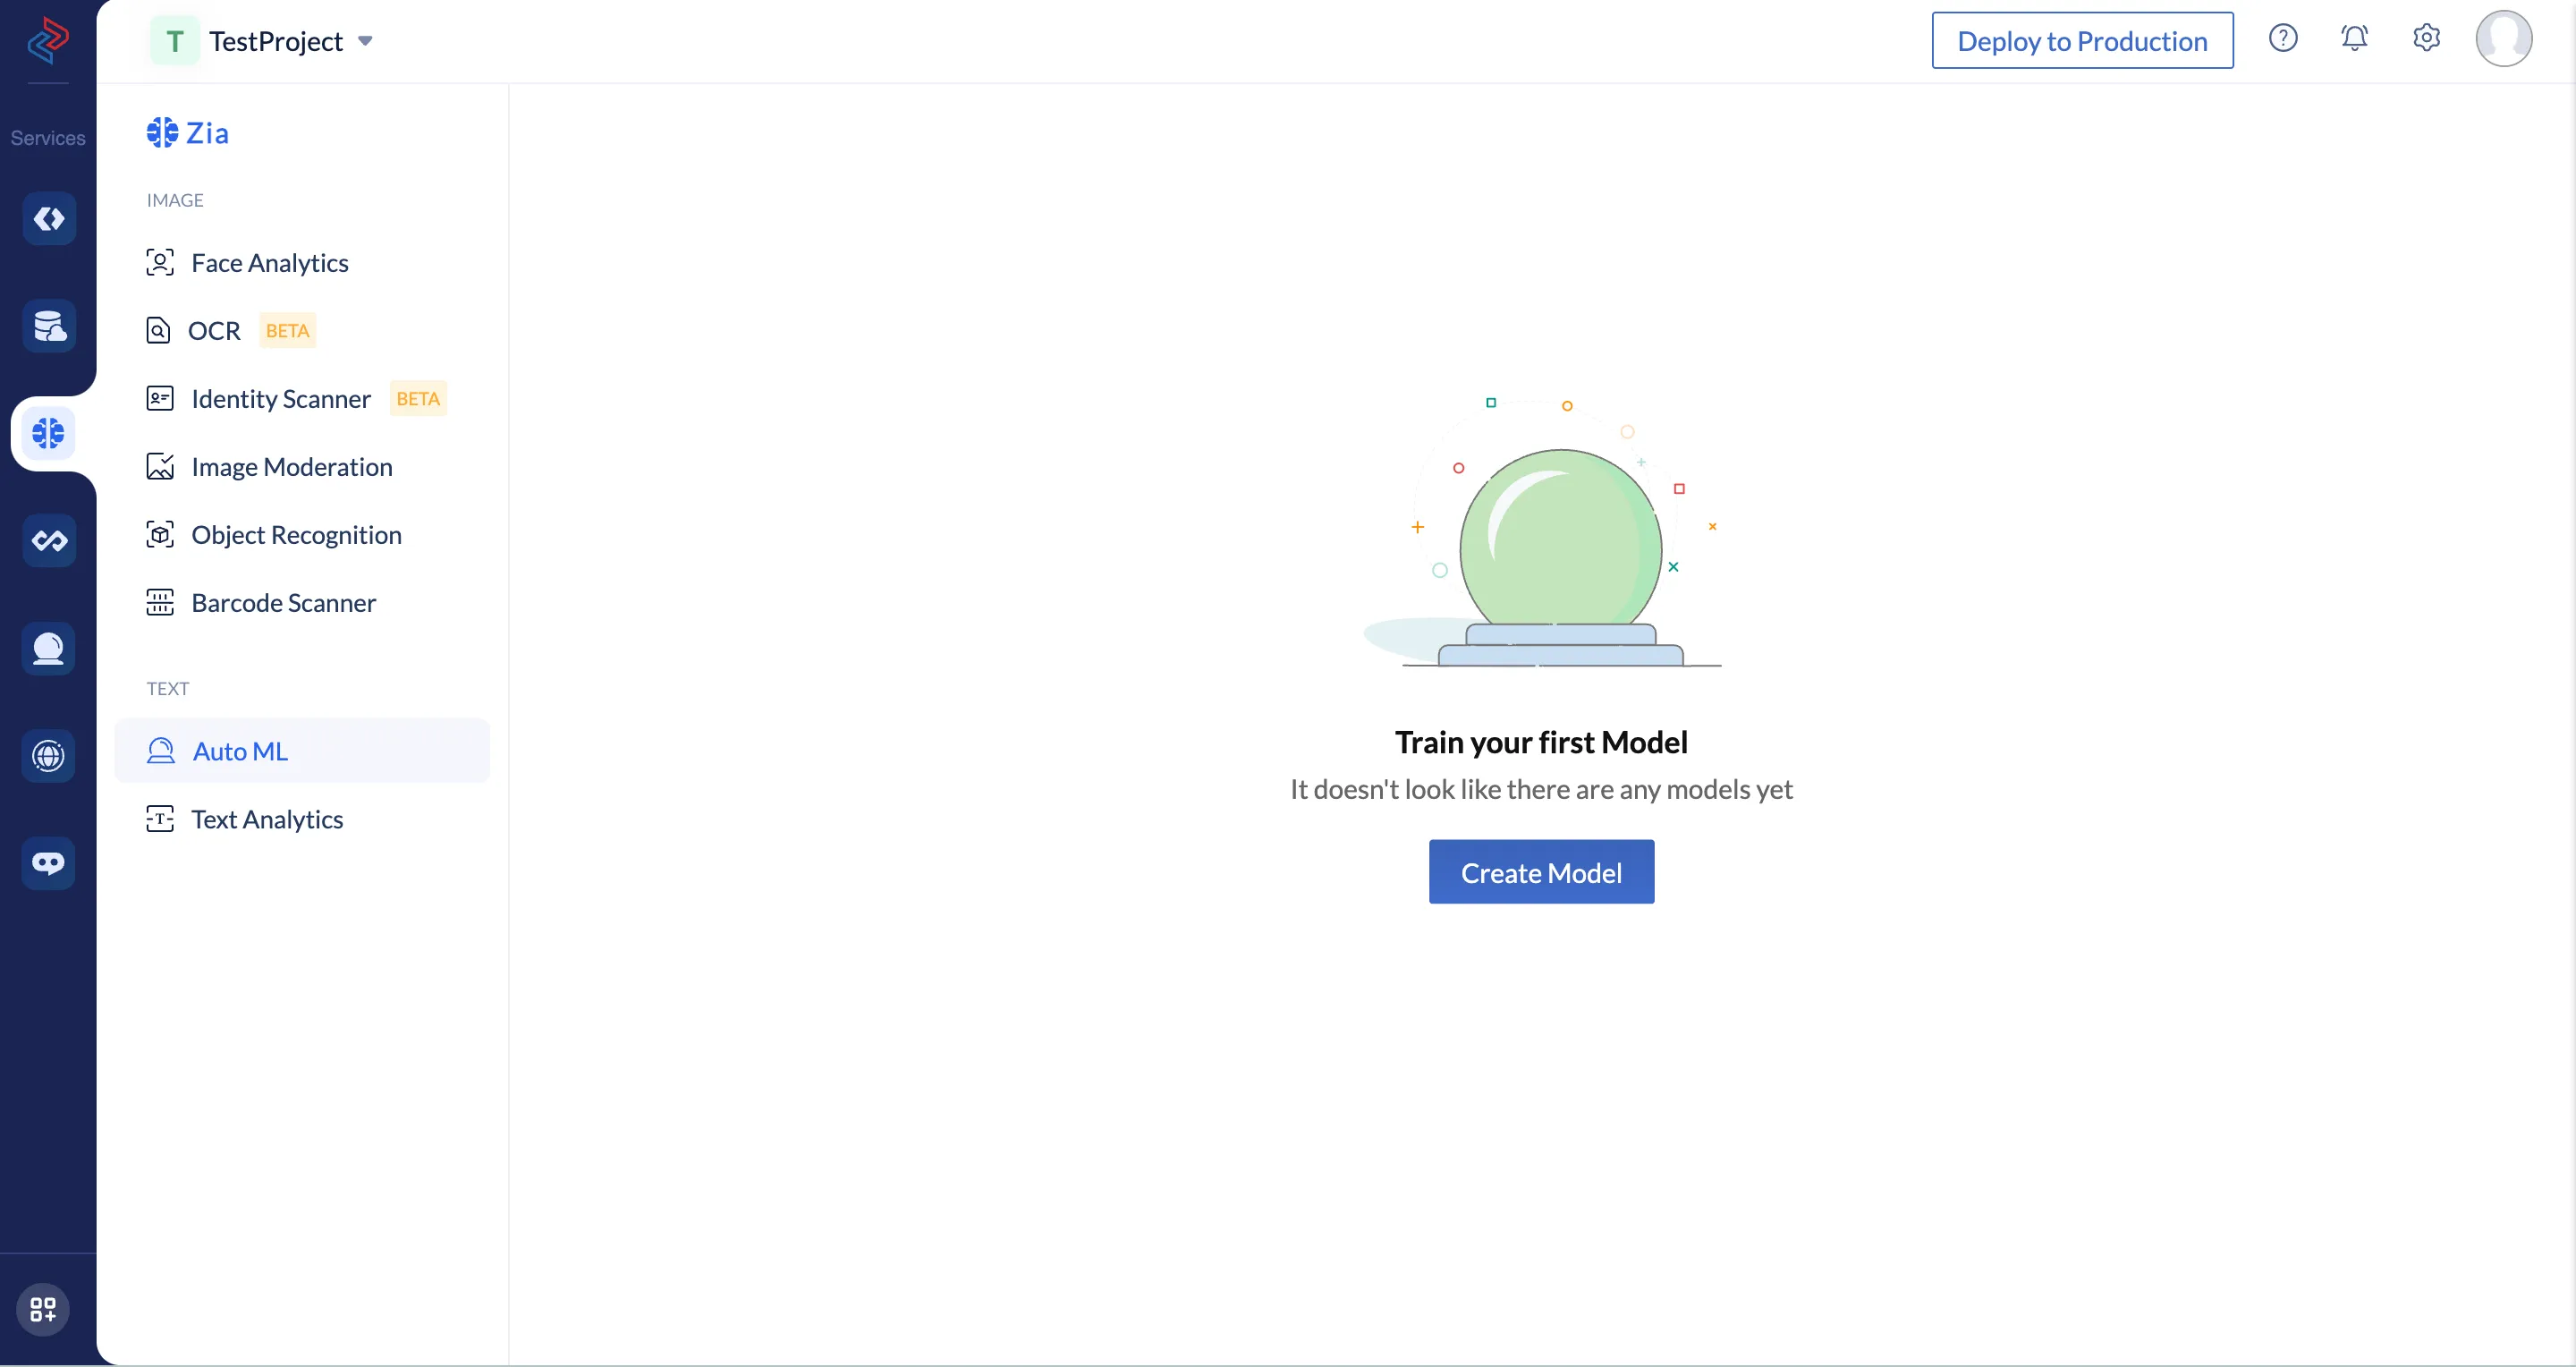
- Navigate to Zia Services in the left pane of the Catalyst console and click AutoML. This will open the AutoML feature where you can create the training models as required.
Create a Model
The process of creating a model and training it is divided into three stages. We will discuss them in order.
To create and train an AutoML model in Catalyst:
- Click Create Model from the AutoML page.
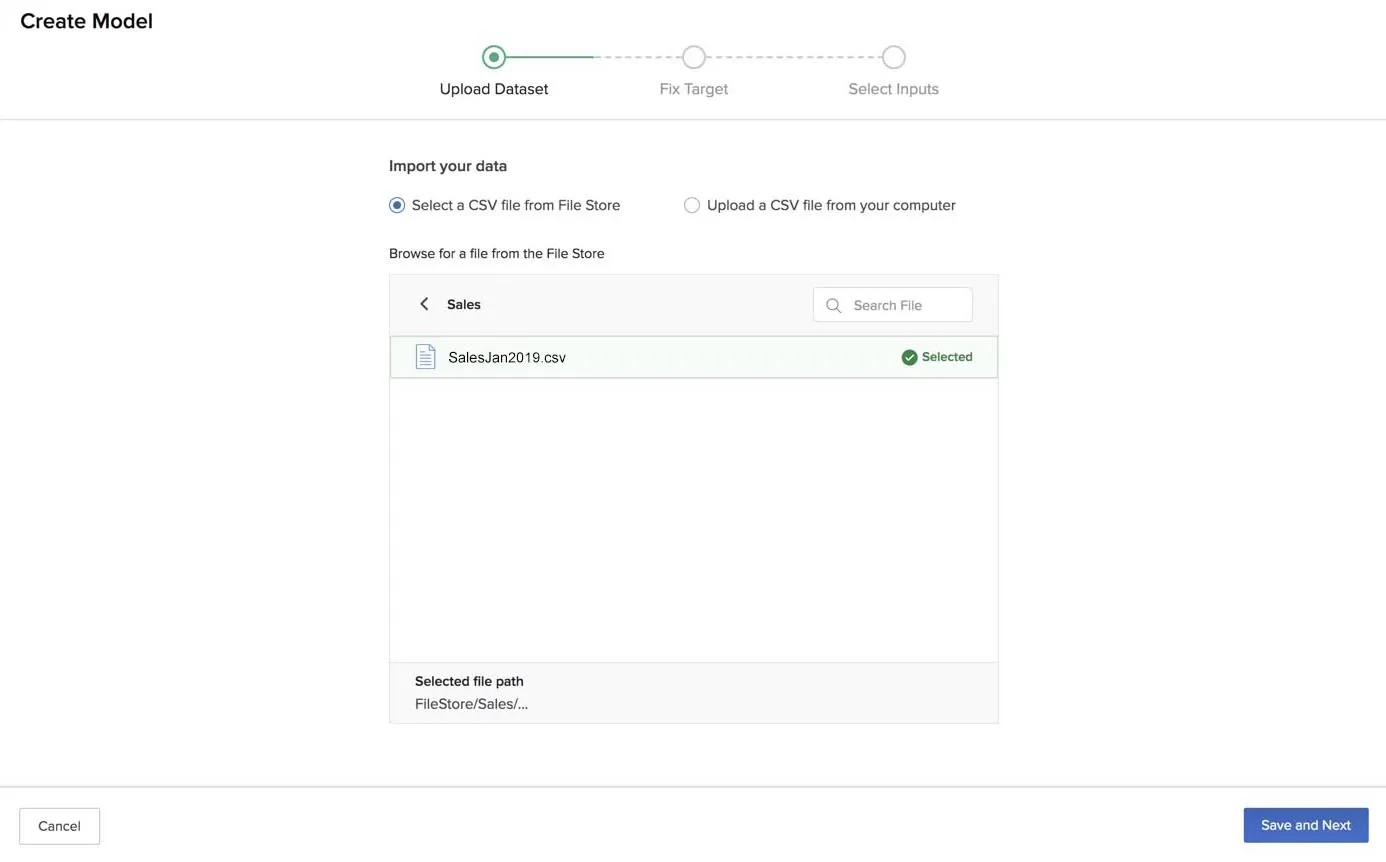
- The first step is to upload a dataset. You can import a dataset by either selecting a CSV file from one of your folders in the File Store or uploading a CSV file from your computer.
You can select a CSV file from the File Store by navigating to the folder it is in and clicking it.
You can upload a CSV file from your computer by browsing for it or dragging it to the drop box.
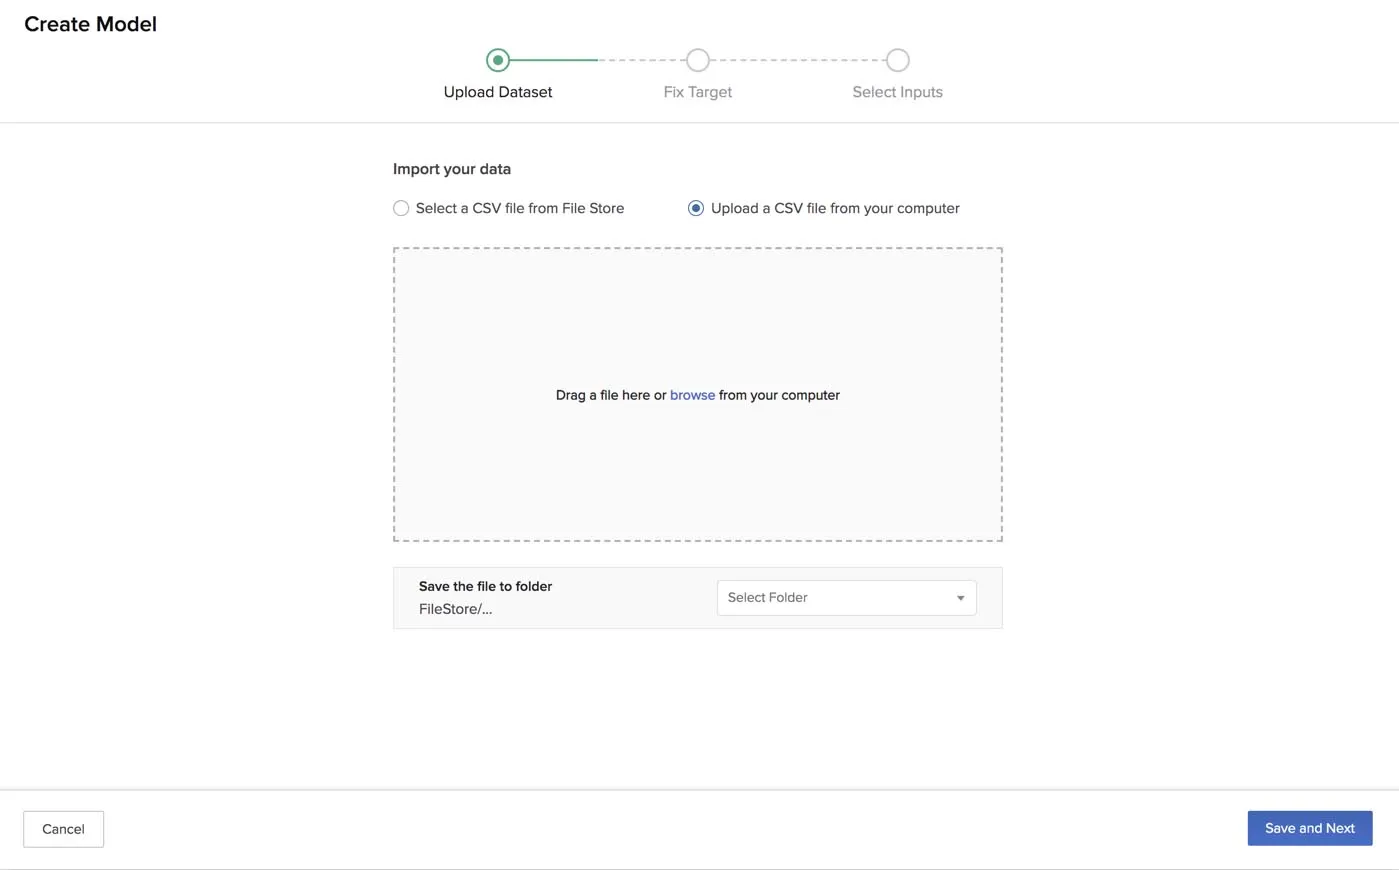
You must then save the CSV file in one of your folders in the File Store. You can select an existing folder or create a new folder.
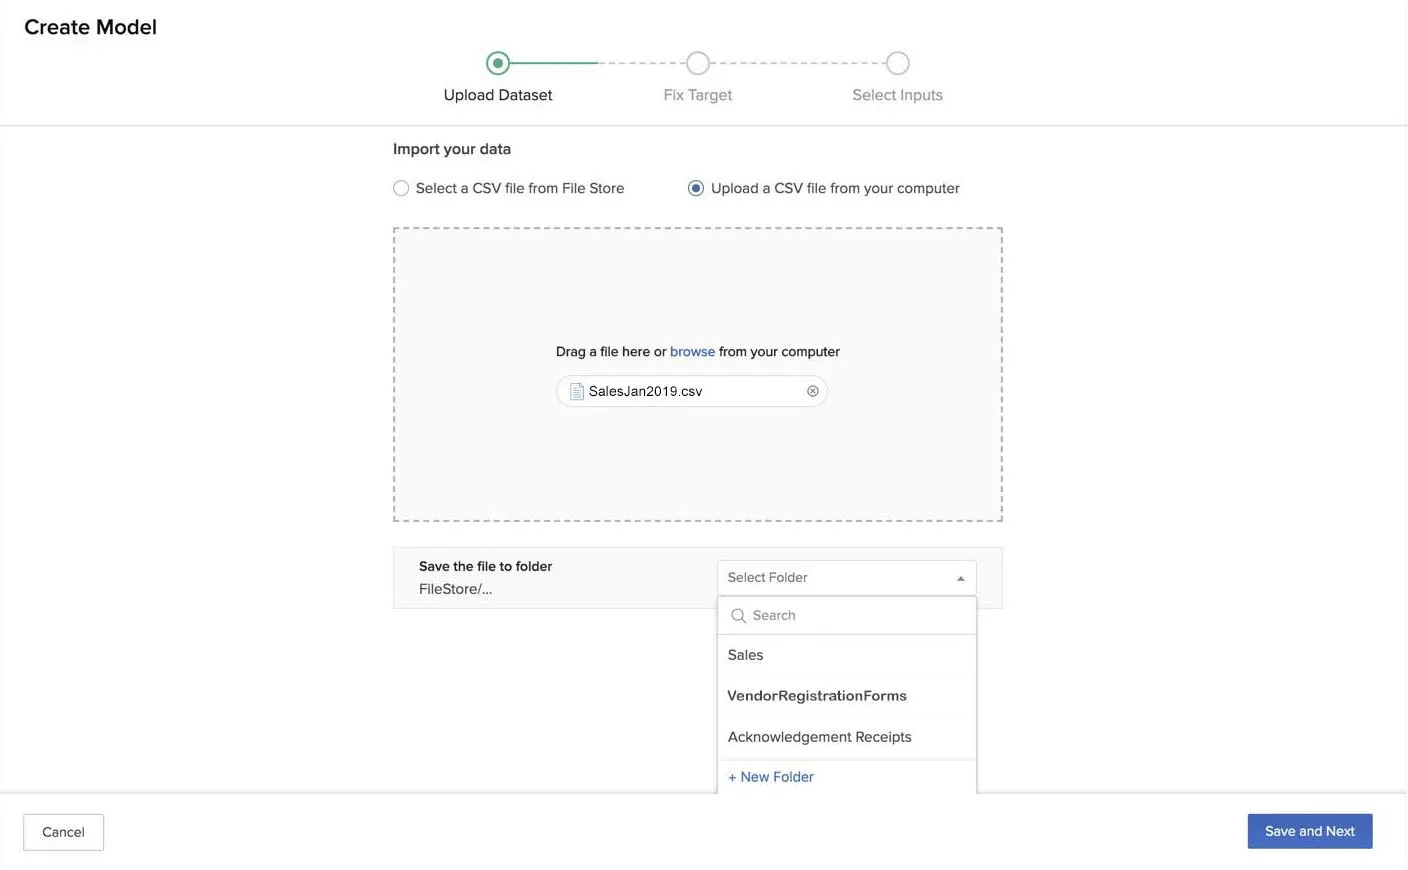
- The File Store selection window only displays CSV files in your folders.
- There is no size limit for the CSV file that you upload through your computer. The storage limits of the File Store apply to storing the CSV file in the File Store.
- Click Save and Next.
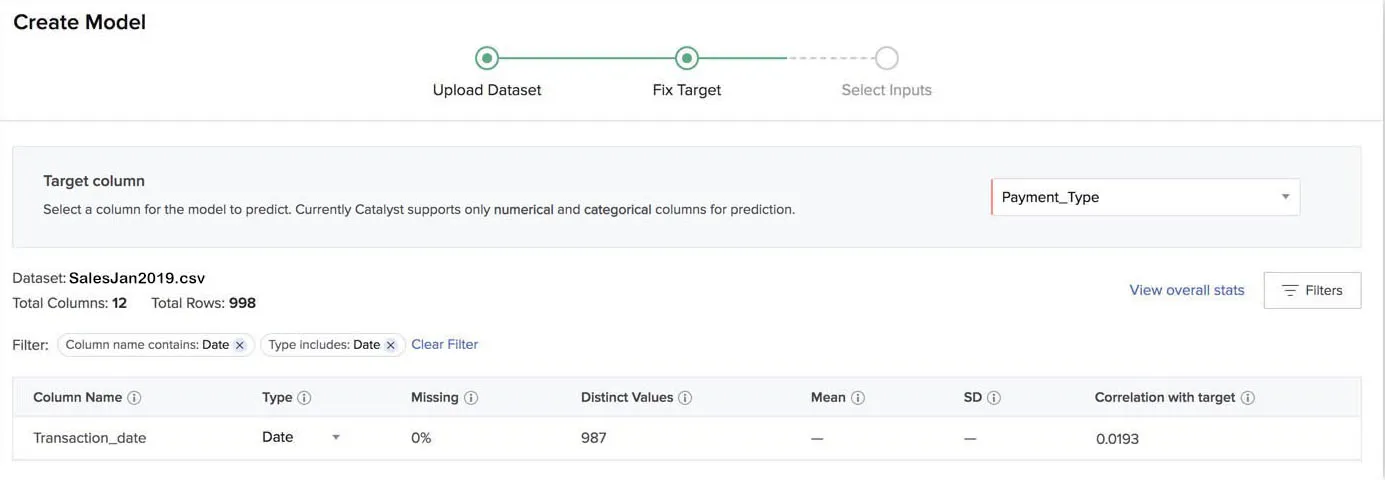
The next stage is to fix the target column.
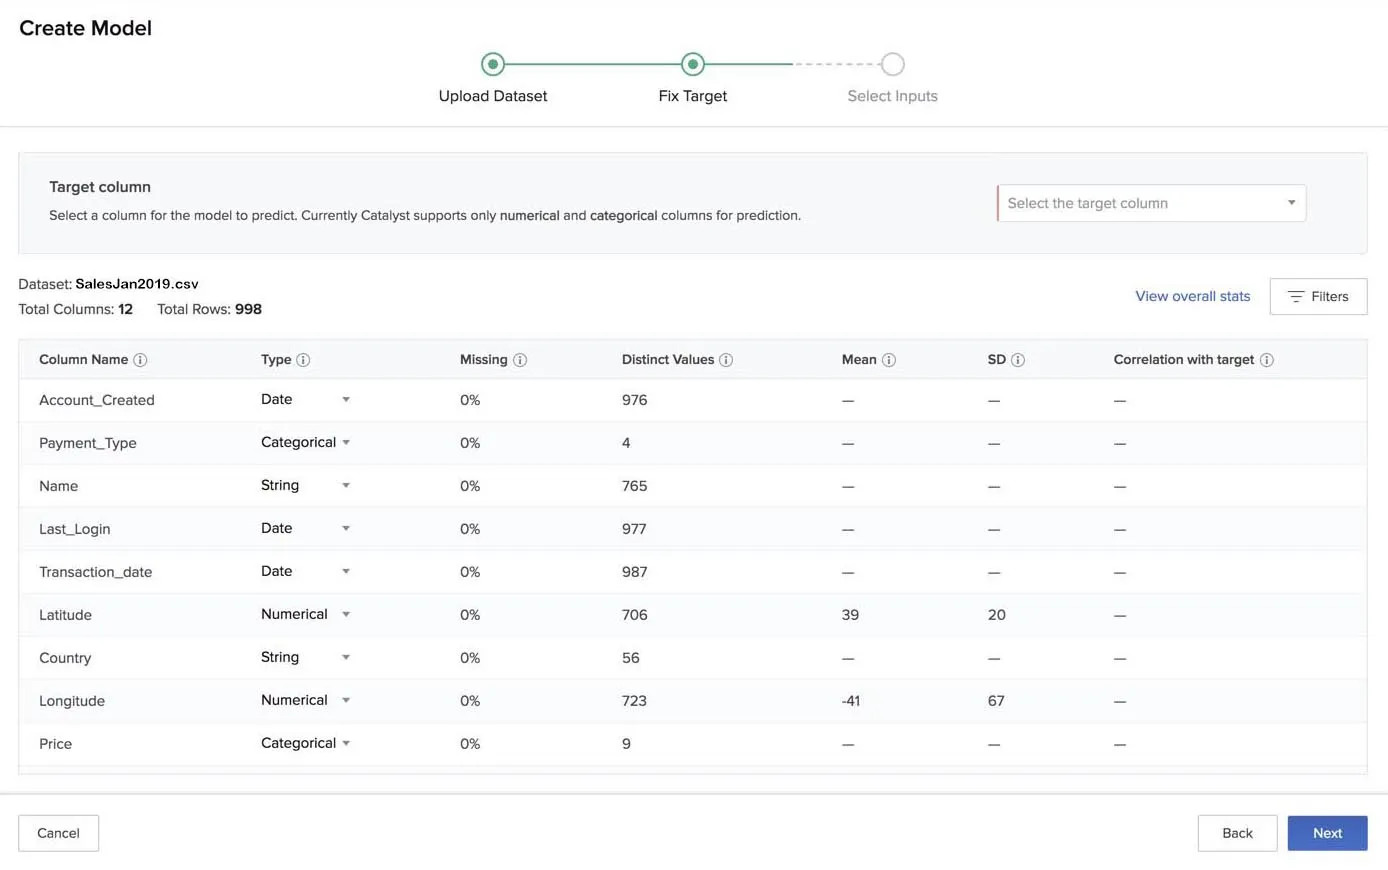
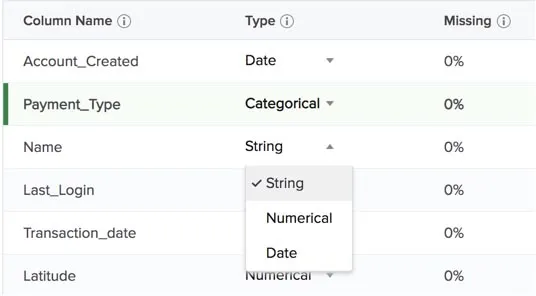
As discussed earlier, Zia analyzes the dataset you uploaded and determines the data type of each column in the CSV file after it is uploaded. The data types are determined based on the values in the column. For example, if a column has only two distinct values repeated in all the records, Zia determines its data type to be binary-class categorical.
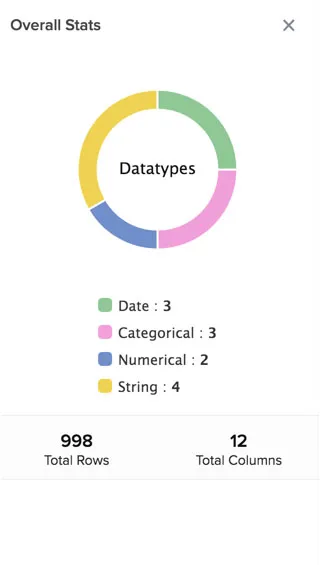
AutoML also calculates and displays the values for missing percentage and distinct entries for all columns, mean and SD for numerical columns. You can hover over the tooltip of a column for a short description of it.
You can also find other information such as the name, total number of columns, and the number of records in the dataset in the page.
- Select a target column from the dataset in the dropdown list.
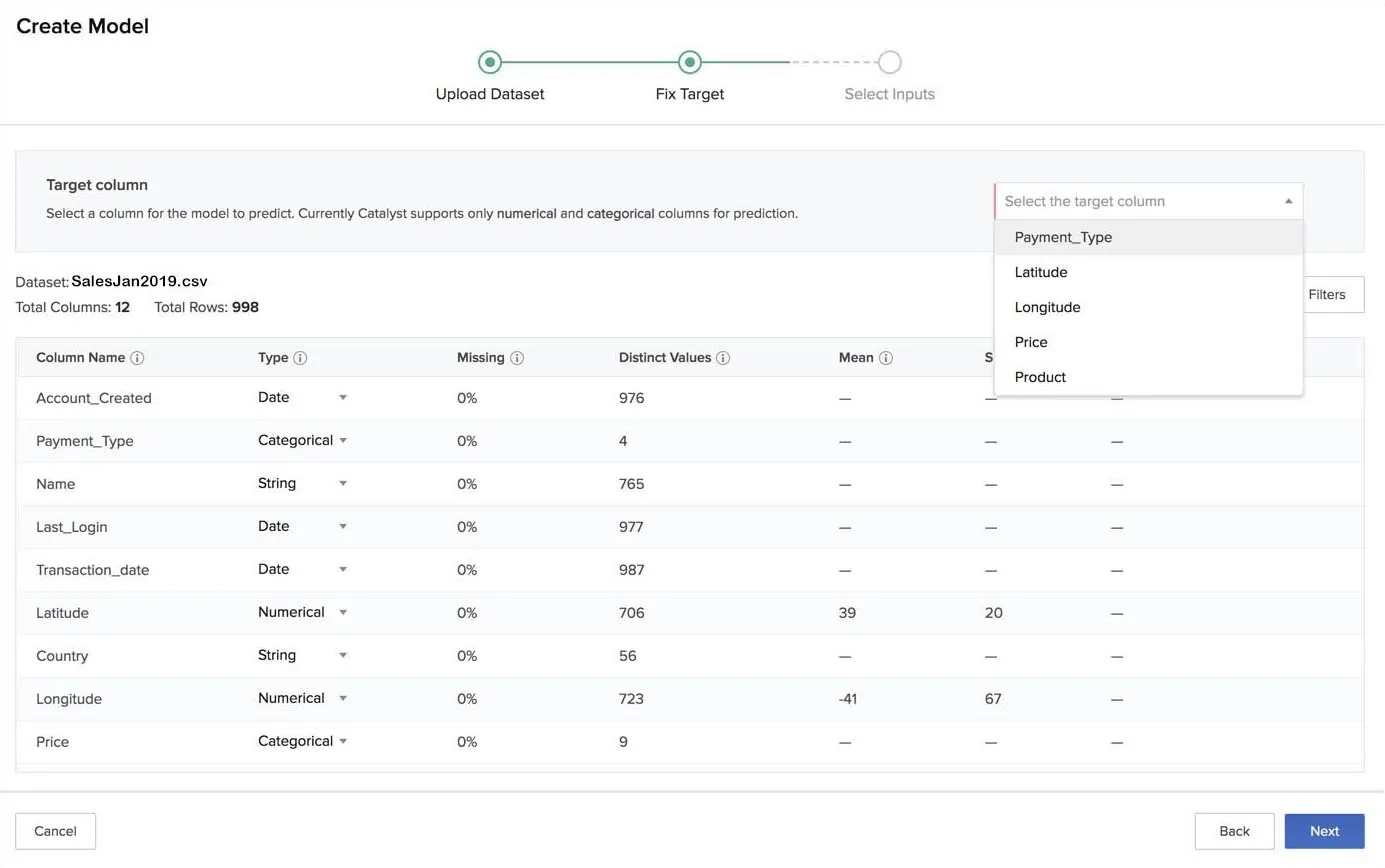
As mentioned earlier, you can only select a numerical or a categorical column as the target column to be predicted. The dropdown list only displays these columns.
Once you have selected a target column, the value of the correlation with the target will be calculated and displayed for every other column, except for the columns of the String type.
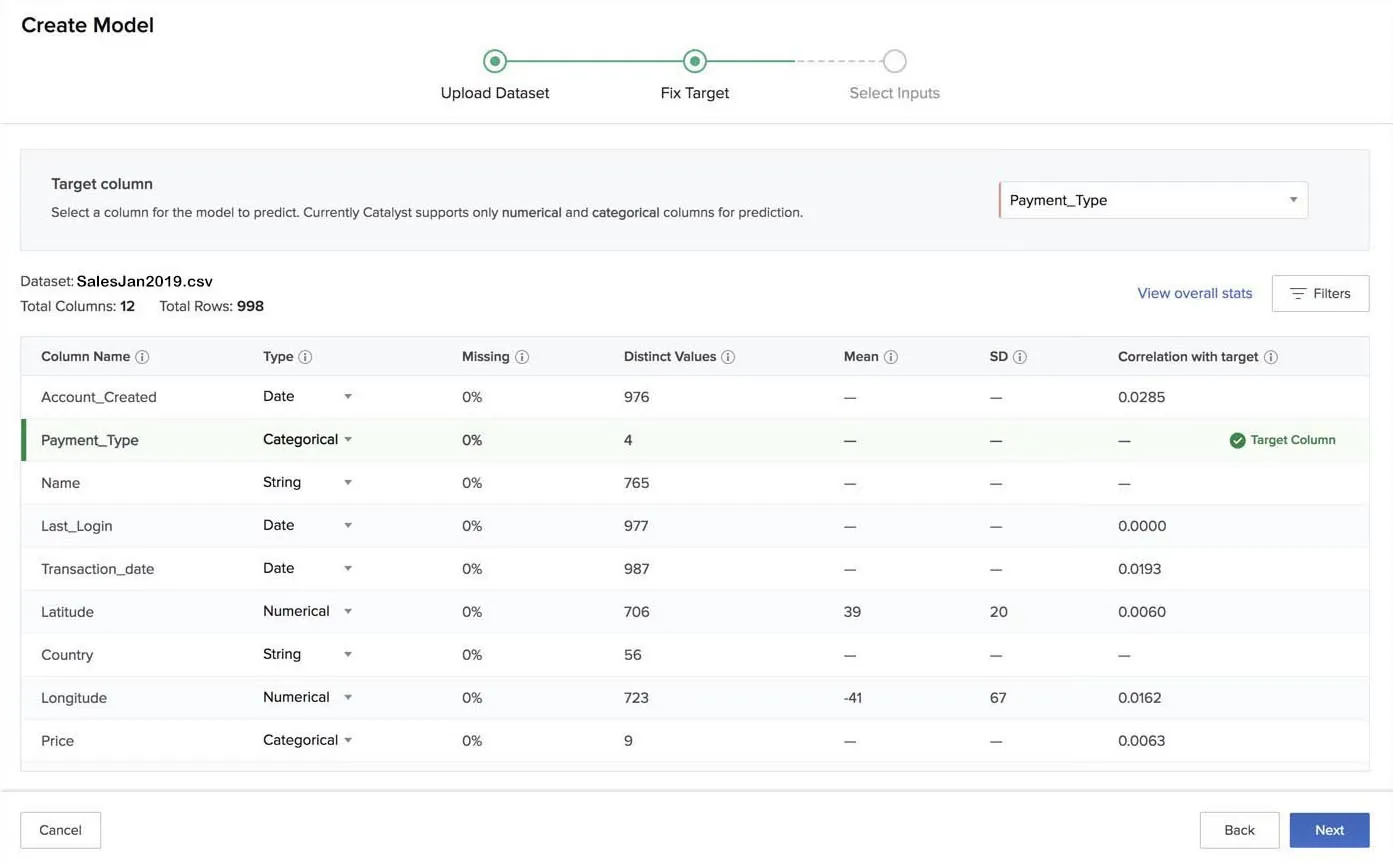
You can change the data type of a column if you think Zia predicted it incorrectly. However, if the data type you choose does not match the values of the column, you will receive an “invalid update” error message. For example, if you select the data type of a column whose values are completely numerical as Date, you will receive the error message.
You can filter the columns displayed in the page by clicking on Filters.
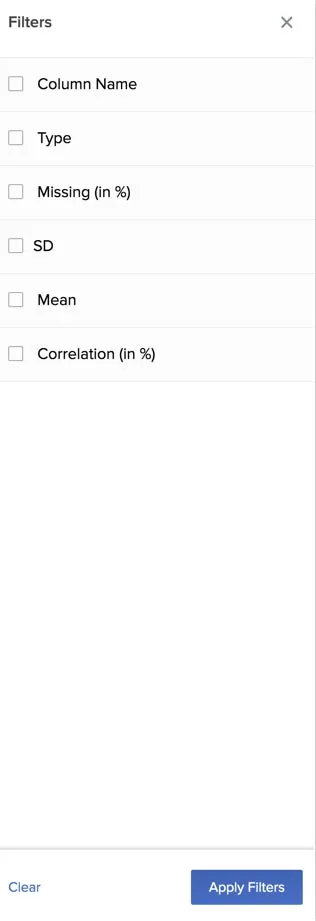
You can select the filters for each column characteristic based on the results you require.
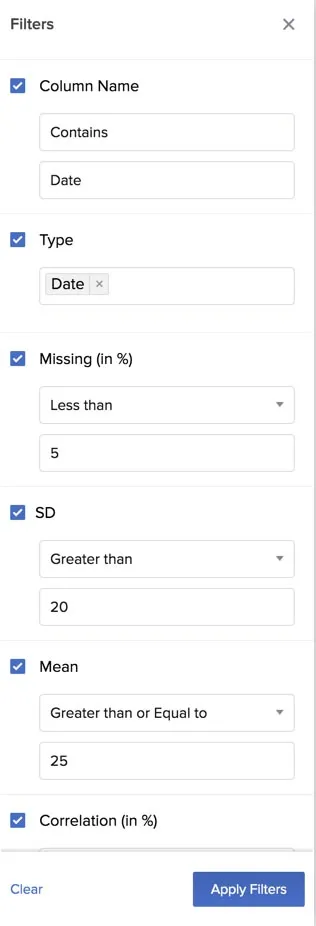
Select the filters and click Apply Filters to view the results.
- After you have configured the target column, click Next.
The final stage is to select the inputs. This page displays the model type and the name of the target column. As mentioned earlier, the model type is based on the data type of the target column that you select.
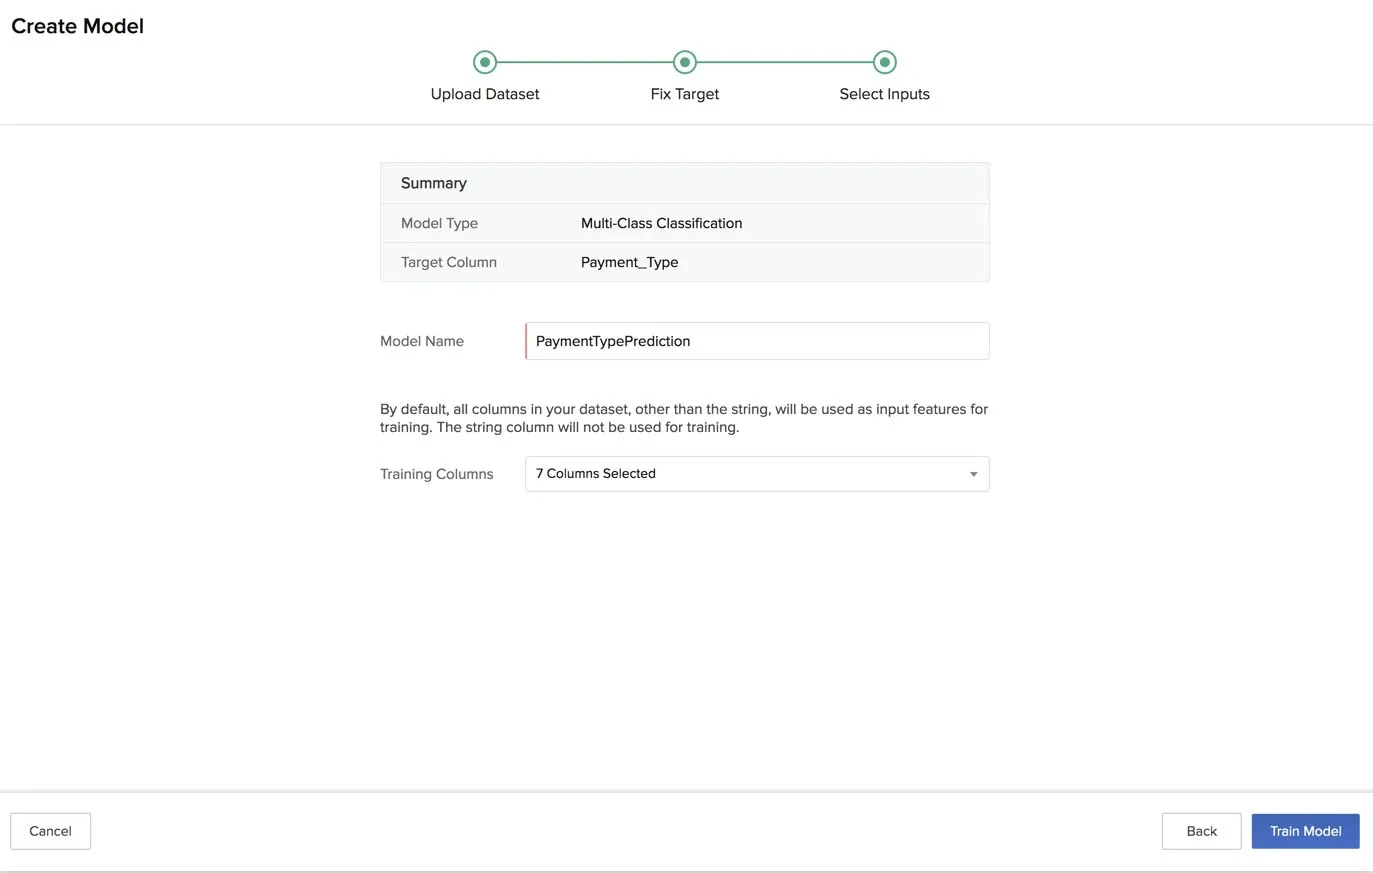
- Enter a name for the model.
- Select the columns to be used for training the model from the dropdown list. All columns in the dataset, other than the String type, are selected for training by default.
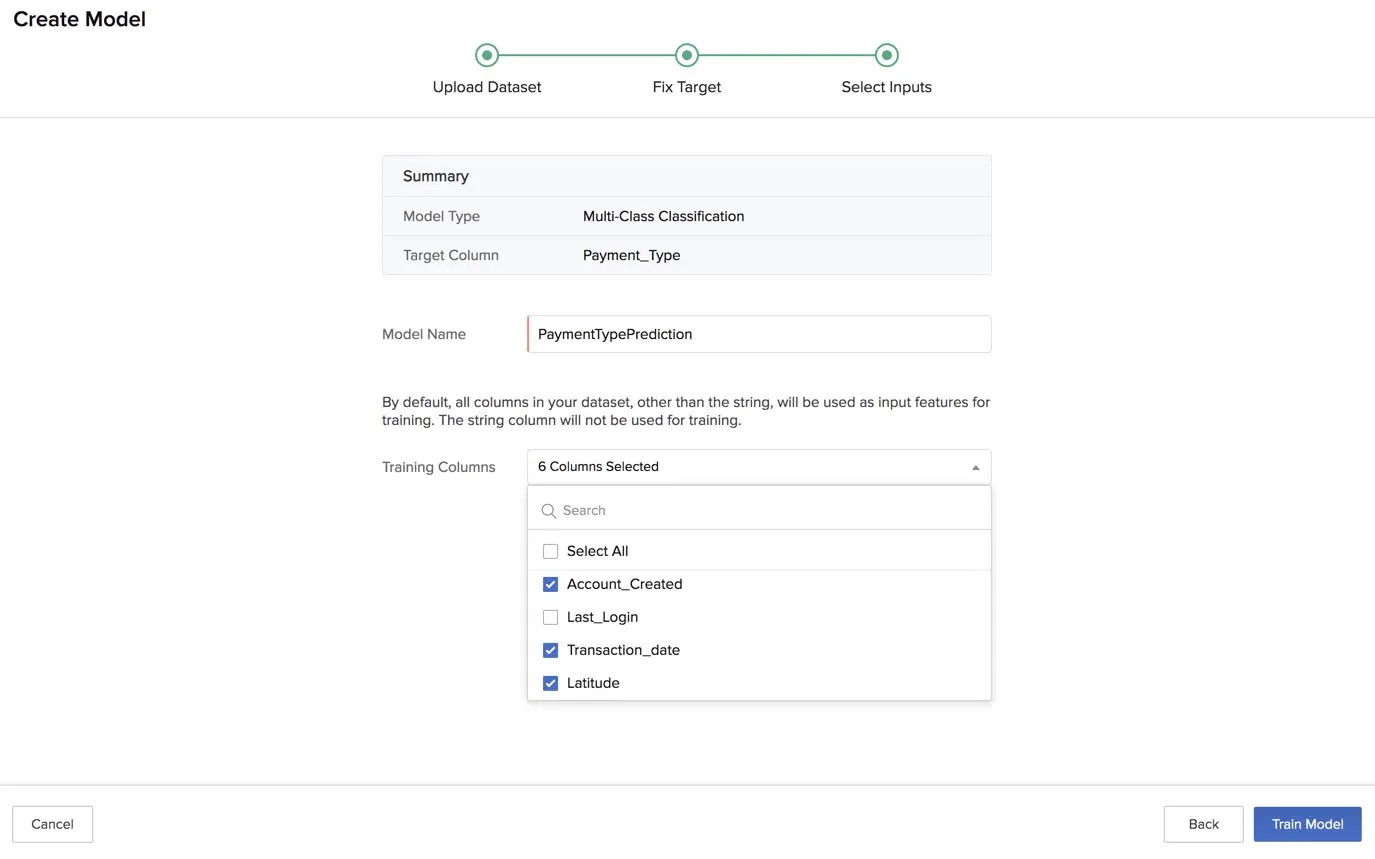
- After you have selected the required columns for training, click Train Model.
The console displays a training progress message while the model training is in progress.
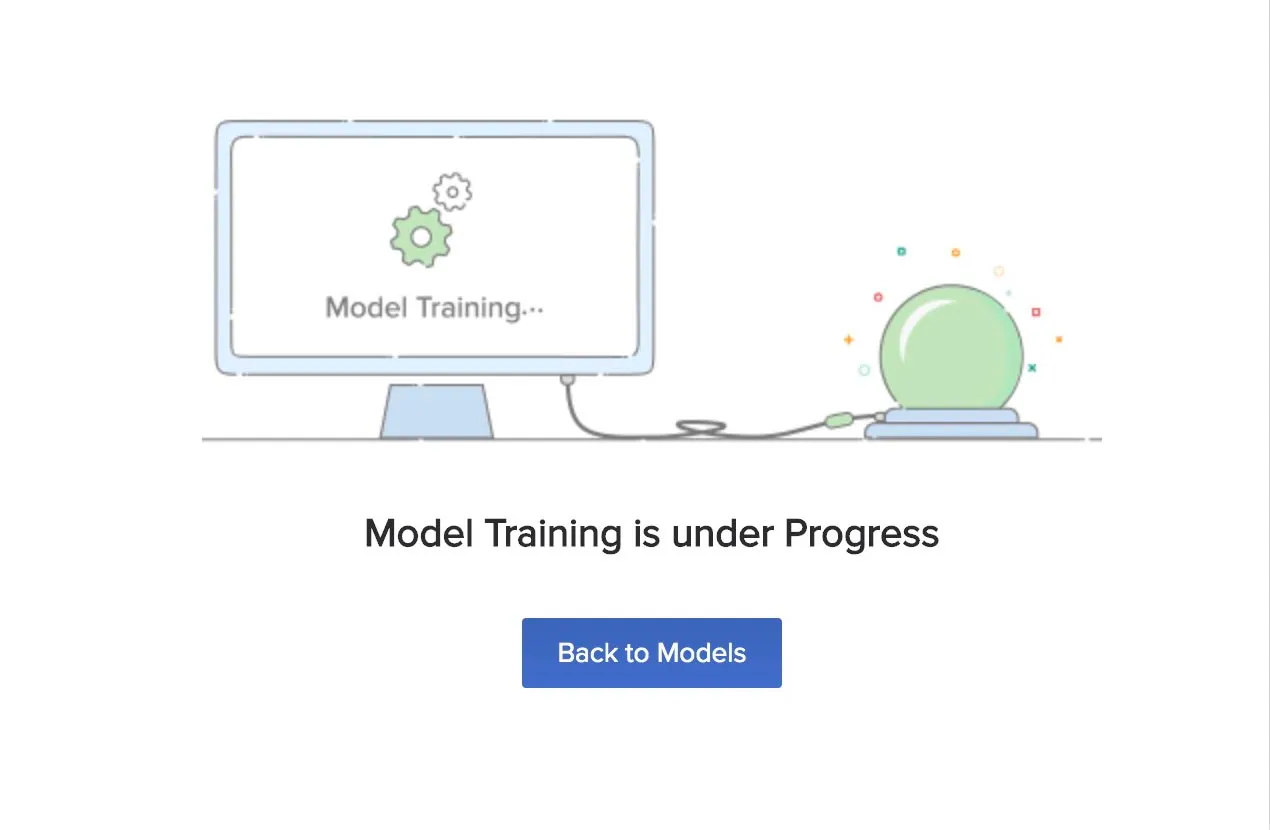
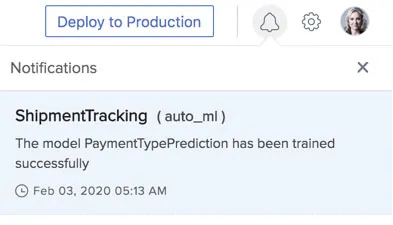
When the training is completed, you will get a notification in your Catalyst console alerting you of the success or failure of the model’s training.
You can now view the Evaluation Report and Model Prediction sections of the model. We will discuss these at the end of this section.
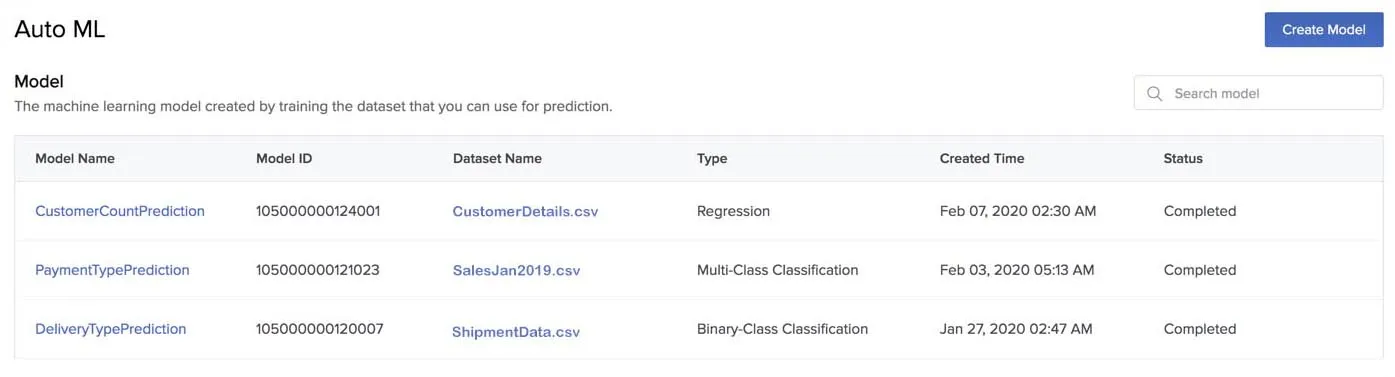
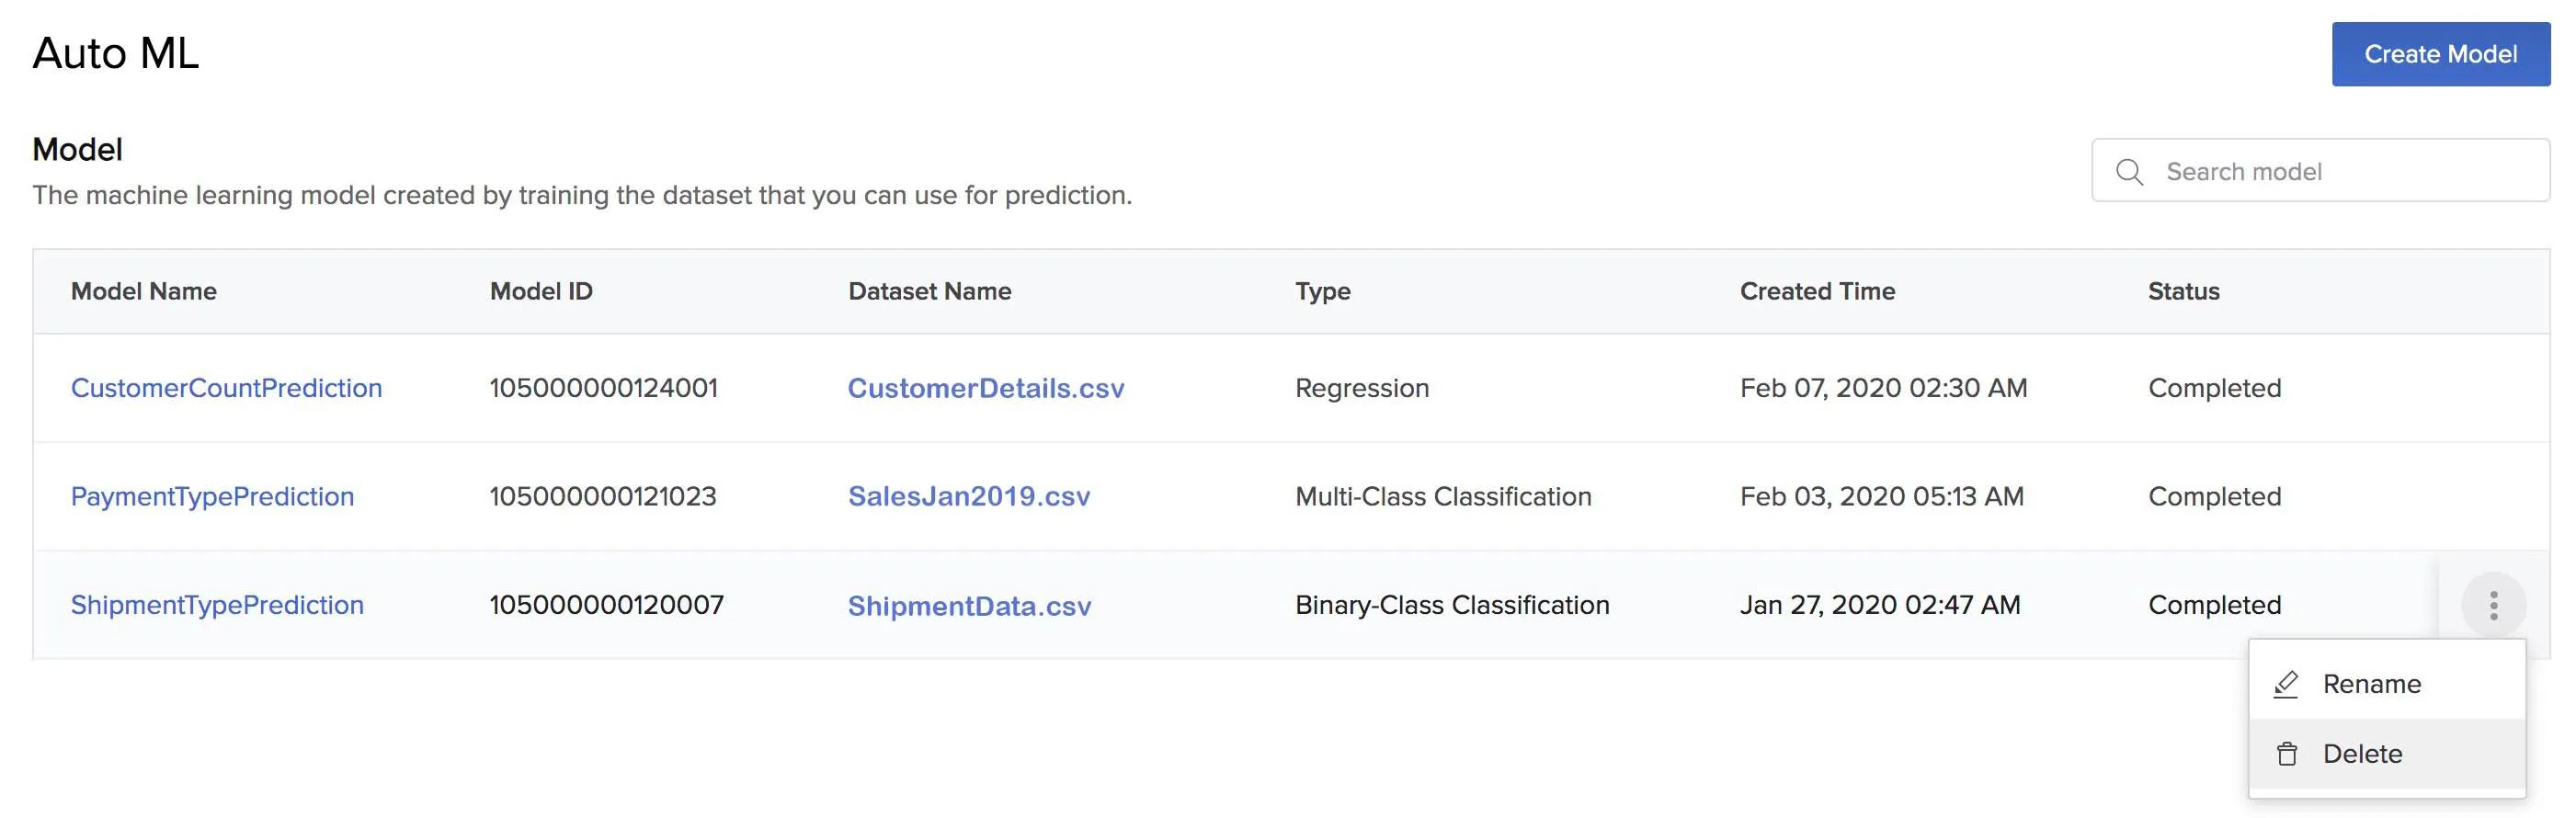
The created model is listed in the AutoML page. A unique Model ID is created for the model, which is used to refer to the model working with the API.
The page also displays details like the name of the dataset that is associated with the model, model type, created time, and status for each model. The status is shown as Completed for the models that have completed the training successfully. You can search for a model by its name using the search bar.
Rename a Model
To rename an AutoML model:
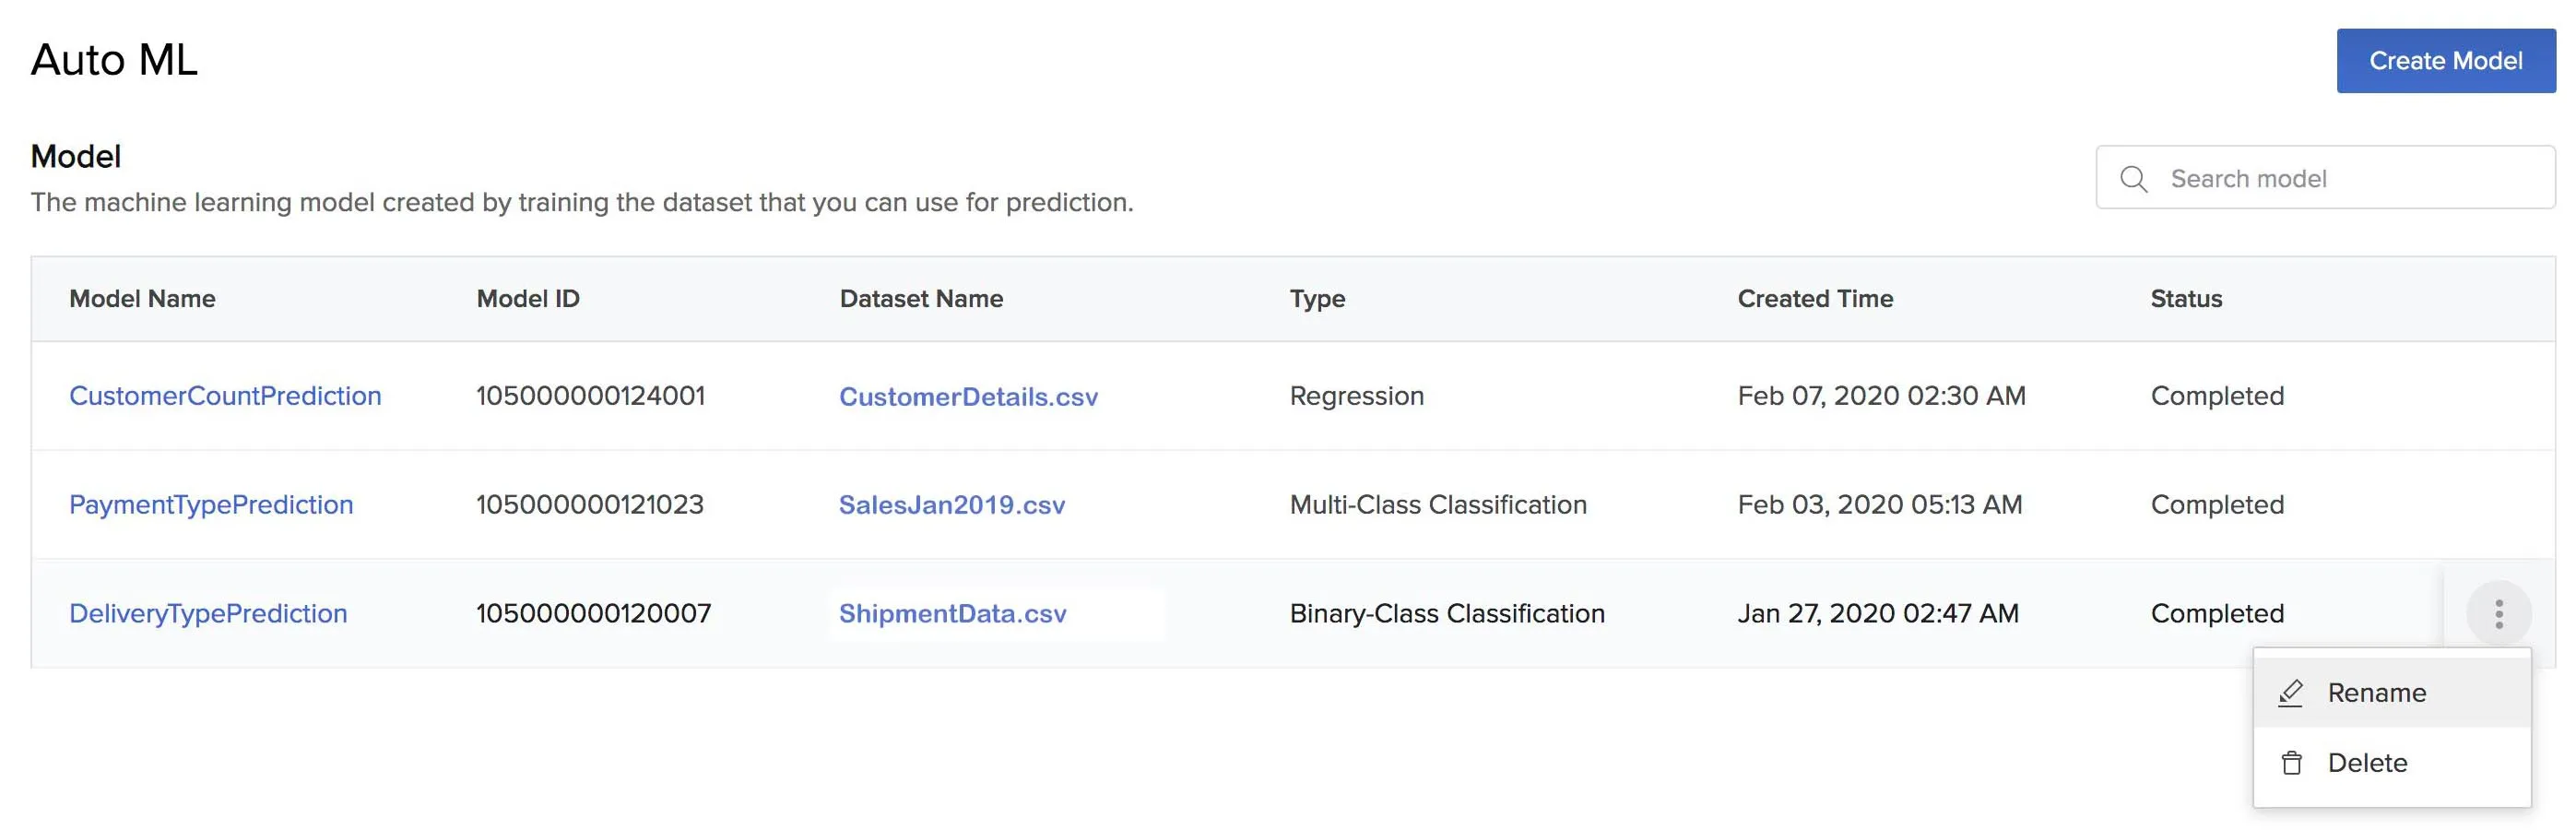
- Click the ellipsis icon for the model you need to rename from the AutoML page and click Rename.
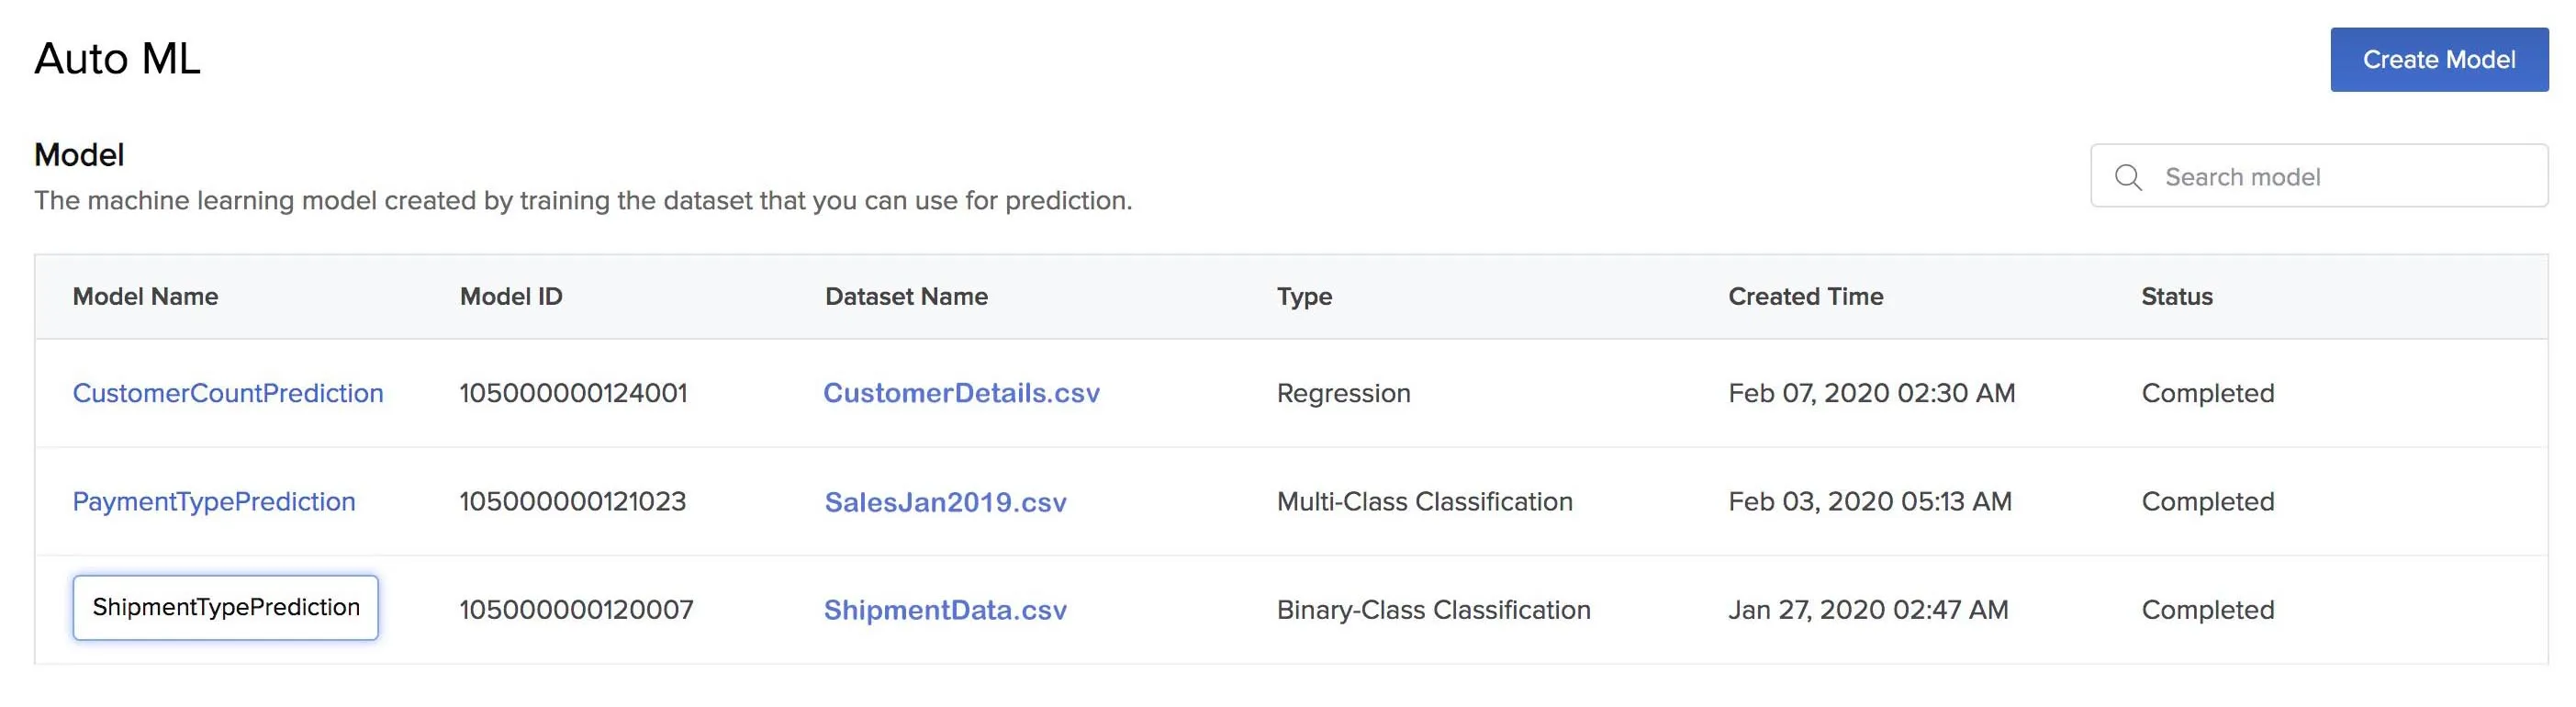
- Enter the new name for the model and press Enter.
Delete a Model
To delete an AutoML model:
-
Click the ellipsis icon for the model you need to delete from the AutoMl page and click Delete.
-
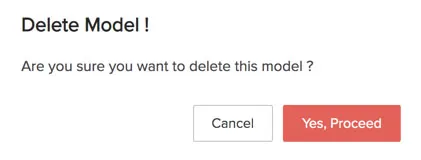
Click Yes, Proceed in the confirmation window.
View a Model’s Evaluation Report
You will be automatically navigated to a model’s Evaluation Report section once the training process is complete. You can also open it by clicking on the model’s name from the AutoML page.
As discussed earlier, the information provided in the evaluation report differs for each model type.
The following evaluation report was generated for the multi-class classification model that we created earlier in this section.
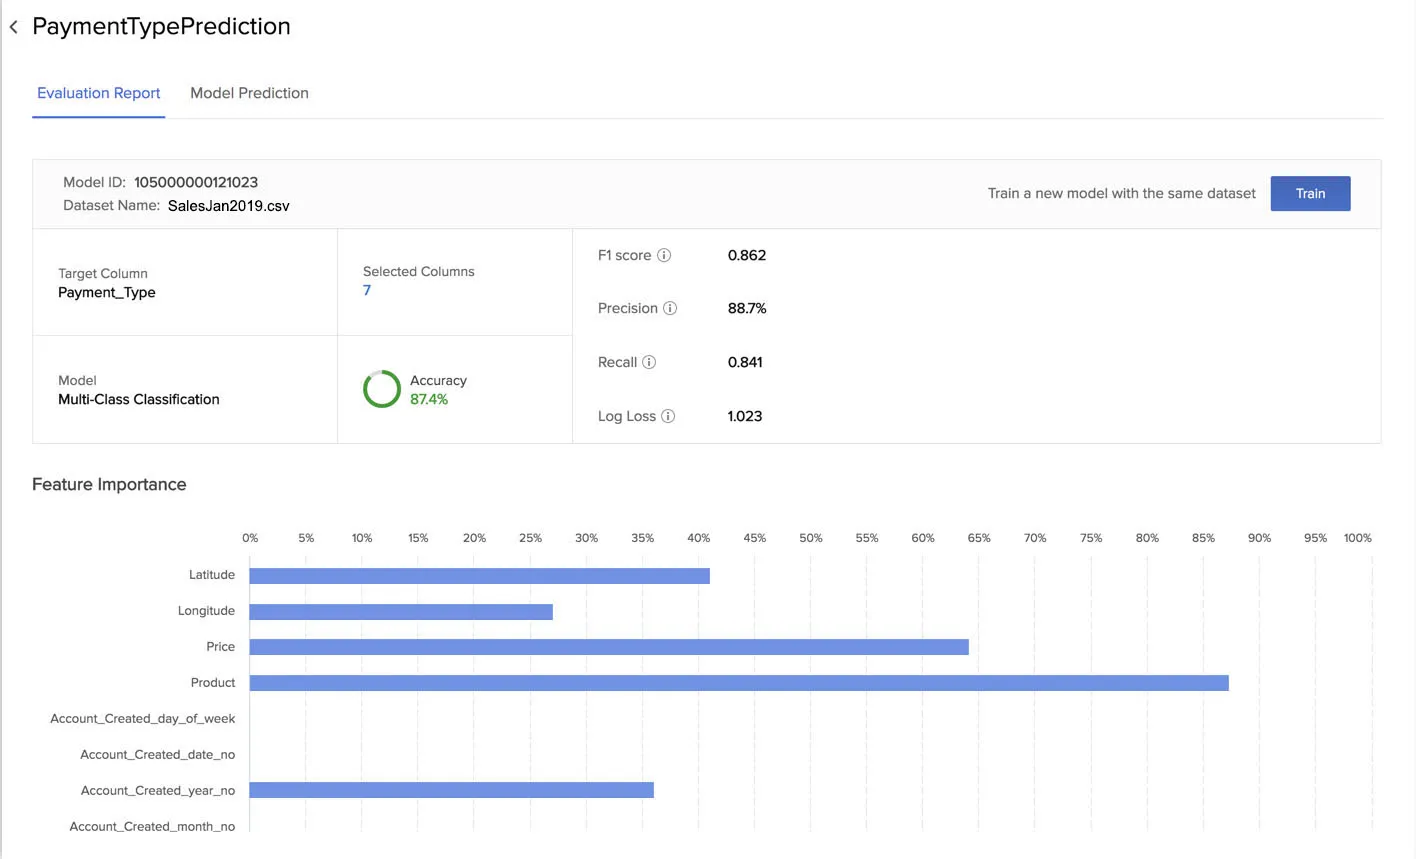
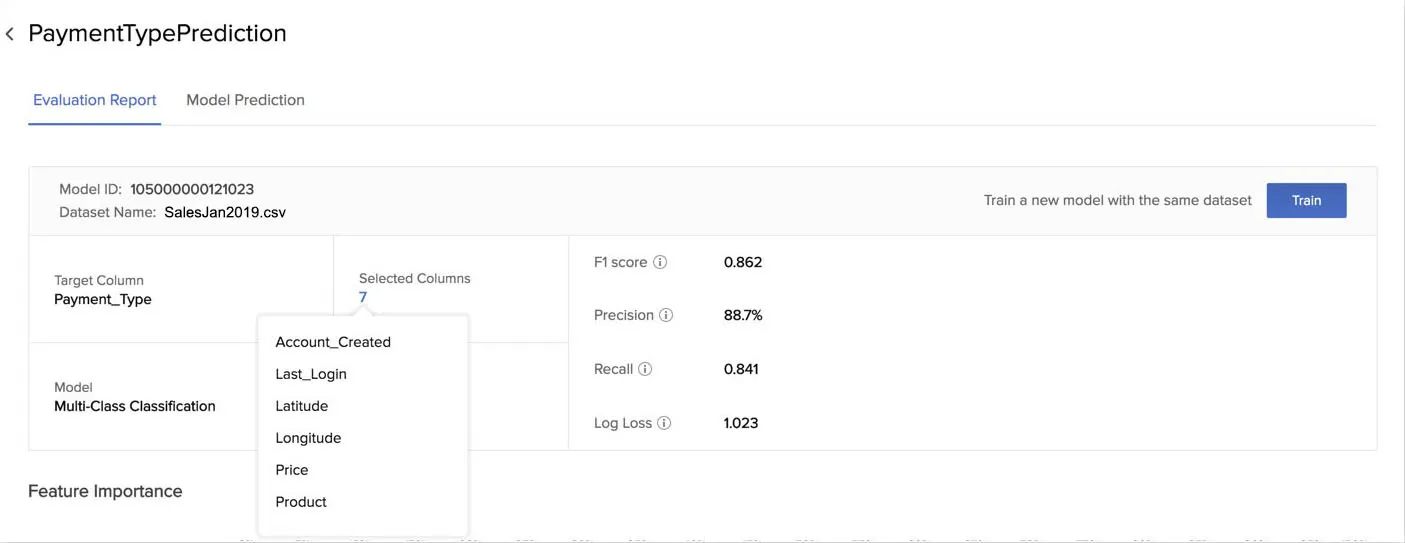
You can refer to this section to learn about the accuracy, F1 score, precision, recall, and log loss statistics. The report also displays the columns that were used for the training under Selected Columns.
The Evaluation Report section also provides you a shortcut to train a new model with the same dataset that you used for this model. You can train a new model if you find the accuracy of this model’s prediction to be too low for your purposes. You can make changes to the new model, such as including or excluding different columns in the dataset this time or changing the data type of a column while training it.
If you click Train, Catalyst will redirect you to the Fix a Target stage of the model creation. The same dataset will be included again automatically. You can then make the necessary changes and train the new model.
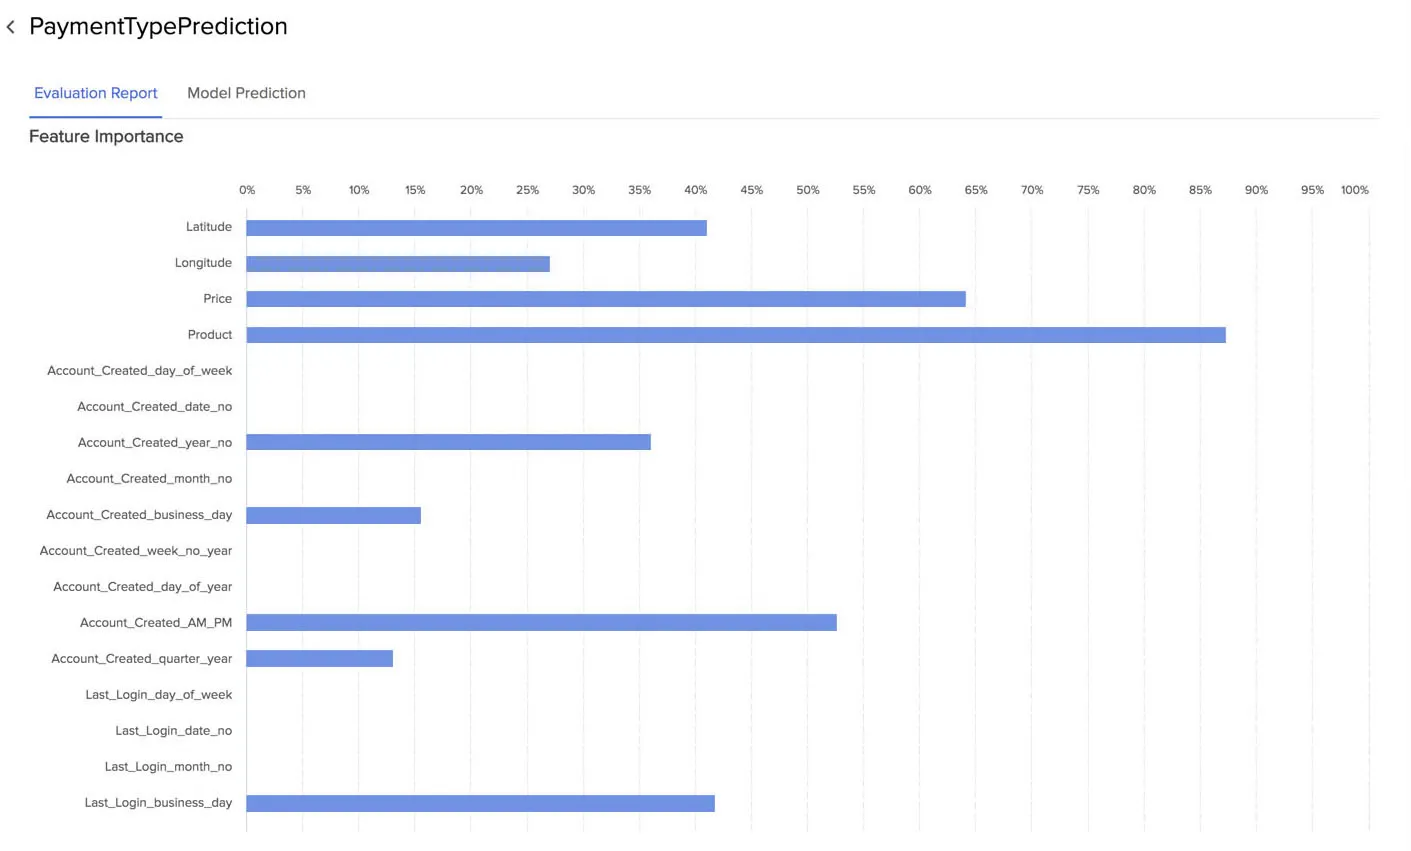
The Evaluation Report section displays a graph named Feature Importance for all three types of model. This displays the importance of each feature or column in the dataset for training this model, in terms of relative percentages. That is, it shows which features AutoML found the most useful while building the model.
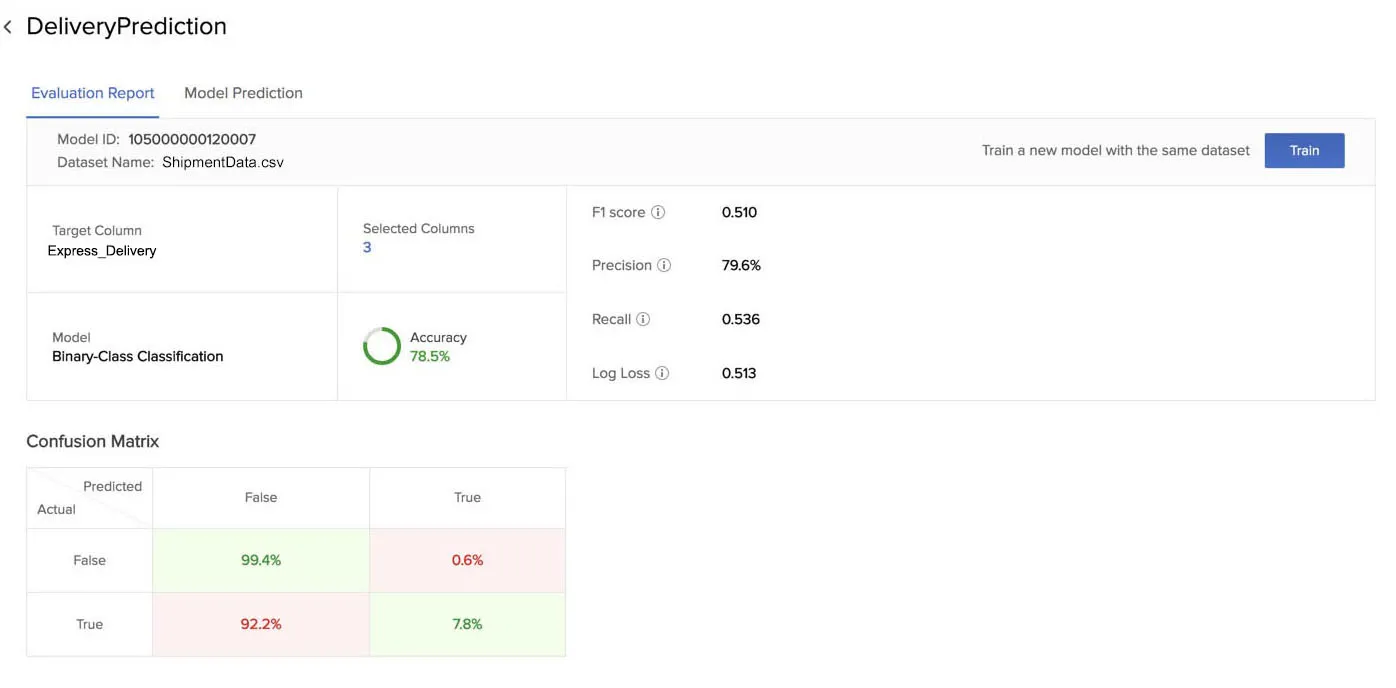
The evaluation report of a binary-class classification model includes additional information, such as the confusion matrix with the TP, TN, FP, FN values, as discussed in this Key Concepts section.
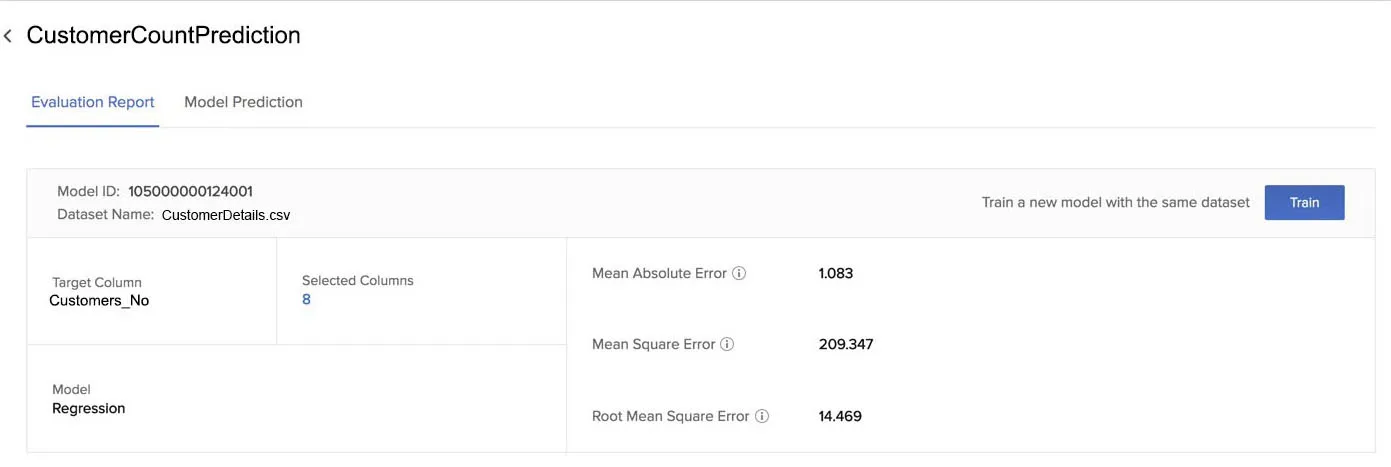
Similarly, the evaluation report of a regression model includes the Mean Absolute Error, Mean Squared Error, and Root Mean Squared Error statistics.
Predict Values
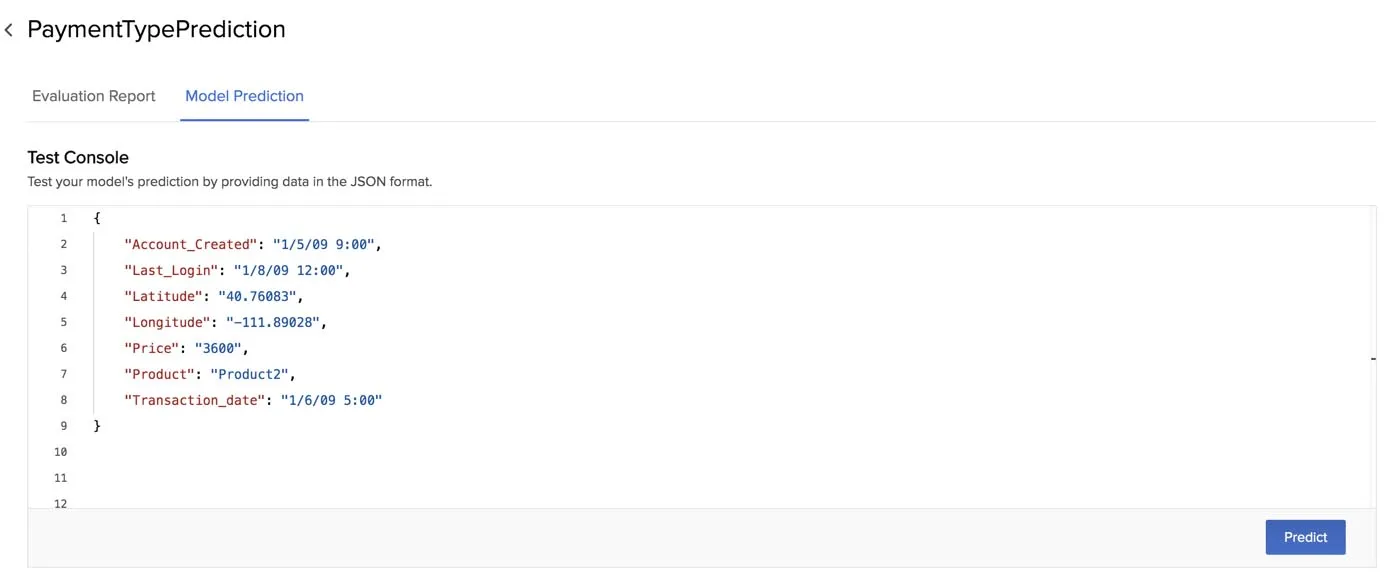
The Model Prediction section provides a test console for you to provide input values and obtain the predictive output.
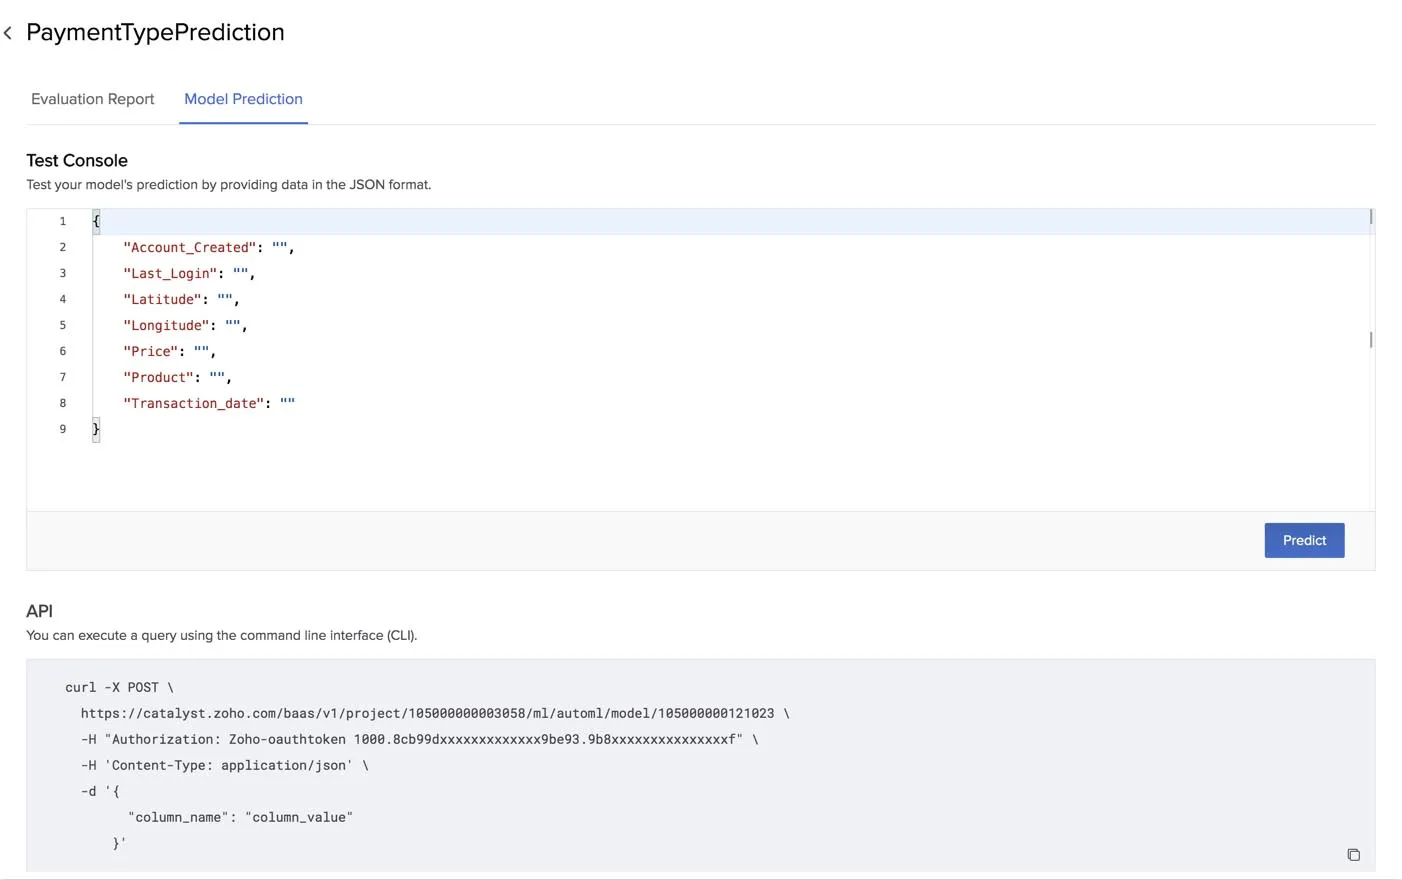
The model applies the knowledge it obtained during its training with the dataset to predict the value of the target for a selection of input that you provide. The accuracy level of this prediction is displayed in the Evaluation Report section. The test console will display the columns that were found to be required for building the model as input fields.
To predict the value of the target of an AutoML model for a set of conditions:
- Click the model’s name from the AutoML page and click Model Prediction.
- Enter input values for the fields in the JSON format.
- If you enter a value in a format that does not match the data type of the column, such as a numerical value for the date type, the console will display a “cannot parse” error. Ensure that you provide the data in the right format.
- You must provide the value for atleast one valid column while testing the prediction.
- If you don’t enter the value for an input field, a default value will be entered for the column by Zia automatically. However, this will affect the accuracy of the prediction.
- Click Predict.
AutoML will display the predicted value of the target column in a pop-up window.
The prediction of a multi-class classification model will contain the possibility of the occurrence of each class in the target, as a percentage value. For example, the model we created earlier predicts the following outcome of the payment type by the customers for the given input data.

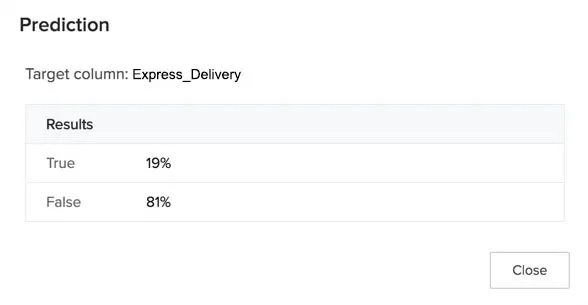
The prediction of a binary-class classification model will contain the possibility of the occurrence of the positive class and the negative class in the target. For example, in a model predicting the possibility of one of the two delivery types, Standard and Express, where the target is an “Express Delivery” positive class, the prediction results estimate that 81% of the time the customers will not use the express delivery, and they will use it only 19% of the time, for a given set of input conditions.
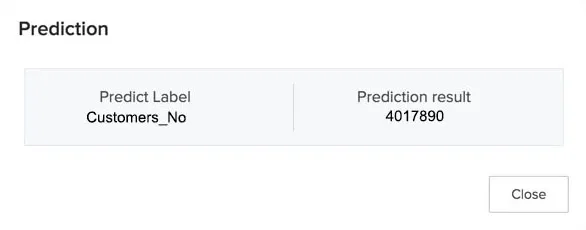
The prediction of a regression model will contain a single numerical result as the value of the target. For example, a model predicts the number of customers of a business for the next year. The Predict Label is the name of the target column, and the Prediction Result column holds the value of the predicted number of customers as 4,017,890 for a given set of input conditions.
AutoML also provides you with the API request template that you can use from your terminal in cURL format.
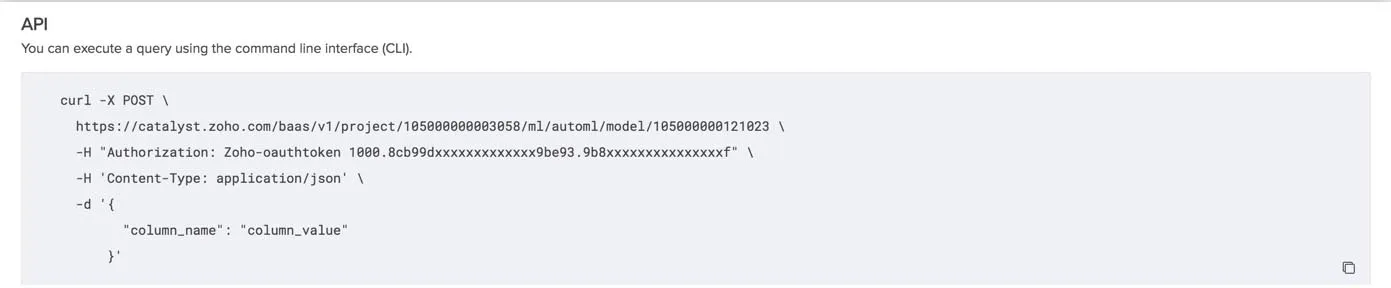
You can copy this code using the copy icon and paste it in your terminal to test your model’s prediction from your local system. You can also implement this request code in your Catalyst application to enable predictions.
You must replace the values of the Project ID and Model ID in the request URL, and the value of the Zoho authorization token in the code. You can refer to the API documentation for more information. You must provide the data for all the columns that are requested in the test console as key-value pairs in JSON format in this request API query.
Last Updated 2025-02-19 15:51:40 +0530 IST
Yes
No
Send your feedback to us