Customize a Template
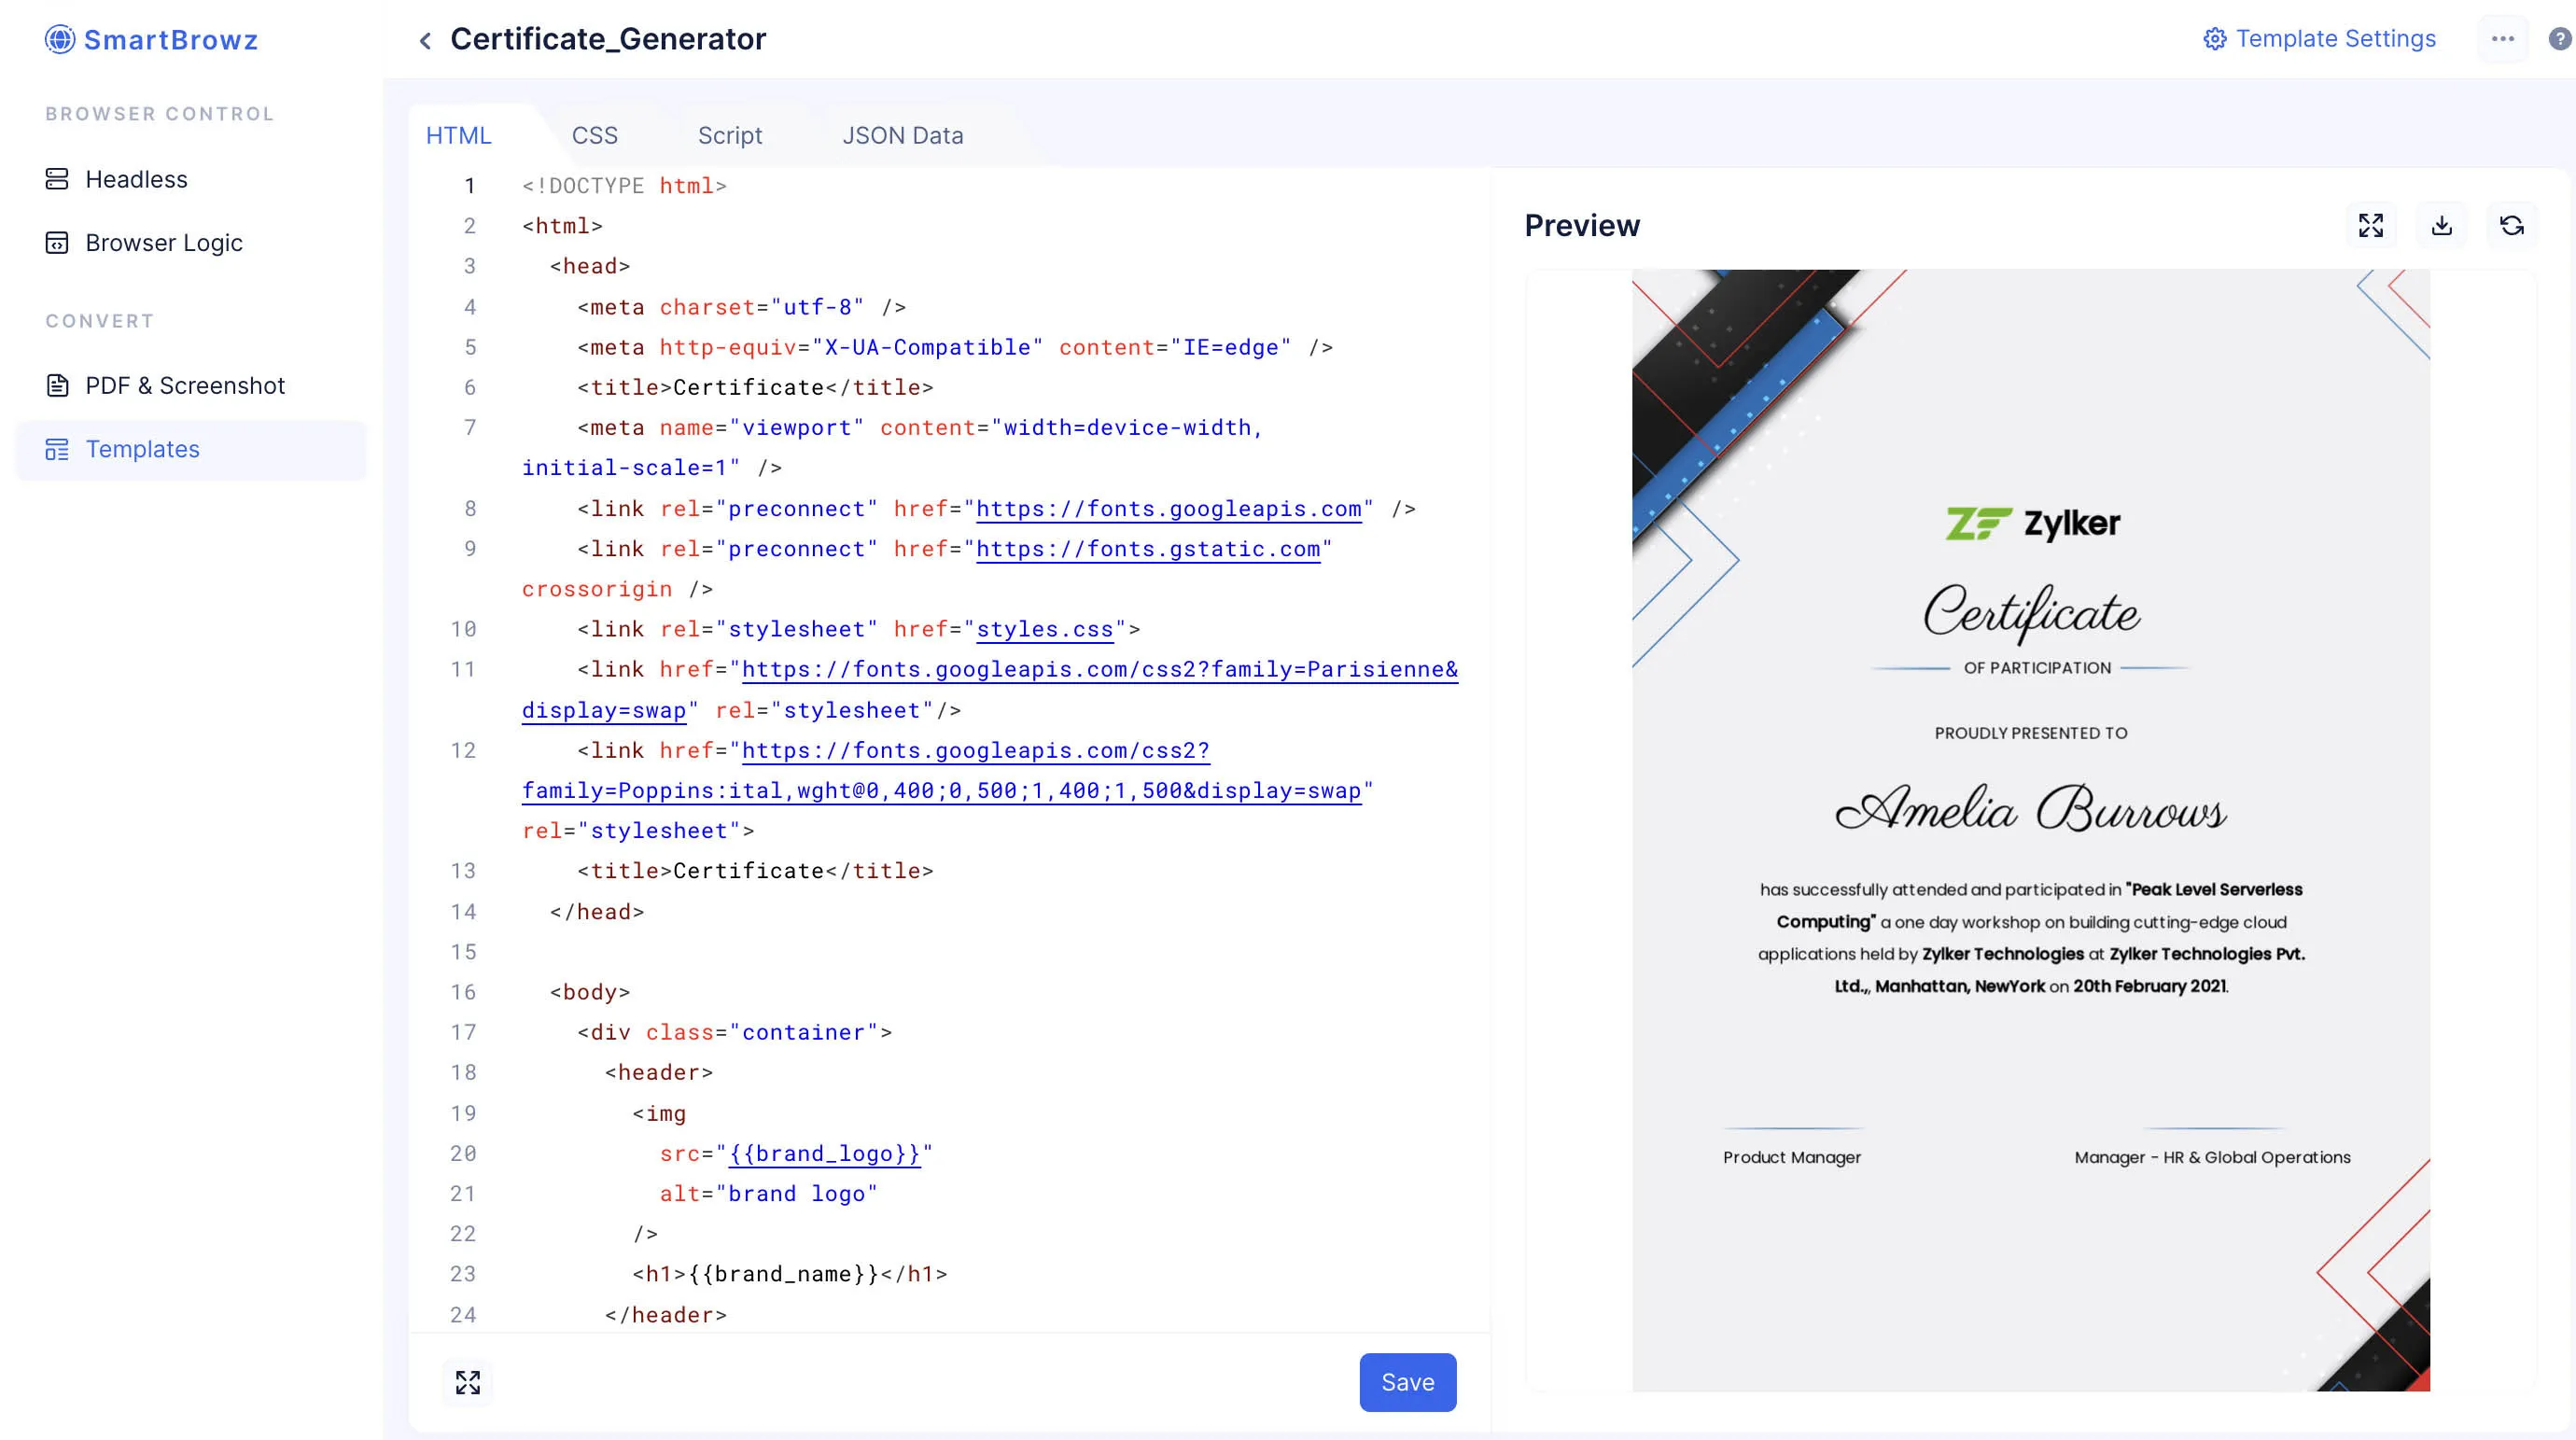
Once you have chosen a template design, you will be directed to the template editor inbuilt in the console that allows you to customize your template and further style it to your preference. For this help document, we will illustrate customizing a template using the Certificate template.
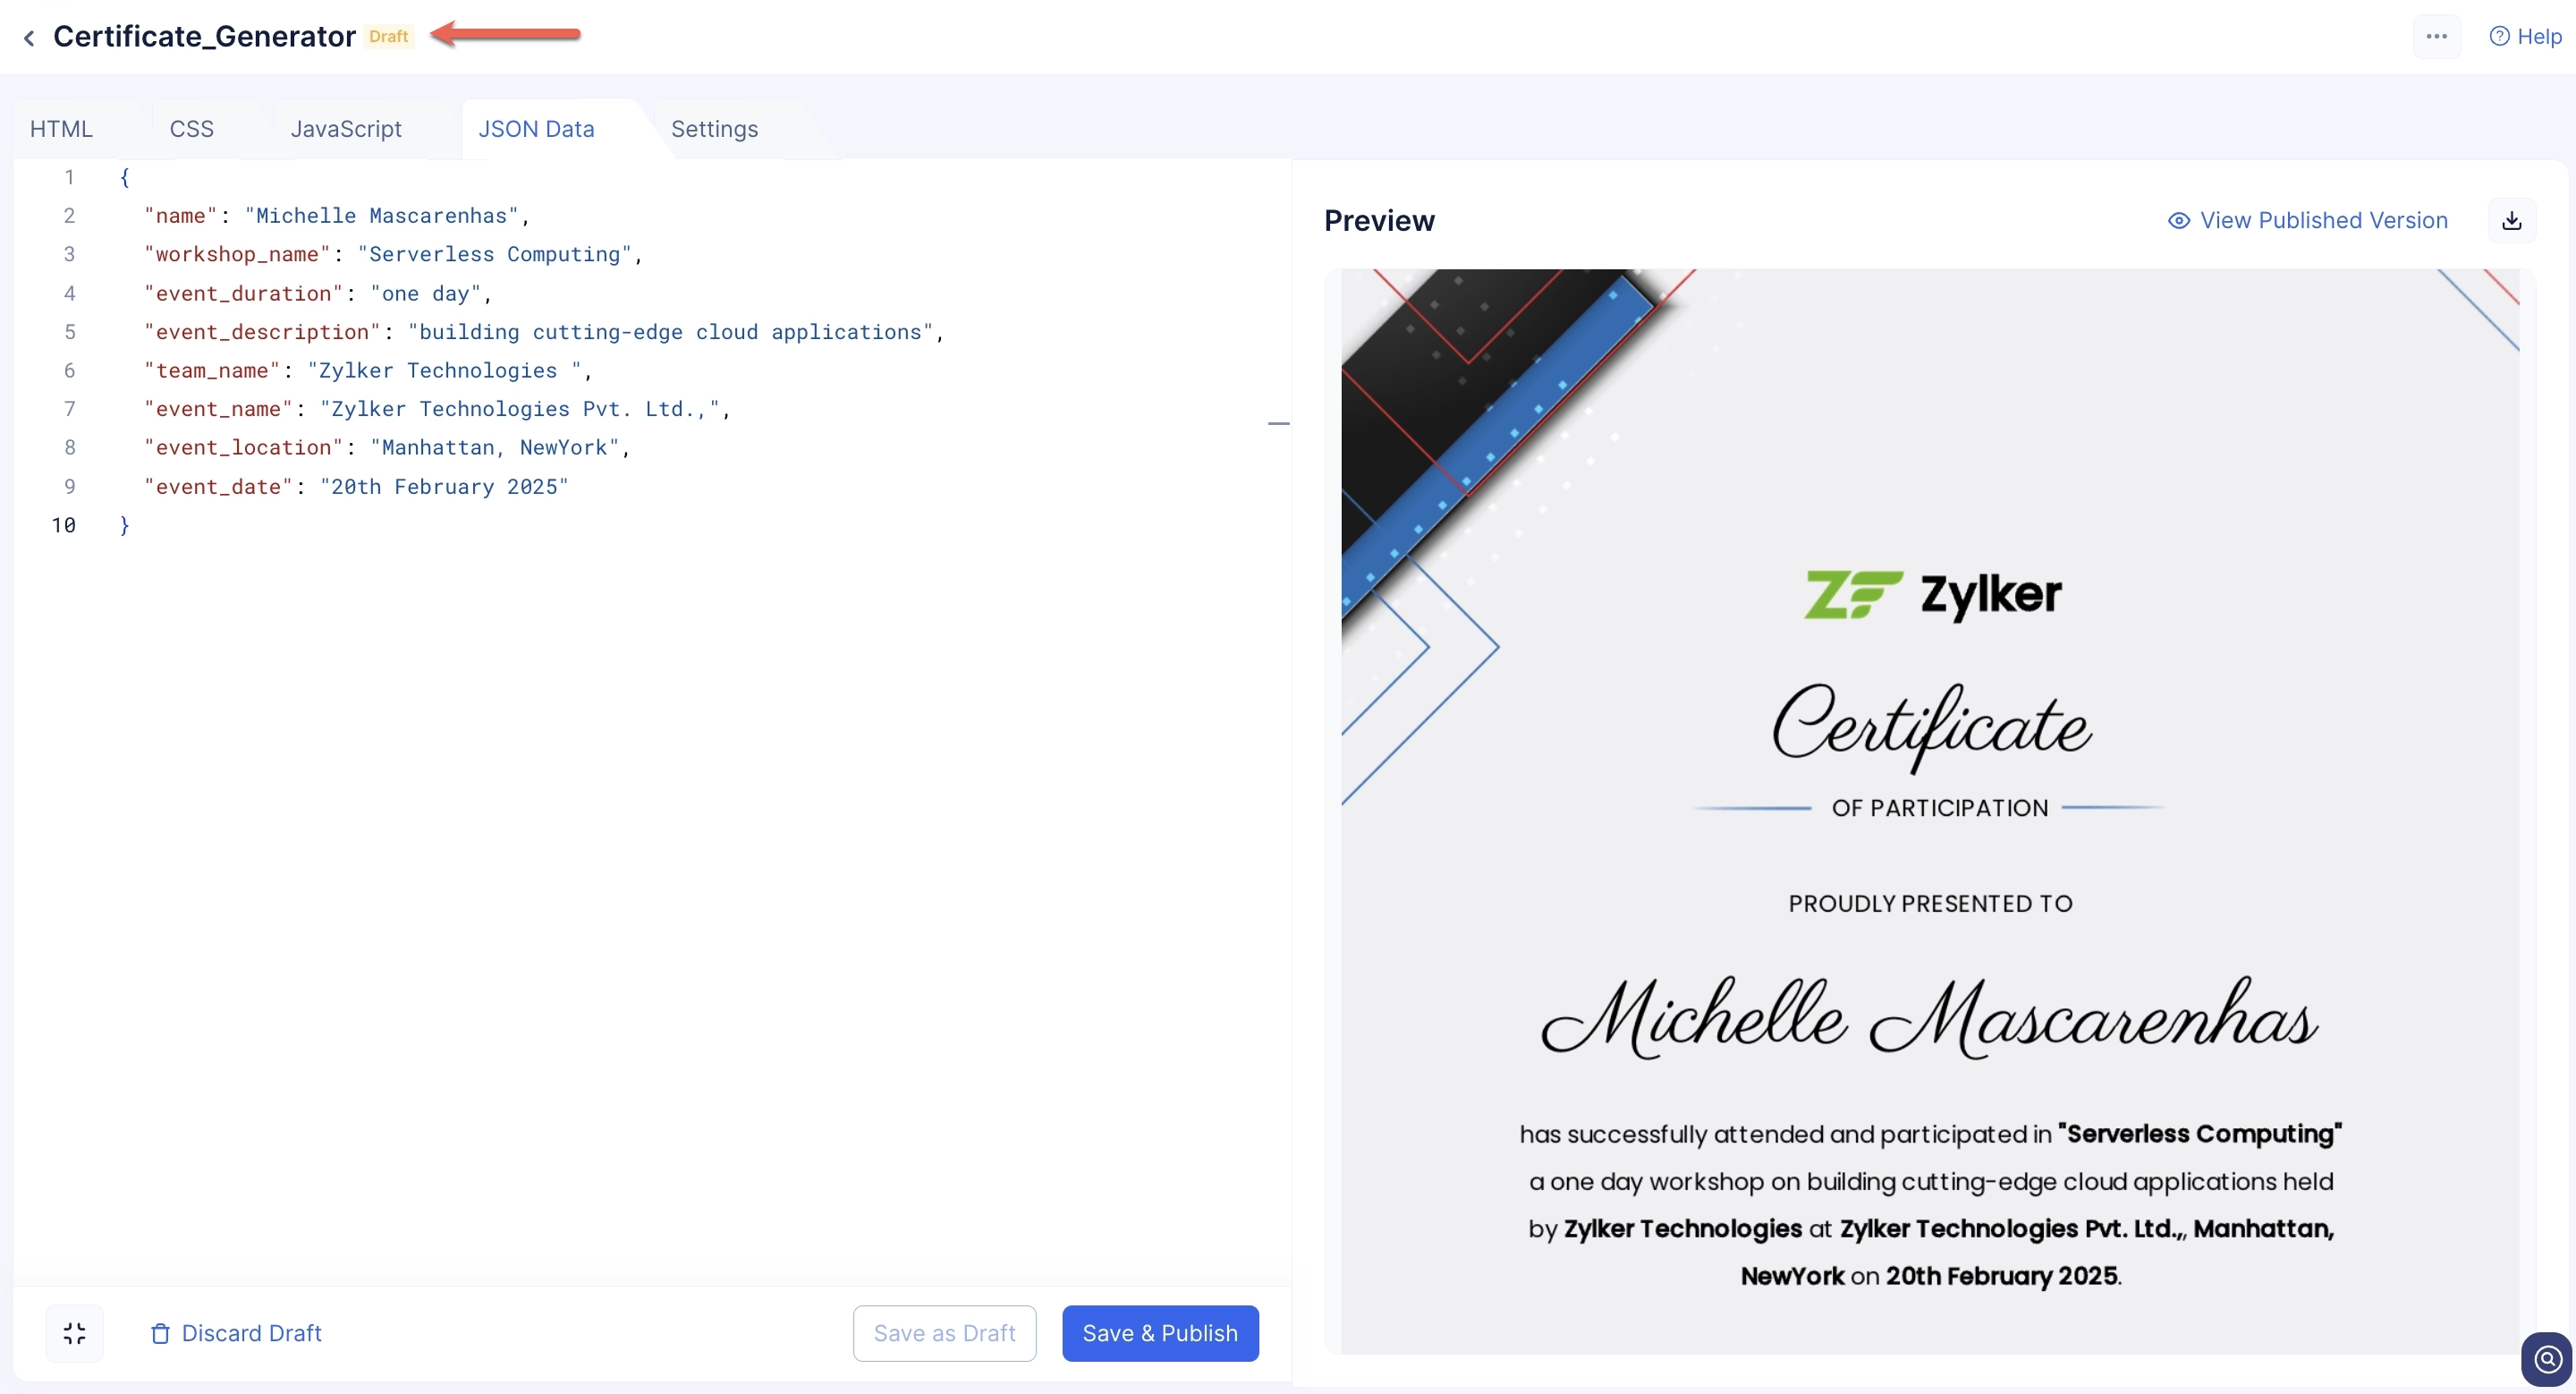
You will have respective editor sections for HTML, CSS and JavaScript to style and customize your template directly in the console, as shown below.
Using LiquidJS to Customize Your Templates
Catalyst SmartBrowz supports the use of LiquidJS to customize your templates. LiquidJS is a popular opensource templating language that you can leverage to quickly create templates to suit your requirements.
The content, the JSON data (Dyanmic data) that you load on to your template is subject to change based on your requirement. Using LiquidJS to customize your templates allows you to leverage the native filters to seamlessly handle this dynamic data.
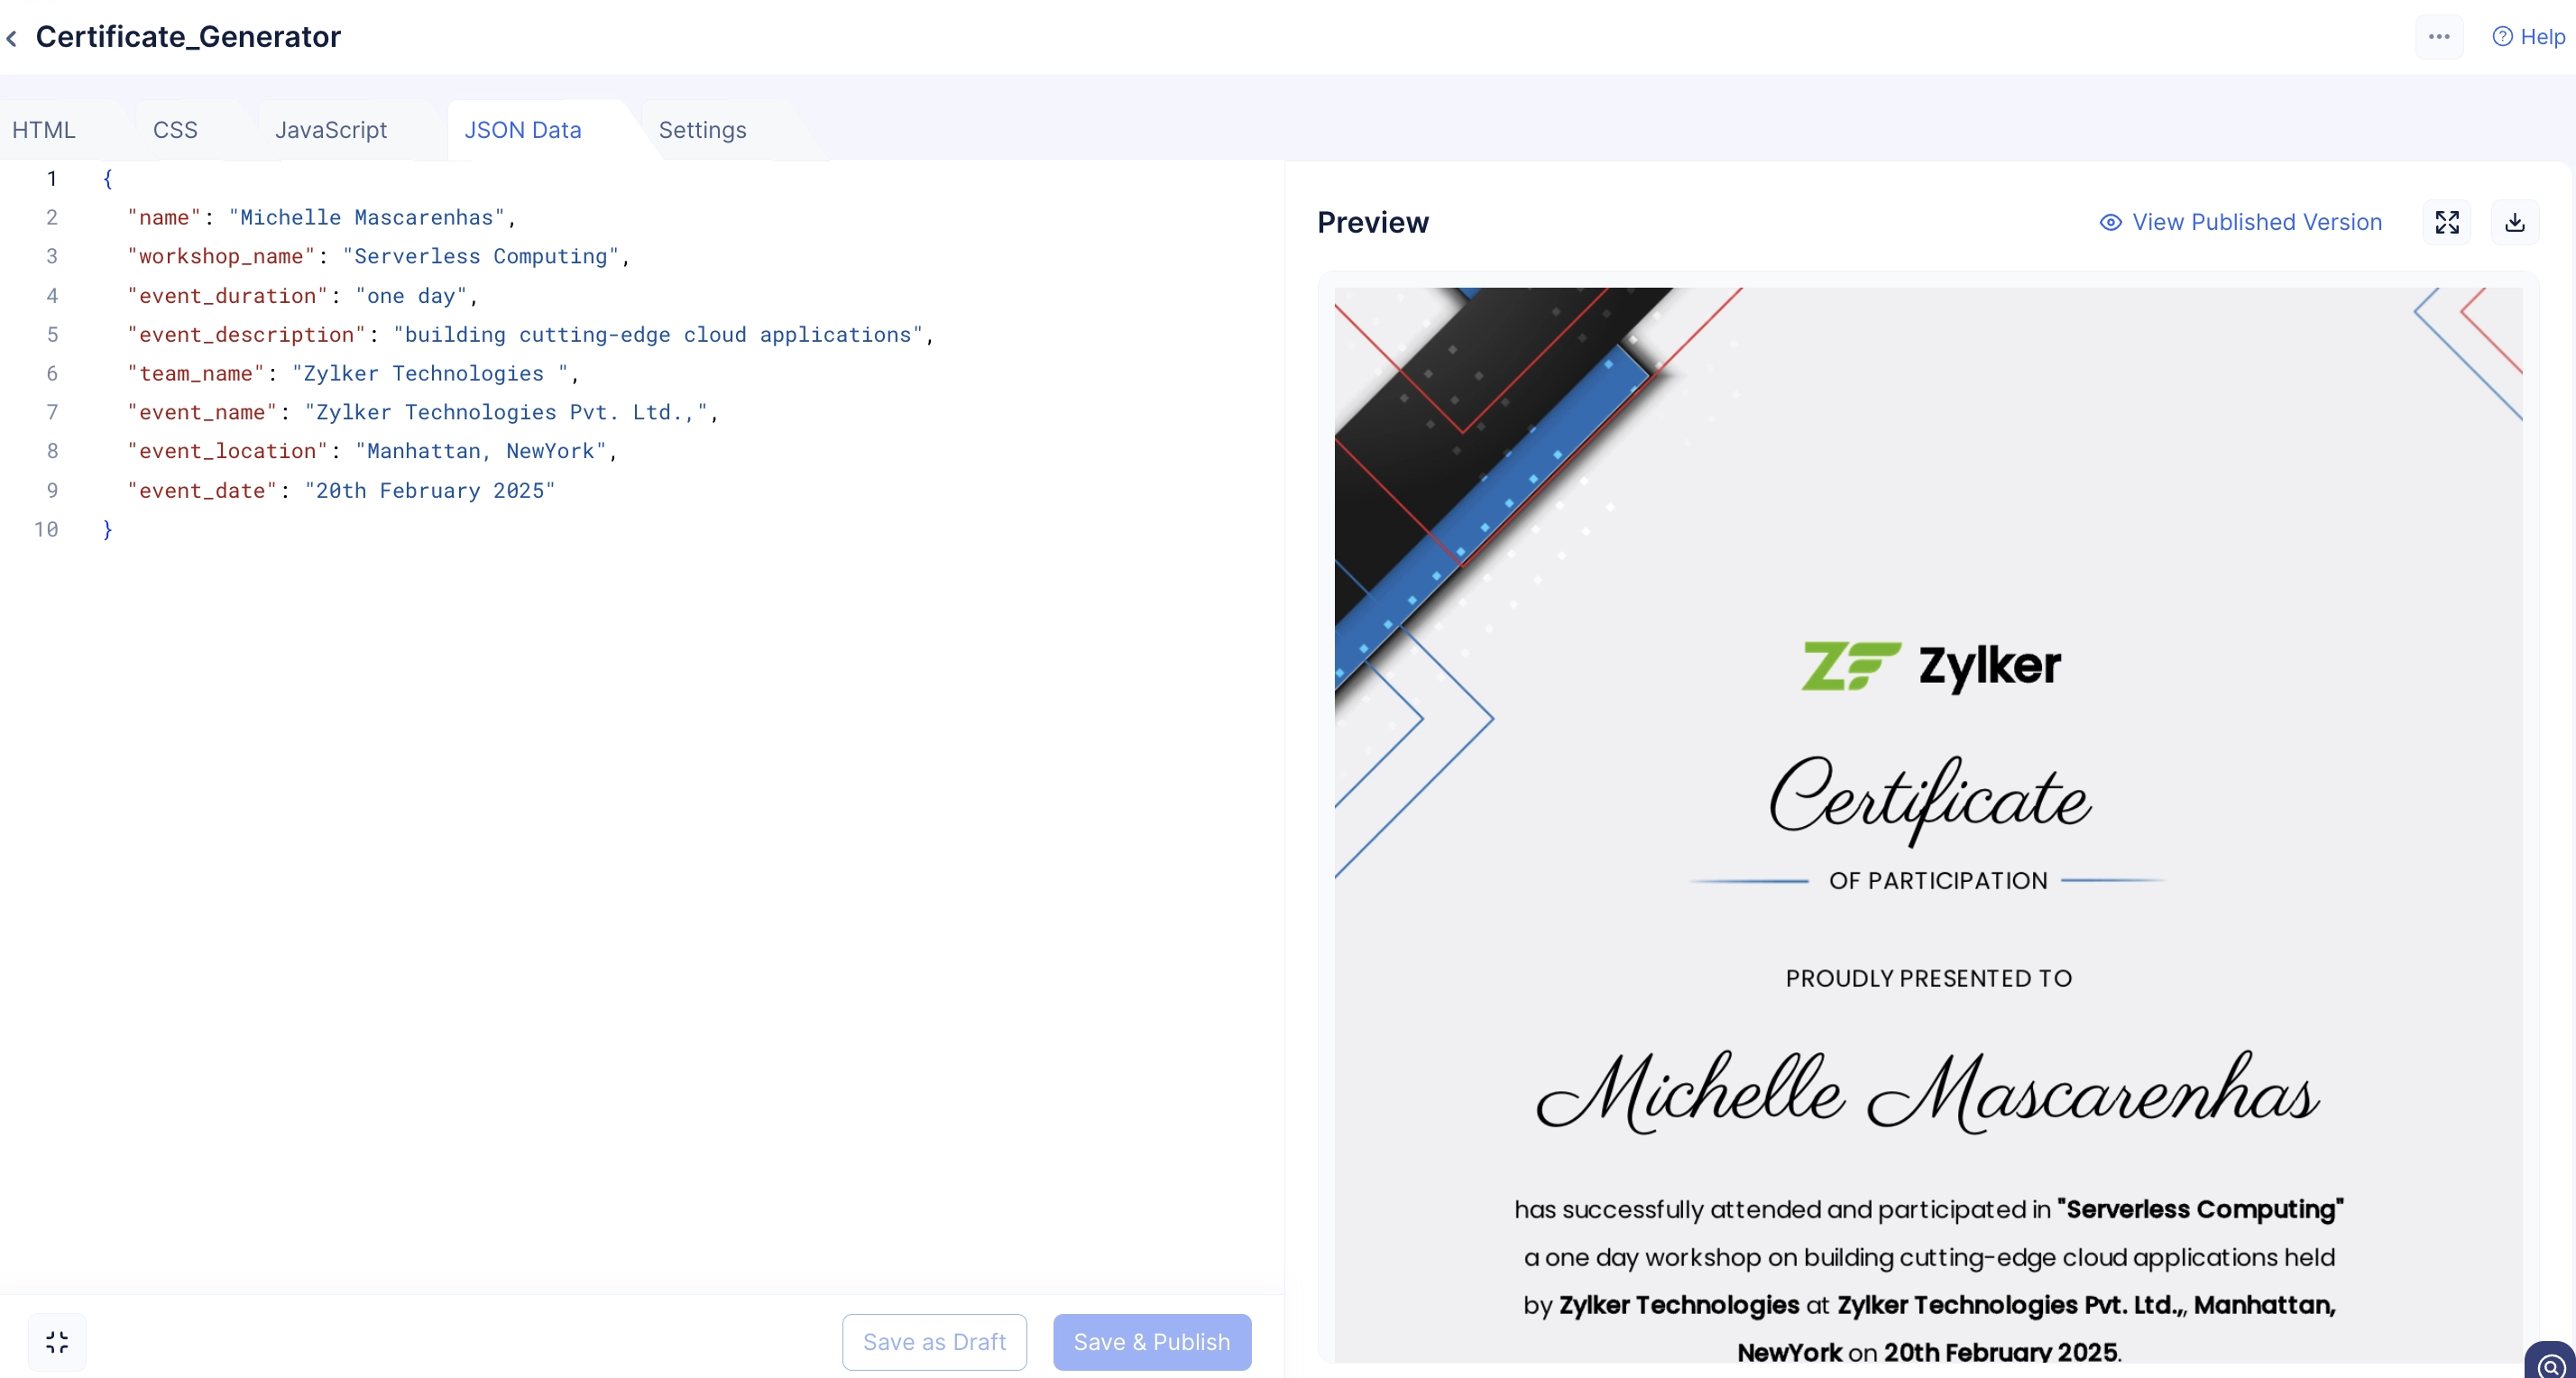
The dynamic data to your template will have to passed as a JSON paylod. For example, consider you are using the Certificate template, then the JSON payload will need to look like this:
{
  "name": "Michelle Mascarenhas",
  "workshop_name": "Serverless Computing",
  "event_duration": "one day",
  "event_description": "building cutting-edge cloud applications",
  "team_name": "Zylker Technologies ",
  "event_name": "Zylker Technologies Pvt. Ltd.,",
  "event_location": "Manhattan, NewYork",
  "event_date": "20th February 2025"
}
LiquidJS Syntax
The following table contains the necessary LiquidJS syntax that you can apply to your templates to customize them to handle dynamic JSON data.
| Tag Type | LiquidJS Syntax |
|---|---|
| Output | copy
|
| Logic (Control Flow) | copy
|
| Loops (For Statement) Iterating over an array |
copy
|
| Loops (For Statement) Using Iterable Object |
copy
|
| Filters | copy
|
| Date Formatting | copy
|
| Assign and Capture Assign variables inside templates |
copy
|
| Assign and Capture Capture multi-line values |
copy
|
| Comments | copy
|
| Default Filters Will display the value you set as default, if no value is provided. |
copy
|
| Conditionals with unless The functions as the opposite of an if statement. The logic under an unless block will only be executed if the condition is false. |
copy
|
| Case/When Conditions | copy
|
| Raw Output To be used to print Liquid code without rendering it. Generally, used for documentation purposes |
copy
|
| Array and Object Filters | copy
|
| Math Filters To use math operators within the template |
copy
|
| Rendering Partial Templates | copy
|
Example HTML Code With LiquidJS
The following code snippet aims to serve as an example illustrating the use of LiquidJS in the HTML code to customize your template.
<!DOCTYPE html>
<html lang="en">
<head>
<meta charset="UTF-8">
<title>Dashboard - {{ user.name }}</title>
</head>
<body>
<!– Header –>
<header>
<h1>Hello, {{ user.name | default: “Guest” }}</h1>
{% if user.role == “admin” %}
<p class=“admin”>You have administrator access.</p>
{% else %}
<p class=“user”>Standard user access granted.</p>
{% endif %}
</header>
<!– Items Section –>
<section>
<h2>Your Items</h2>
<ul>
{% for item in items %}
<li>{{ forloop.index }}. {{ item.name }}</li>
{% endfor %}
</ul>
<p> <strong>First Item:</strong> {{ items | first | map: “name” }}</p>
<p> <strong>Total Items:</strong> {{ items | size }}</p>
</section>
<!– Pricing Section –>
<section>
<h2>Price Breakdown</h2>
<p>Original Price: ${{ price }}</p>
<p>After Discount ($10 off): ${{ price | minus: 10 }}</p>
<p>After Tax (10%): ${{ price | times: 1.1 }}</p>
<p>Half Price: ${{ price | divided_by: 2 }}</p>
</section>
<!– Time Section –>
<section>
<h2>Date & Time</h2>
<p>Current Timestamp: {{ “now” | date: “%Y-%m-%d %H:%M:%S” }}</p>
<p>Next Billing Date: {{ “2025-02-07” | date: “%B %d, %Y” }}</p>
</section>
<!– Custom Message –>
<section>
<h2>Message</h2>
{% assign greeting = “Hello” %}
<p>{{ greeting }} {{ user.name }}!</p>
{% if custom_message %}
<div class=“custom-message”>
{{ custom_message }}
</div>
{% else %}
<div class=“custom-message”>
No custom message provided.
</div>
{% endif %}
</section>
<!– User Role Case –>
<section>
<h2>Role Based Content</h2>
{% case user.role %}
{% when “admin” %}
<p>You are on the <strong>Admin Dashboard</strong>.</p>
{% when “user” %}
<p>You are on the <strong>User Dashboard</strong>.</p>
{% else %}
<p class=“alert”>Unknown role. Please contact support.</p>
{% endcase %}
{% unless user.role == "admin" %}
<p class="alert">You are not an admin.</p>
{% endunless %}
</section>
<!– Raw Display –>
<section>
<h2>Liquid Syntax Example</h2>
{% raw %}
To print user name: {{ user.name }}
{% endraw %}
</section>
</body>
</html>
Templates in Draft Mode
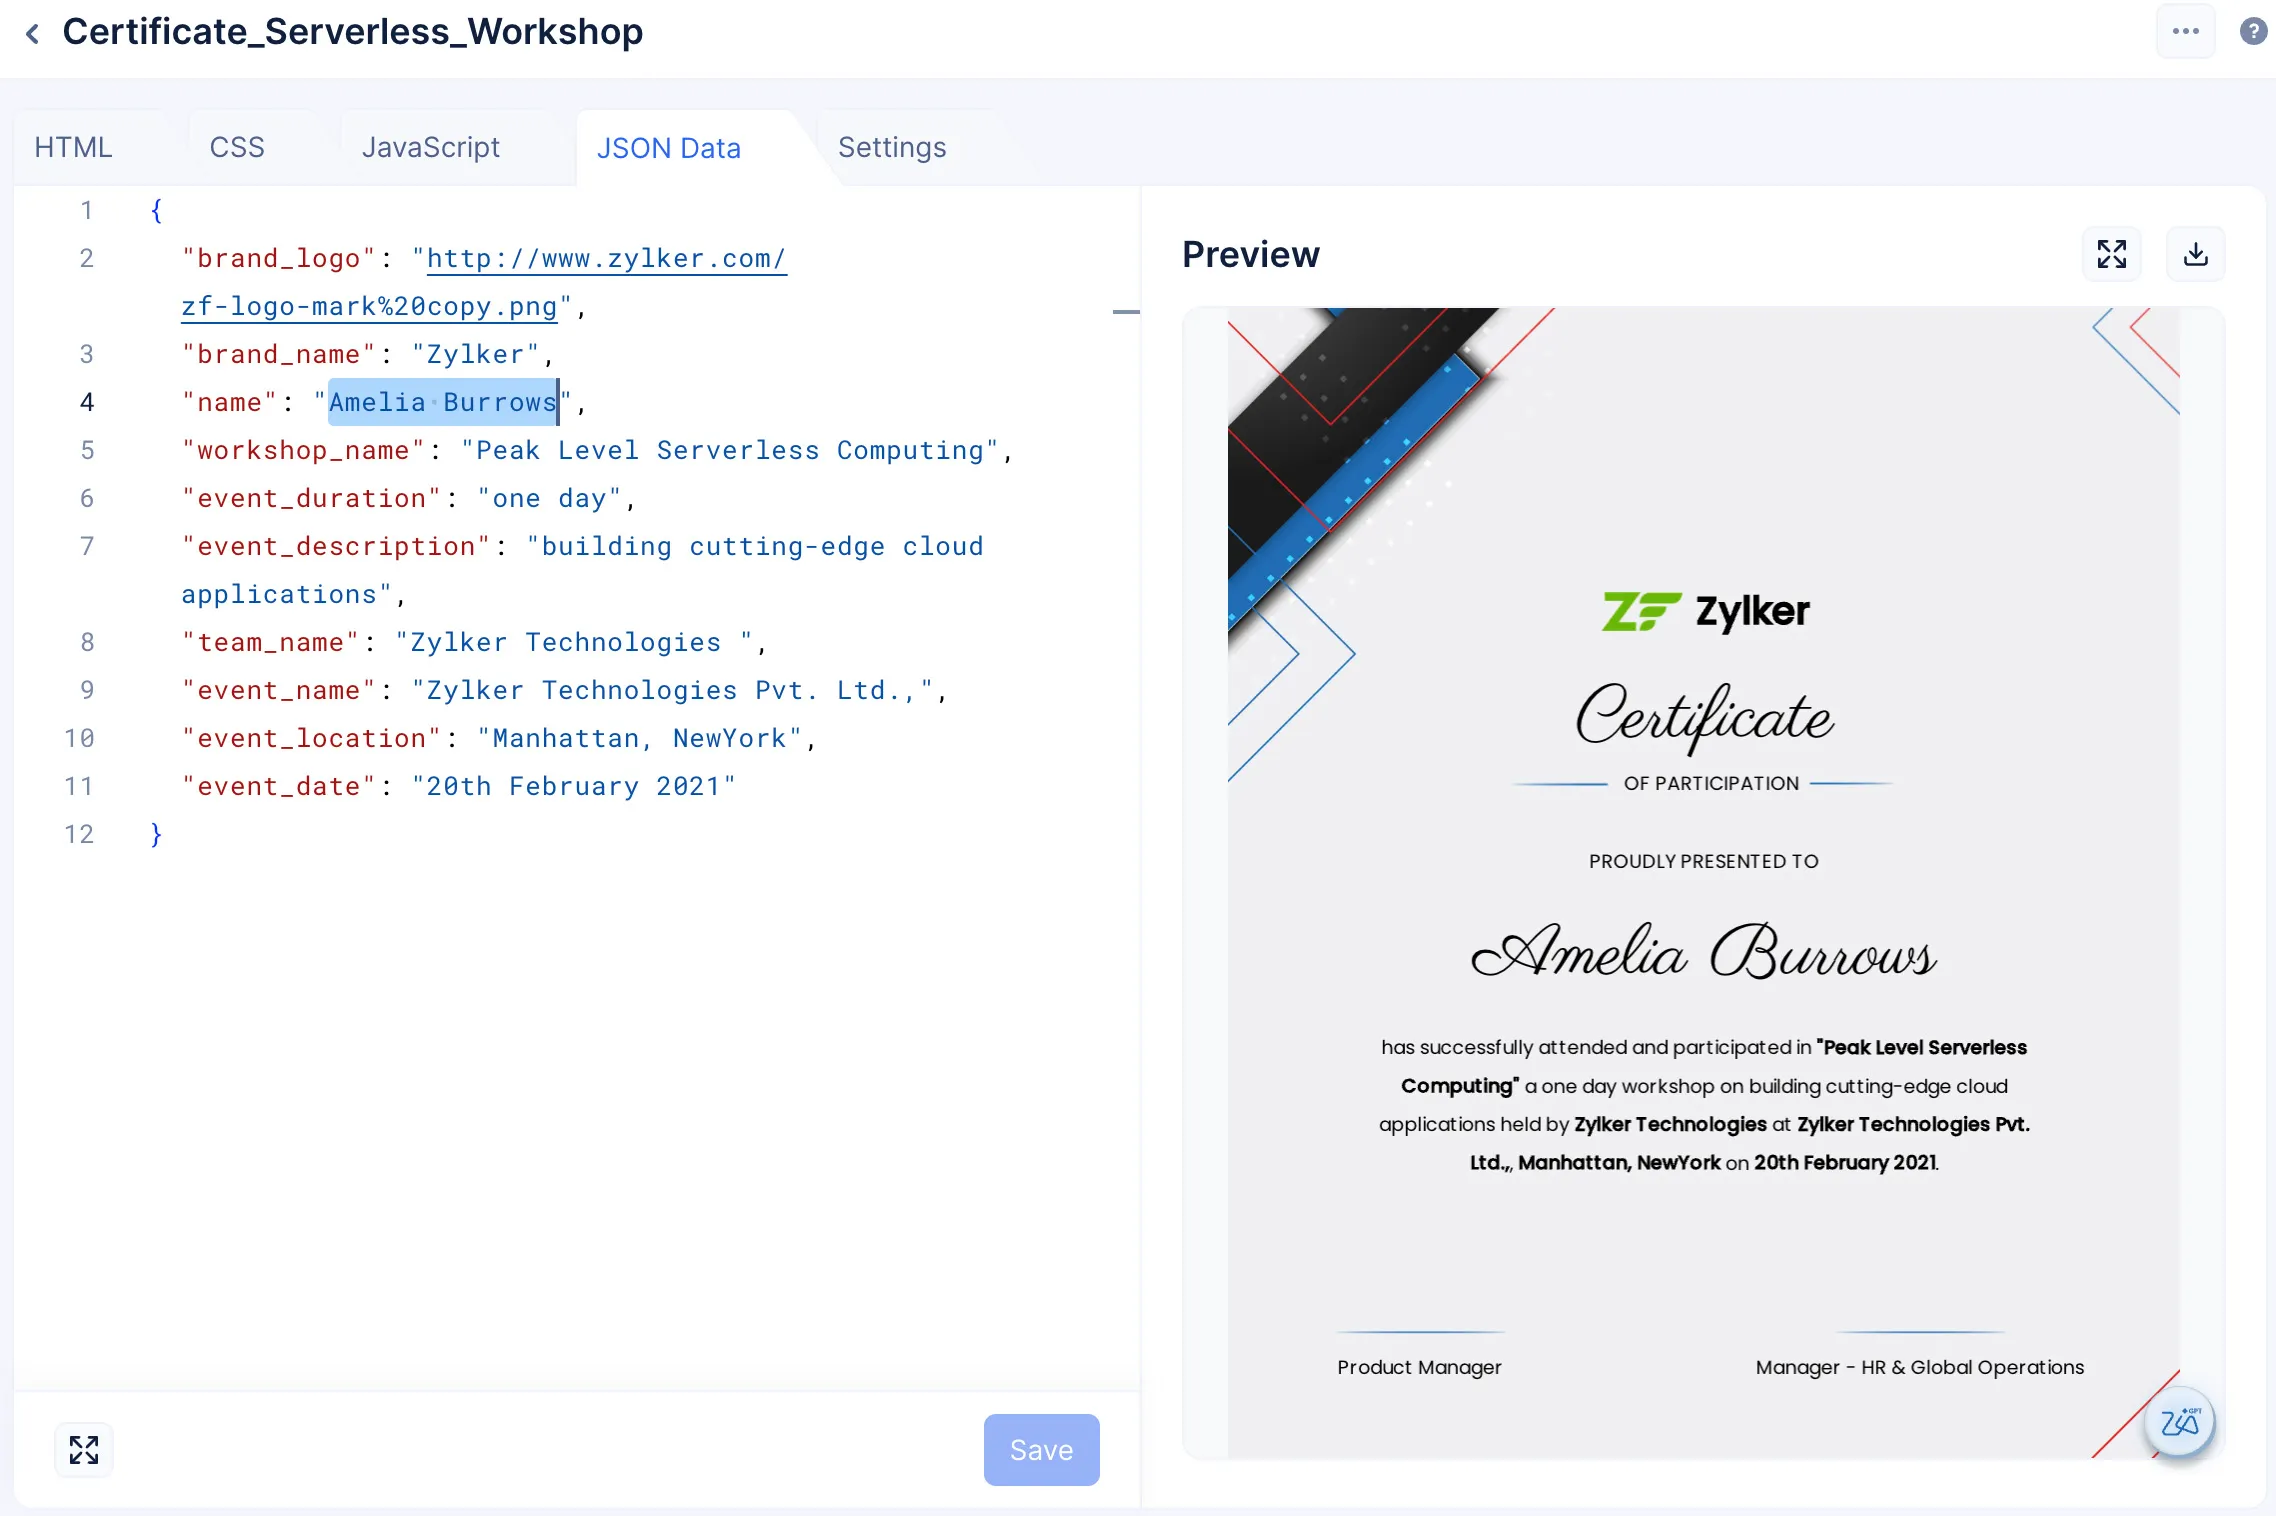
You can customize the HTML, CSS, and JavaScript code based on your requirements. You can use the JSON Data section to pass custom input data to the template.
To render the changes you make in the editor, you can click the Save as Draft button.
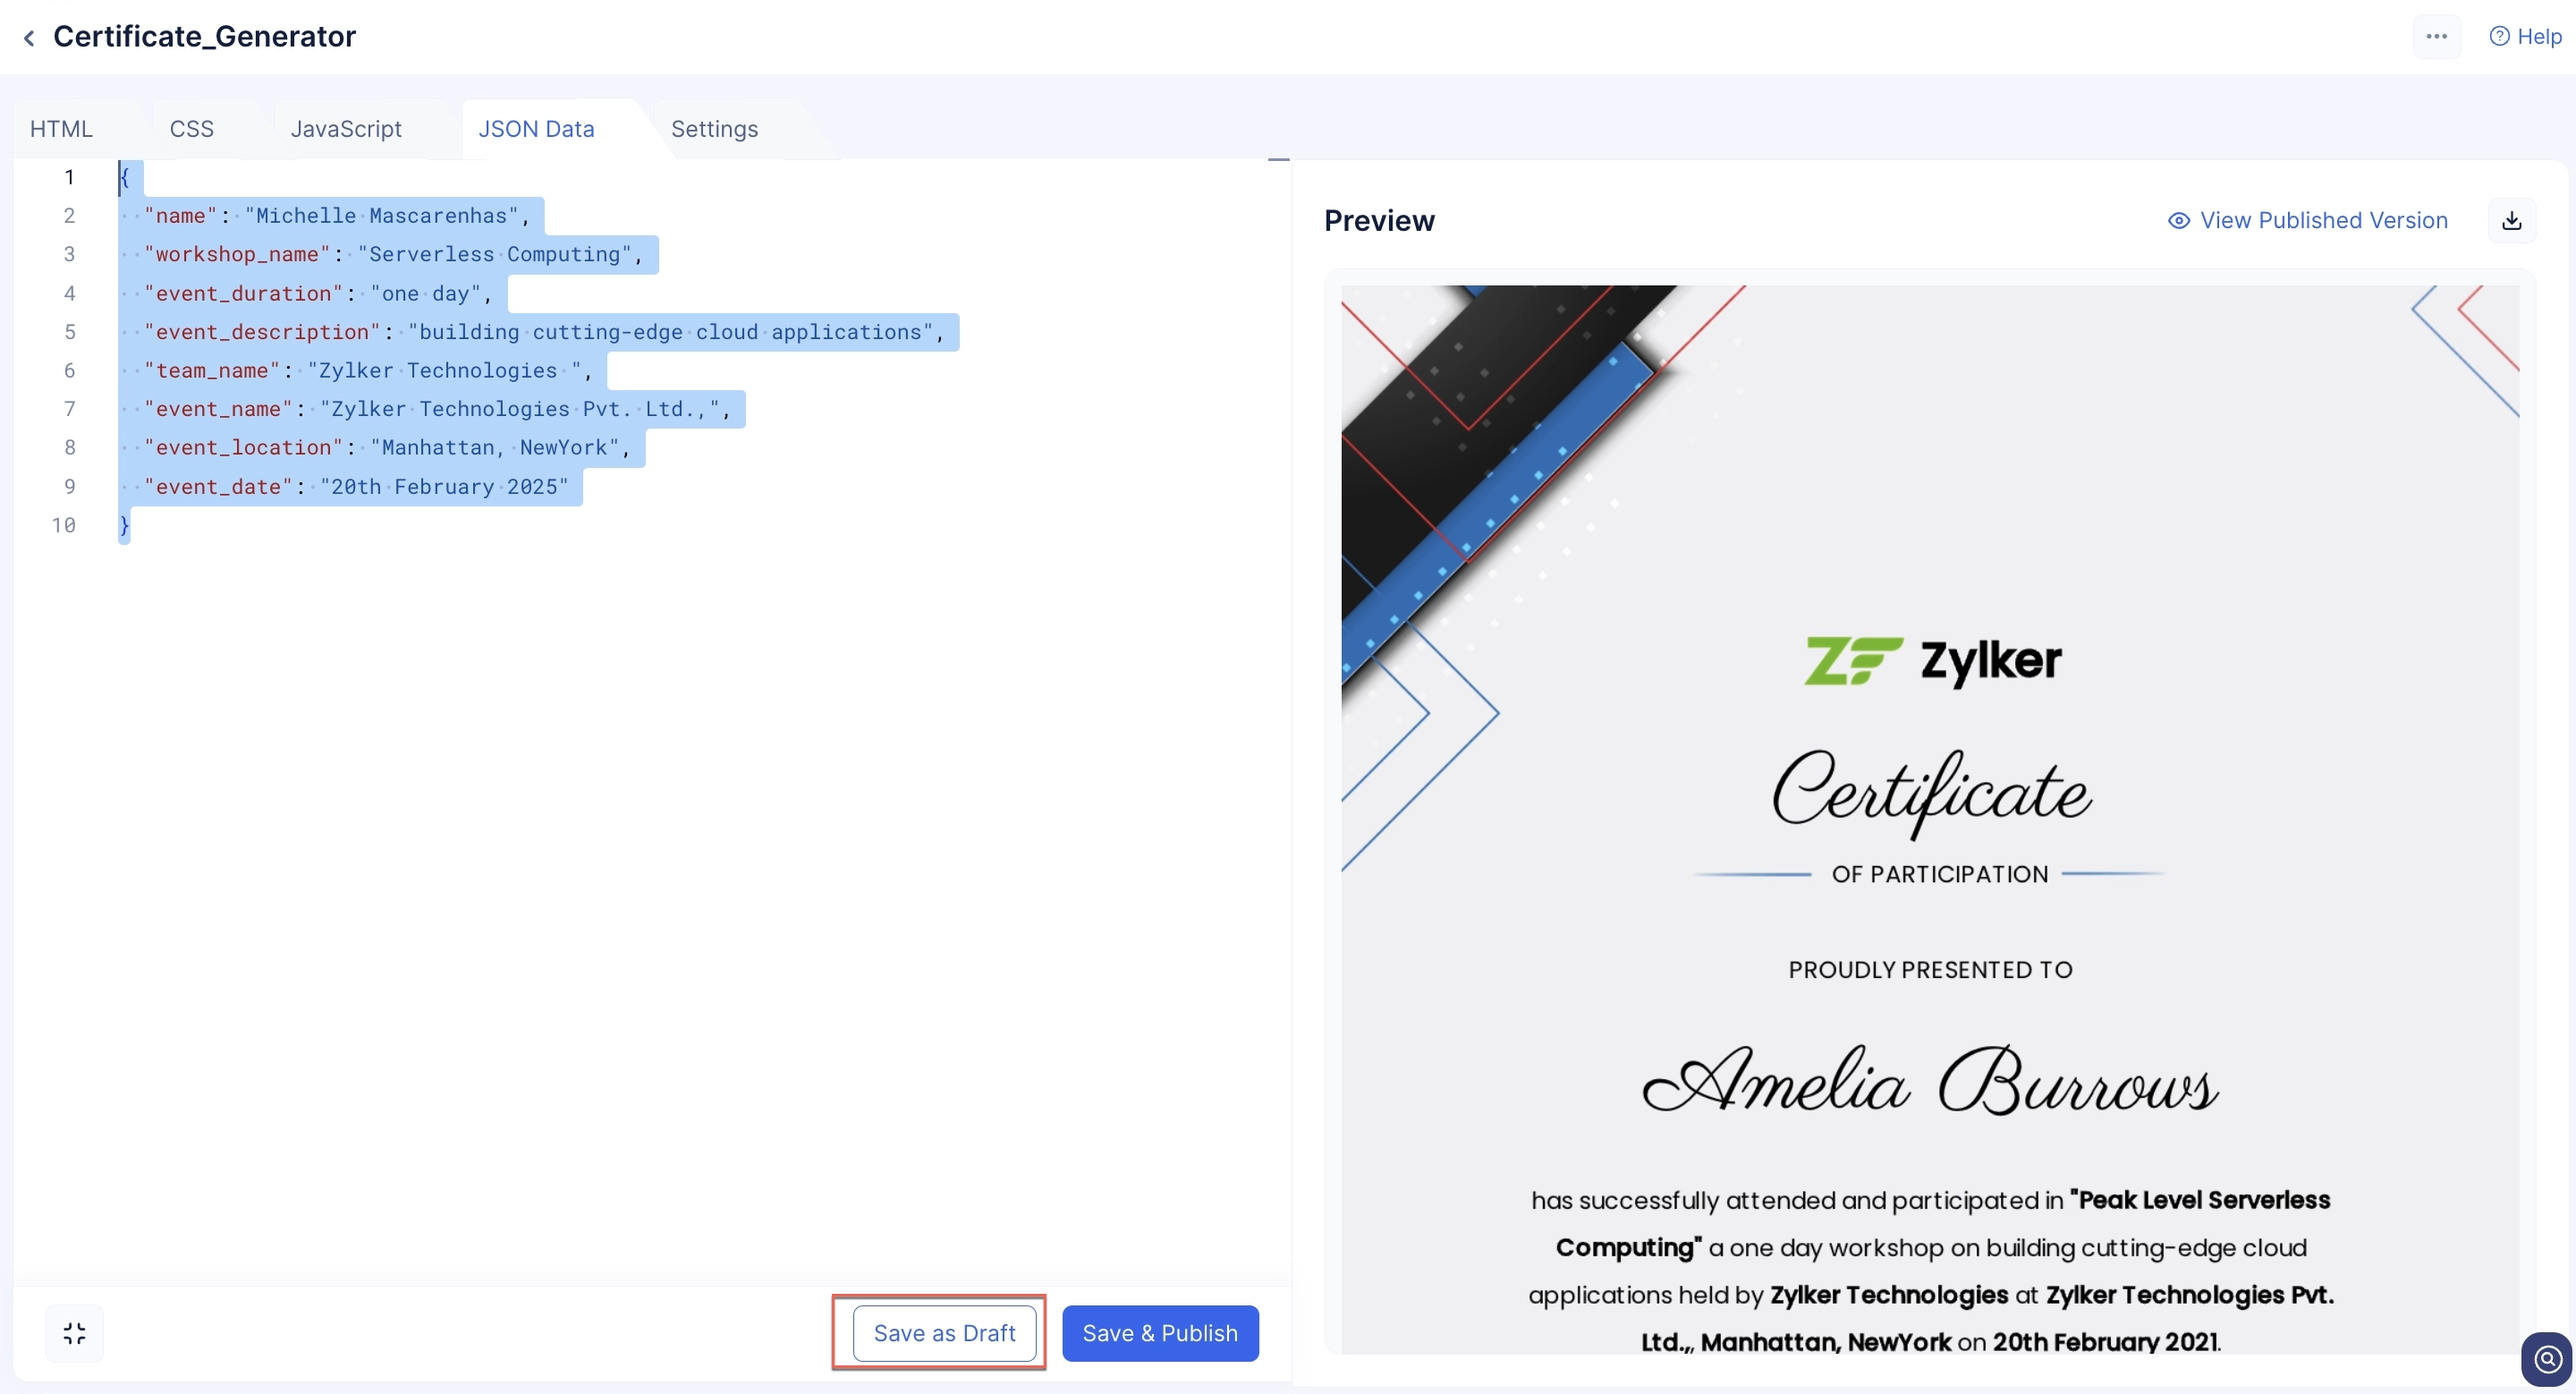
This will allow you to view the changes you make to your template without affecting the published version.
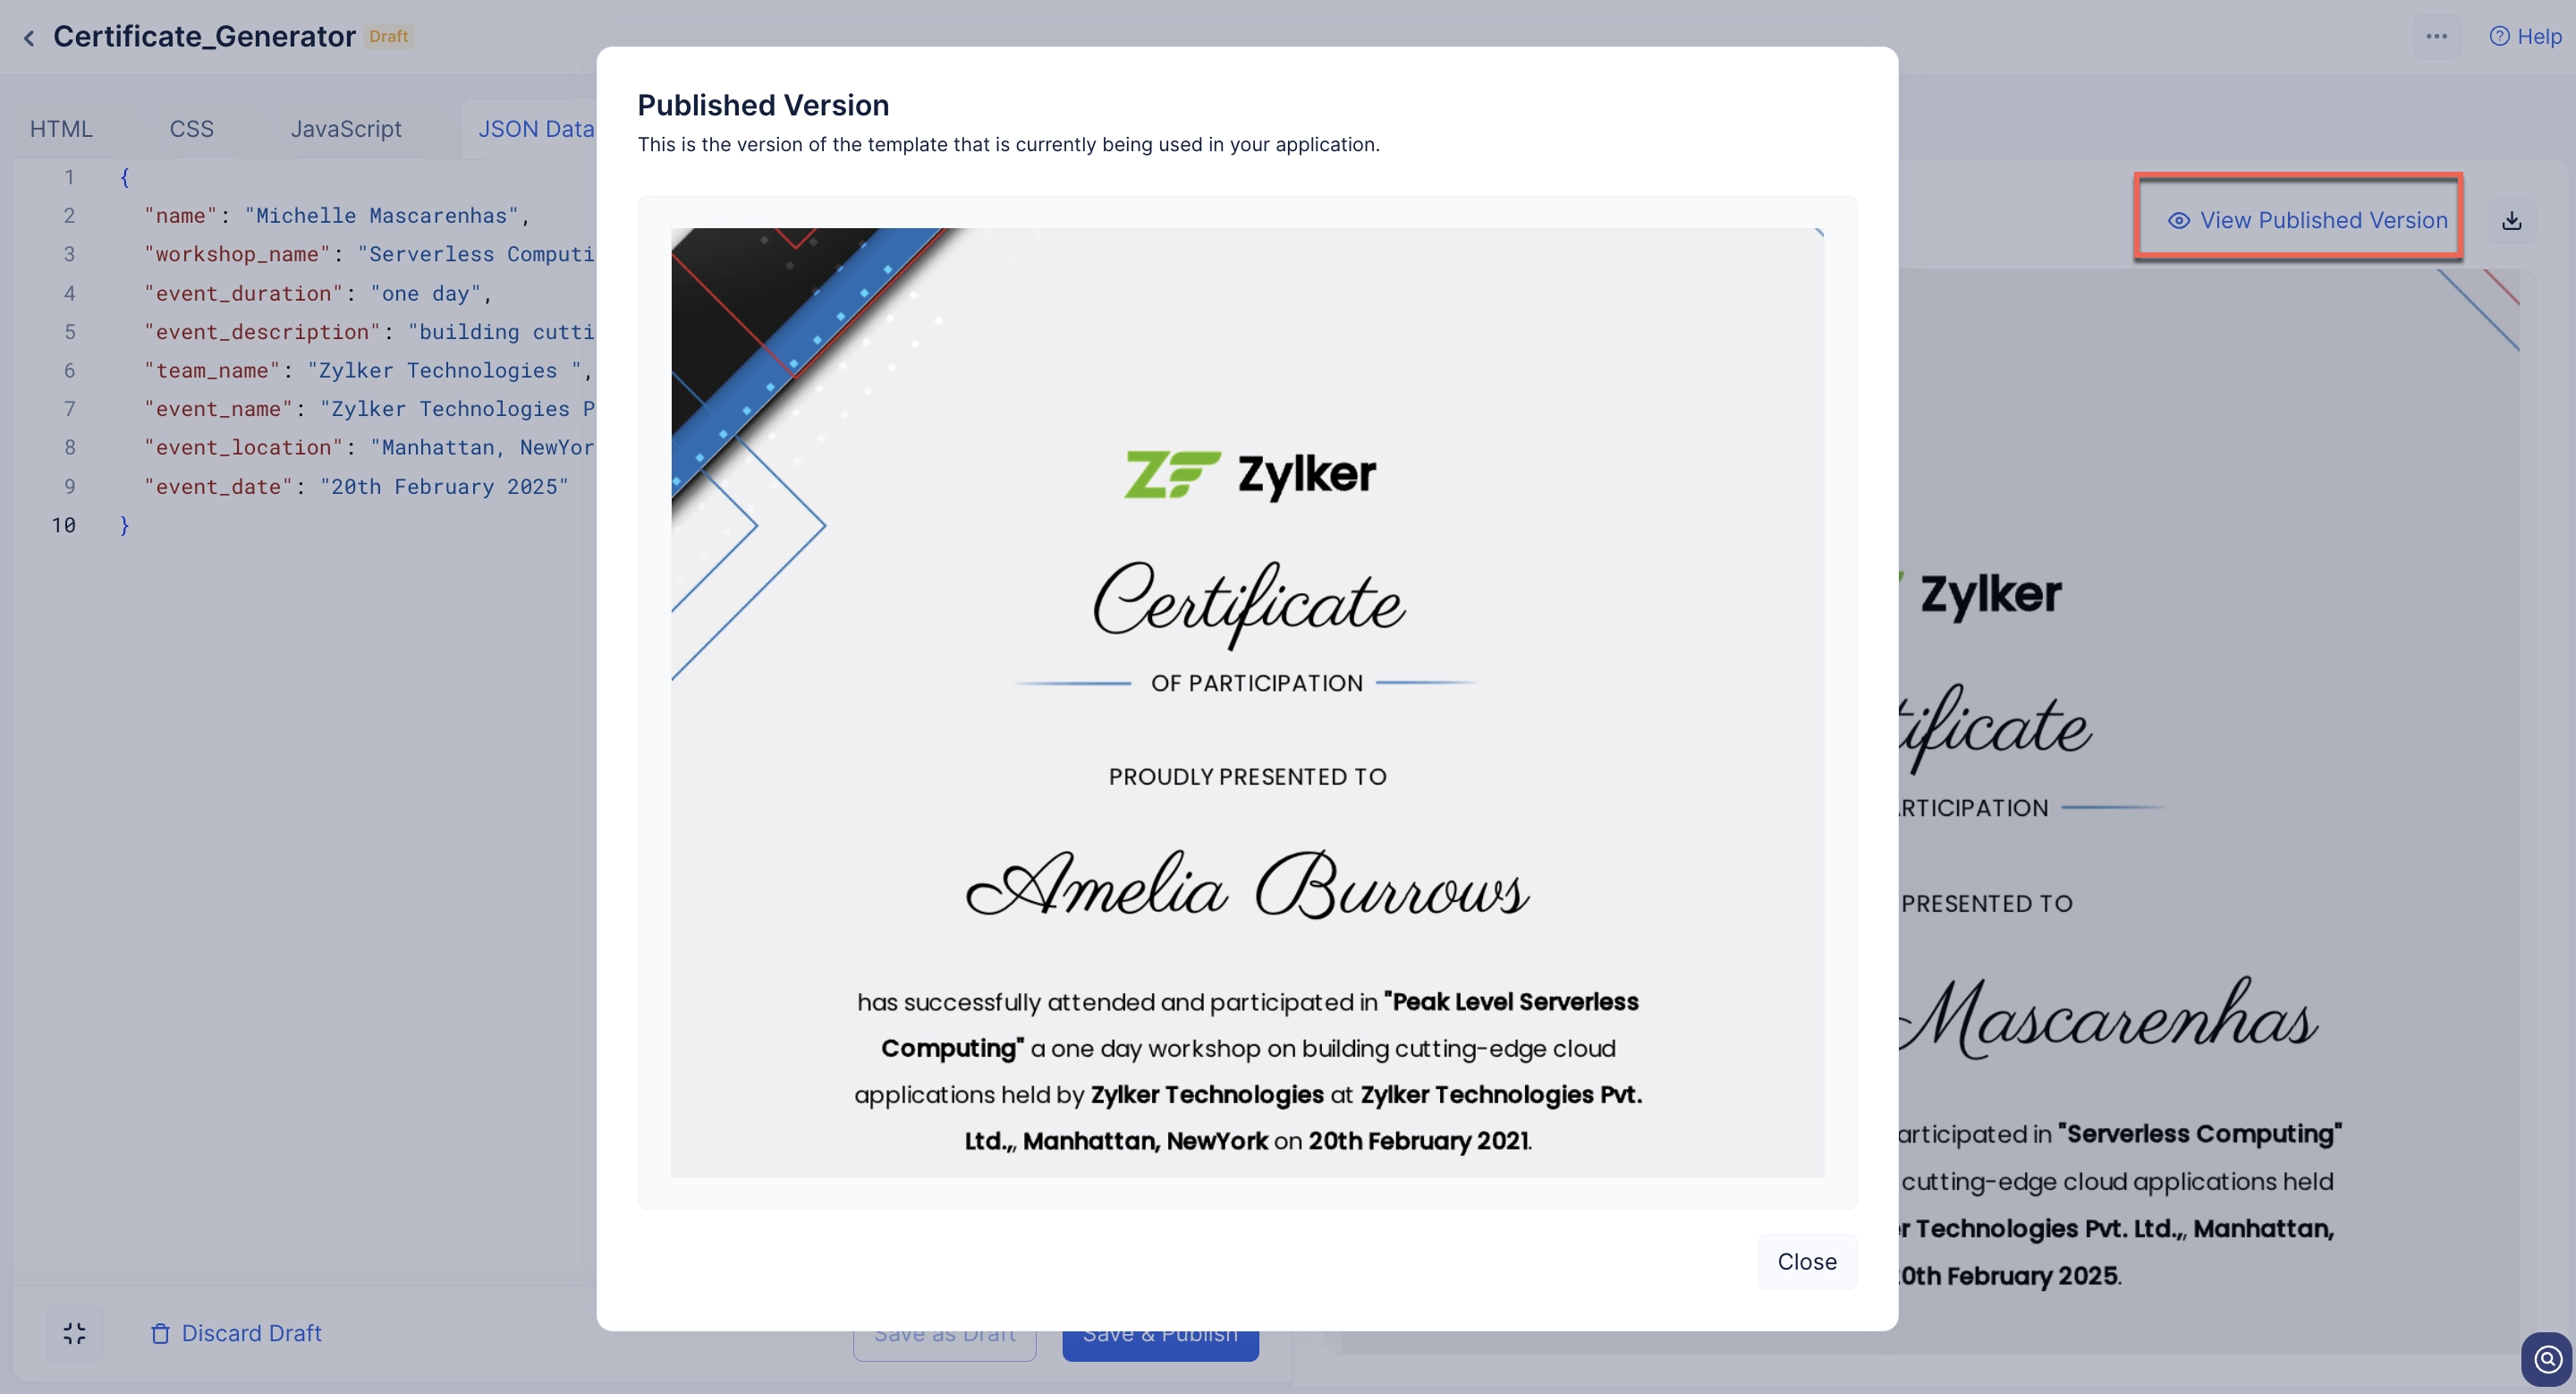
You can always, view the published version of the template by clicking the View Published Version button.
Once you’ve completed your required edits, you can render them live by clicking the Save & Publish button.
This action will delete the current live version and render your draft as the live version of the template.
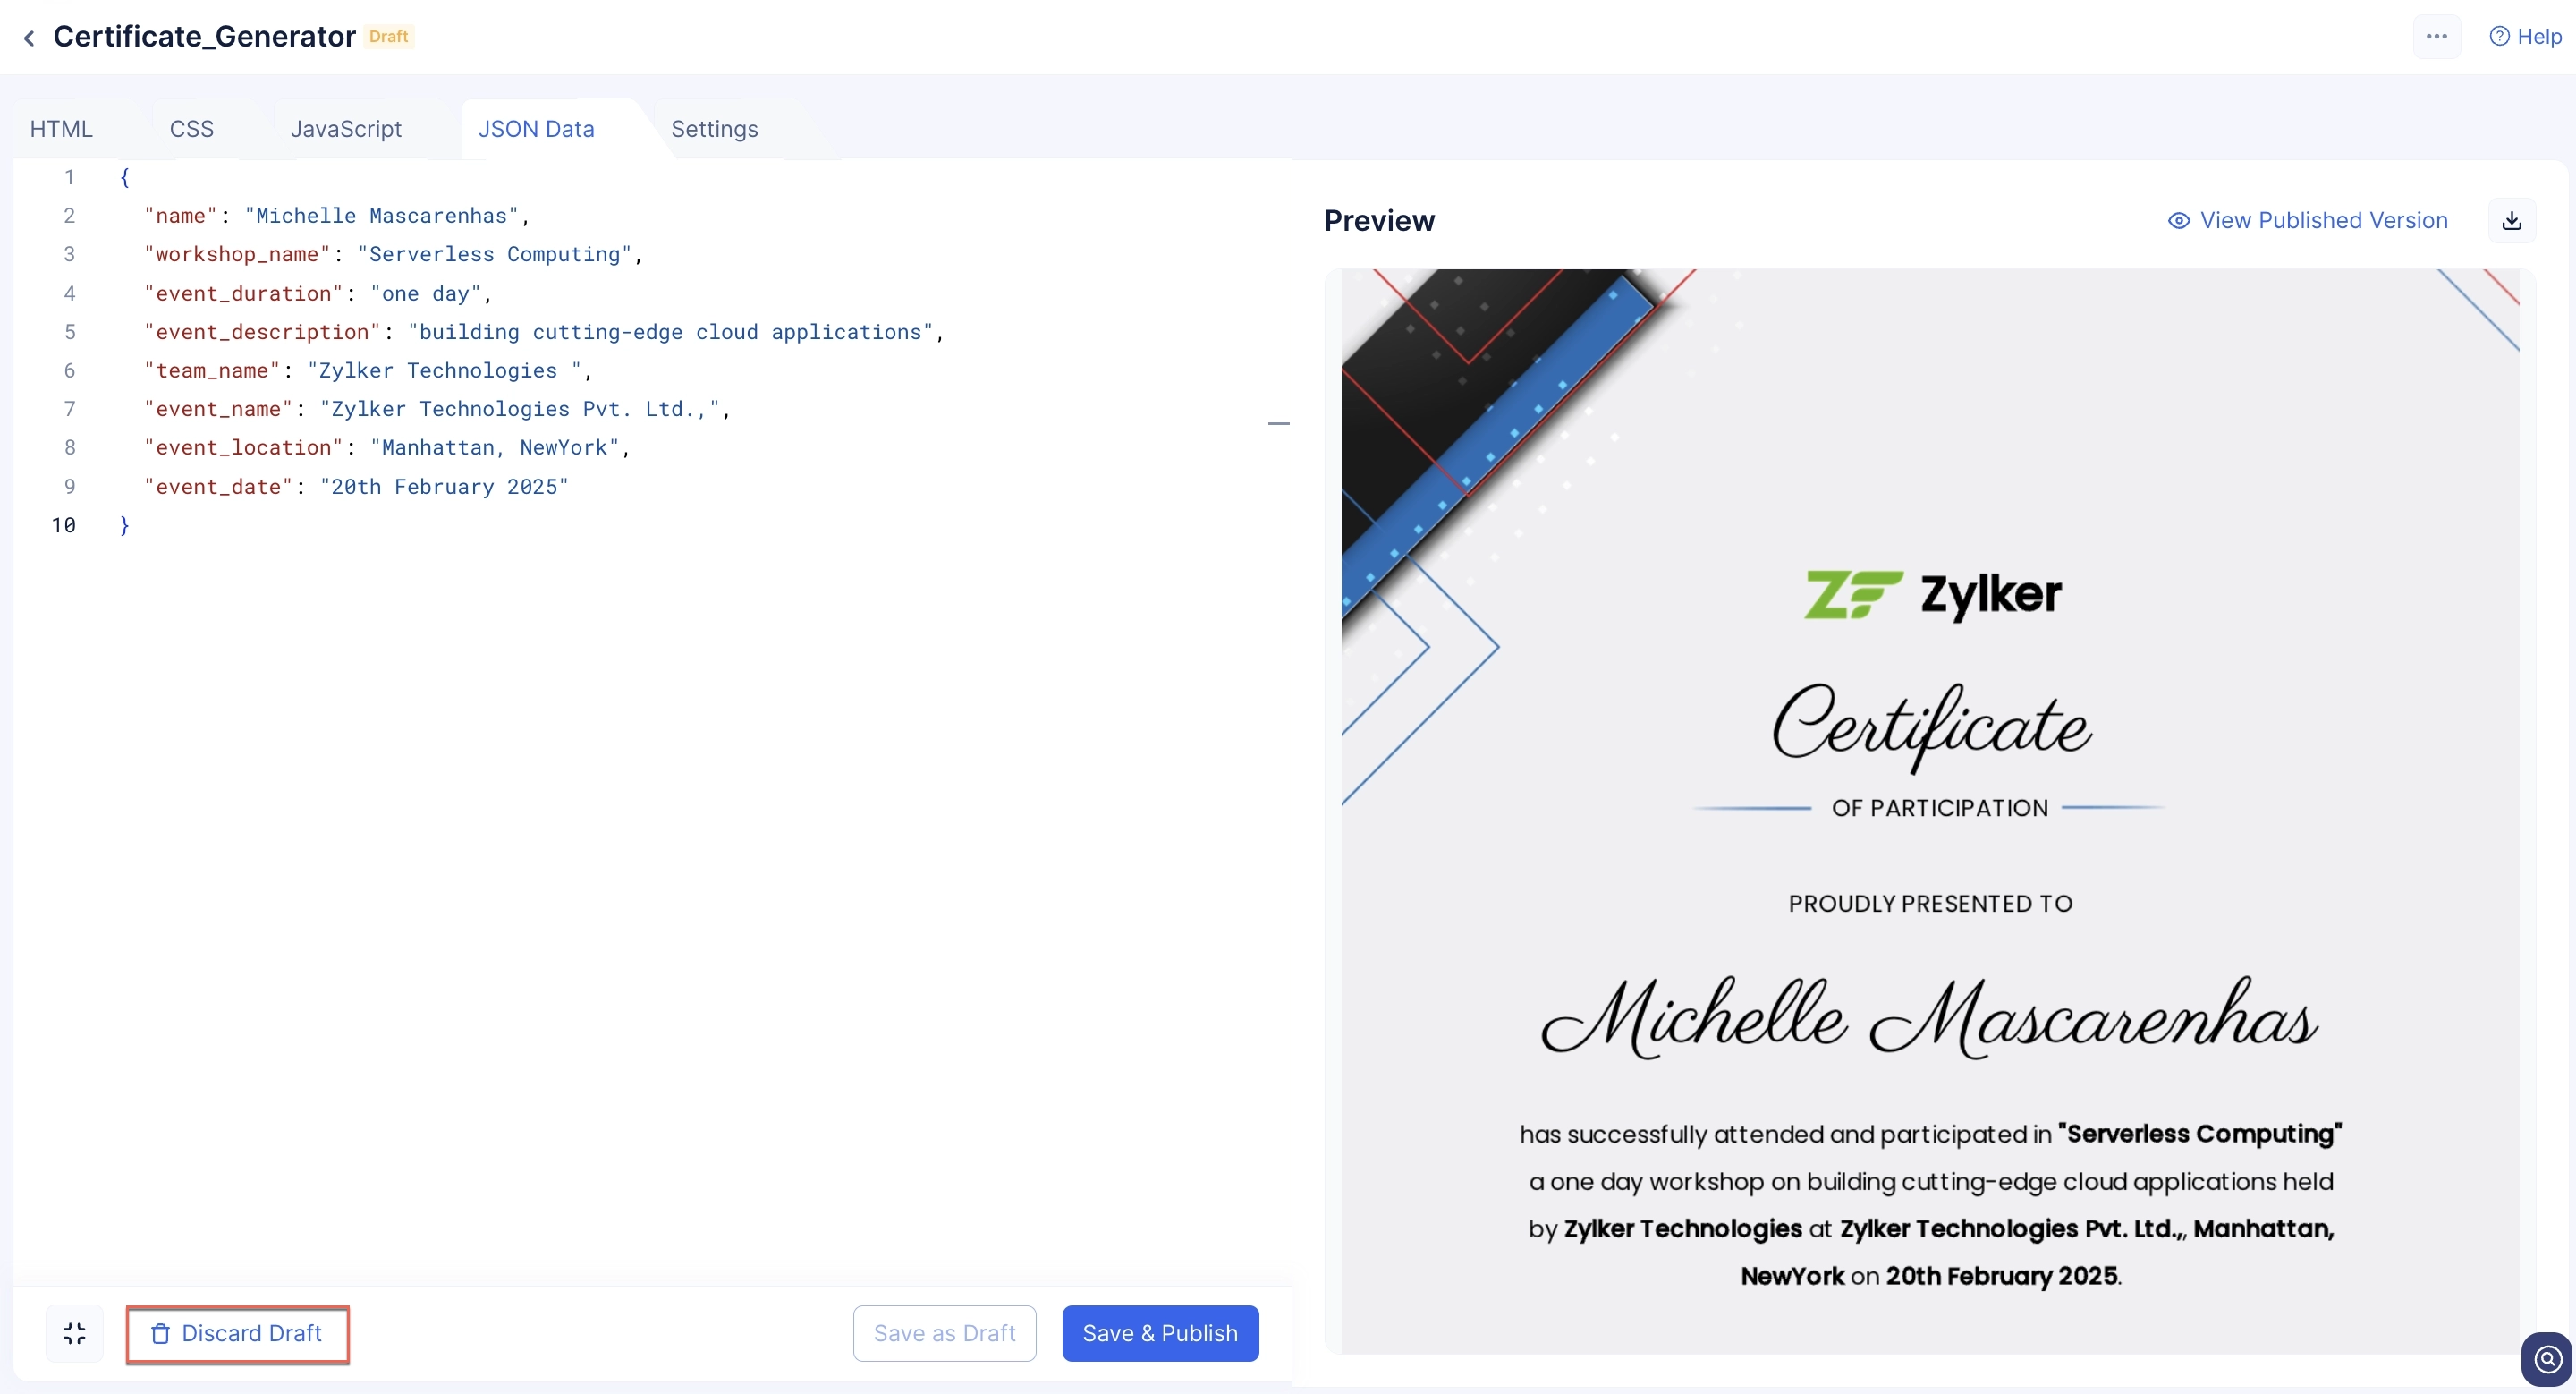
Discard Drafts
If you happen to be unsatisfied with your edits and wish to remove all changes to your draft, in essence, restore your template to its latest published version, then you can simply discard the draft.
To discard a draft:
-
Click the Discard Draft button.
-
Click Confirm to discard the draft.

The draft will be deleted. The code and configurations rendering your template to the latest live version will be restored in the editor.
Customize the Orientation and Layout of the Template
Using the Settings section, you can password protect your visual document, style the layout and the orientation of the document and also decide your output format.
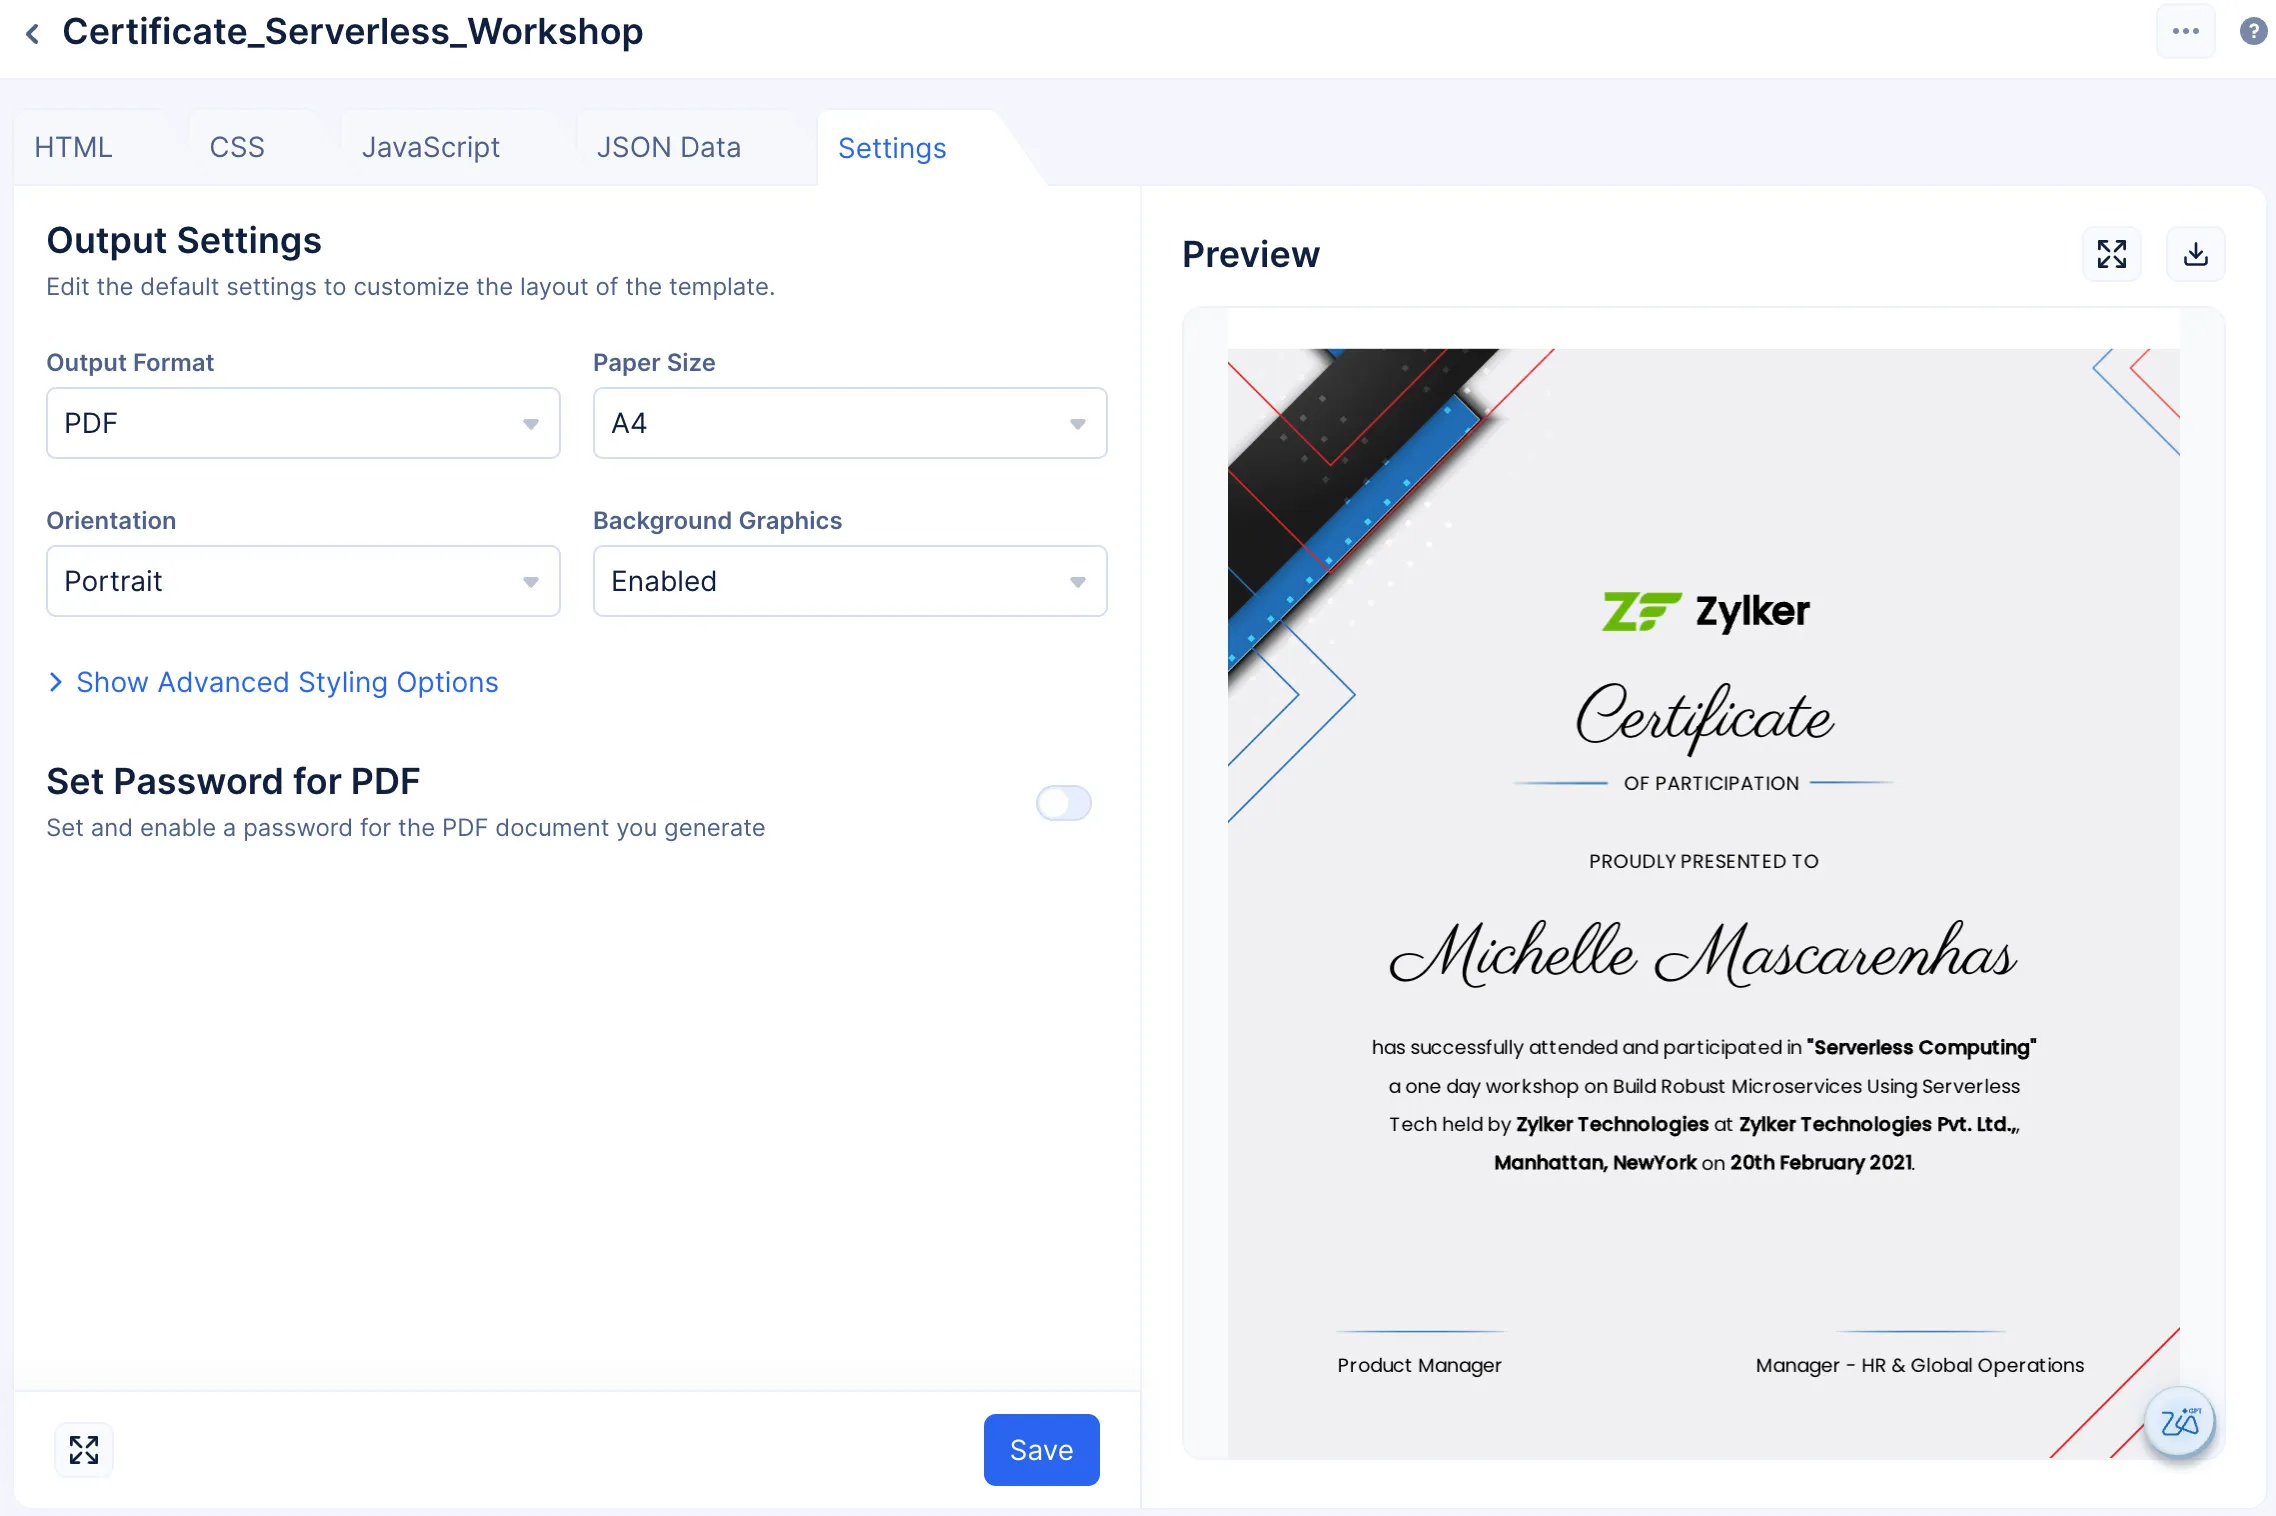
In this section, use the various drop-down selections to customize the following features of your template:
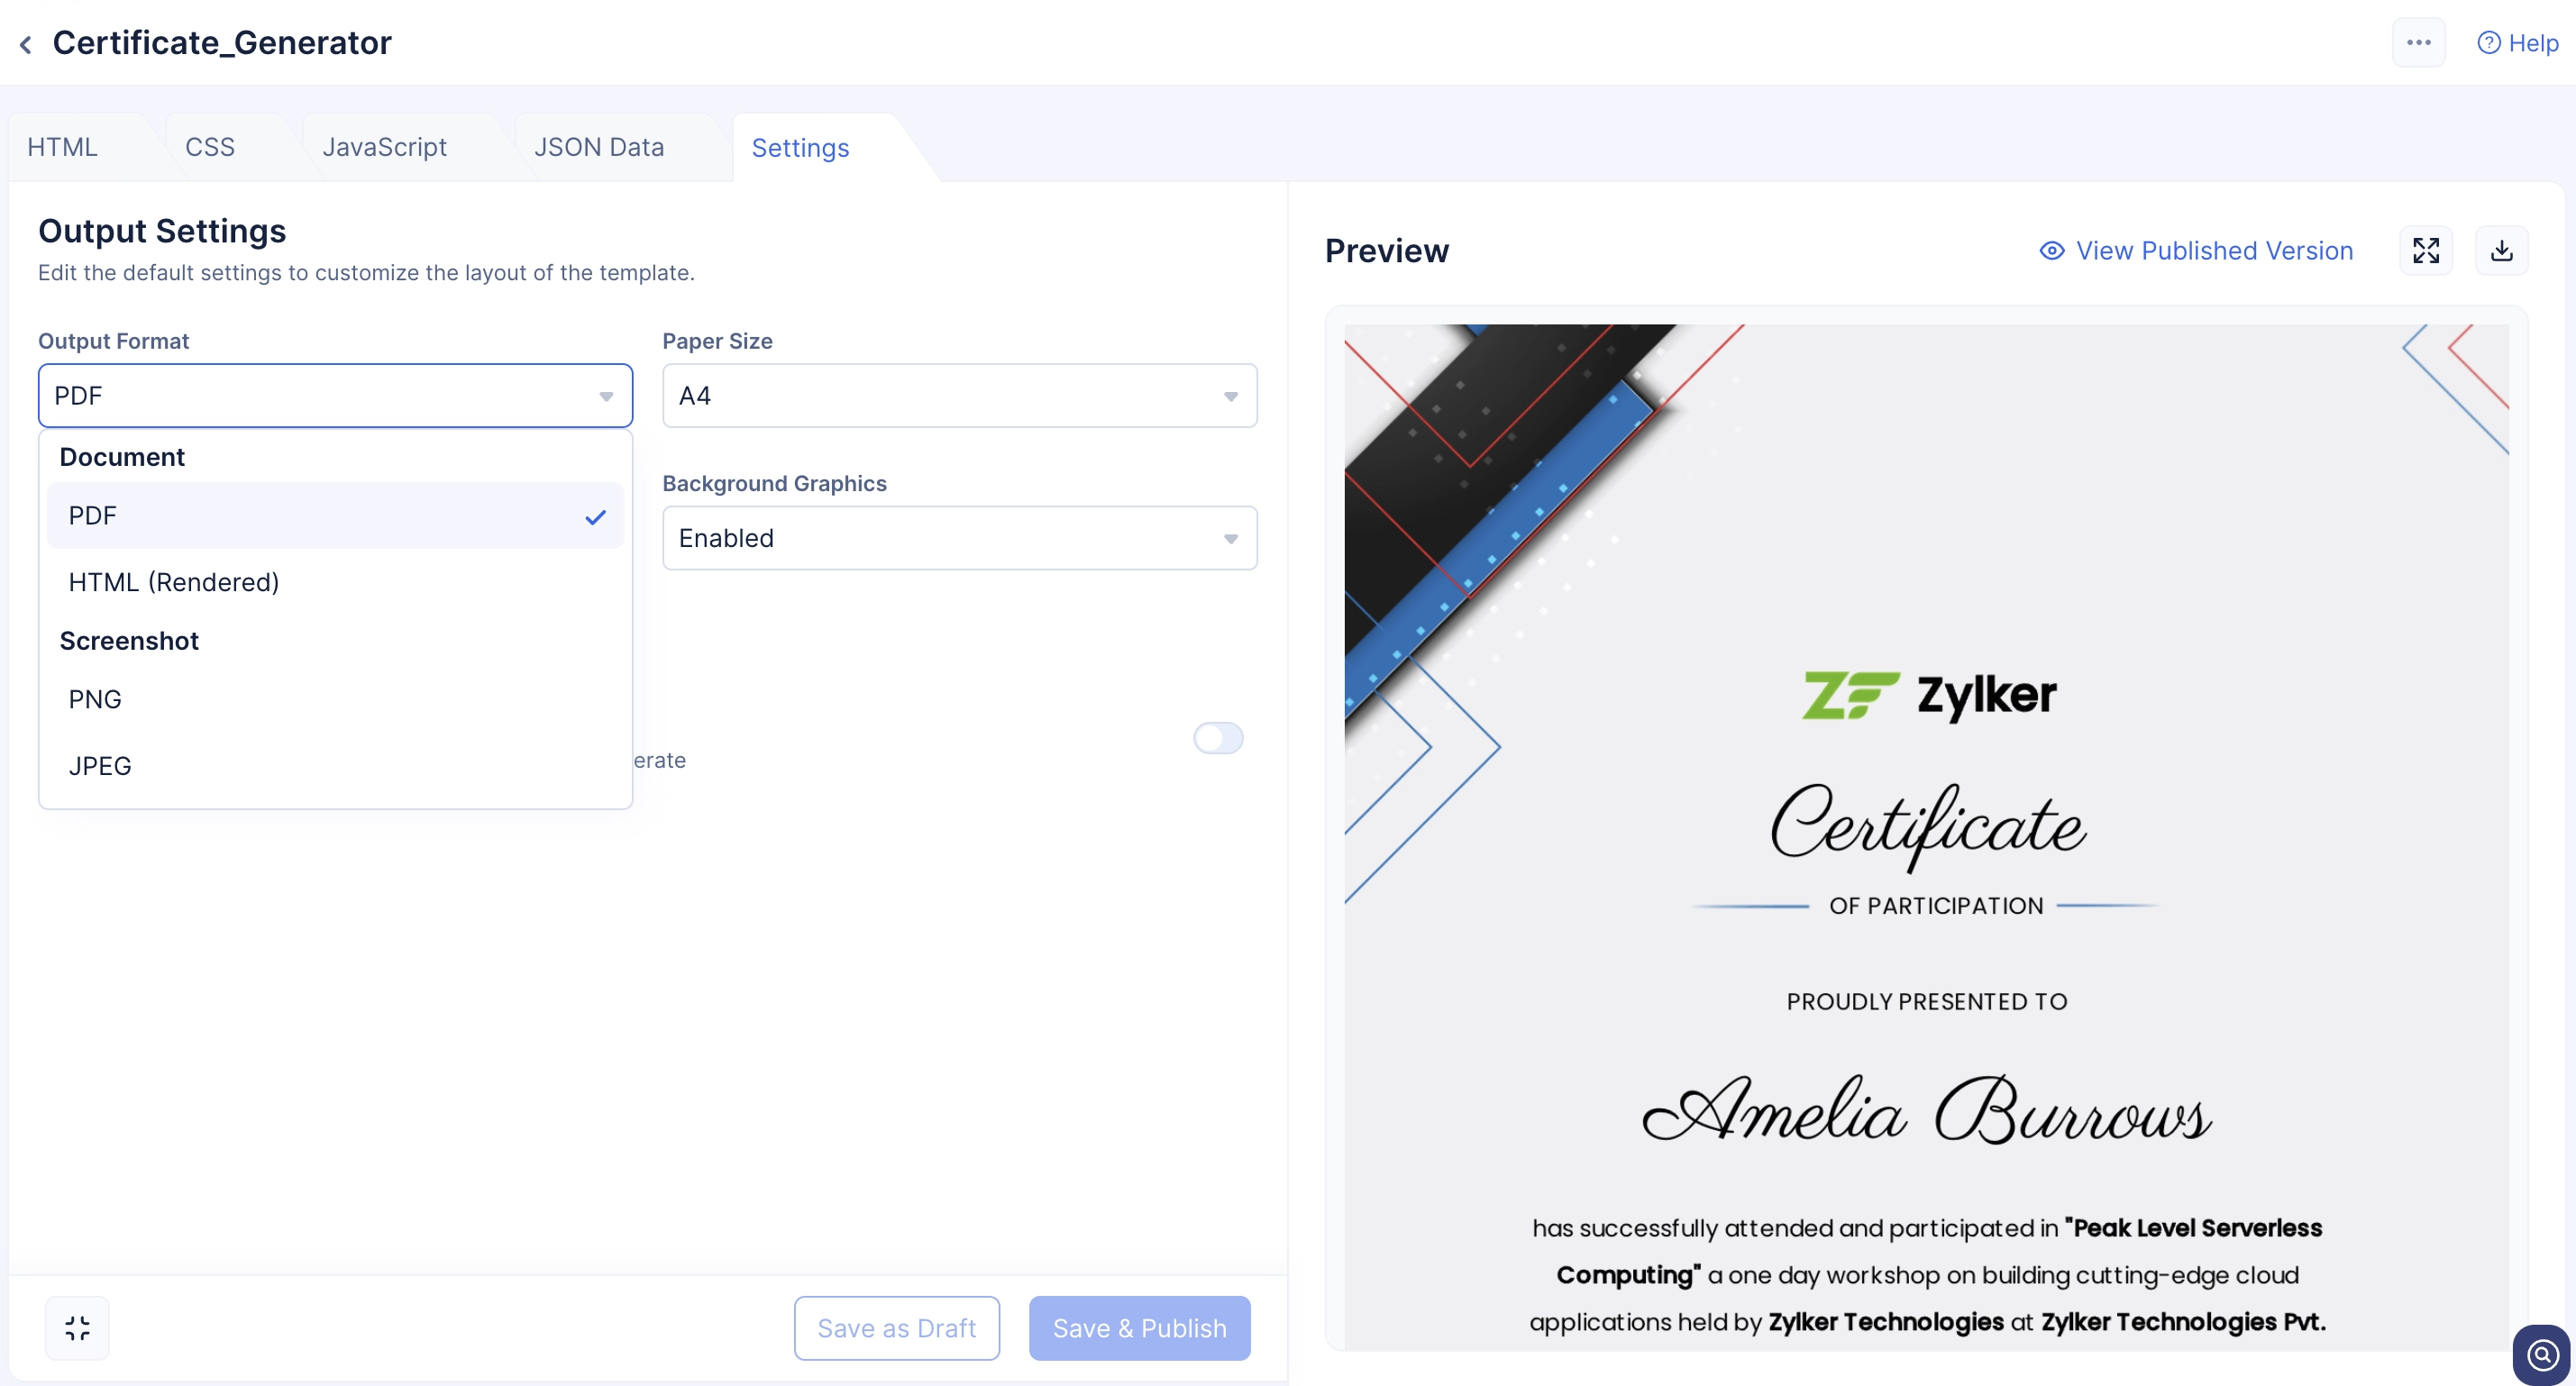
Output Format
You can generate outputs for your template in the following formats:
- HTML (Rendered): The HTML (Rendered) output format downloads the template as HTML code. All of the templates styling, configurations and the template itself will be downloadable as HTML code.
- PNG, JPEG.
Paper size
SmartBrowz Templates provides you with all the ISO 216 paper size options including a Custom option to design your template’s paper layout

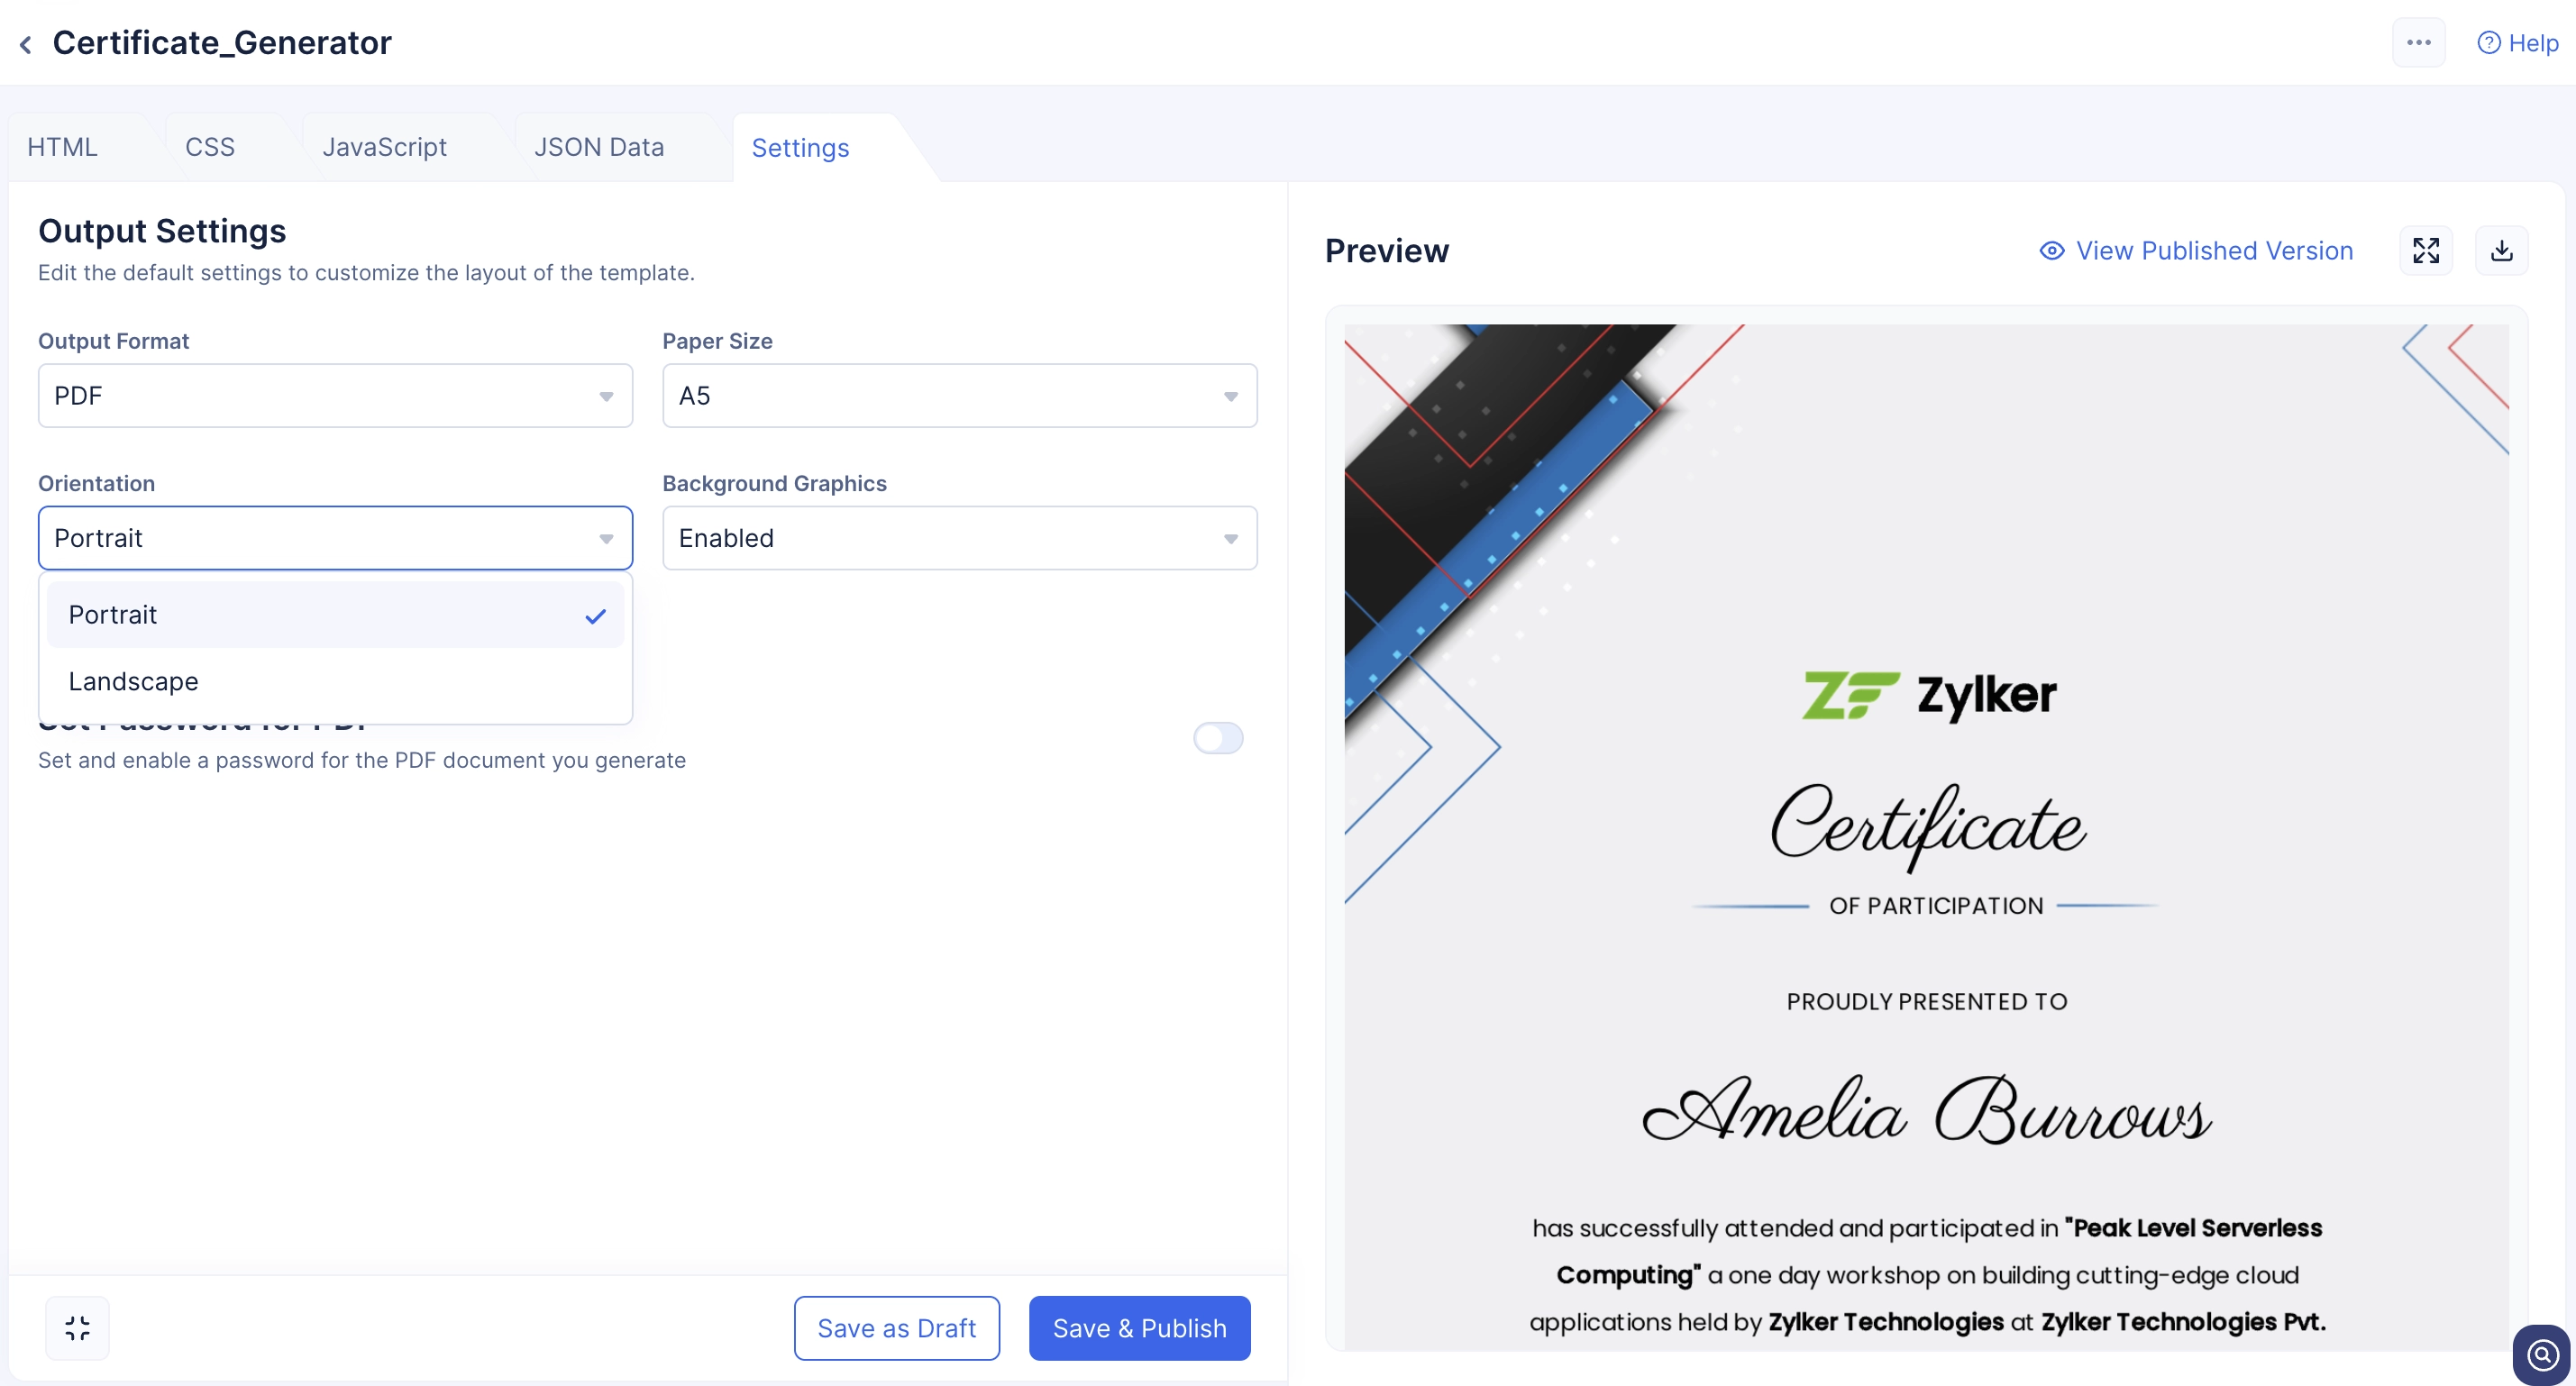
Orientation
SmartBrowz Templates provides you with the option to choose the orientation of your template. You have the option to generate your template in the Landscape or Portrait orientation.
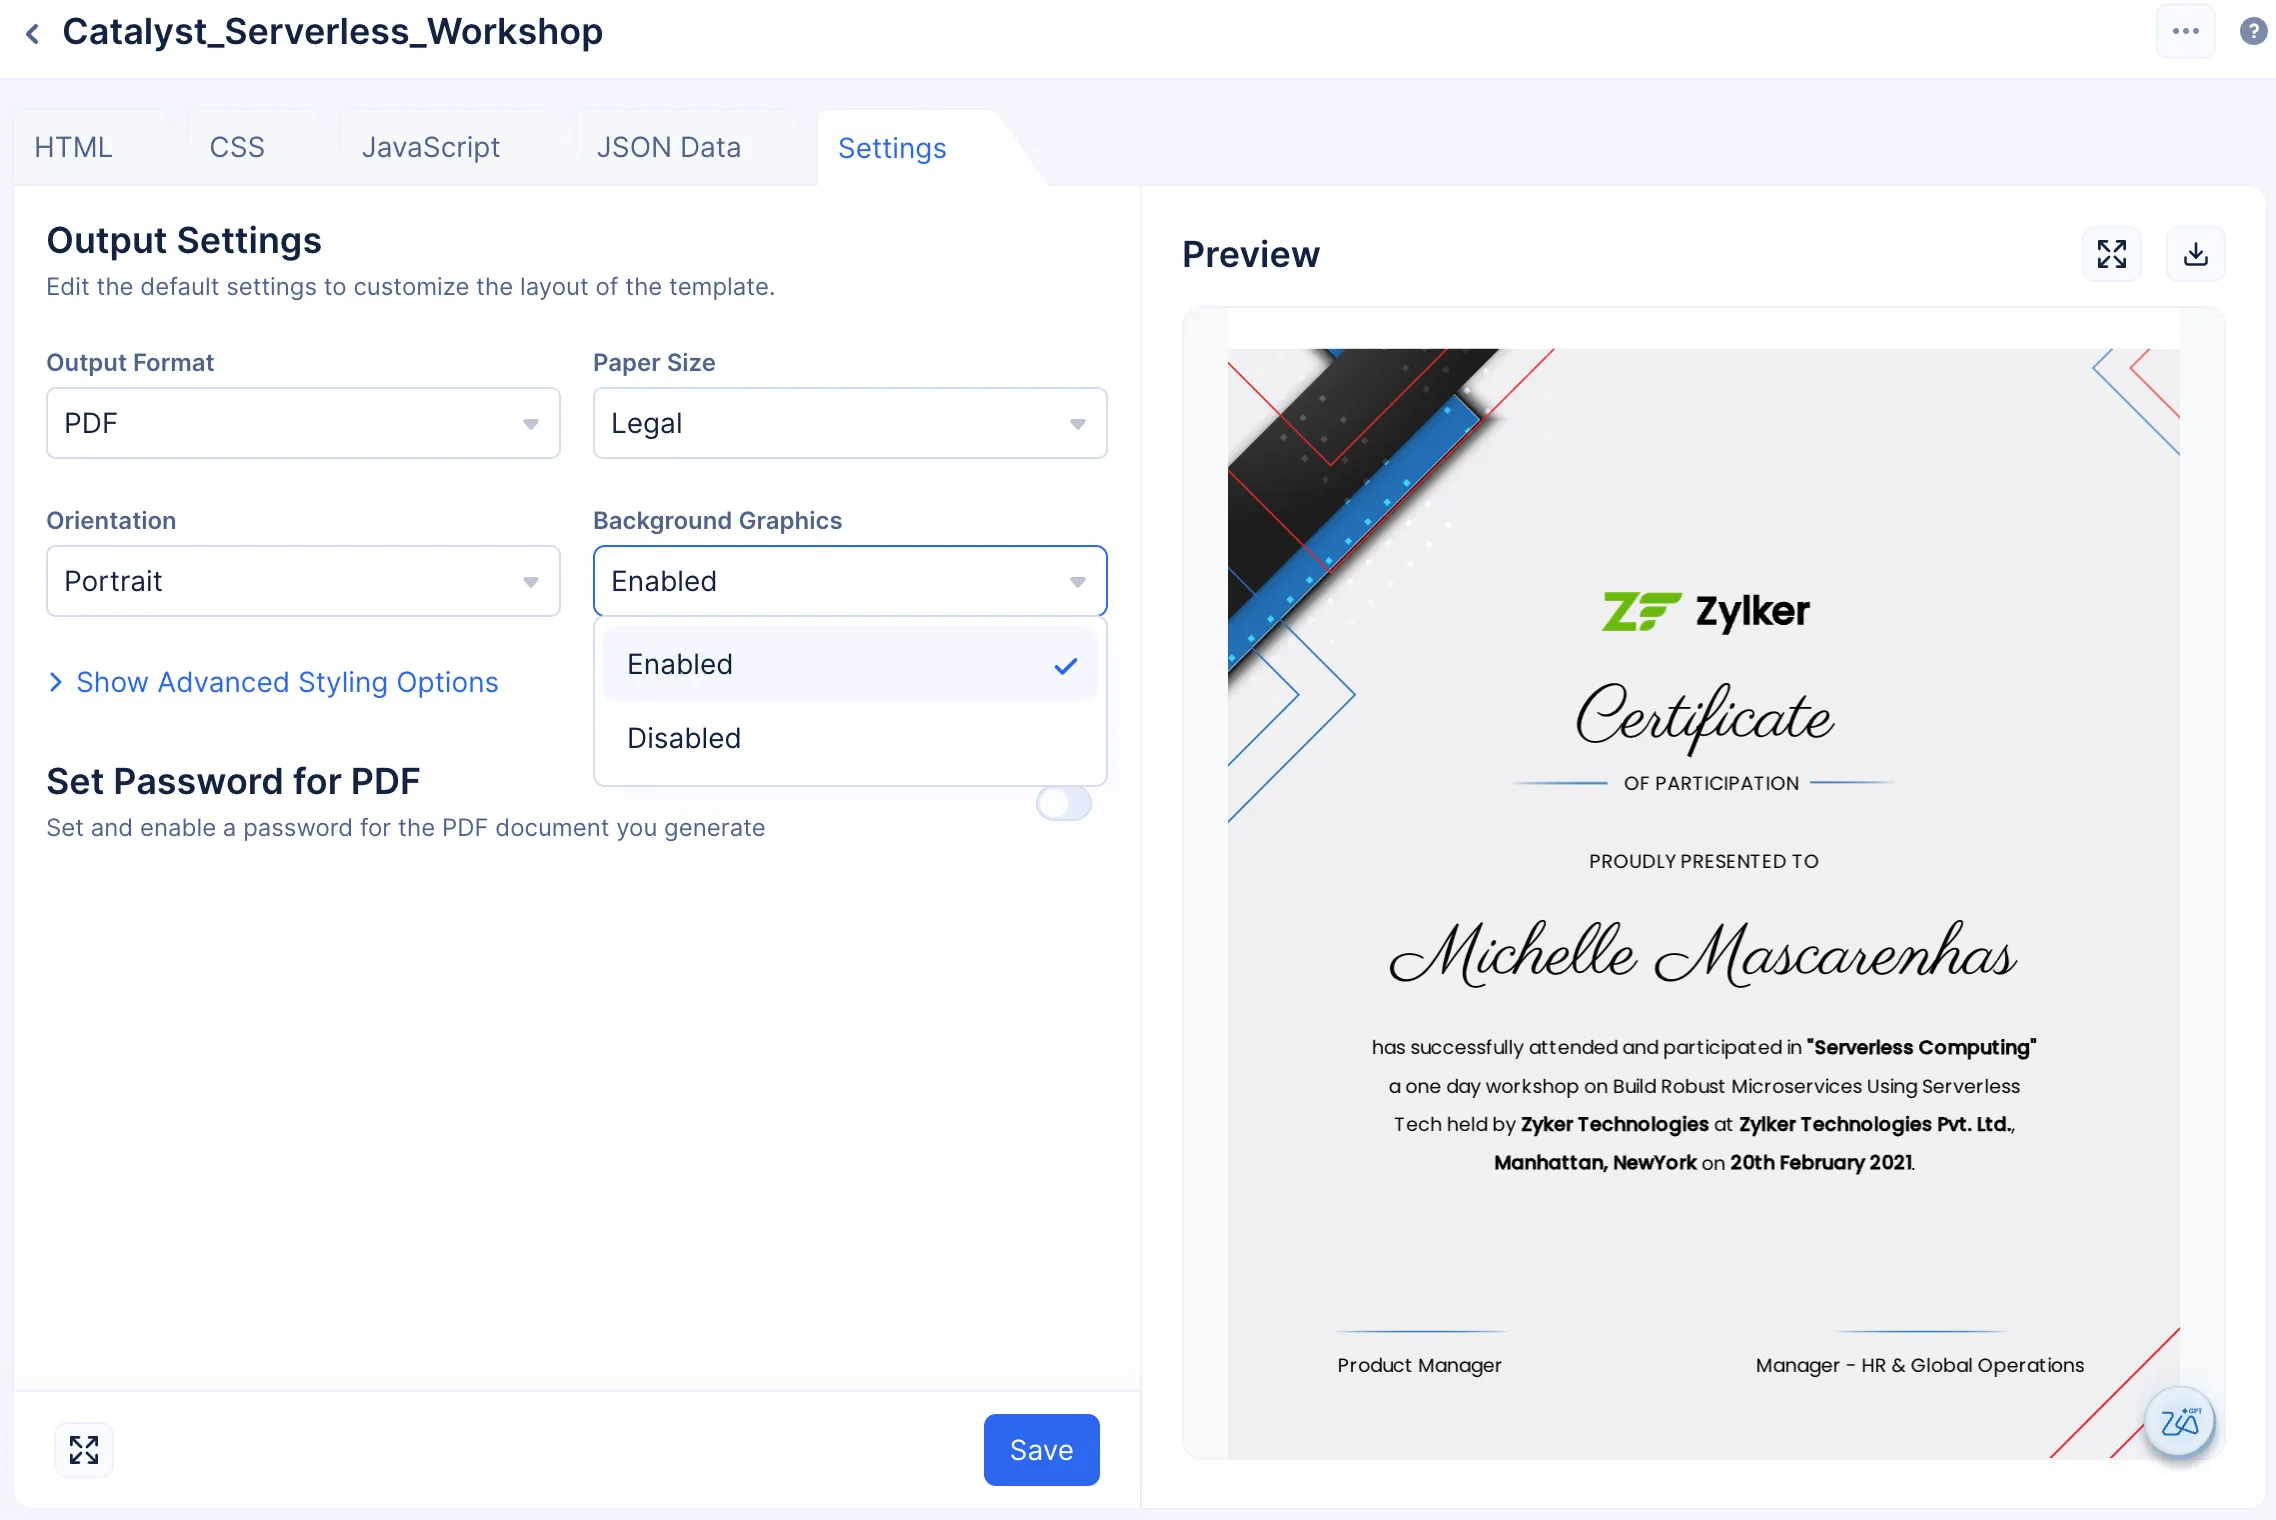
Background graphics
SmartBrowz Templates provides you with the option to Enable or Disable background graphics for your template.
Advanced Styling Options
You can further change the margin-orientation of your template, by clicking Show Advanced Styling Options.
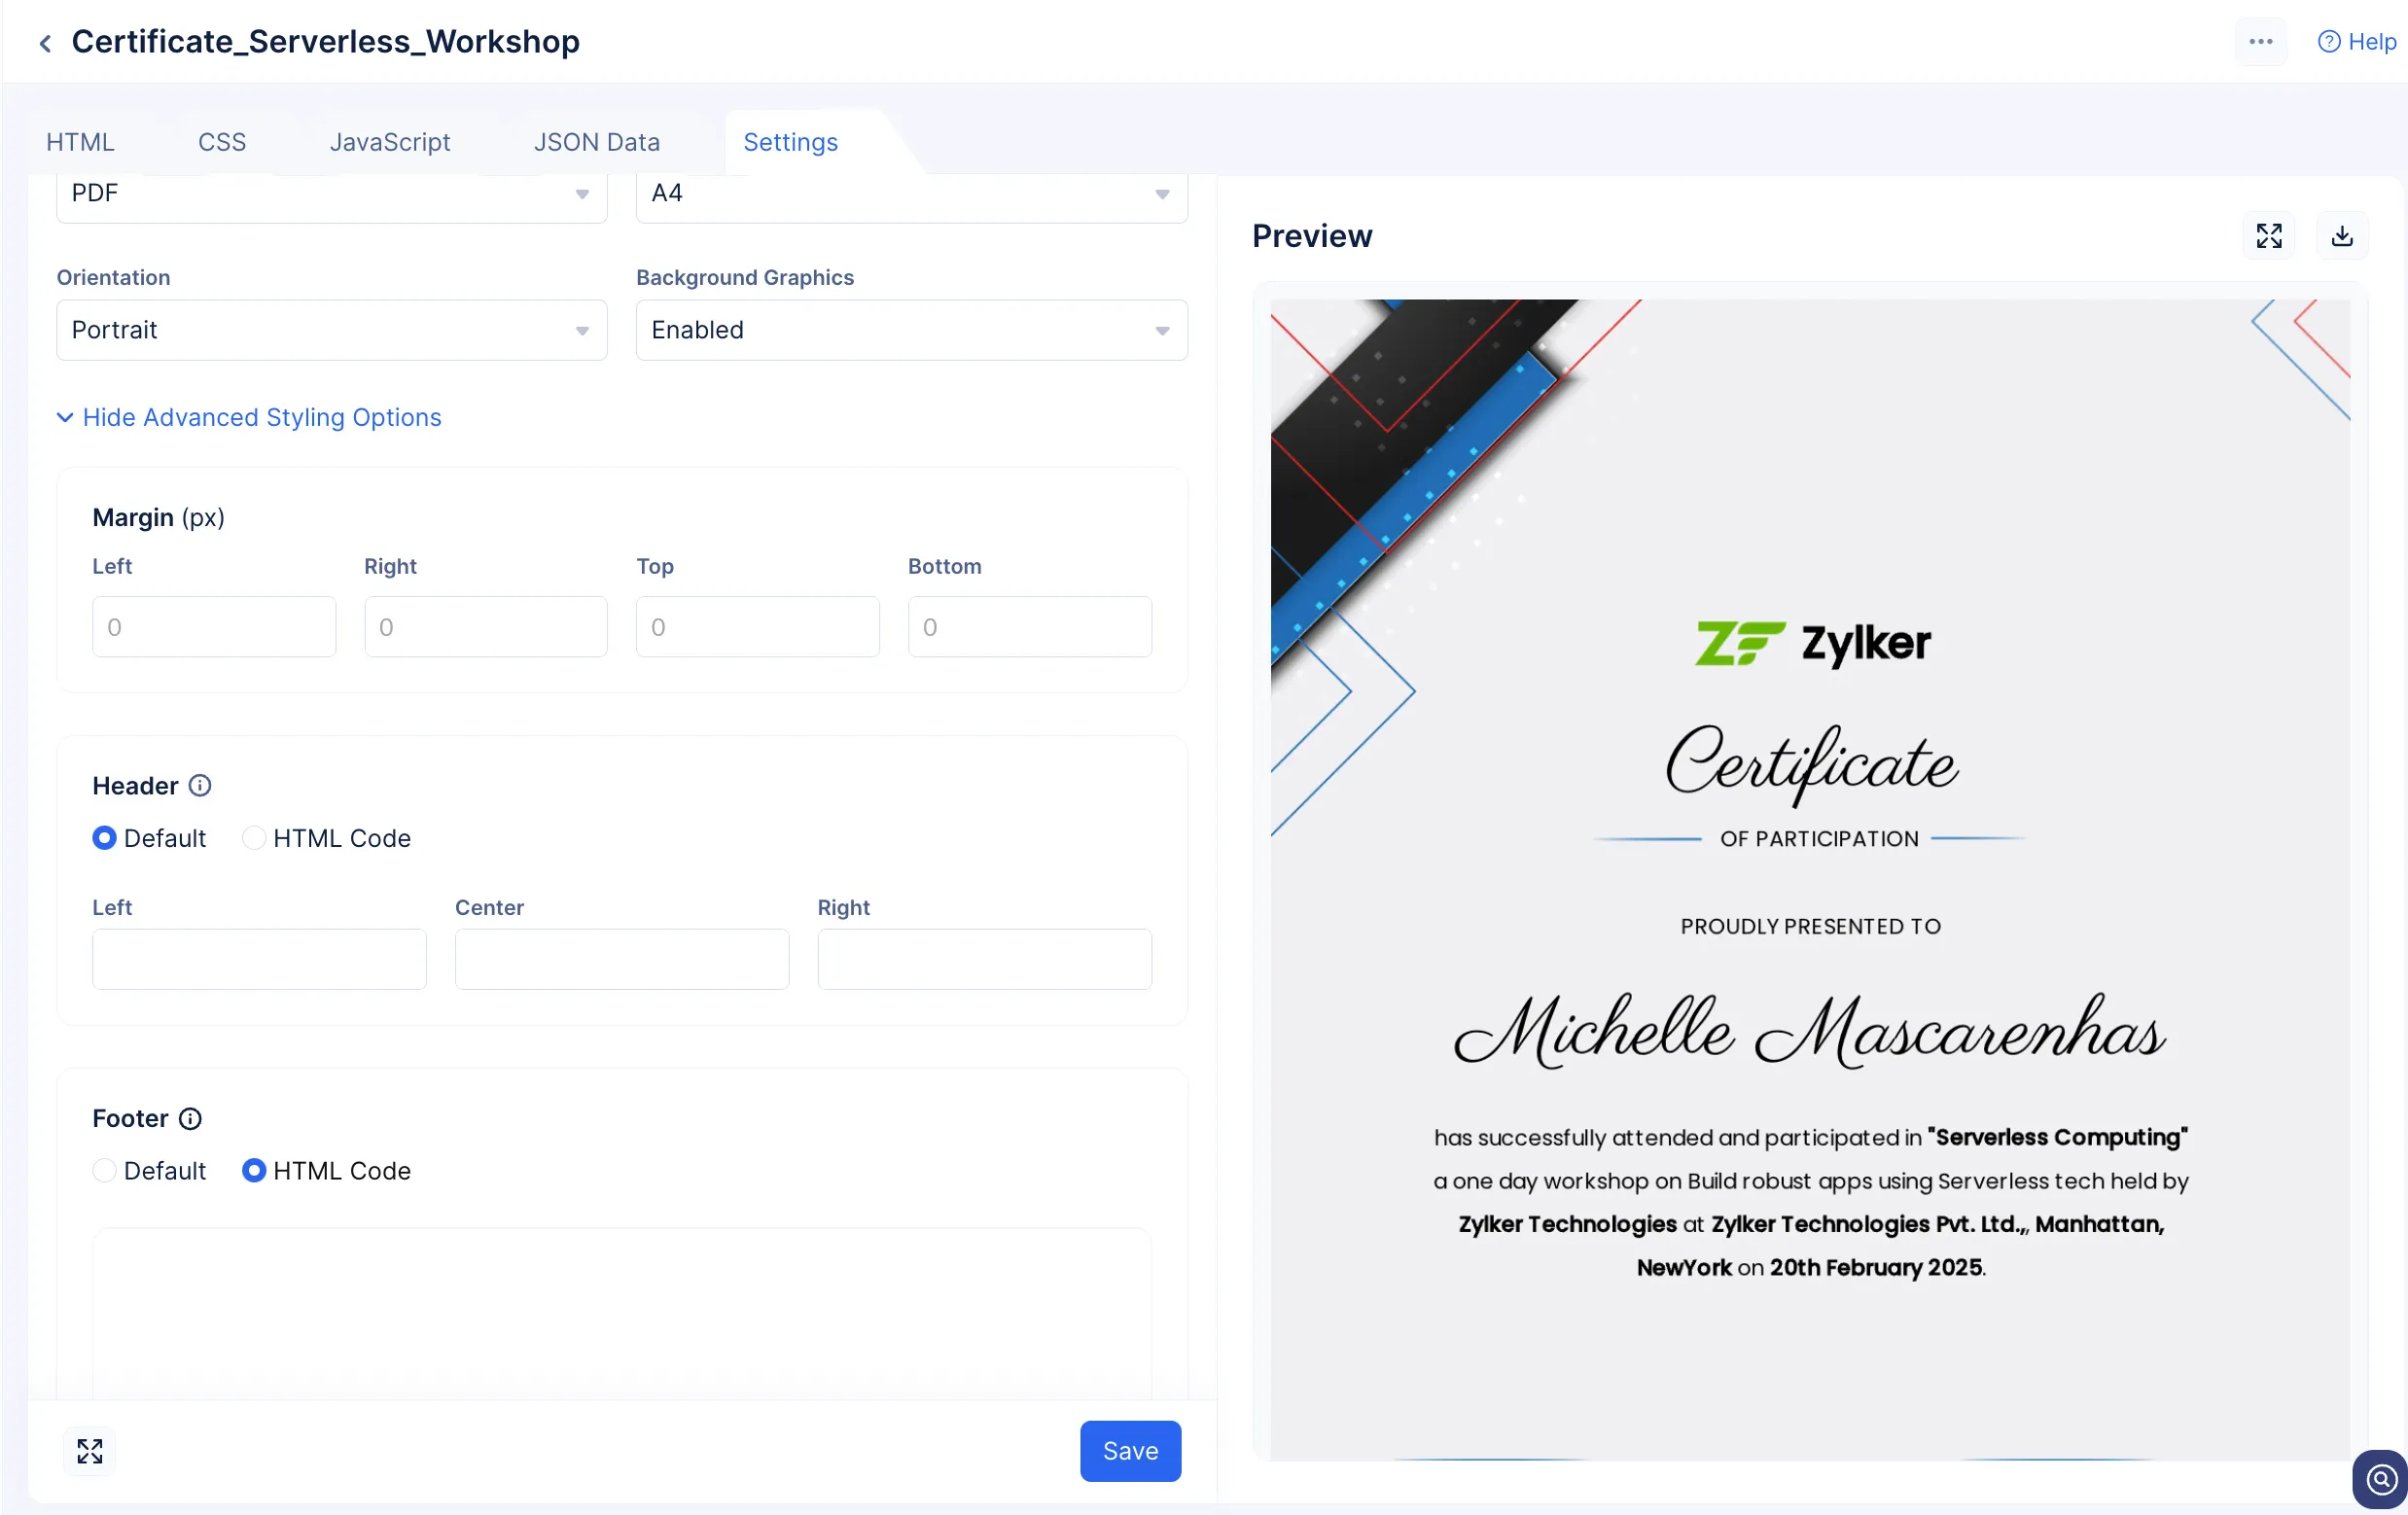
-
While configuring your document’s Header and Footer, you can either provide values in the input field, or you can code your customization in HTML by selecting the HTML Code option.
-
While inputting values for the Header and Footer, ensure you provide it as 10px or above to view the change in the preview section.
Password Protected PDFs
Templates allows you to password protect documents that are generated using a template. You can either manually set the password for your template, or you can code a logic that instructs Catalyst to set a password dynamically.
To password protect PDFs, click the Set Password for PDF toggle:
-
There are two ways you can set a password for your PDF:
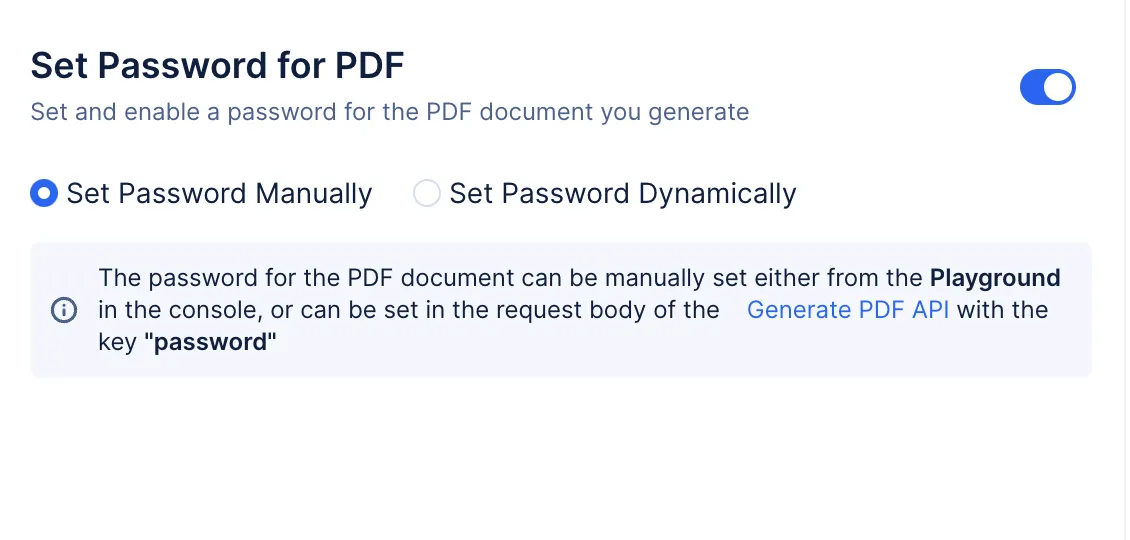
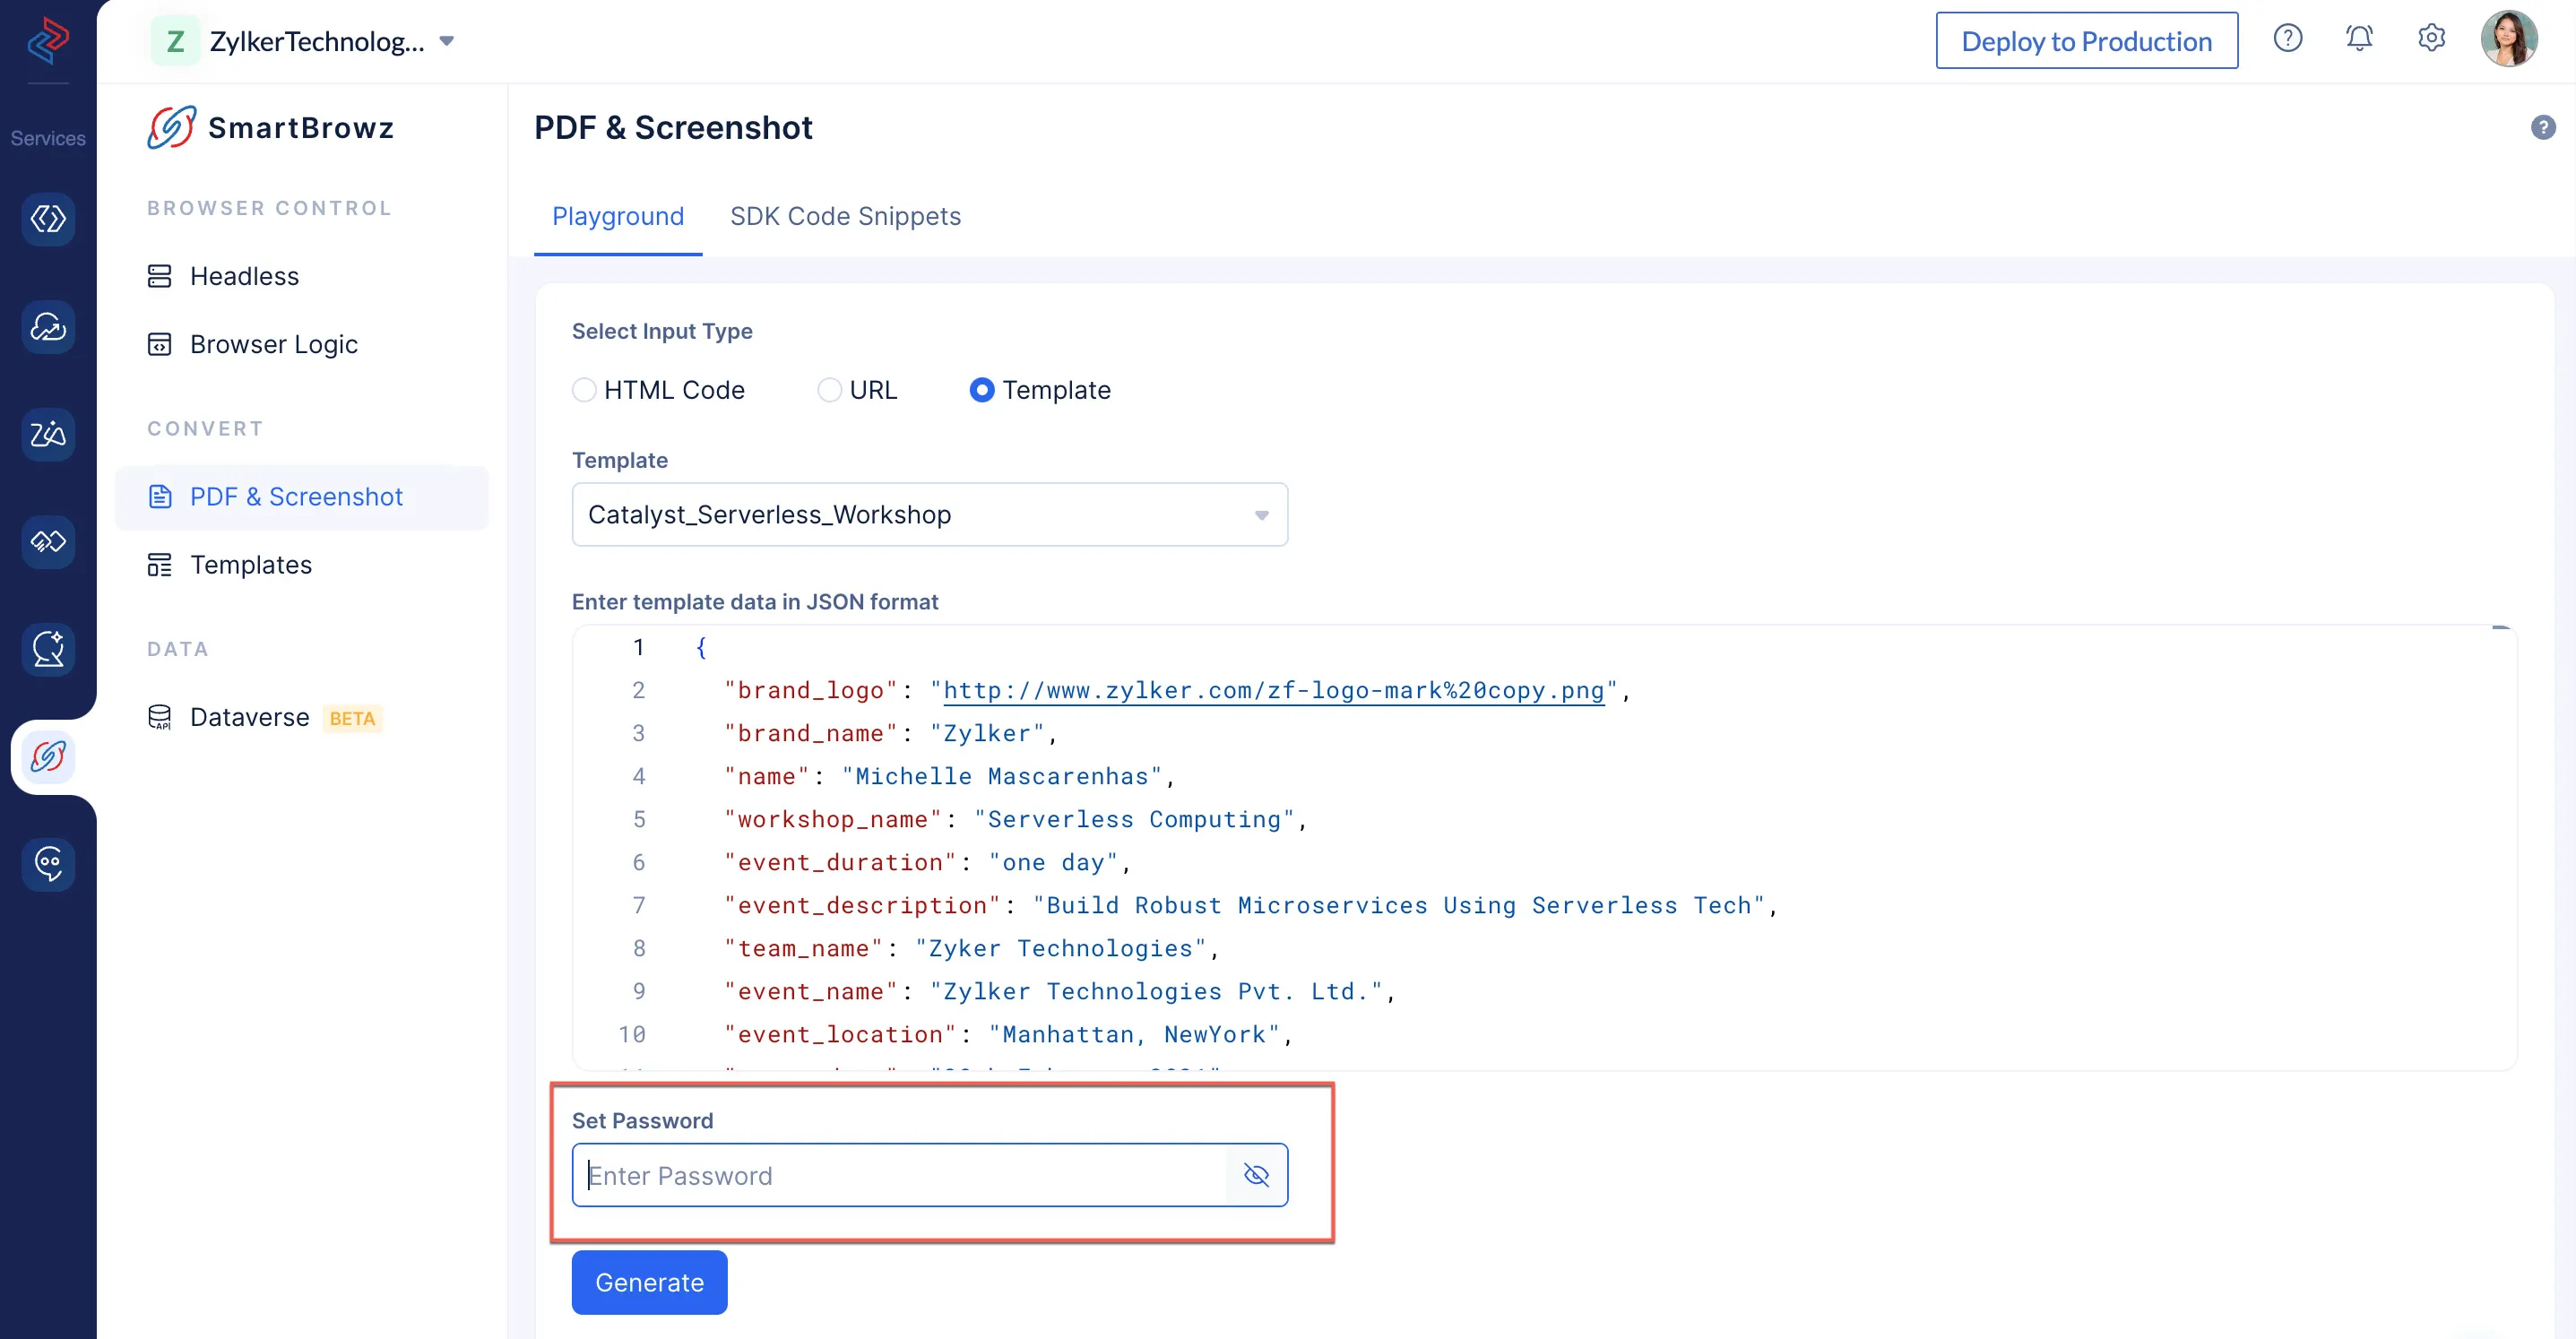
- By default, the Set Password Manually option will be selected. Choosing this option, allows you to set the password for your PDF in the Playground section of the PDF & Screenshot component.
Note: You can also manually set the password for your PDF using this API by passing your password for the document as a JSON key value pair "password" inside the "pdf_options" JSON.- Click the Set Password Dynamically option to code a custom logic that ensures each time a PDF is generated from the template, based on the logic you coded a password will be set for the document automatically.
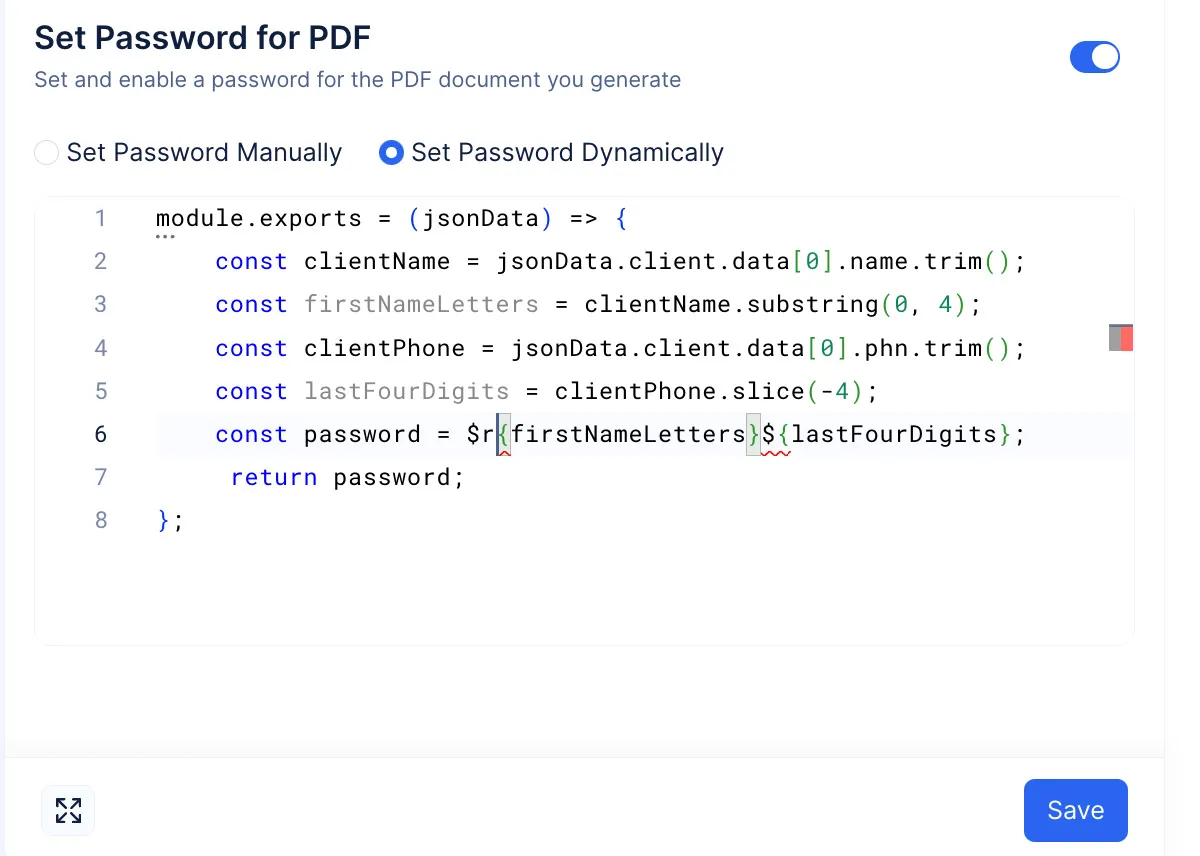
For this help documentation, we have implemented the code snippet shown below:
- By default, the Set Password Manually option will be selected. Choosing this option, allows you to set the password for your PDF in the Playground section of the PDF & Screenshot component.
module.exports = (jsonData) => {
    // Extract the first four letters from client.name
    const clientName = jsonData.client.data[0].name.trim(); // Remove leading/trailing spaces
    const firstNameLetters = clientName.substring(0, 4);
    // Extract the last four digits from client.phn
    const clientPhone = jsonData.client.data[0].phn.trim(); // Remove leading/trailing spaces
    const lastFourDigits = clientPhone.slice(-4);
    const password = ${firstNameLetters}${lastFourDigits};
    //so password will be "Amel2782"
 return password;

};
The value for jsonData input is shown below:
{
    "address": {
        "name": "107 Traction Street,Green Ville",
        "postal": "South carolina-600028"
    },
    "client": {
        "data": [
            {
                "name": "Amelia Burrows",
                "phn": "+1-212-6782782",
                "start": "Monday,Feburary,28,2019",
                "end": "Monday,March,28,2019"
            }
        ]
    }
}
The PDF document generated from this template will have a password pattern that is a combination of their first name and last digits of their phone number.
- Click Save & Publish, to apply the password protection to your template.
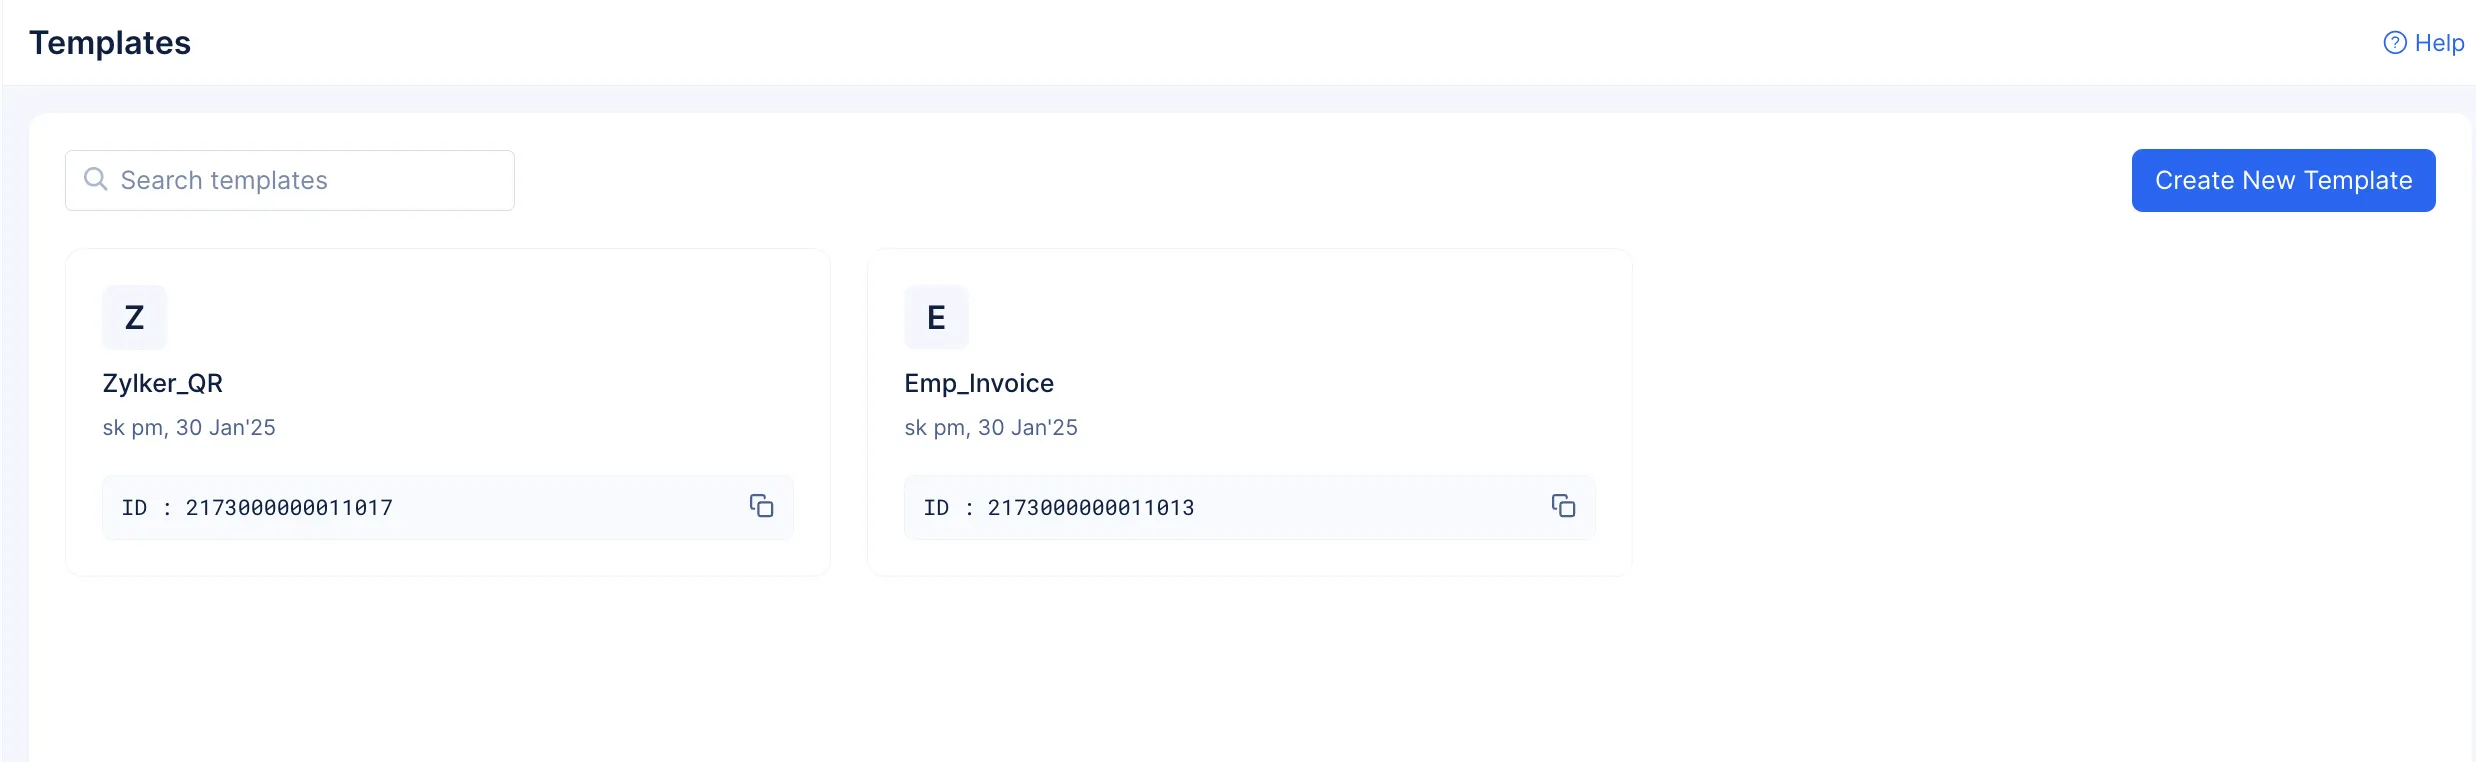
Once you have completed all the customizations to your template, you can access your this template at any time from the Templates component.
Last Updated 2025-12-16 10:31:39 +0530 IST
Yes
No
Send your feedback to us