Introduction
This tutorial will help you build a simple client application that allows your end-users to log in to your application after they have been authenticated using Embedded Authentication Type with a Custom User Validation function function. The Embedded Authentication type allows you to load your login element as an iFrame in your application.
The Embedded Authorization Portal application uses the following Catalyst services and their respective components:
- Catalyst Cloud Scale
- Authentication: The end-user will be authenticated to your application using the Embedded Authentication, a Native Catalyst Authentication Type.
- Web Client Hosting: The front end of the application is going to be hosted on Catalyst using the Web Client Hosting component. We will be initializing and configuring the client as a Basic web app and a React app.
- Catalyst Serverless
- Functions: We will be using Basic I/O function to code the logic used to implement Custom User Validation. We will be coding the function in Python.
This tutorial will help you understand and how to use the various features of Embedded Authentication Type. We will be incorporating the following functionalities in this tutorial:
- Sign up to the web app using an email address
- Log in to the app using the sign-up account information
- Log in to the app using any or all of the following Identity Provider Logins:
- Reset the password option in case an end-user forgets their password
- Configure Email Verification and Password Reset email templates
- Configure and add a Custom User Validation function
- View profile information after logging into the application
- Log out of the application
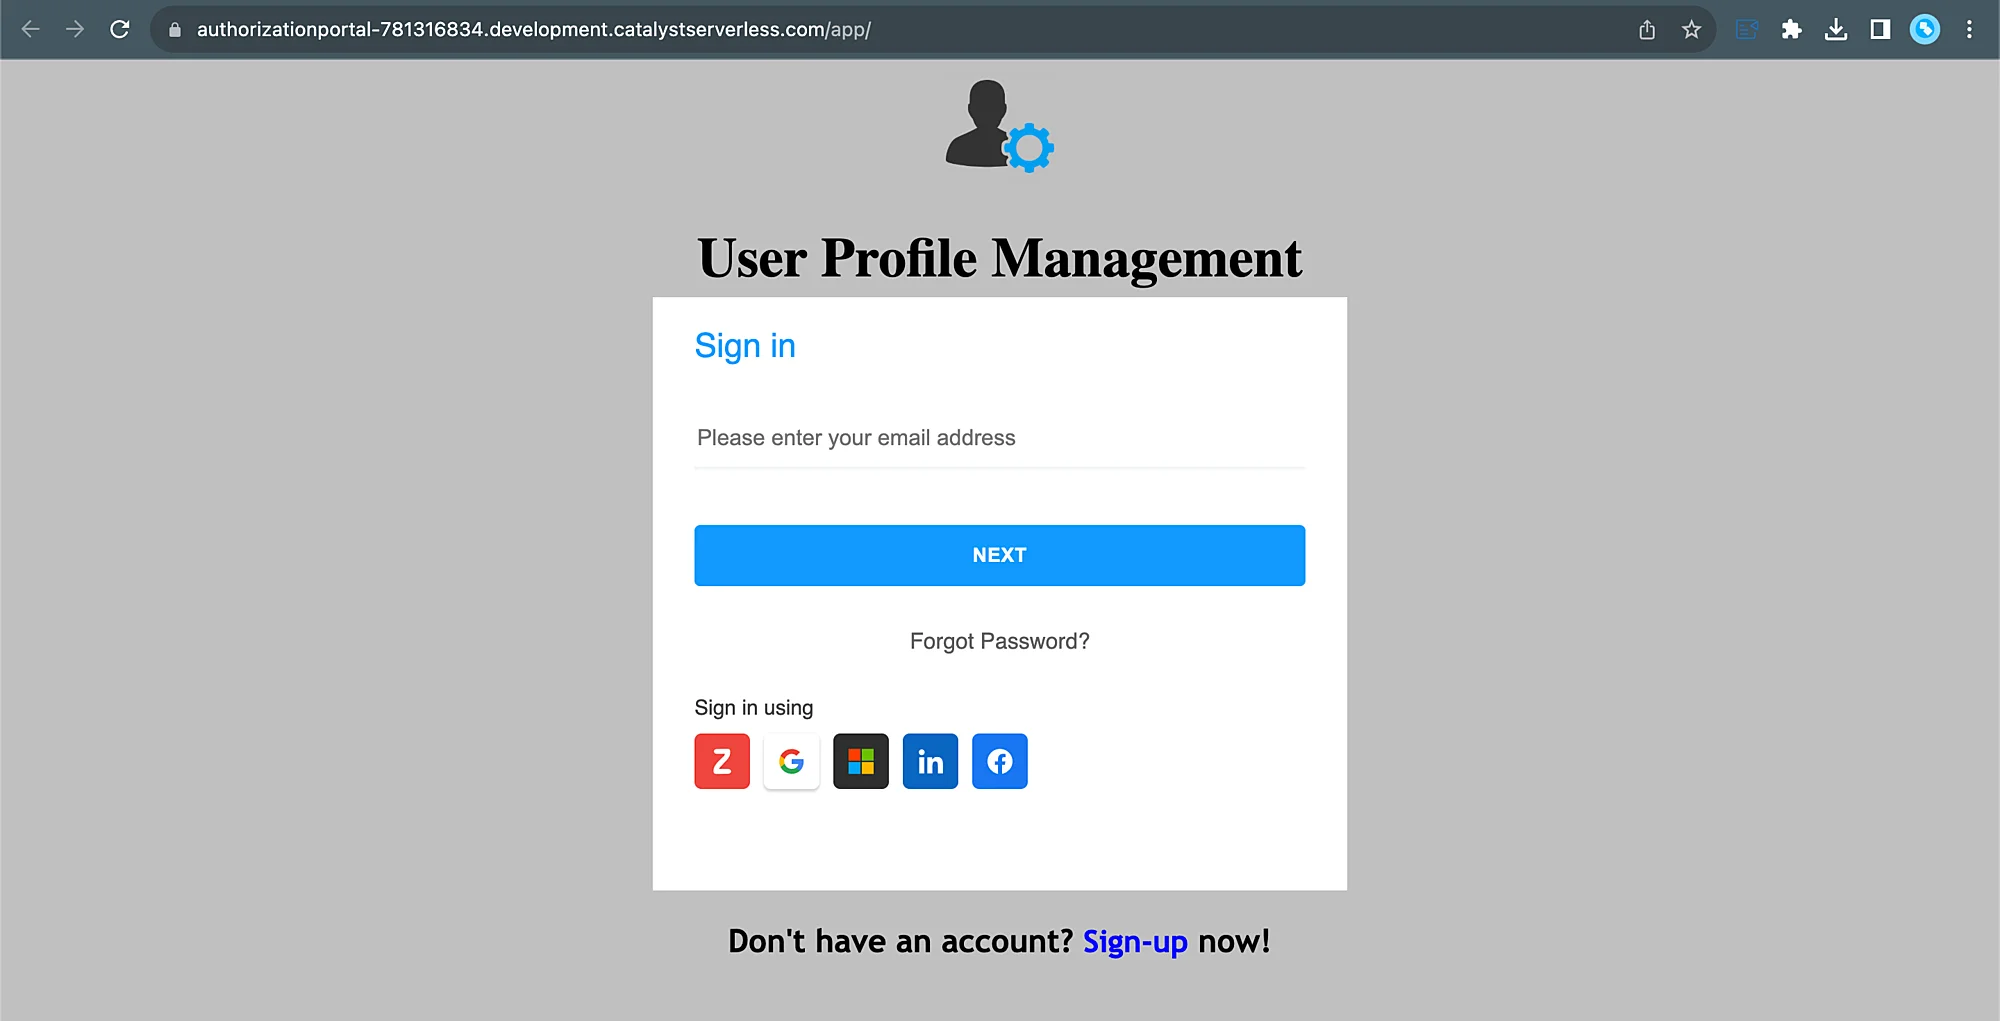
The following is an example of how the client application will appear:

You can access a working application and test its functionality here: Try the App!
You will be using the following features of the Authentication component in this application:
-
User Management: The user profiles are automatically saved in this section when they sign up for the application. Using this feature, you can manage the end-users’ access to your application and configure their roles.
-
Authentication Type: You will be able to view the authentication type you have configured for your application, and edit your configurations when required.
-
Whitelisting: You will use this section to enable Custom User Validation. You can also use this section to enable CORS and iFrame access to your application.
-
Email Templates: You will be able to configure and customize Email Verification and Password Reset emails from this section.
We will use the Catalyst web console and the Catalyst Command Line Interface (CLI) to build this application.
You will be given the code for the files to be included in the function and client directory of your project in this tutorial. You can either copy the provided code or customize it, should you feel it necessary and paste it into the appropriate files as directed.
Application Architecture
The authorization portal’s application logic is described below:
-
Login process: The end-user will be directed to the login page. They can either opt in to log in to the application using the Zoho, Google, LinkedIn, Microsoft 365, or Facebook identity provider logins, or click the Sign Up option provided to sign up using their email address.
-
Custom user validation: The details inputted by the end-user during the login process will sent be as a JSON input to the Custom User Validation function. if the details are successfully validated per the custom logic present in the Basic I/O function, the verification email will be triggered.
-
Email verification triggered: Once users sign up for the application, an email verification email will be sent to the email address used to register the account. The email verification content and style can be customized per your preference using the Email Templates feature of Authentication.
-
Password setup: When end-users click the link present in the email verification email, they will be directed to the password setup page. Here, the end-user can secure their account by setting a password of their preference.
-
End-user account created: After the password is set, the user account will be created, and the end-user will now be able to log in to the application using the credentials they created. You can confirm the account has been created by viewing the account details in the User Management section of the Authentication component.
-
Password reset option: End-users will have the option to reset the password by opting for the Forgot Password option present in the login page. They will then be prompted to provide any of their previous passwords to recover their account or go ahead with the reset option. Once the users go ahead with the reset option, a one-time password (OTP) email will be sent to the user. Once the OTP is verified, they can set a new password for their account.
-
As we are using the Embedded Login method which is a native Catalyst Authentication type, you will be given the scripts for the native login form that can be added to your application’s web client. You can also customize the design and branding of the login and password reset elements by configuring the css file mentioned in the script. Refer this Styling Embedded Authentication type help section, to style your iFrame and the login element.
-
Instead of opting for the Forgot Password option, the end-user can also contact the app administrator to reset their credentials. Using the User Management feature, a Password Reset email can be sent from within Catalyst to the user, containing a link and instructions to reset their password. This email can be styled using the Email Templates feature.
Last Updated 2025-10-21 12:04:01 +0530 IST