Create a data pipeline
Now that we’ve uploaded the dataset, we’ll create a data pipeline with the dataset.
-
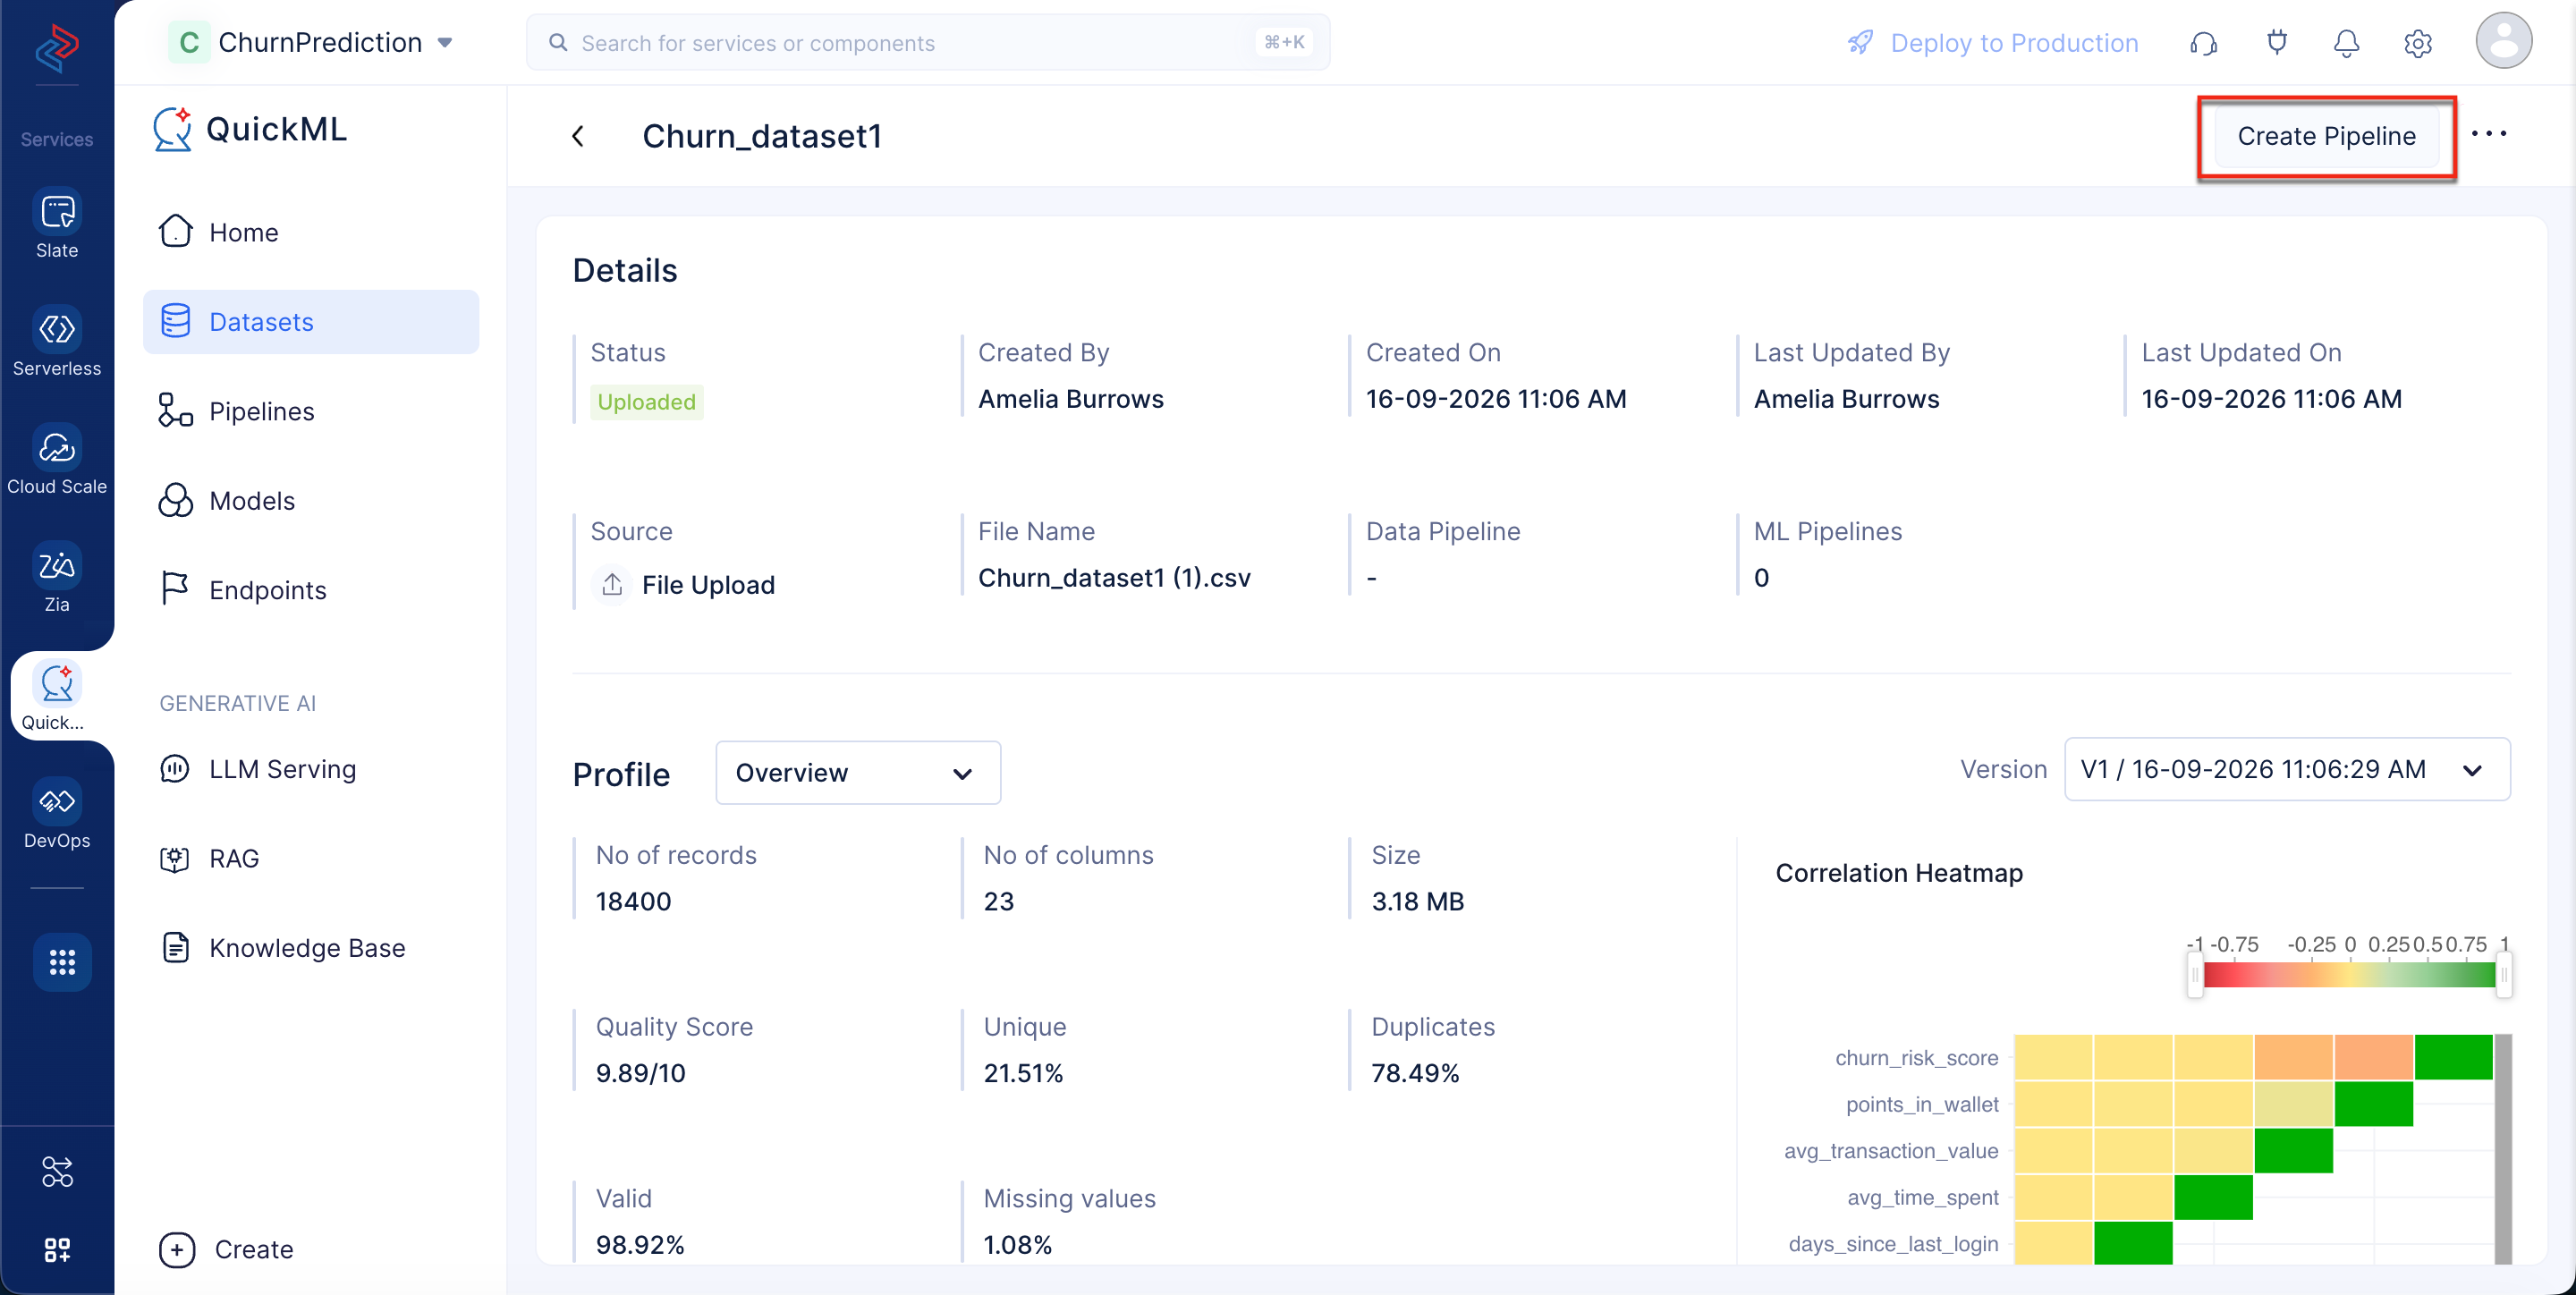
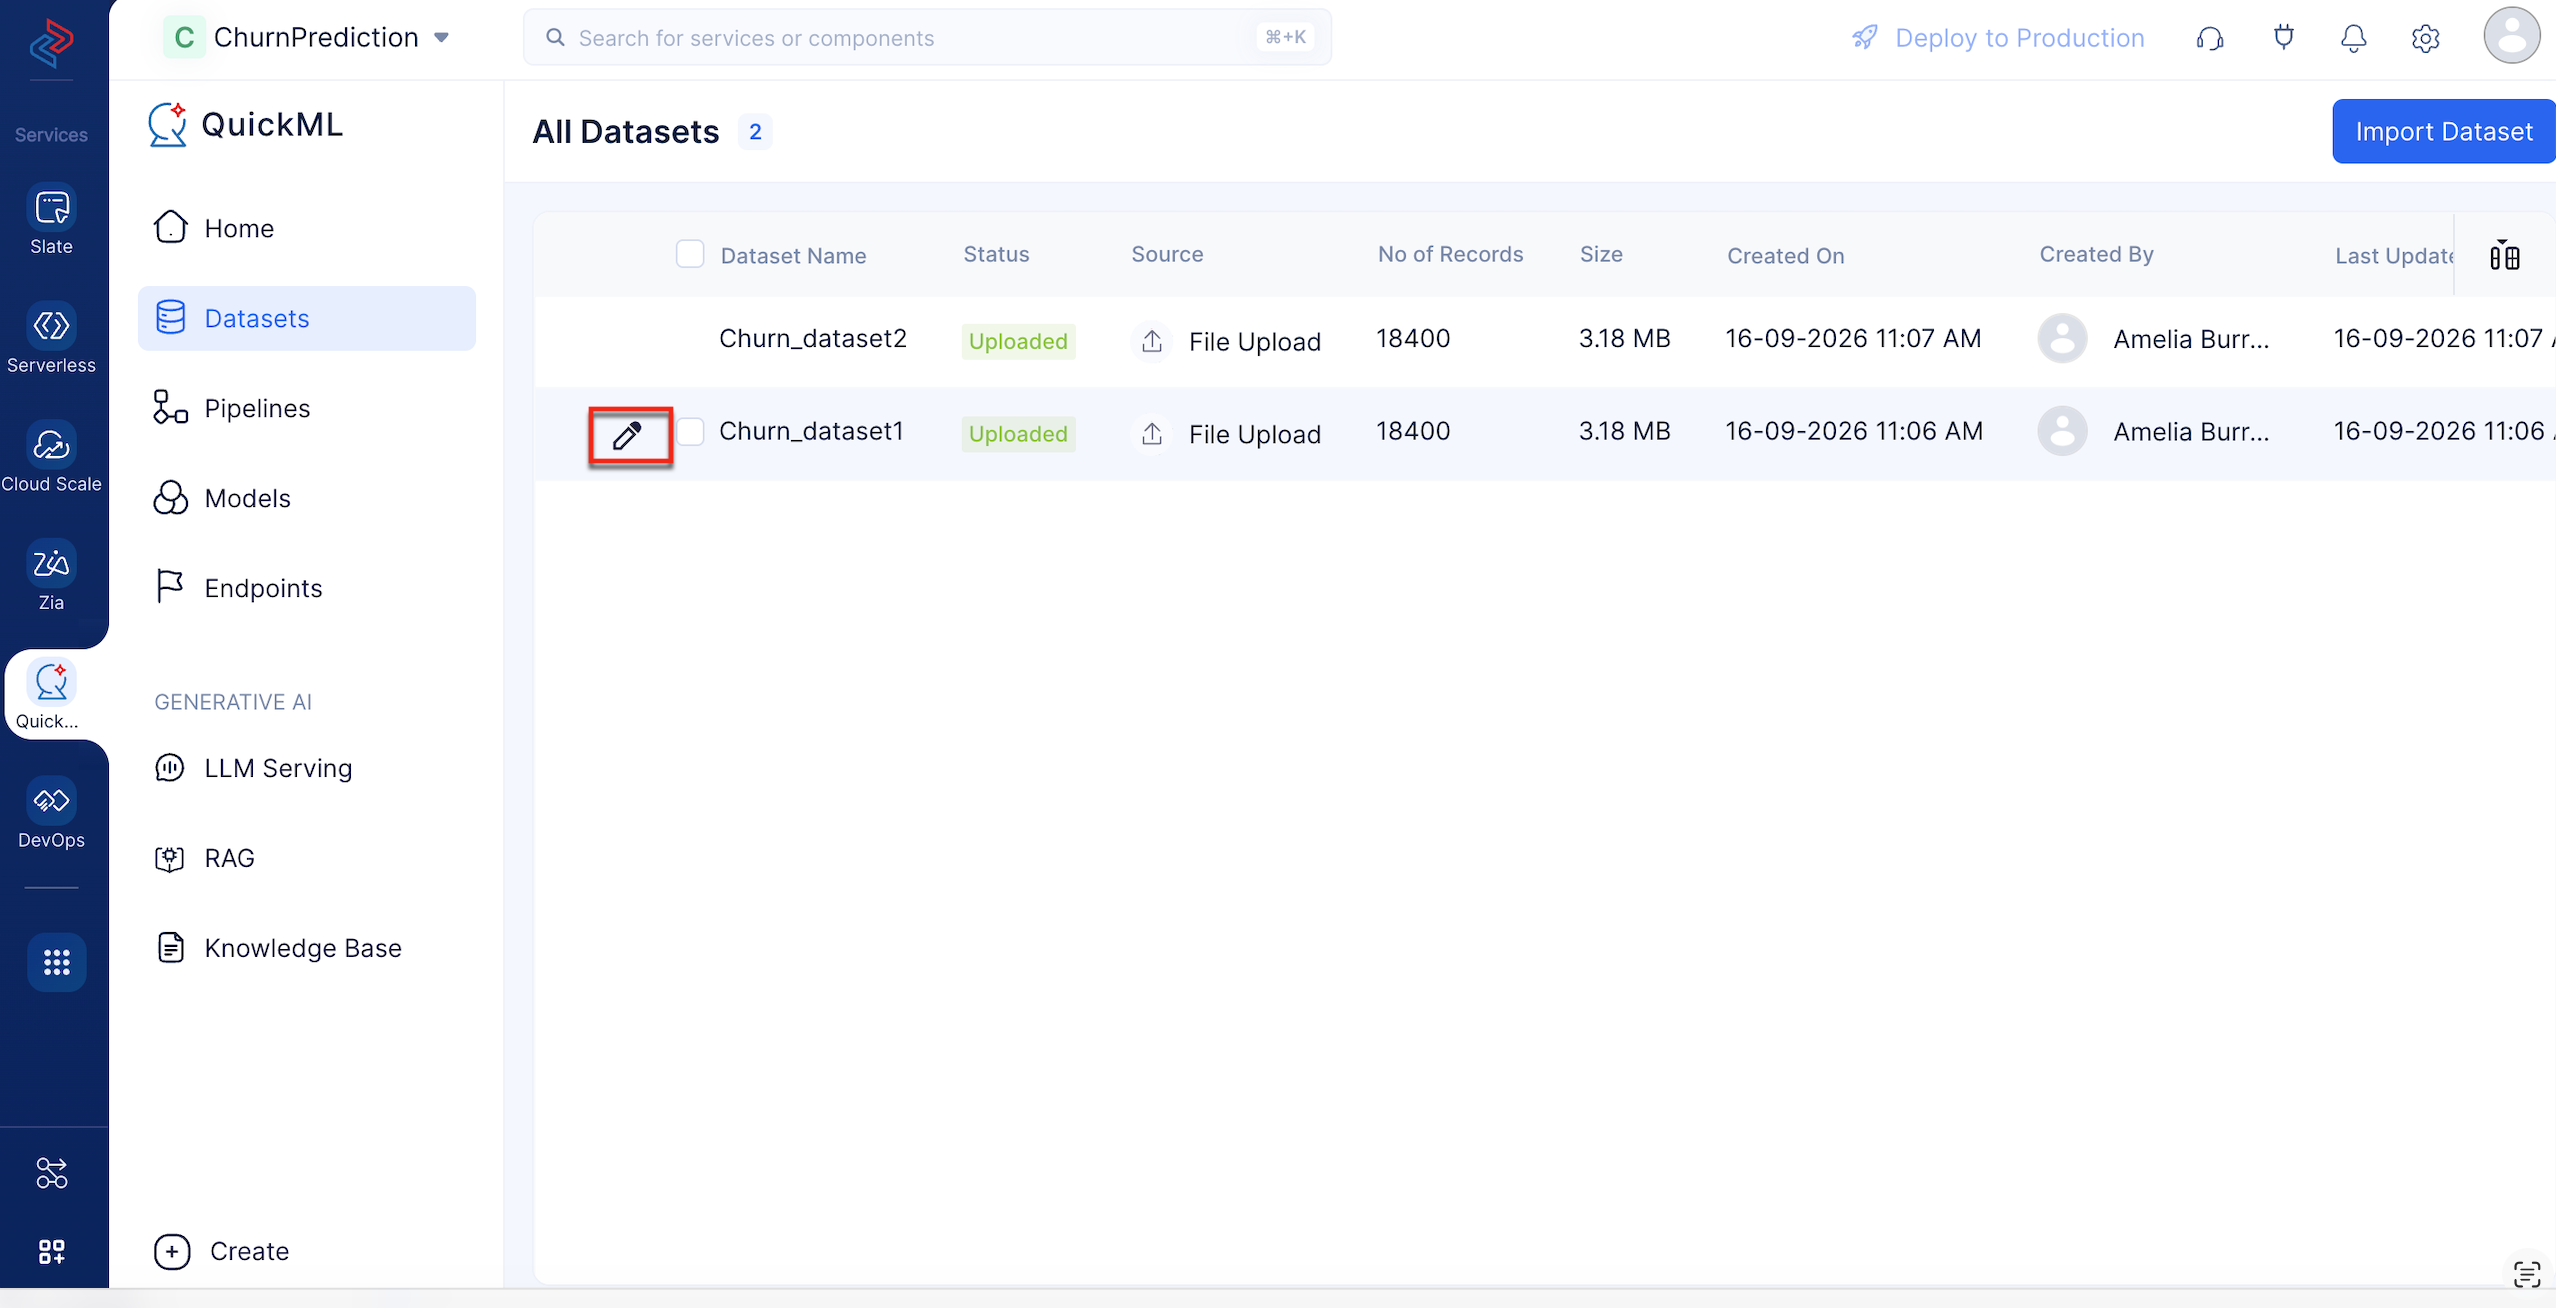
Navigate to the Datasets component in the left menu. There are two ways to create a data pipeline:
- Click on the dataset, then click Create Pipeline in the top-right corner of the page.
- Hover over the dataset name and click the pen icon.
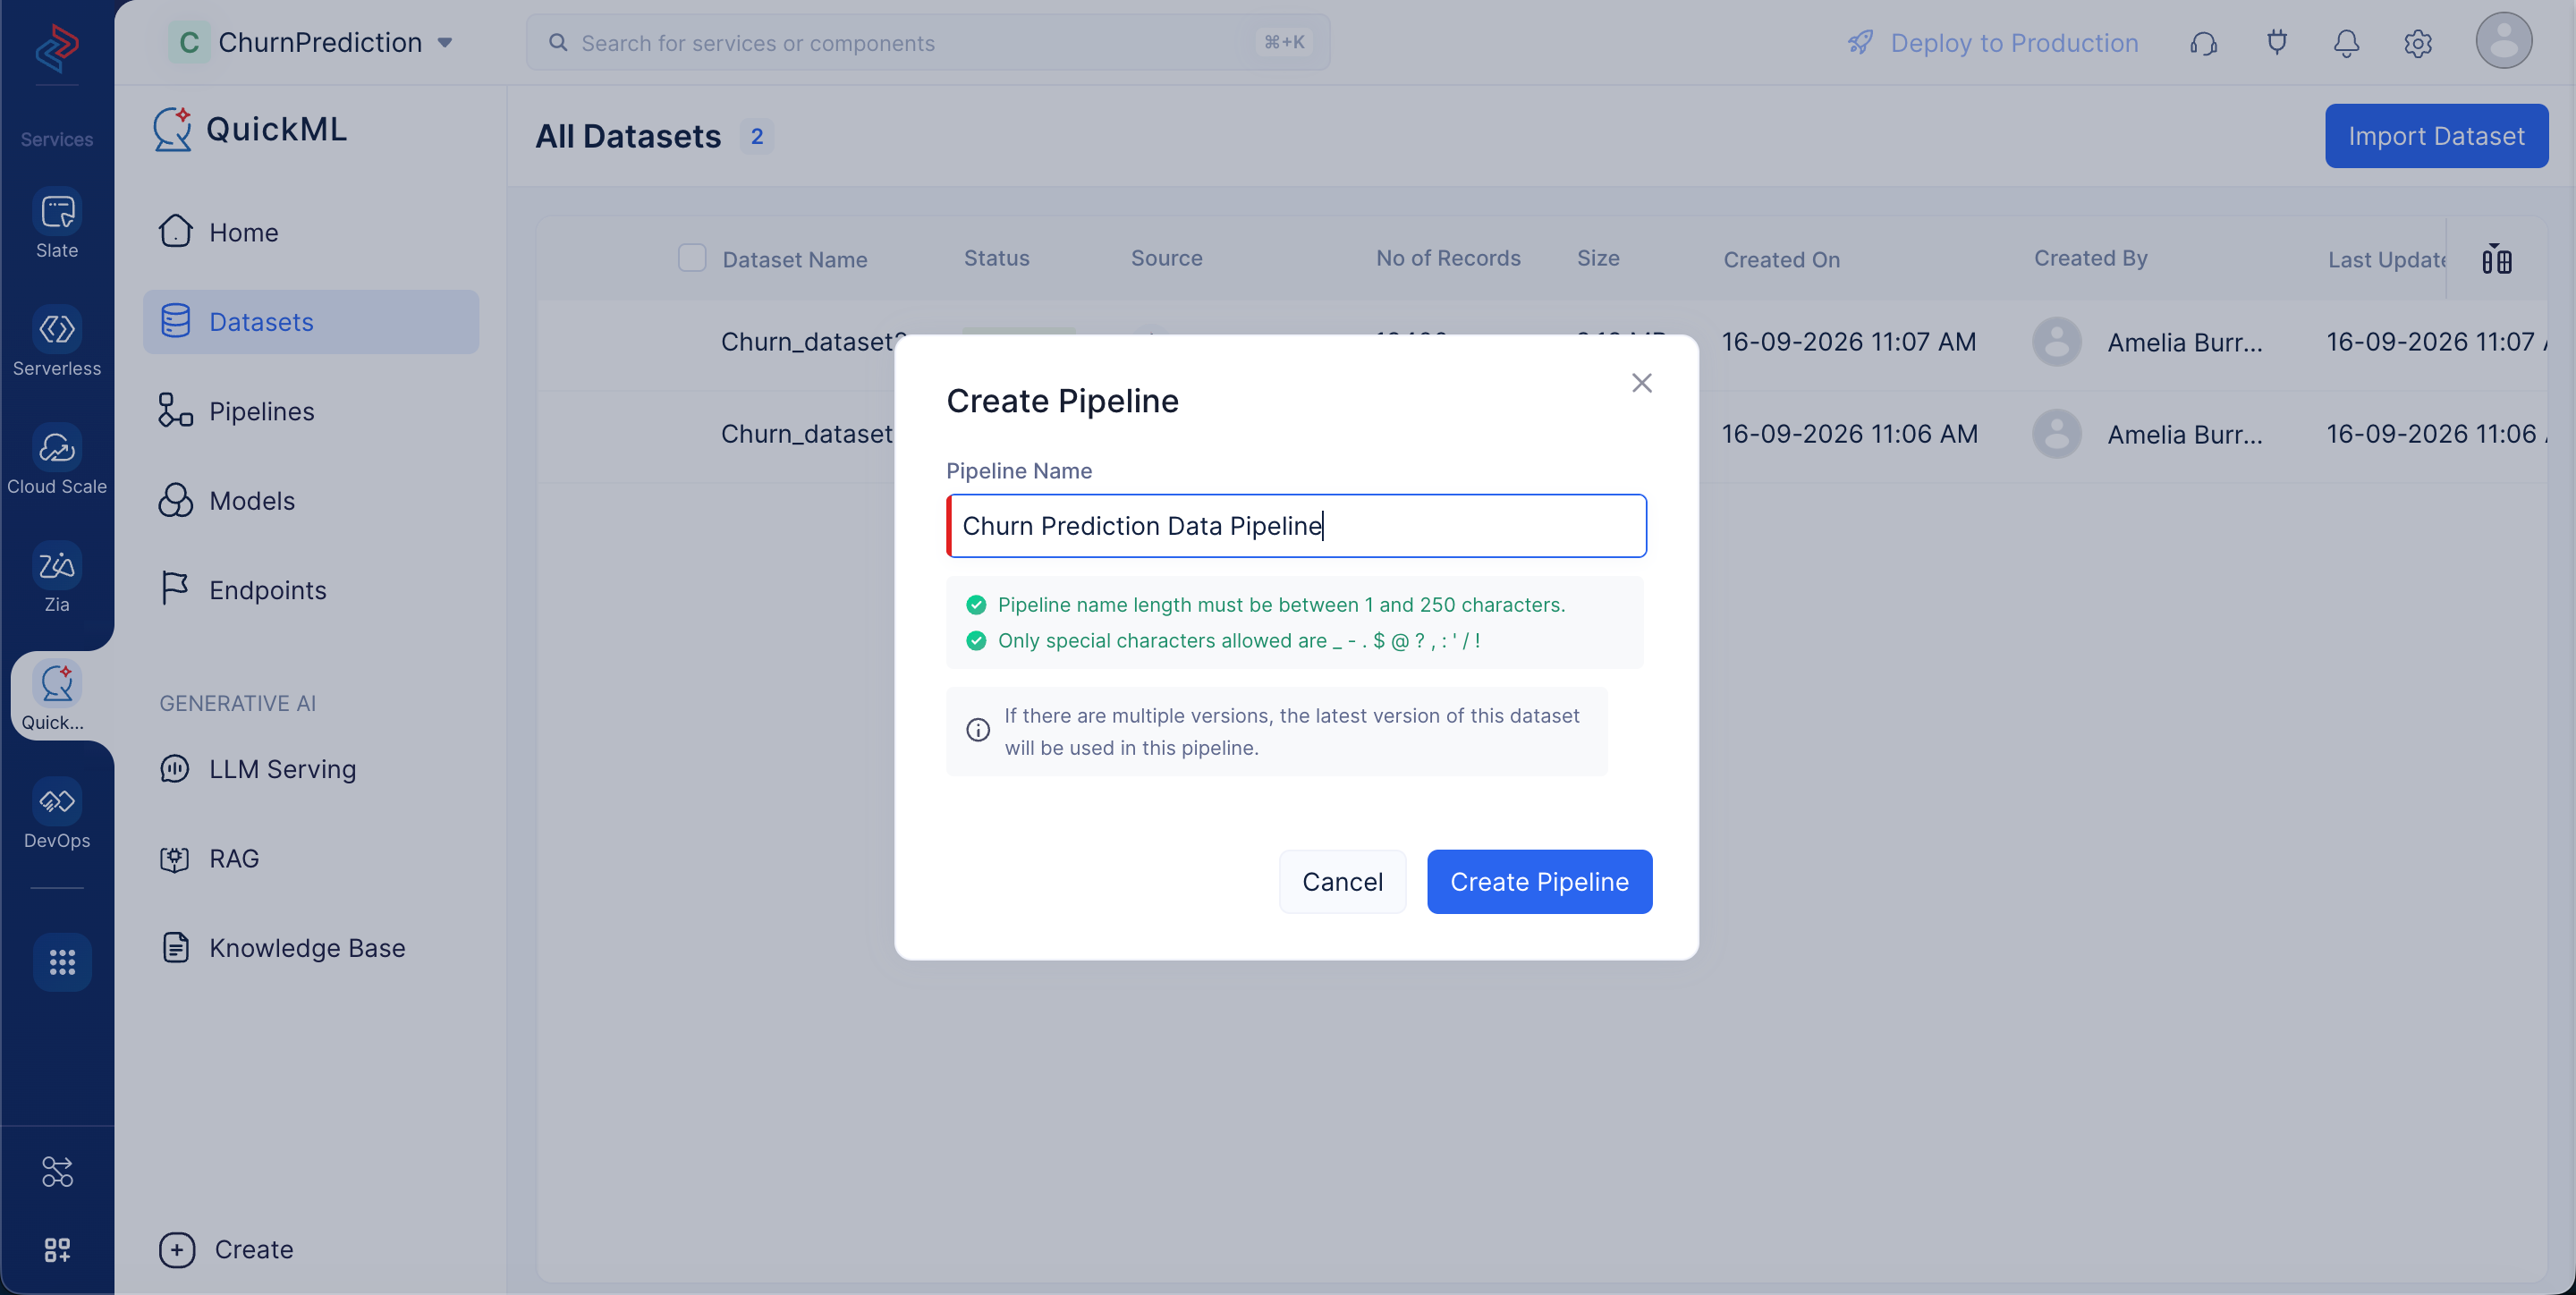
- Name the pipeline “Churn Prediction Data Pipeline” and click Create Pipeline.
The pipeline builder interface will be opened.
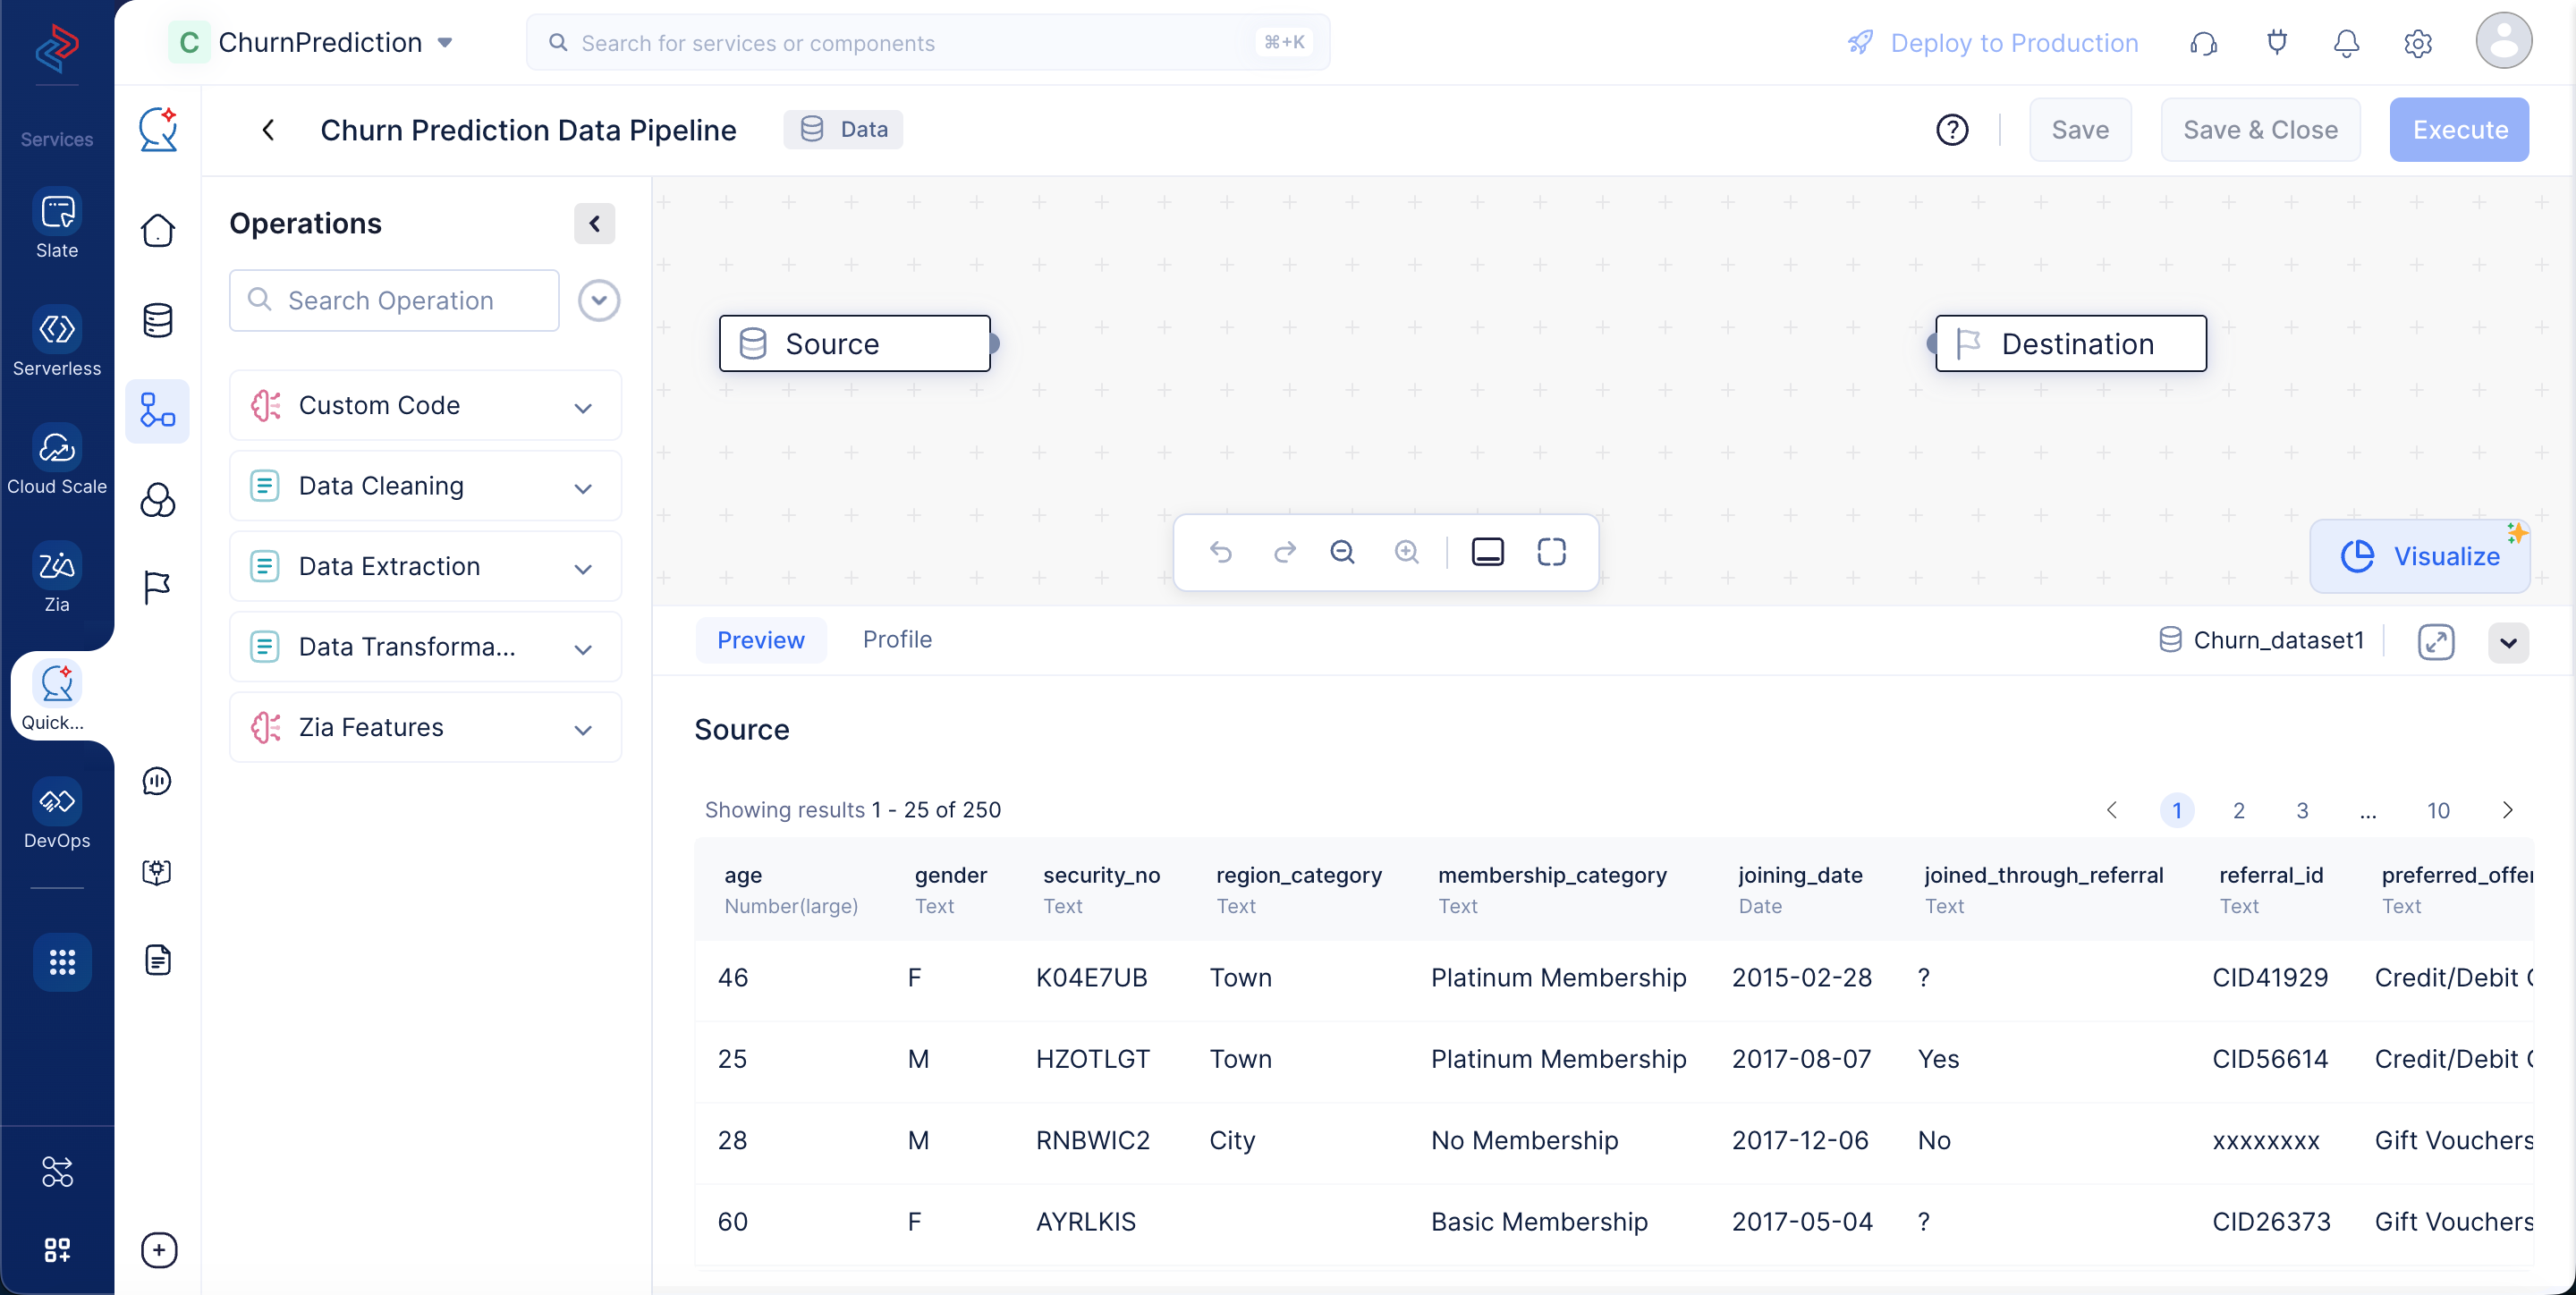
The following data preprocessing operations will be performed to clean, refine, and transform the datasets before executing the data pipeline. Each operation is represented by individual data nodes that will be used to build the pipeline.
Stage 1: Adding datasets
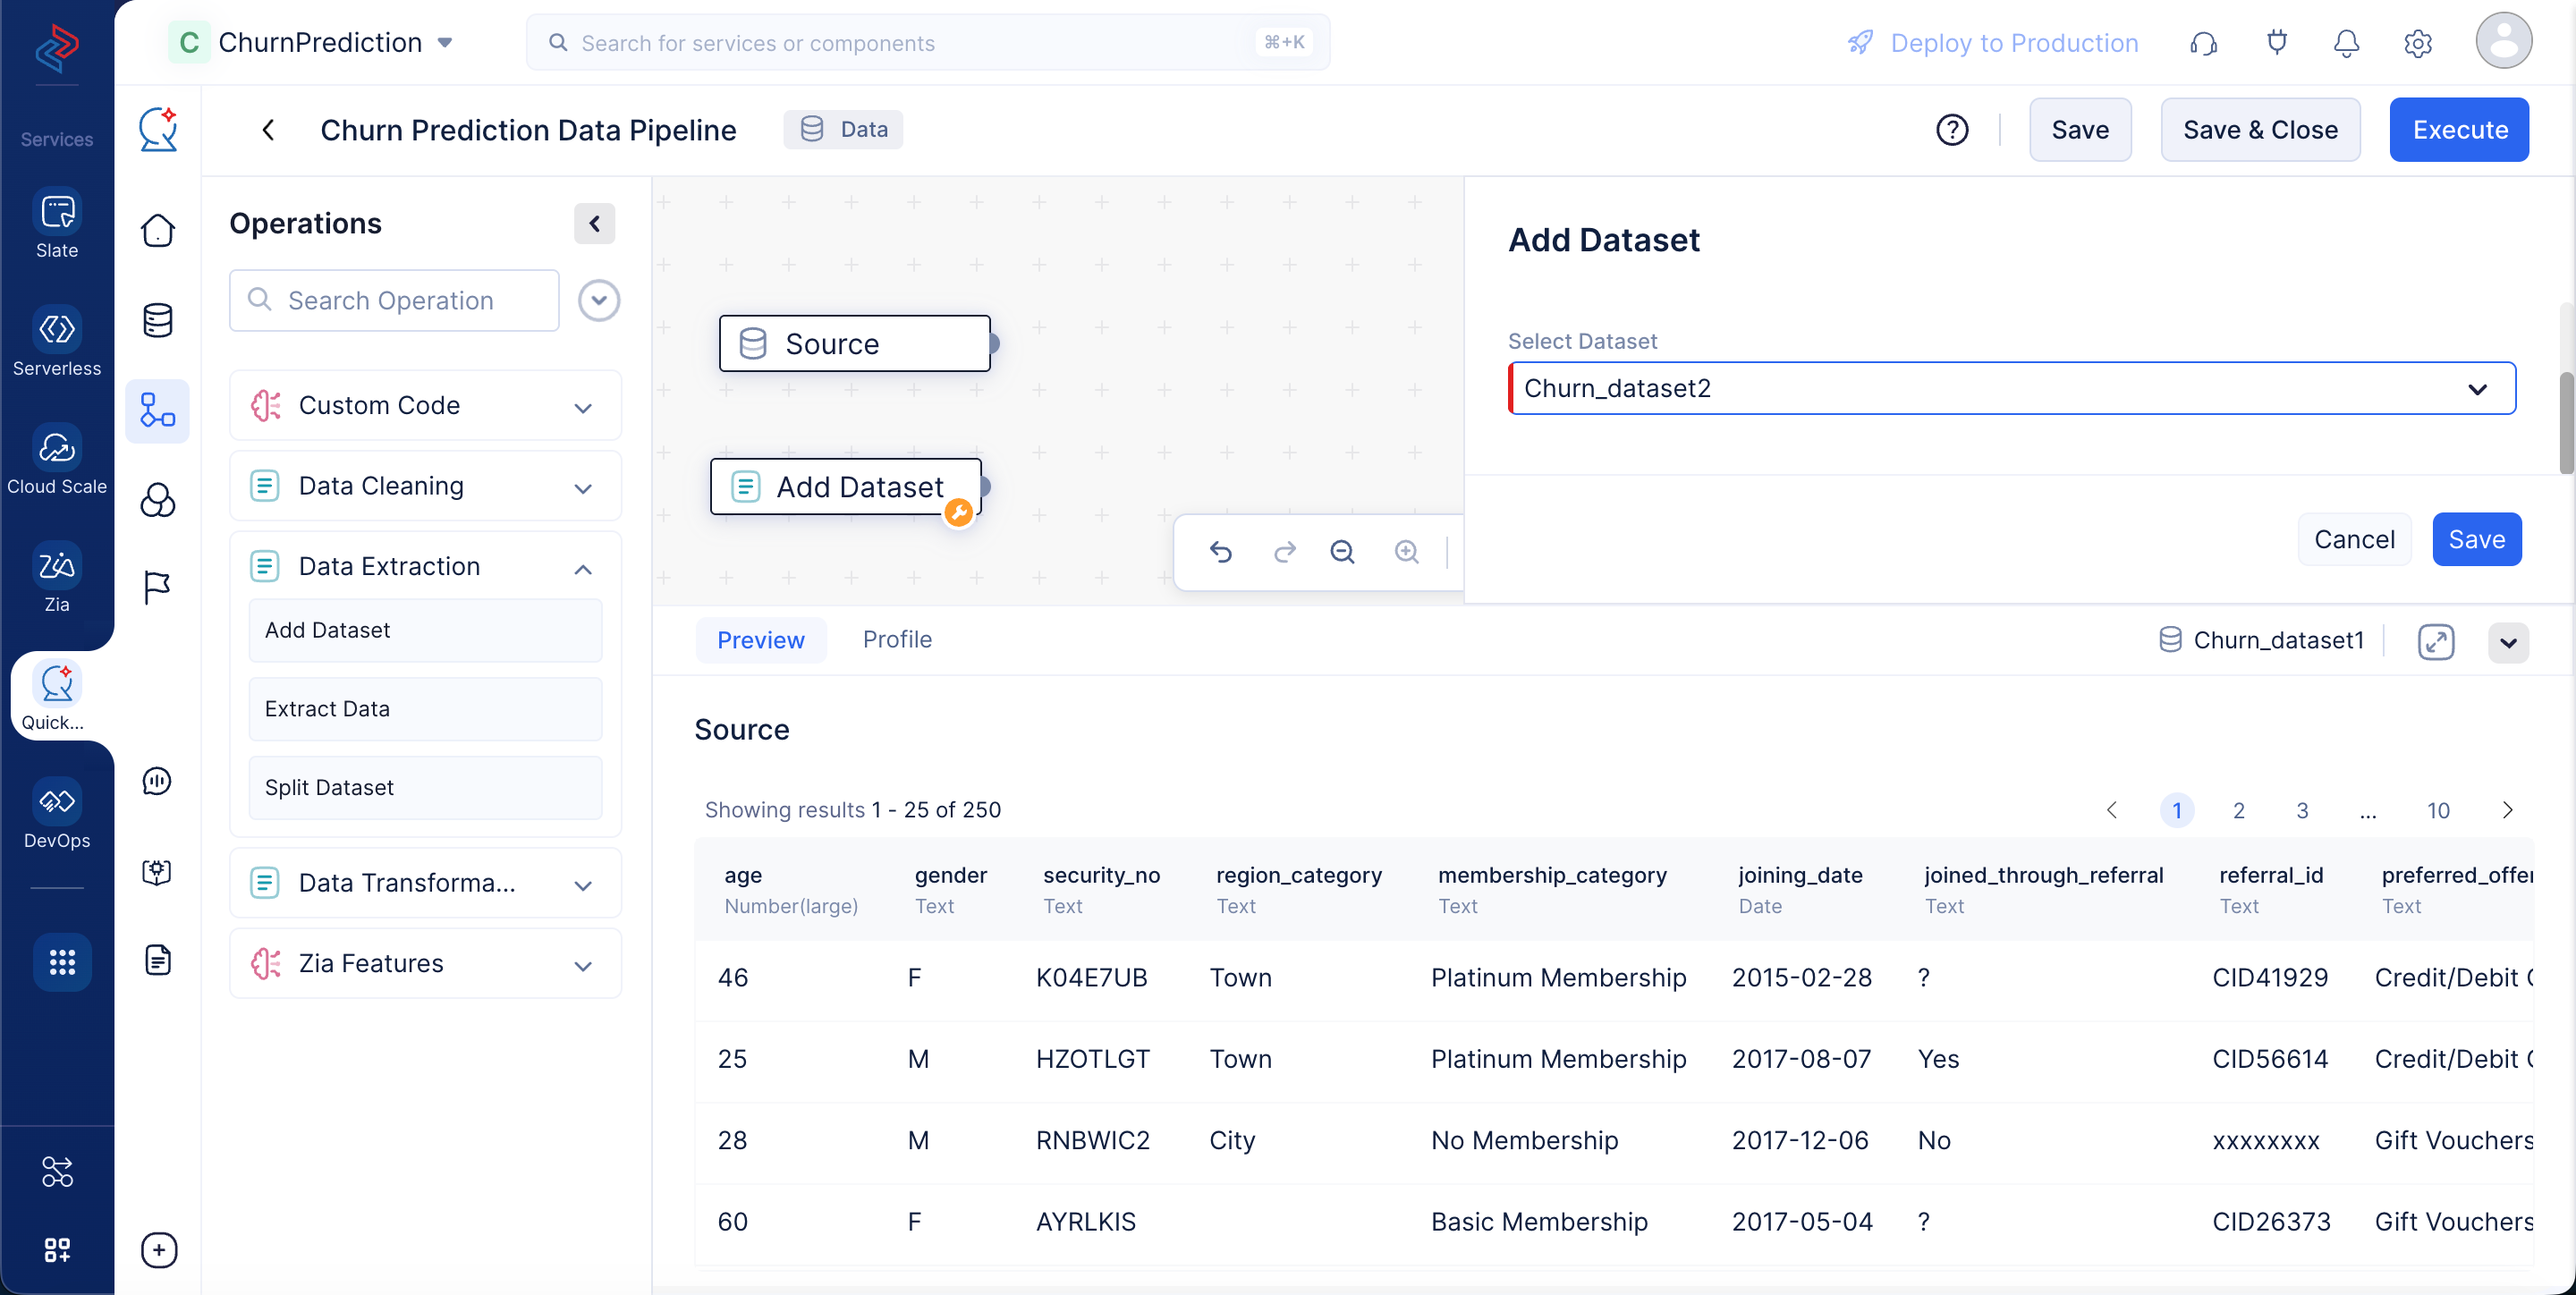
Using the Add Dataset node in QuickML, we can add a new dataset to the pipeline (please note that you must first upload the dataset you wish to add). Click Data Extraction in the left panel, and choose Add Dataset. Here, we’re adding the Churn_2 dataset to merge with the existing dataset. In the node configuration, choose Churn_dataset2 and click save.
Stage 2: Combining two datasets
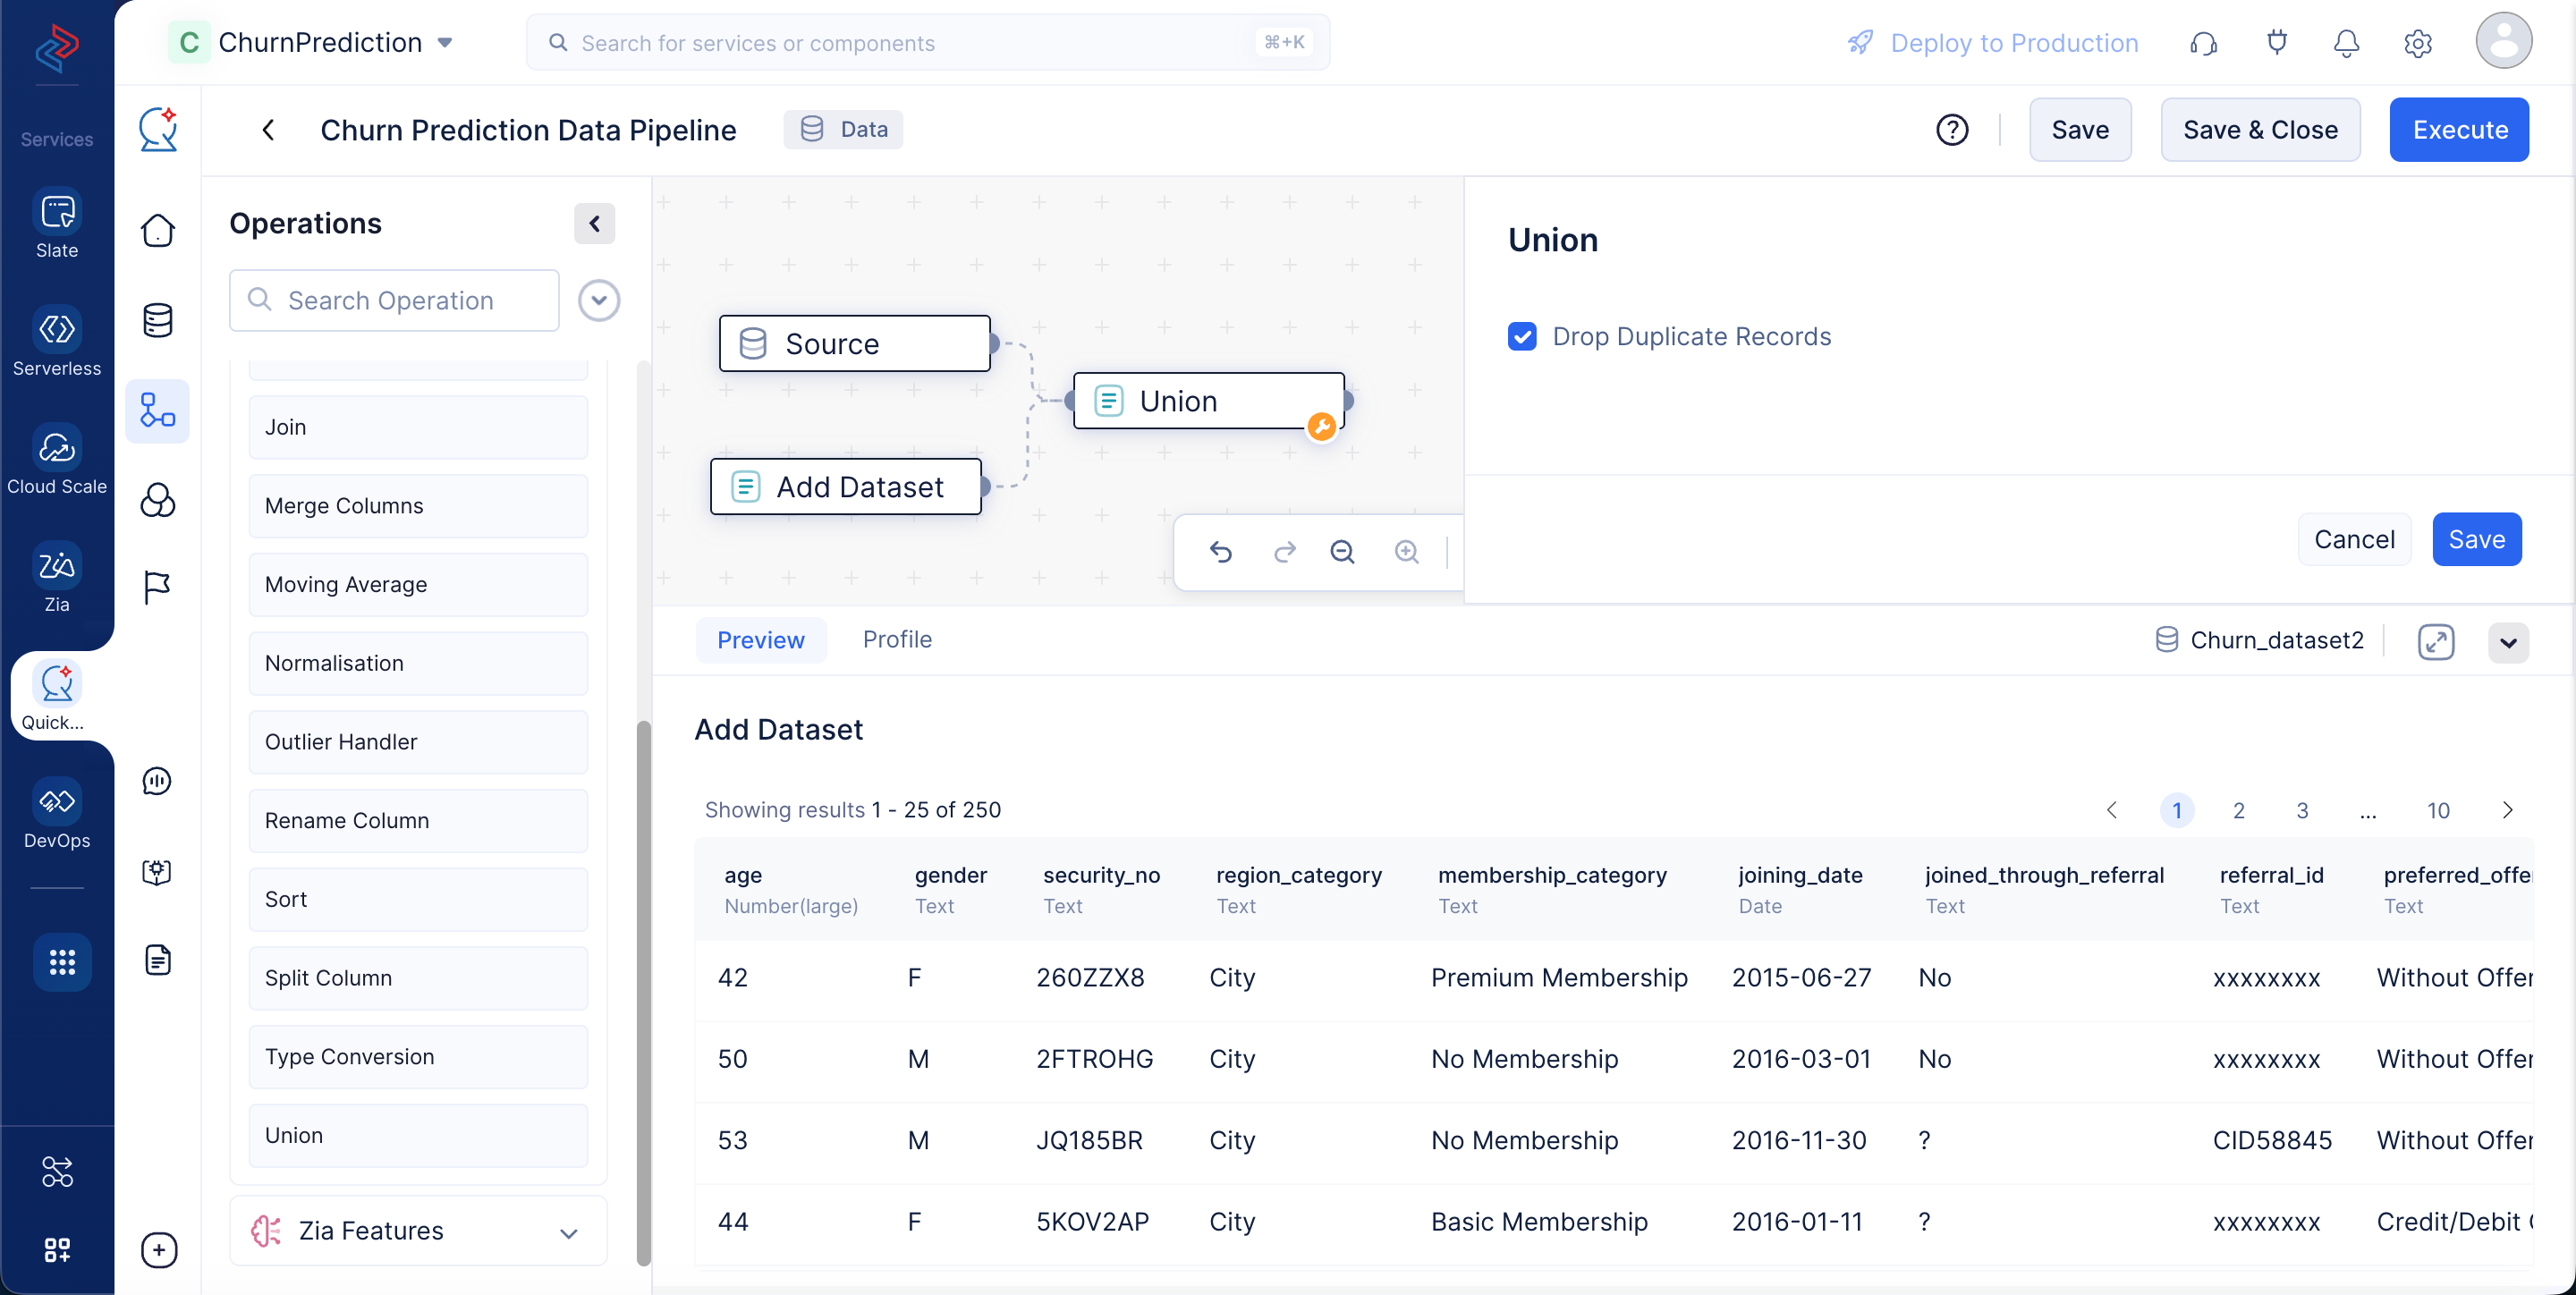
Select Data Transformation in the left panel and choose Union. This will combine Churn_1 and Churn_2 into a single dataset. If any duplicate records exist in either dataset, select the “Drop Duplicate Records” checkbox while performing the operation.
Stage 3: Selecting or droping columns
Selecting or dropping columns is a common step in data preprocessing for analysis and machine learning. The decision depends on the goals of your analysis or model.
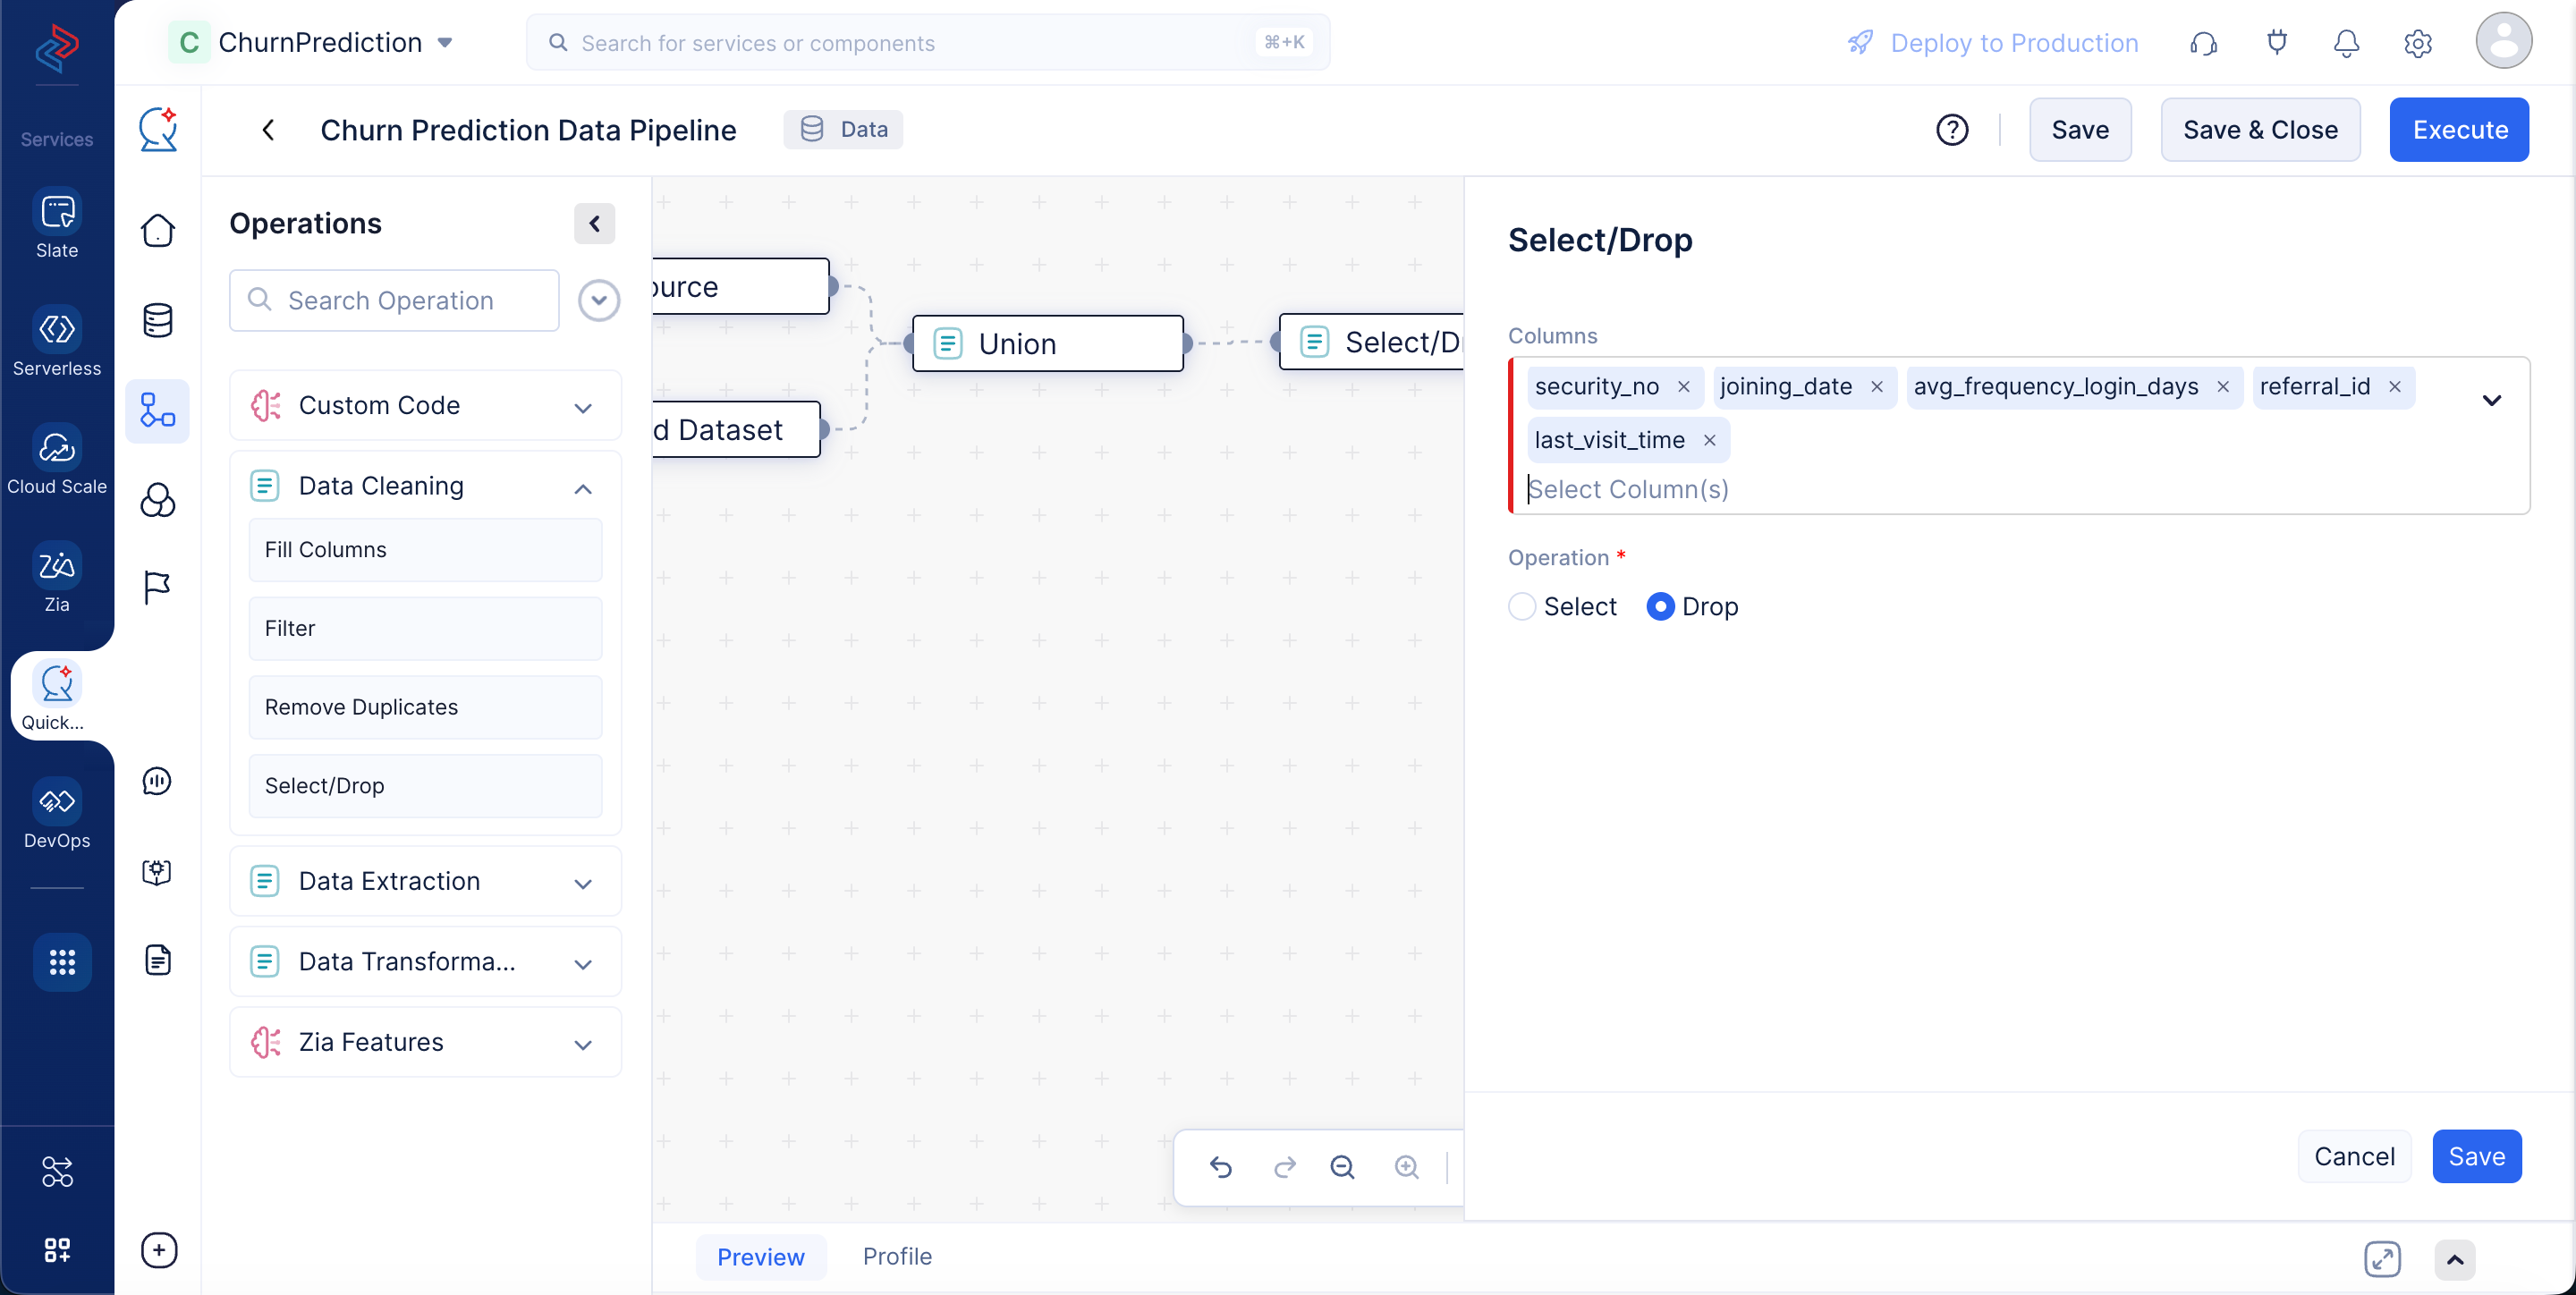
In this case, the columns we don’t need for model training are security_no, joining_date, avg_frequency_login_days, last_visit_time, and referral_id. With QuickML, you can easily select the relevant fields for model training using the Select/Drop node from the Data Cleaning component.
Stage 4: Filling columns
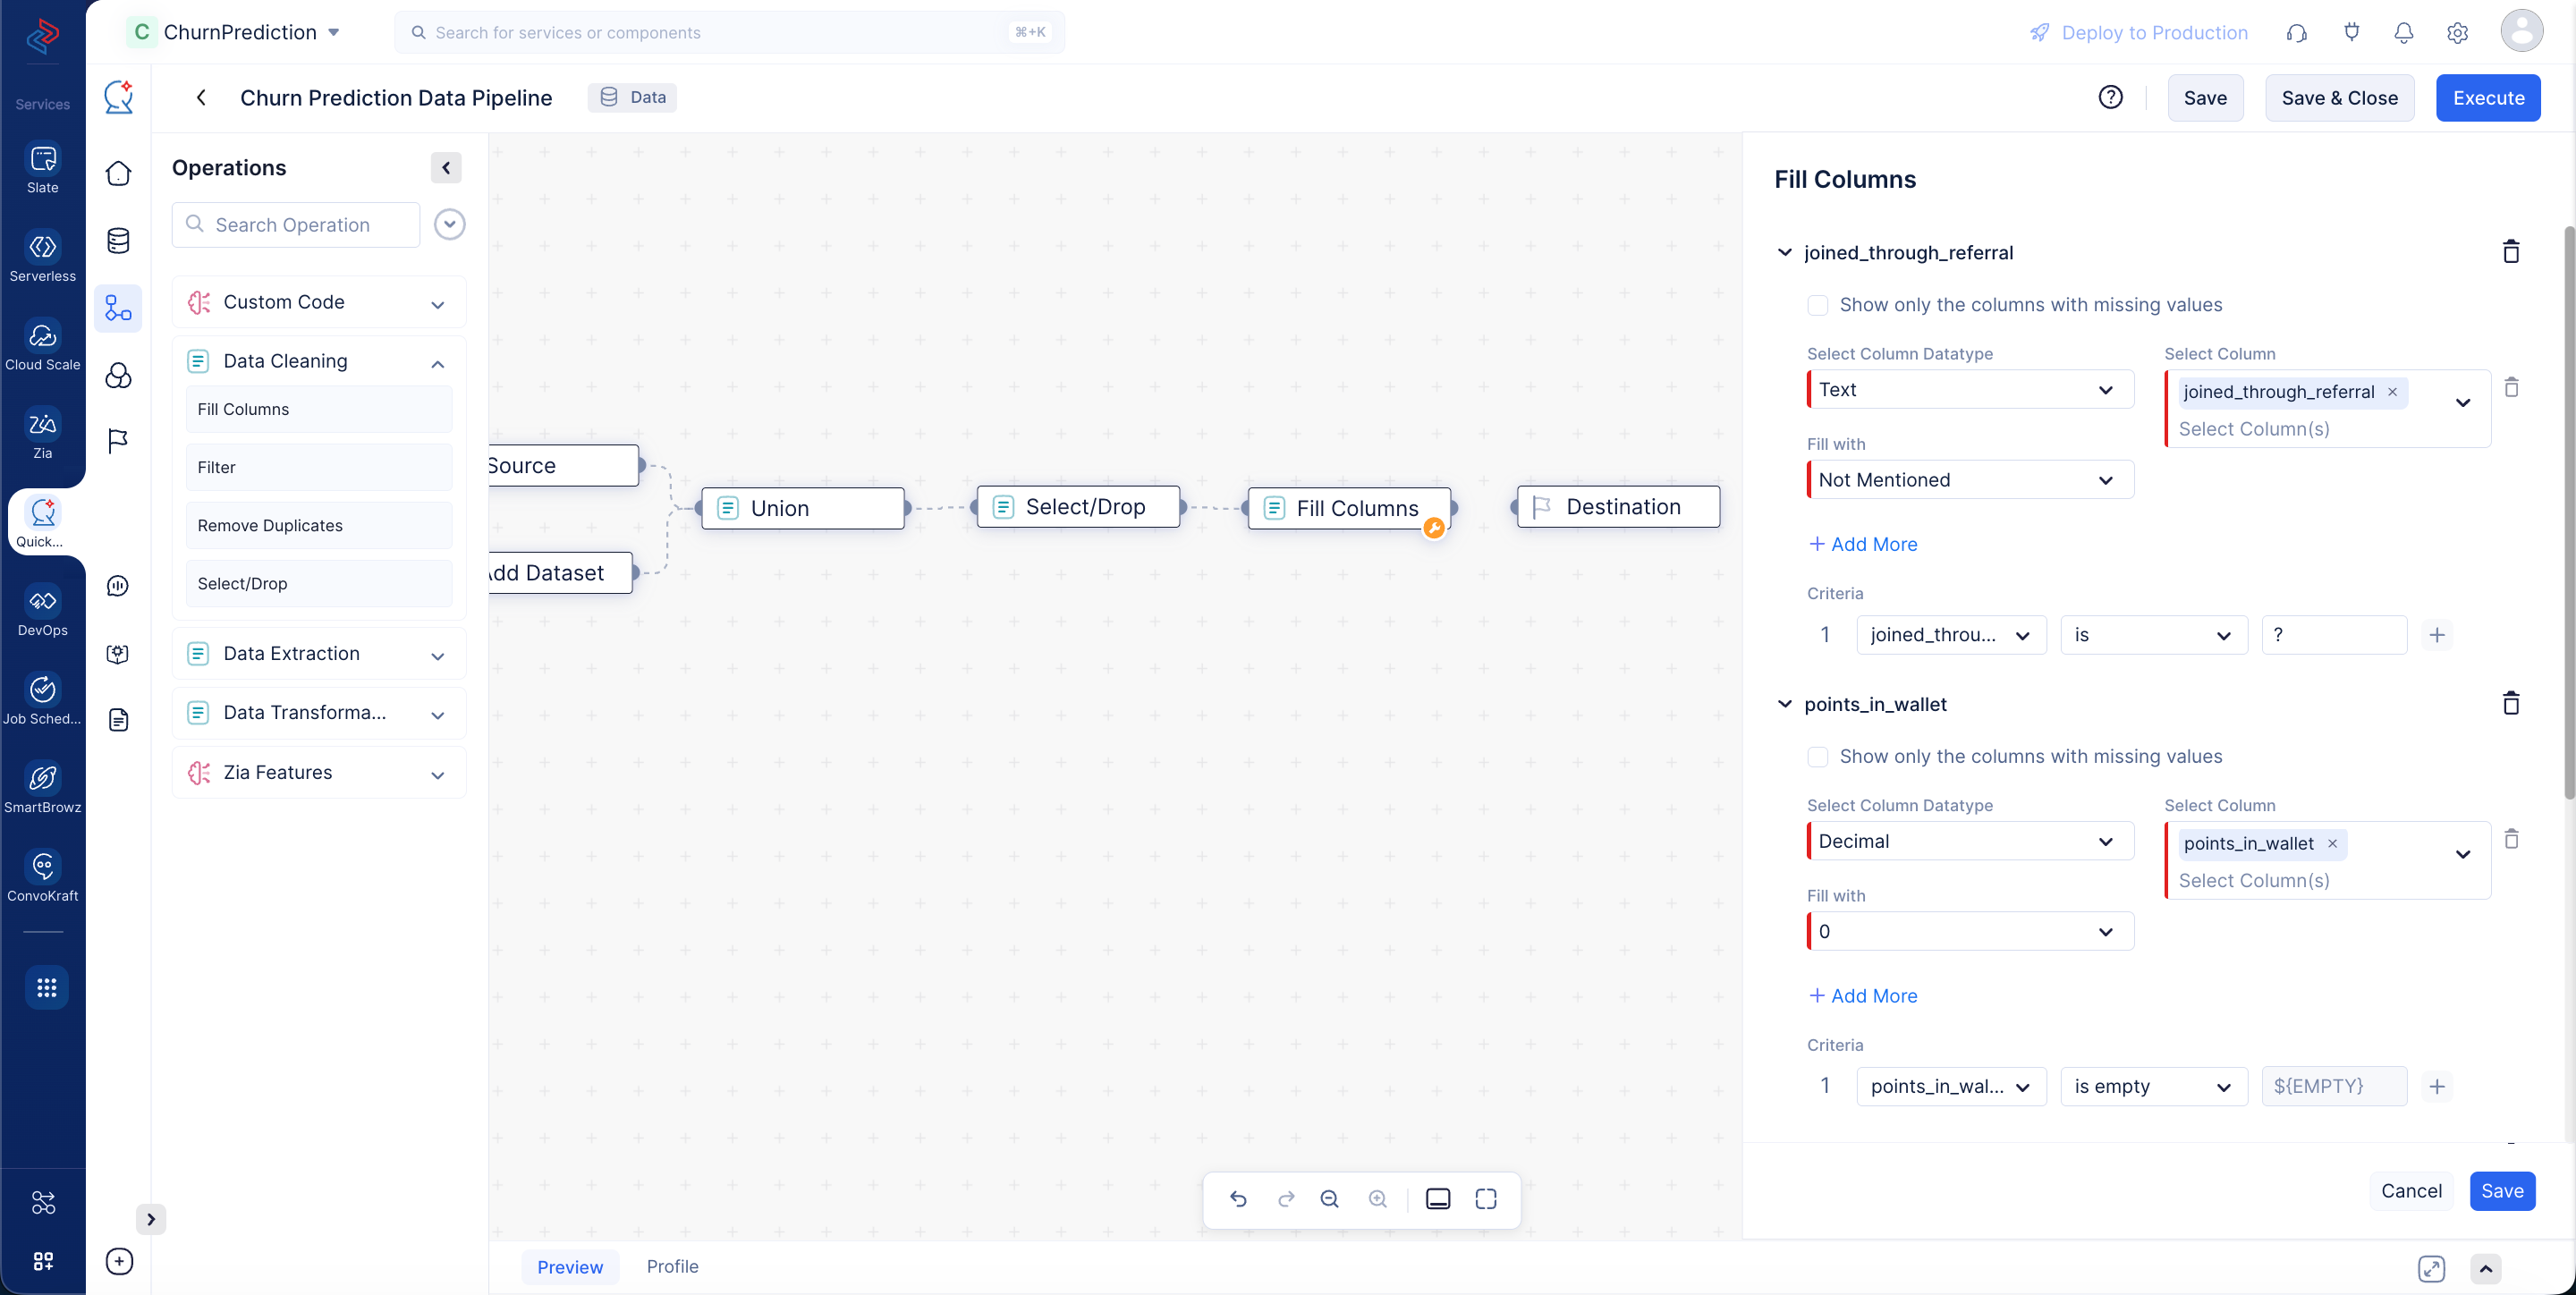
With the Fill Columns node in QuickML, we can easily fill column values based on specific conditions. You can replace null or non-null values according to your needs.
In this case, we’re filling the columns joined_through_referral and medium_of_operation by replacing rows with a “?” value with the custom label Not mentioned. For the points_in_wallet column, we’re replacing empty values with a custom value of 0.
Stage 5: Filtering data
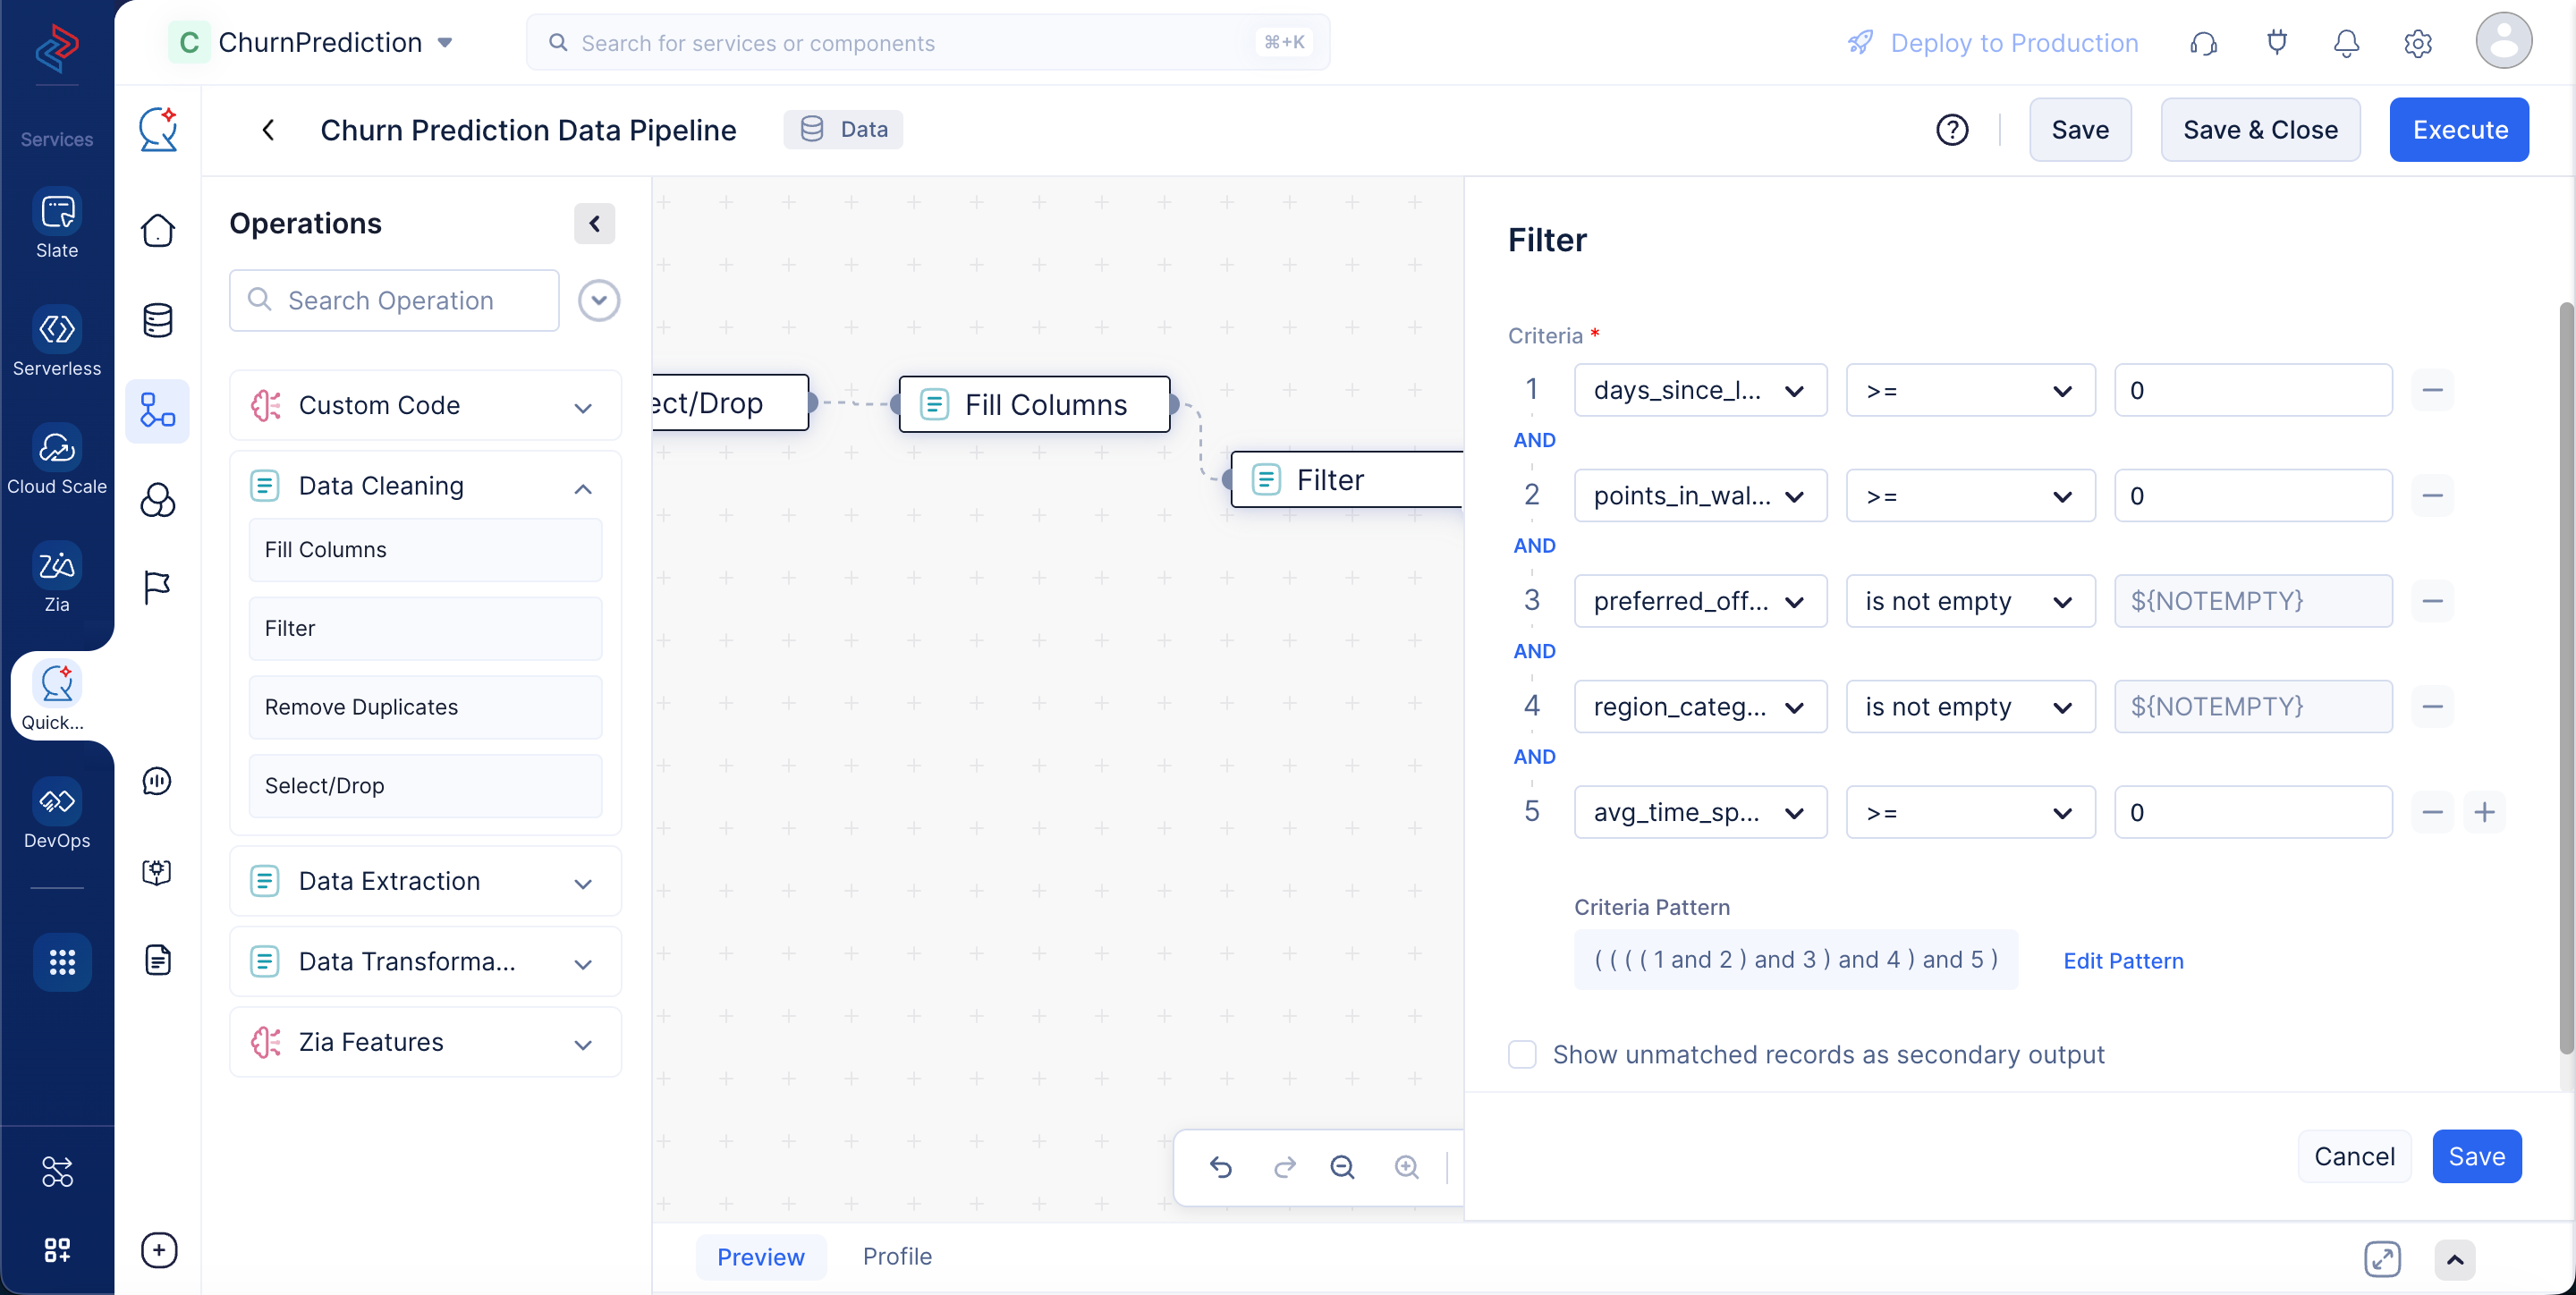
Filtering a dataset involves selecting a subset of rows from a DataFrame that meet certain criteria or conditions. Here, we’re using the Filter node from the Data Cleaning section to filter the days_since_last_login, avg_time_spent, and points_in_wallet columns whose values are greater than or equal to 0, and for columns preferred_offer_types and region_category that have non-empty values.
Stage 6: Performing sentiment analysis
Sentiment analysis is a technique used to determine the sentiment or emotional tone expressed in a piece of text, such as customer feedback or reviews. The goal is to classify the text as positive, negative, or neutral based on the emotions or opinions it conveys.
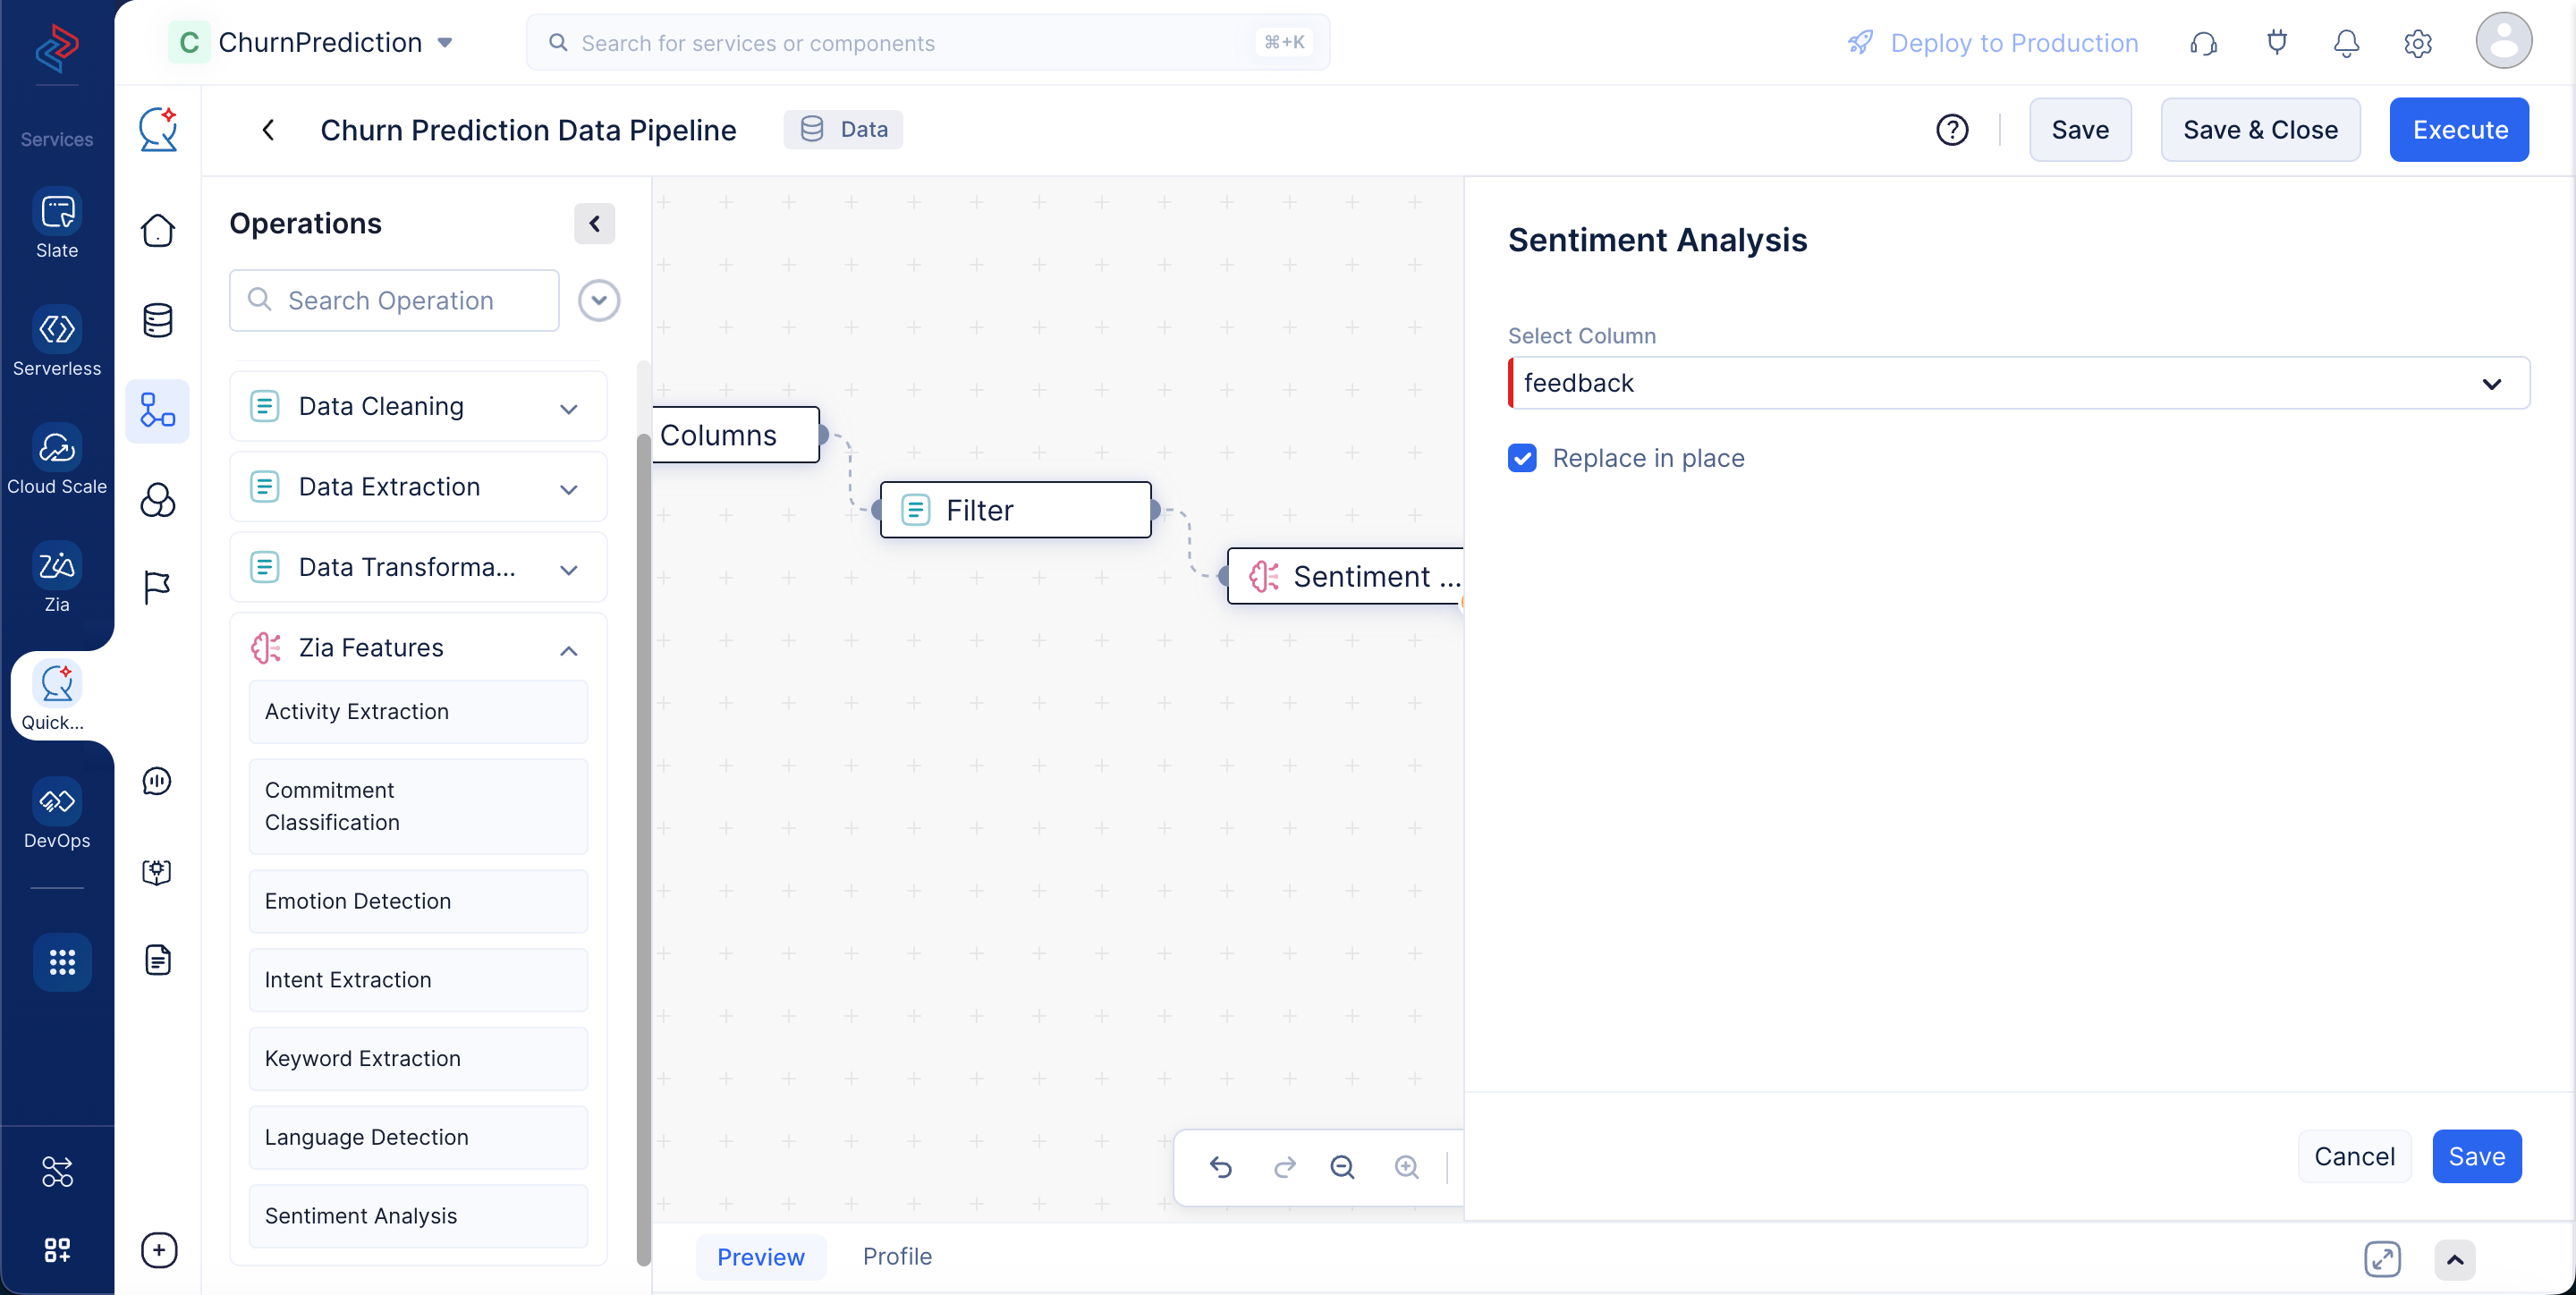
Here, we have the column named feedback, which contains the feedback about the product. We can classify the values of the column as positive, negative, or neutral using the Sentiment Analysis node under Zia Features. Select the Replace in place checkbox if you want to replace the value of the feedback column with the result of the Sentiment Analysis node.
Stage 7: Executing the pipeline
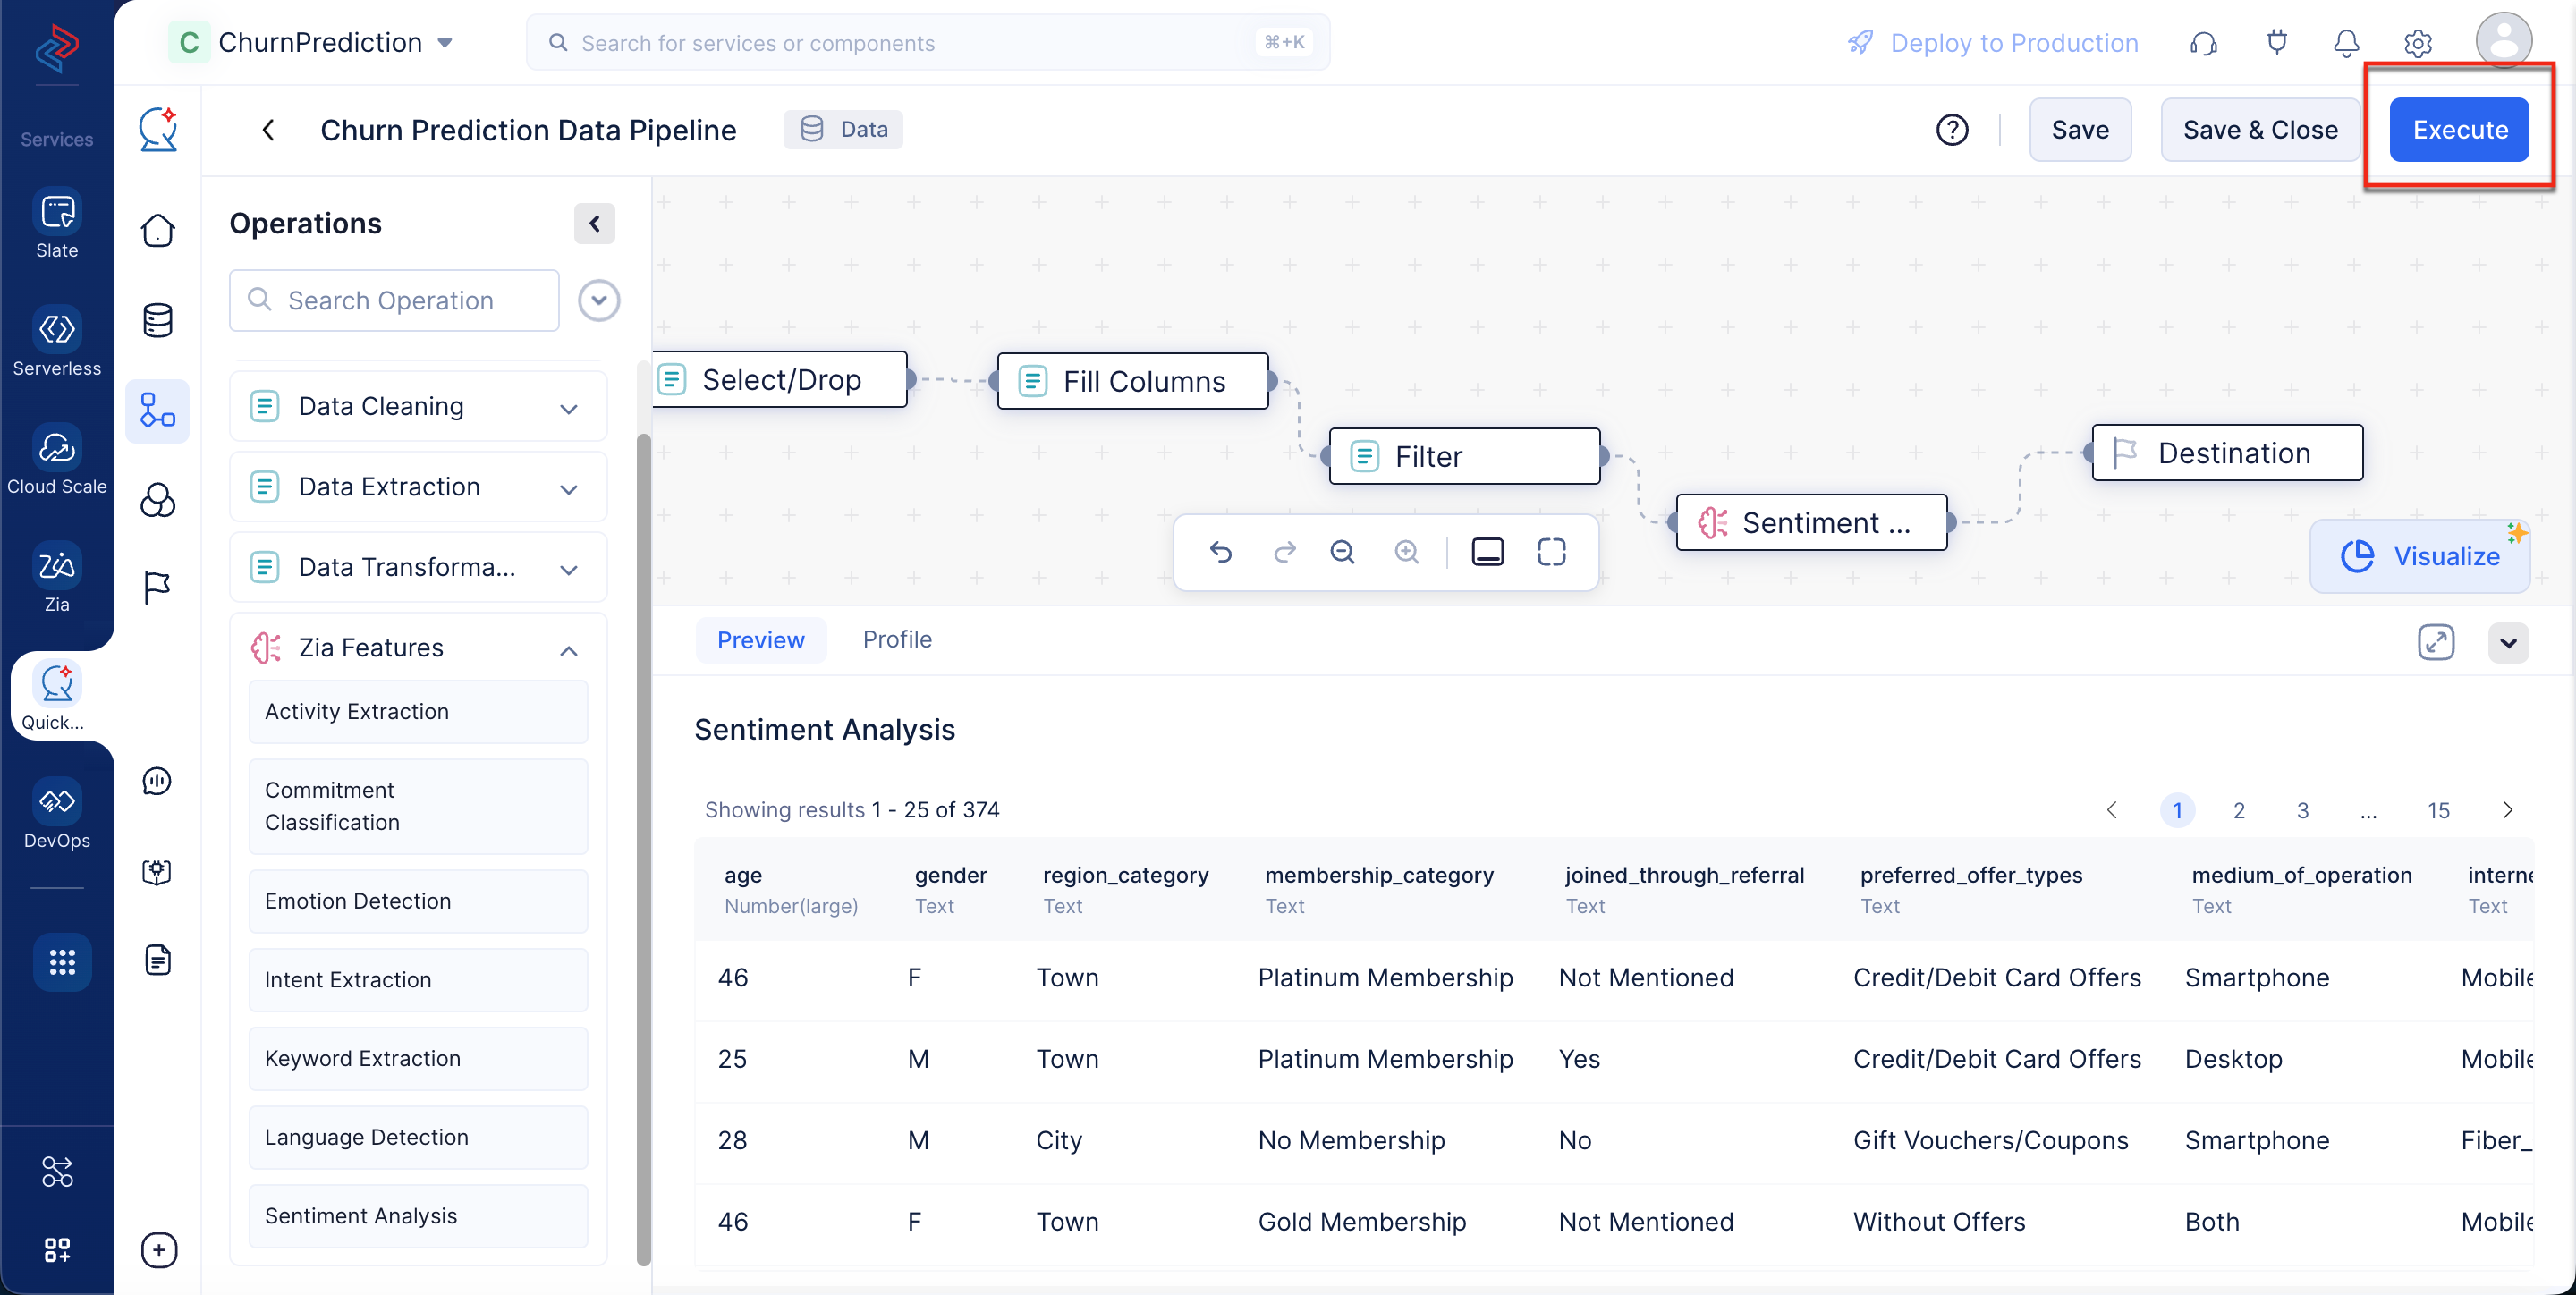
Now, connect the Sentiment Analysis node to the Destination node. Once all of the nodes are connected, click the Save button to save the pipeline. Then click the Execute button to execute the pipeline.
You’ll be redirected to a page that shows the executed pipeline with the execution status.
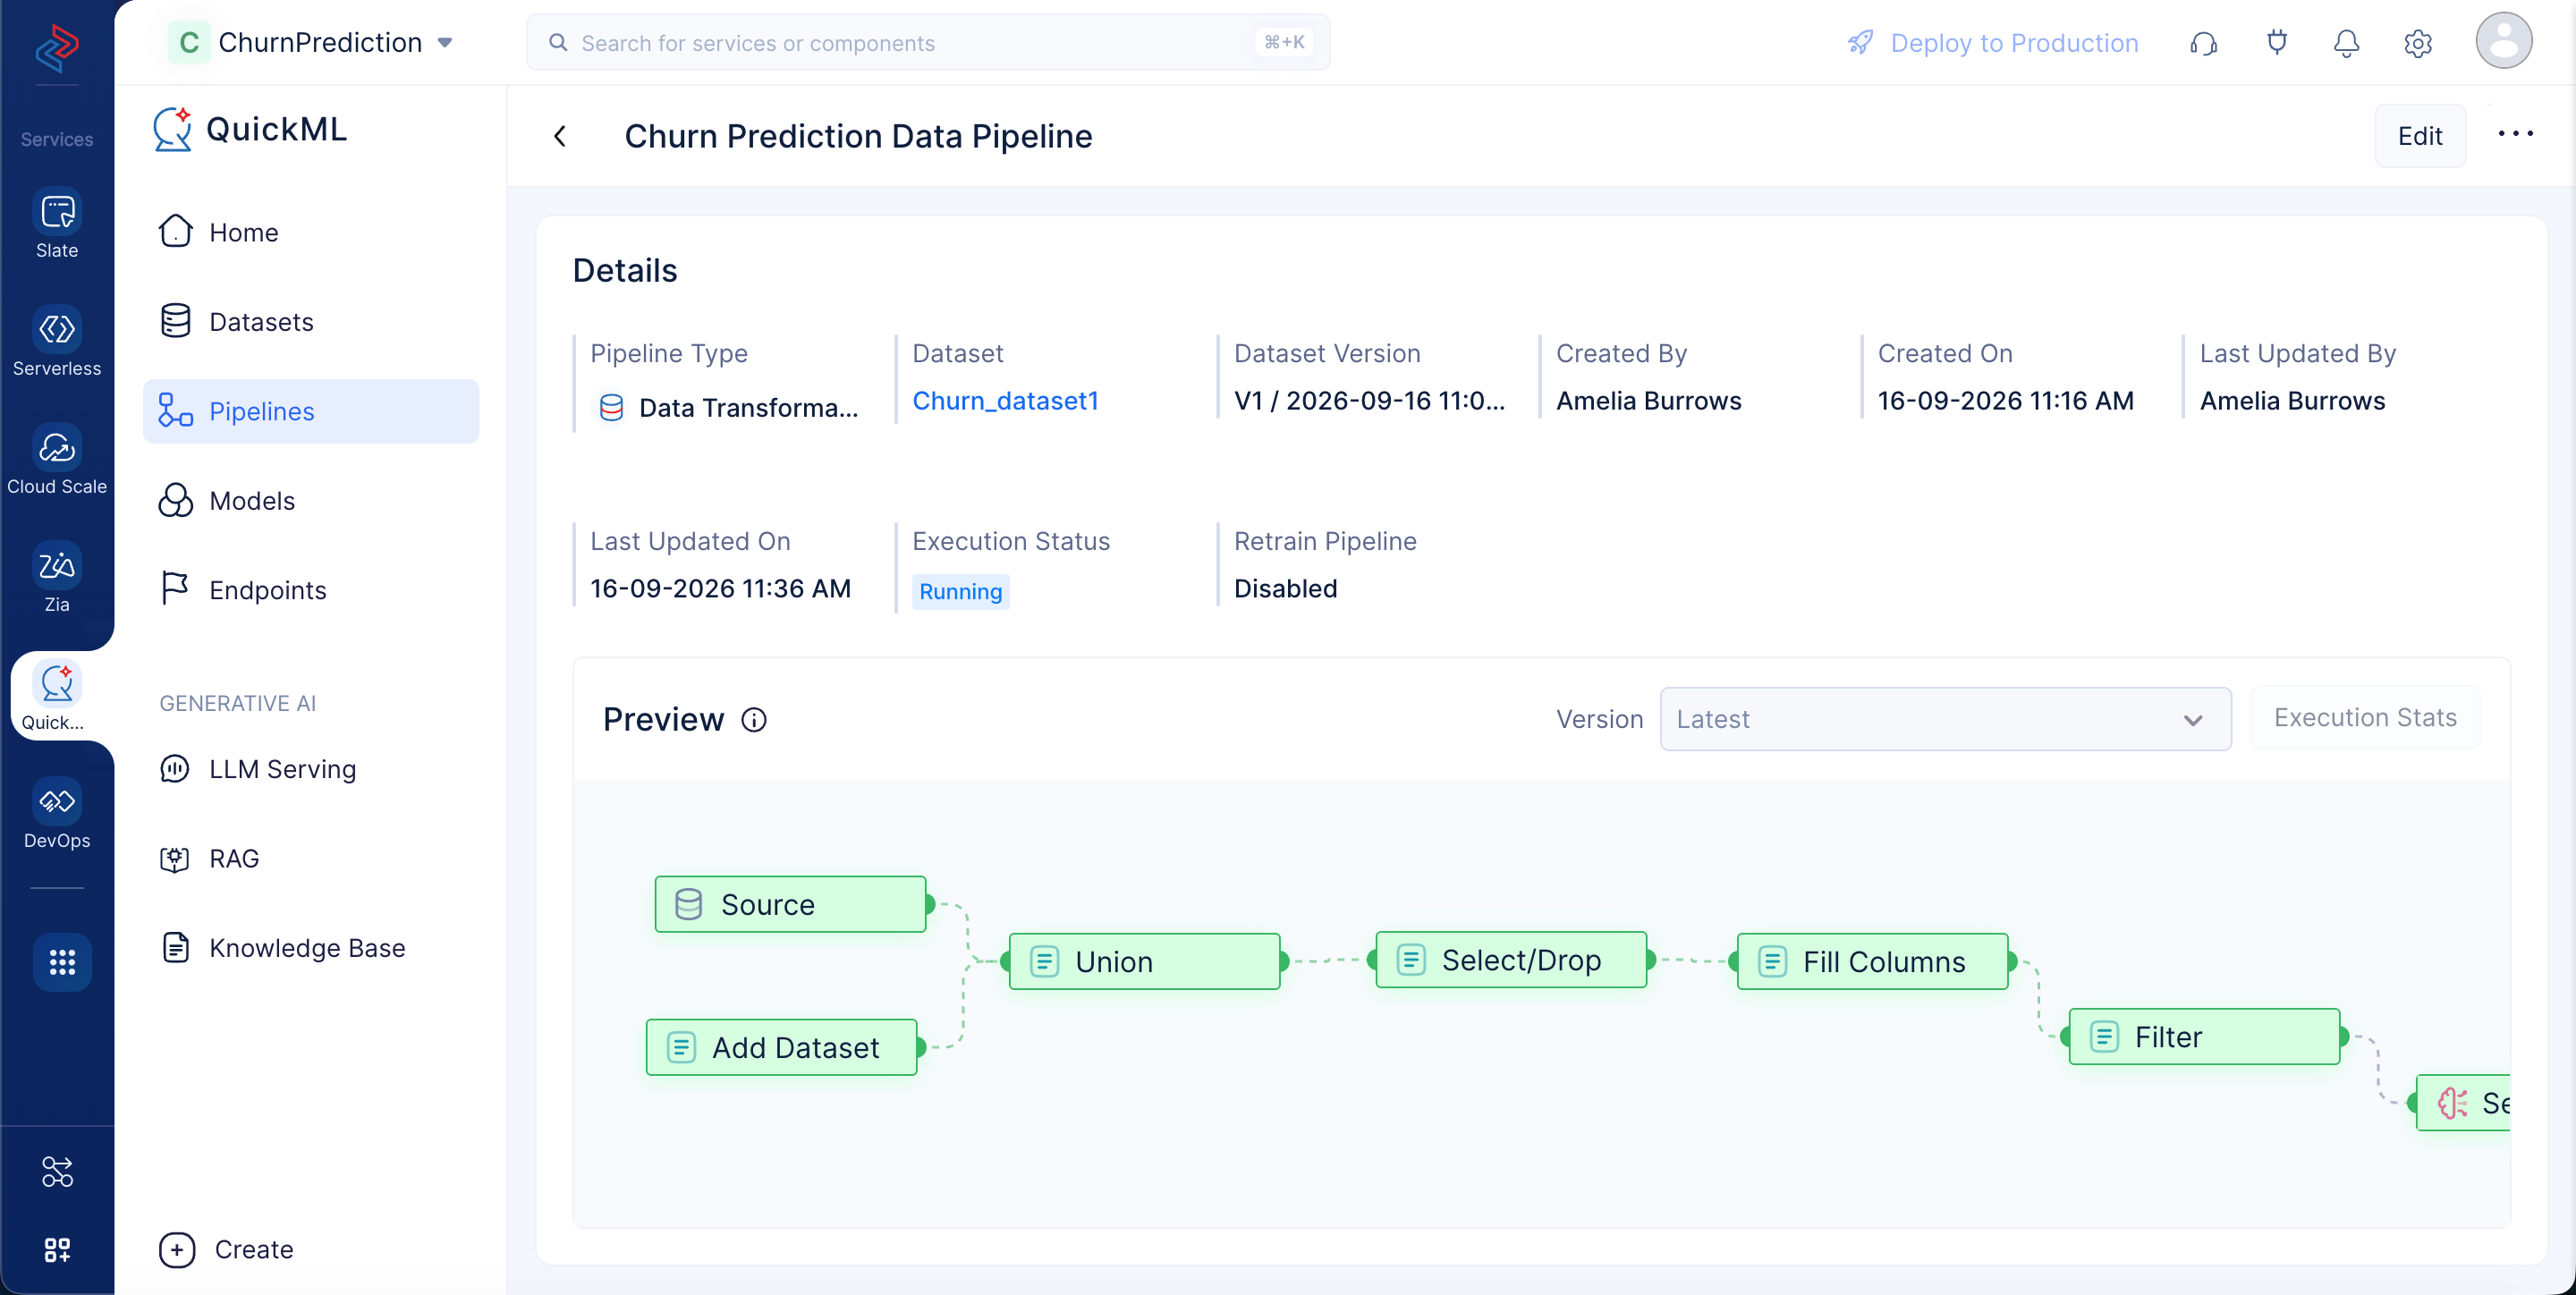
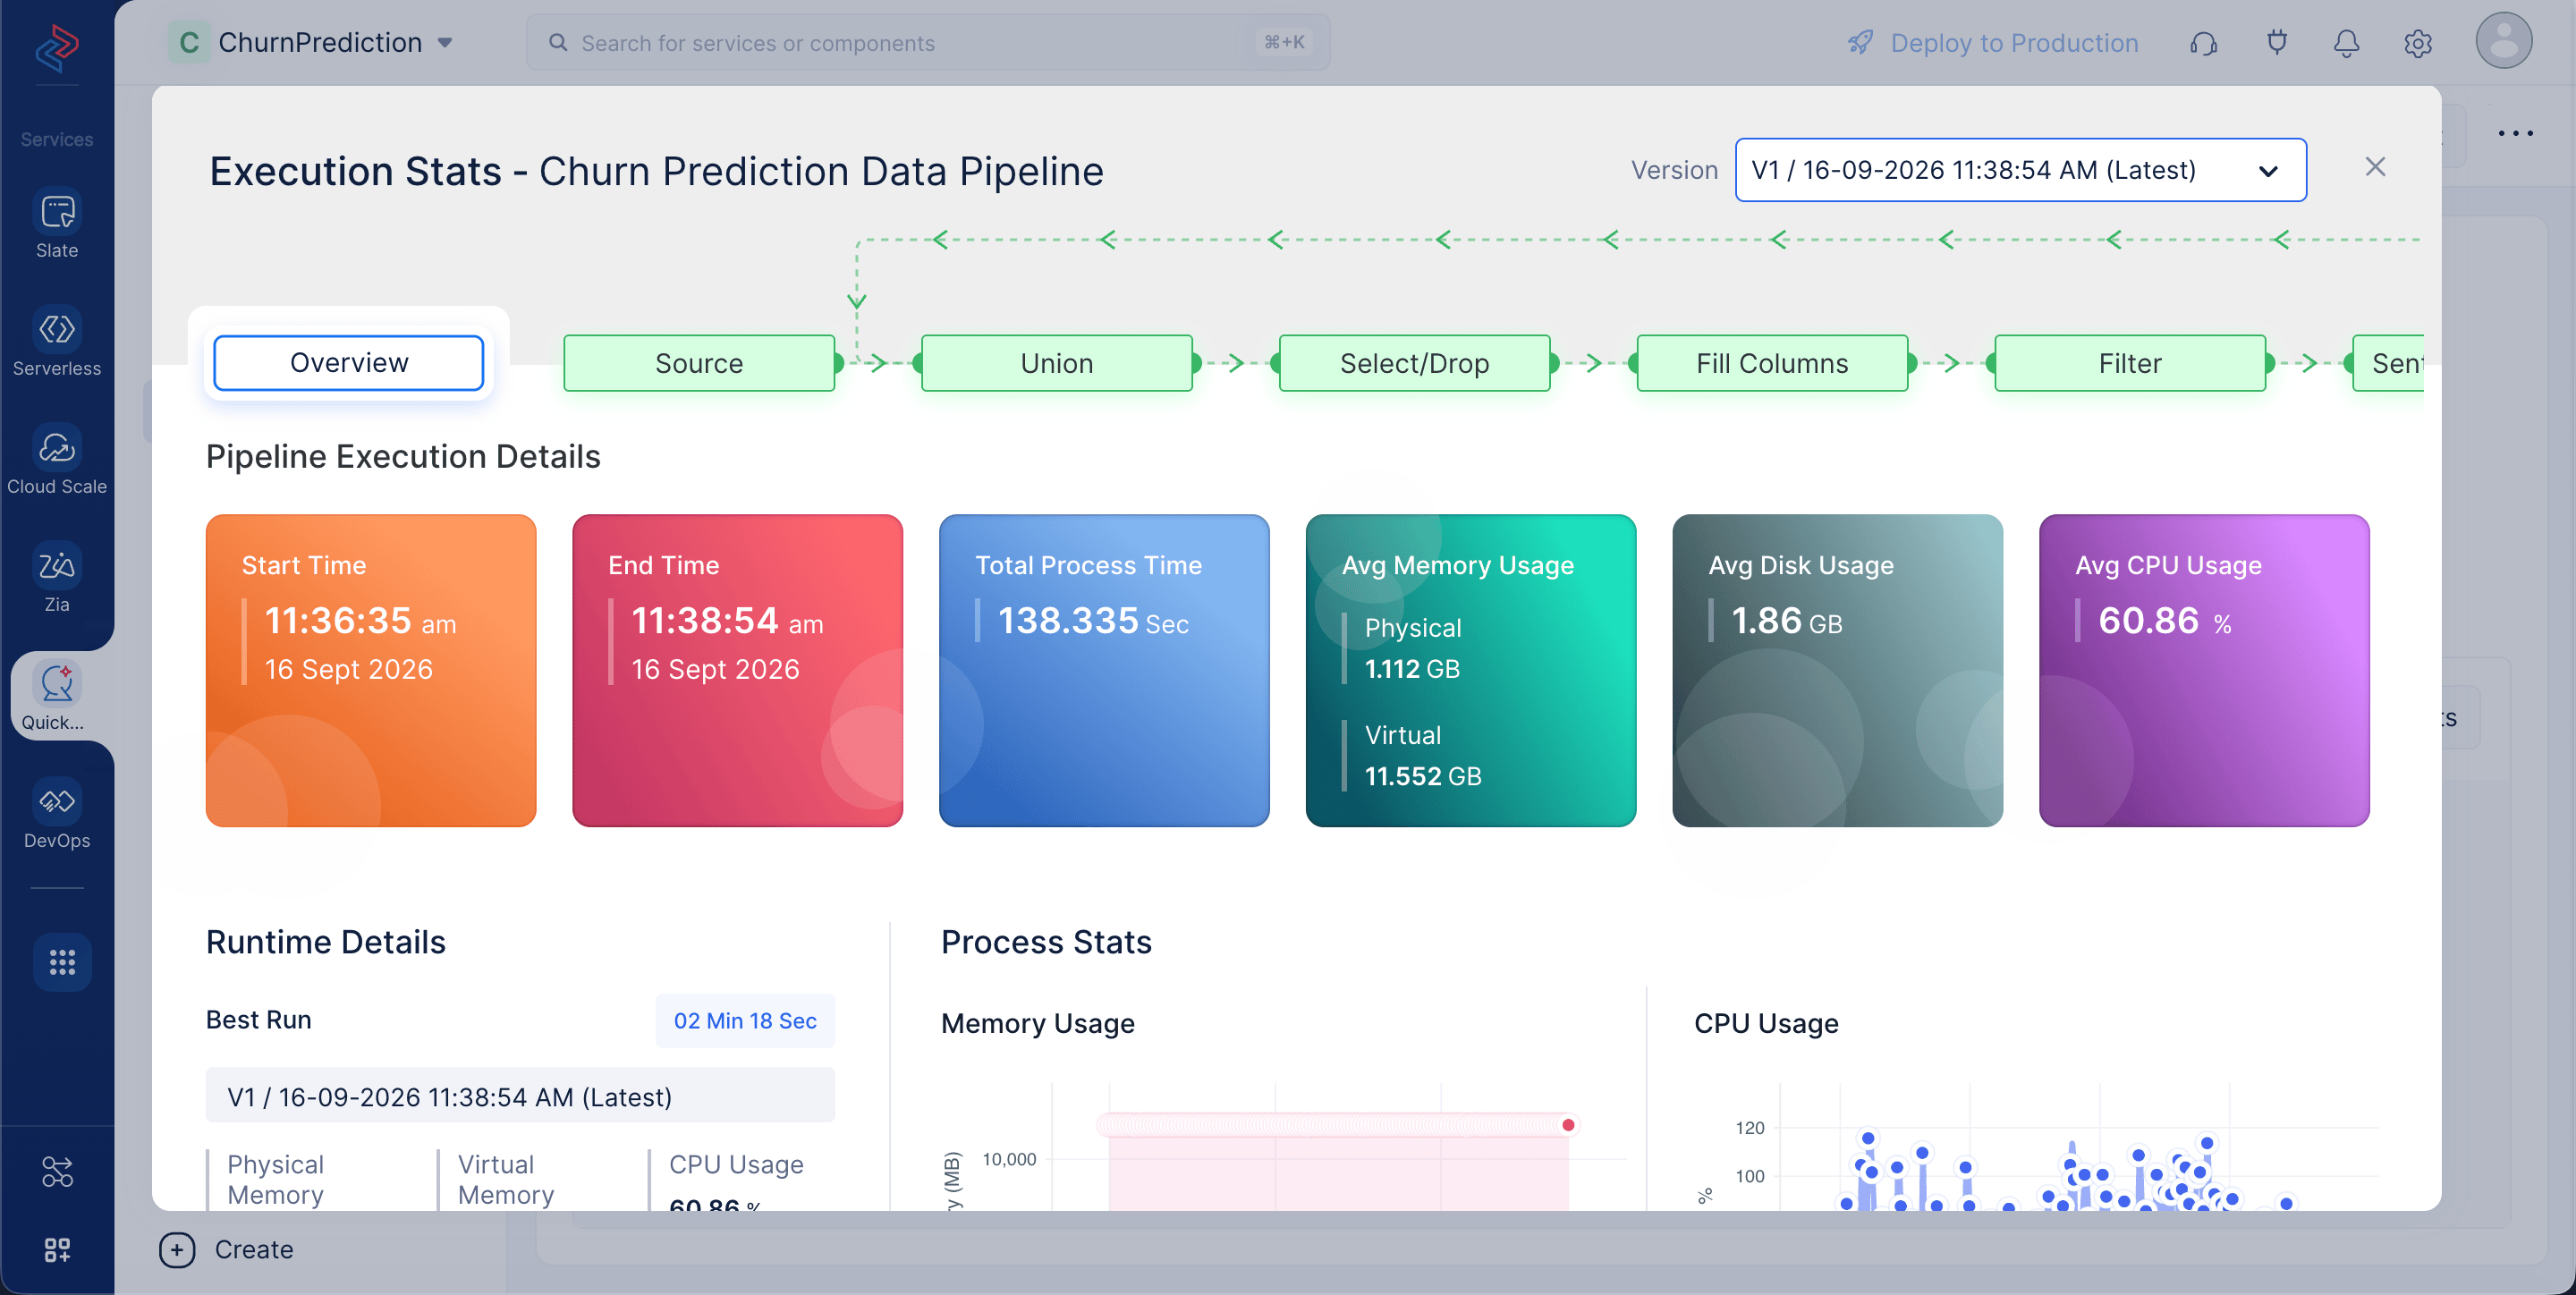
Click on Execution Stats to access details regarding the compute usage.
Last Updated 2026-09-29 11:31:01 +0530 IST