Create an endpoint
Let’s create an endpoint for the above Churn Prediction model, which contains Endpoint URL (model API) details, which allows external applications to access the model seamlessly and get predictions from it.
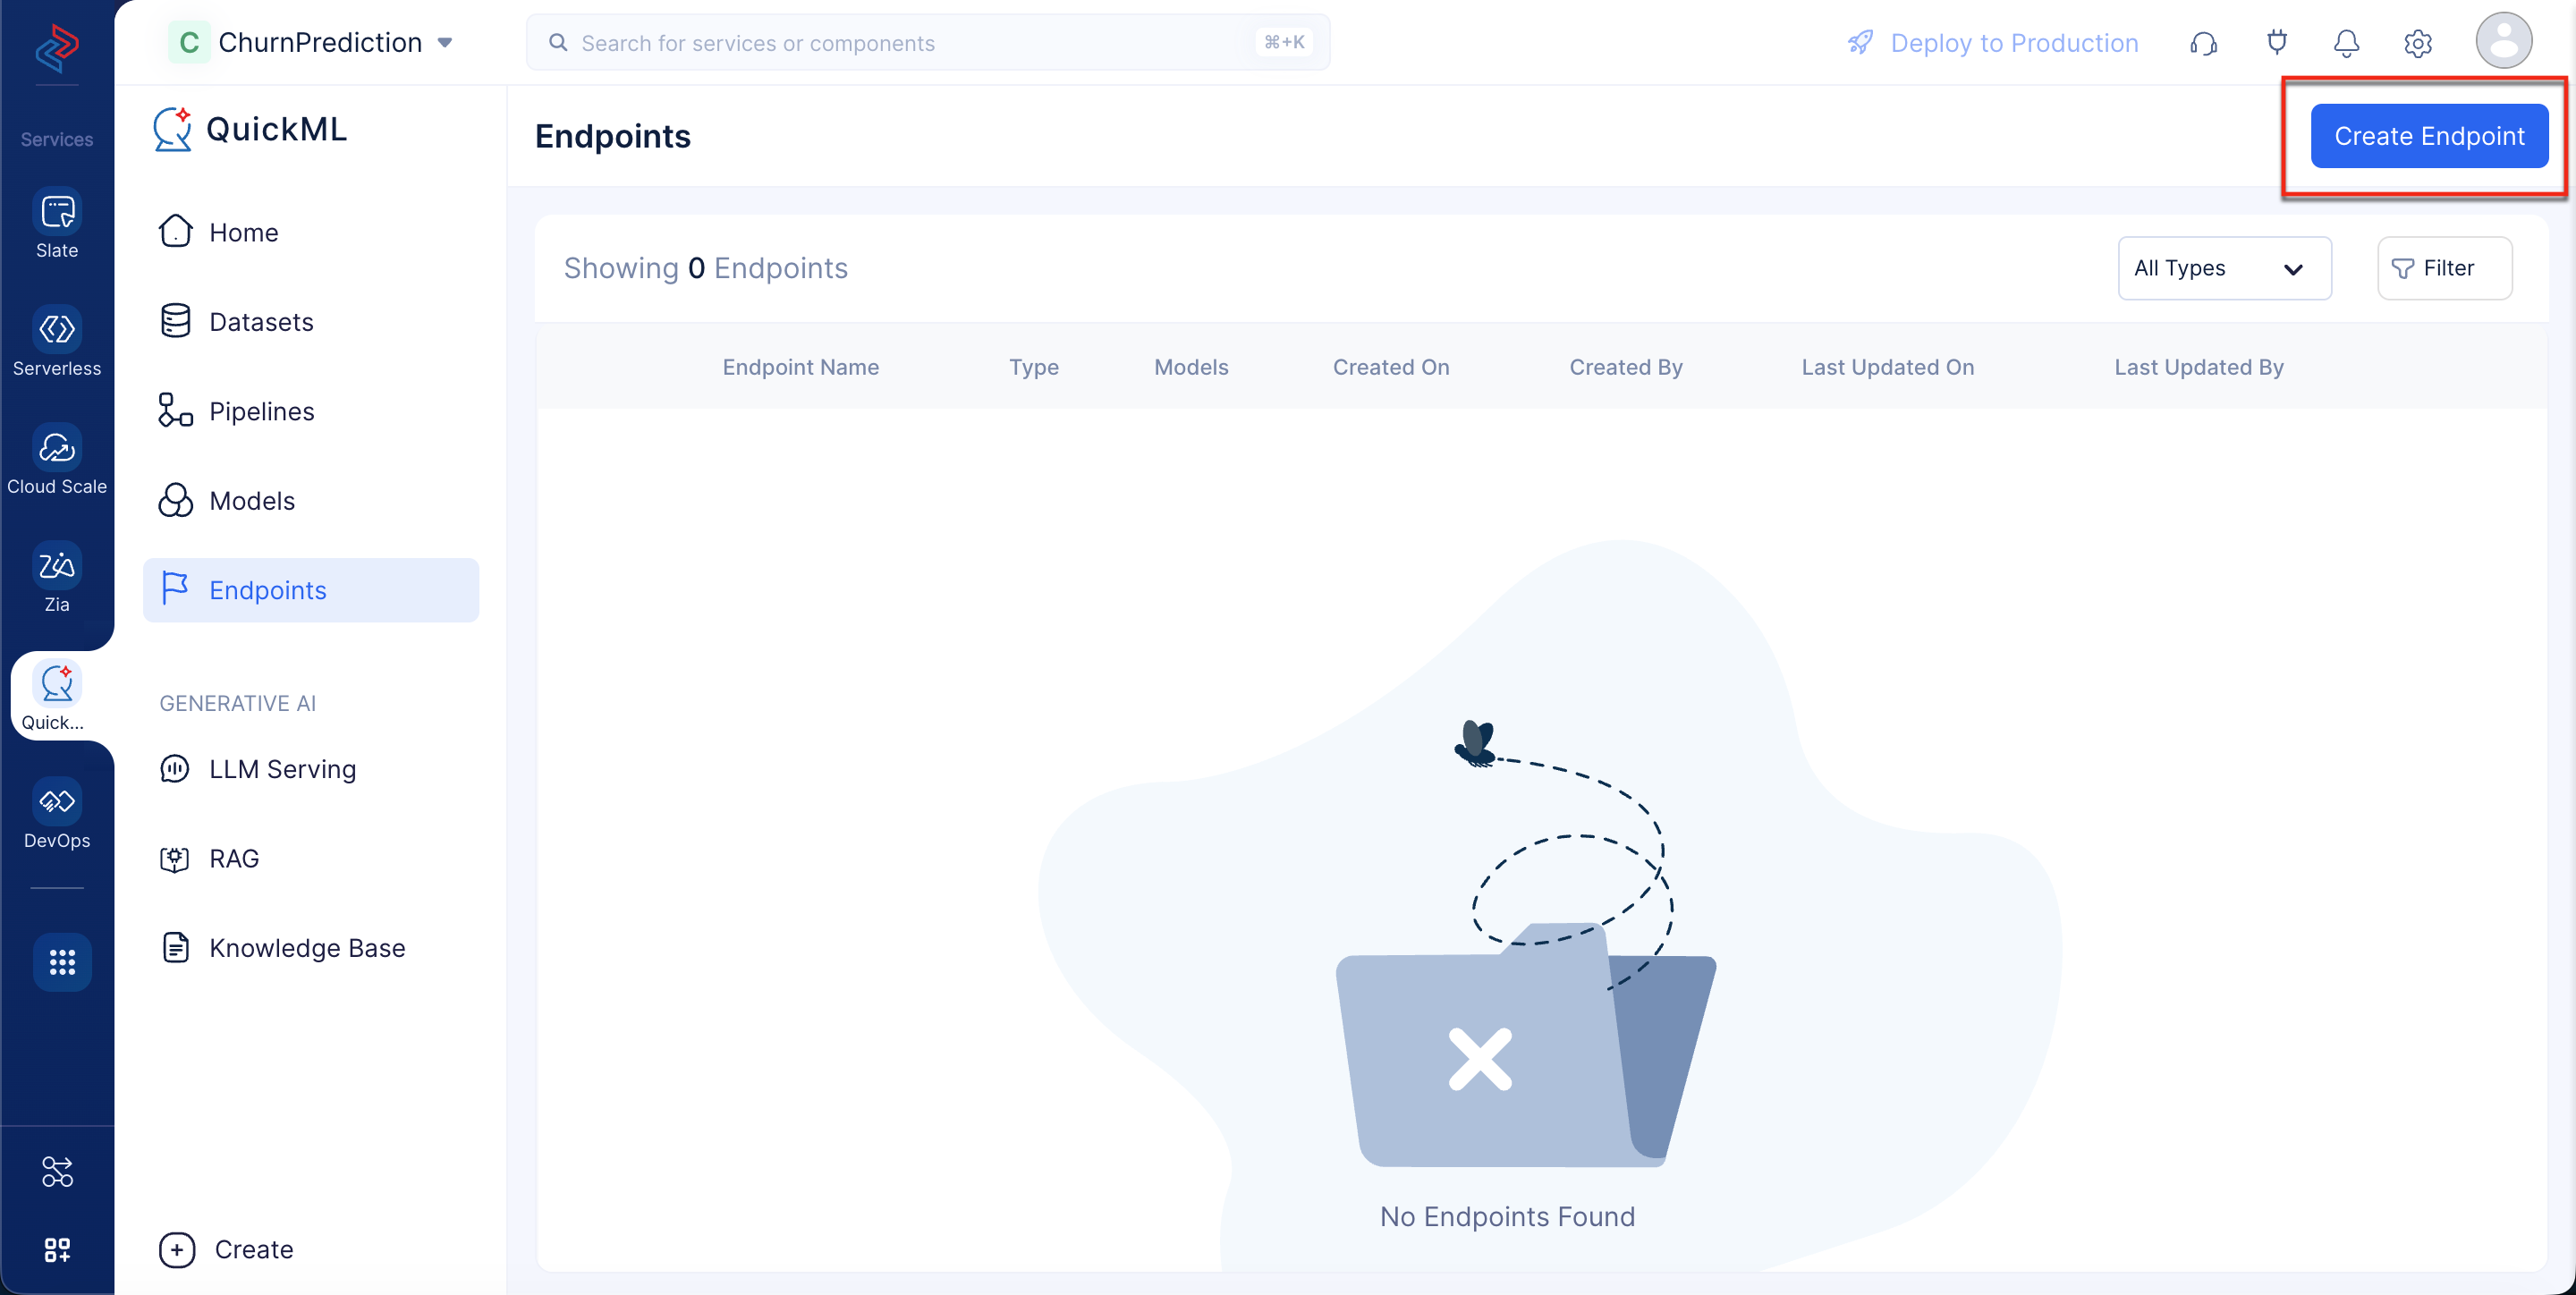
- Navigate to the Endpoints component in the left menu and click Create Endpoint.
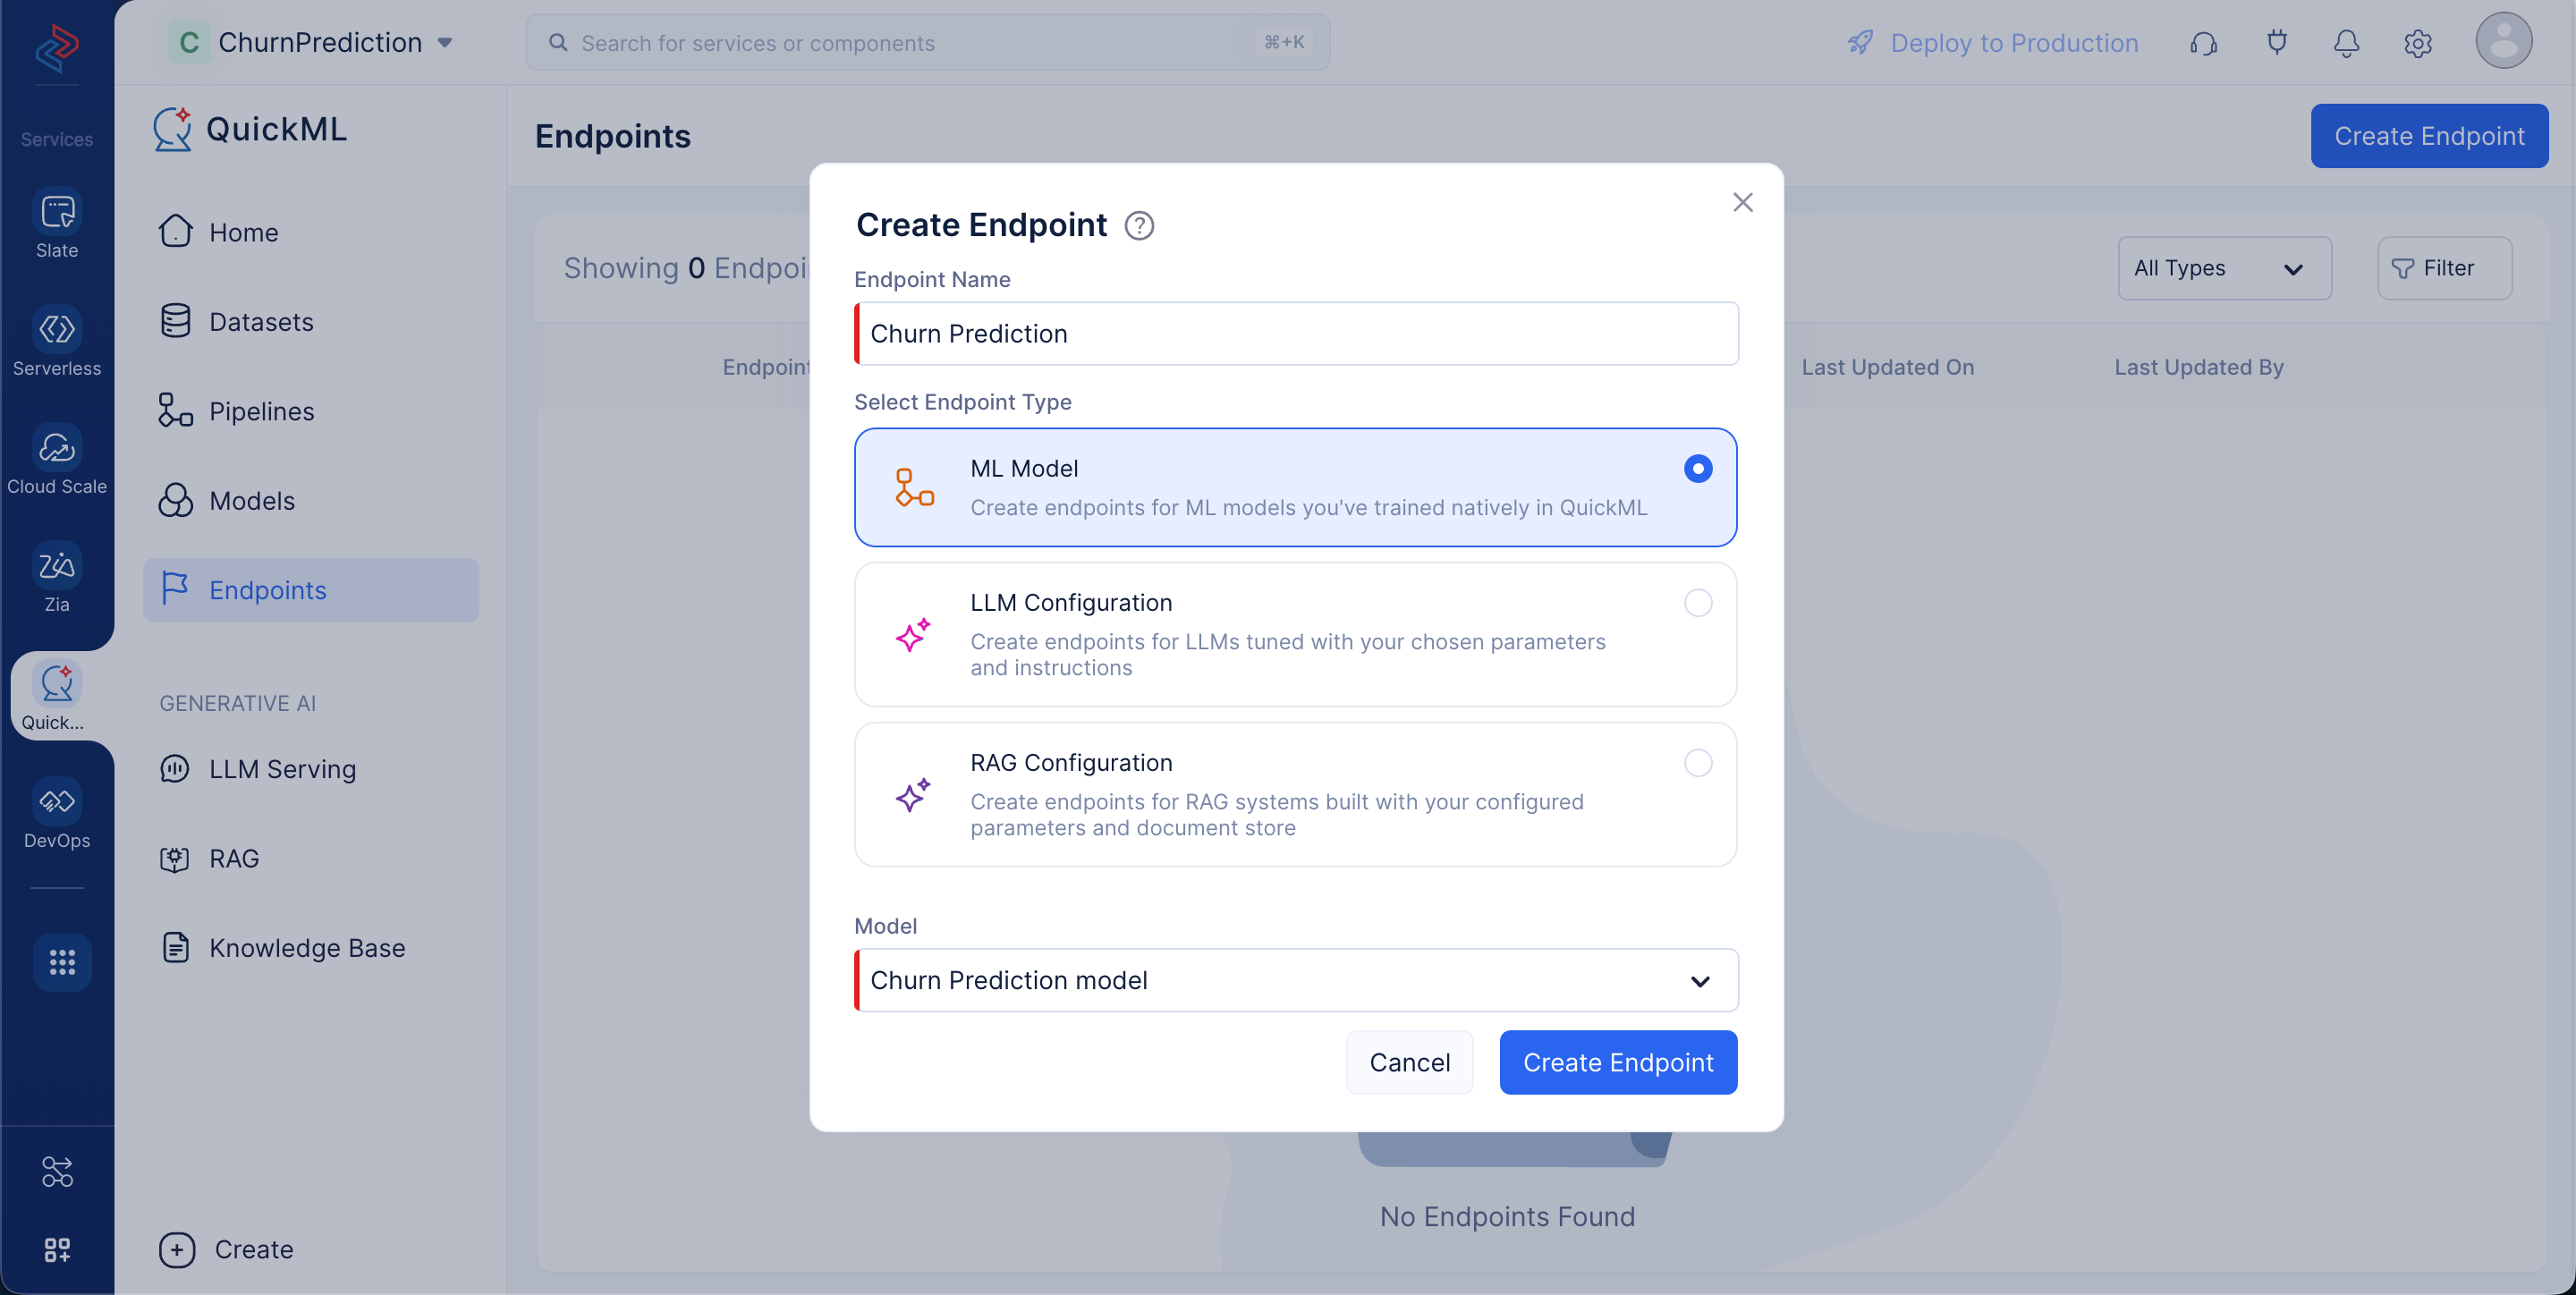
- Enter the endpoint name as Churn Prediction, select the endpoint type as ML Model, and choose the Churn Prediction Model from the Choose Model field. Then click Create Endpoint.
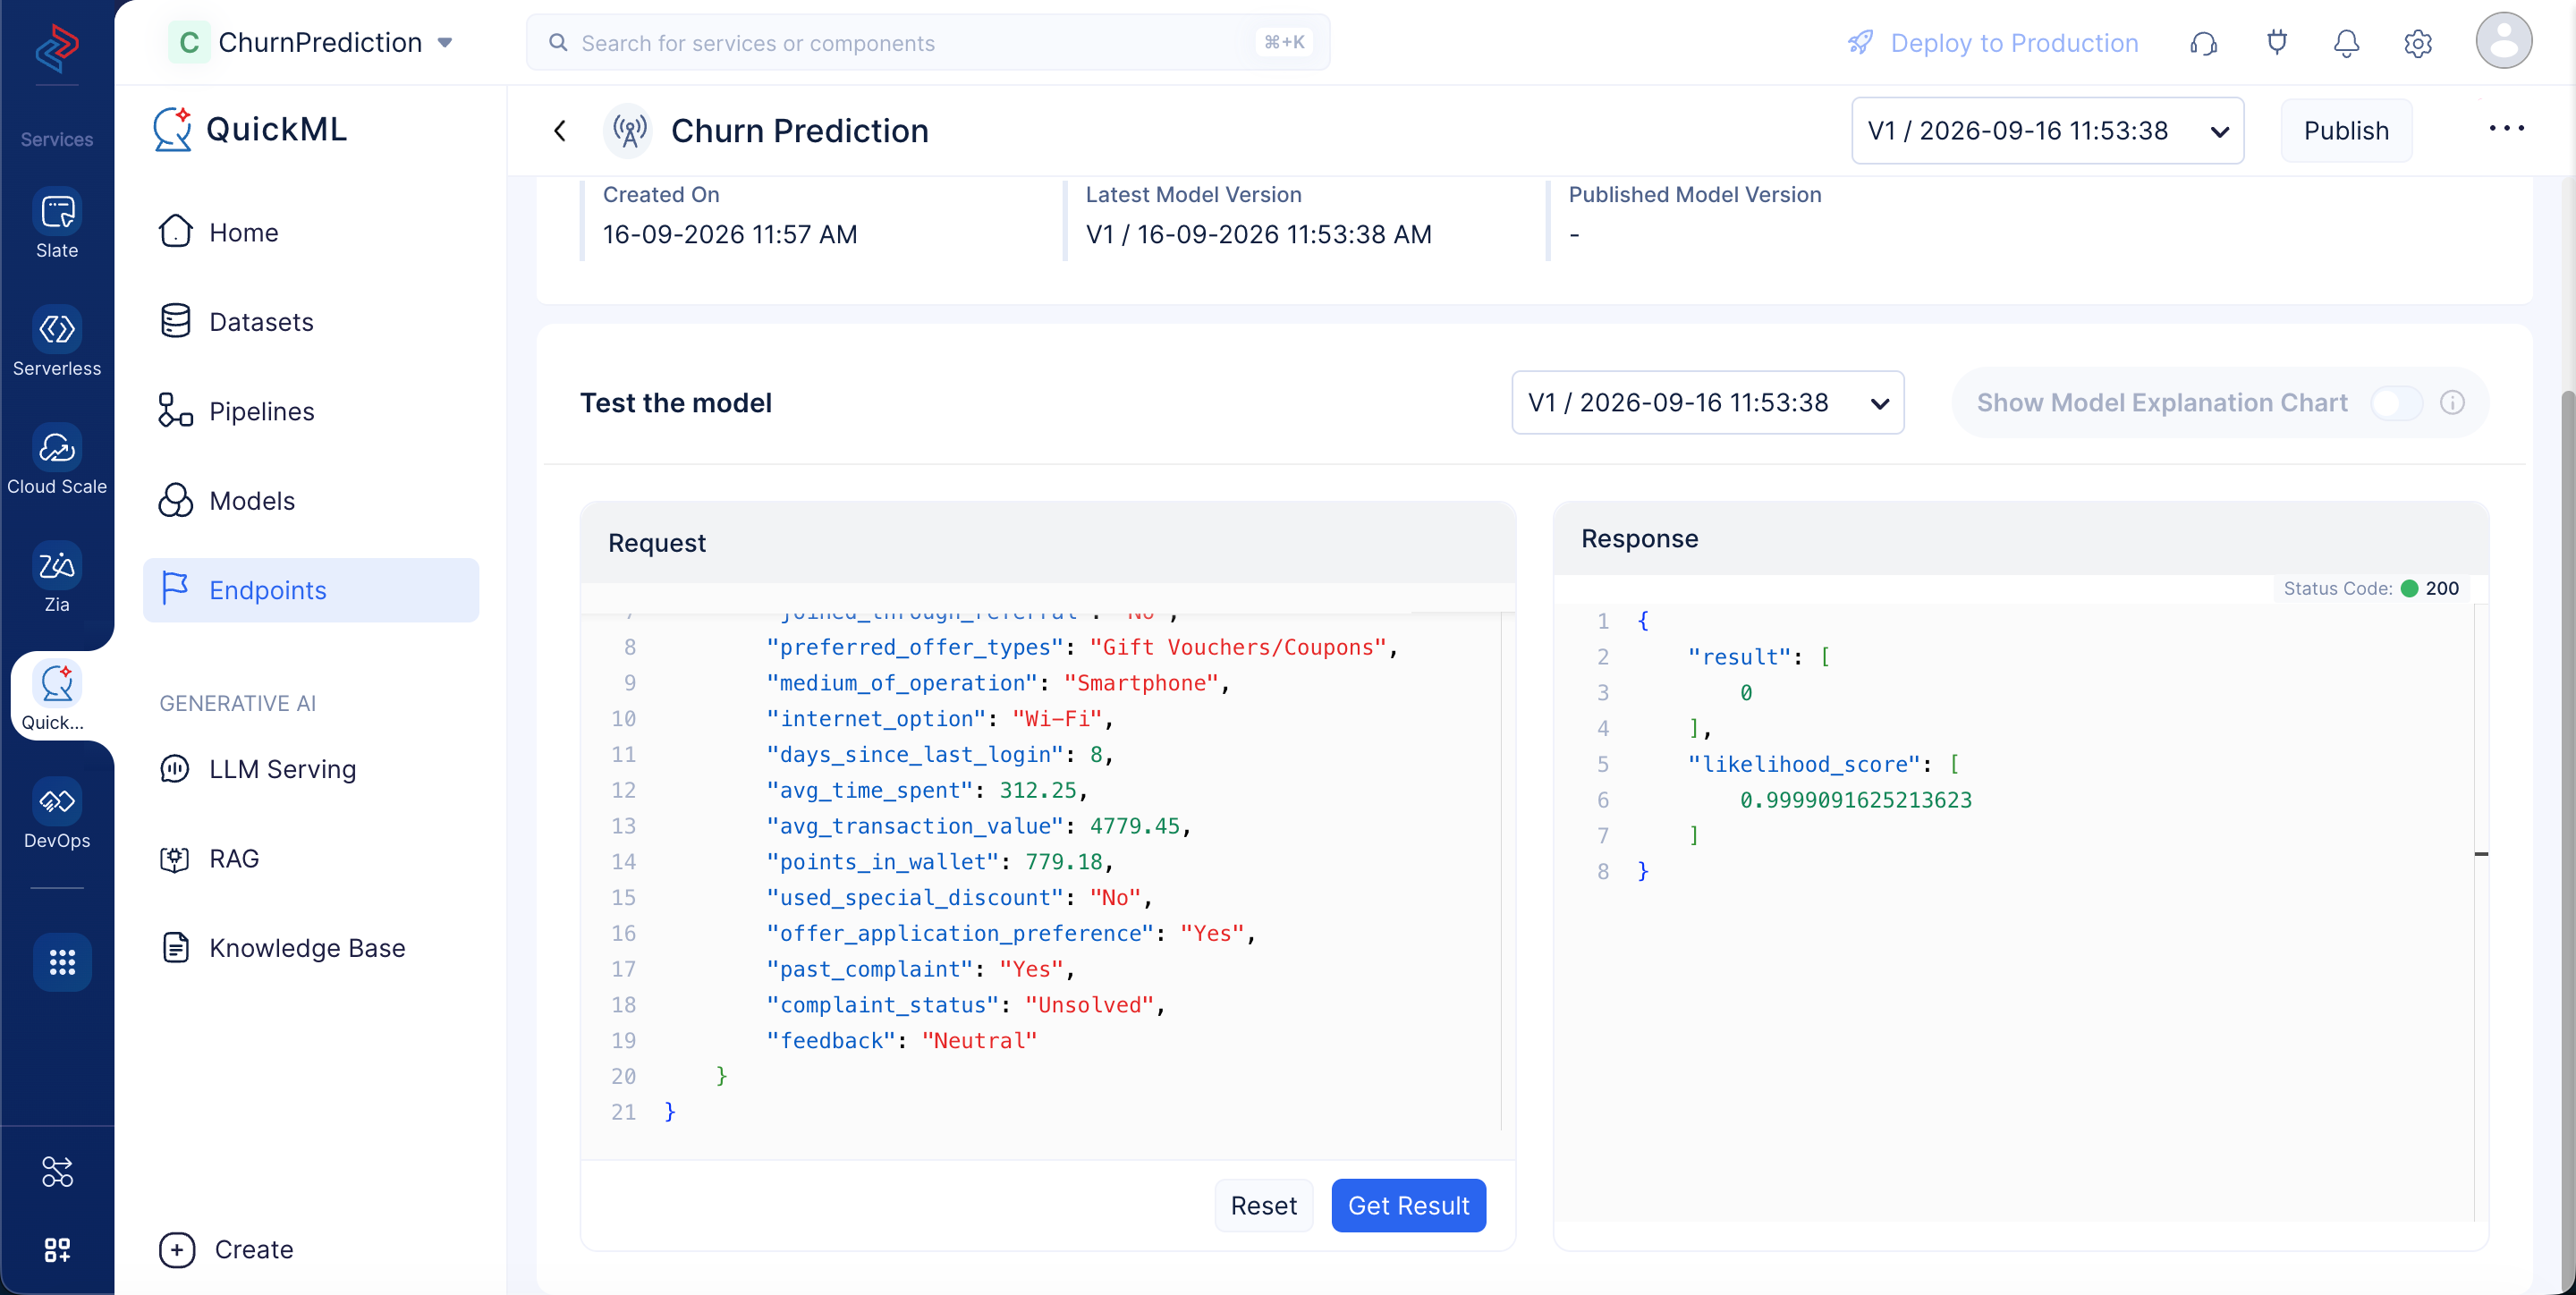
In the endpoint’s detail page, test the model by providing a sample request in the Request box, then click the Get Result button. This will generate the predicted value in the Response box.
Note: The “likelihood_score” displayed in the sample response indicates the model’s confidence in its prediction or generated result. In this case, a score of 0.98 suggests that the model is highly confident (98%) in the accuracy or relevance of the response it has provided. This metric helps users interpret the reliability of the output and make informed decisions based on it.
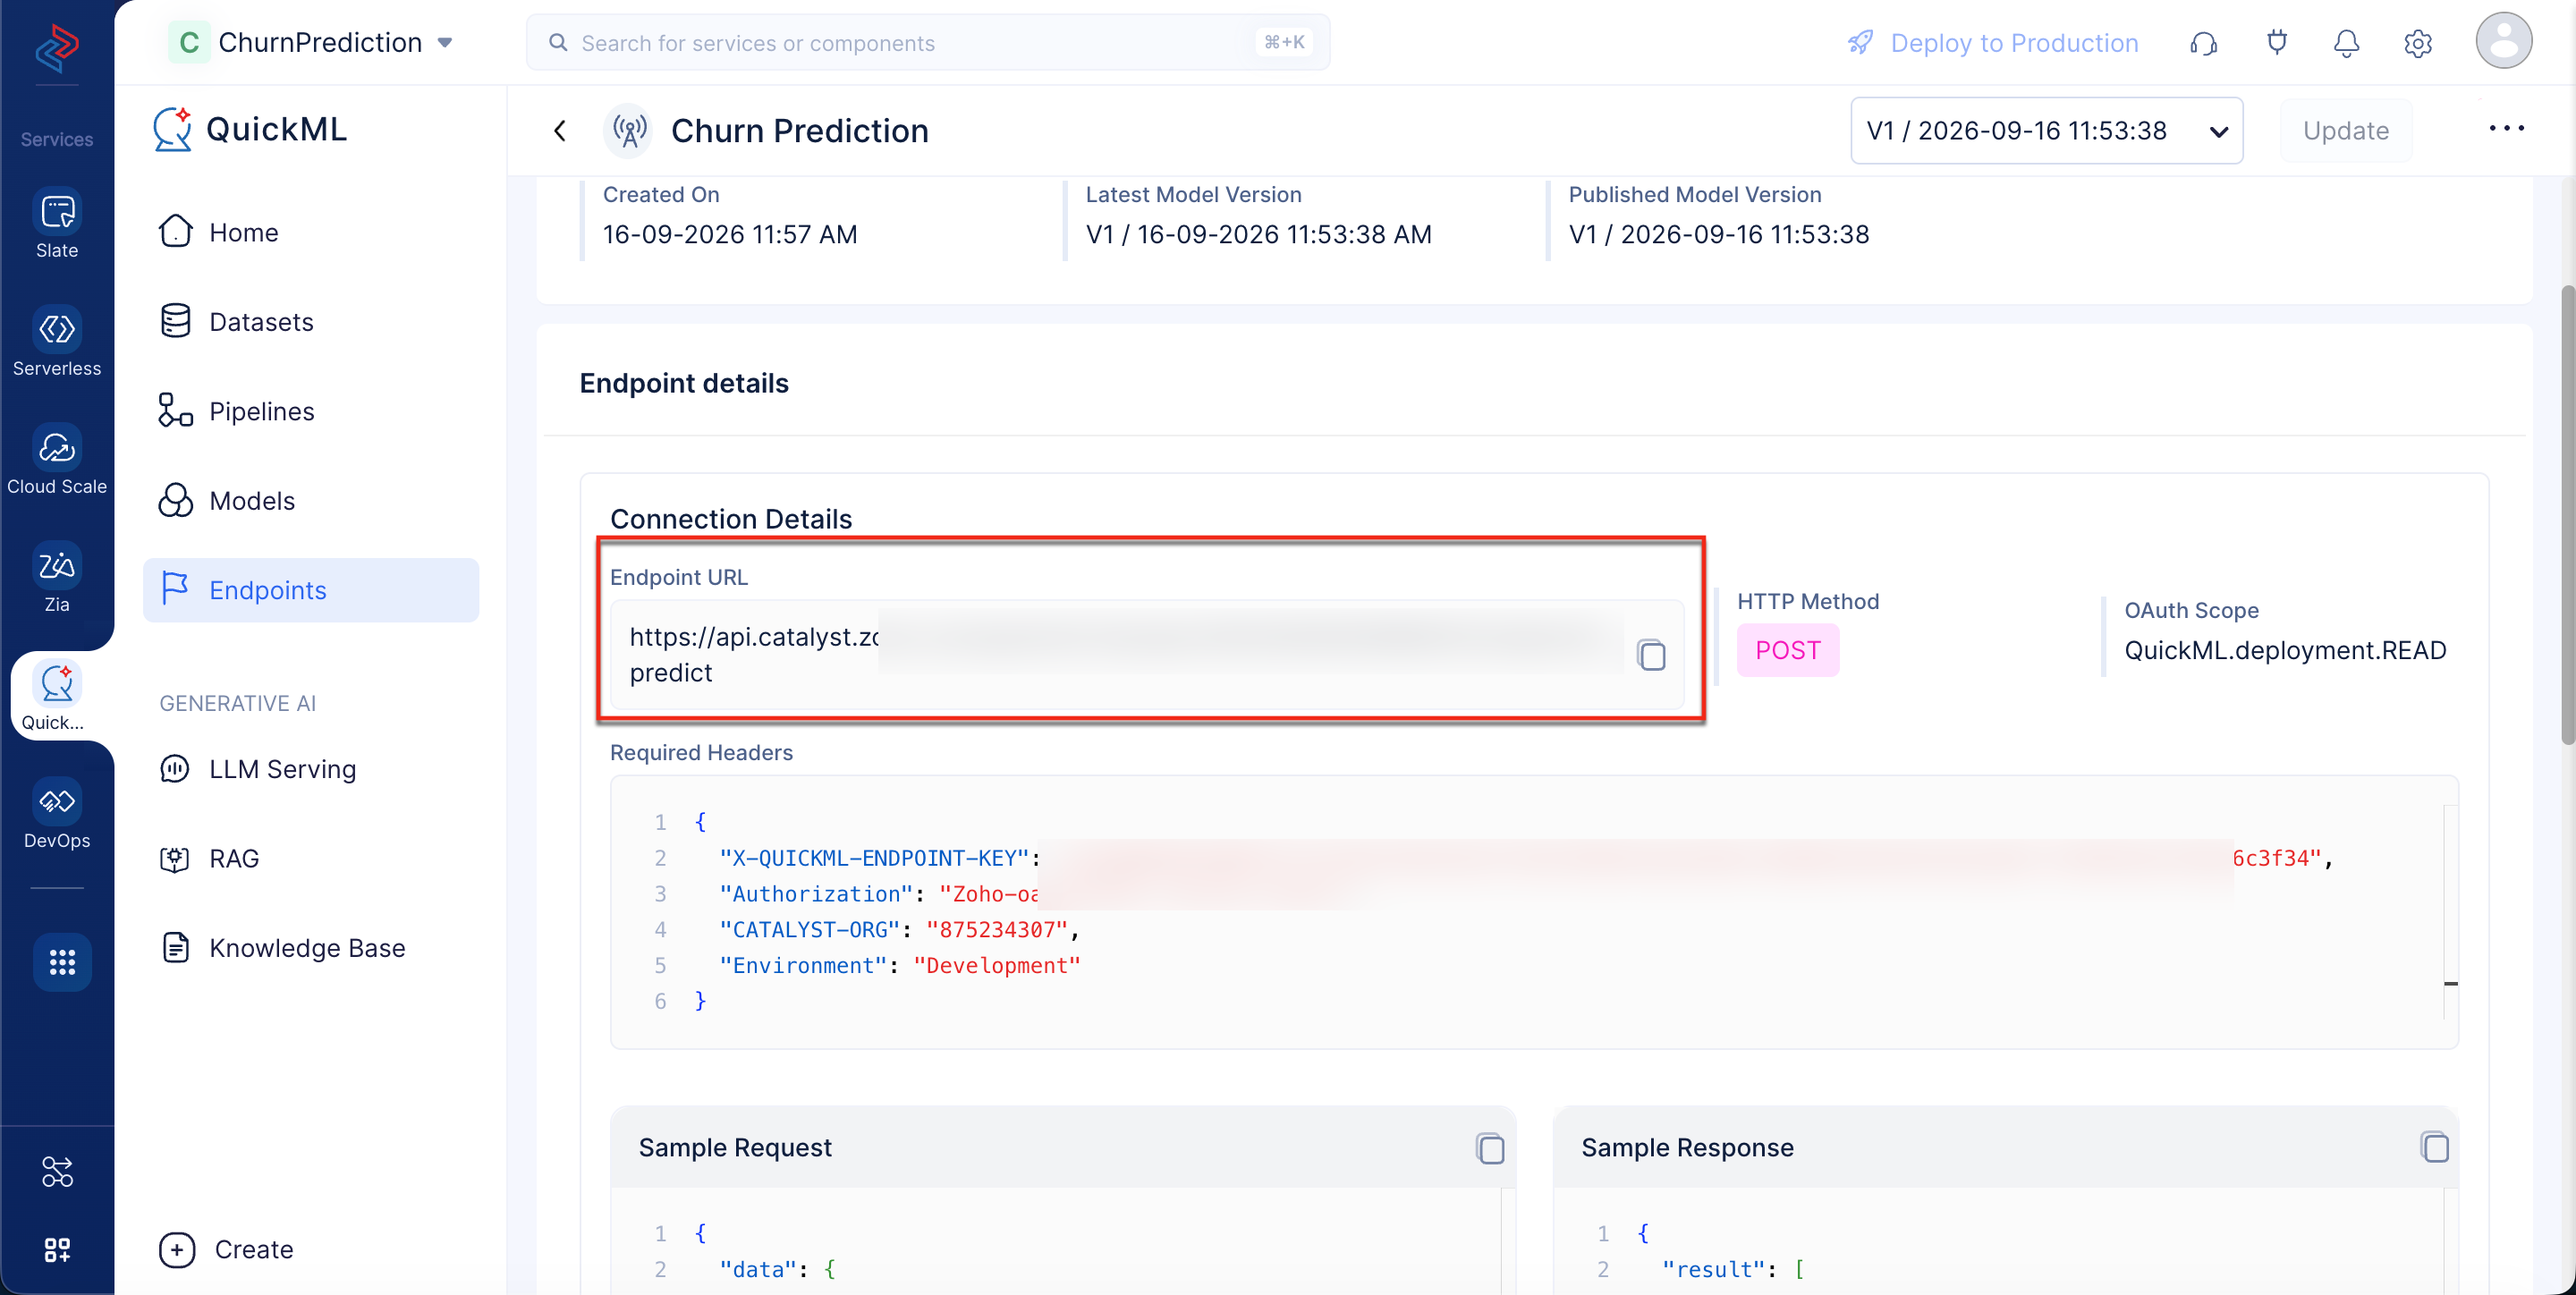
- Click Publish on the top-right corner of the page, and Endpoint URL details will be generated. These details are used to integrate the ML model created with other applications.
Last Updated 2026-09-29 11:31:01 +0530 IST