Create an Endpoint
Now , let’s create an endpoint to allow external applications to interact with the model and get responses.
-
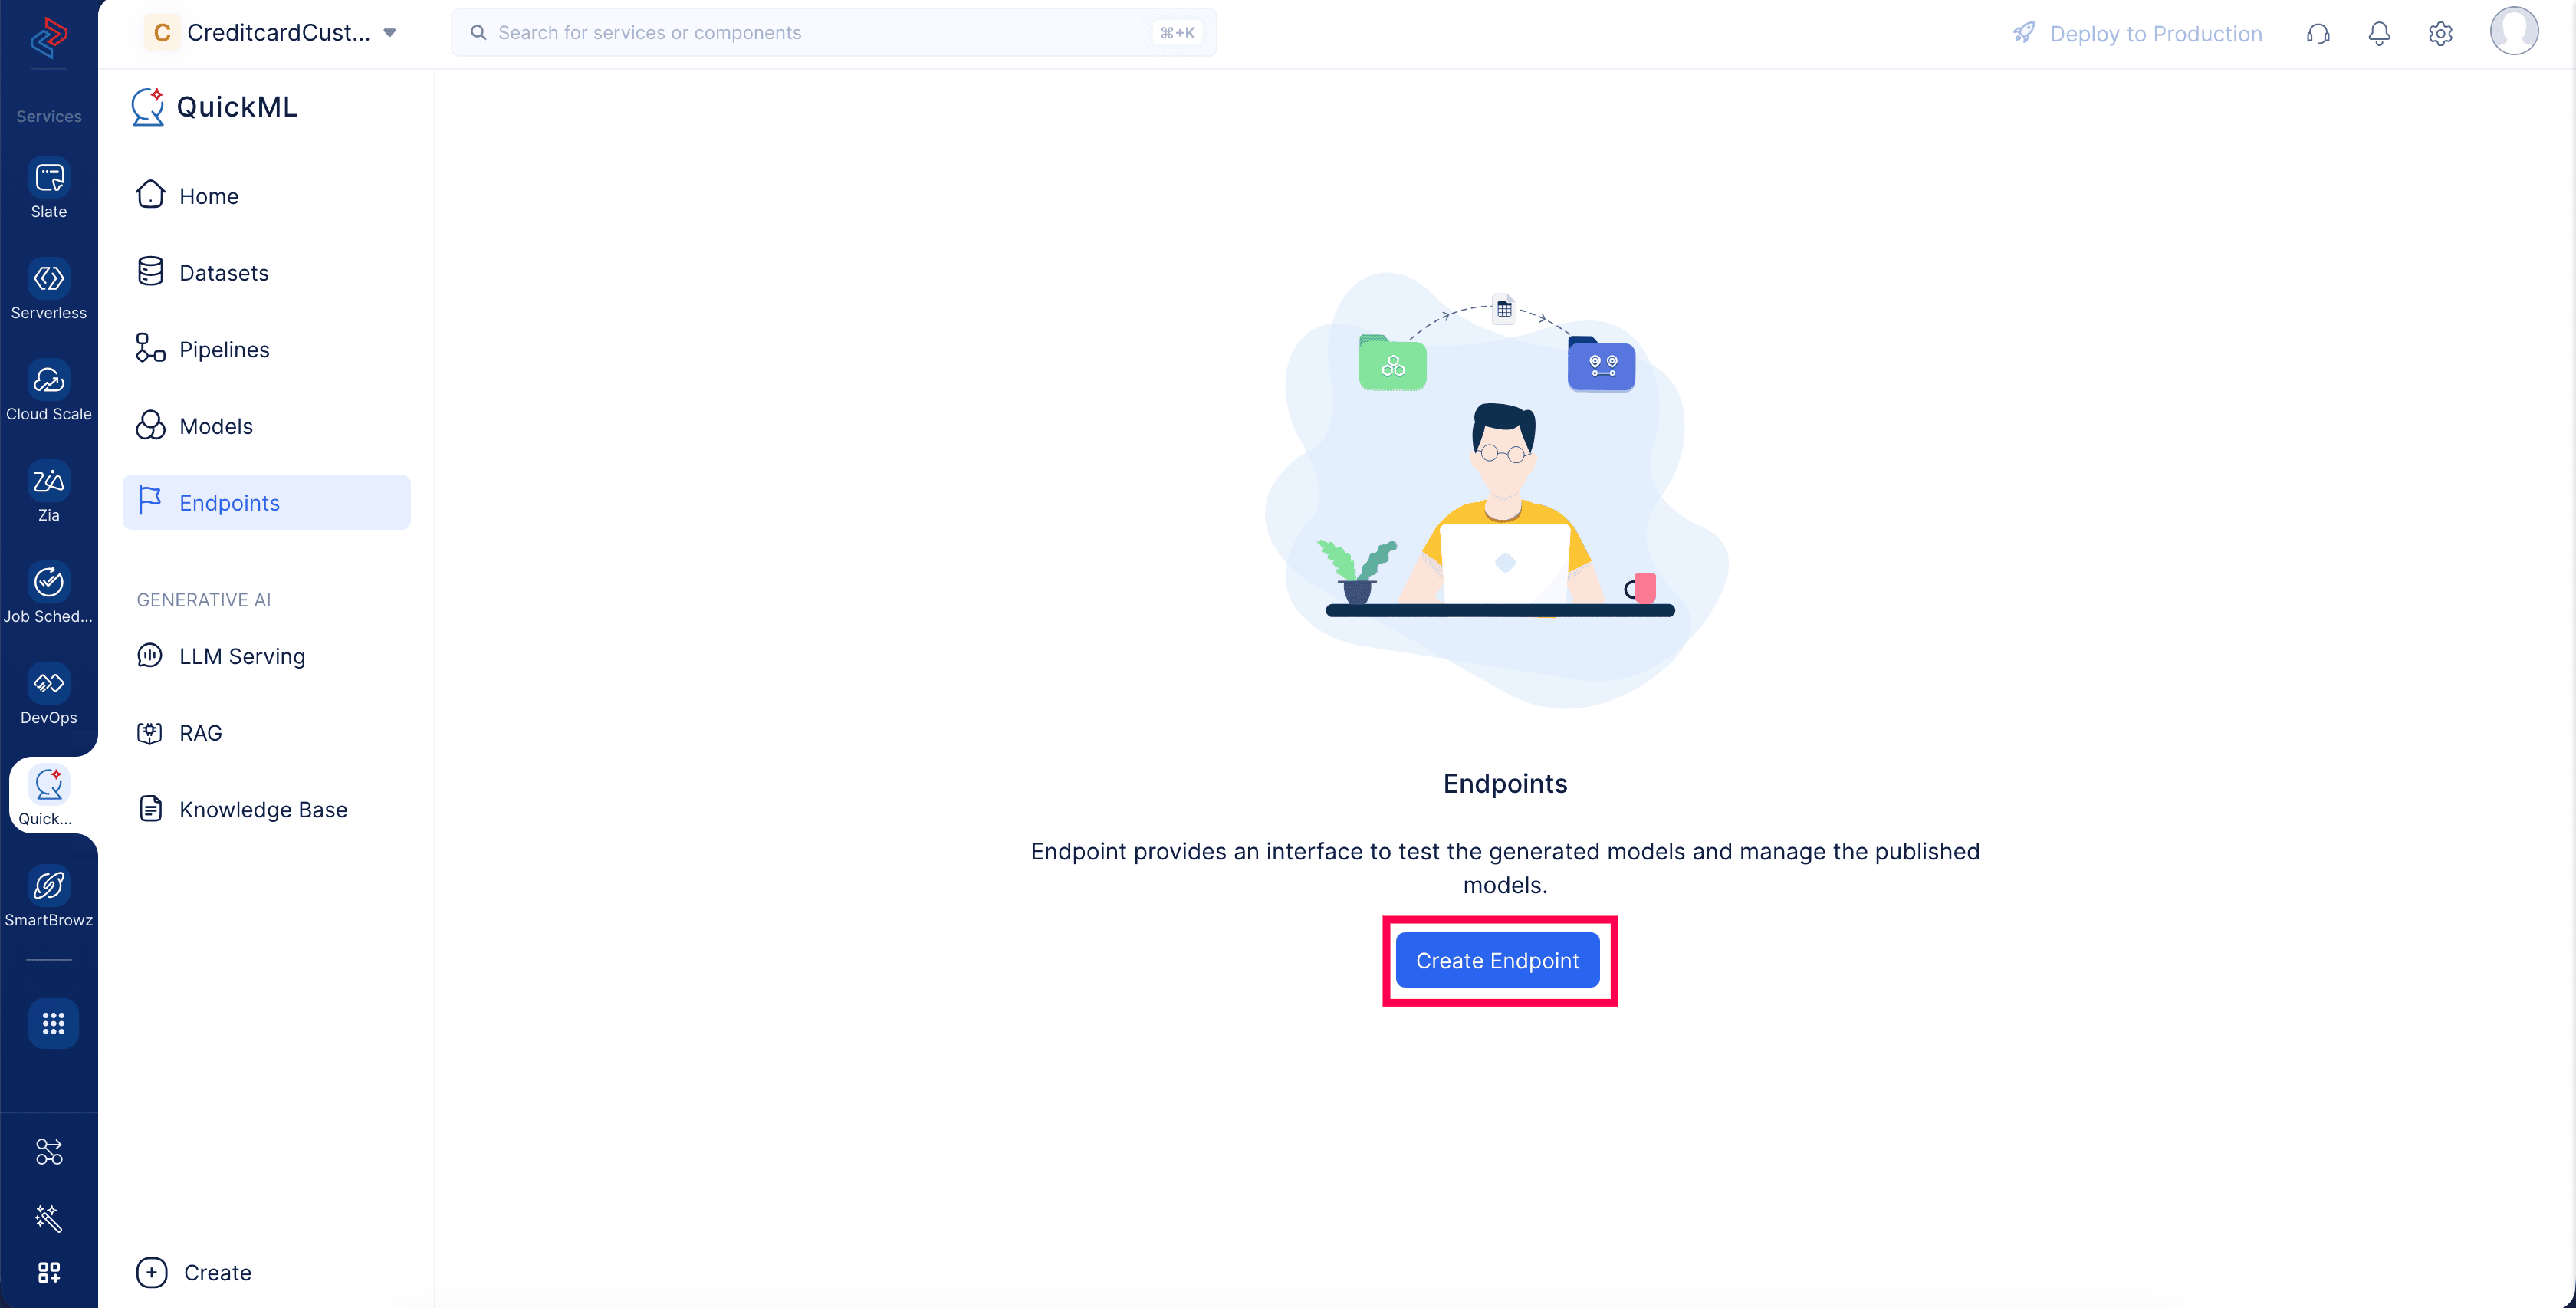
Navigate to the Endpoints component in the left menu and click Create Endpoint .
-
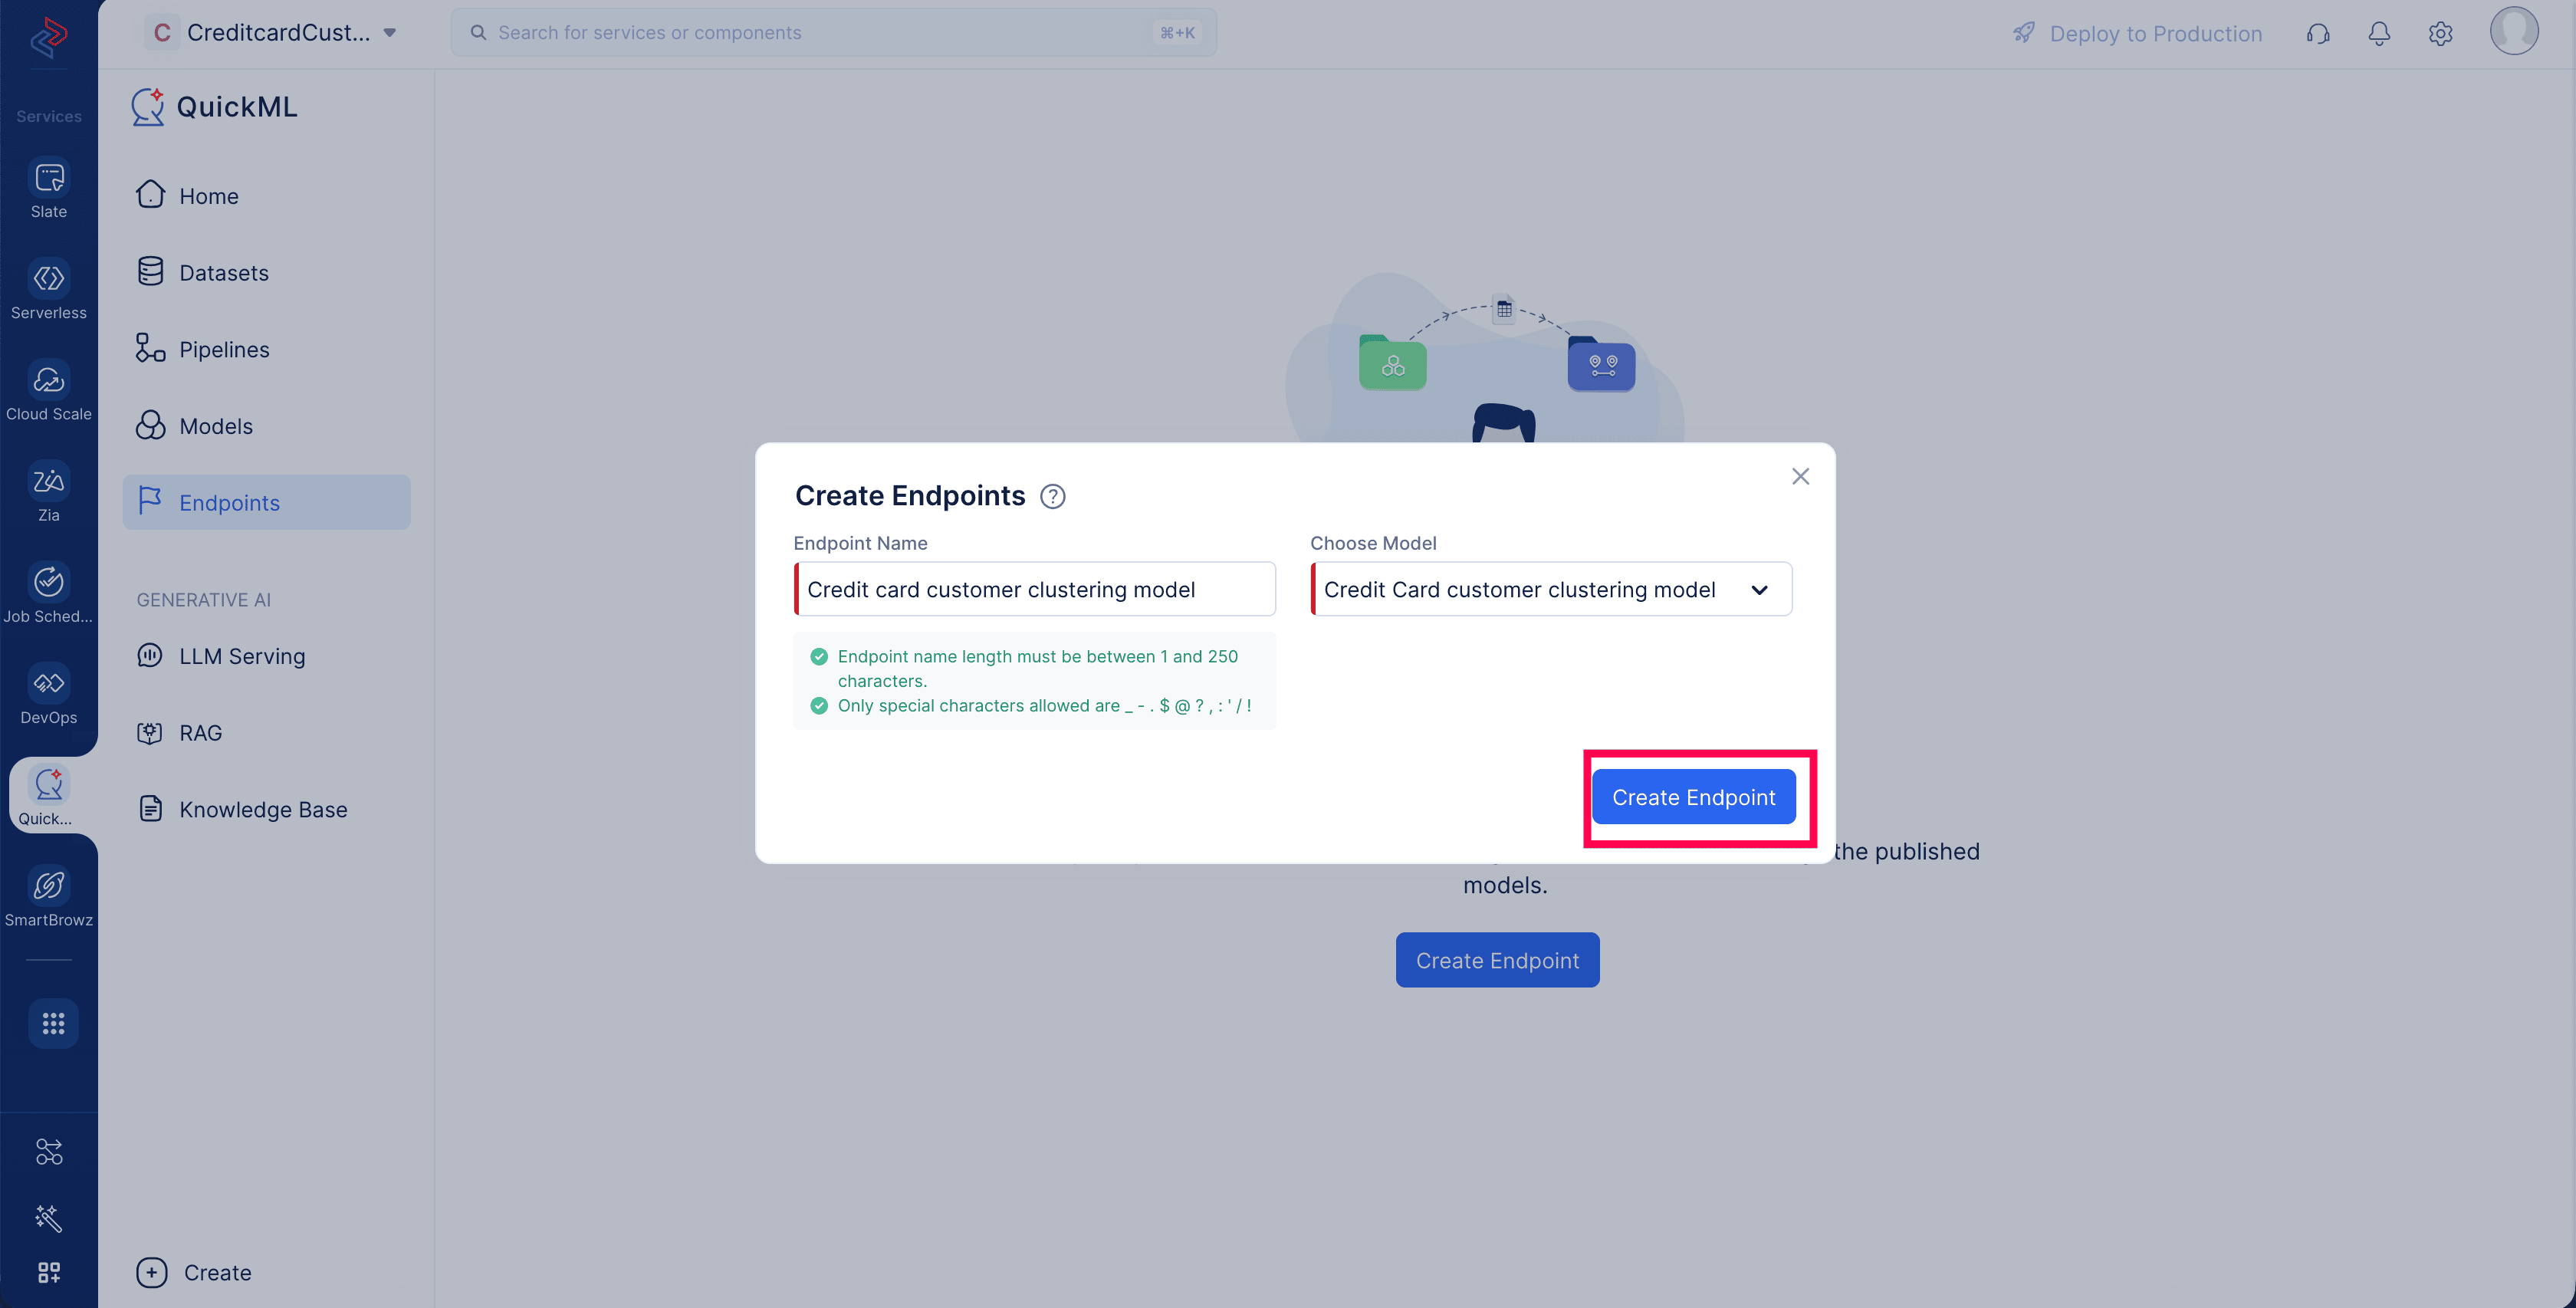
Provide a name for the endpoint in the Endpoint Name field (we’ll name it Credit card customer clustering model ) and select the model pipeline name from the drop-down values of the Choose Model field. Click Create Endpoint .
-
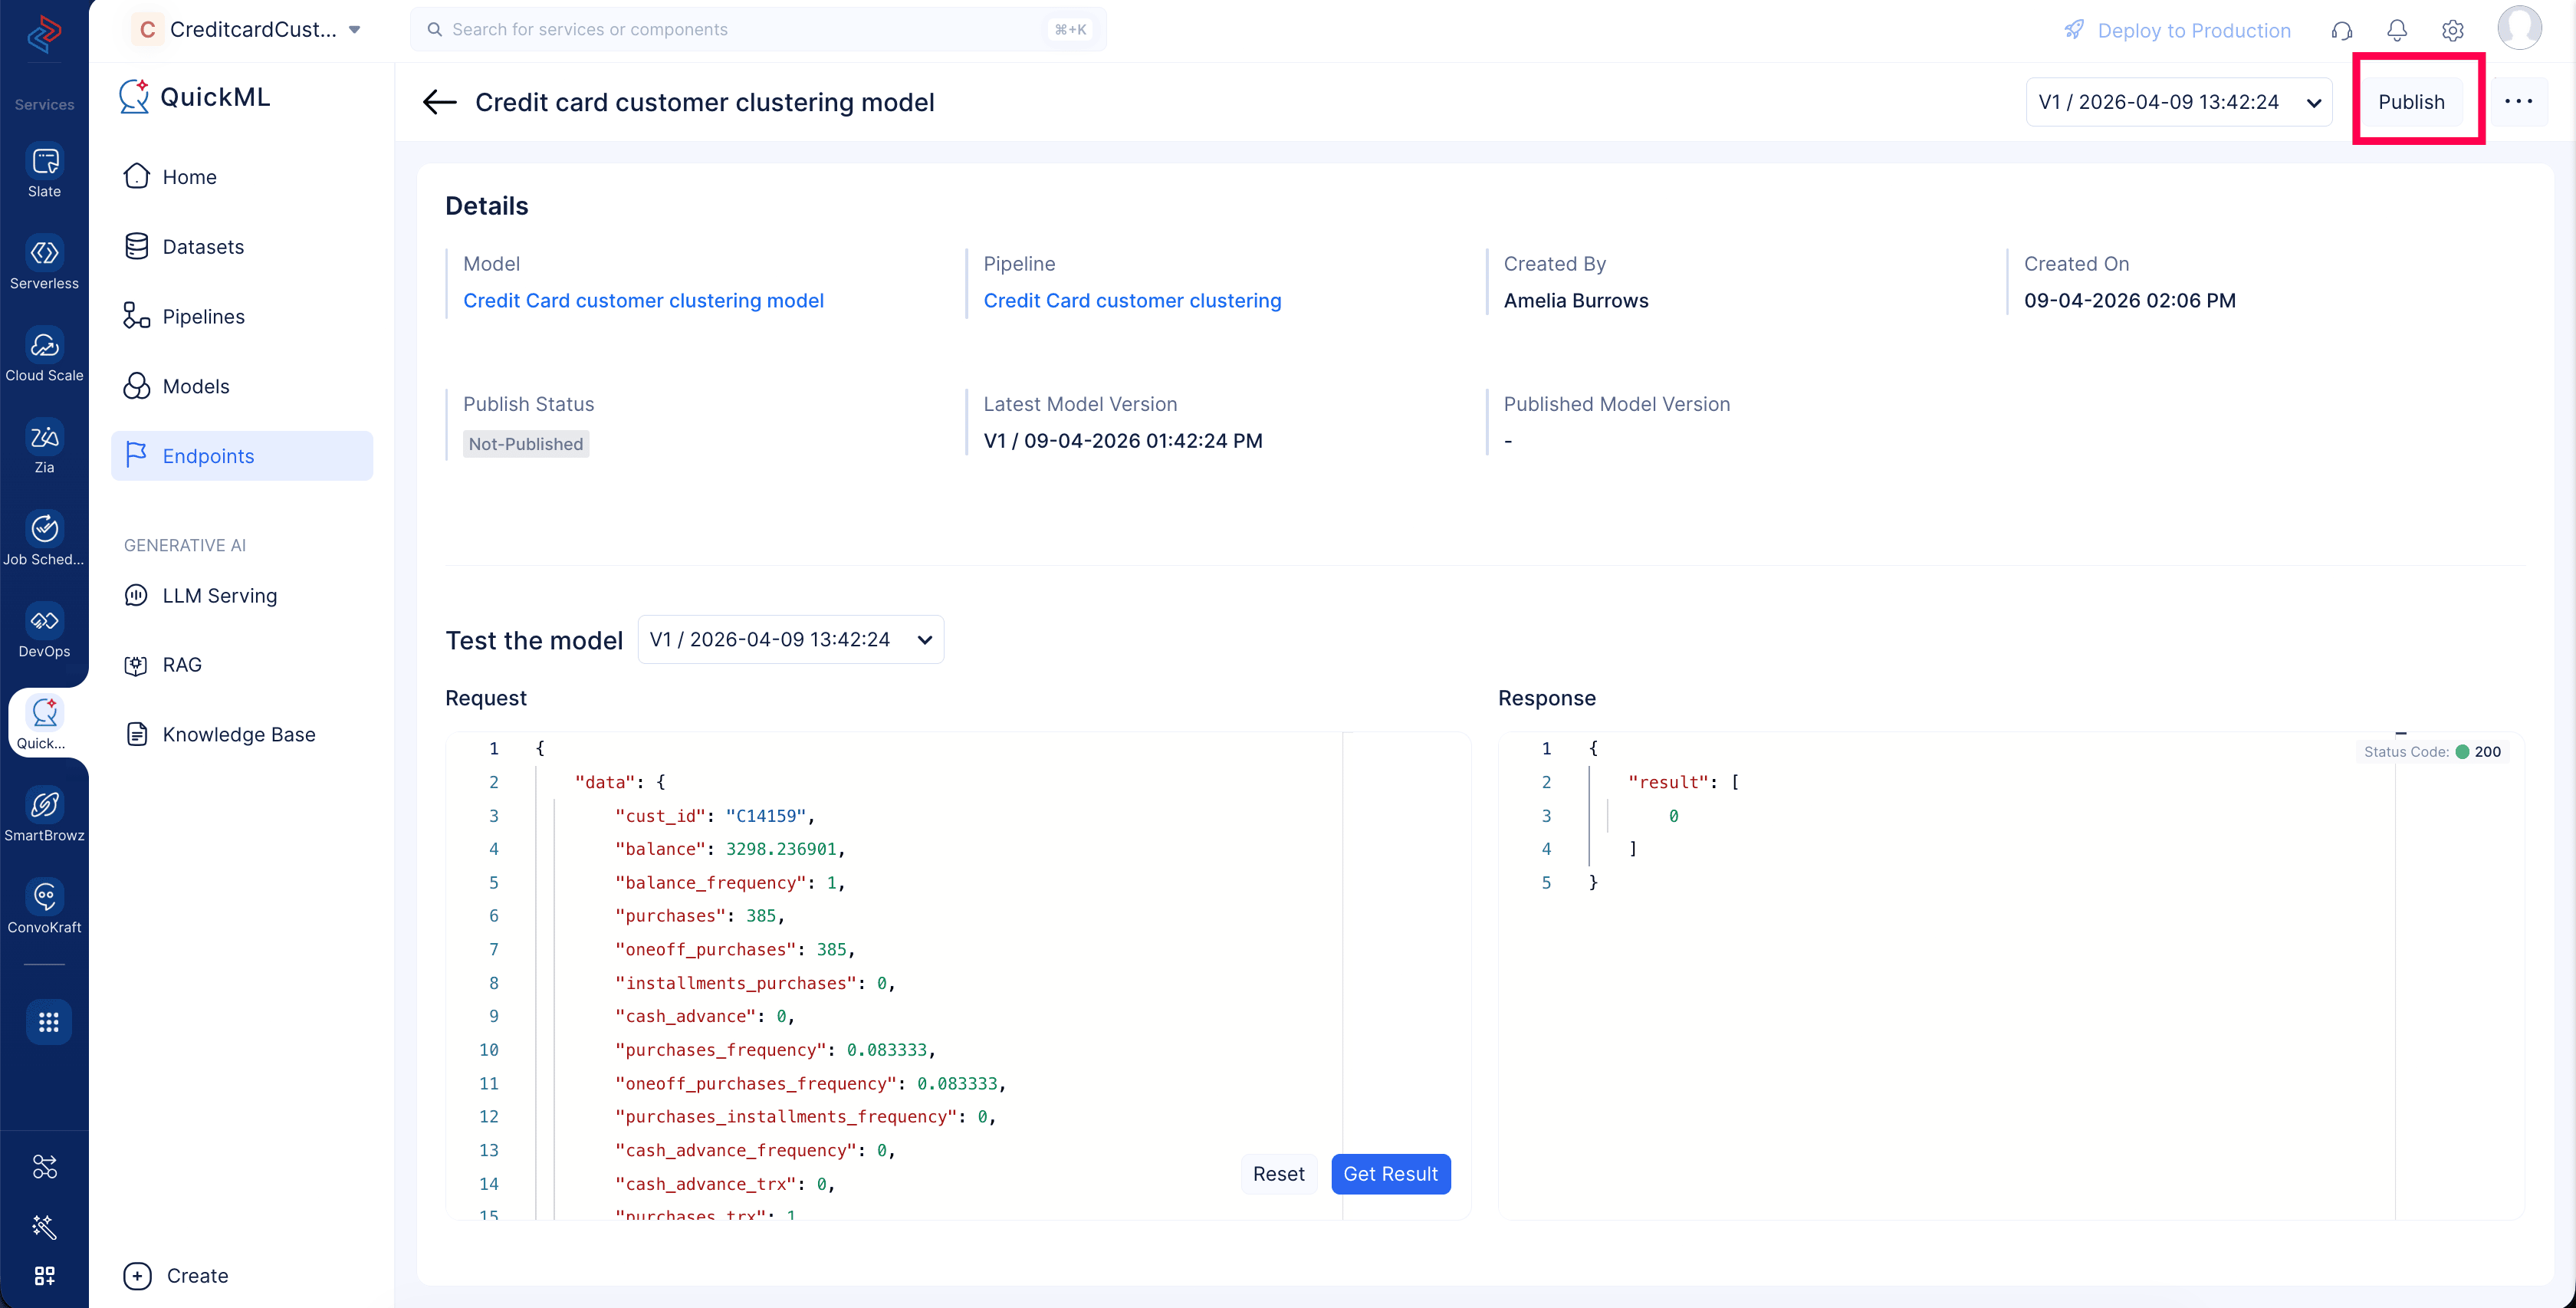
Once the endpoint is created, you can view its details and test the deployed model directly from the Test the model section.
In this view , the Request panel displays the input format expected by the model. It indicates the sample record information with all the required input features.
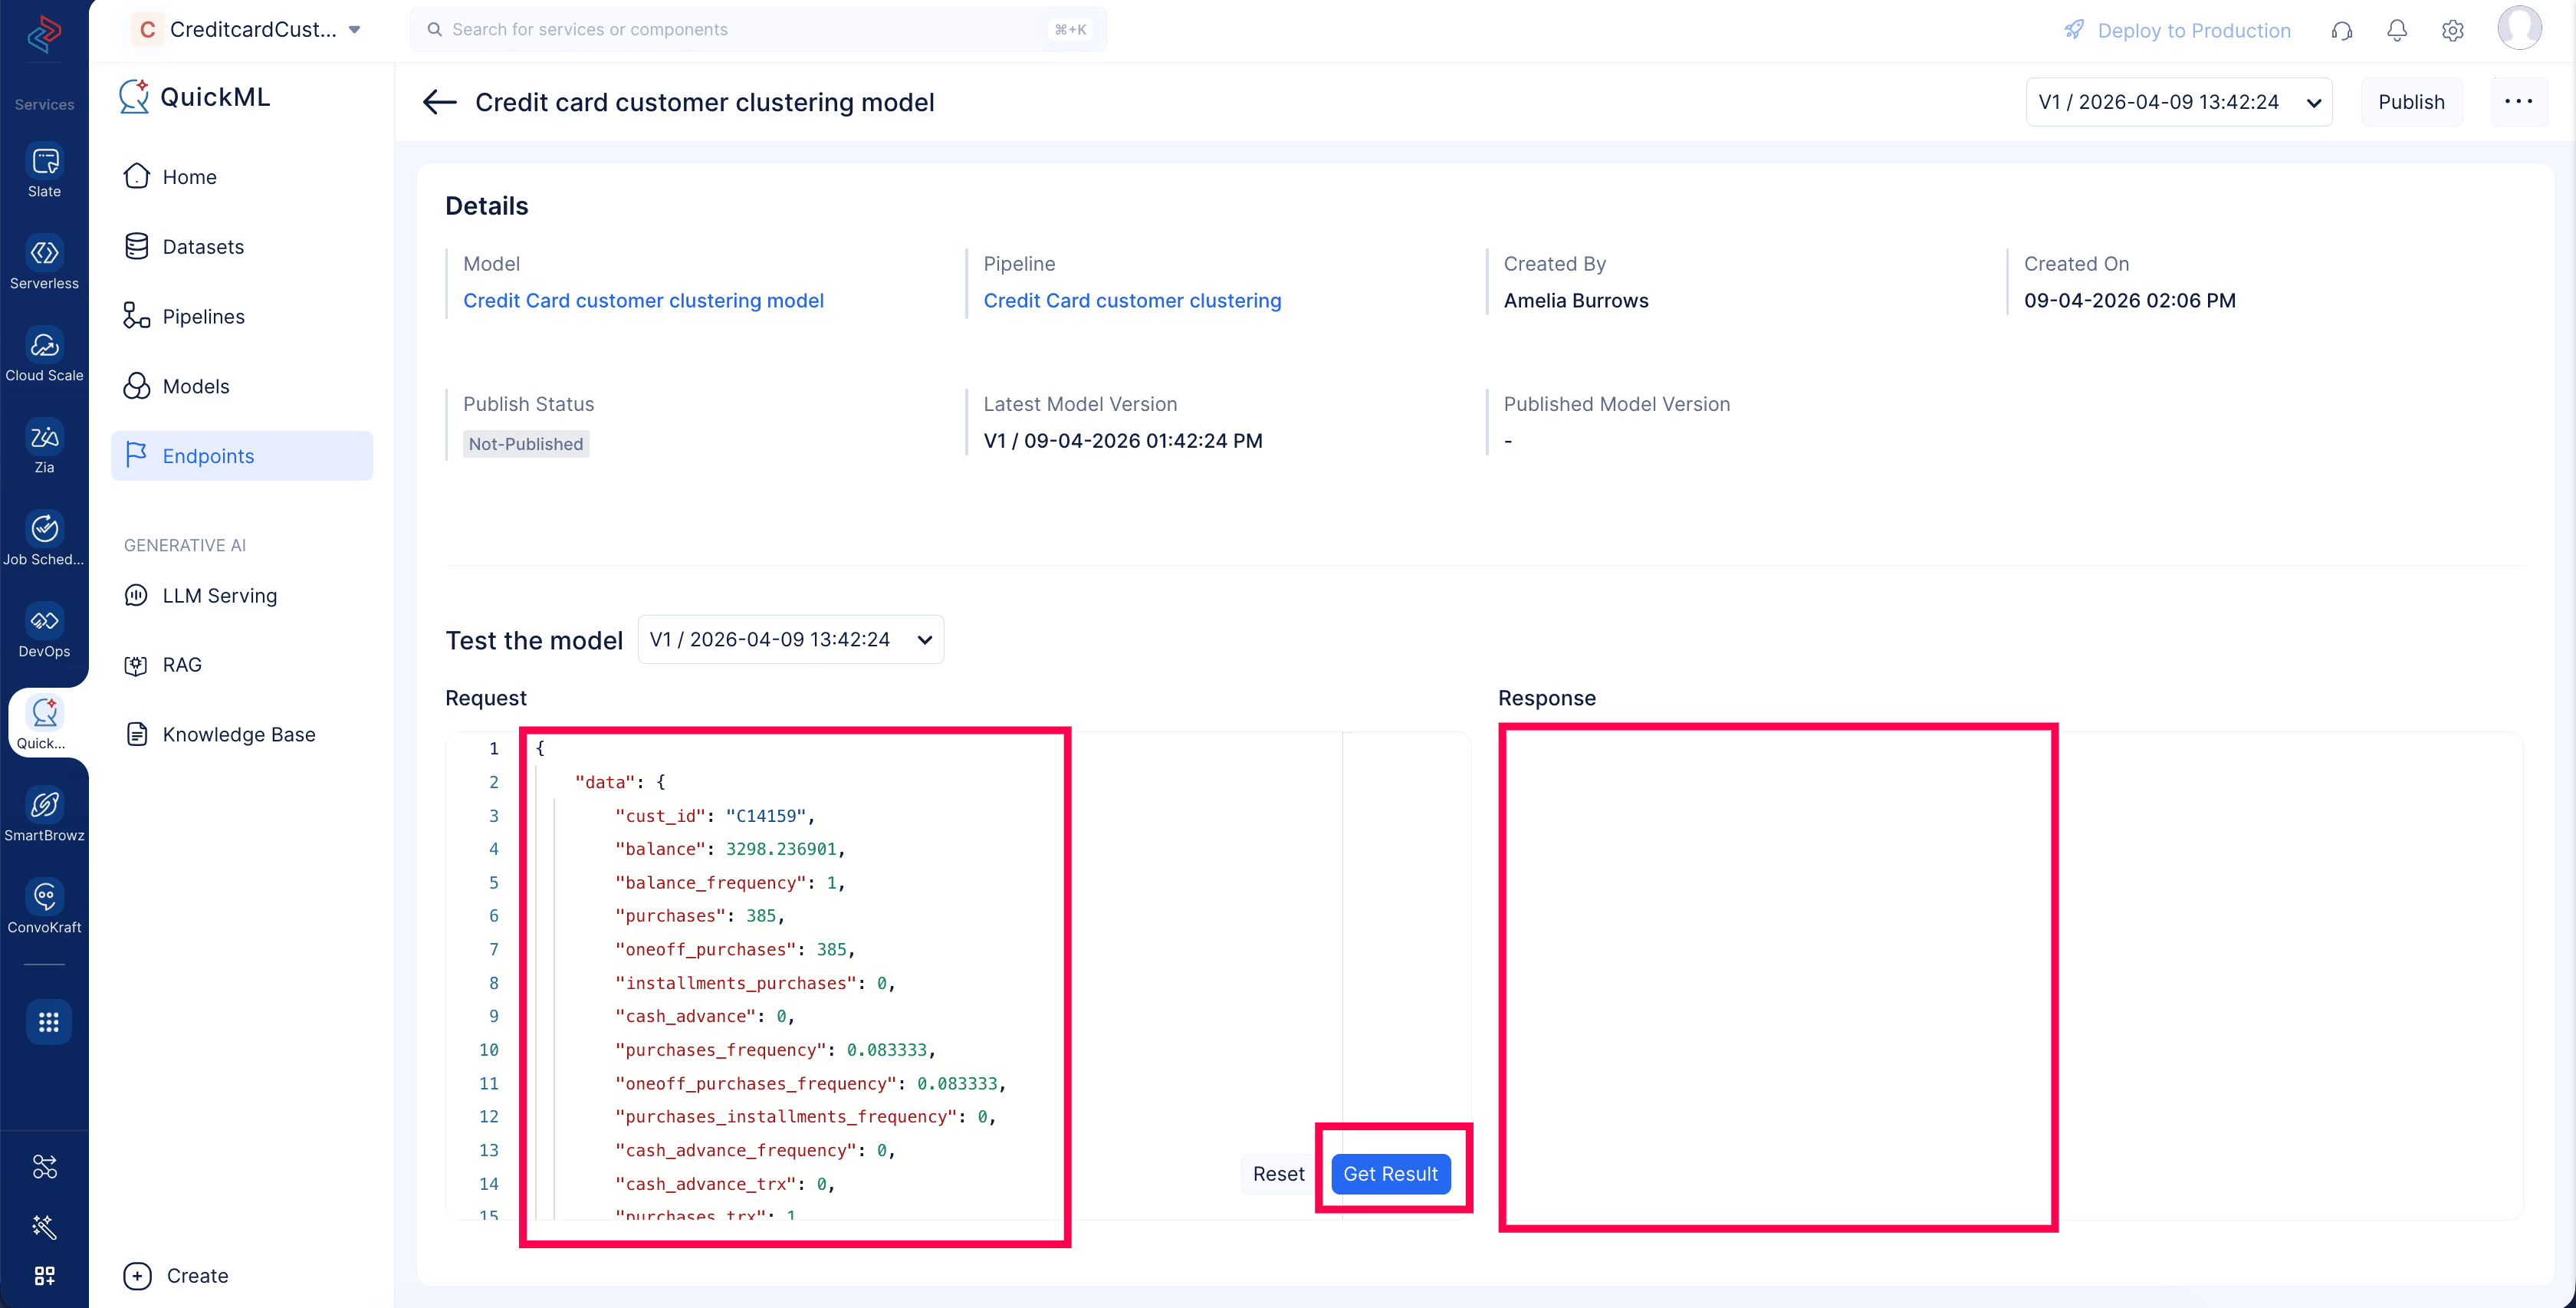
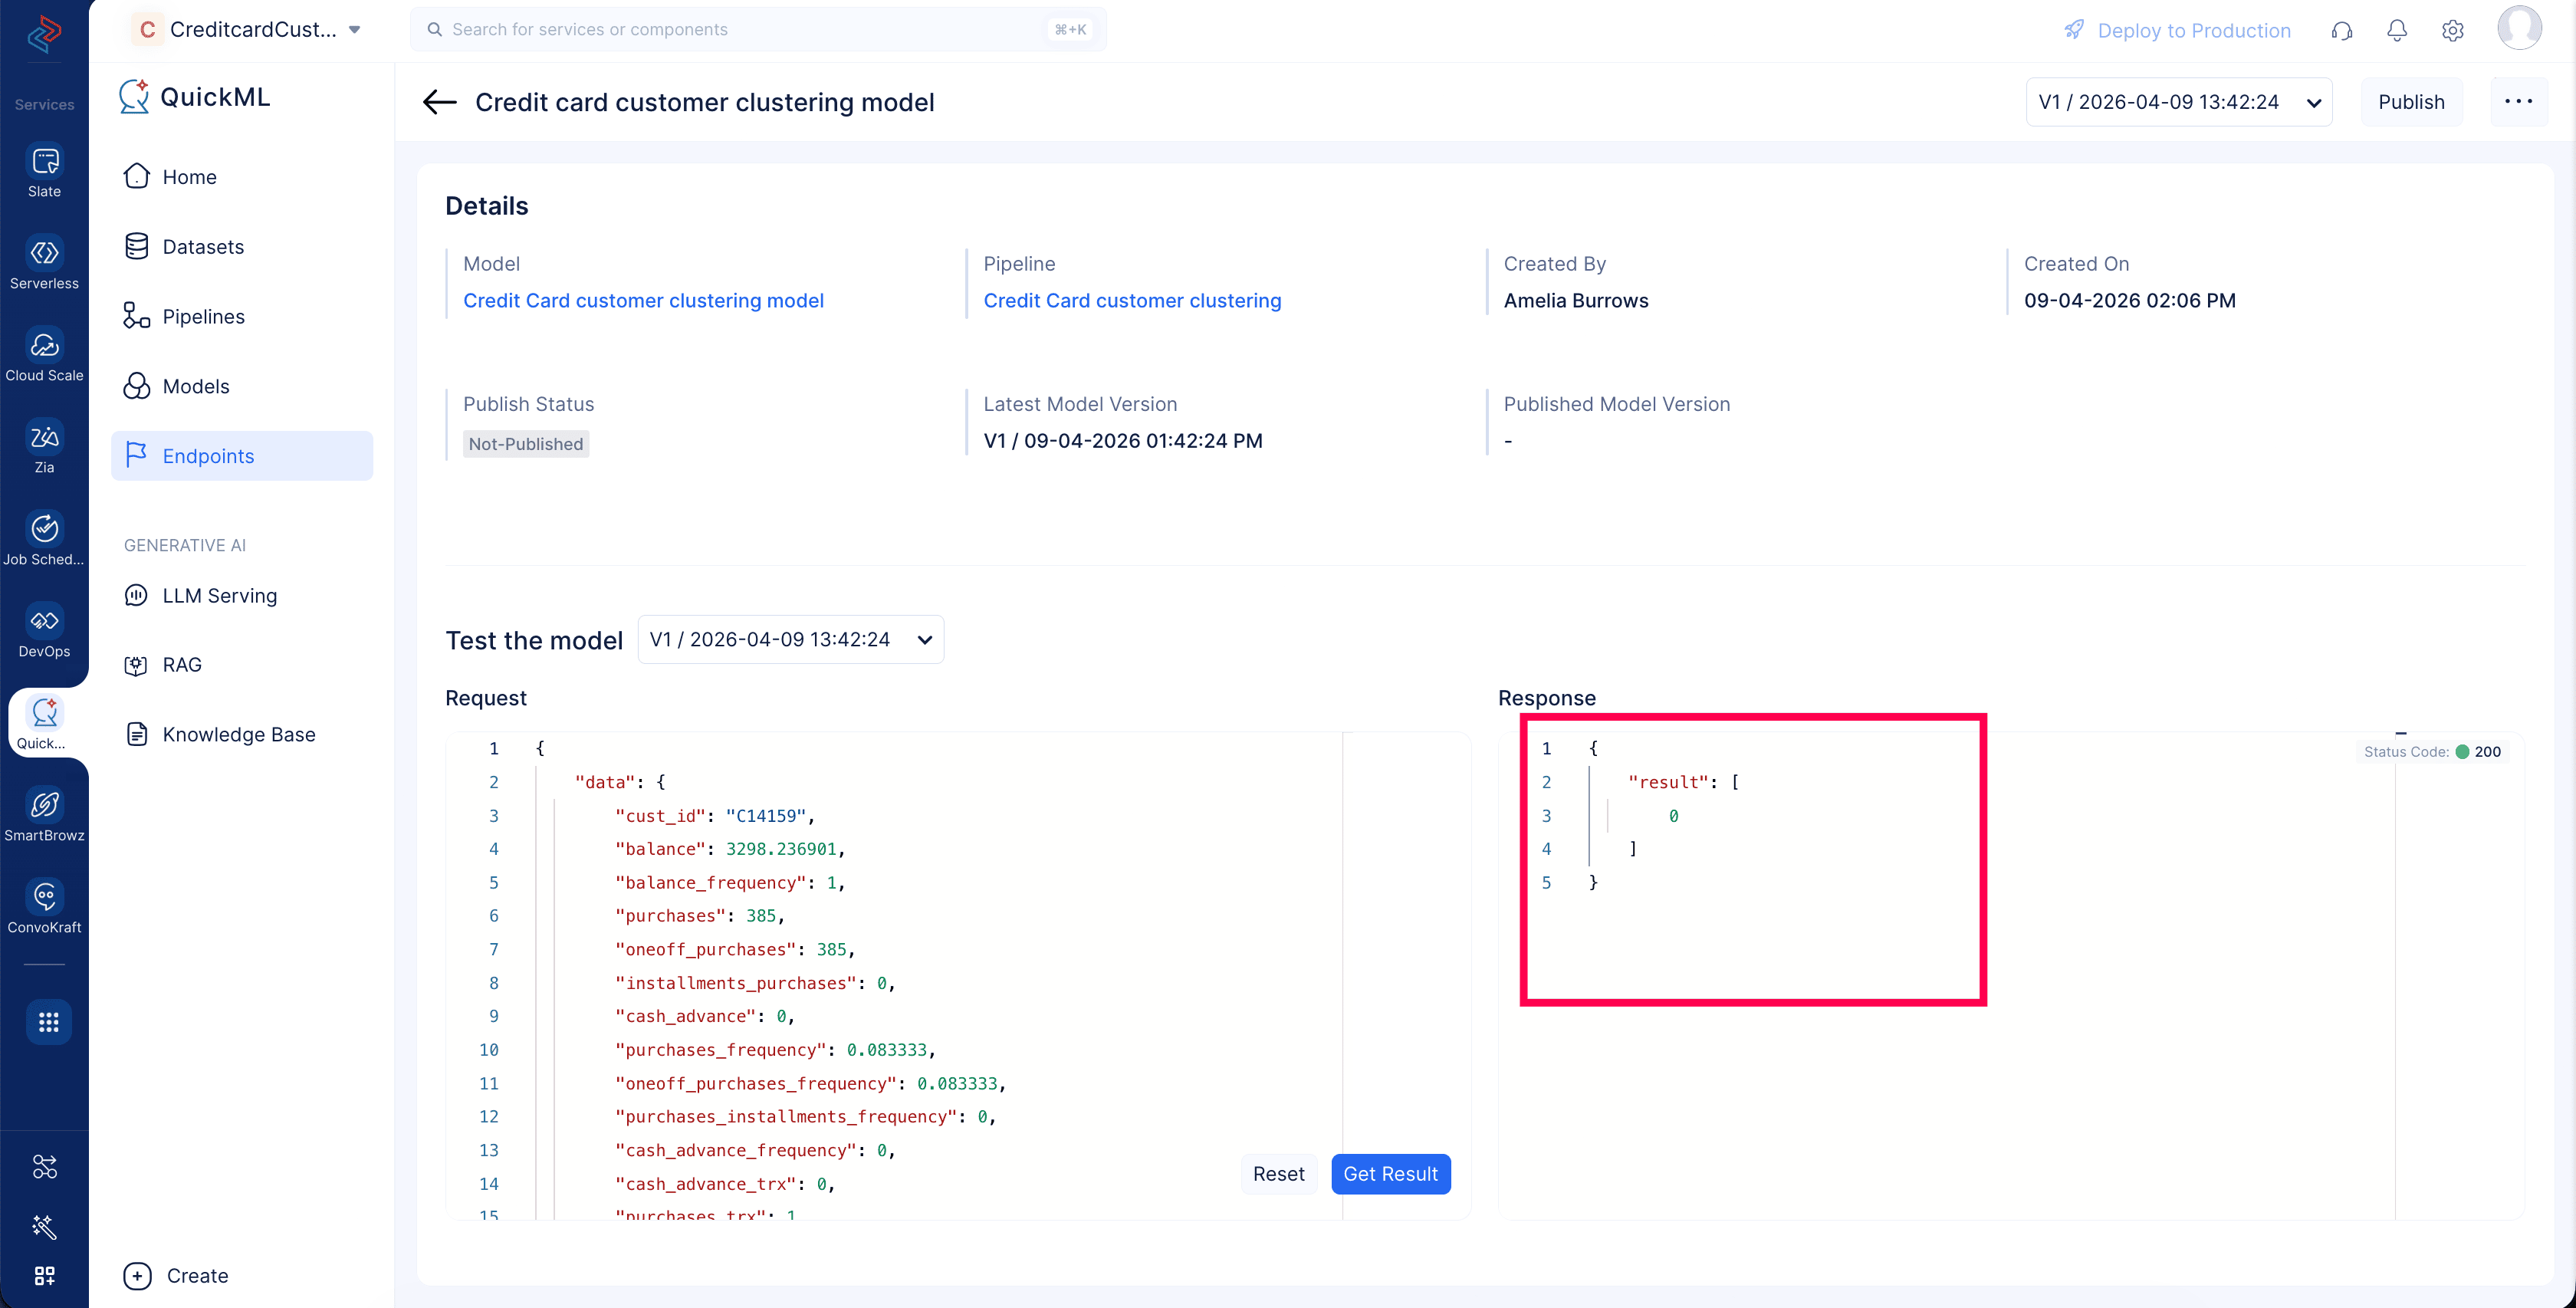
When you click Get Result , the model processes this customer information as JSON input and generates the cluster number in a JSON response which this customer falls in.
This helps users validate that the model is returning predictions in the expected structure before integrating the endpoint into business applications.
-
Click Publish to publish the endpoint.
-
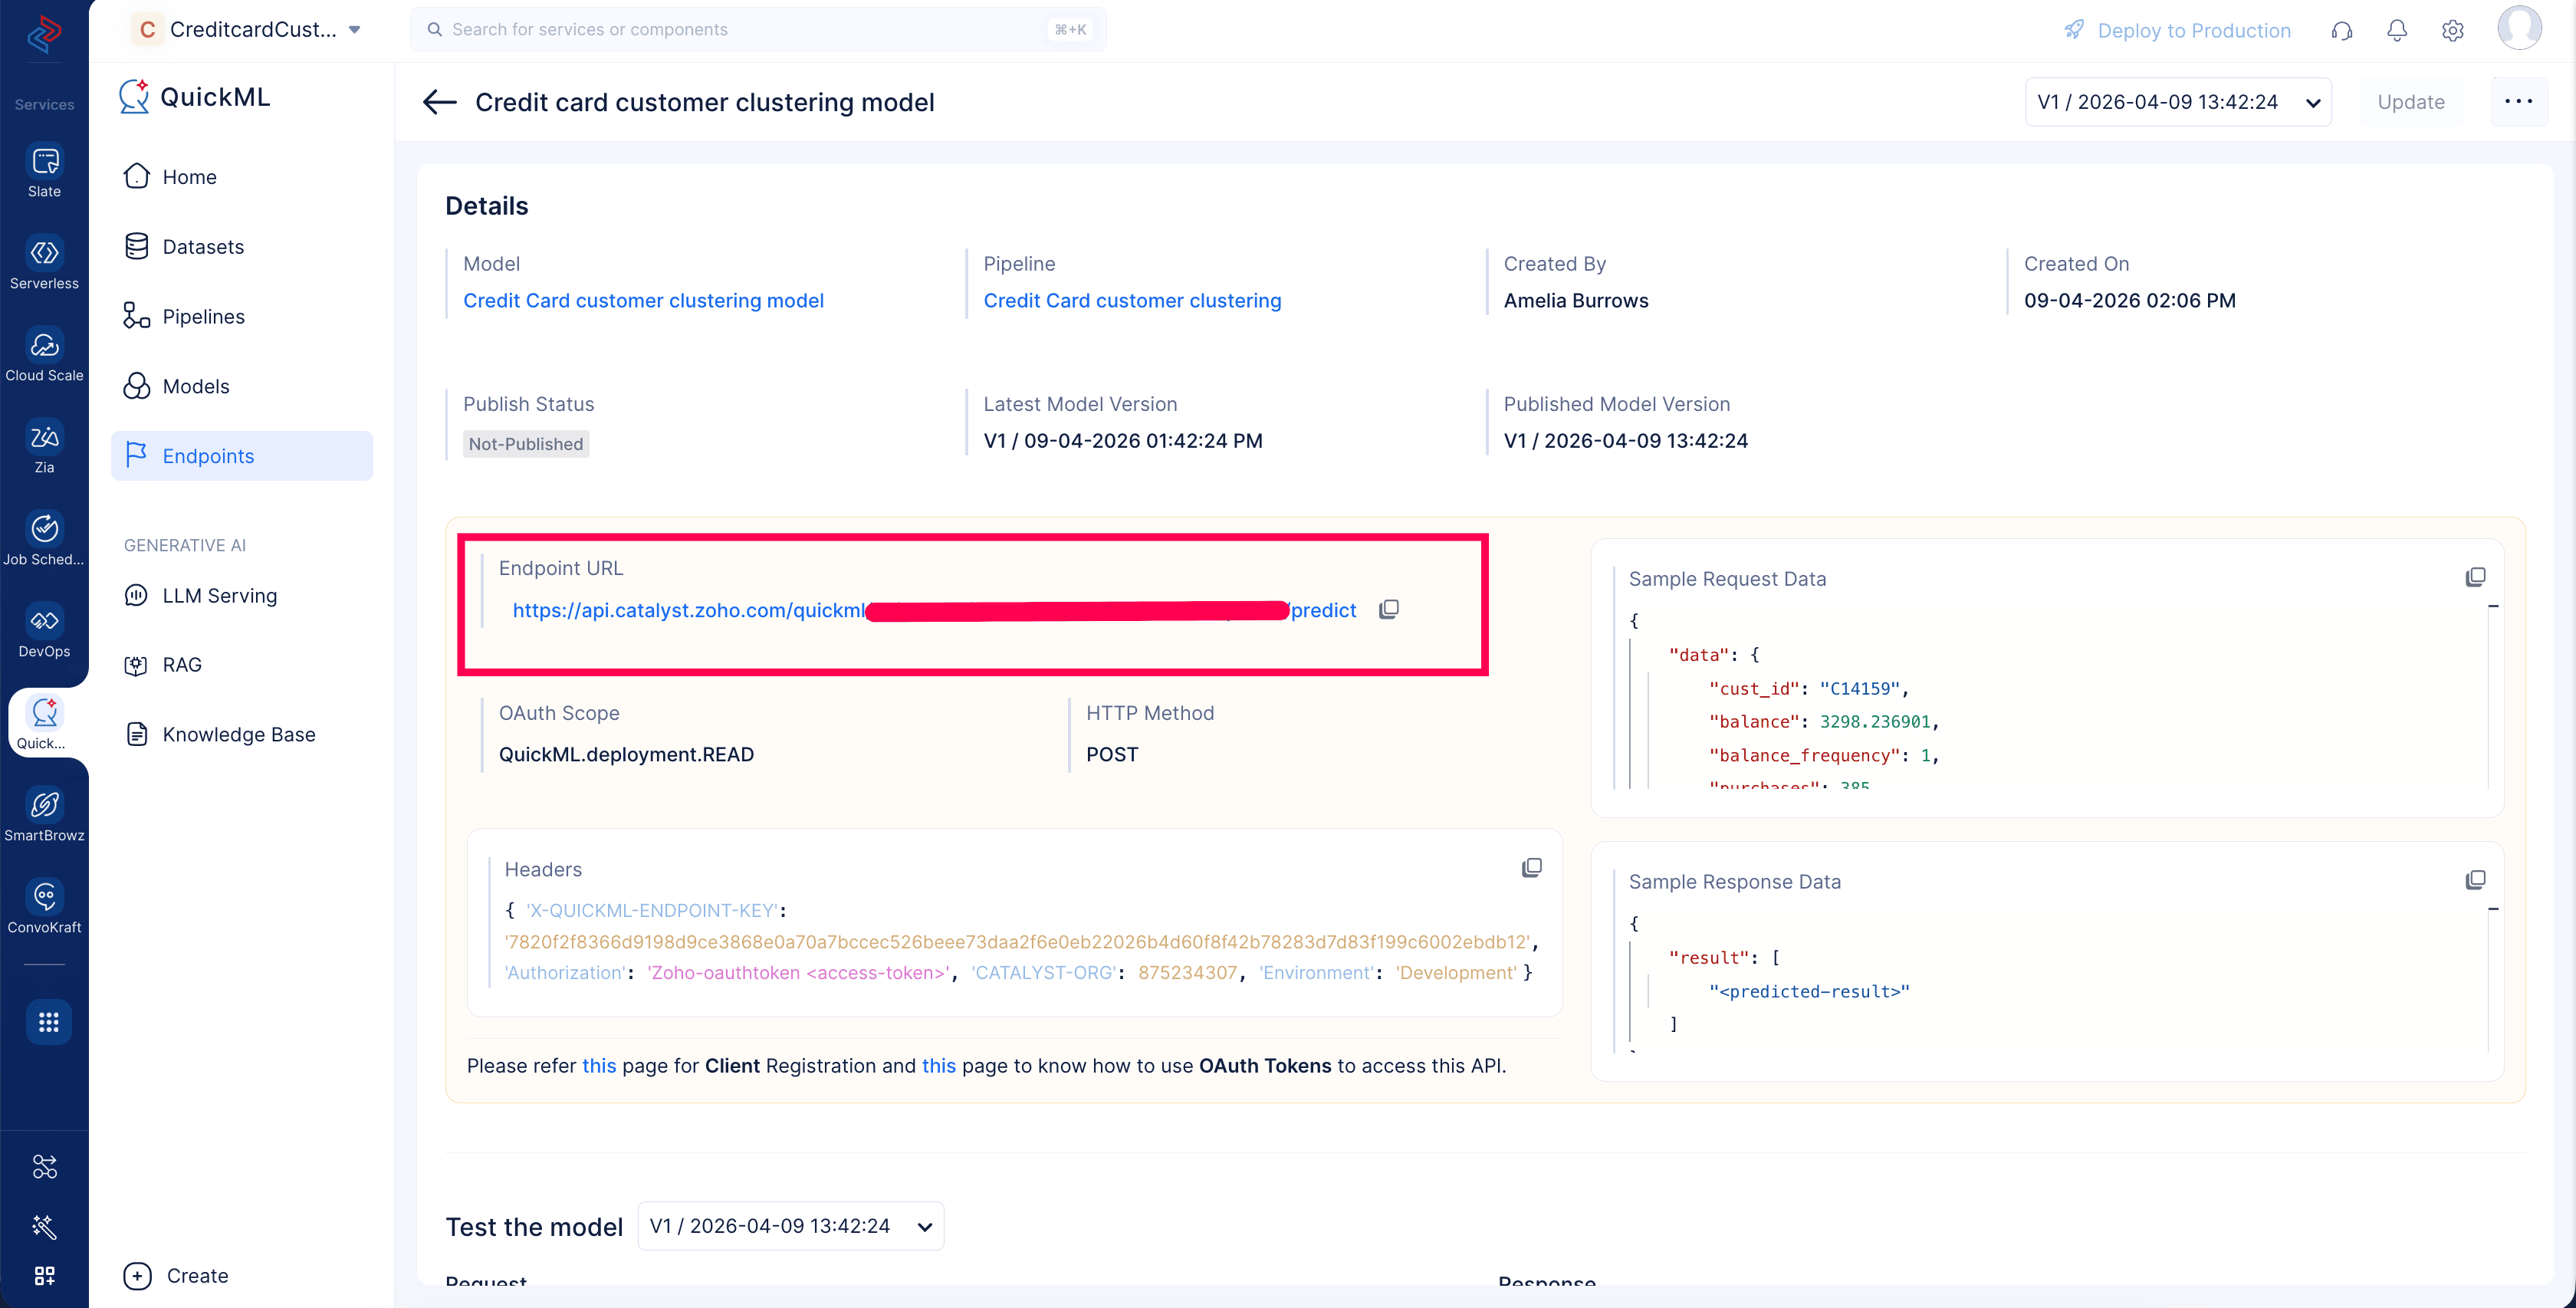
Upon publishing the endpoint, it will generate API details —which include the endpoint API URL, scope, headers and a sample request and response data which is used to access the model from external applications.
That’s it! You’ve successfully built and deployed a customer segmentation model using Catalyst QuickML. You can now use the cluster assignments from the model predictions dataset to tailor campaigns to each customer segment, and understand new customer behavior in real time based on the cluster they belong to using the model’s endpoint response.
Last Updated 2026-08-20 12:42:54 +0530 IST