Catalyst Tools Project Explorer
The Project Explorer feature of Catalyst Tools extension allows you to perform the following operations:
-
Switch between your active projects and re-initialize your default project.
-
Search for the client, functions and API Gateway rules available in the project.
-
Pull and overwrite function, client, and API Gateway components from the remote project.
-
Log out of your Catalyst account in the extension.
There are two ways to navigate to the Project Explorer:
-
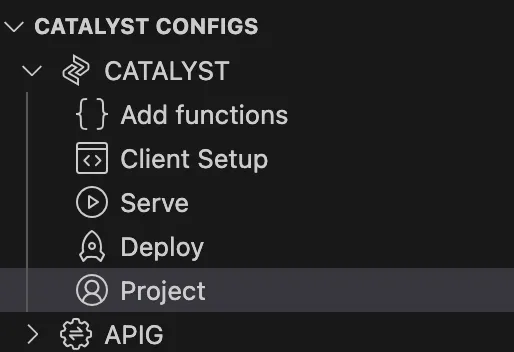
Click the Project option present in the CATALYST CONFIGS section.
-
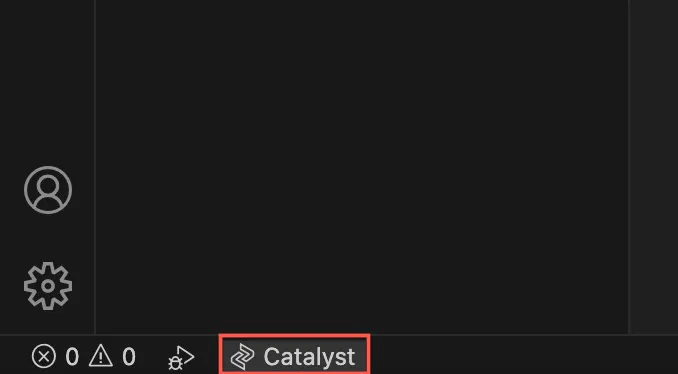
Click the Catalyst button present in the status bar of the IDE.
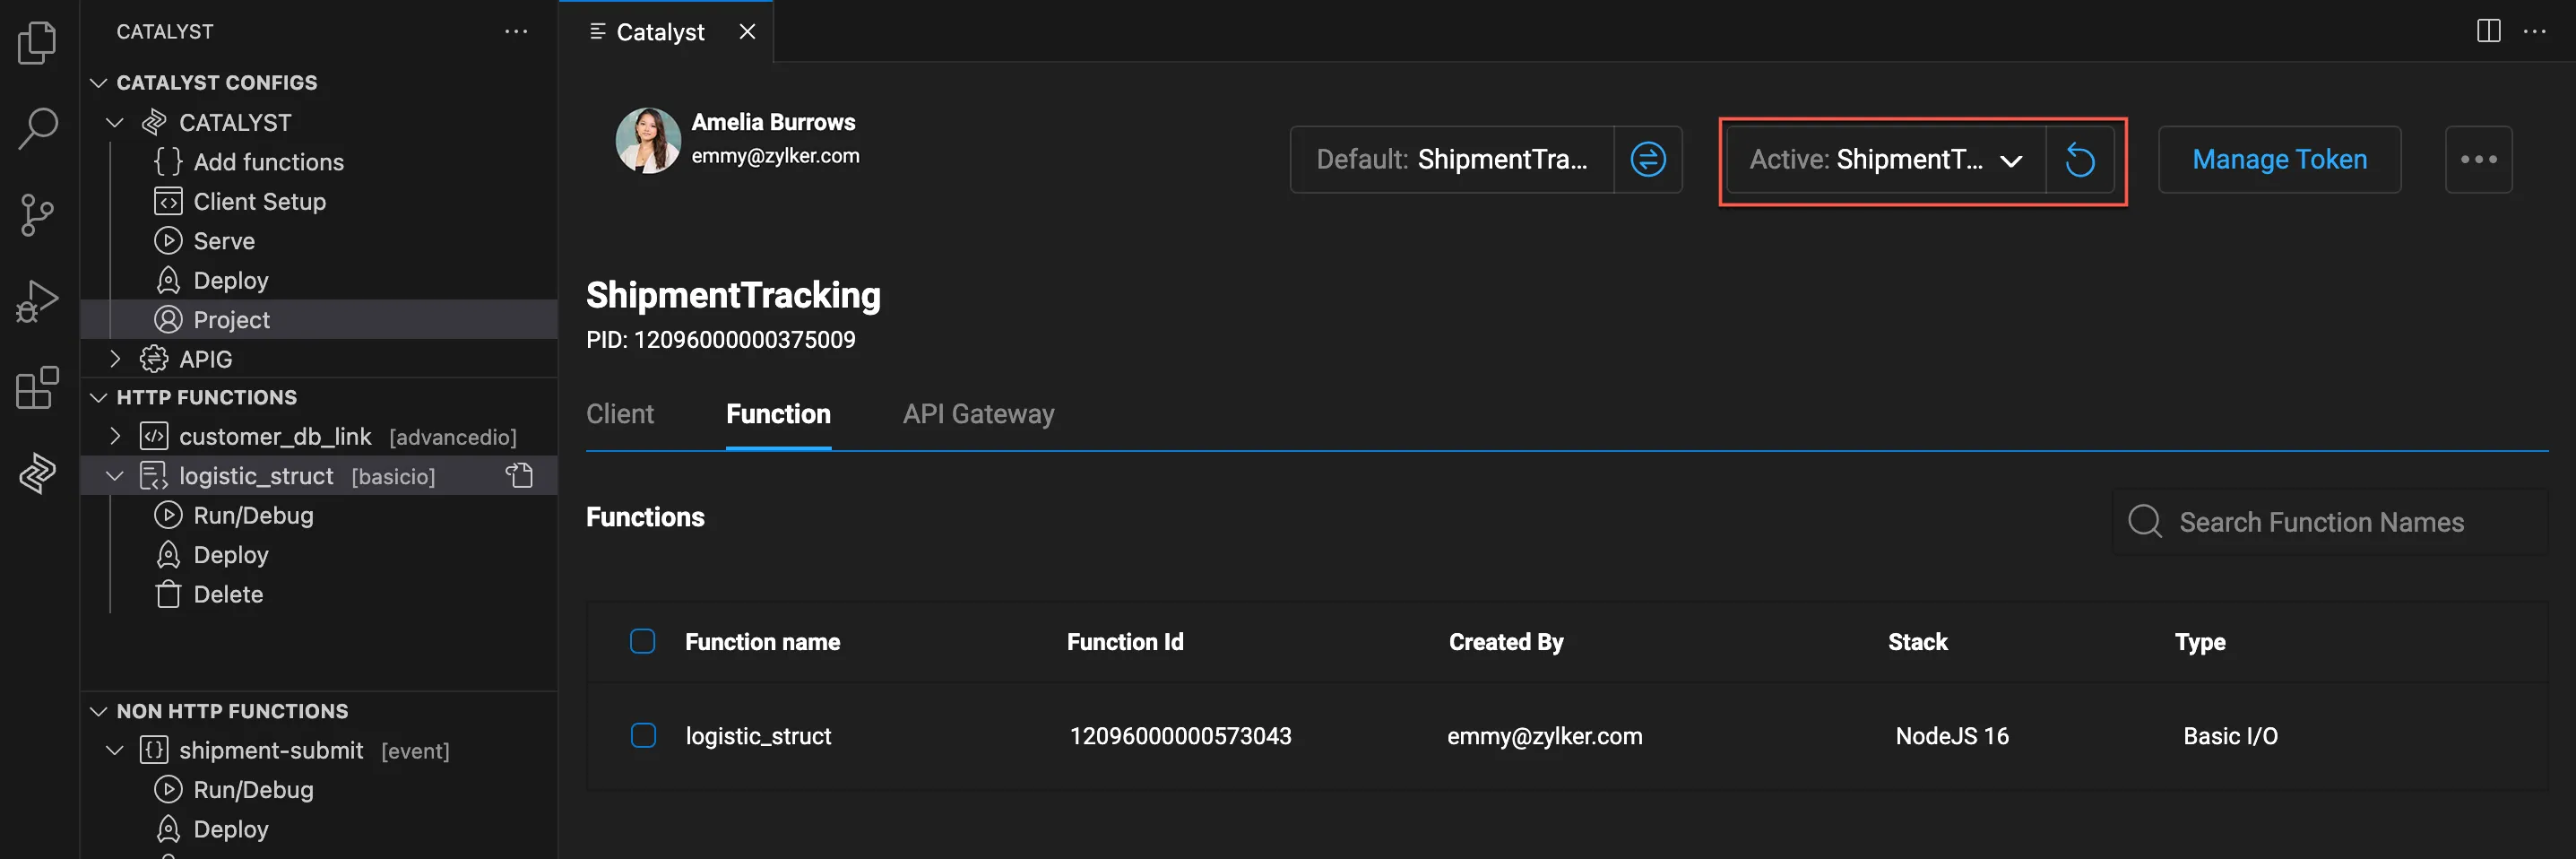
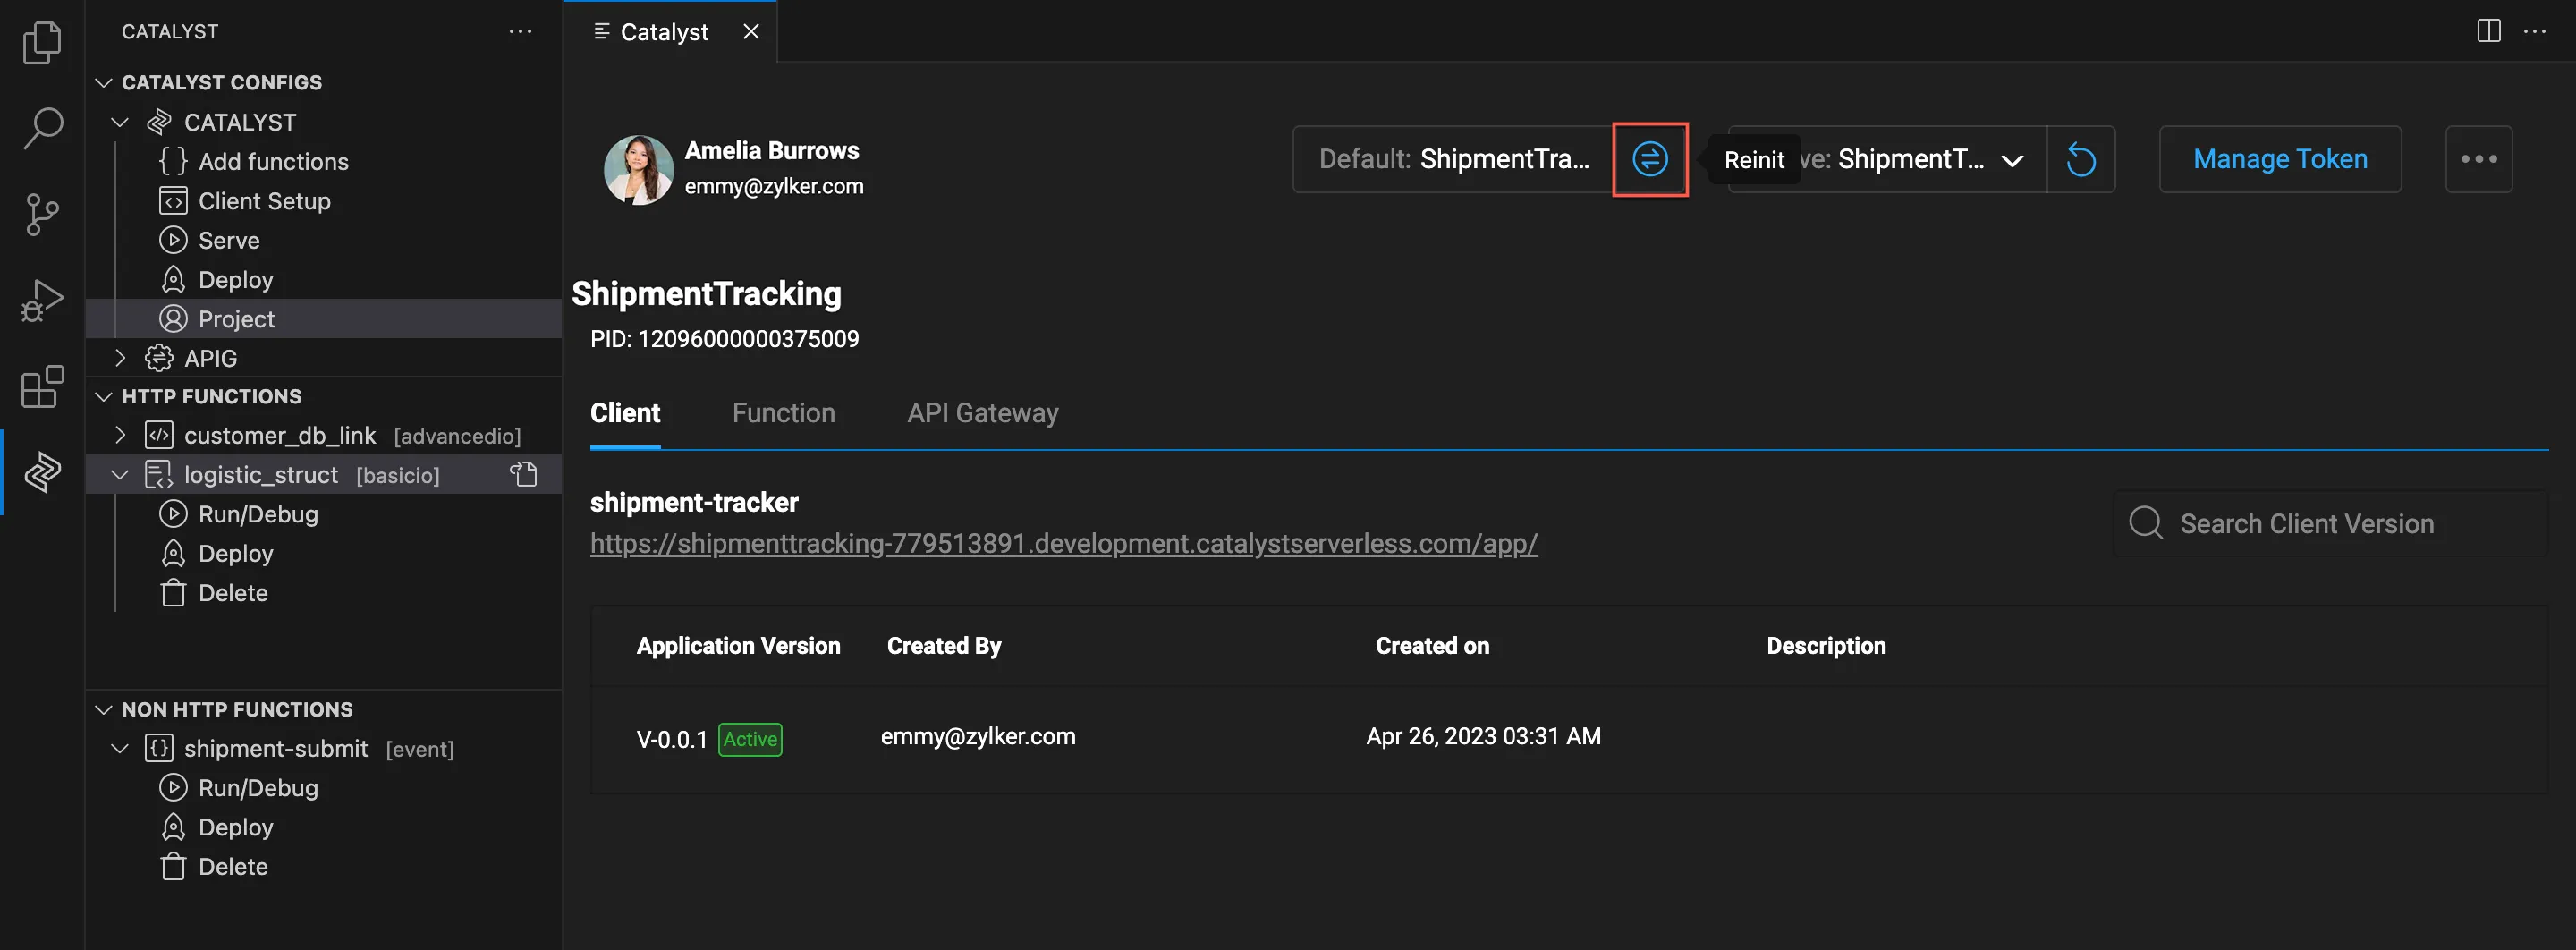
In the Project Explorer, you will be able to view the following:
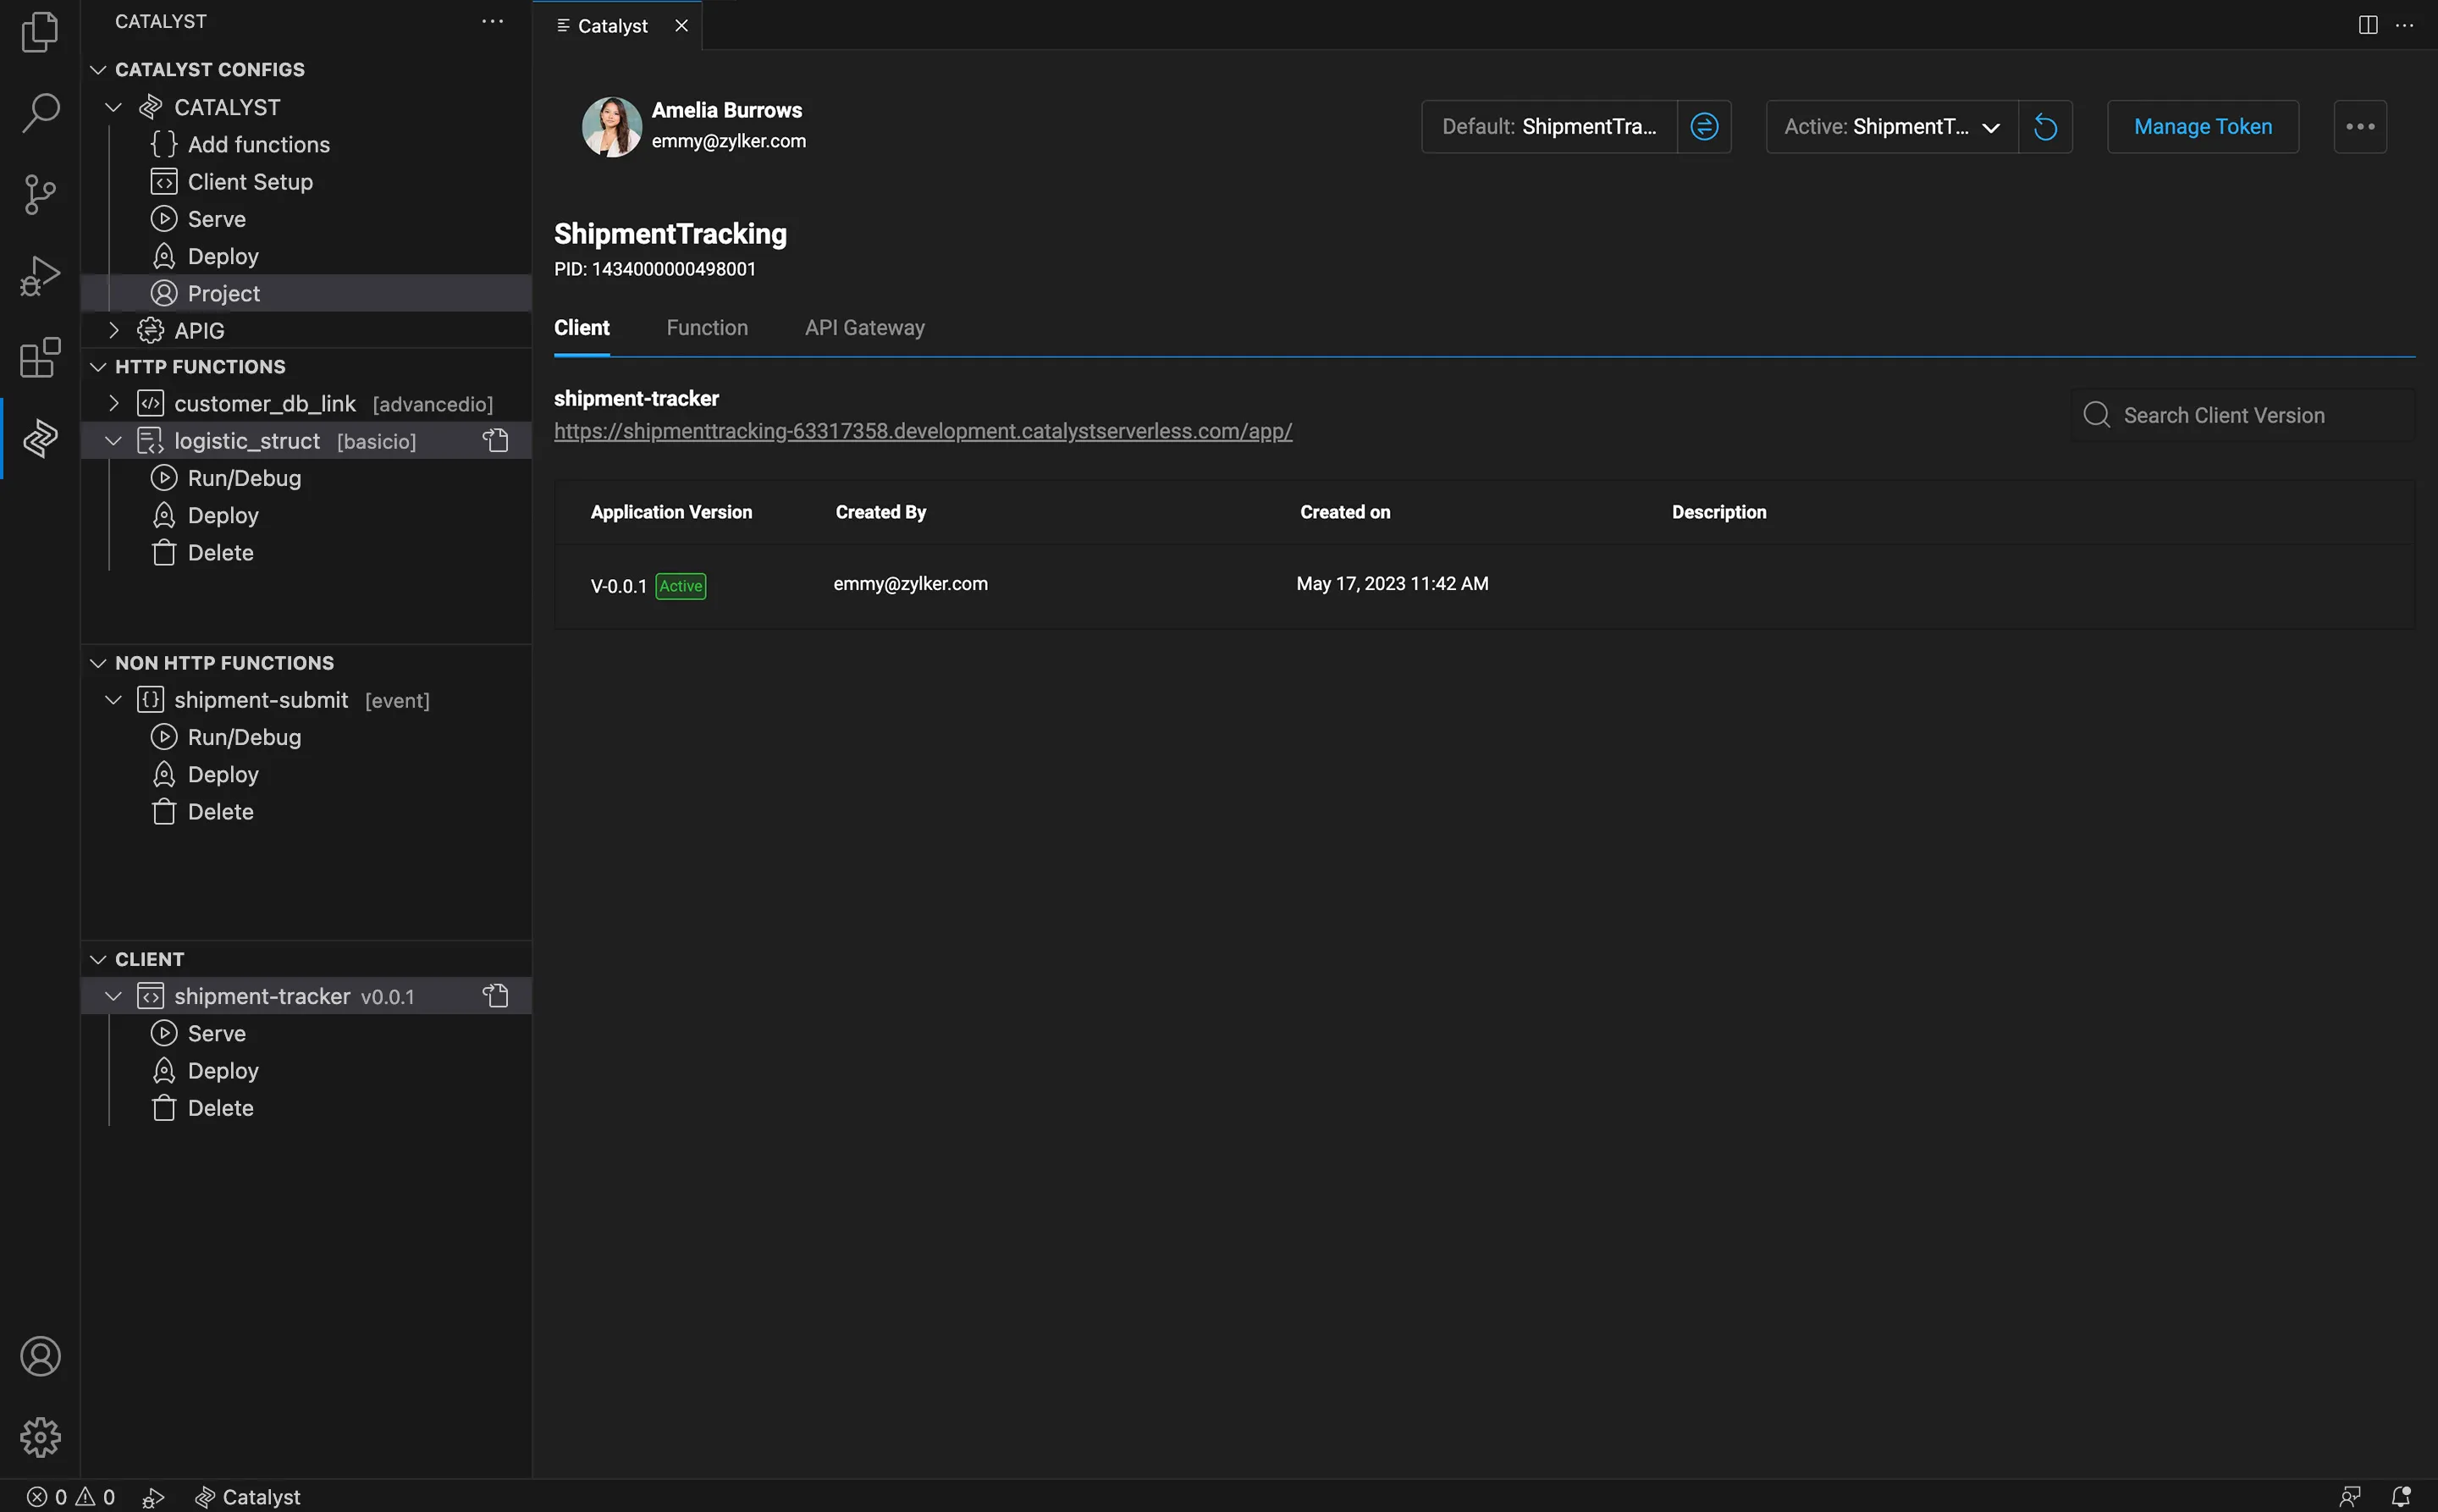
- The account details of the account you used to log in to Catalyst
- A list of all projects in your account
- The web application URL of the project
- The name and Project ID of the project
- Meaningful details about the Client, Function and API Gateway components
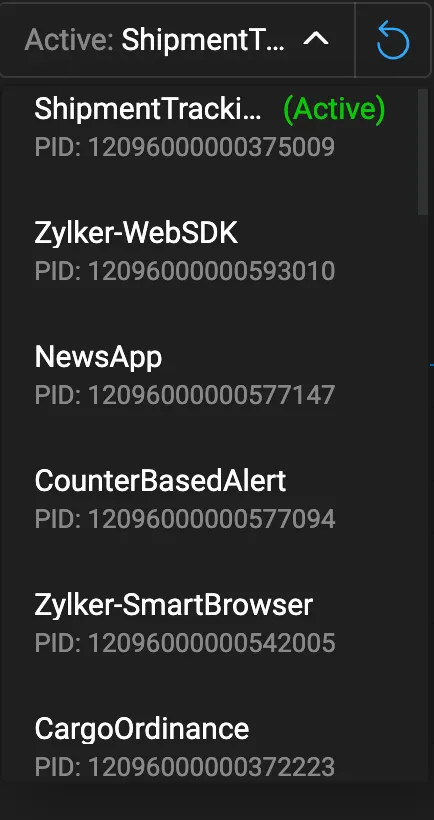
Switch Between Projects
In the Project Explorer, you can pull any of your active projects that are present in the Catalyst console, and you can reinitialize your default project.
To switch between the active projects:
-
Click the arrow icon in the Active section of the Project Explorer.
-
Choose the project you wish to switch to from the drop-down selection.
You can also click the reset icon to ensure all the updates made in the Catalyst console is reflected in the local environment in the Project Explorer.

To re-initialize default project:
-
Click the re-init button in the Default section of the Project Explorer.
-
Choose the project you wish to re-initialize and click the Re-init button that appears next to it.
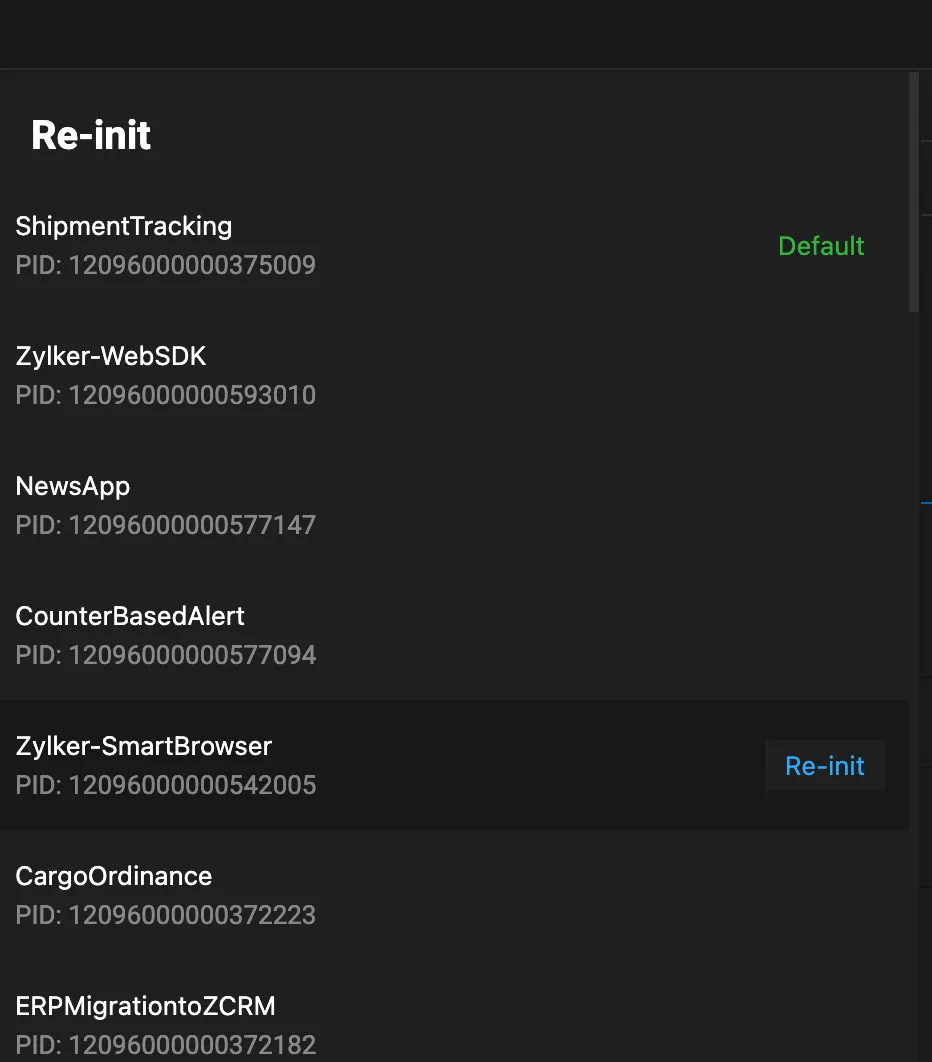
The project in your directory will be re-initialized.
Pull Project Resources
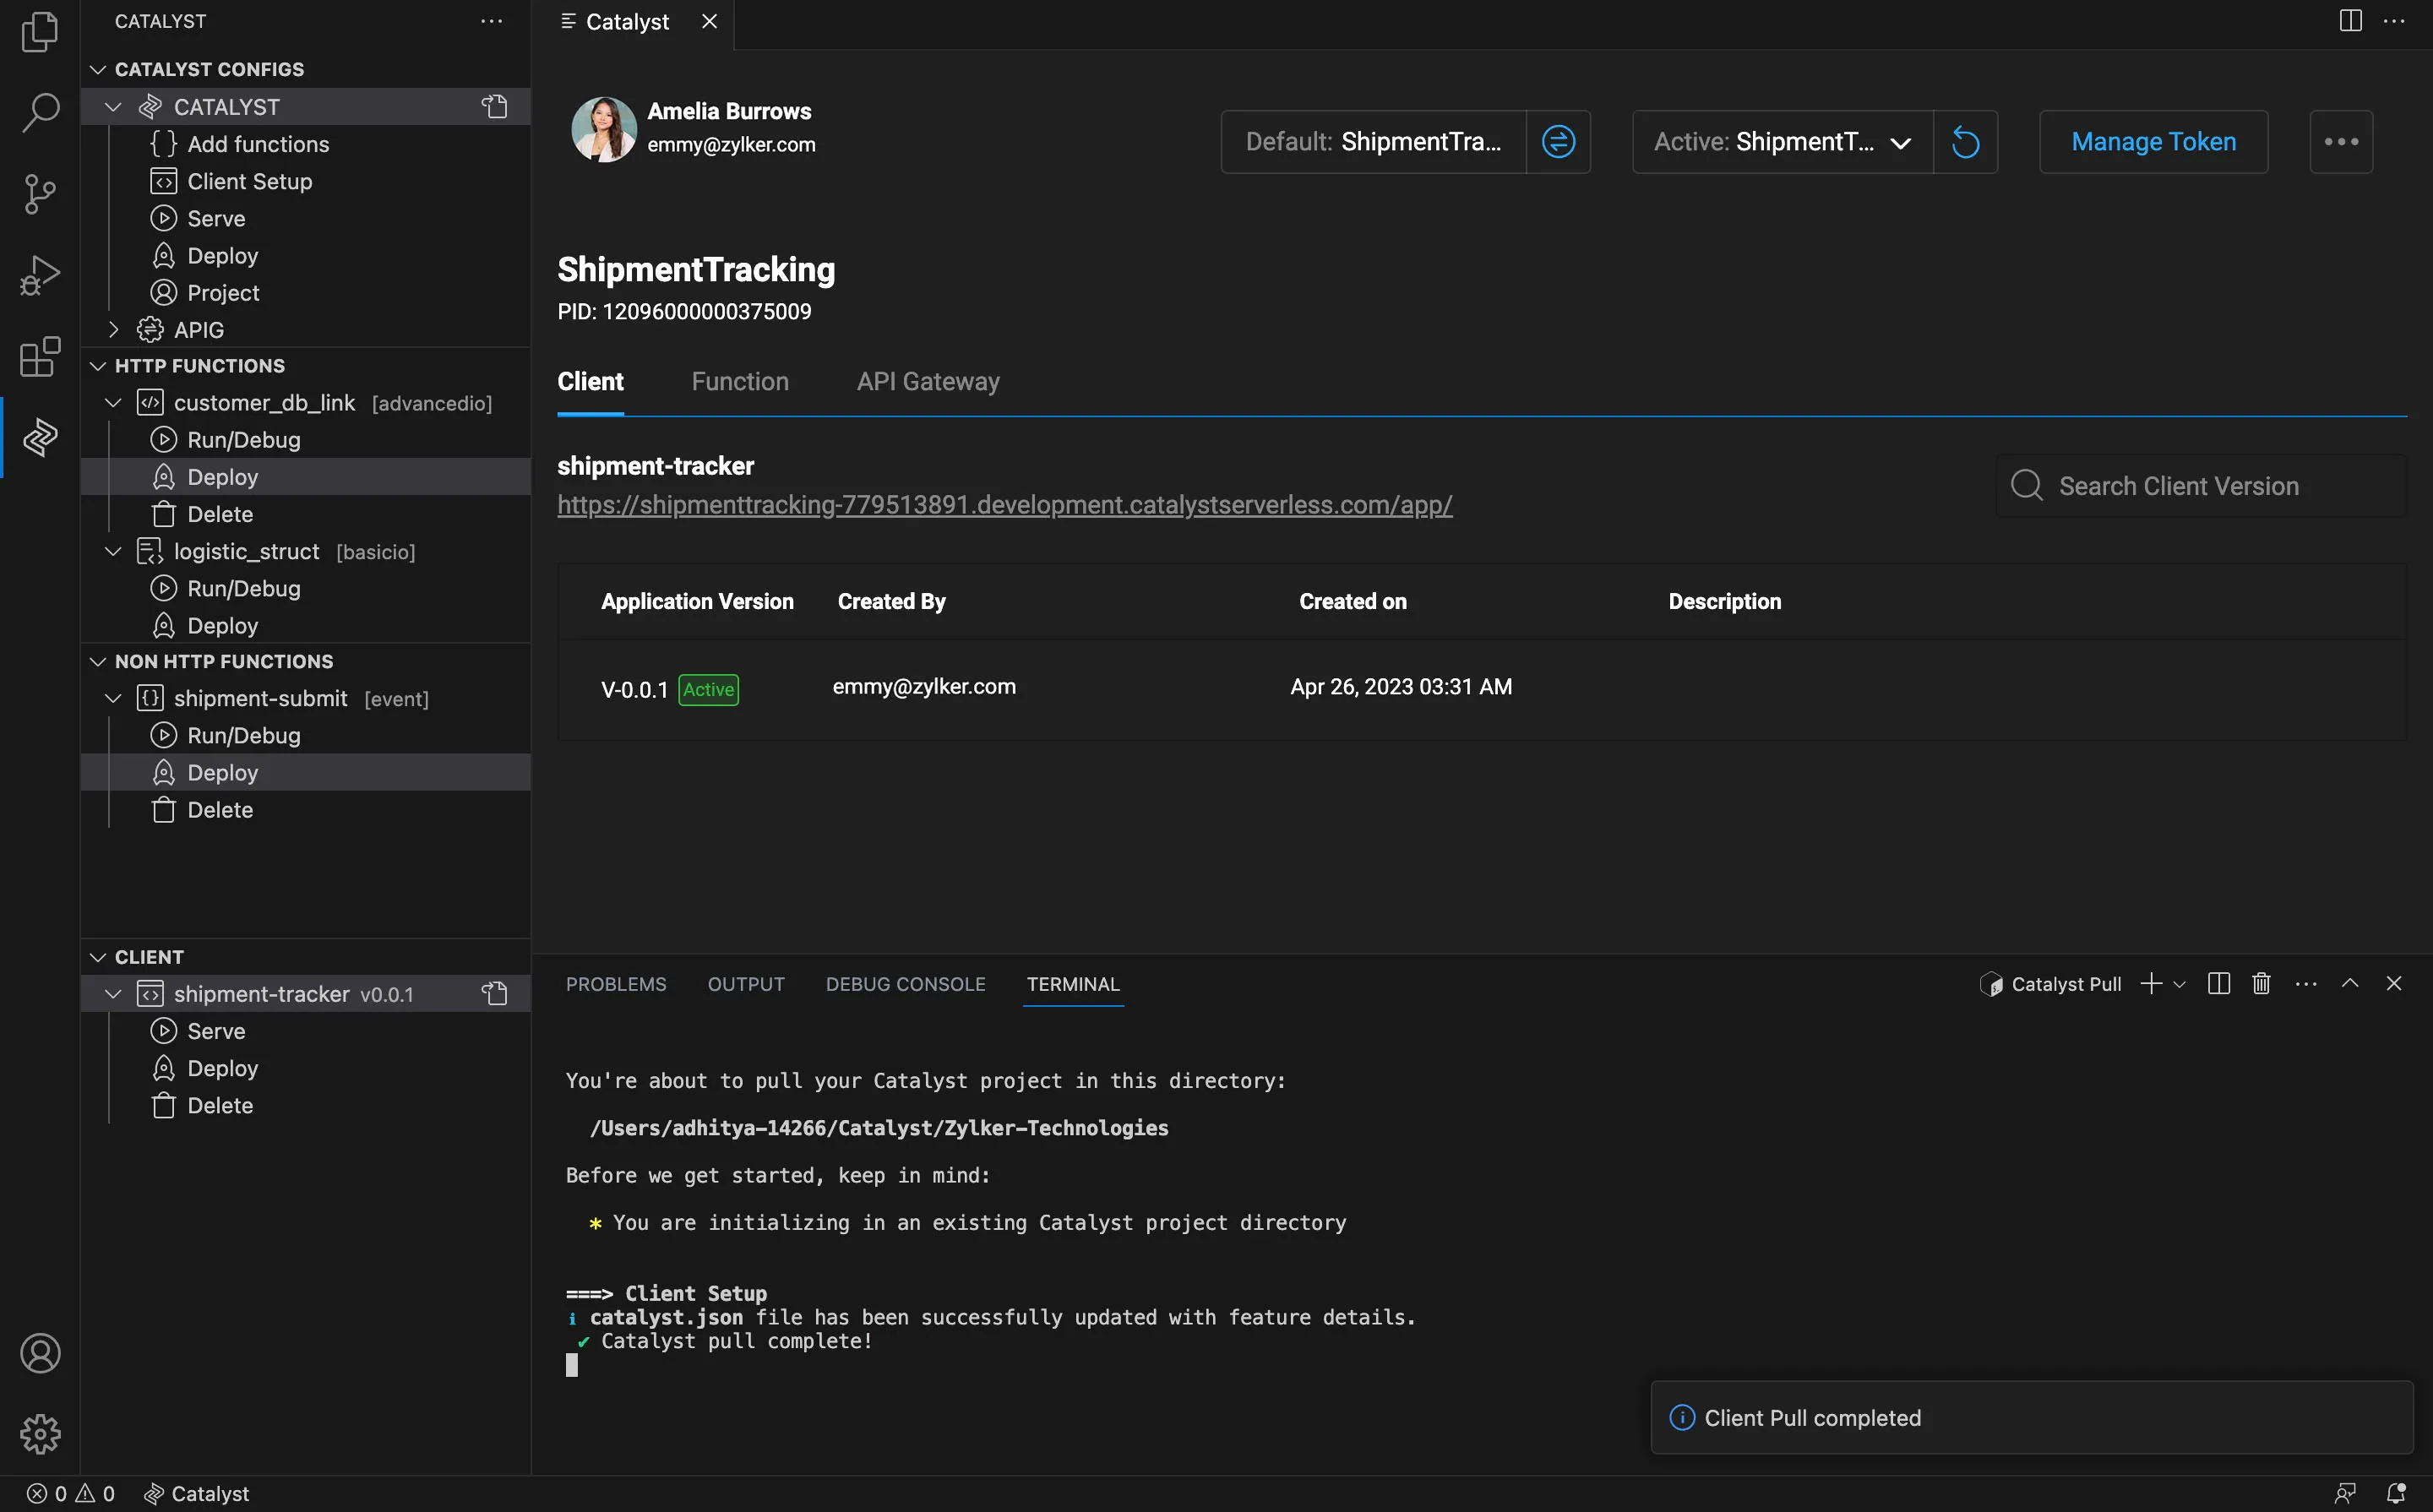
The Project Explorer feature of Catalyst Tools allows you and your collaborators to easily pull project resources like Client, Function, and API Gateway from the remote project. If a specific resource does not exist in your local project’s directory, it will be automatically created during the pull. However, if a resource is already present in your project folder, the extension will ask you for confirmation to overwrite the existing file.
You can work on the resources and push the changes made, by deploying the entire project again, or just the components that you modified.
You can learn more about pulling resources to your local environment from the Pull Resources help page.
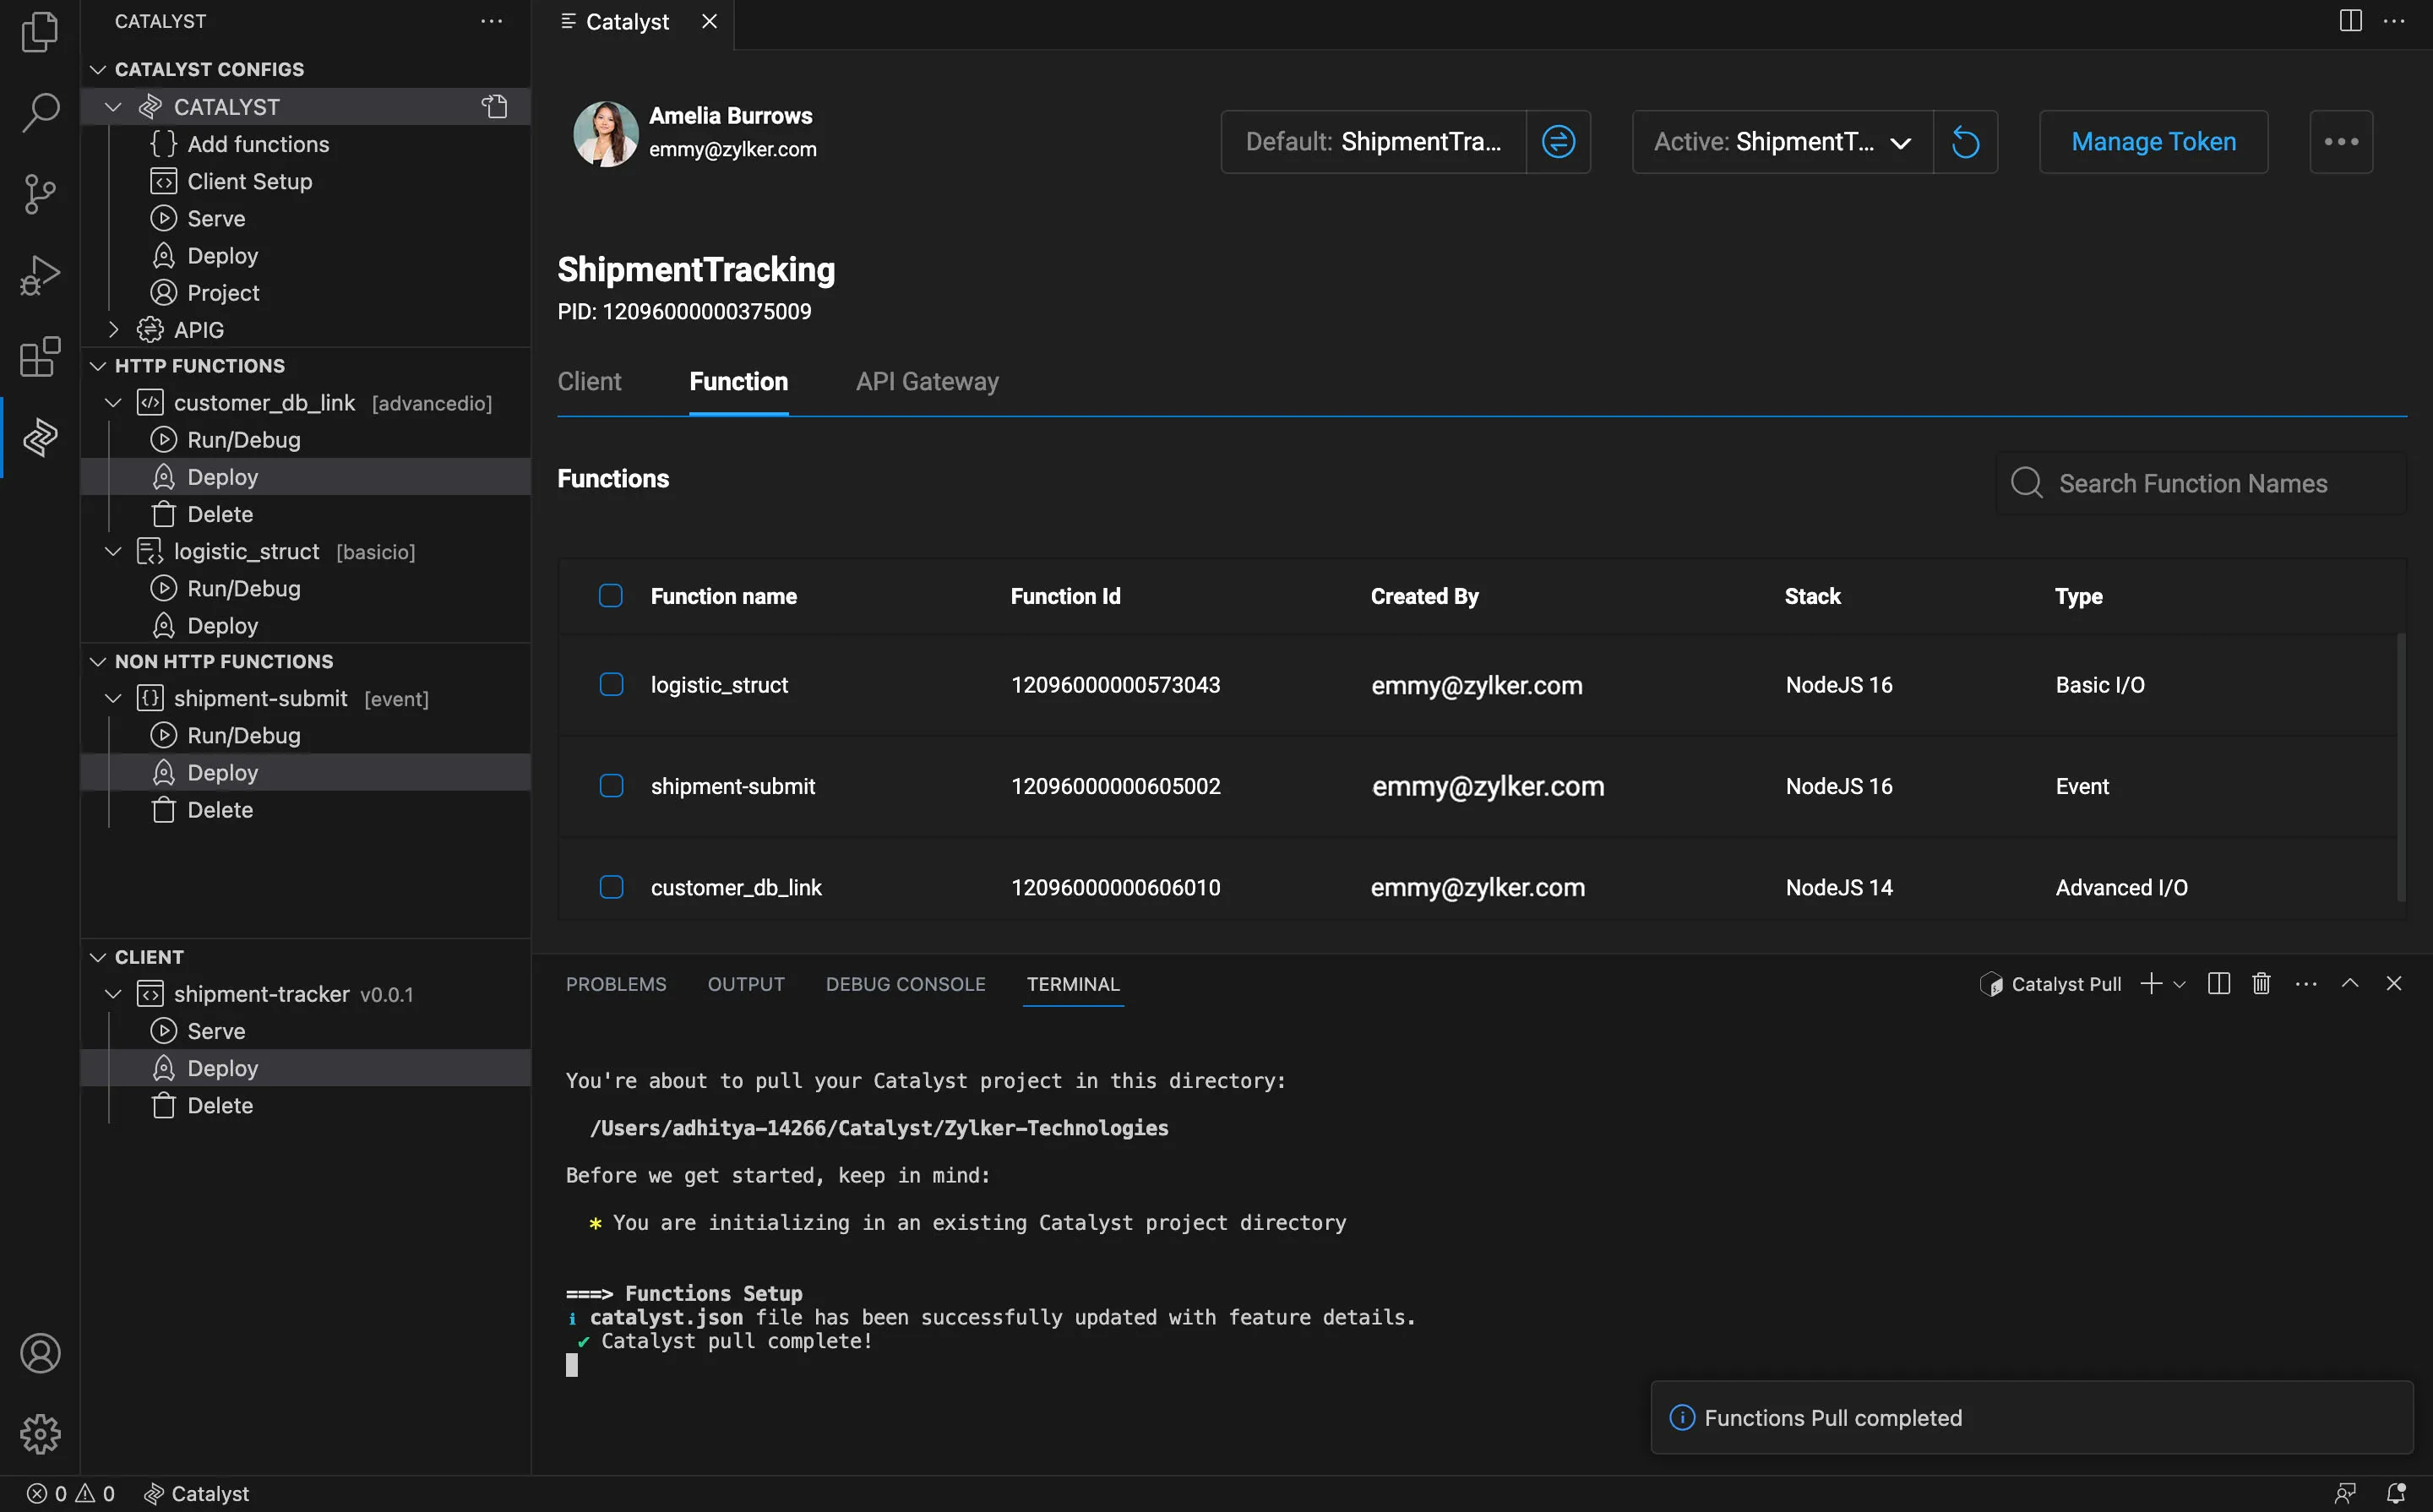
Pull a client resource:
-
Navigate to the Client section in the Project Explorer.
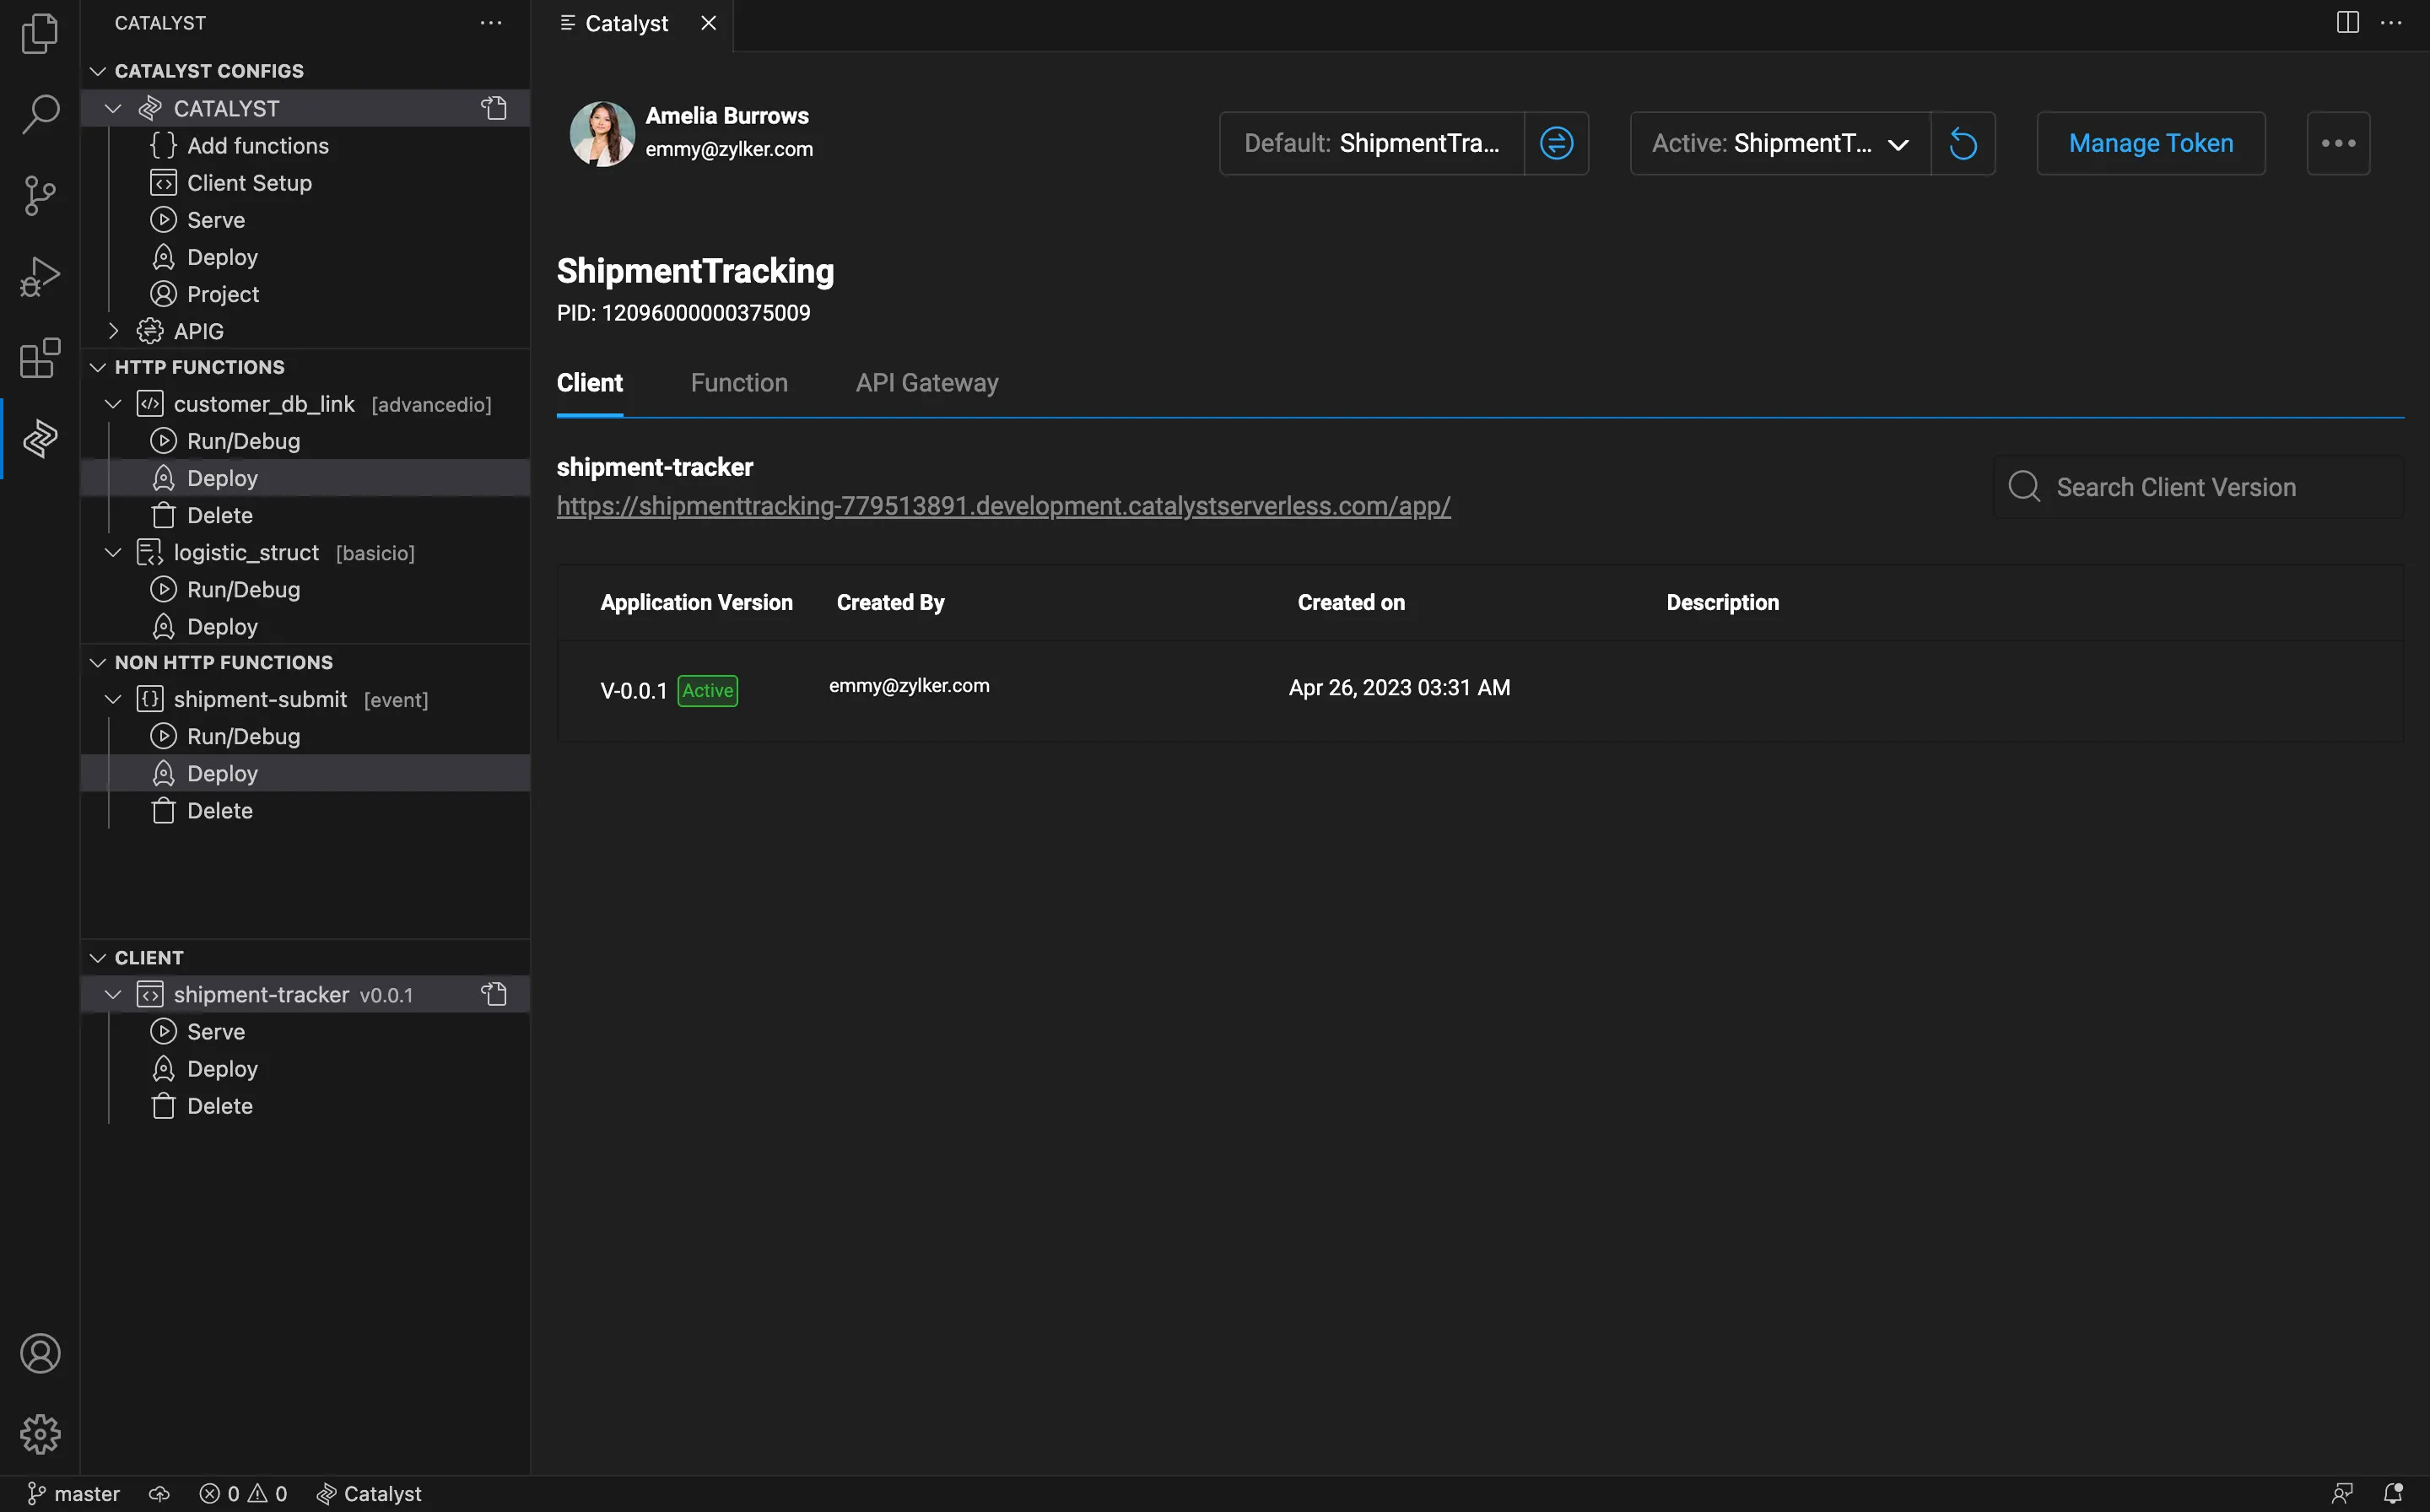
-
Click the pull icon button that appears next to the client details.
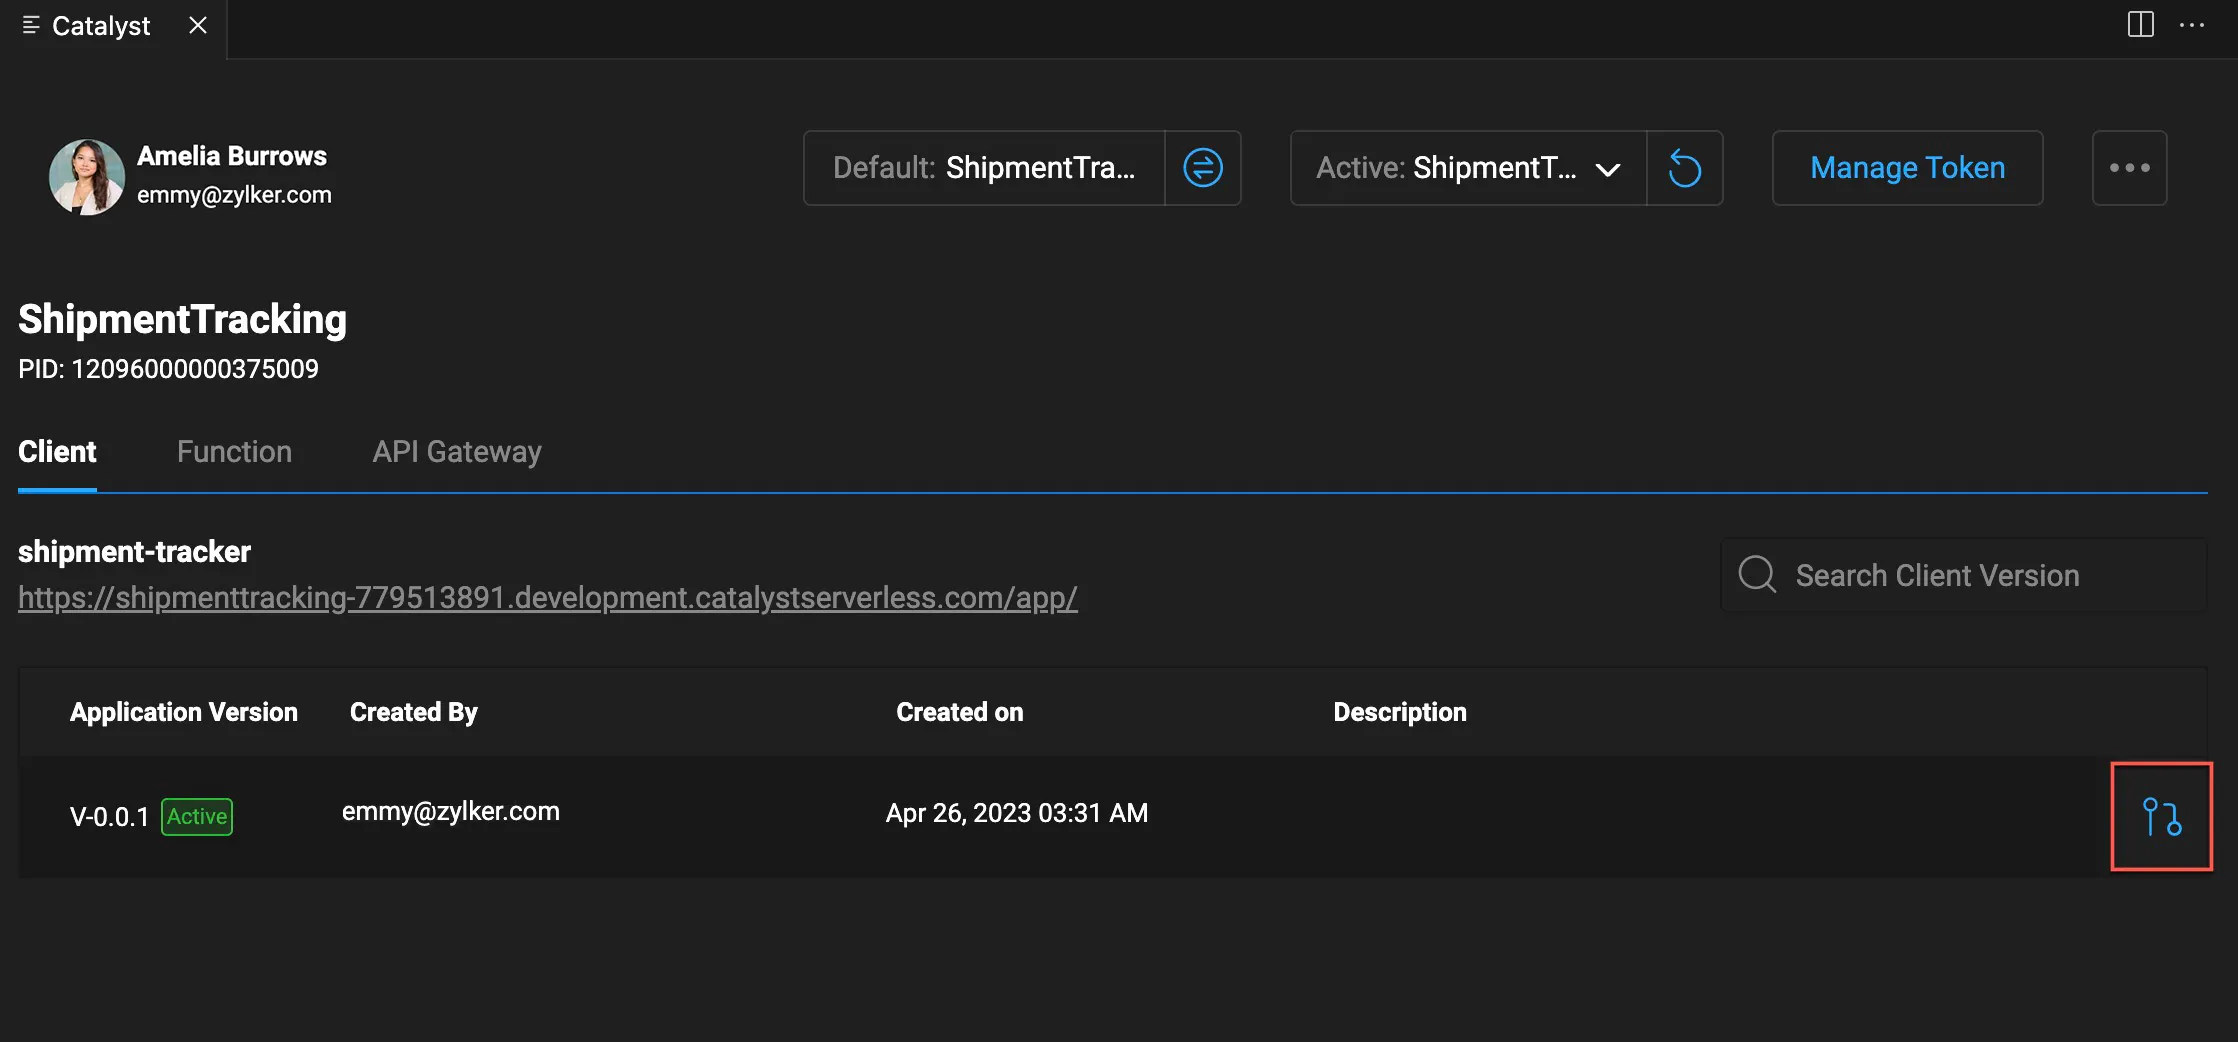
The client component will be pulled. If a client component already exists in your local project, it will be overwritten.
Pull a function:
-
Navigate to the Function section in the Project Explorer.
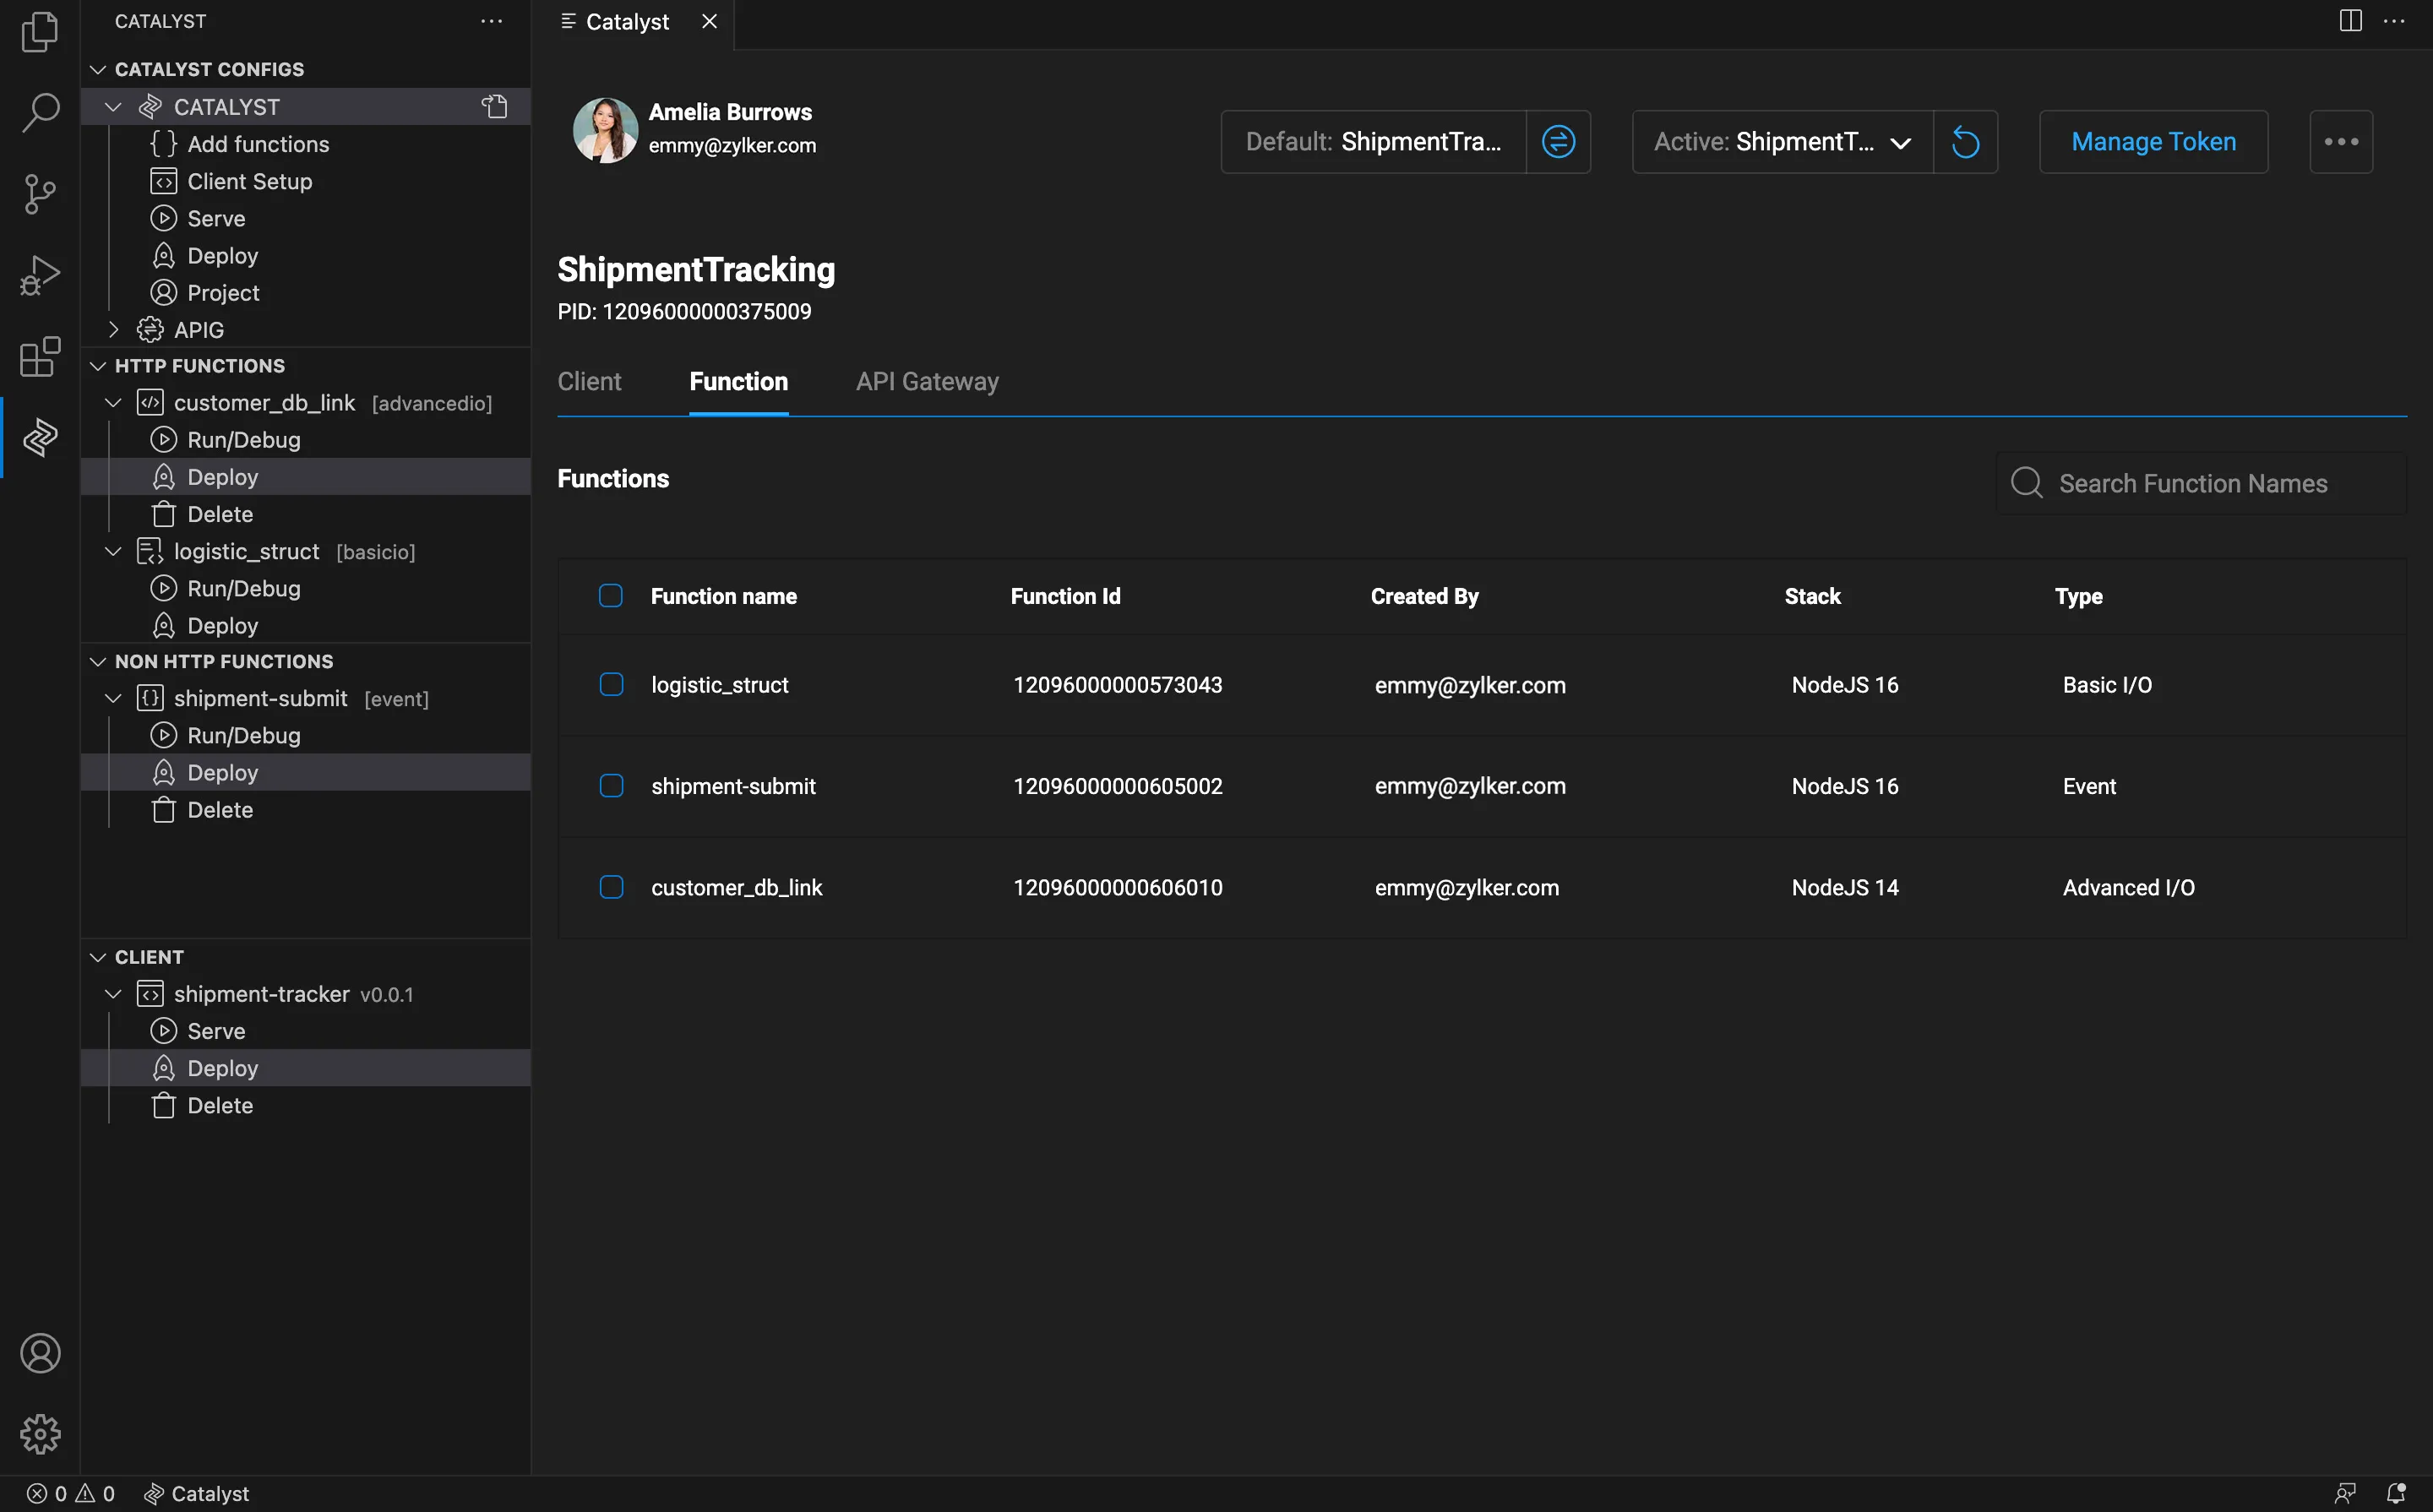
-
Select the required function, and click the pull-icon that appears next to it.
-
Select the required function from the prompt, to confirm overwrite and confirm your preference by clicking the submission-icon.
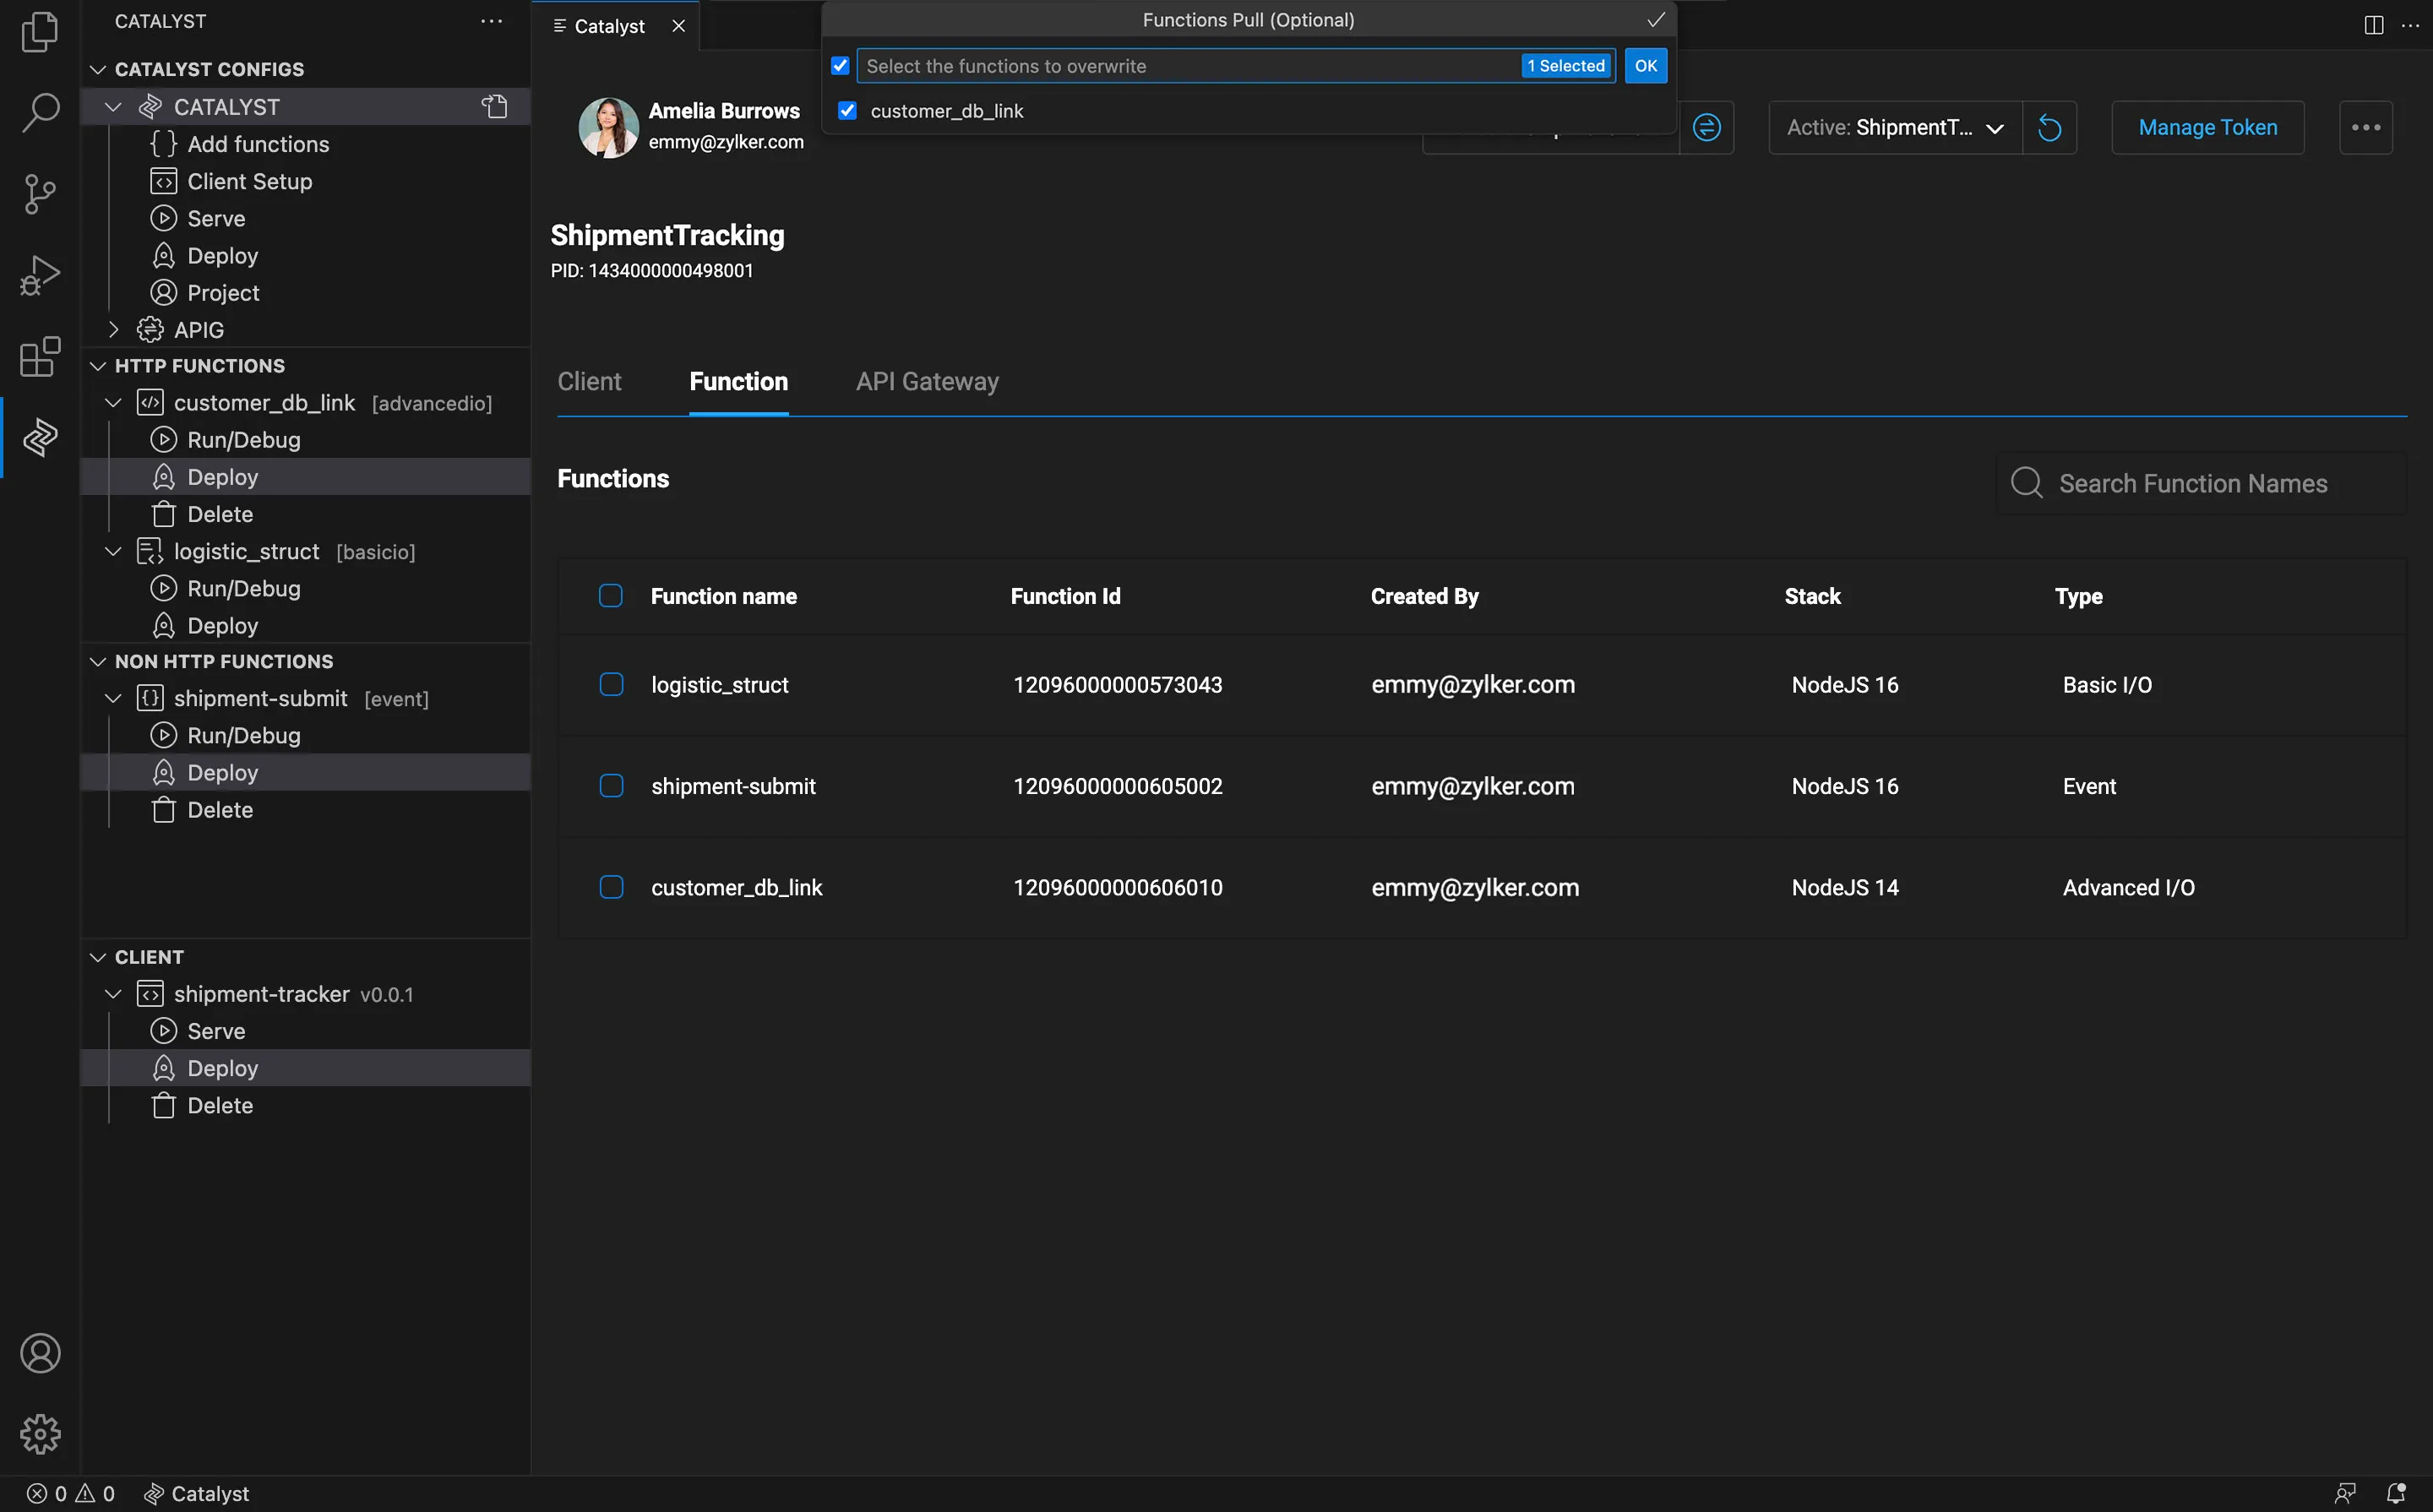
The selected function will be pulled and be available in your project directory.
Perform a Bulk Pull:
You can also perform a bulk pull operation of functions in the following manner:
-
Select the check-box present in the table-heading, then click the Pull Selected button.
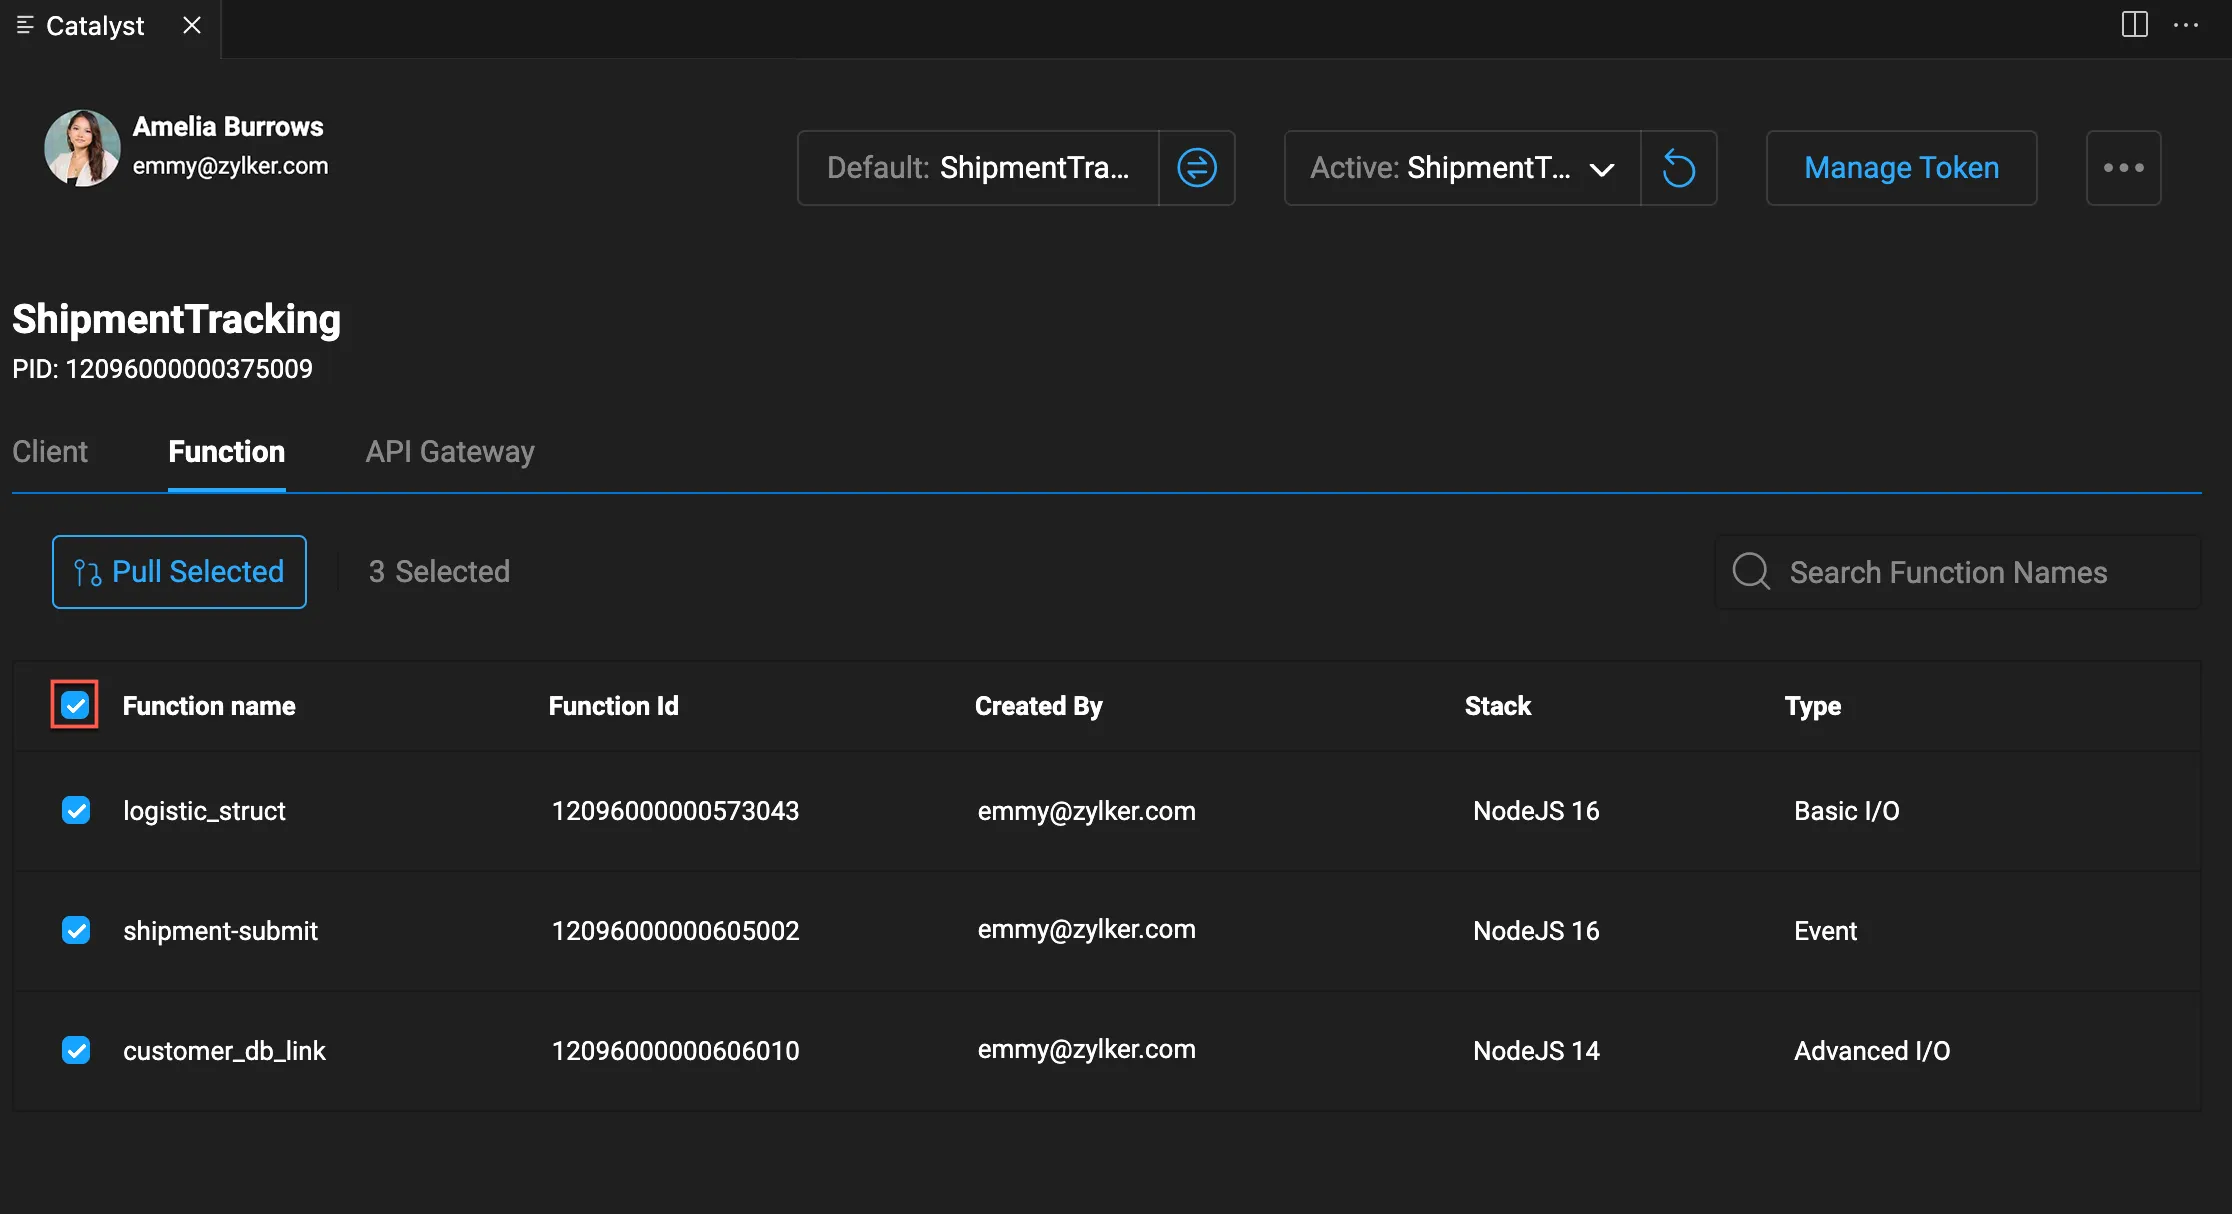
-
Confirm the functions you wish to pull, then click the submission icon.
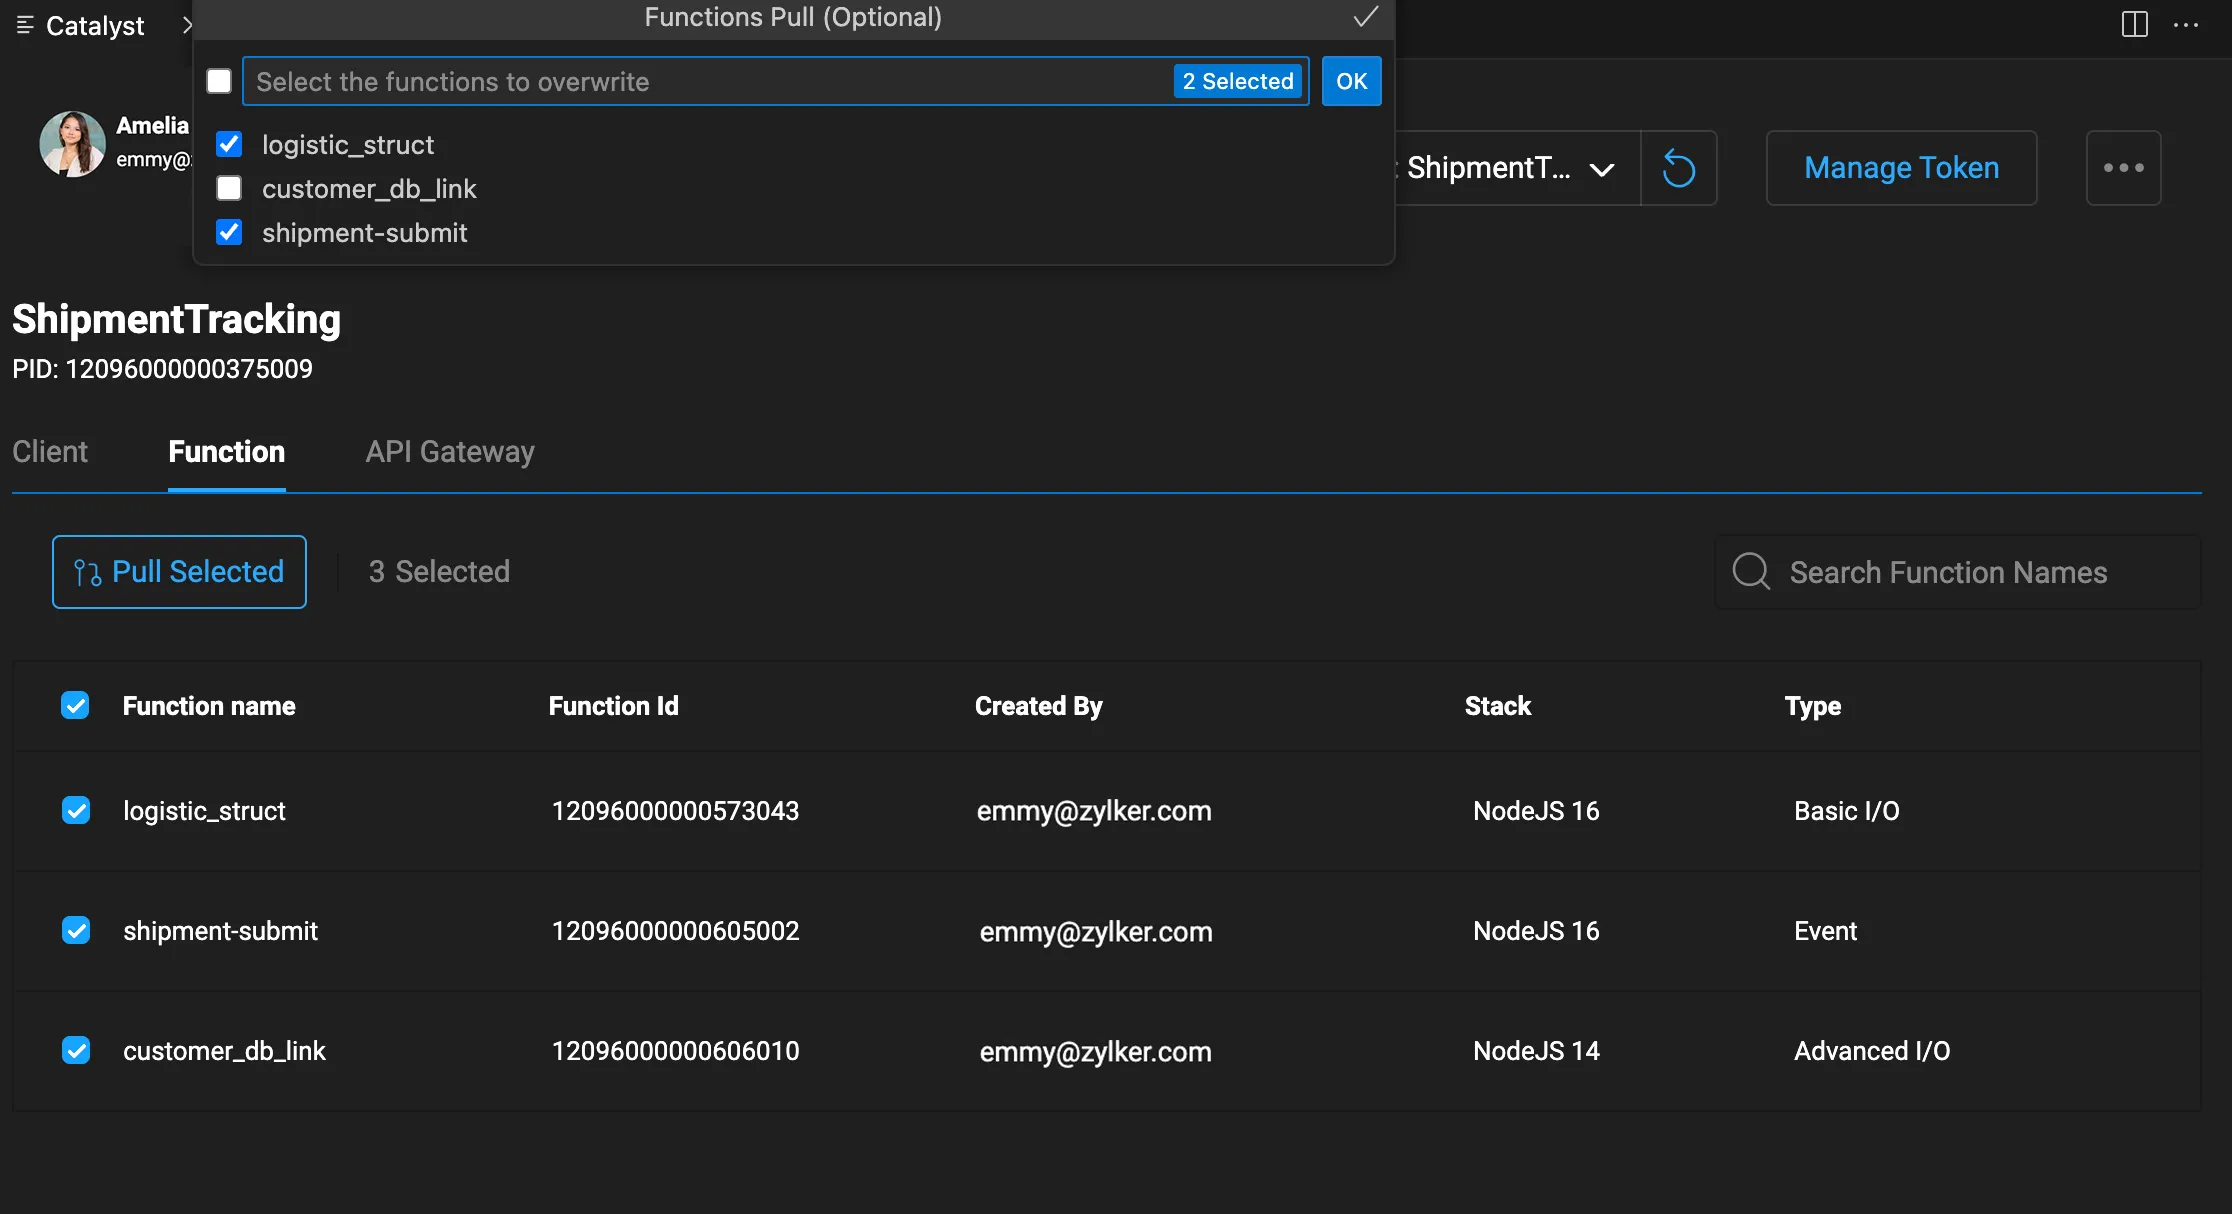
The selected functions will be pulled and be available in your directory.

Pull an API Gateway Rule:
The API Gateway Rules file is a JSON file that contains the definitions of each API created in the API Gateway component for your application. If you have not created any APIs in your project, you can still fetch the file with sample API definitions through the pull.
You can refer to Working with API Gateway help page for details about using this feature in a local environment.
In the API Gateway section of the console, you will be able to view whether the component has been enabled in the Catalyst console or not.

If the API Gateway component has not been enabled, then you will not be able to pull the rules file locally through the extension.
If the component has been enabled in the Catalyst console, you can pull the API Gateway rules in the following manner:
-
Navigate to the API Gateway section of the Project Explorer.
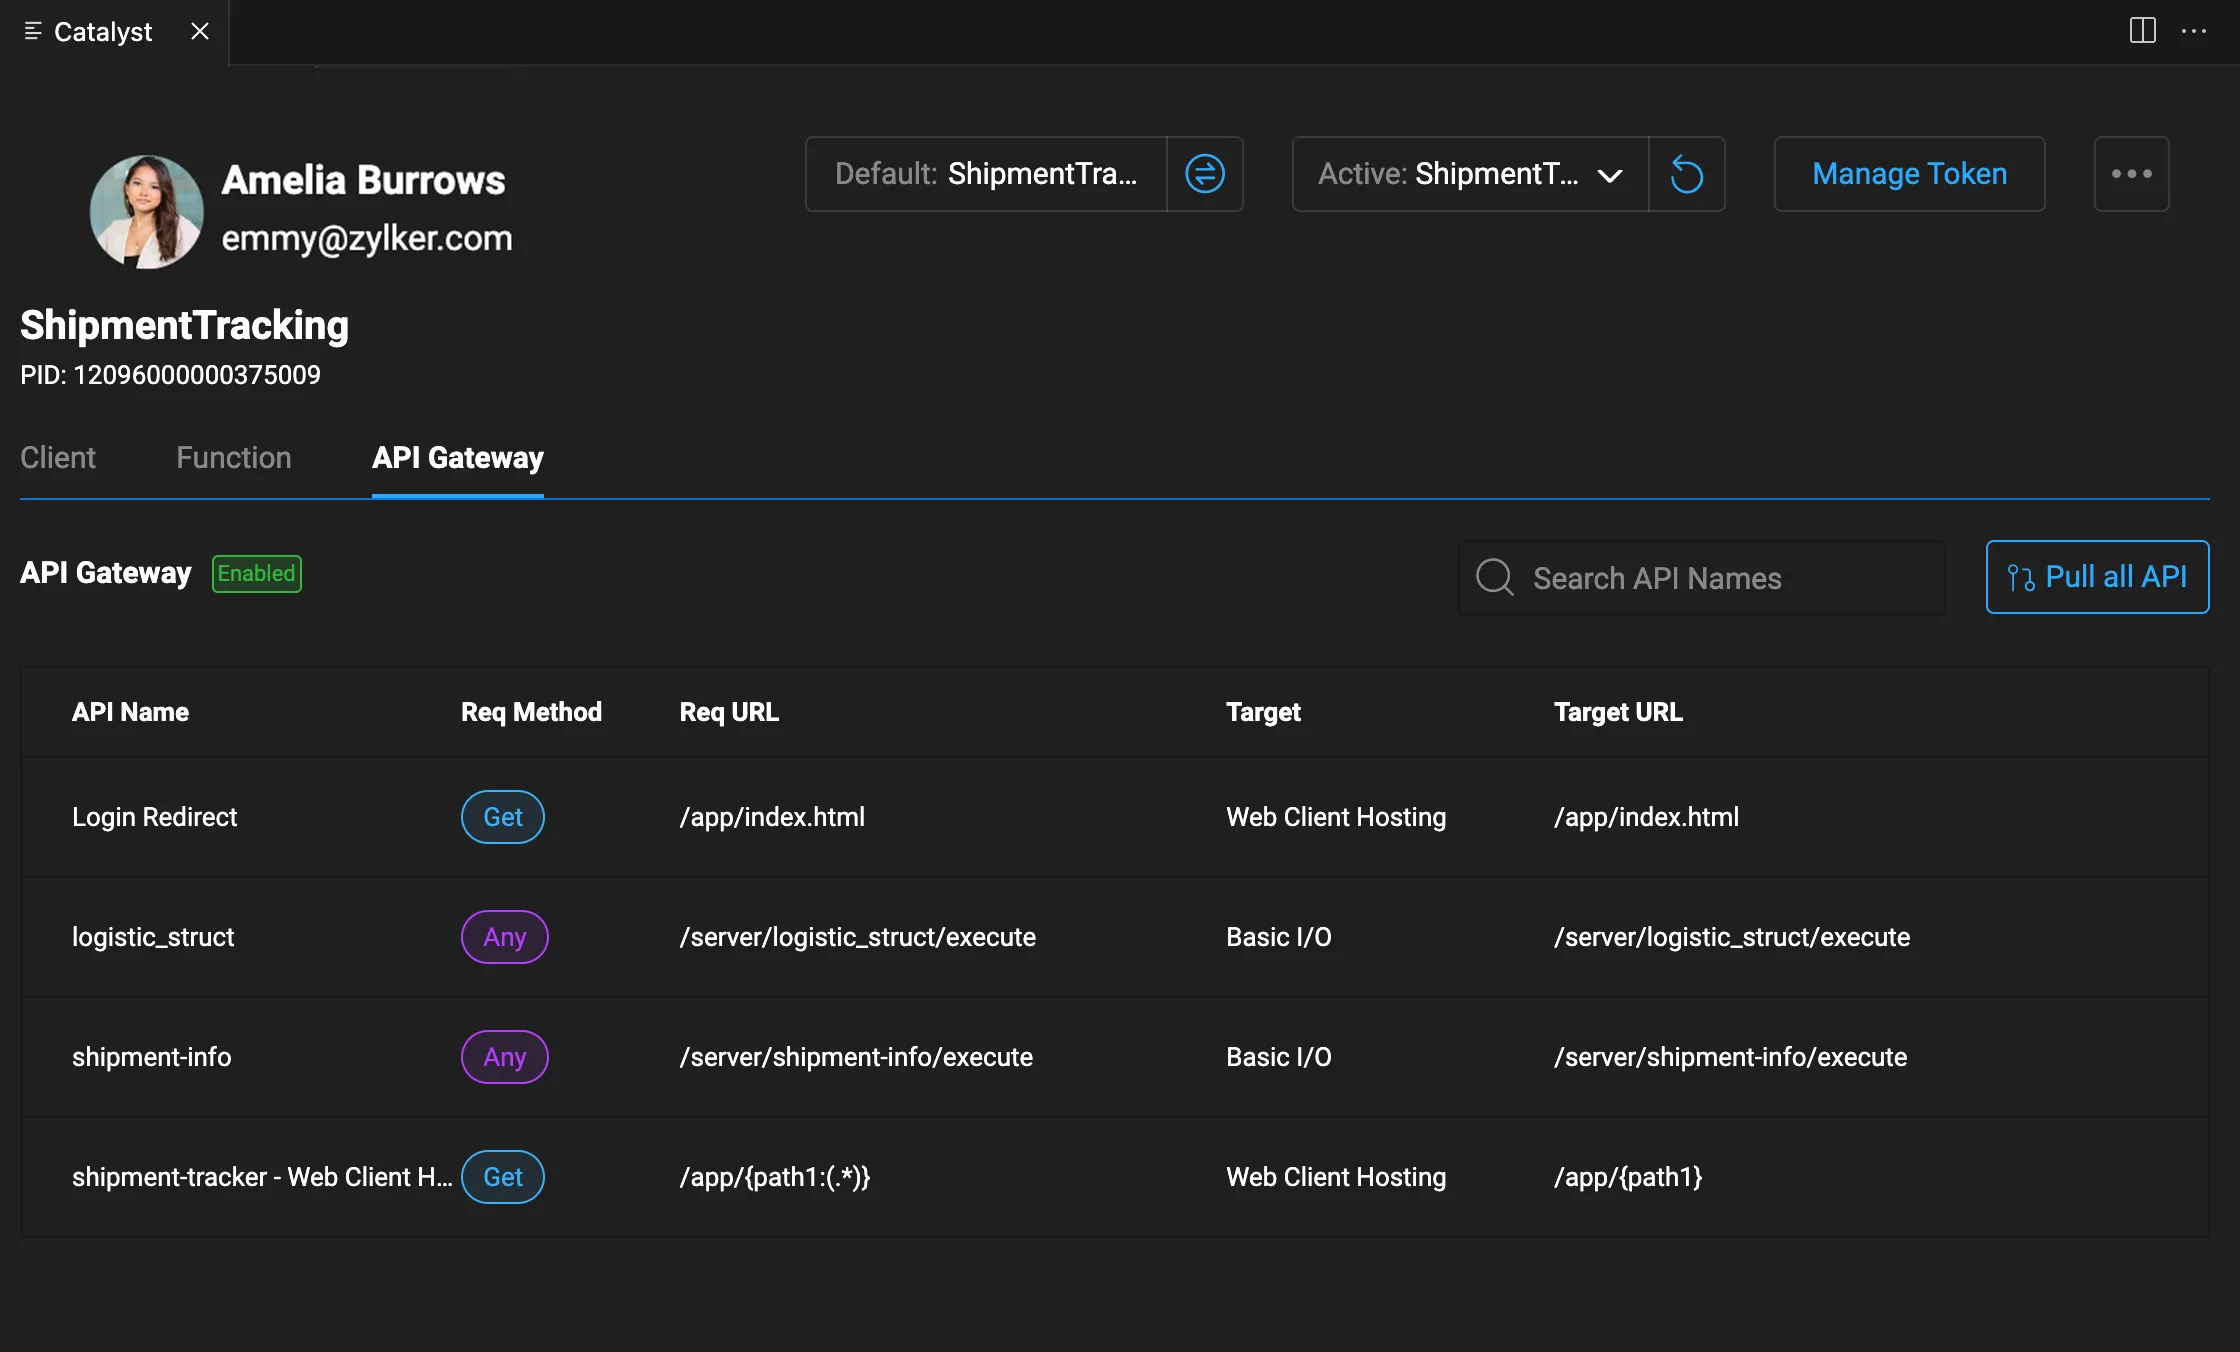
-
Click the Pull All Rules button.
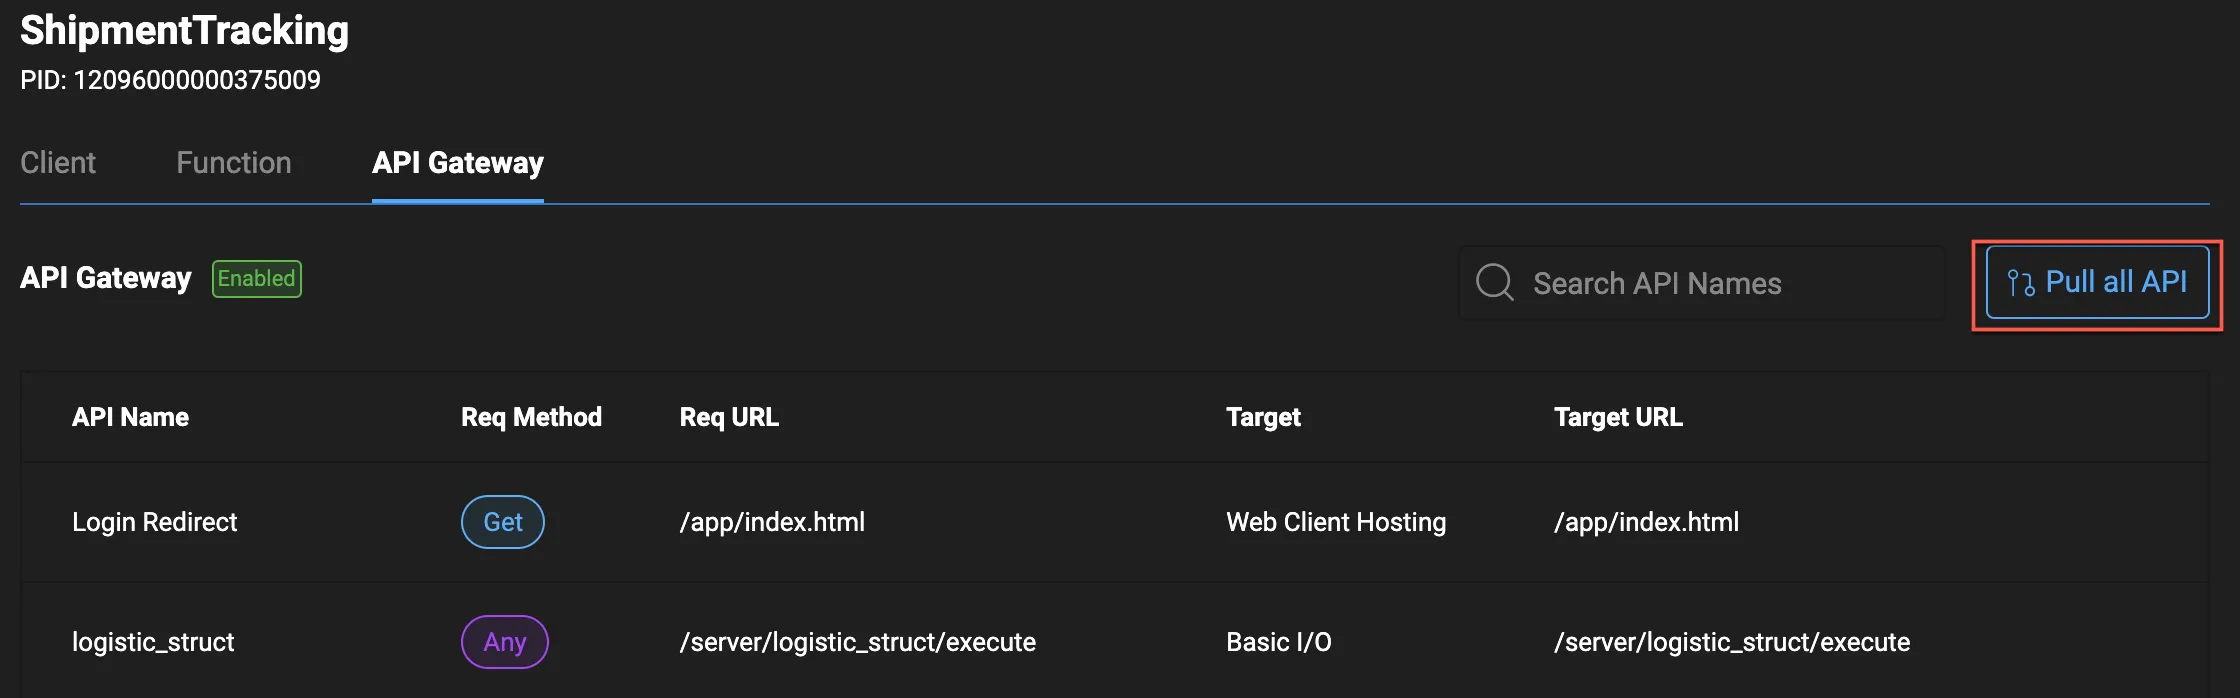
All the rules associated with the API Gateway will be pulled.
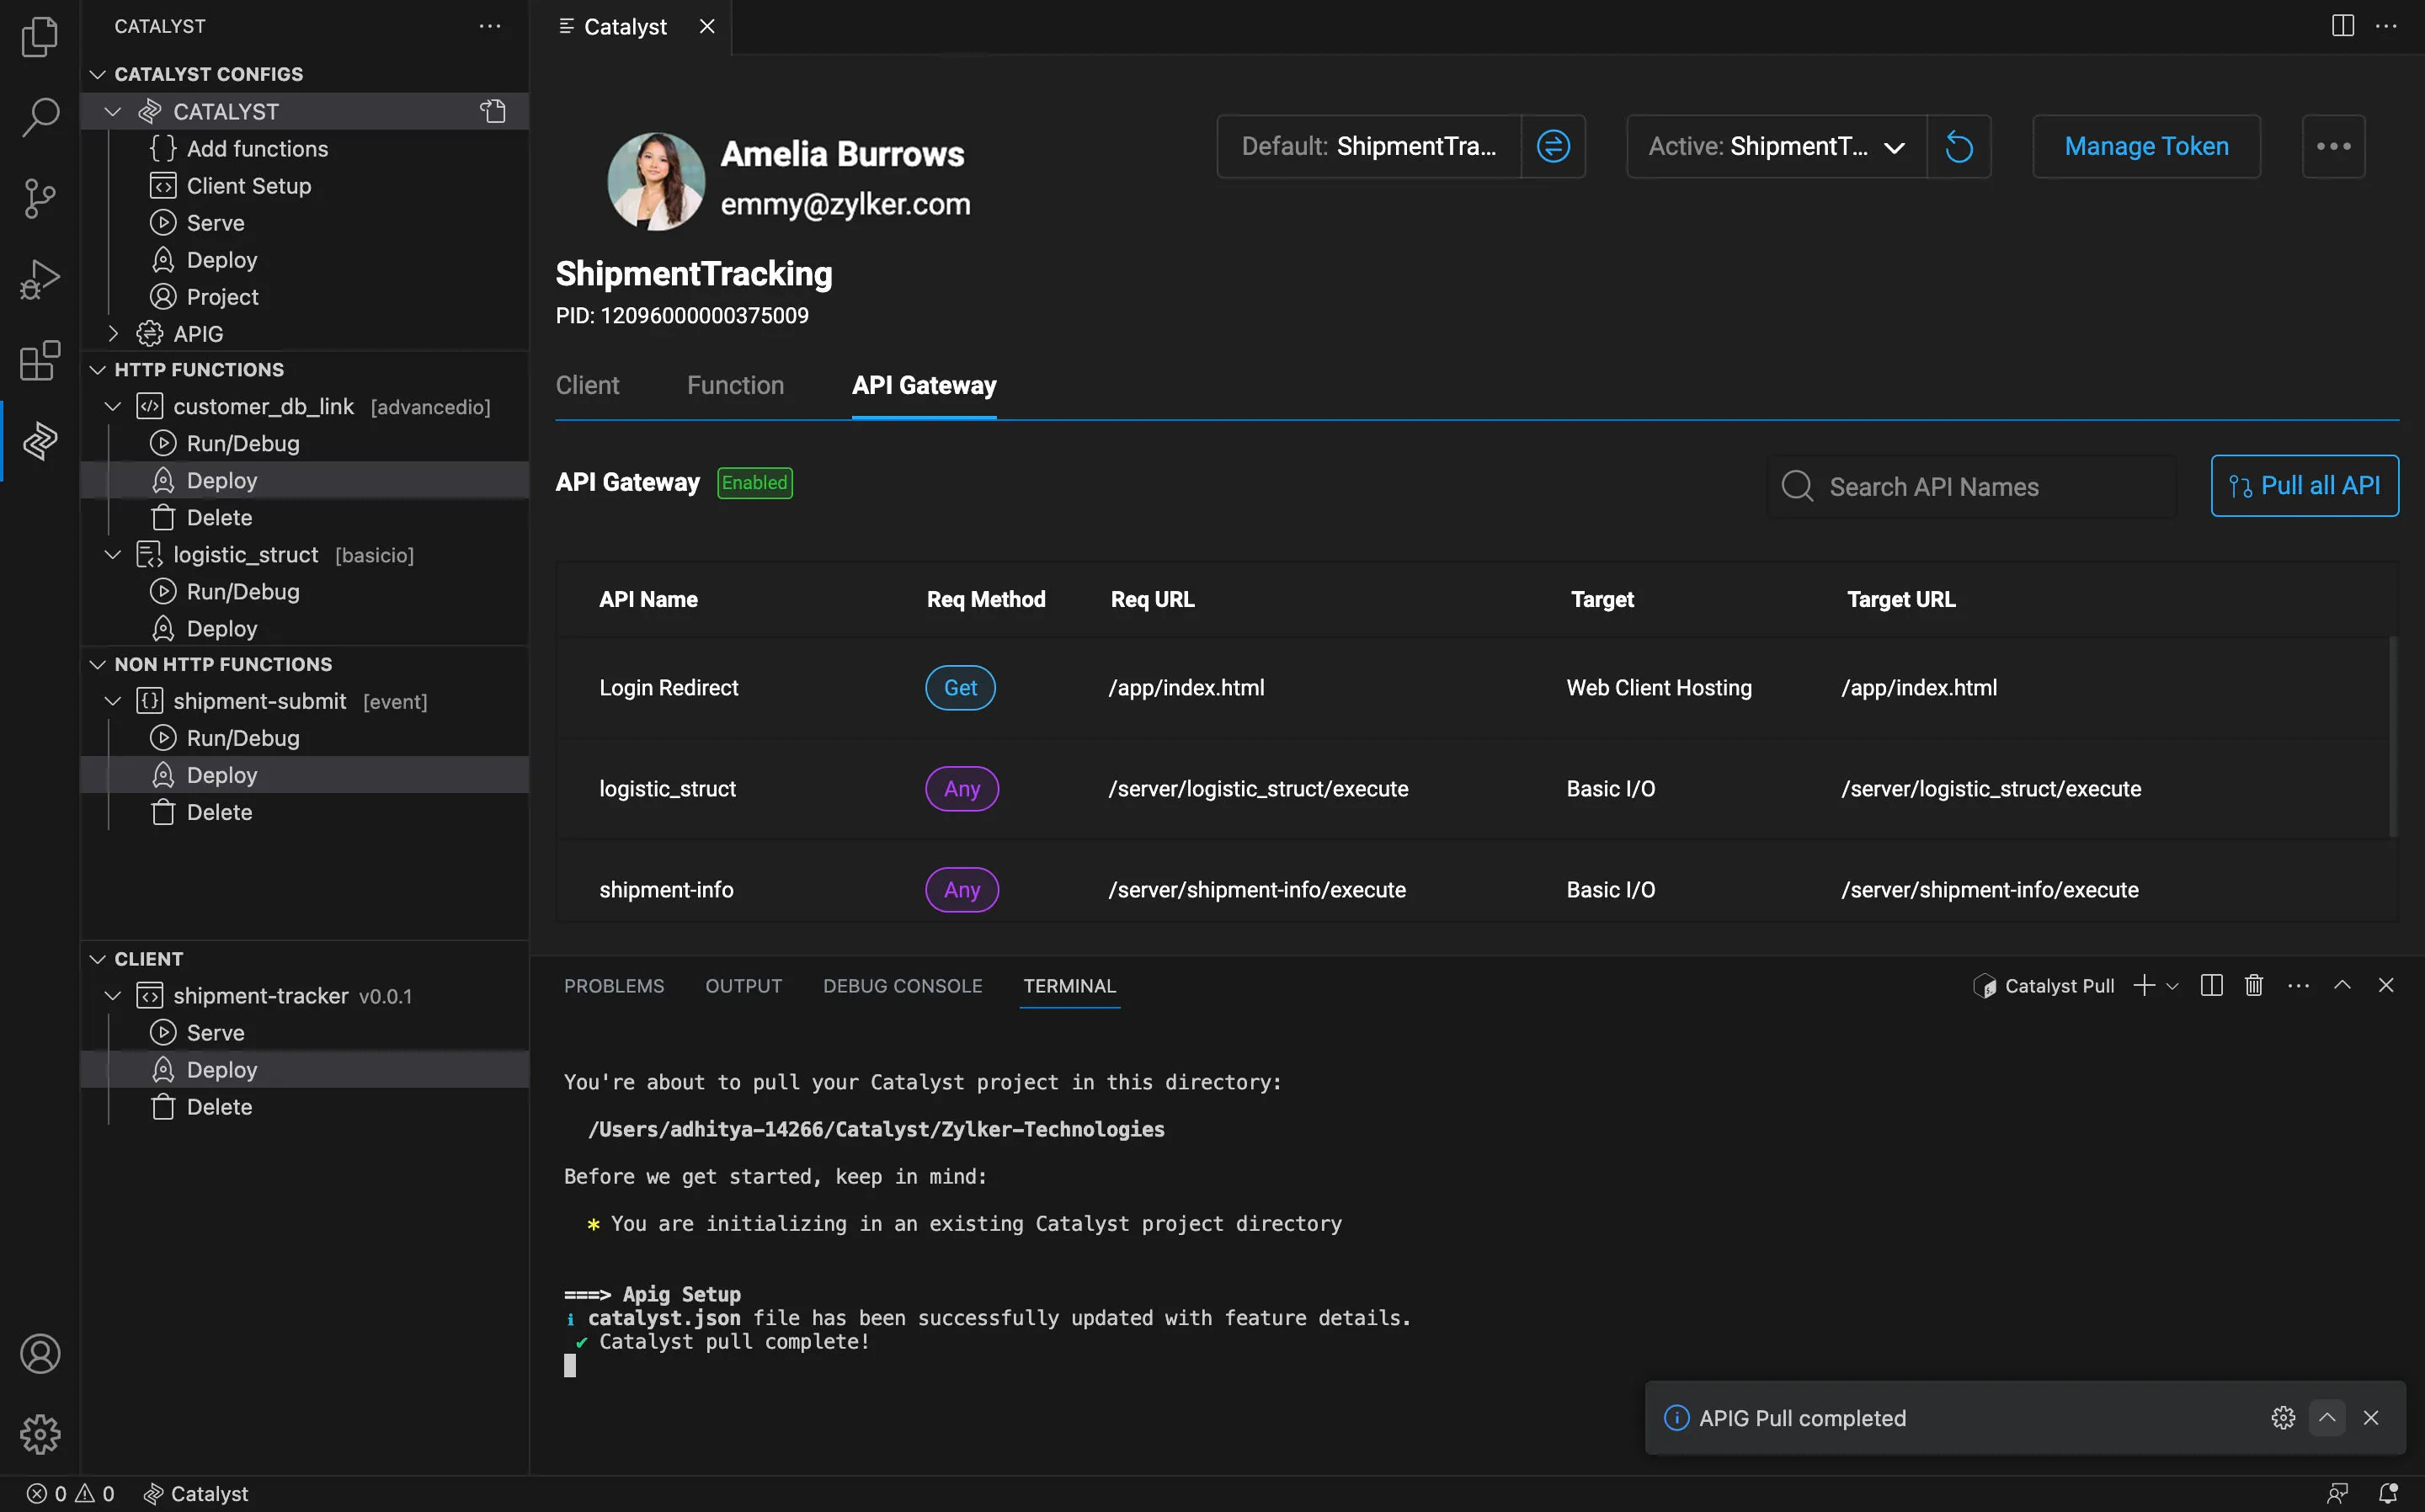
The rules associated with the API Gateway will be made available to you in your project directory as a JSON file named catalyst-user-rules.
A sample of catalyst-user-rules.json file is given below:
[
{
"name": "shipment-tracker - Web Client Hosting",
"source_endpoint": "/app/{path1:(.*)}",
"target_endpoint": "/app/{path1}",
"target": "client",
"method": "GET",
"throttling": {
"overall": {},
"ip": {}
}
},
{
"name": "shipment-info",
"source_endpoint": "/server/shipment-info/execute",
"target_endpoint": "/server/shipment-info/execute",
"target": "basicio",
"method": "ANY",
"throttling": {
"overall": {},
"ip": {}
},
"target_id": "12096000000568097"
},
{
"name": "logistic_struct",
"source_endpoint": "/server/logistic_struct/execute",
"target_endpoint": "/server/logistic_struct/execute",
"target": "basicio",
"method": "ANY",
"throttling": {
"overall": {},
"ip": {}
},
"target_id": "12096000000573043"
},
{
"name": "Login Redirect",
"source_endpoint": "/app/index.html",
"target_endpoint": "/app/index.html",
"target": "client",
"method": "GET",
"throttling": {
"overall": {},
"ip": {}
},
"system": true
}
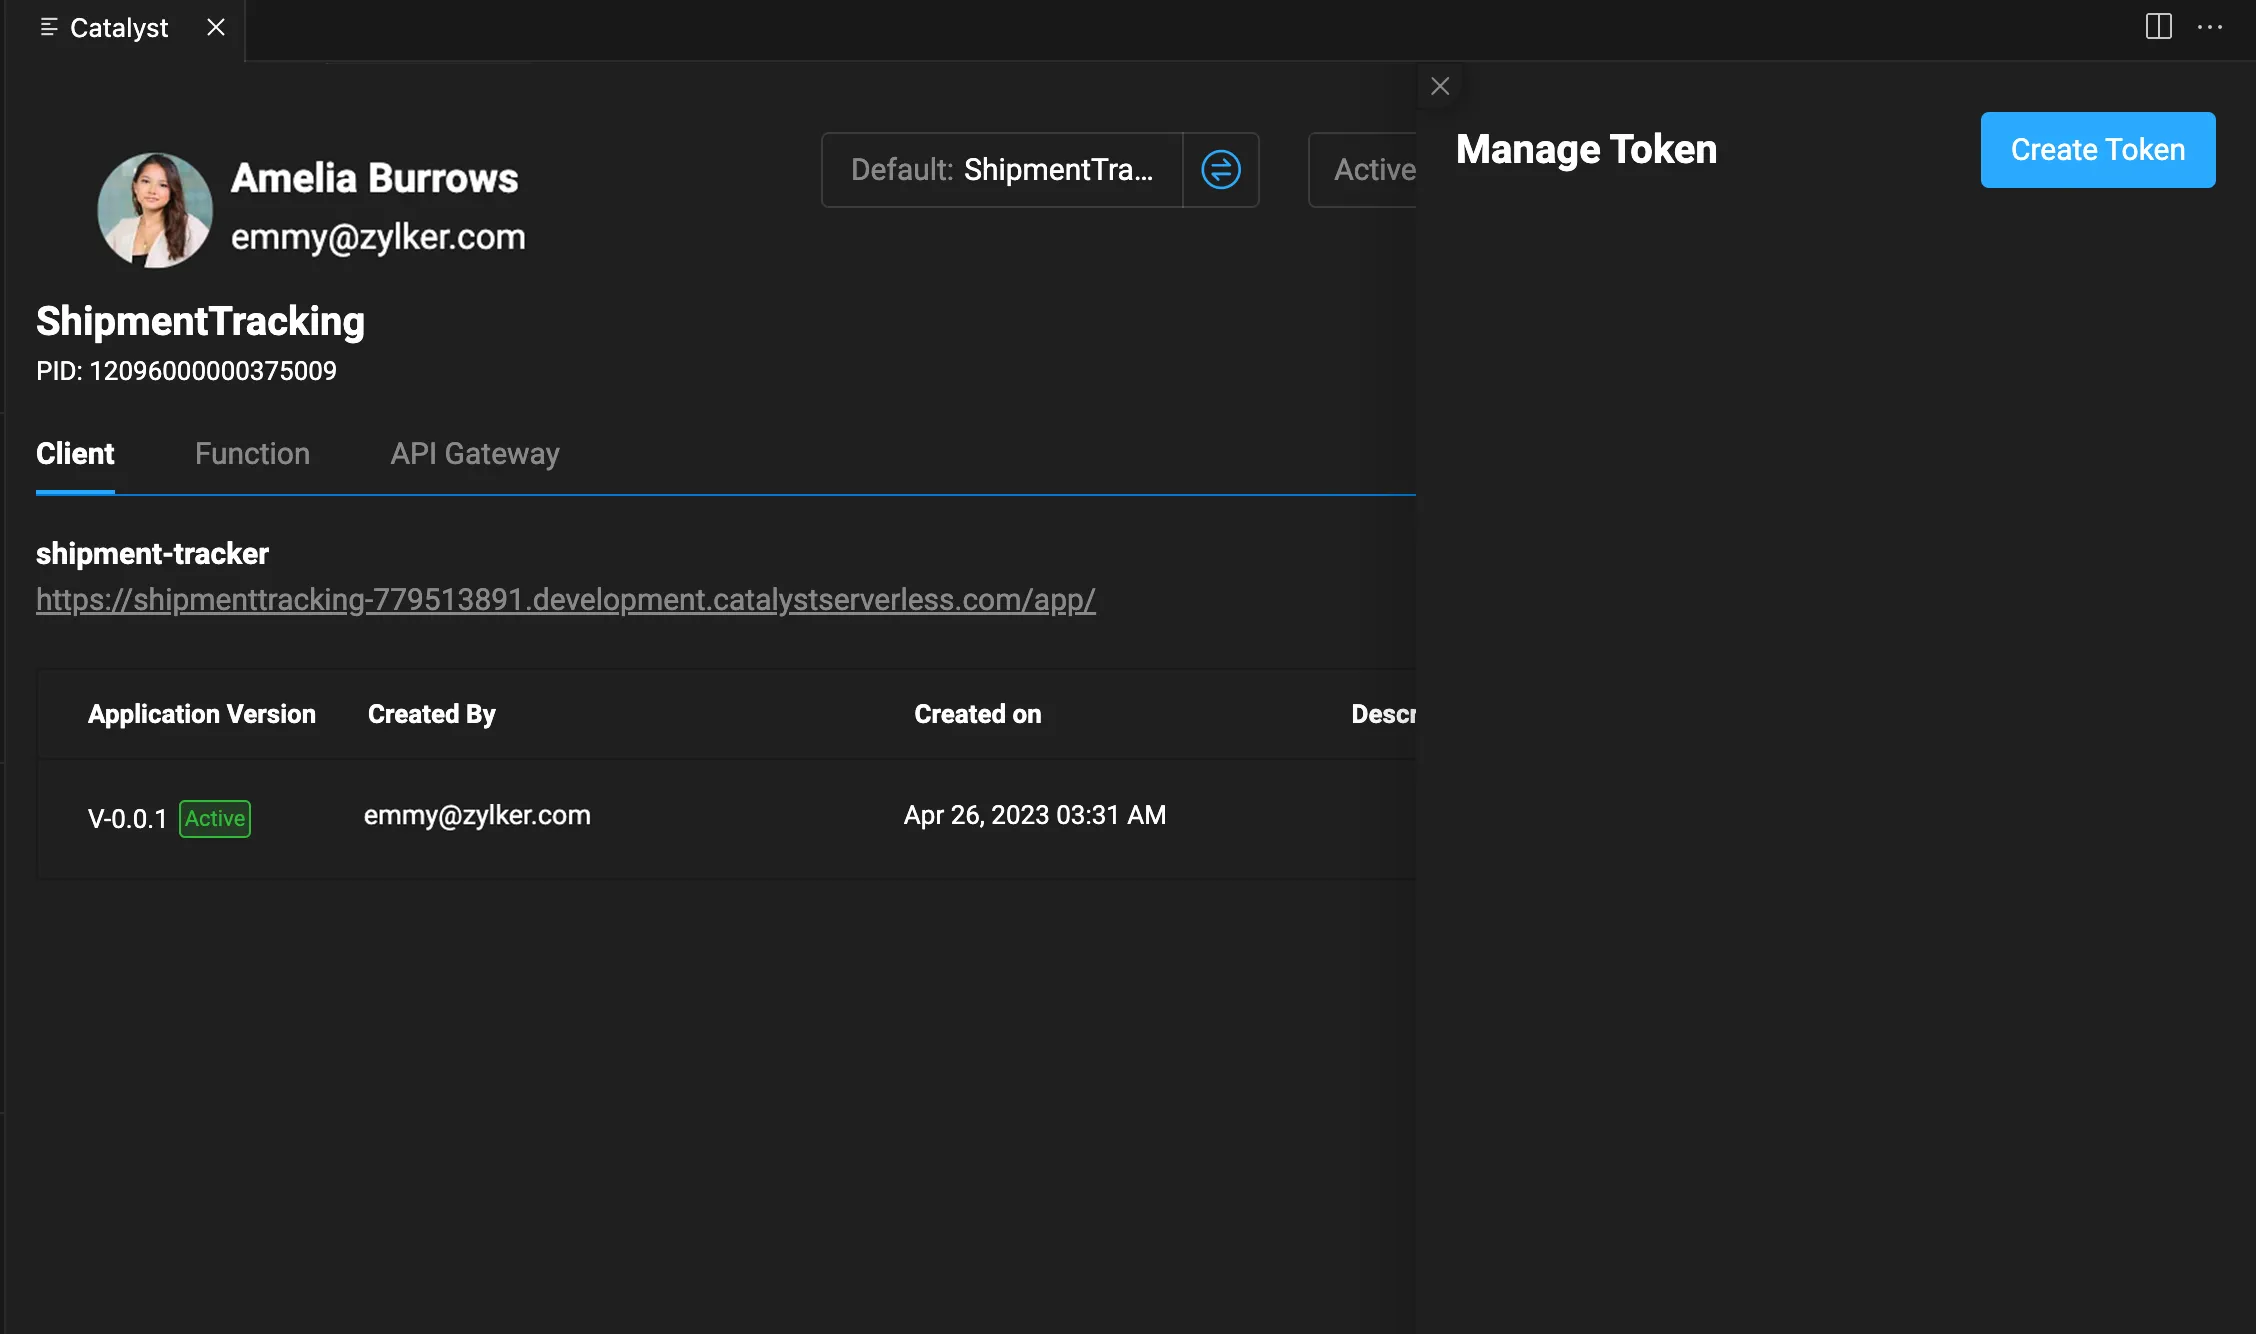
]Manage Authentication Tokens
Catalyst allows you to generate authentication tokens to directly and securely access your Catalyst account without logging in. These tokens validate your operations with your Catalyst accounts and its projects. You can learn more from Working with Tokens help page.
You can generate authentication tokens easily from your VS Code IDE using the Project Explorer feature of the Catalyst Tools extension.
To generate tokens, perform the following steps:
-
Click the Manage Token button.

If there are any tokens that have been previously created, they will be displayed here. -
To generate new token, click the Create Token button.
-
The token terminal will open in VS Code and a verification URL and verification code will be generated.
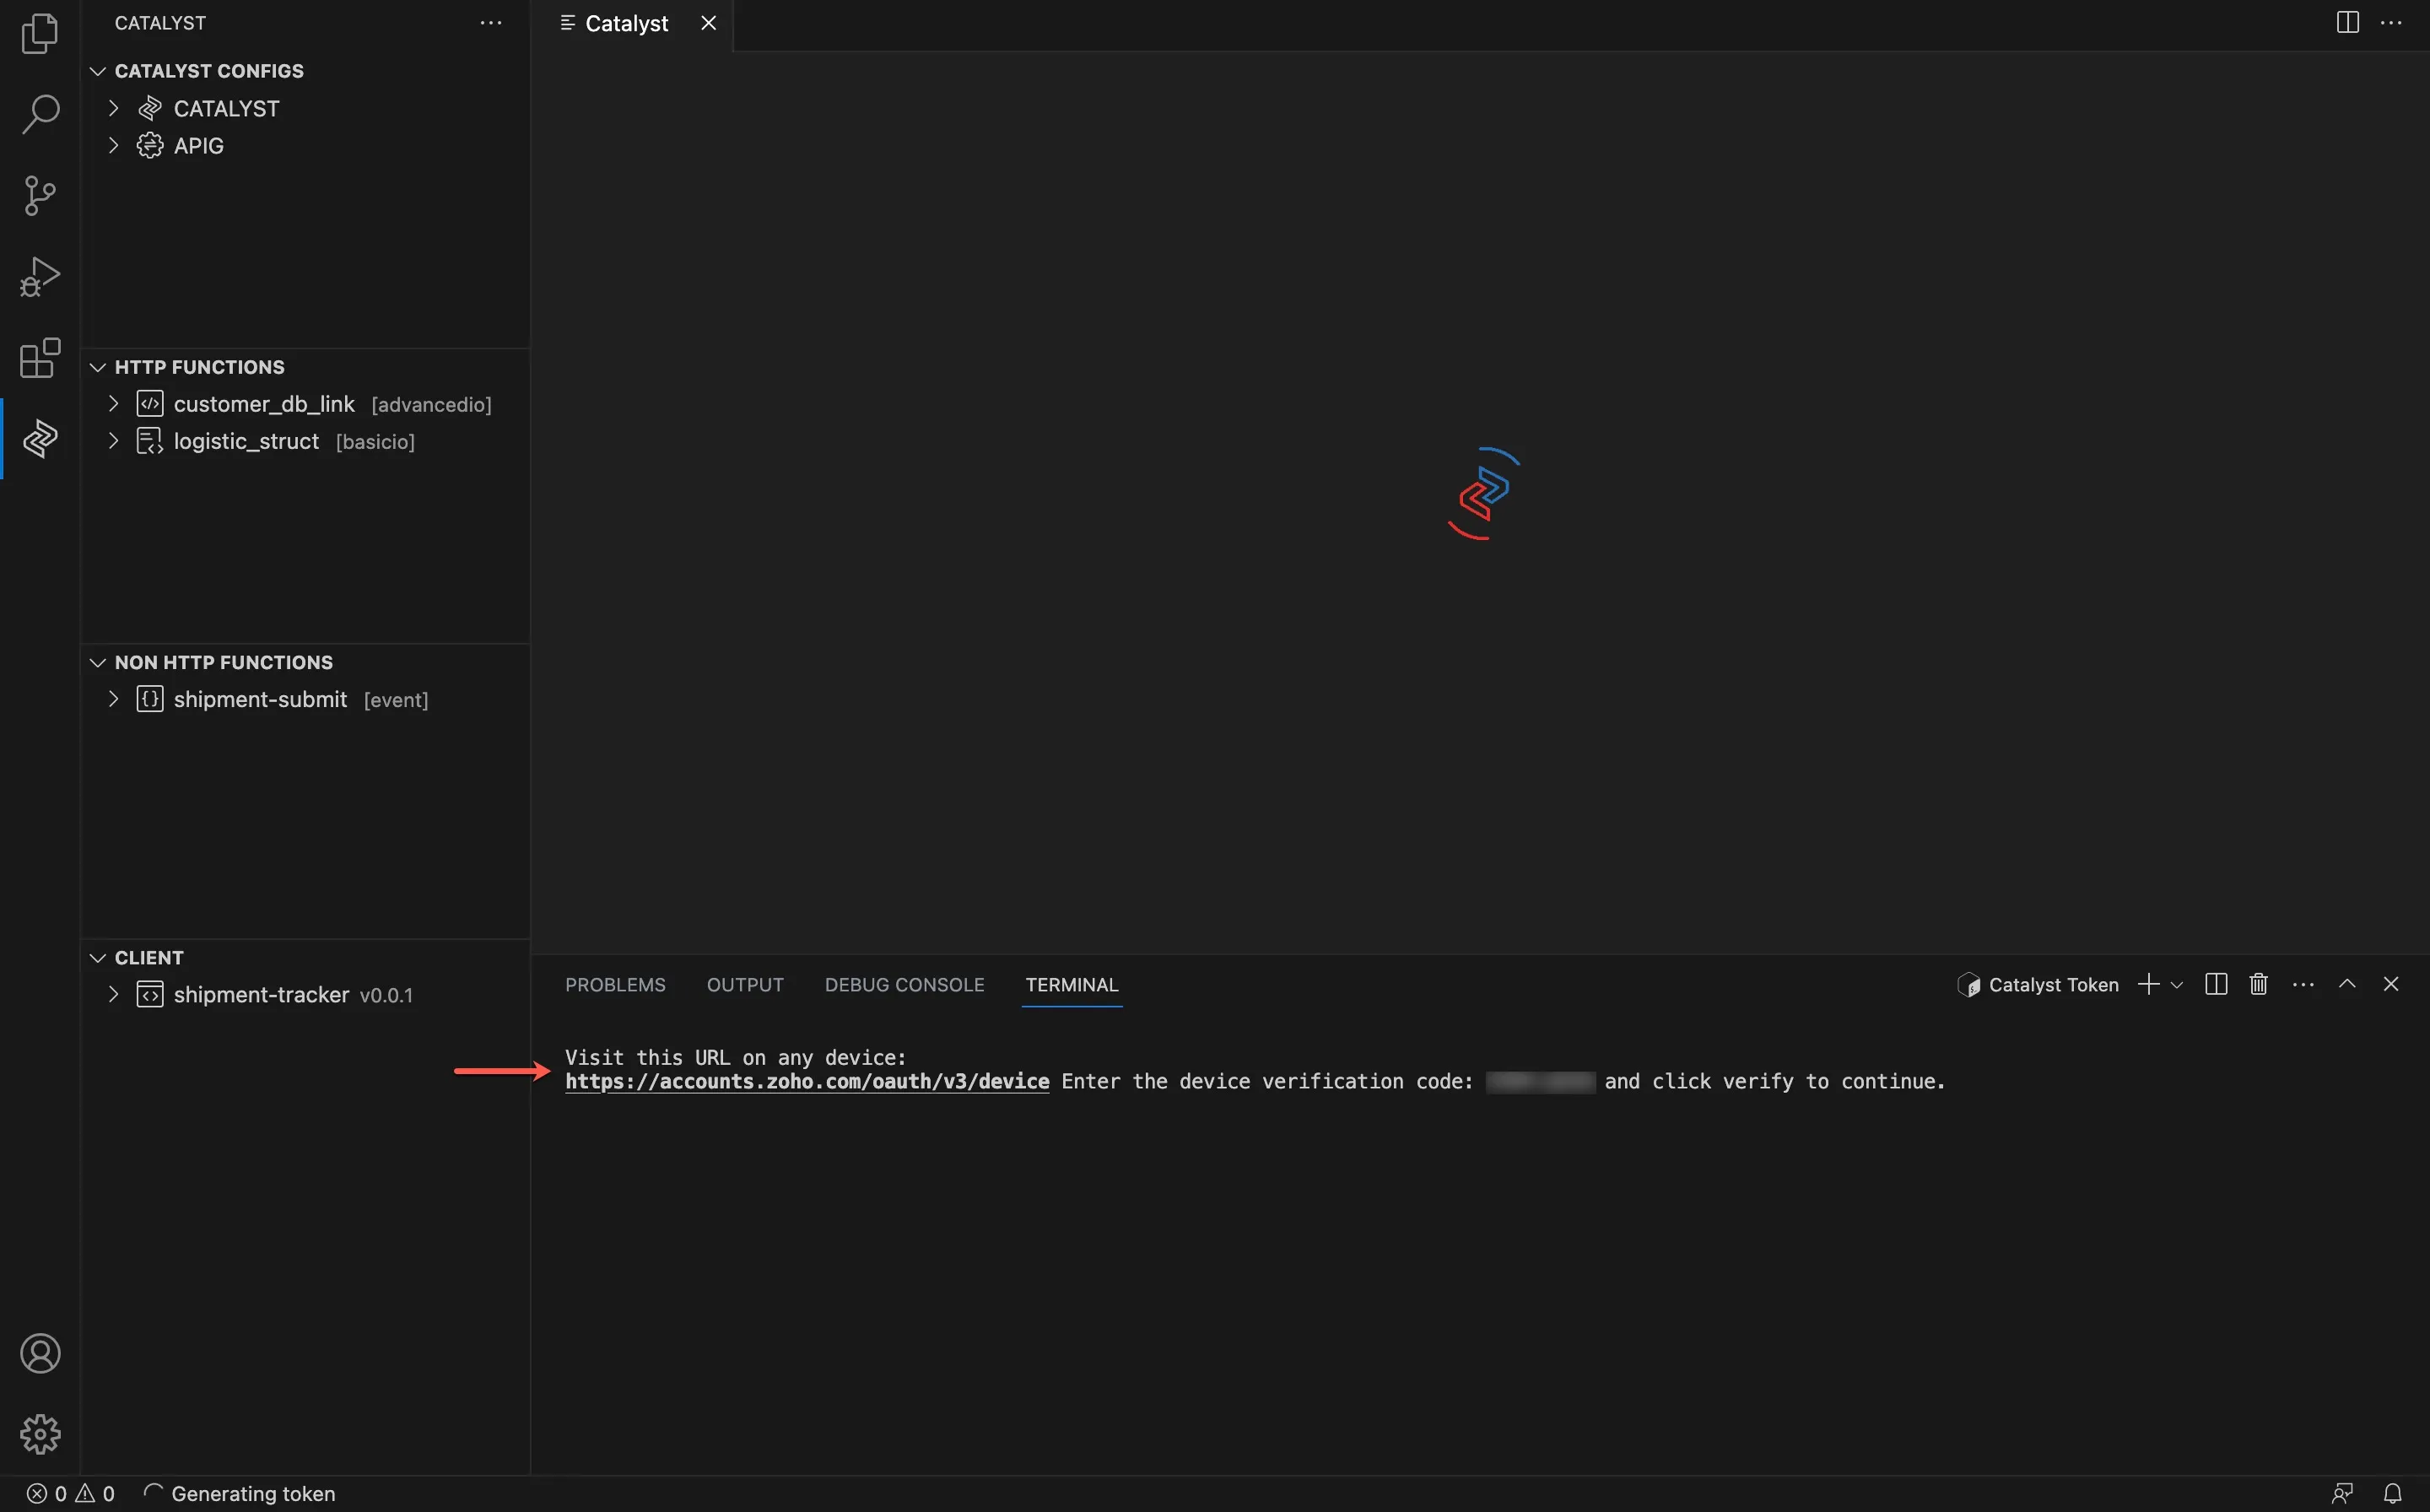
-
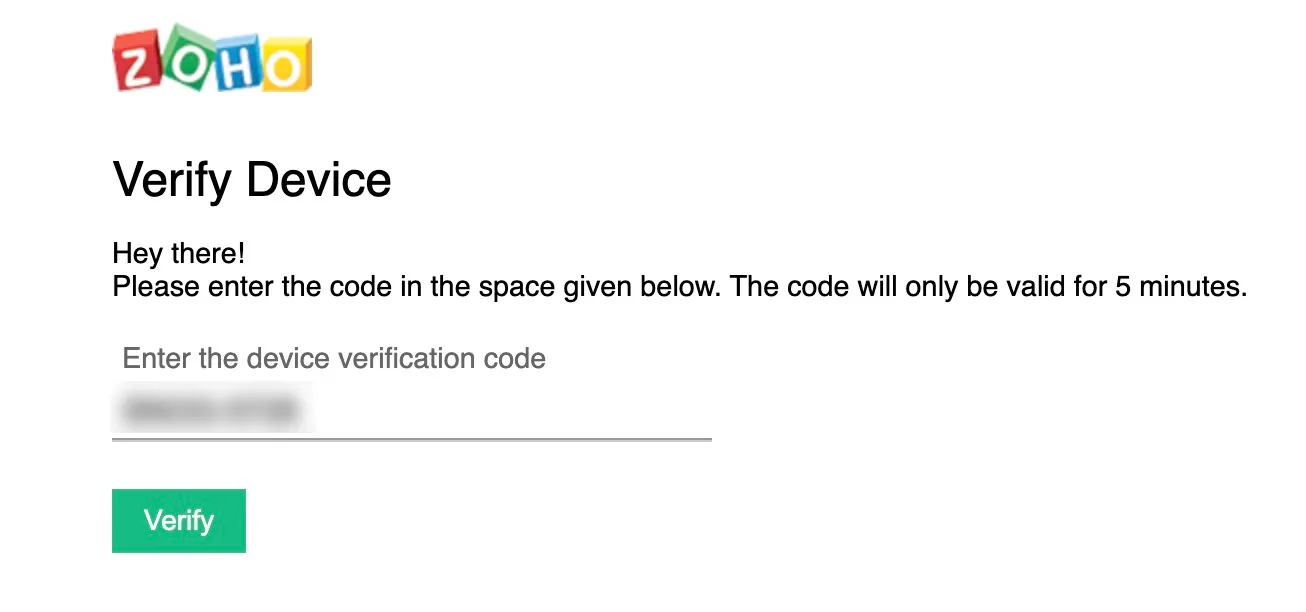
Click the URL, paste the verification code in the space provided, and click Verify.
-
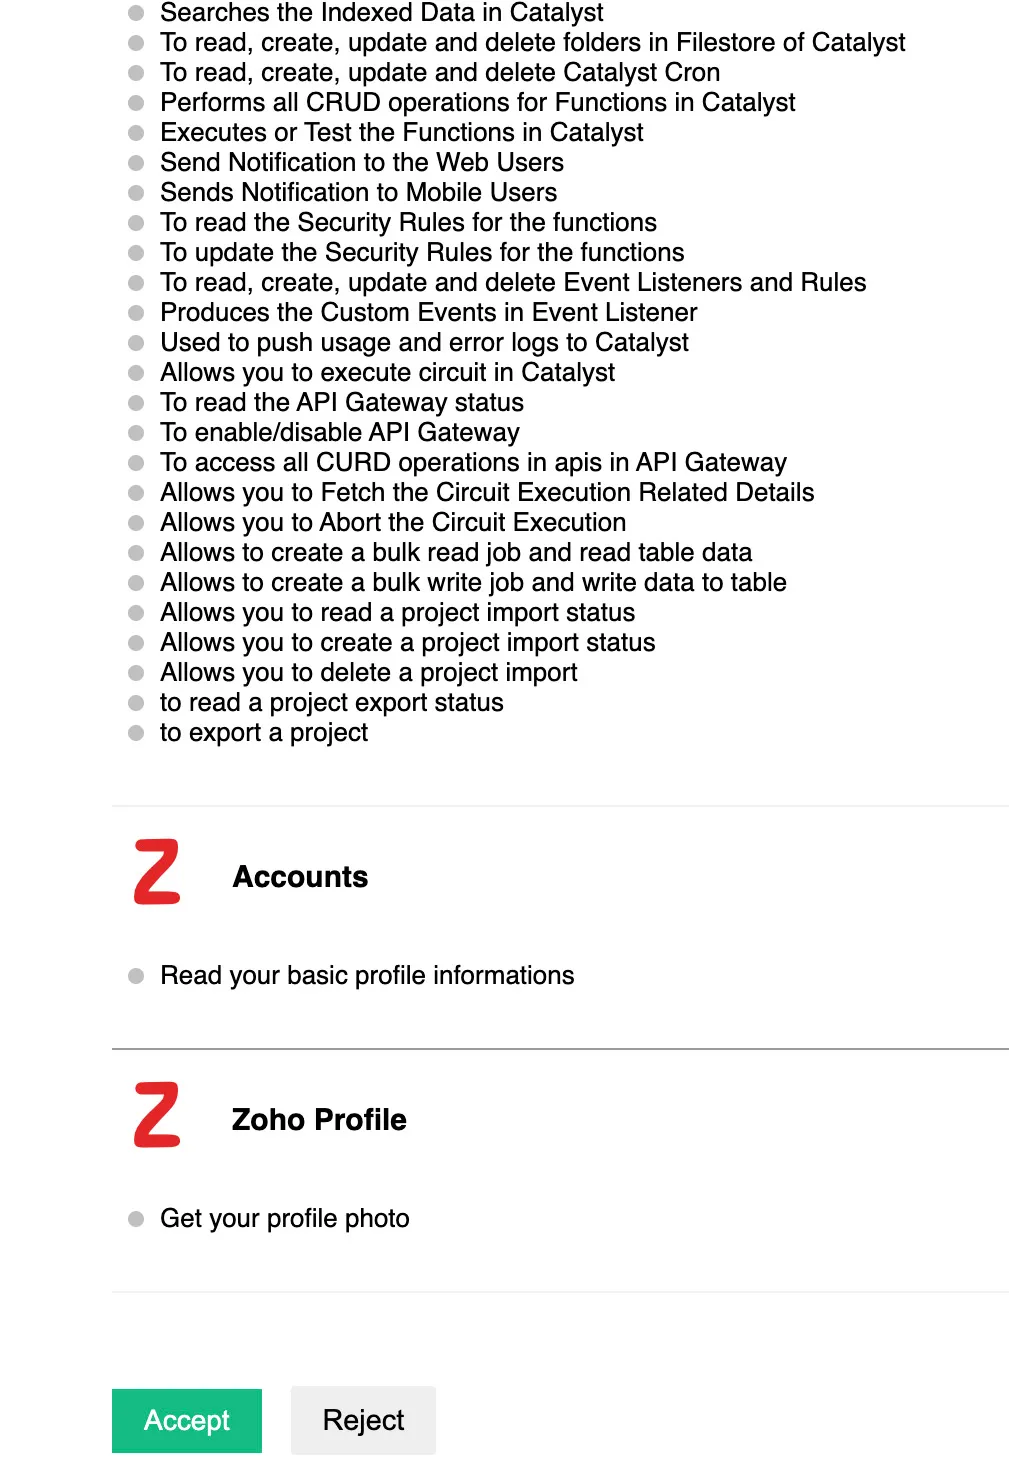
Click Accept after going through the list of scopes and permissions.
Your access has been authenticated.
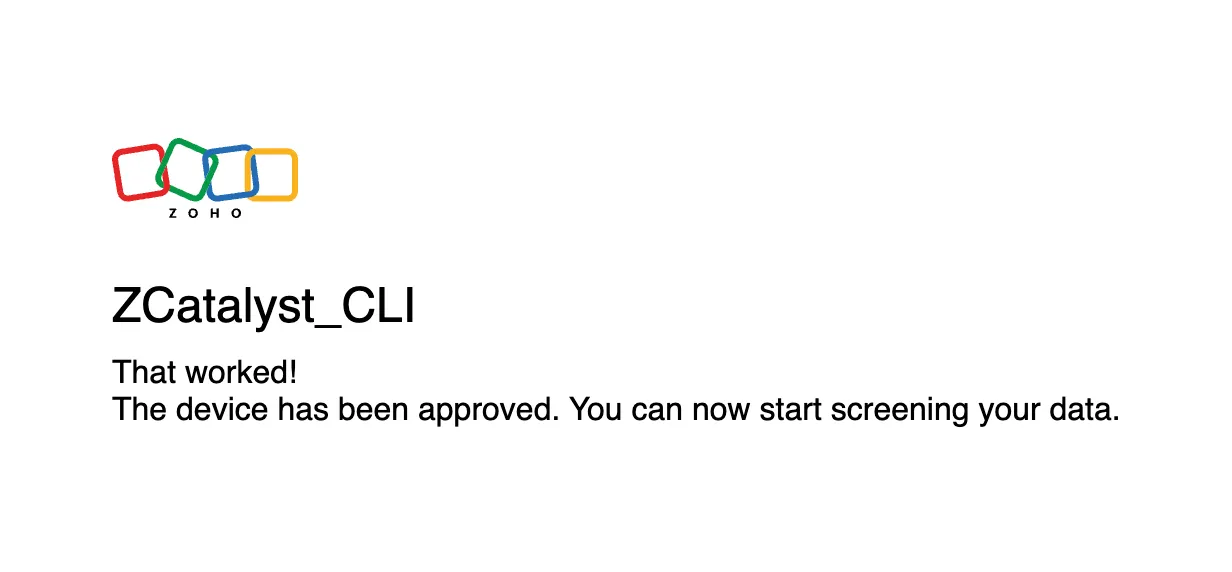
When you return to VS Code IDE, your token will be generated and present in the Manage Token window, and in the token terminal.
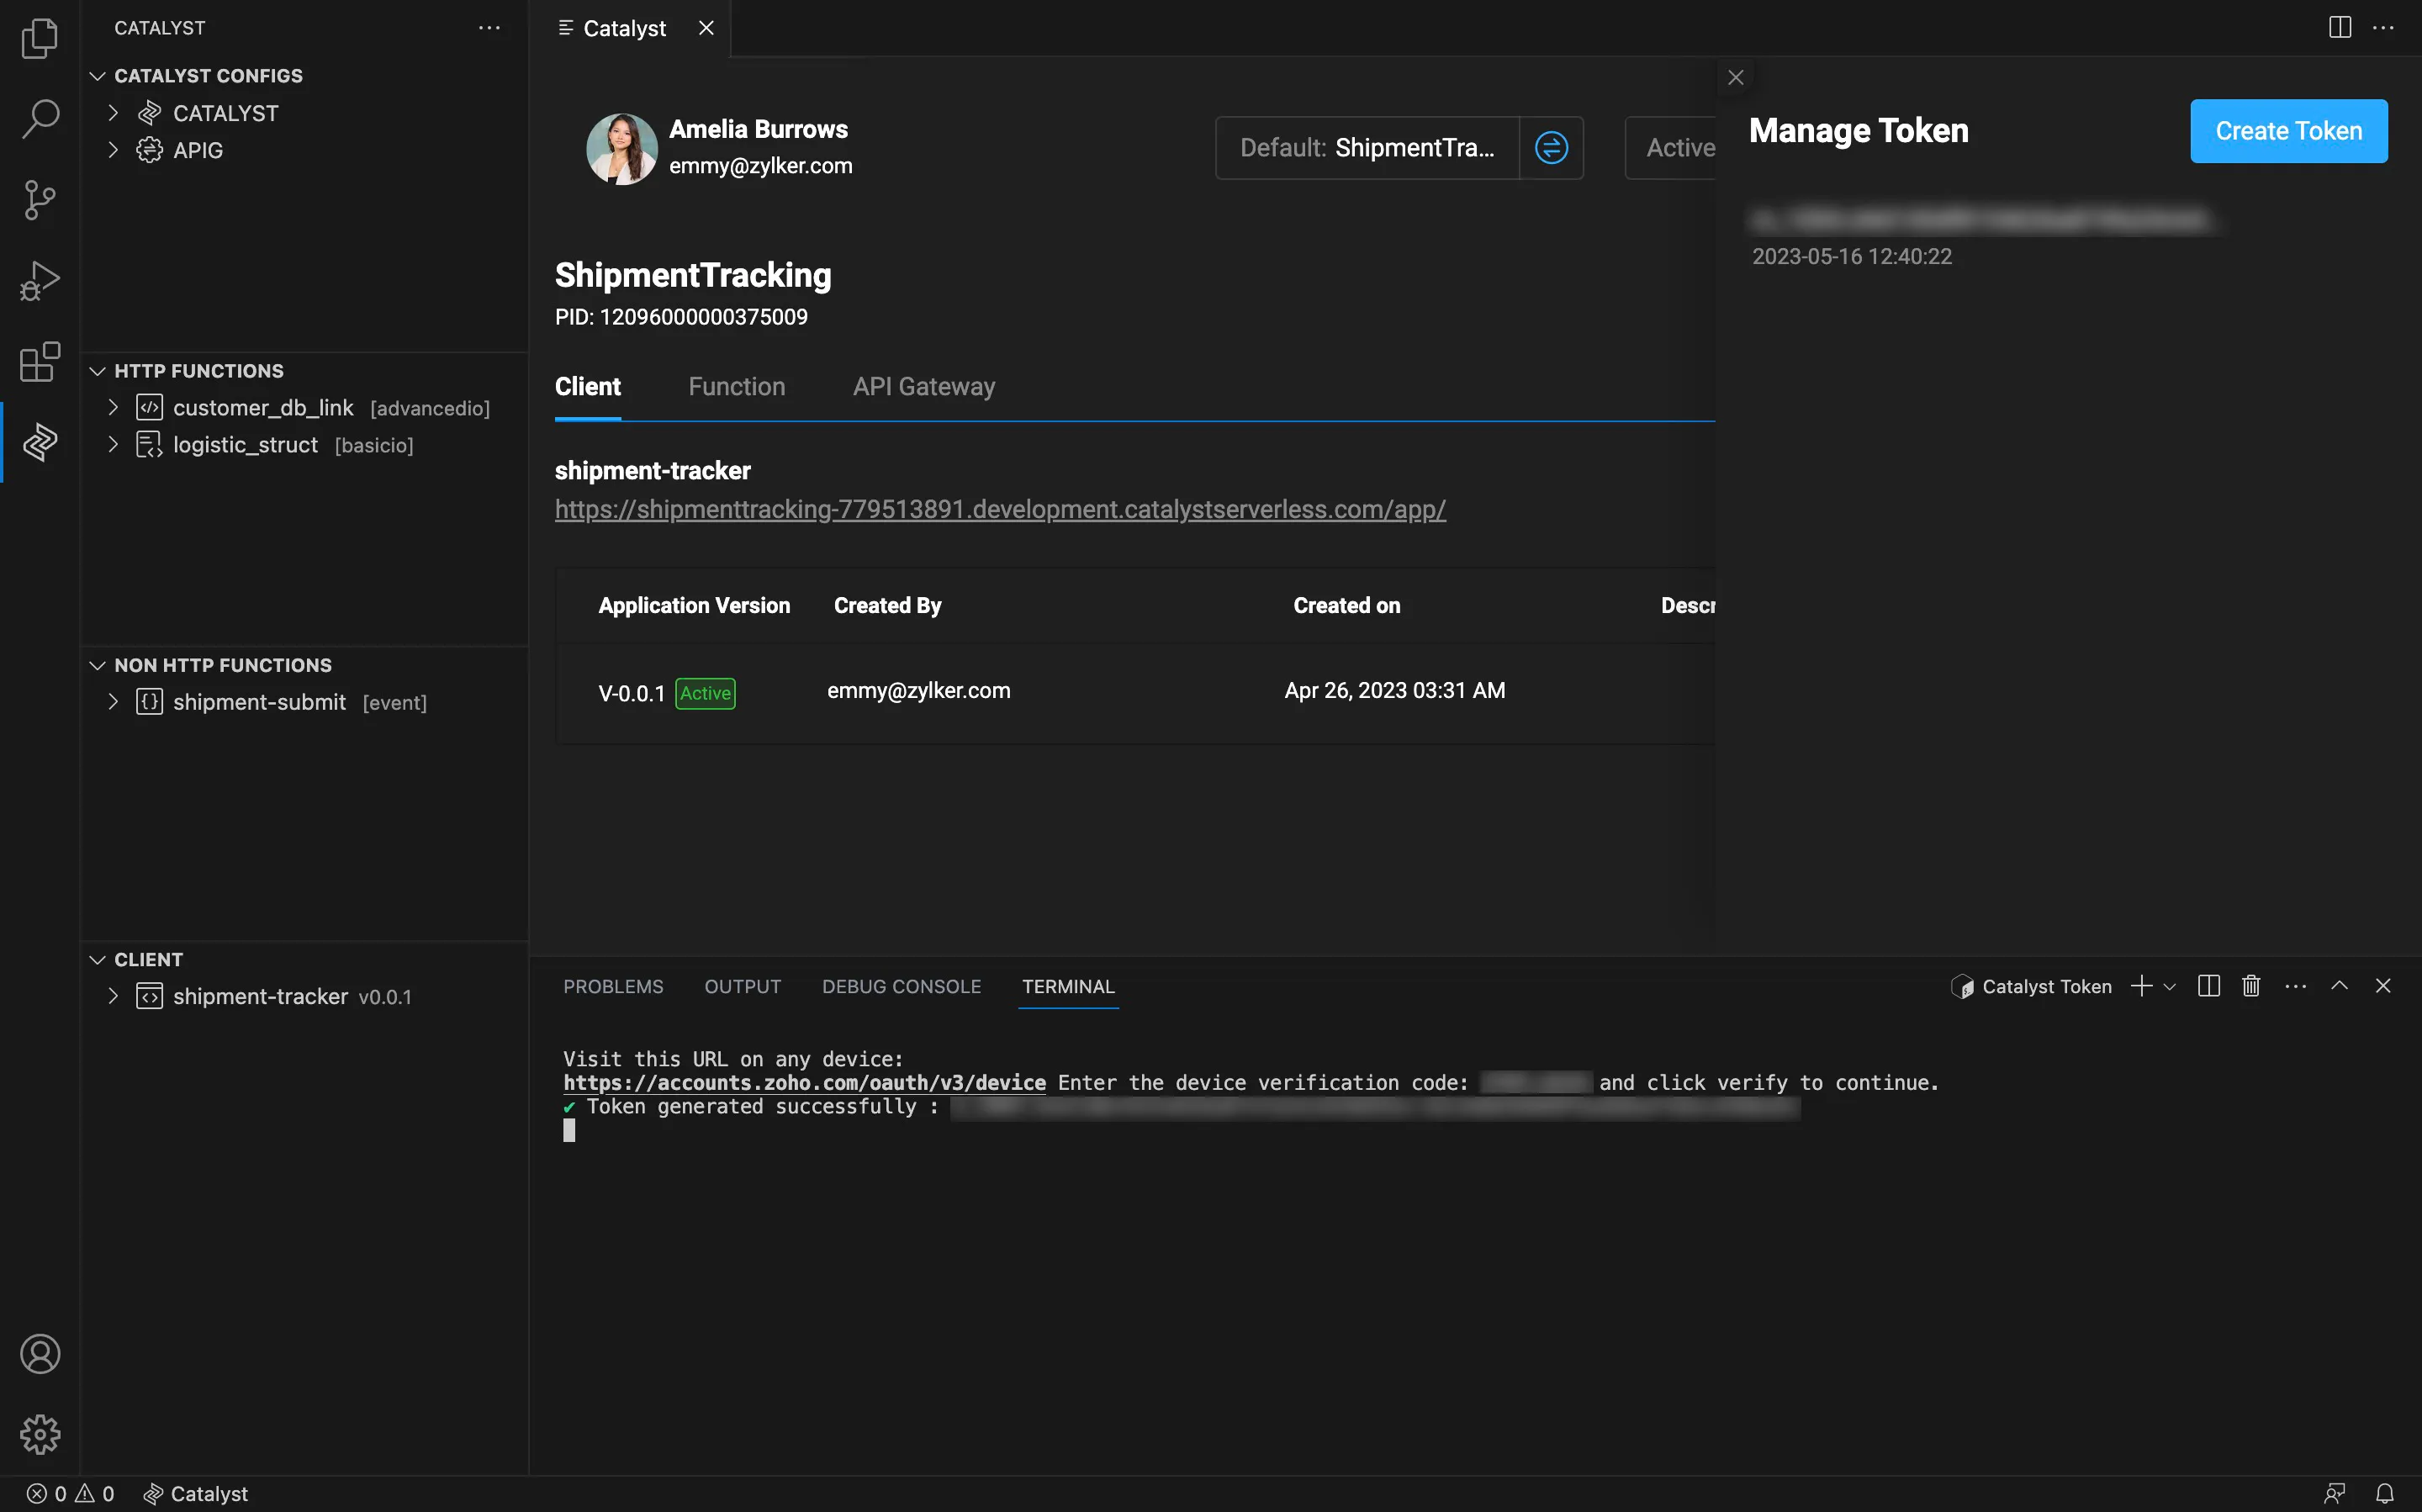
Click the copy icon to copy the token and click the Revoke button to revoke tokens.
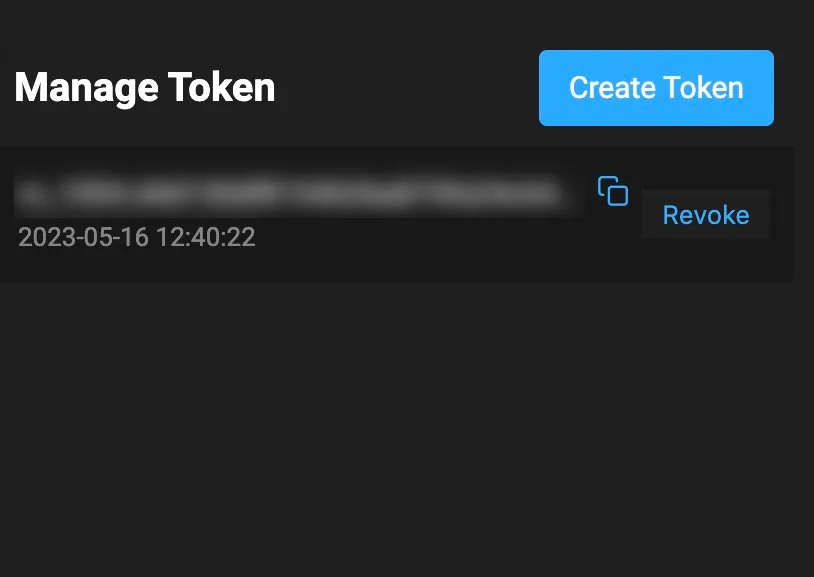
You can use this token to authenticate your access to your Catalyst account.
Log Out from your Catalyst Account
You can log out from your Catalyst account in VS Code extension’s environment in the Project Explorer feature.
To log out of your Catalyst account, perform the following steps:
-
Click the ellipsis-icon present in the Project Explorer.

-
Click Log Out.

You will be successfully logged out. You can log back in to your Catalyst account from the IDE, by following the steps listed in this help page.
Last Updated 2025-10-09 21:41:25 +0530 IST
Yes
No
Send your feedback to us