Create your first ML Pipeline
Let’s look at how to create an ML pipeline using the QuickML platform.
Creating ML Pipeline using pipeline builder interface
-
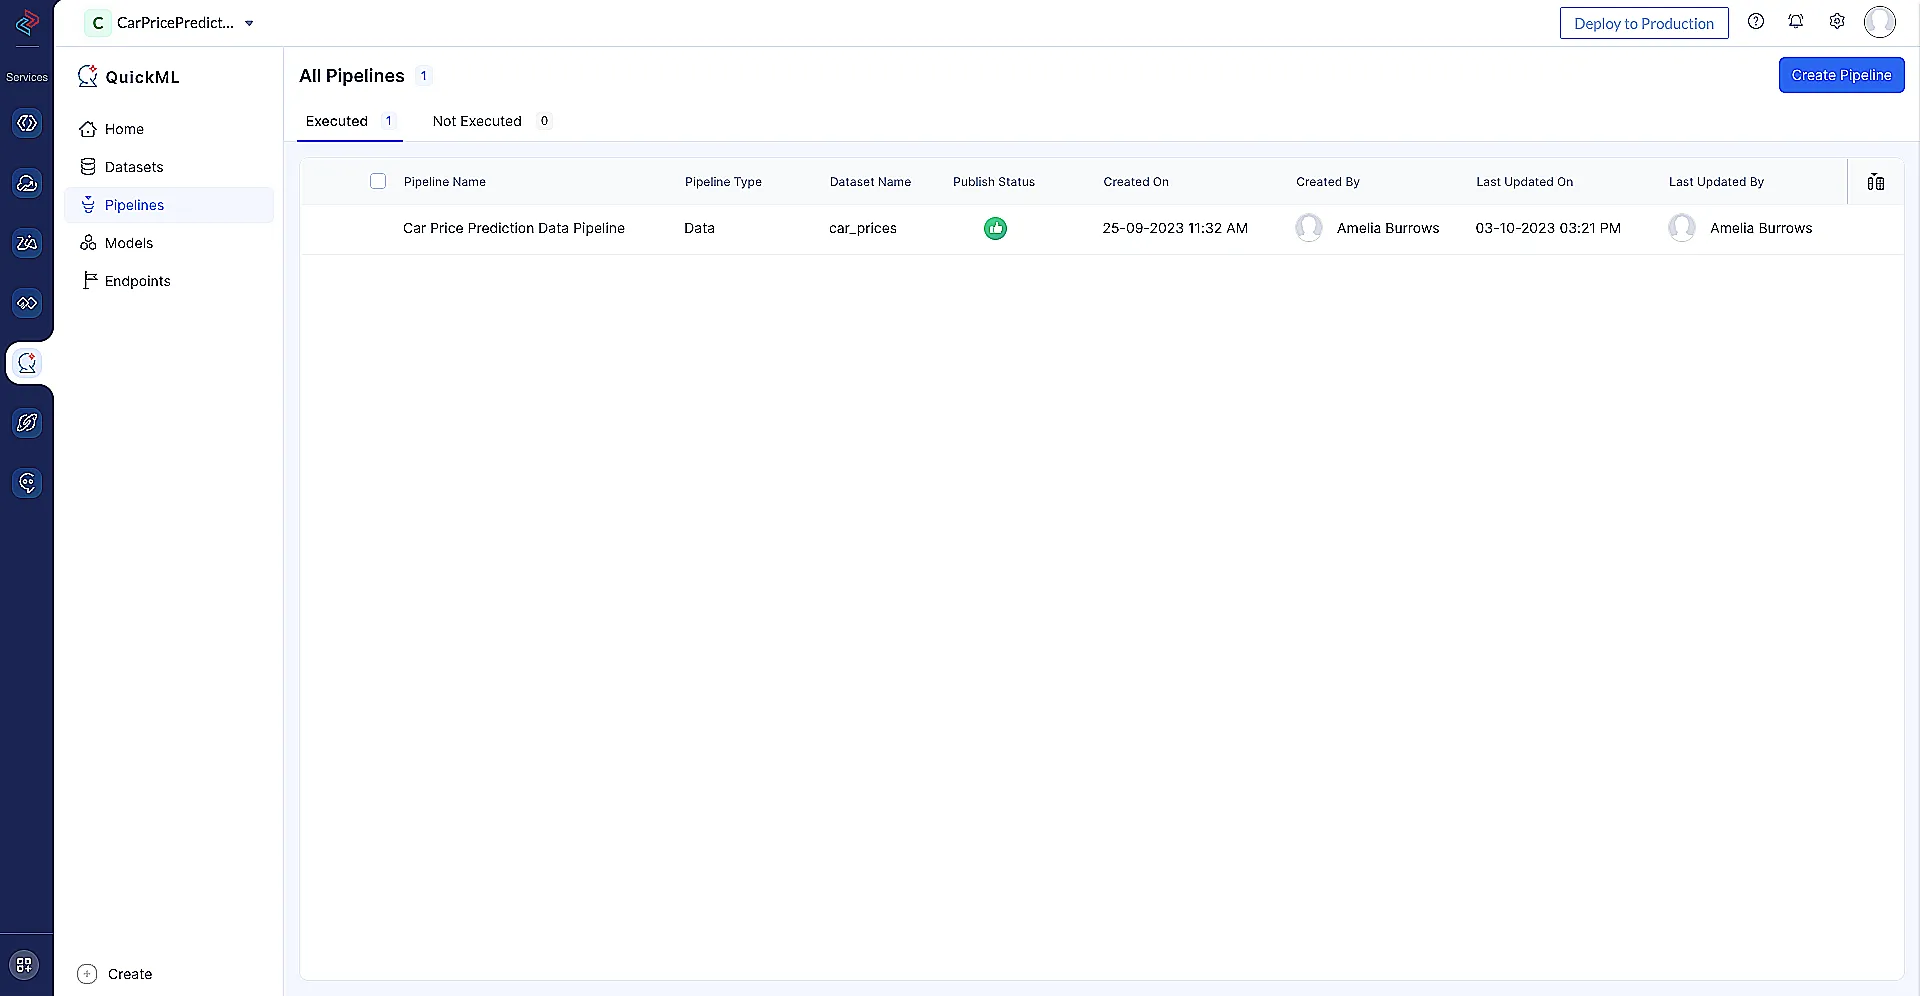
Go to the Pipelines section
-
Click Create-Pipeline to create the ML pipeline in the QuickML platform using the uploaded dataset.
-
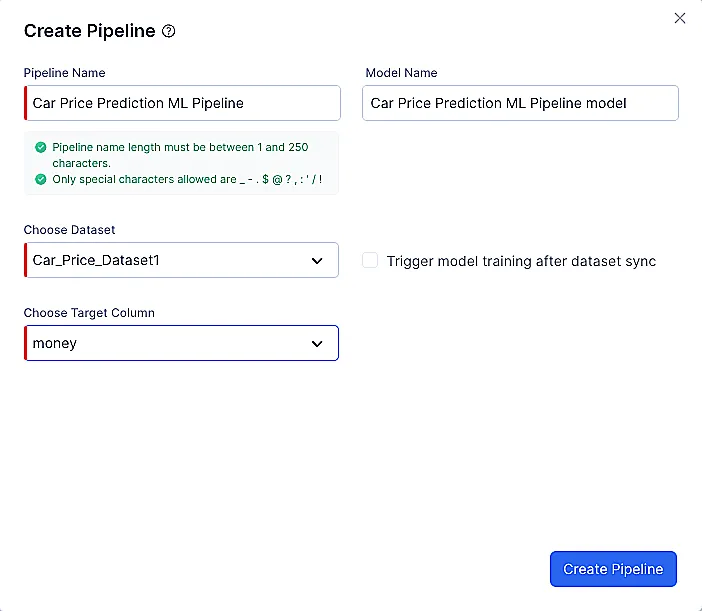
Provide the ML Pipeline name, Model name, and Choose dataset with which you need to prepare the ML Pipeline. In Target column, select the column for which you are going to perform the prediction and click the Create Pipeline button.
Note: When you create an ML pipeline from the same dataset as your data pipeline, the output data (the modified version of the dataset from the data pipeline) will be fetched automatically.
-
Once the pipeline builder interface is opened, you can now drag and drop the required nodes to perform the ML operations. Example: In this picture, you can see the Ordinal Encoder node has been connected to the source. In configuration, select all the columns except year, mileage, and money as these are already in numeric form.
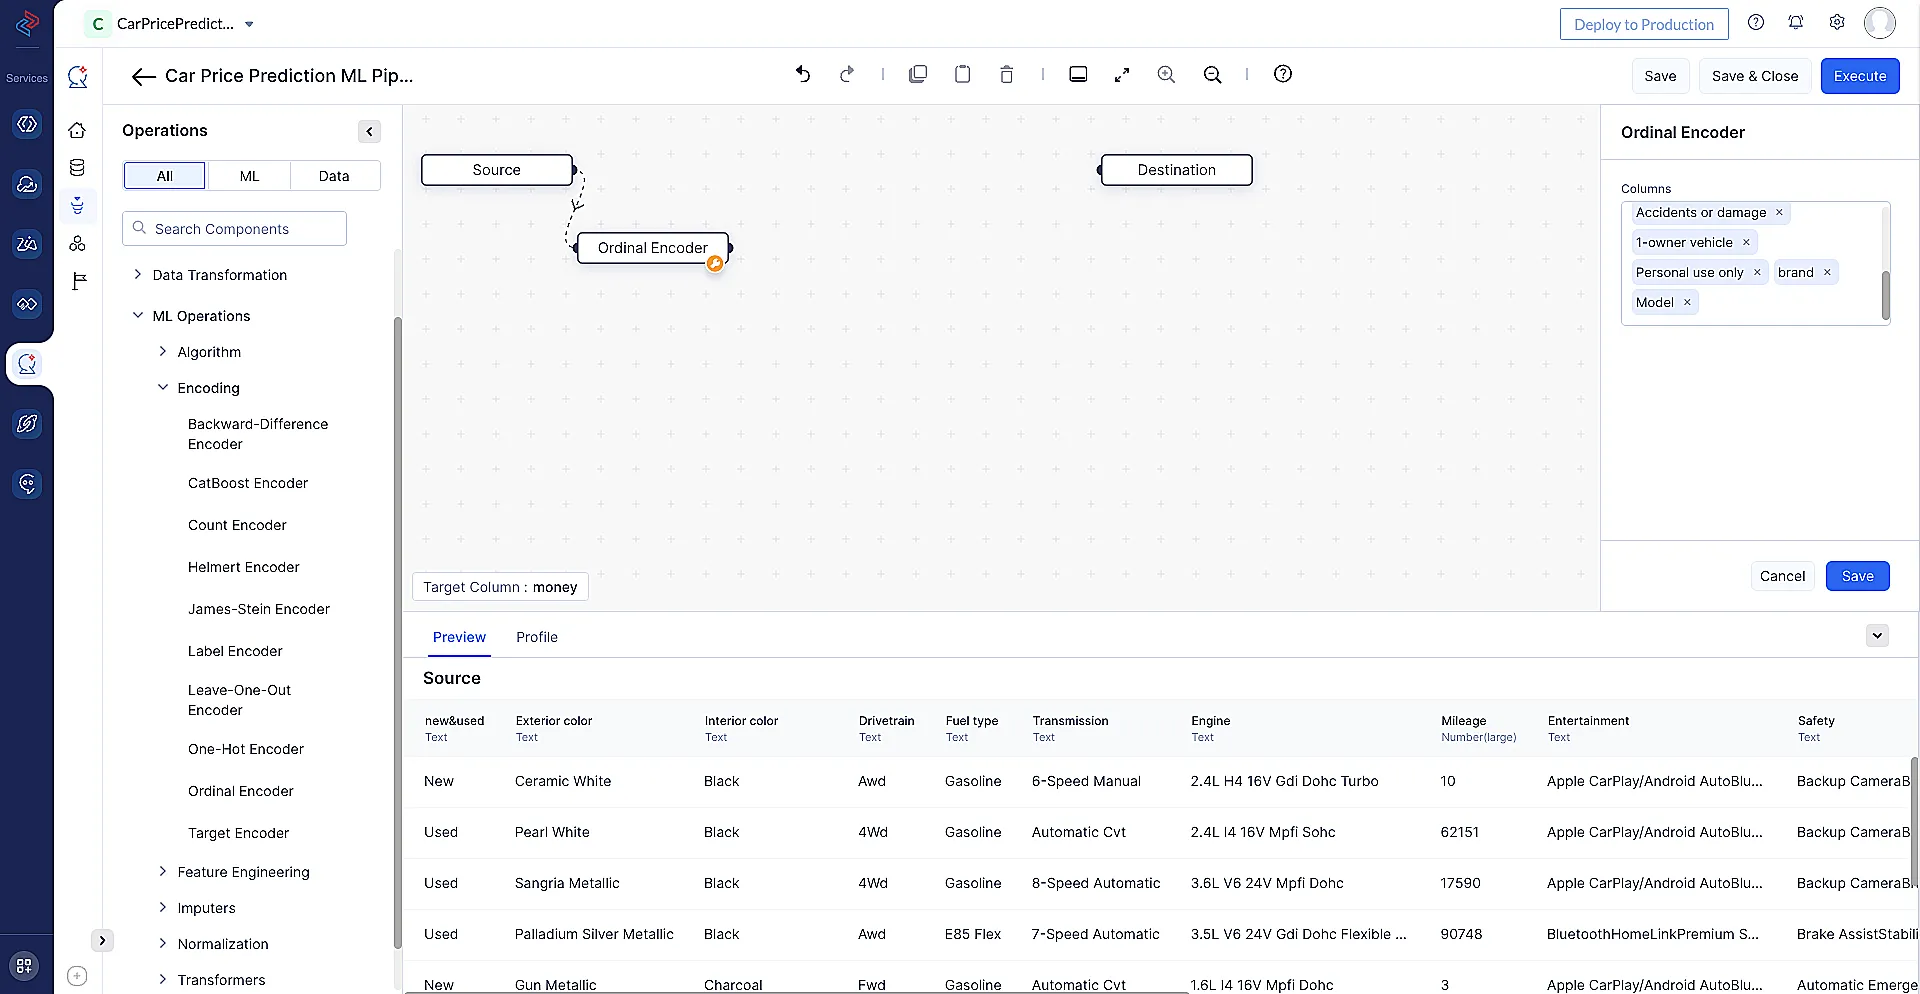
Once the configuration is done, click Save and proceed further. -
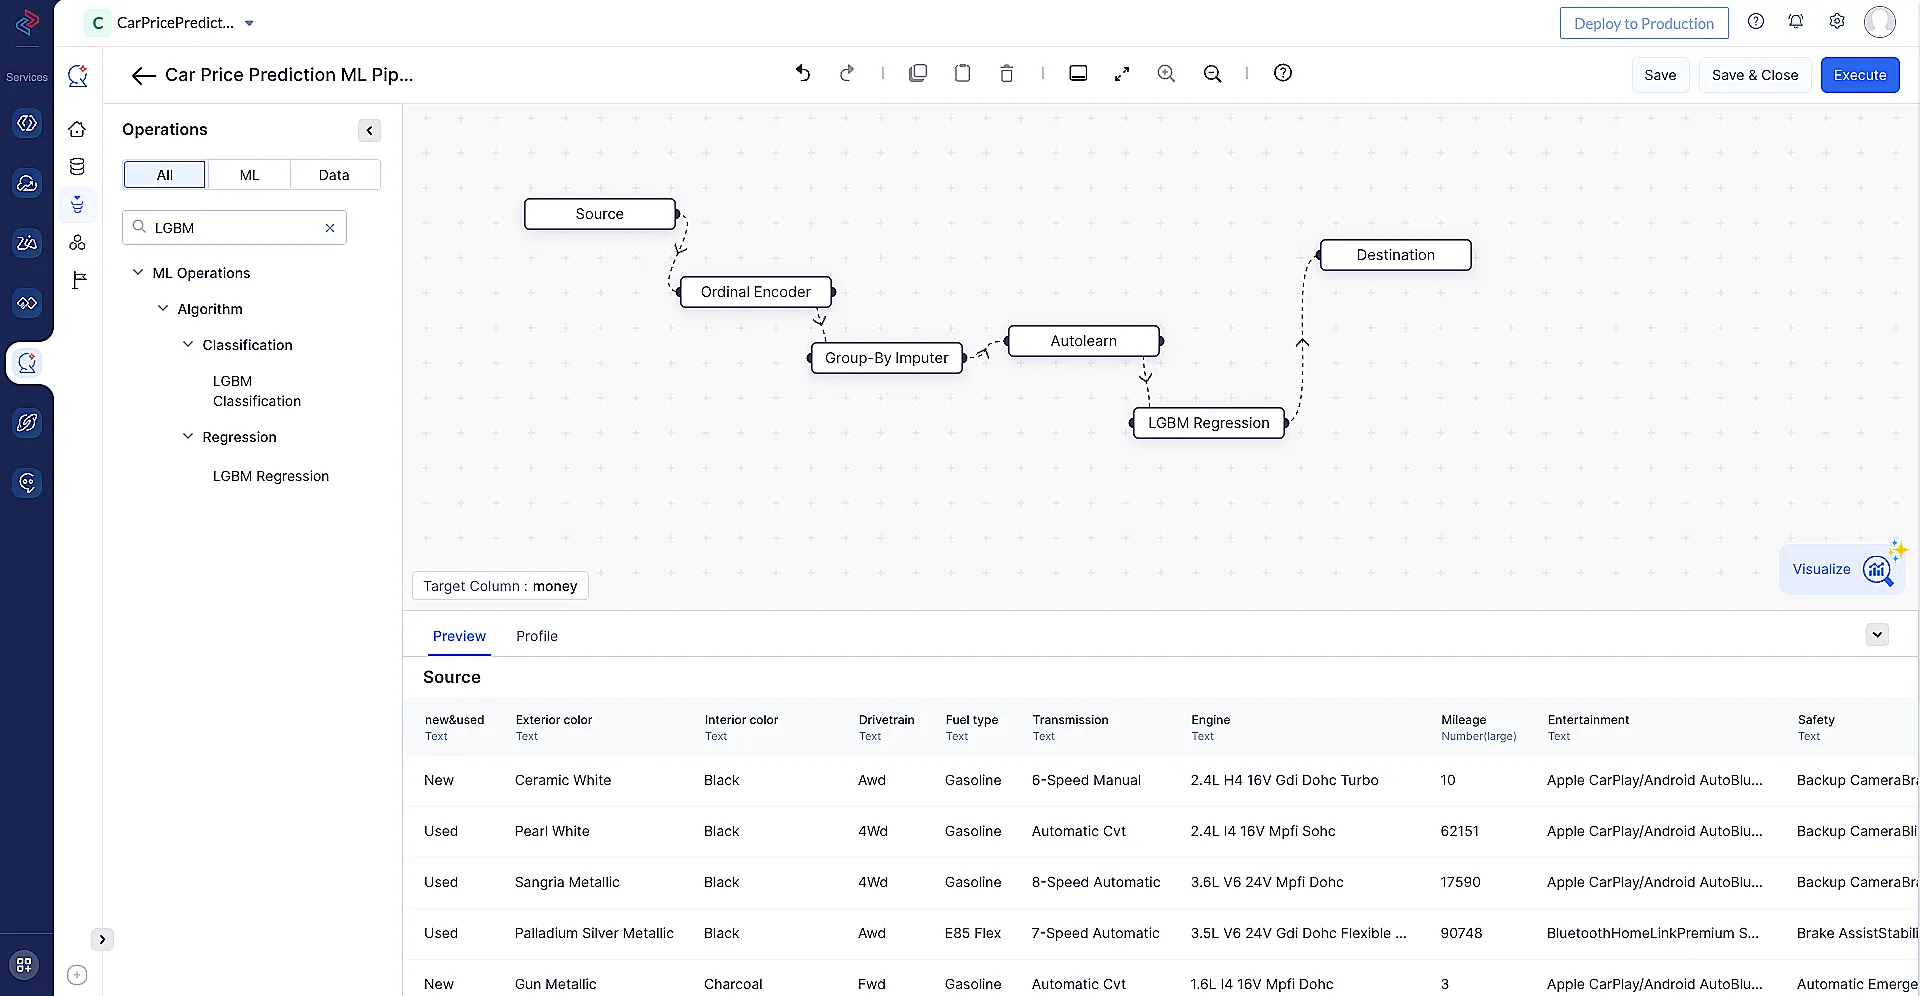
Likewise, you can connect all the required nodes to perform the prediction and complete the pipeline, as shown below.
-
Once the pipeline is completed click Save and, then click Execute.
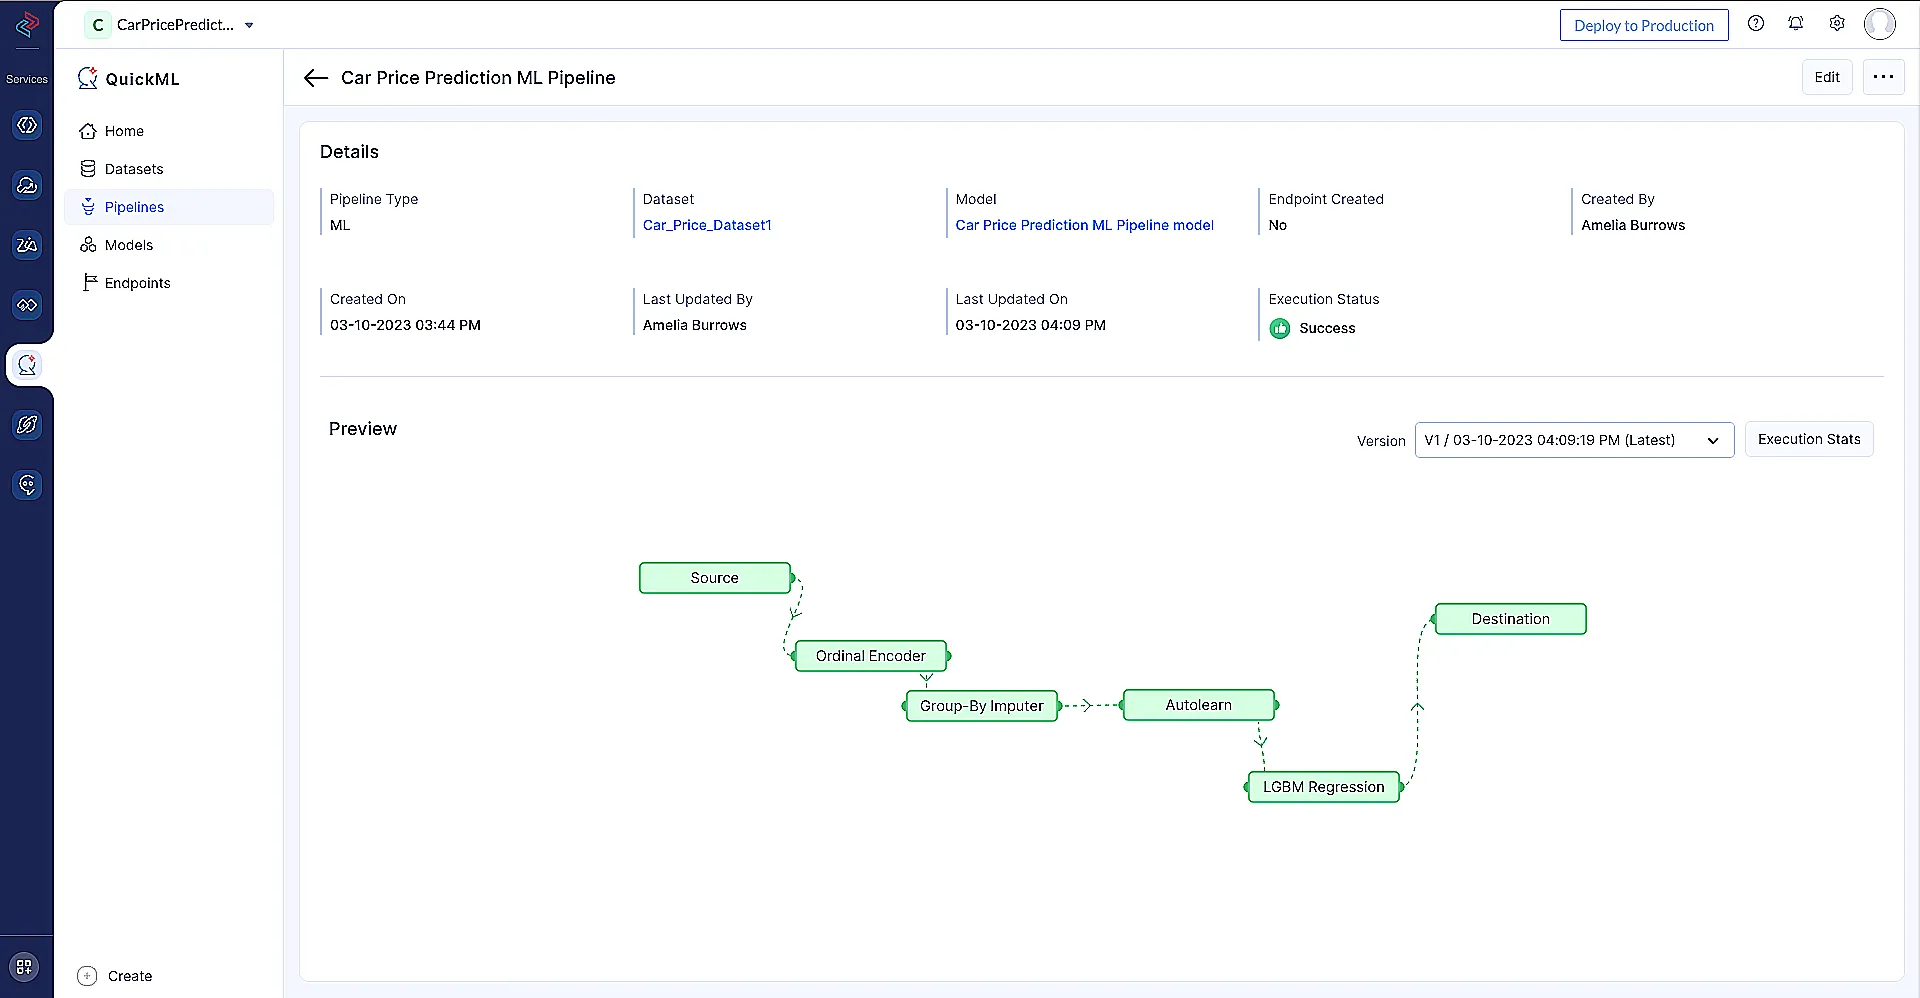
Once the pipeline is successfully executed, you can see the execution status as Success as shown above. -
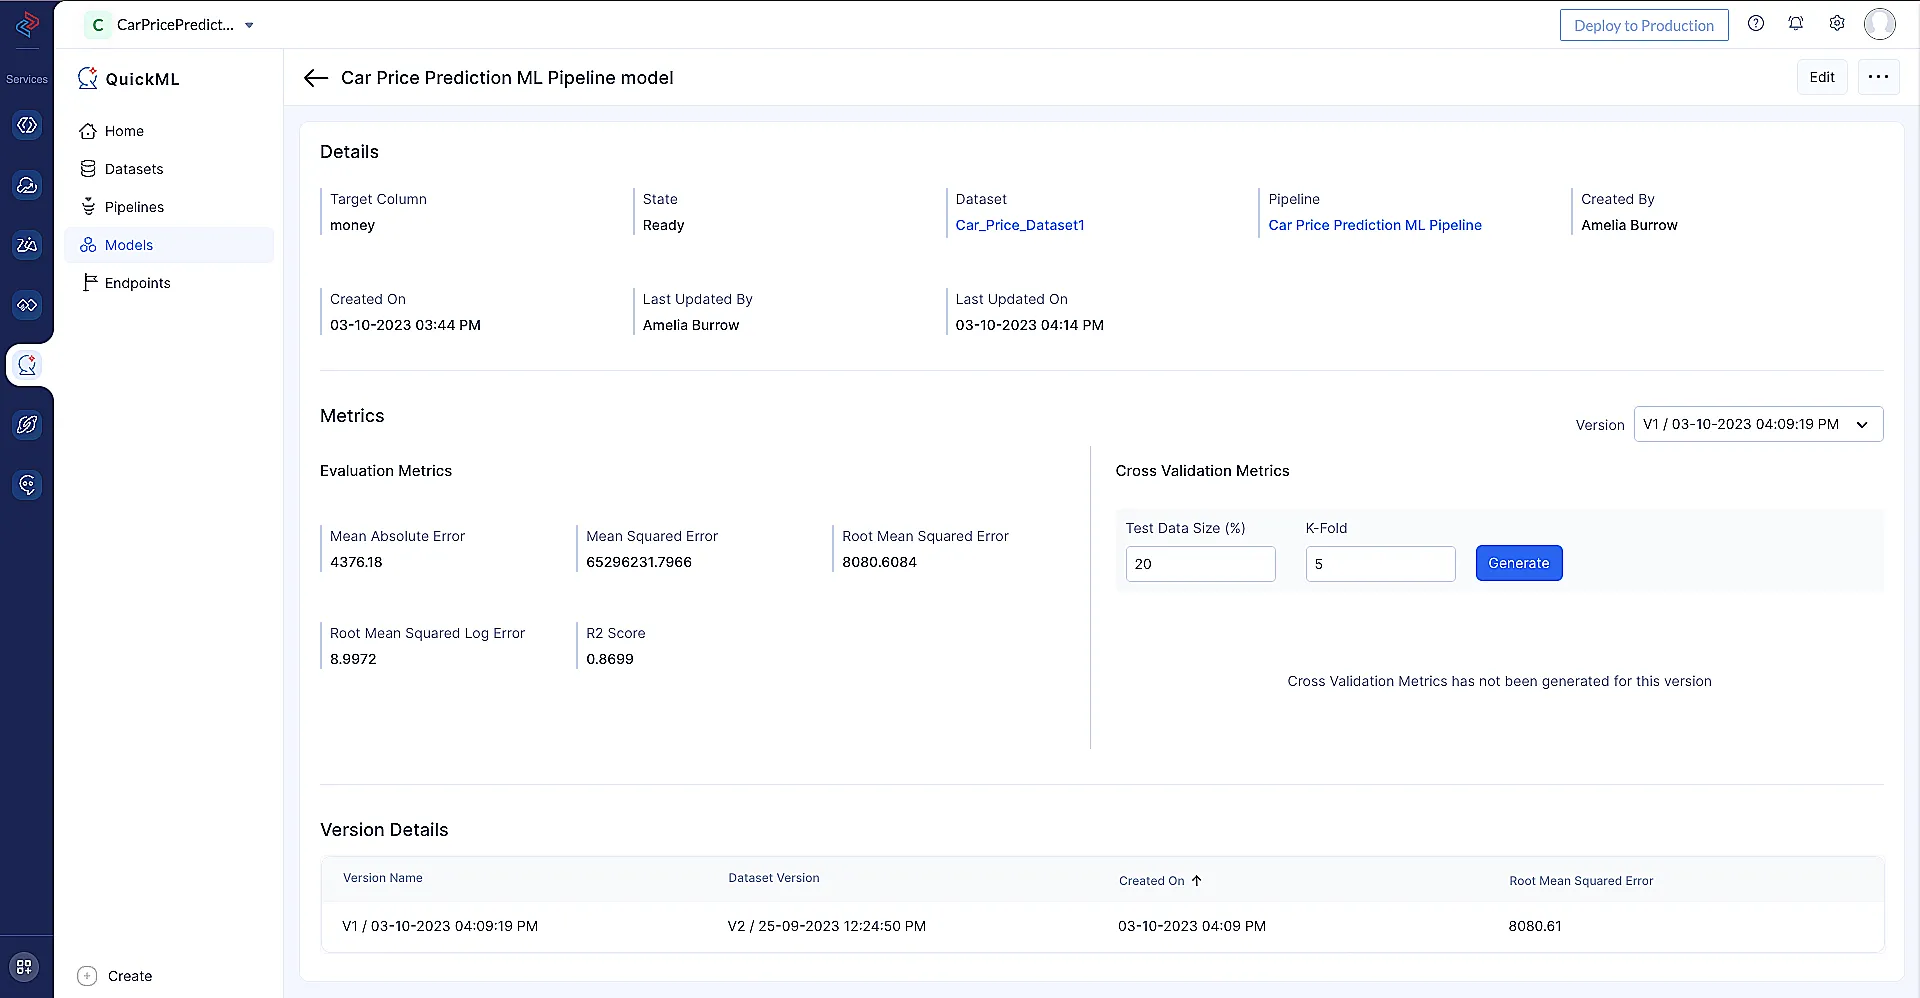
By clicking on the model name (Car Price Prediction ML Pipeline model) you will be redirected to model details page, where you can see the model evaluation metrics data, as shown below.
Last Updated 2025-02-19 15:51:40 +0530 IST
Yes
No
Send your feedback to us