Configure the Advanced I/O Function
Now, we will begin coding the payslip generator application by configuring the function component.
The function’s directory, functions/payslip_generator_function contains:
- The index.js main function file
- The catalyst-config.json configuration file
- Node modules
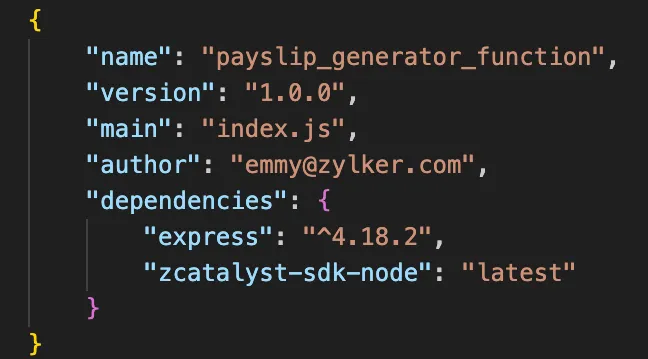
- package.json and package-lock.json dependency files
You will be adding code in the index.js file.
The Advanced I/O function contains the following functionalities:
-
Triggers the PDF & Screenshot SDK to run a headless browser where we render the inputted details onto the template and generate a PDF document.
-
Triggers the Send Mail SDK to attach the PDF document and send it via email from within the application.
Install Express Framework for Node.js
We will be using the Express framework to code the Advanced I/O function. To import the Express package in your function’s code, you must install the Express dependency in your system.
To install Express.js in your local machine, navigate to the function’s home directory (functions/payslip_generator_function) in your terminal and execute the following command:
This will install the Express module and save the dependencies.

This information will also be updated in the package.json file.
Now, let’s begin coding the Advanced I/O function.
Copy the code given below and paste it in the index.js in the functions/payslip_generator_function directory of your project, and save the file. You can use any IDE of your choice to work with the application’s files.
-
Please go through the code in this section to make sure you fully understand it.
-
Ensure you have provided your Template ID in line 33, and the configured email ID in line 68.
'use strict'
const express = require('express')
const catalyst = require('zcatalyst-sdk-node')
const fs = require('fs')
const app = express()
const os = require('os')
const path = require('path')
app.use(express.json())
app.post('/generatepayslip', async (req, res) => {
  try {
    const catalystApp = catalyst.initialize(req)
    const smartbrowz = catalystApp.smartbrowz()
    if (!req.body) {
      throw new Error('Request body is empty')
    }
    const {
      employeeName,
      employeeEmail,
      employeeId,
      designation,
      basicSalary,
      allowances,
      deductions,
      paymentMethod
    } = req.body
    const date = new Date()
    const currentMonth = date.toLocaleString('default', { month: 'long' })
    const currentYear = date.getFullYear()
    const filepath = path.join(os.tmpdir(), '/payslip.pdf')
    // Generate output from template
    await smartbrowz
      .generateFromTemplate('xxxxxxxx12345', // Provide your Template ID
        {
        // Data to be passed to the template retrieved from the client
          template_data: {
            company: 'Zylker Technologies',
            employeeName,
            employeeId,
            designation,
            basicSalary,
            allowances,
            deductions,
            totalEarnings:
            parseFloat(basicSalary) + parseFloat(allowances),
            netSalary:
            parseFloat(basicSalary) +
            parseFloat(allowances) -
            parseFloat(deductions),
            paymentMethod,
            month: currentMonth,
            year: currentYear
          }
        })
      .then((inputStream) => {
        return new Promise((resolve, reject) => {
          inputStream
            .pipe(fs.createWriteStream(filepath))
            .on('close', resolve)
            .on('error', reject)
        })
      }).catch((err) => {
        throw err
      })
    await catalystApp
      .email()
      .sendMail({
        from_email: 'emmy@zylker.com', // Provide your email ID configured in the Console
        to_email: [employeeEmail],
        html_mode: true,
        subject: `Payslip for the month of ${currentMonth} ${currentYear}`,
        content: `Hello ${employeeName}, Your payslip for ${currentMonth} ${currentYear} has been issued. You can find your payslip attached with this email. Cheers,Zylker`,
        attachments: [fs.createReadStream(filepath)] // create a file stream for the file attachment
      })
      .then((row) => {
        res.status(200).send('Payslip generated and sent to Employee email')
      })
      .catch((err) => {
        throw err
      })
  } catch (error) {
    console.log(error)
    res.status(500).send(error)
  }
})
module.exports = app
The function directory is now configured. We can now proceed to configuring the client directory.
Last Updated 2025-11-19 20:37:41 +0530 IST