Create a text analytics model
Create a text analytics pipeline
Let’s create a text analytics pipeline using the uploaded dataset.
Click Create in the bottom left corner of the QuickML page and select Pipeline from the options shown.
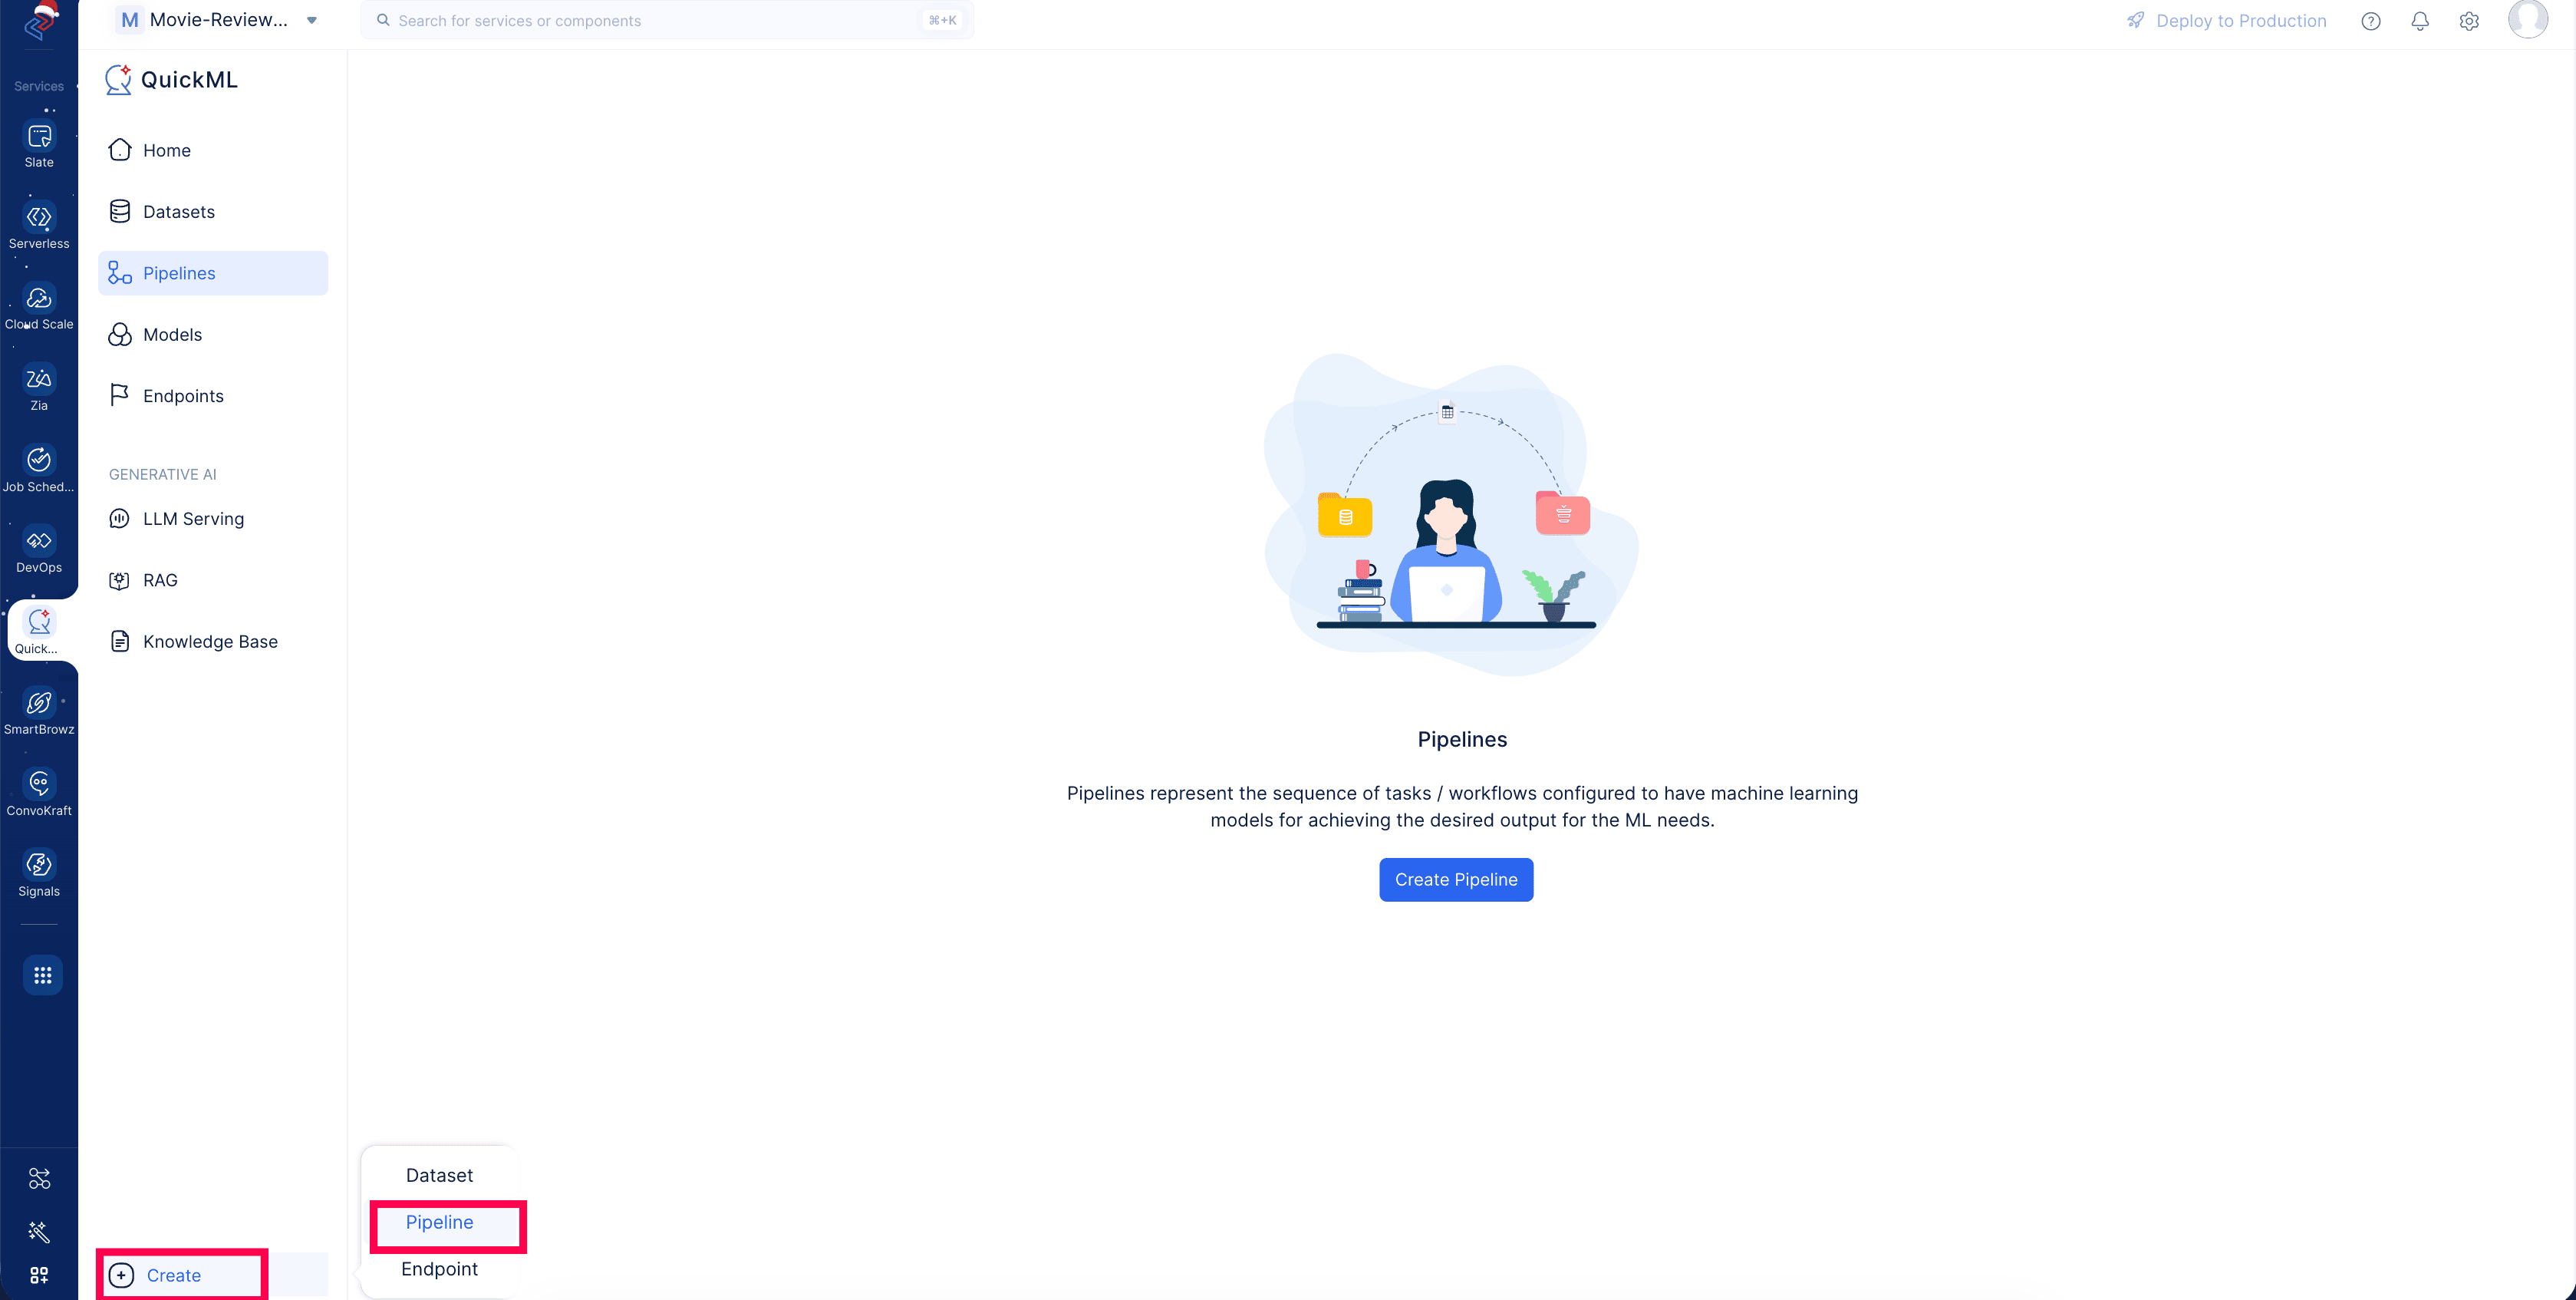
In the Create Pipeline window, choose Text Analytics as the pipeline type.
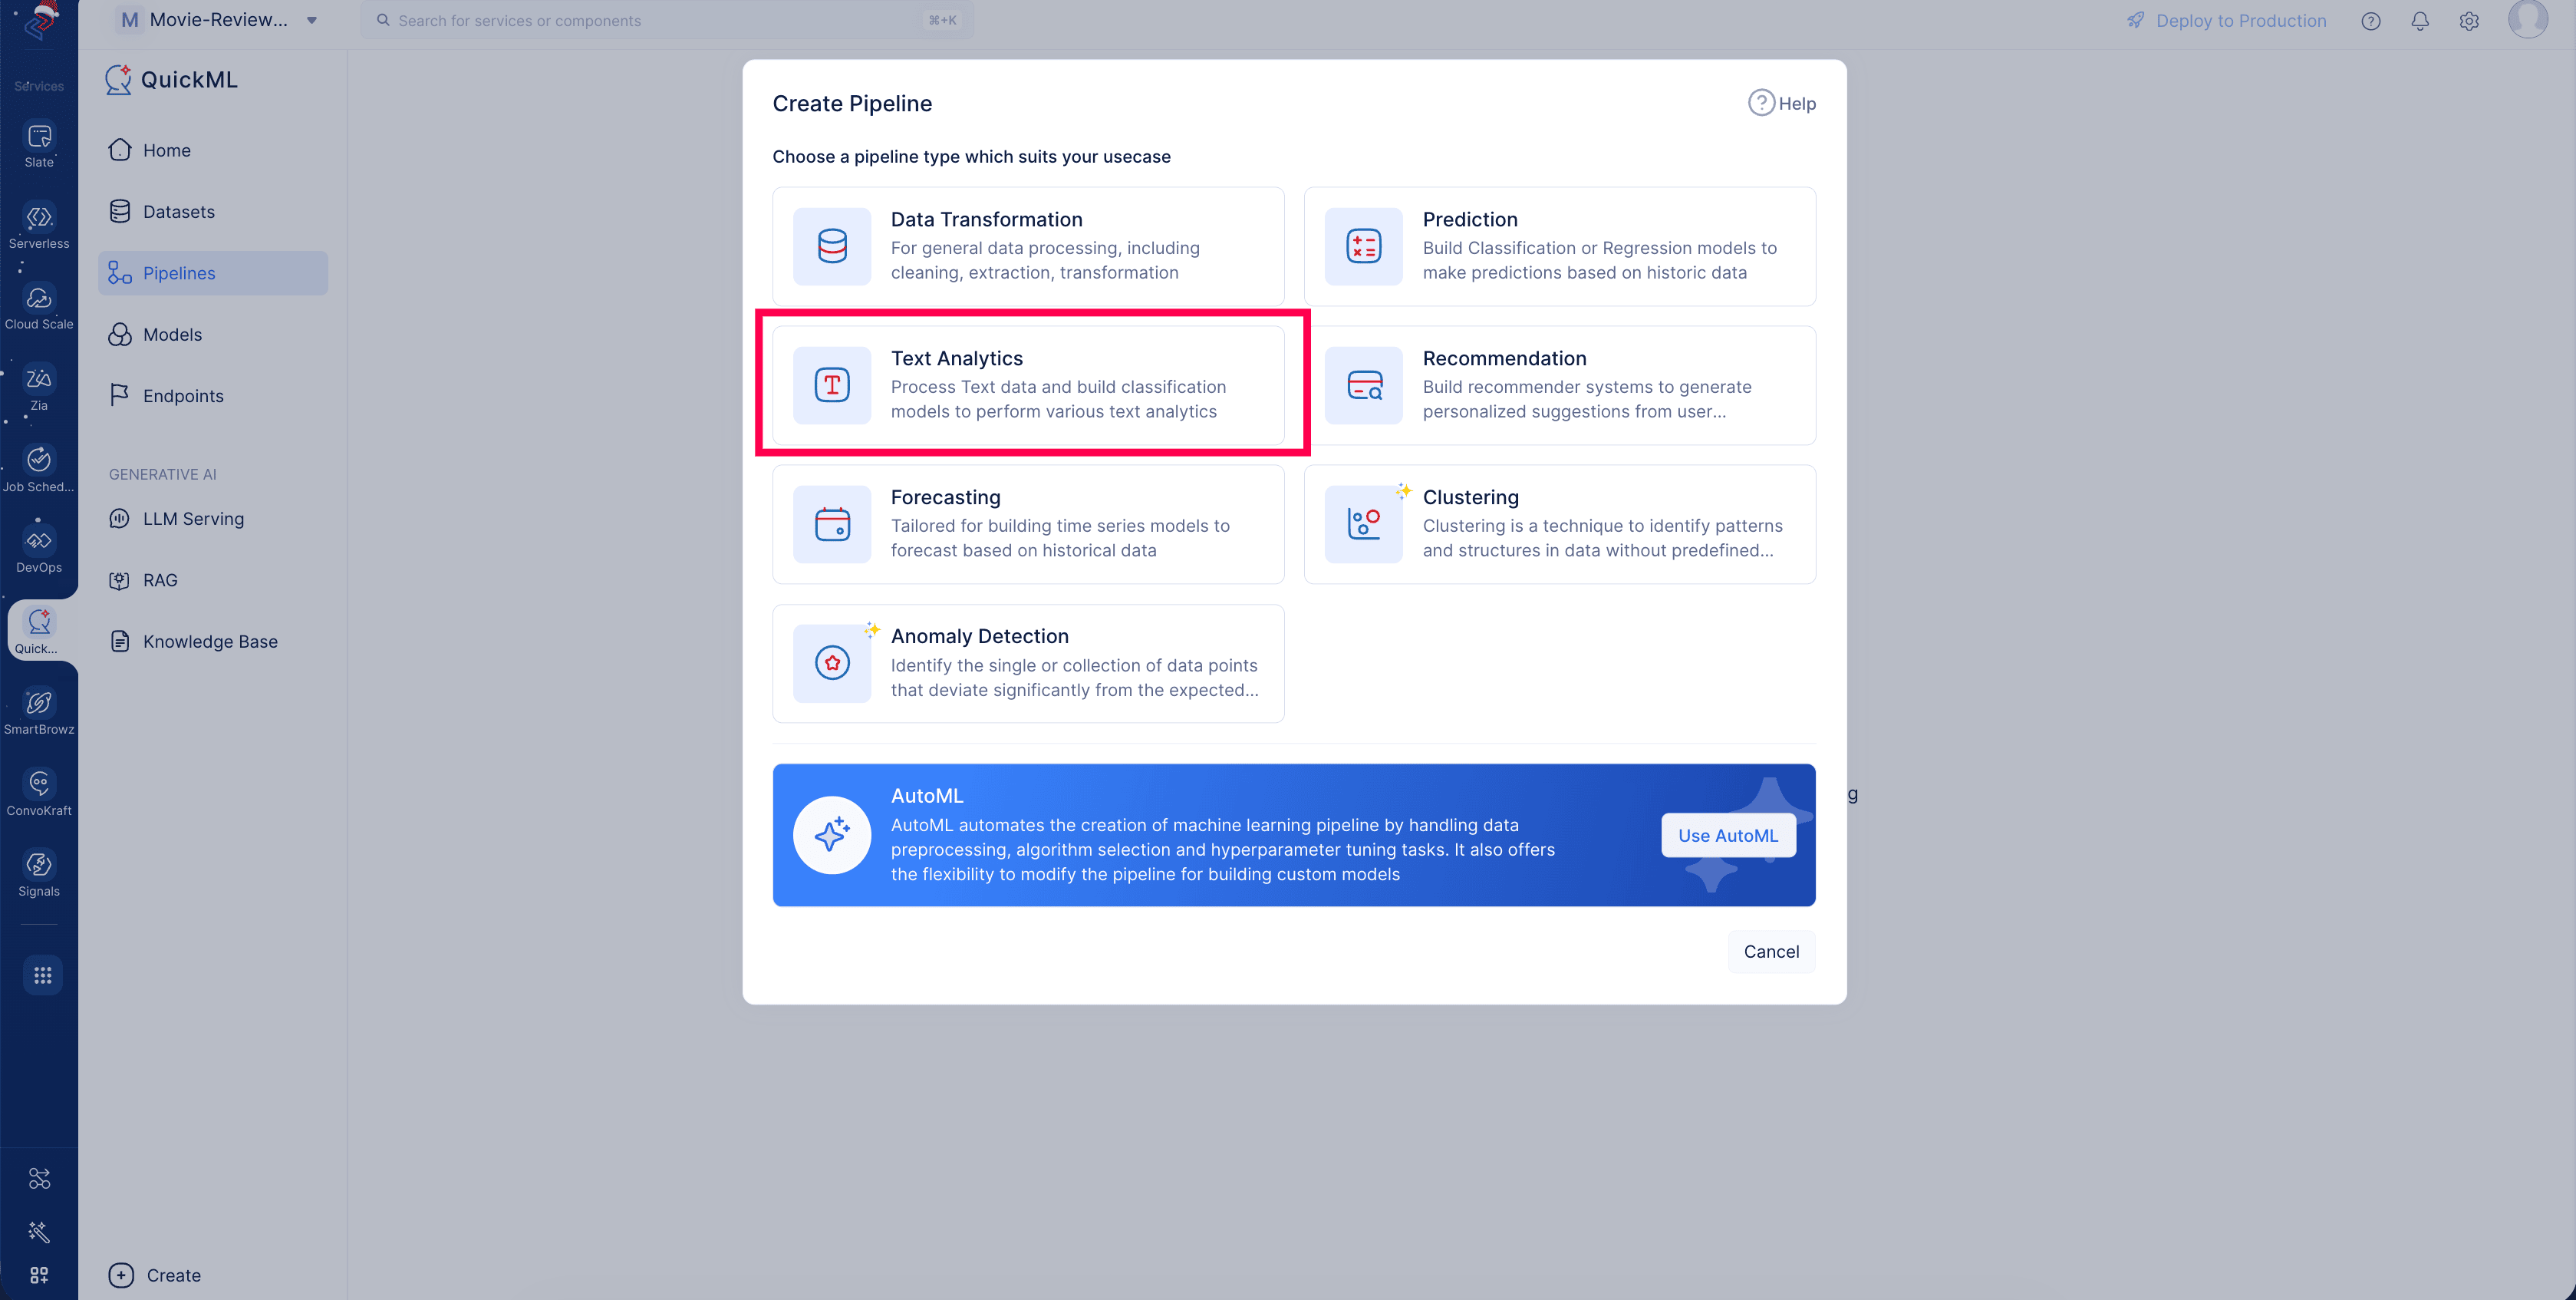
You’ll be asked to choose a pipeline builder mode that works for you. Select Smart Mode.
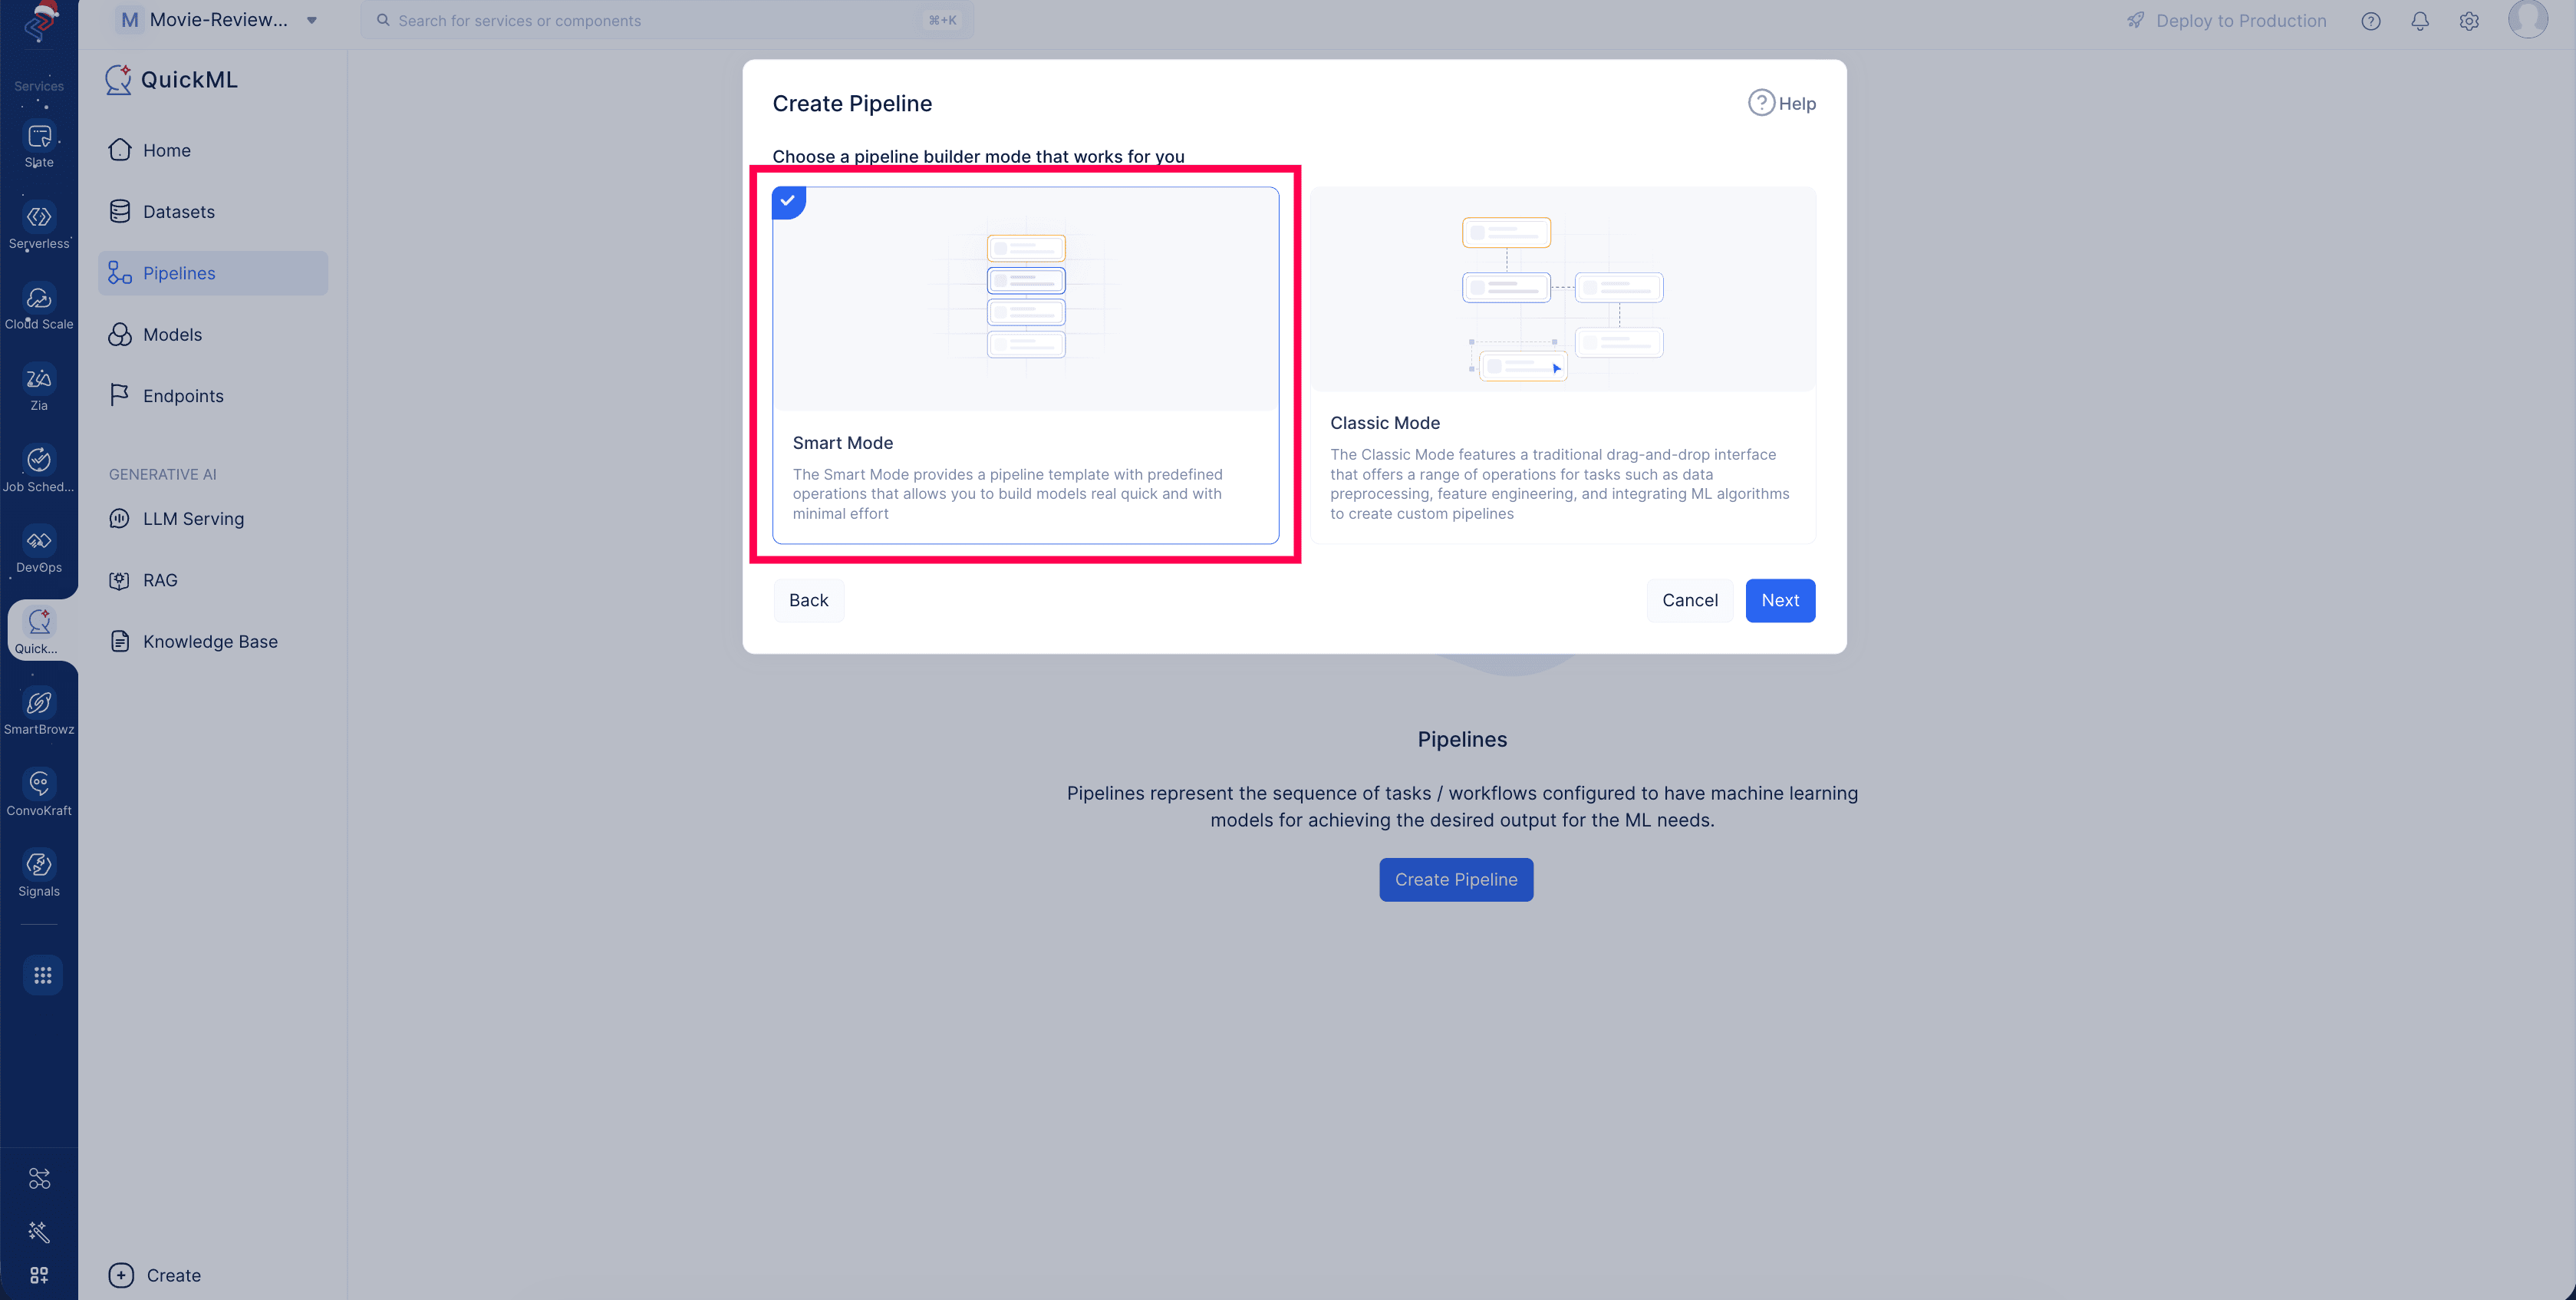
- In the Create Pipeline pop-up window, name the pipeline Movie Reviews sentiment and the model Movie Reviews sentiment model. Then, select the Movie Review Sentiments dataset in the Choose Dataset dropdown and select the target column Label (since we’re building a model to extract the sentiments from movie reviews).
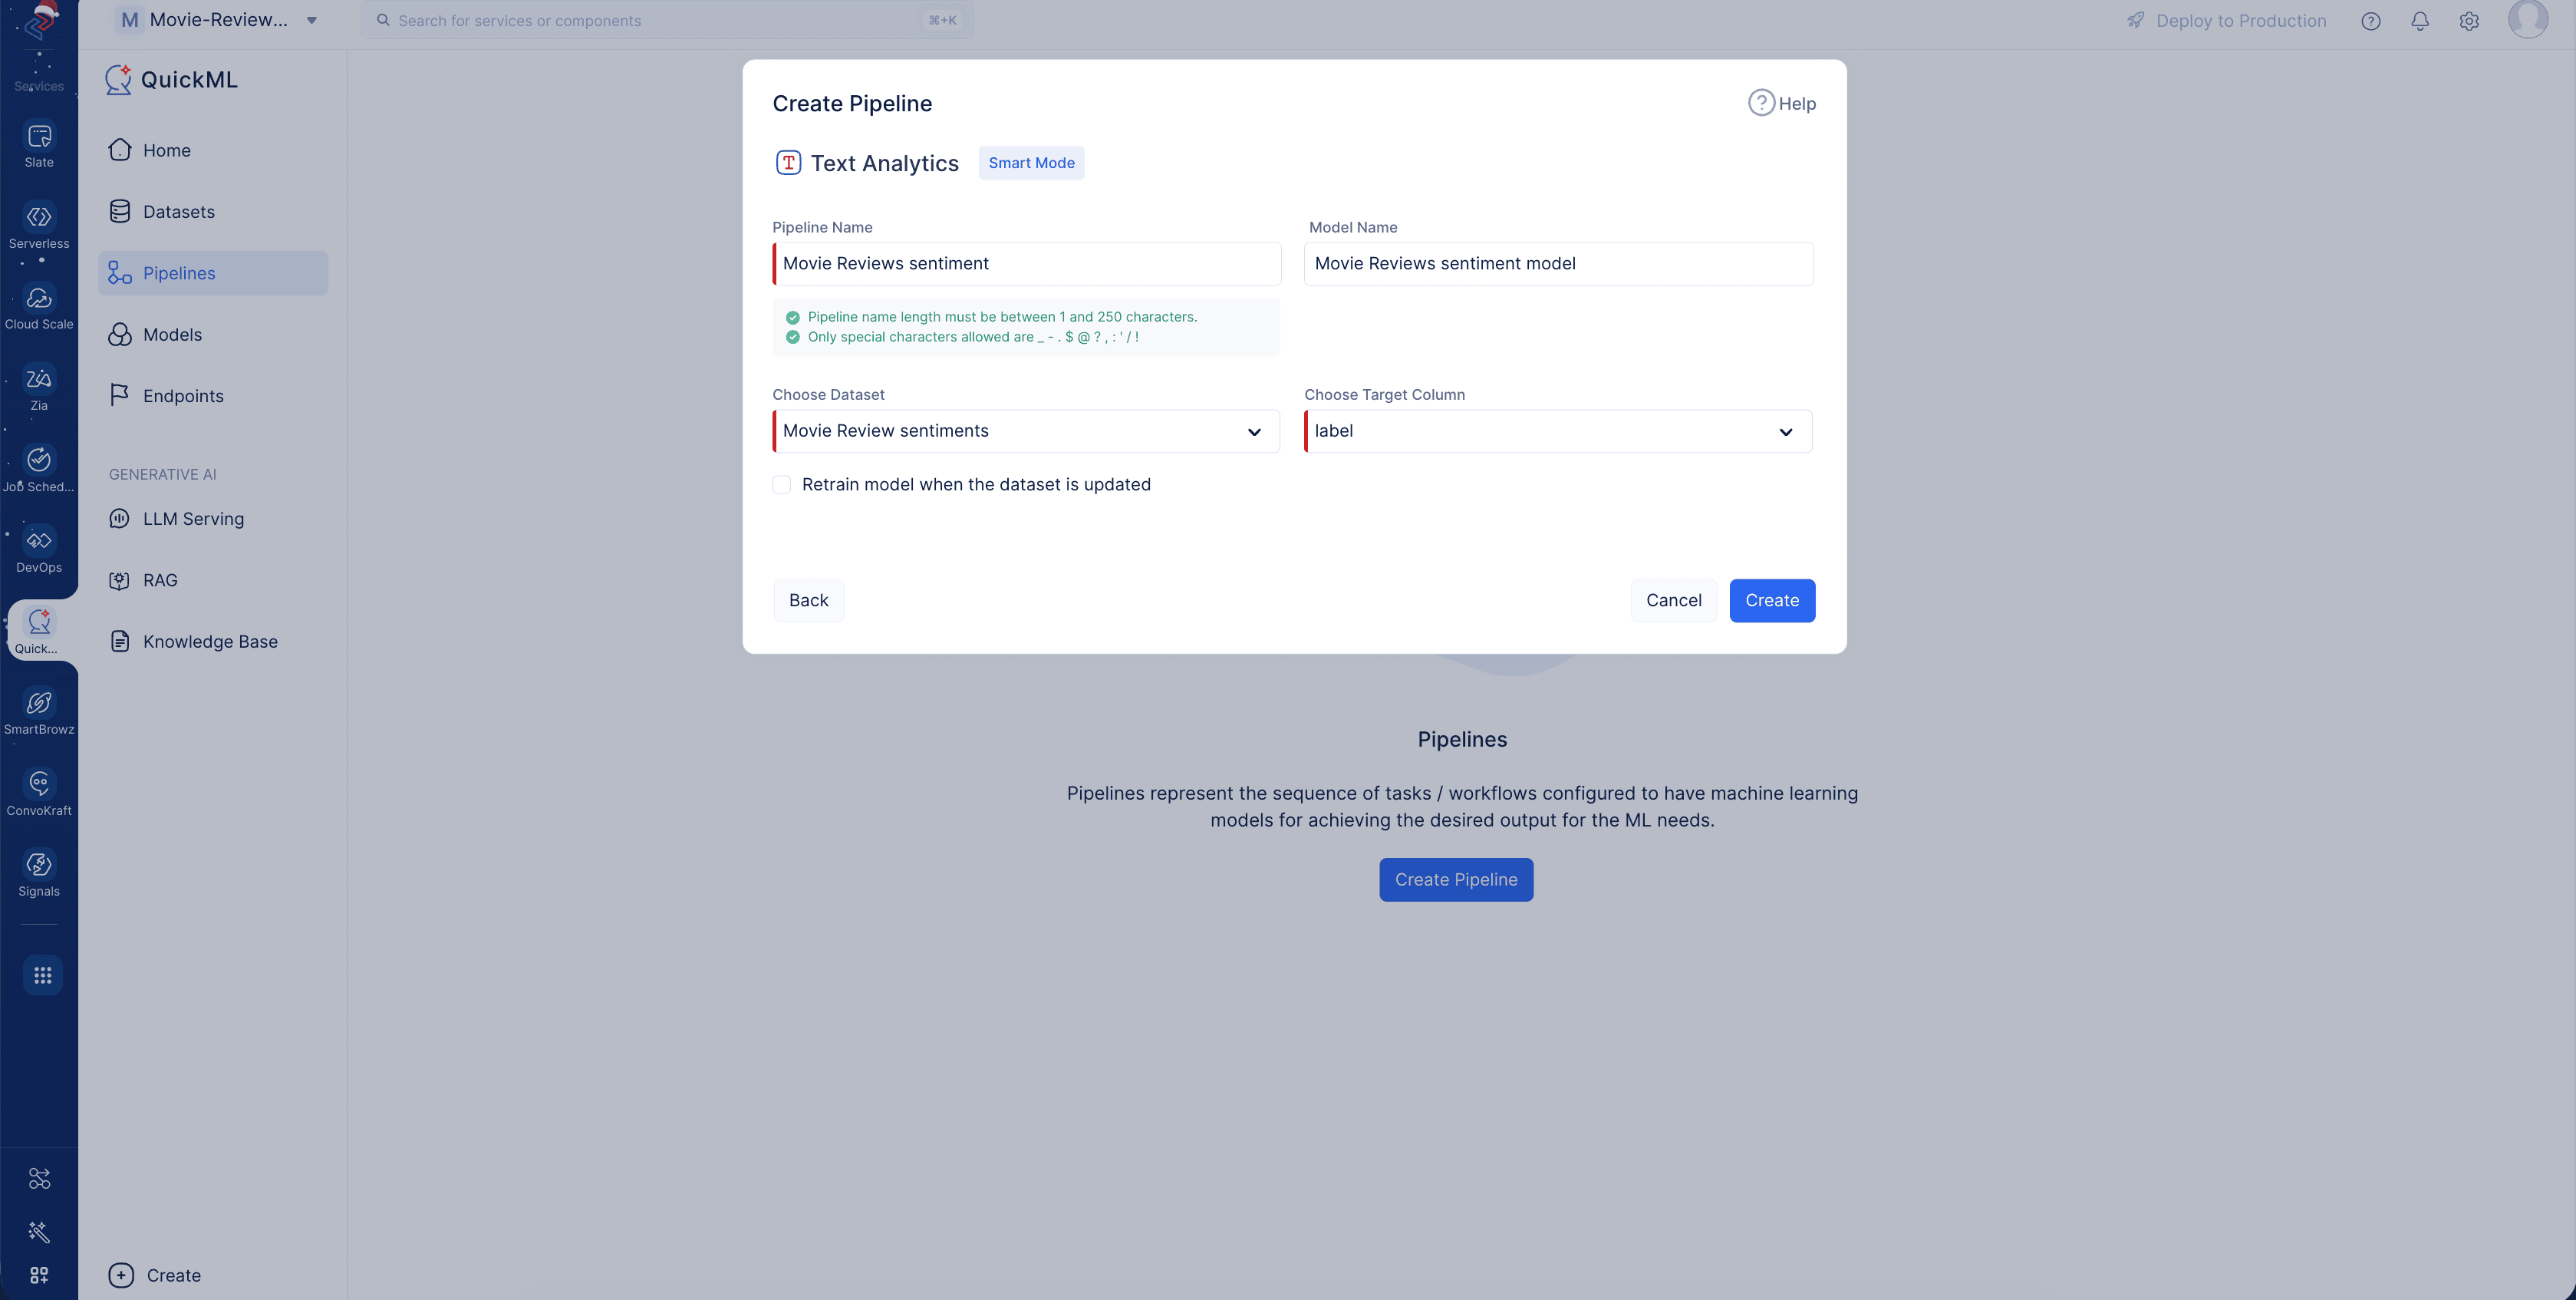
Click Create to create the pipeline.
You’ll land on the Text analytics Smart mode pipeline builder. Smart mode builder is a prebuilt pipeline template with the required operations to build a pipeline seamlessly in short time.
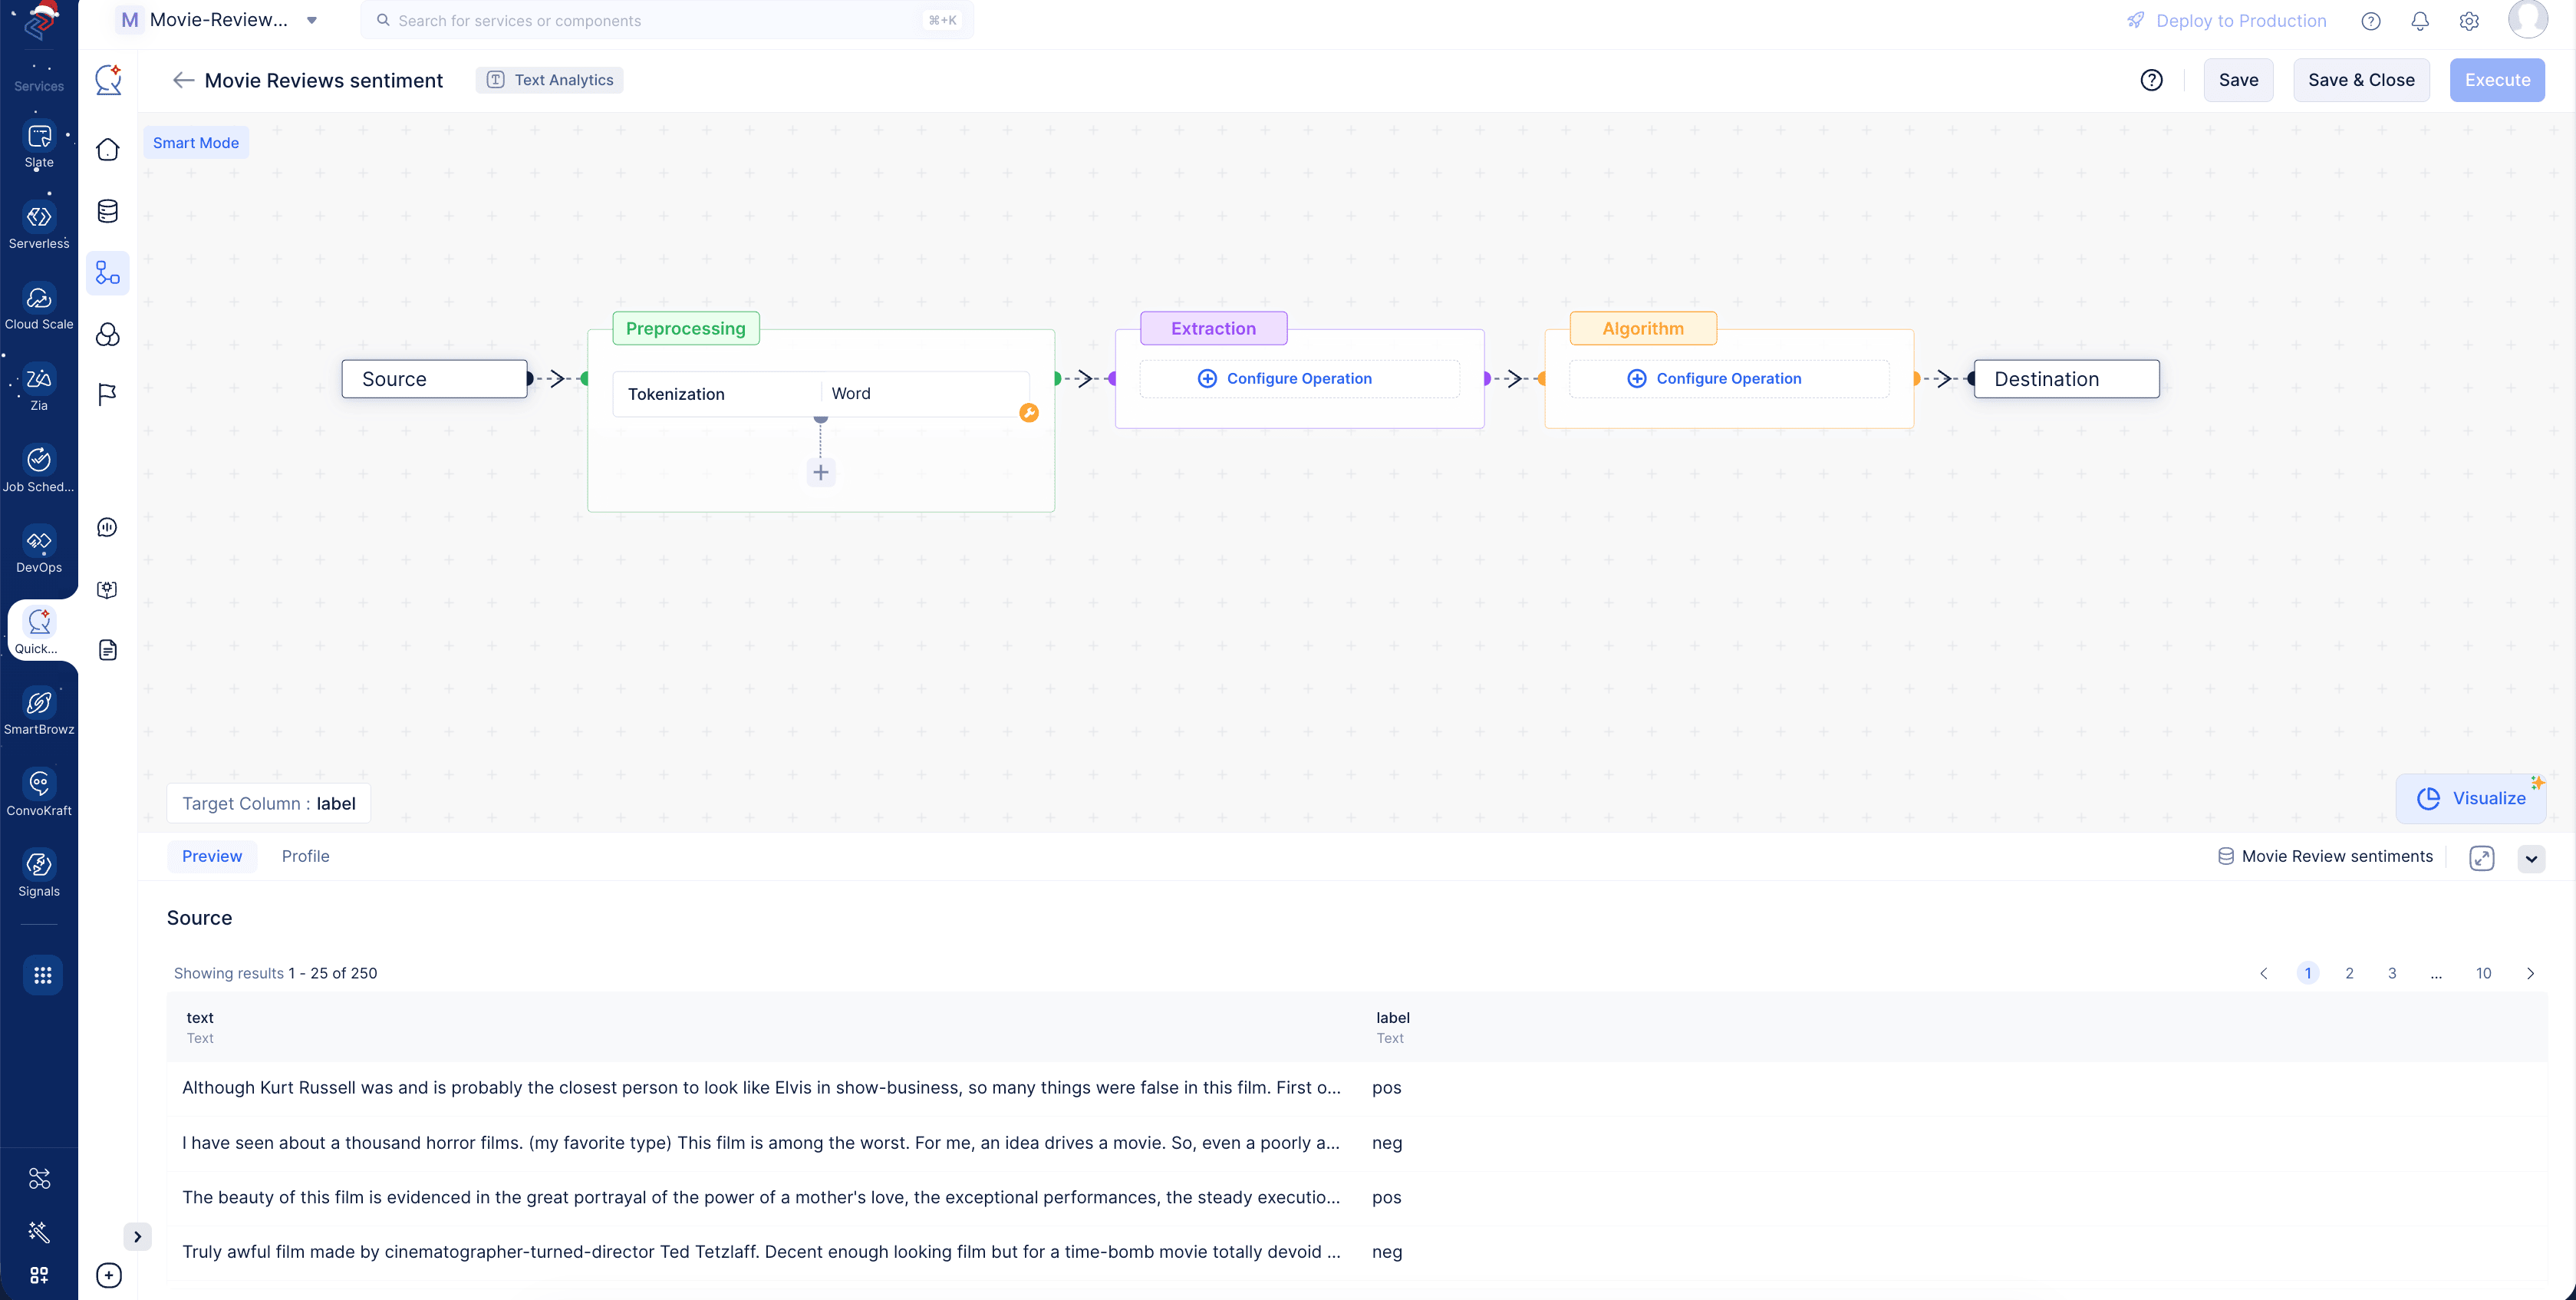
Smart mode pipeline builder contains three main stages: Preprocessing, Extraction, and Algorithm in the pipeline template, a sample preview as shown above.
Also, if you navigate to the profile tab in the builder beside the sample preview, there is an option to show the profile for sample data and whole data.
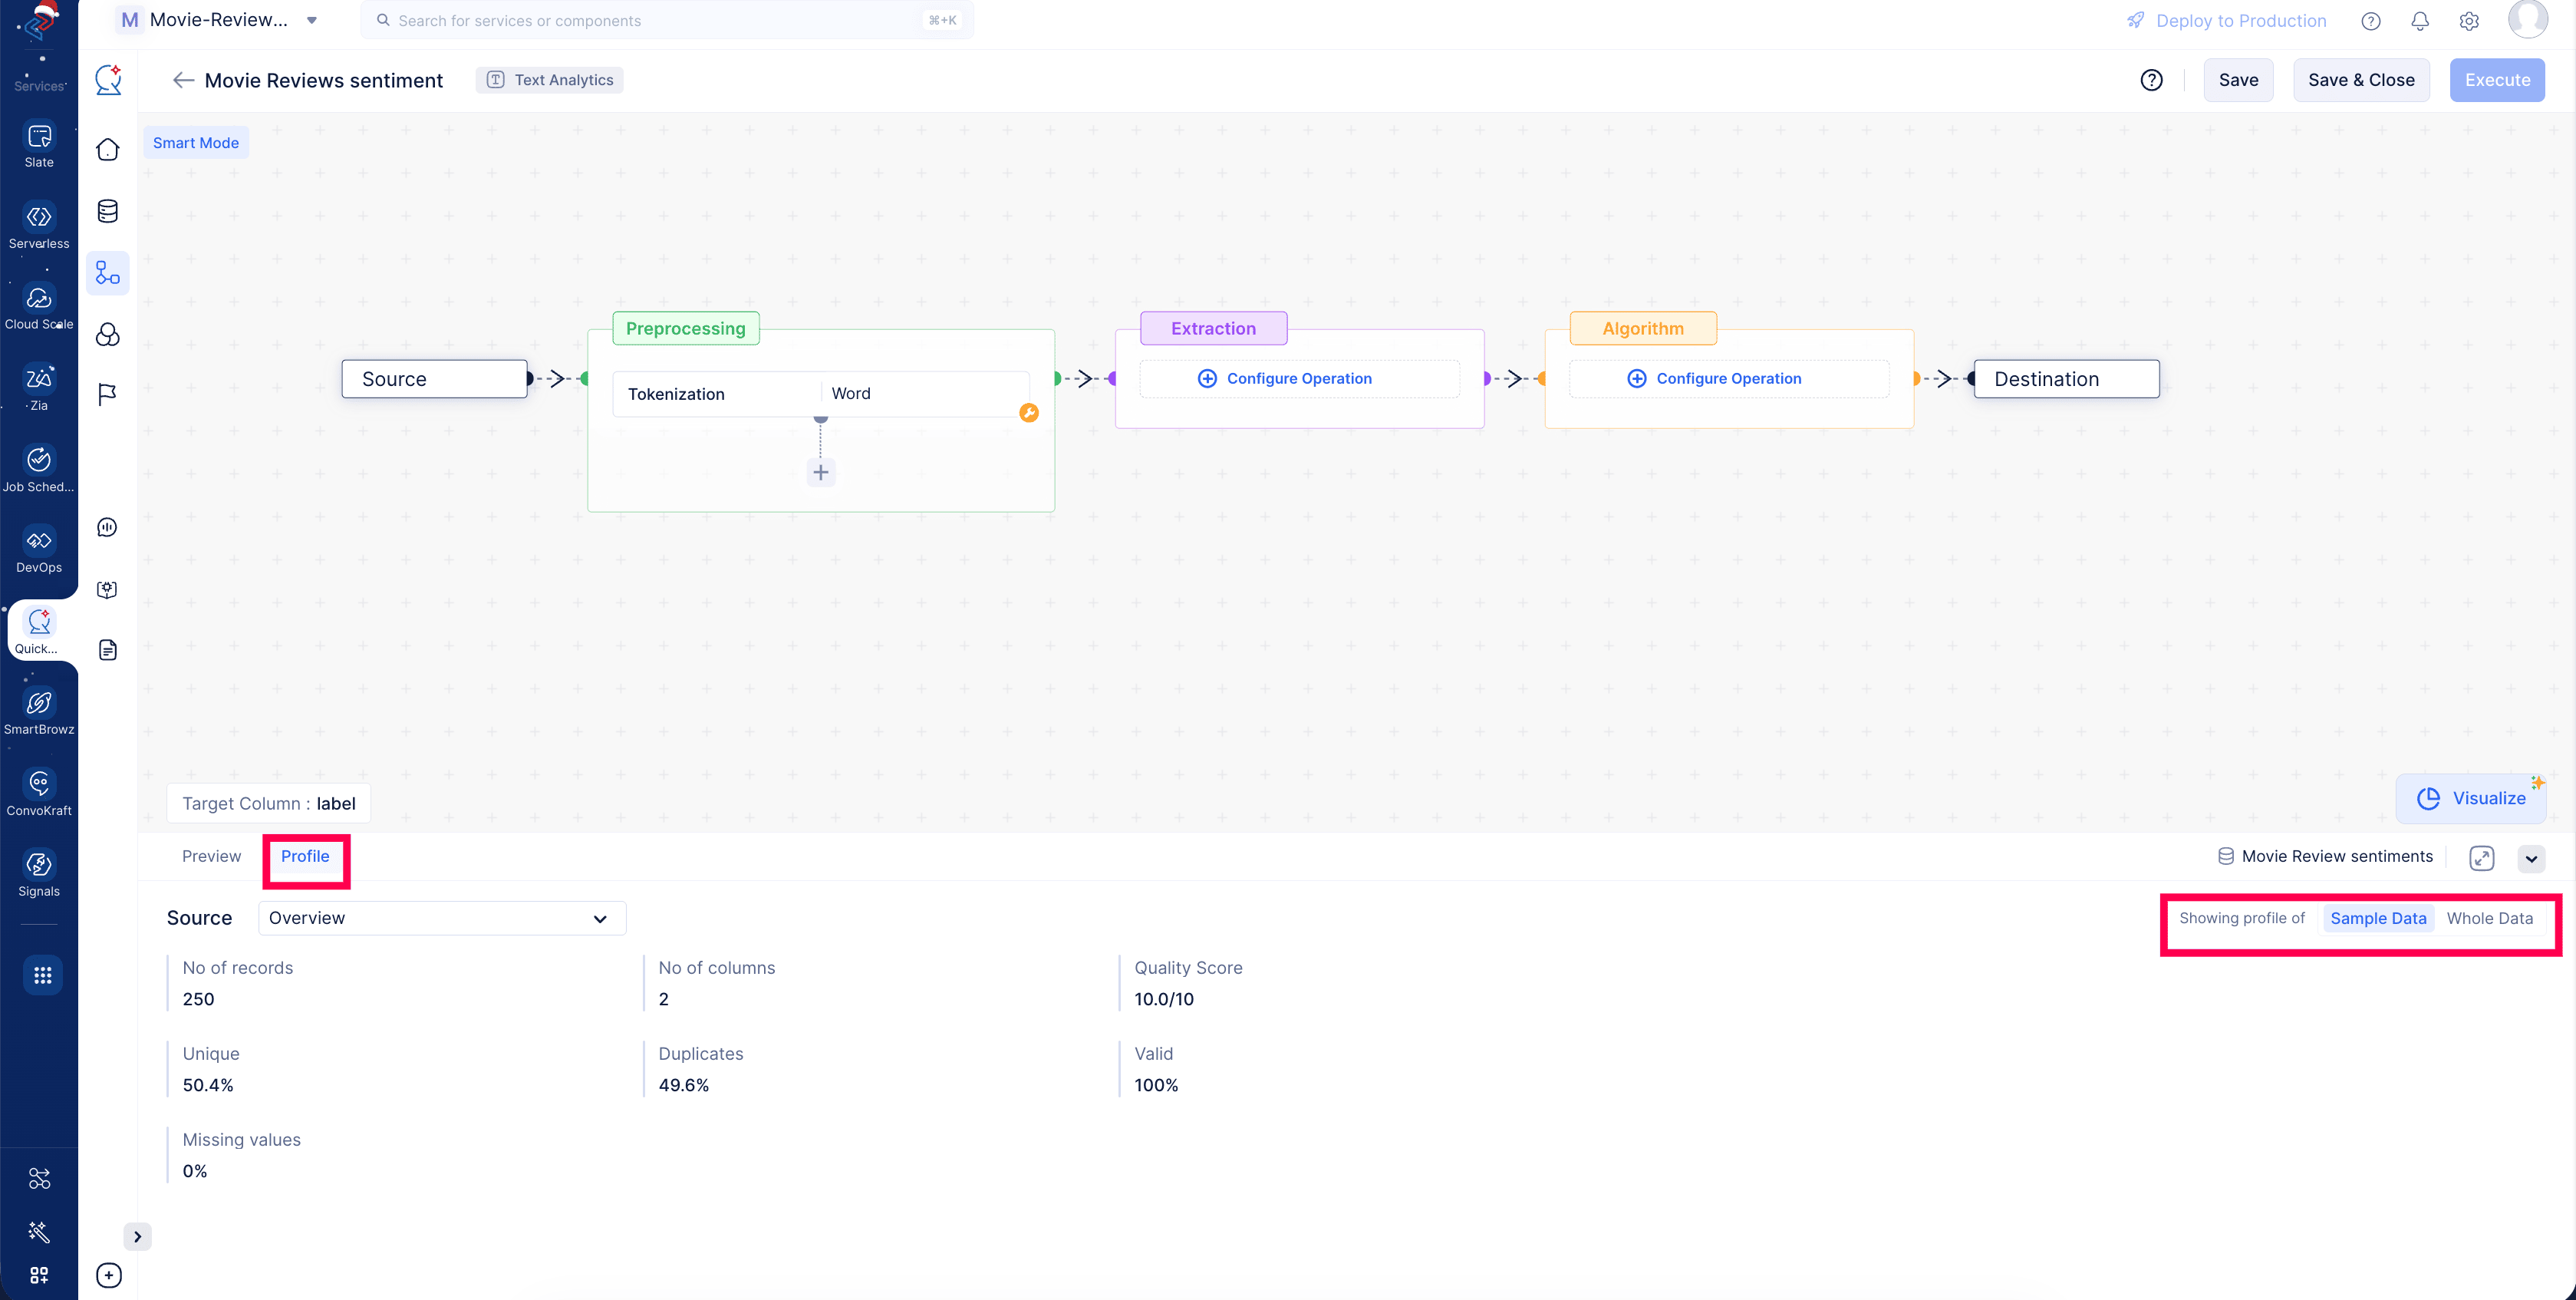
Profile for the Sample data is generated by default after configuring each operation in the pre-processing and extraction stages, but if you need a profile of the whole dataset during the pipeline building process, select whole data and click generate.
Pre-processing configuration
The first step in building any ML model is pre-processing. In the smart builder, we have predefined, required, pre-processing operations. These operations are different from the prediction models that we had in earlier tutorials.
Below is a list of operations to be configured in the pre-processing stage:
- Tokenization : Word
- Case conversion : Lower
- Stemming : Porter stemming
- Lemmatization : WordNet Lemmatizer
- Noise removal : Stop words
- Text Normalization : Default
- Label Encoder : Target column
Let’s go through each stage and see why it’s necessary to configure it.
-
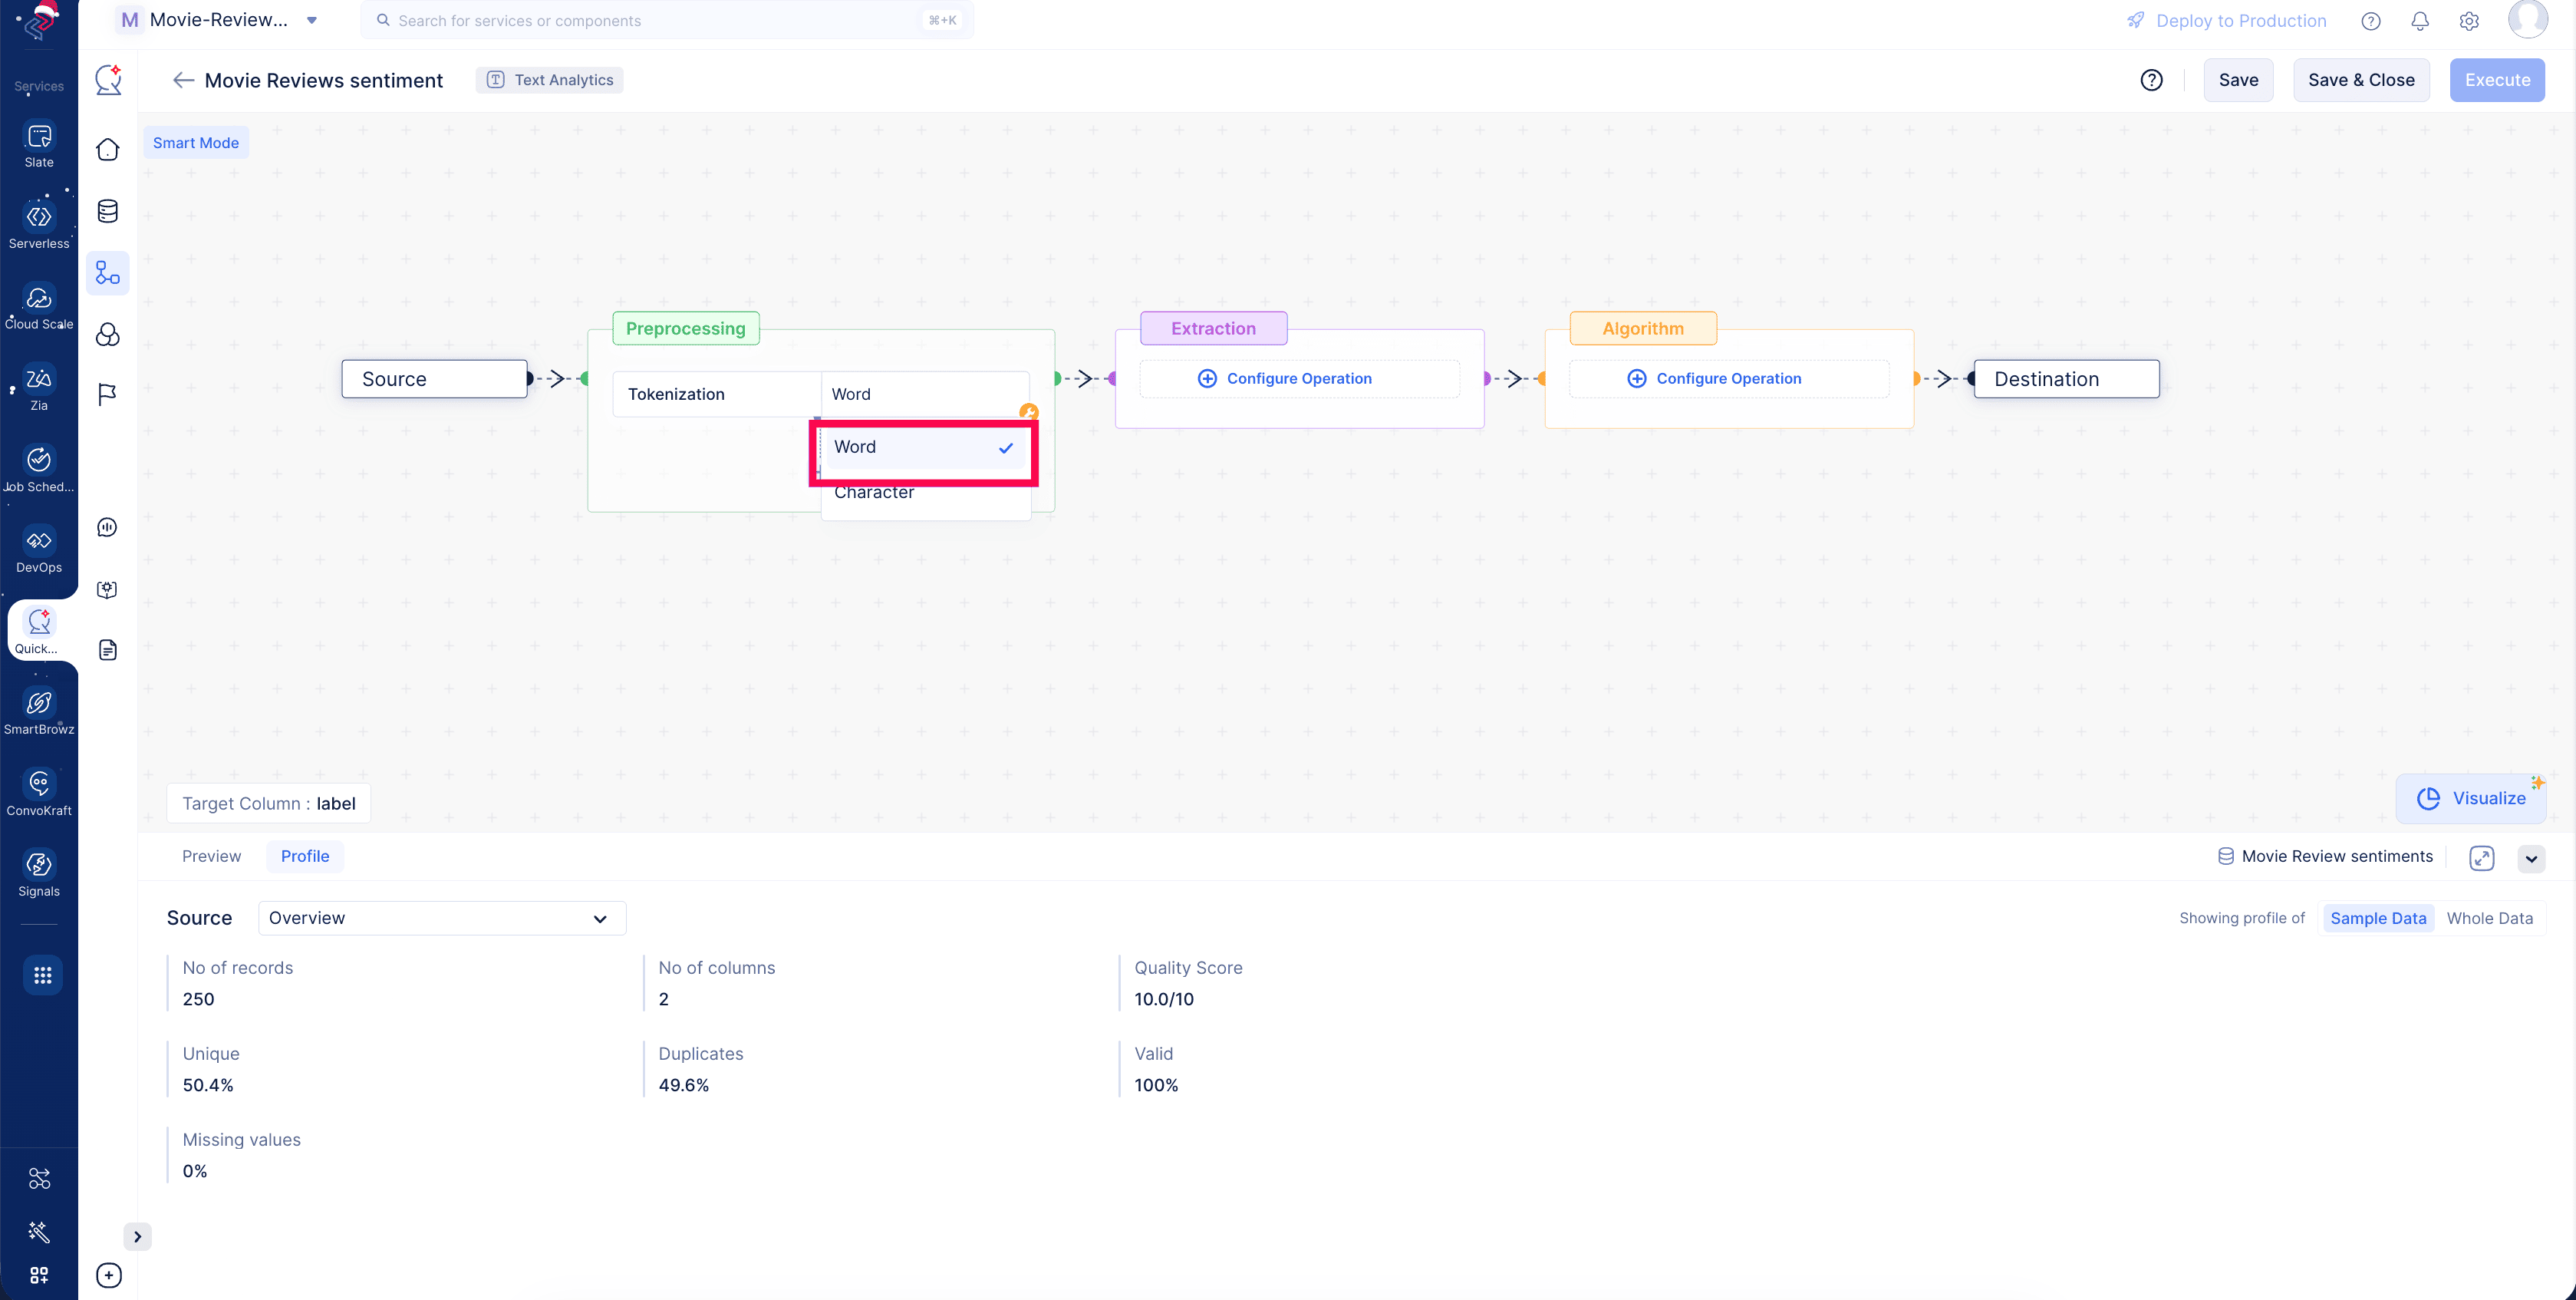
Tokenization Tokenization refers to breaking down a large amount of text into smaller units like words. Here, select the option Word in the tokenization operation.
-
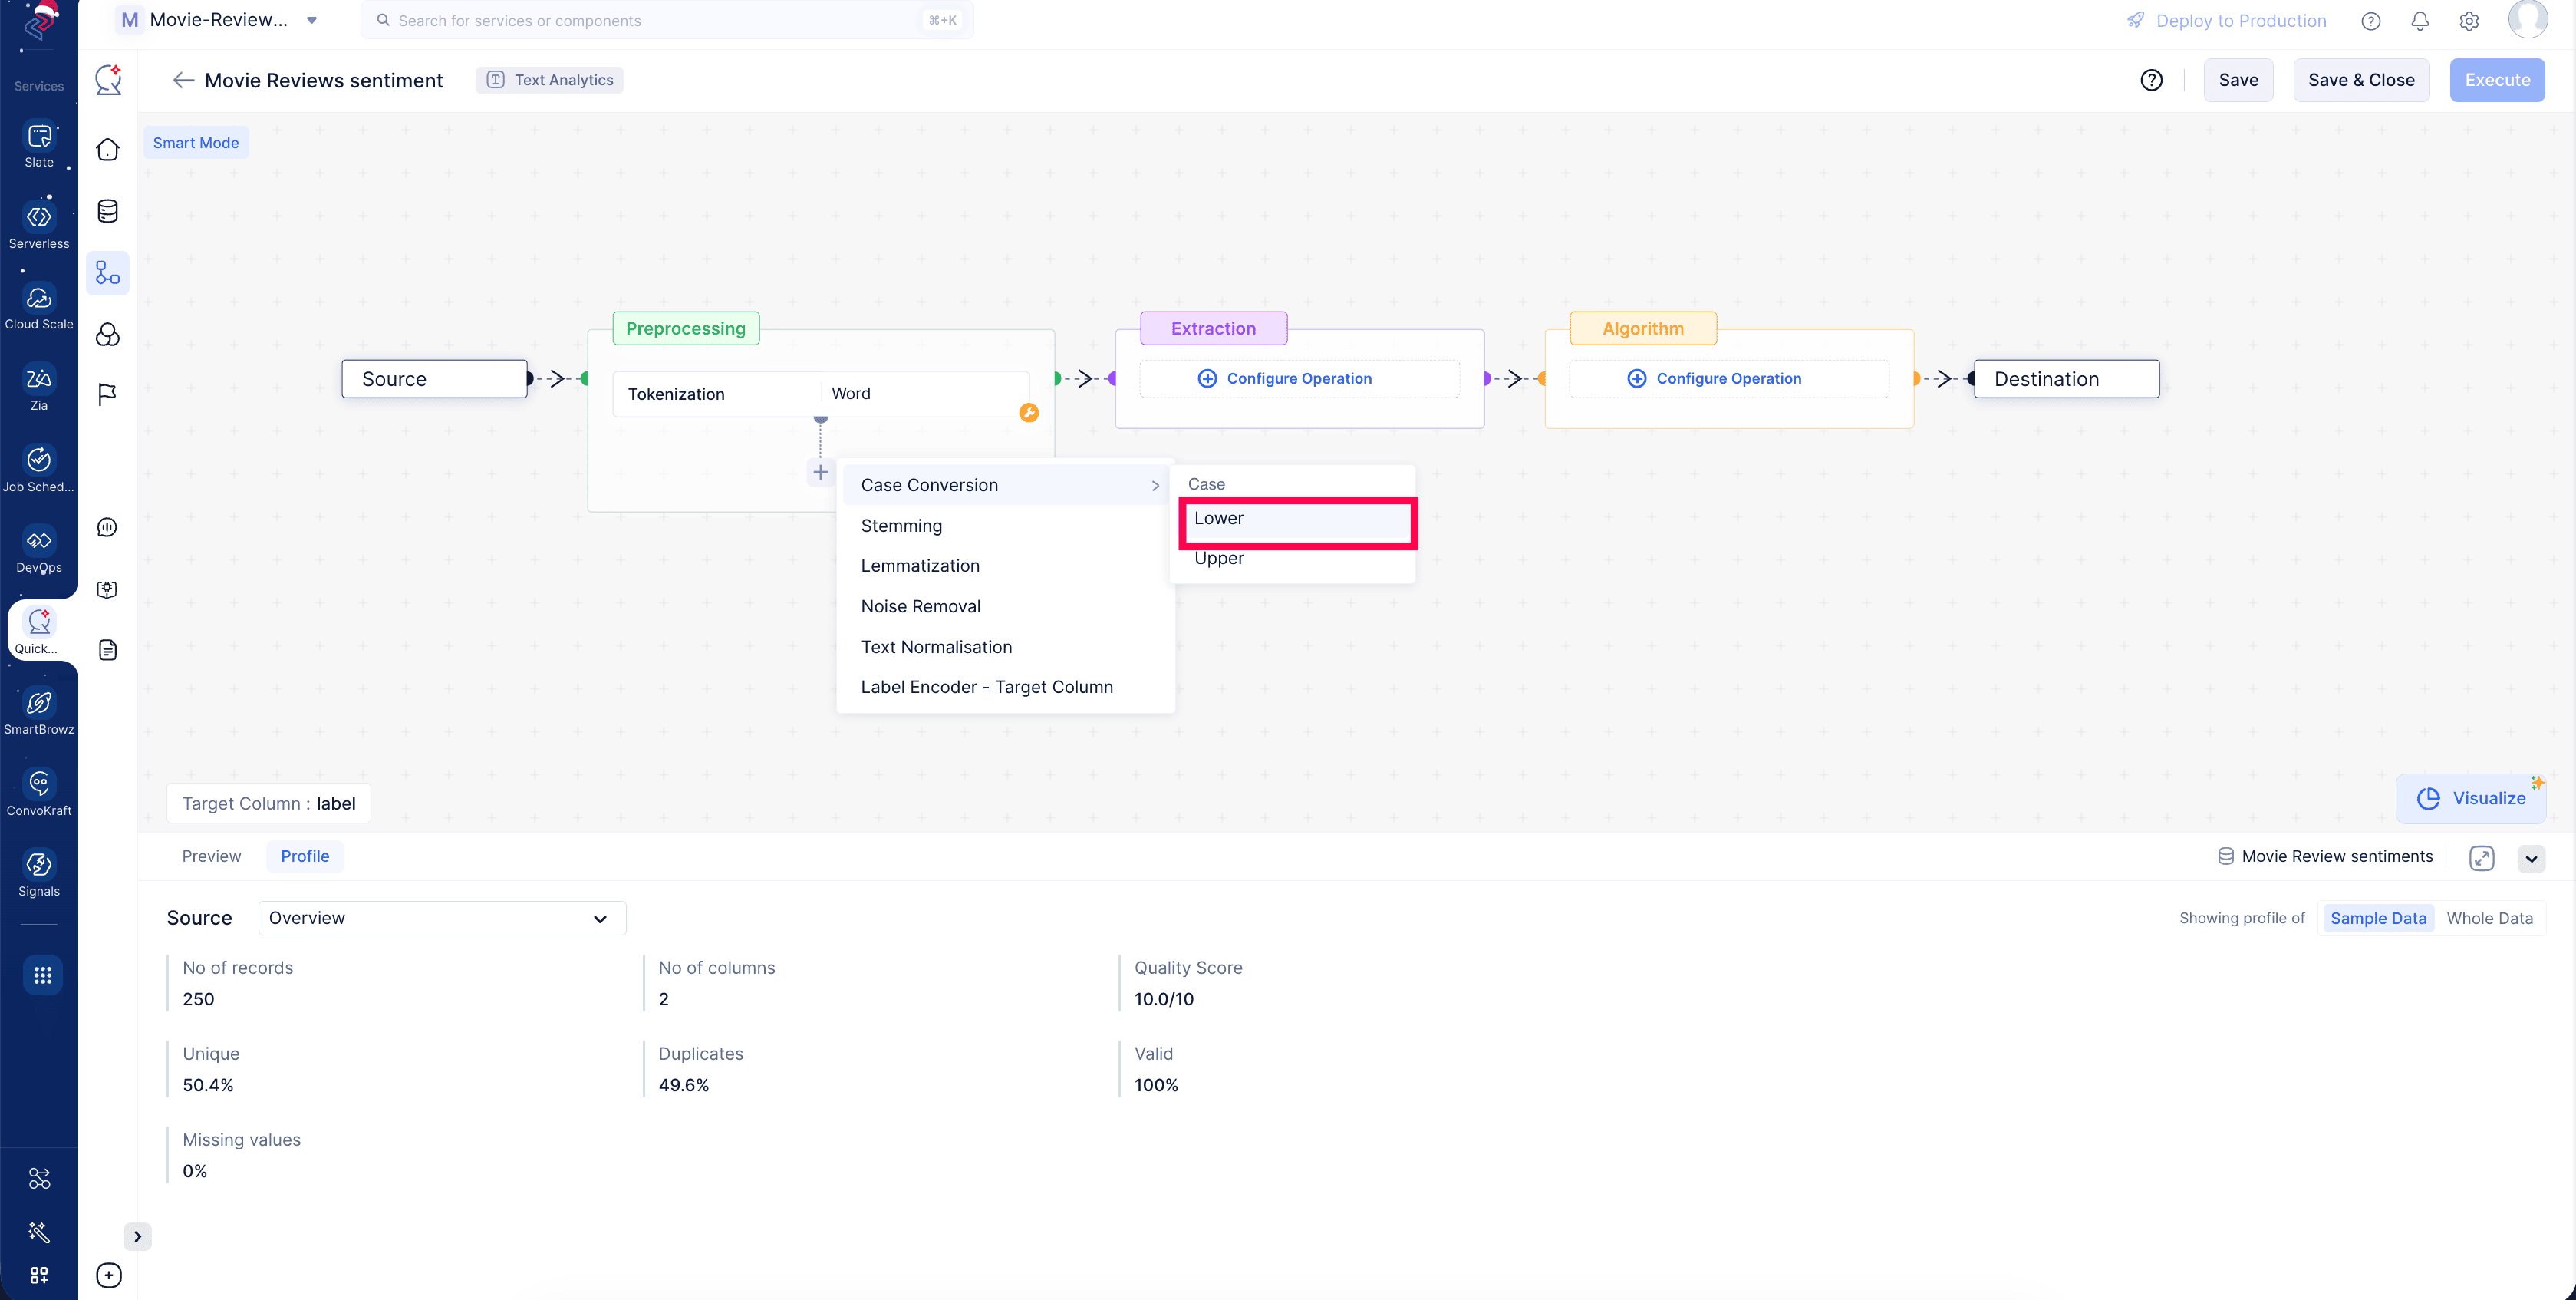
Case conversion This converts the raw text data with different cases into a unified case. Here, set case conversion as Lower.
-
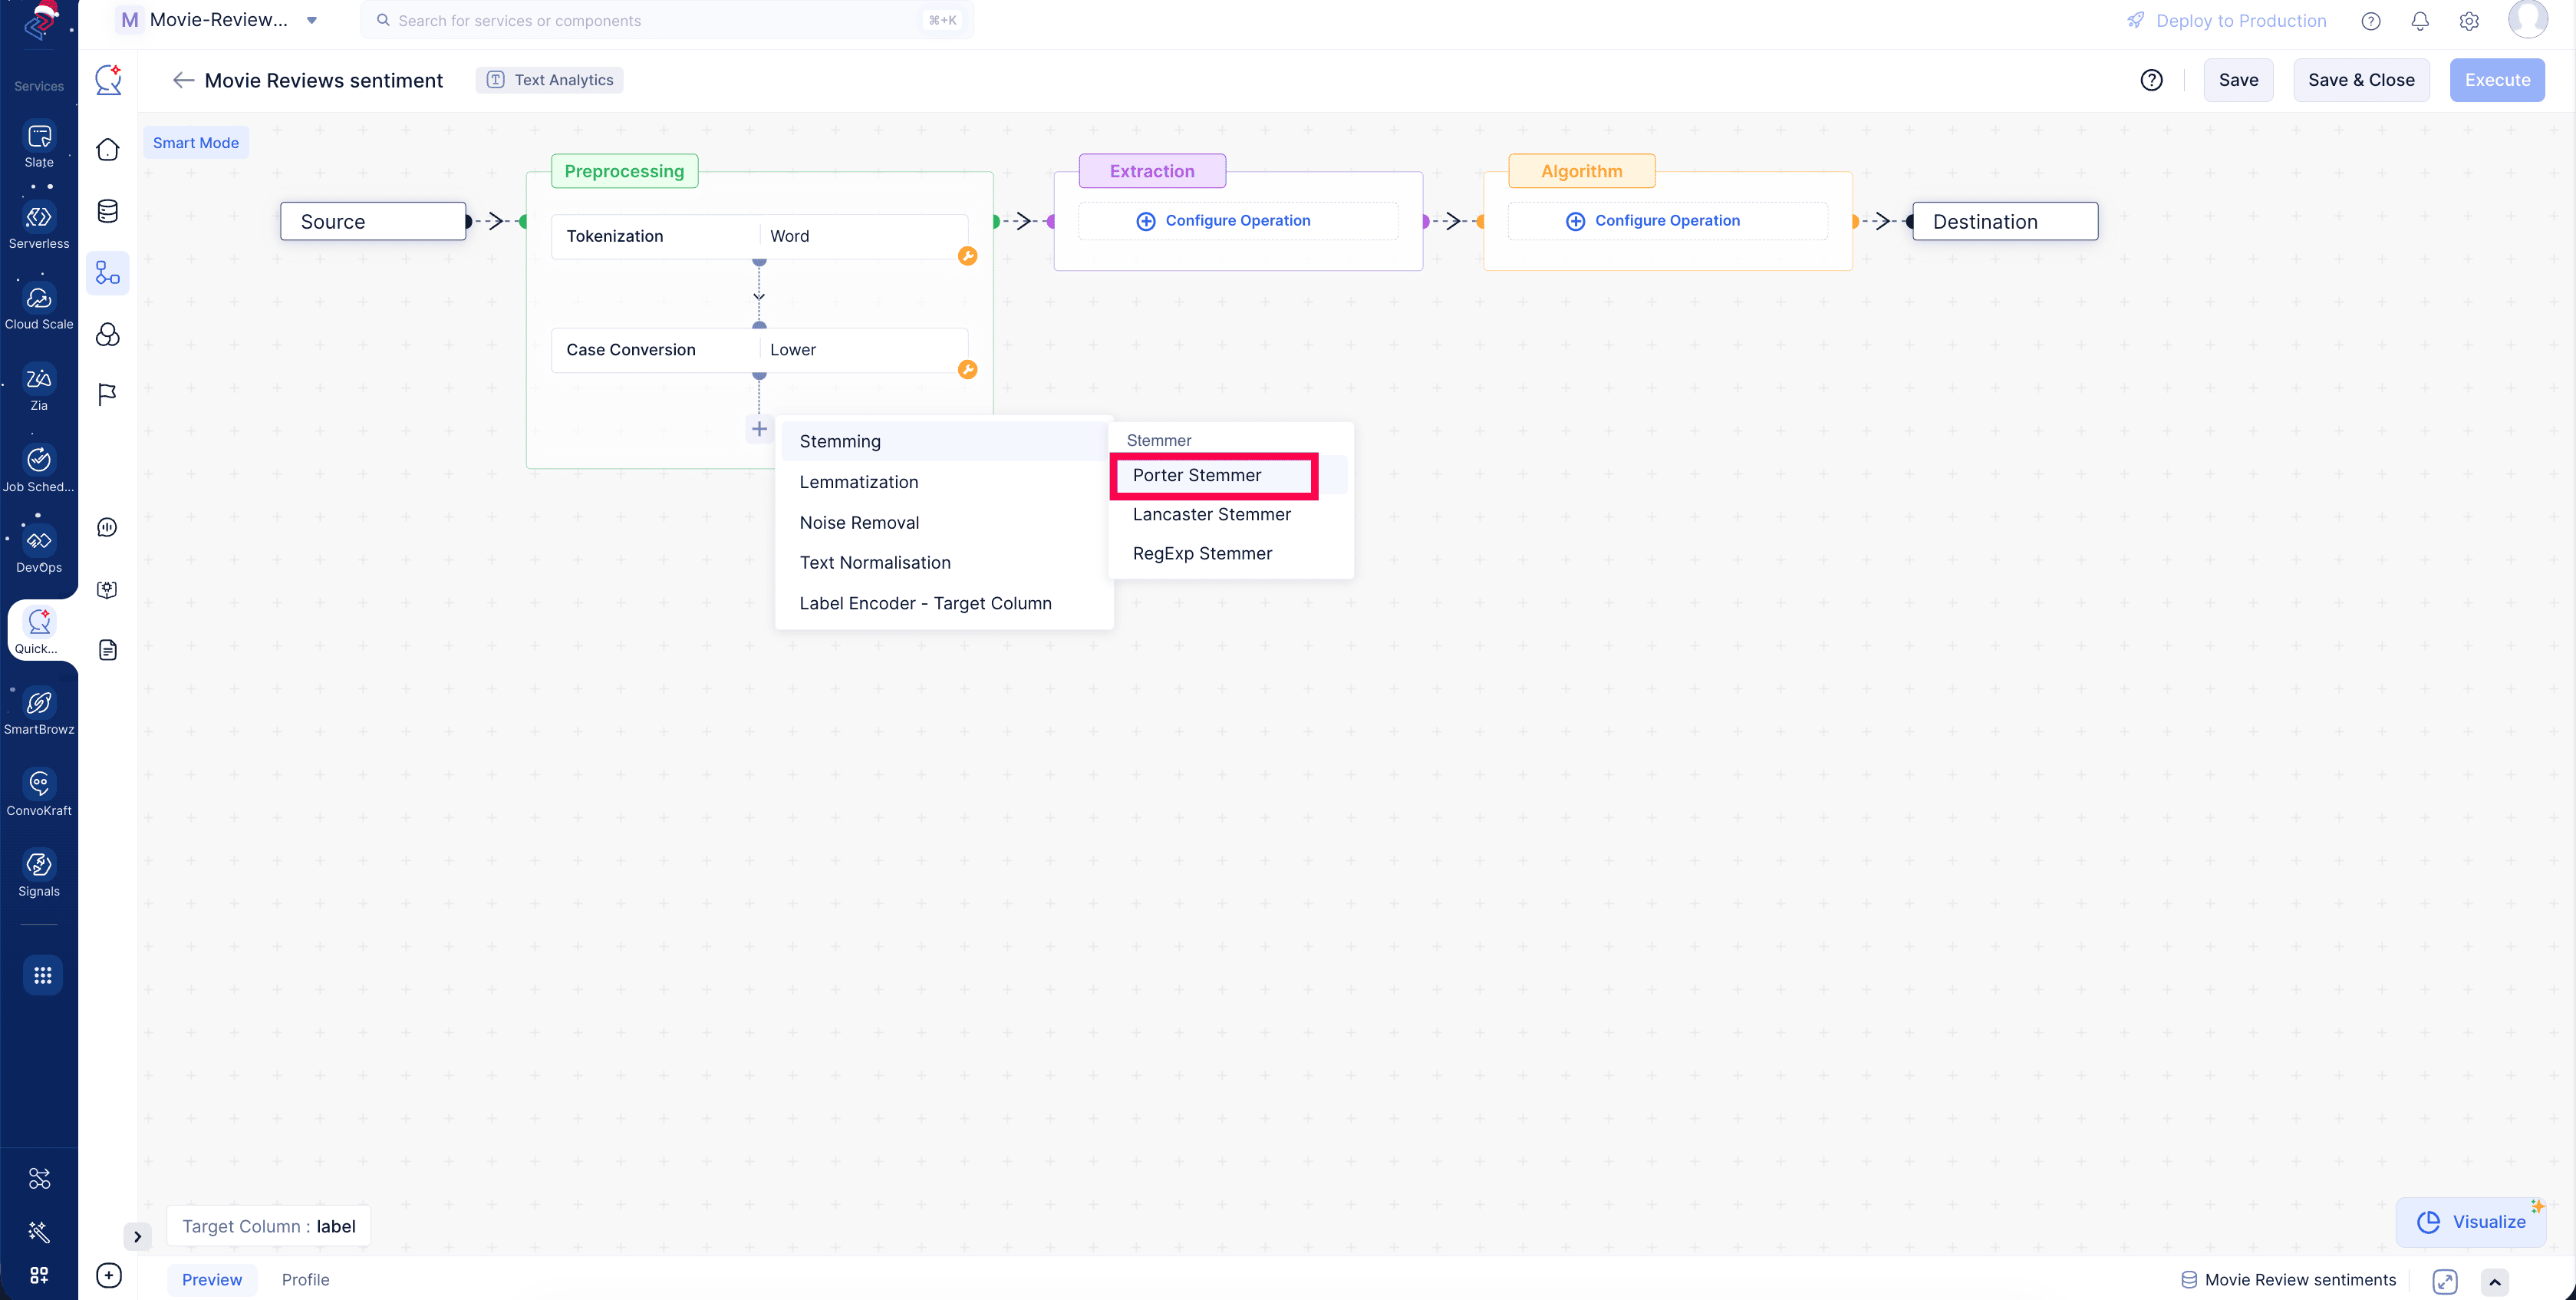
Stemming and 4. Lemmatization Both these techniques reduce words to their root forms, helping normalize word variations for more consistent analysis. Here, configure the stemming operation with Porter Stemmer, a predefined library of words.
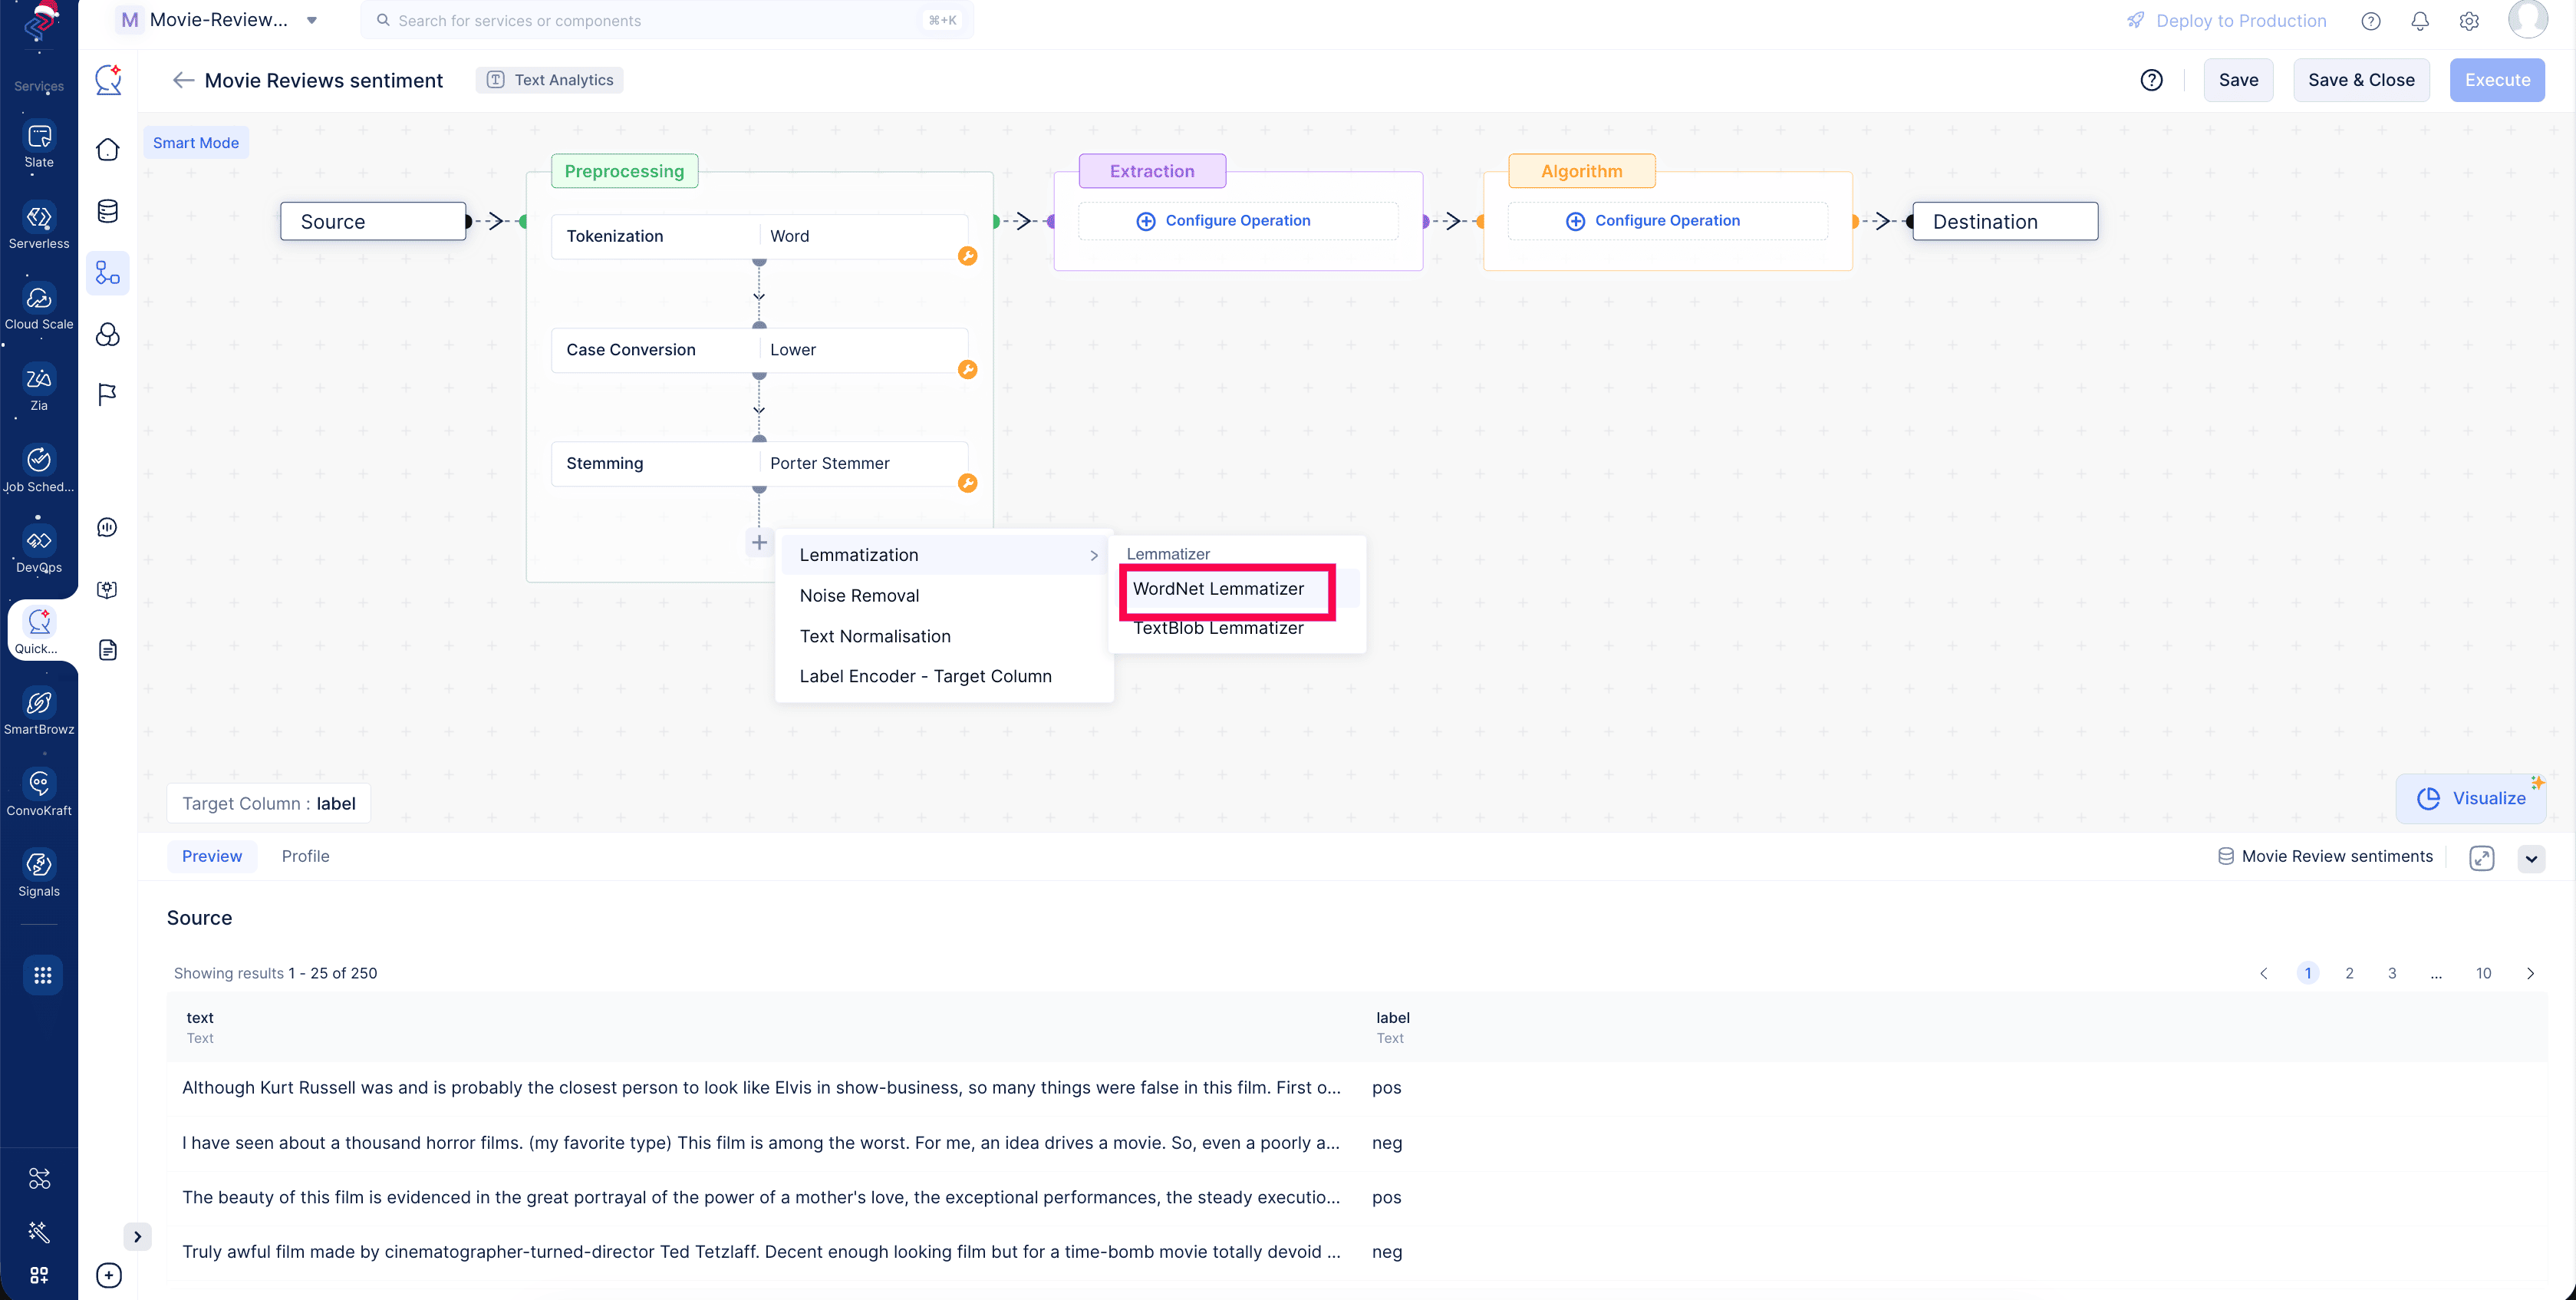
Configure the lemmatization operation with WordNet Lemmatizer, a predefined library of words.
-
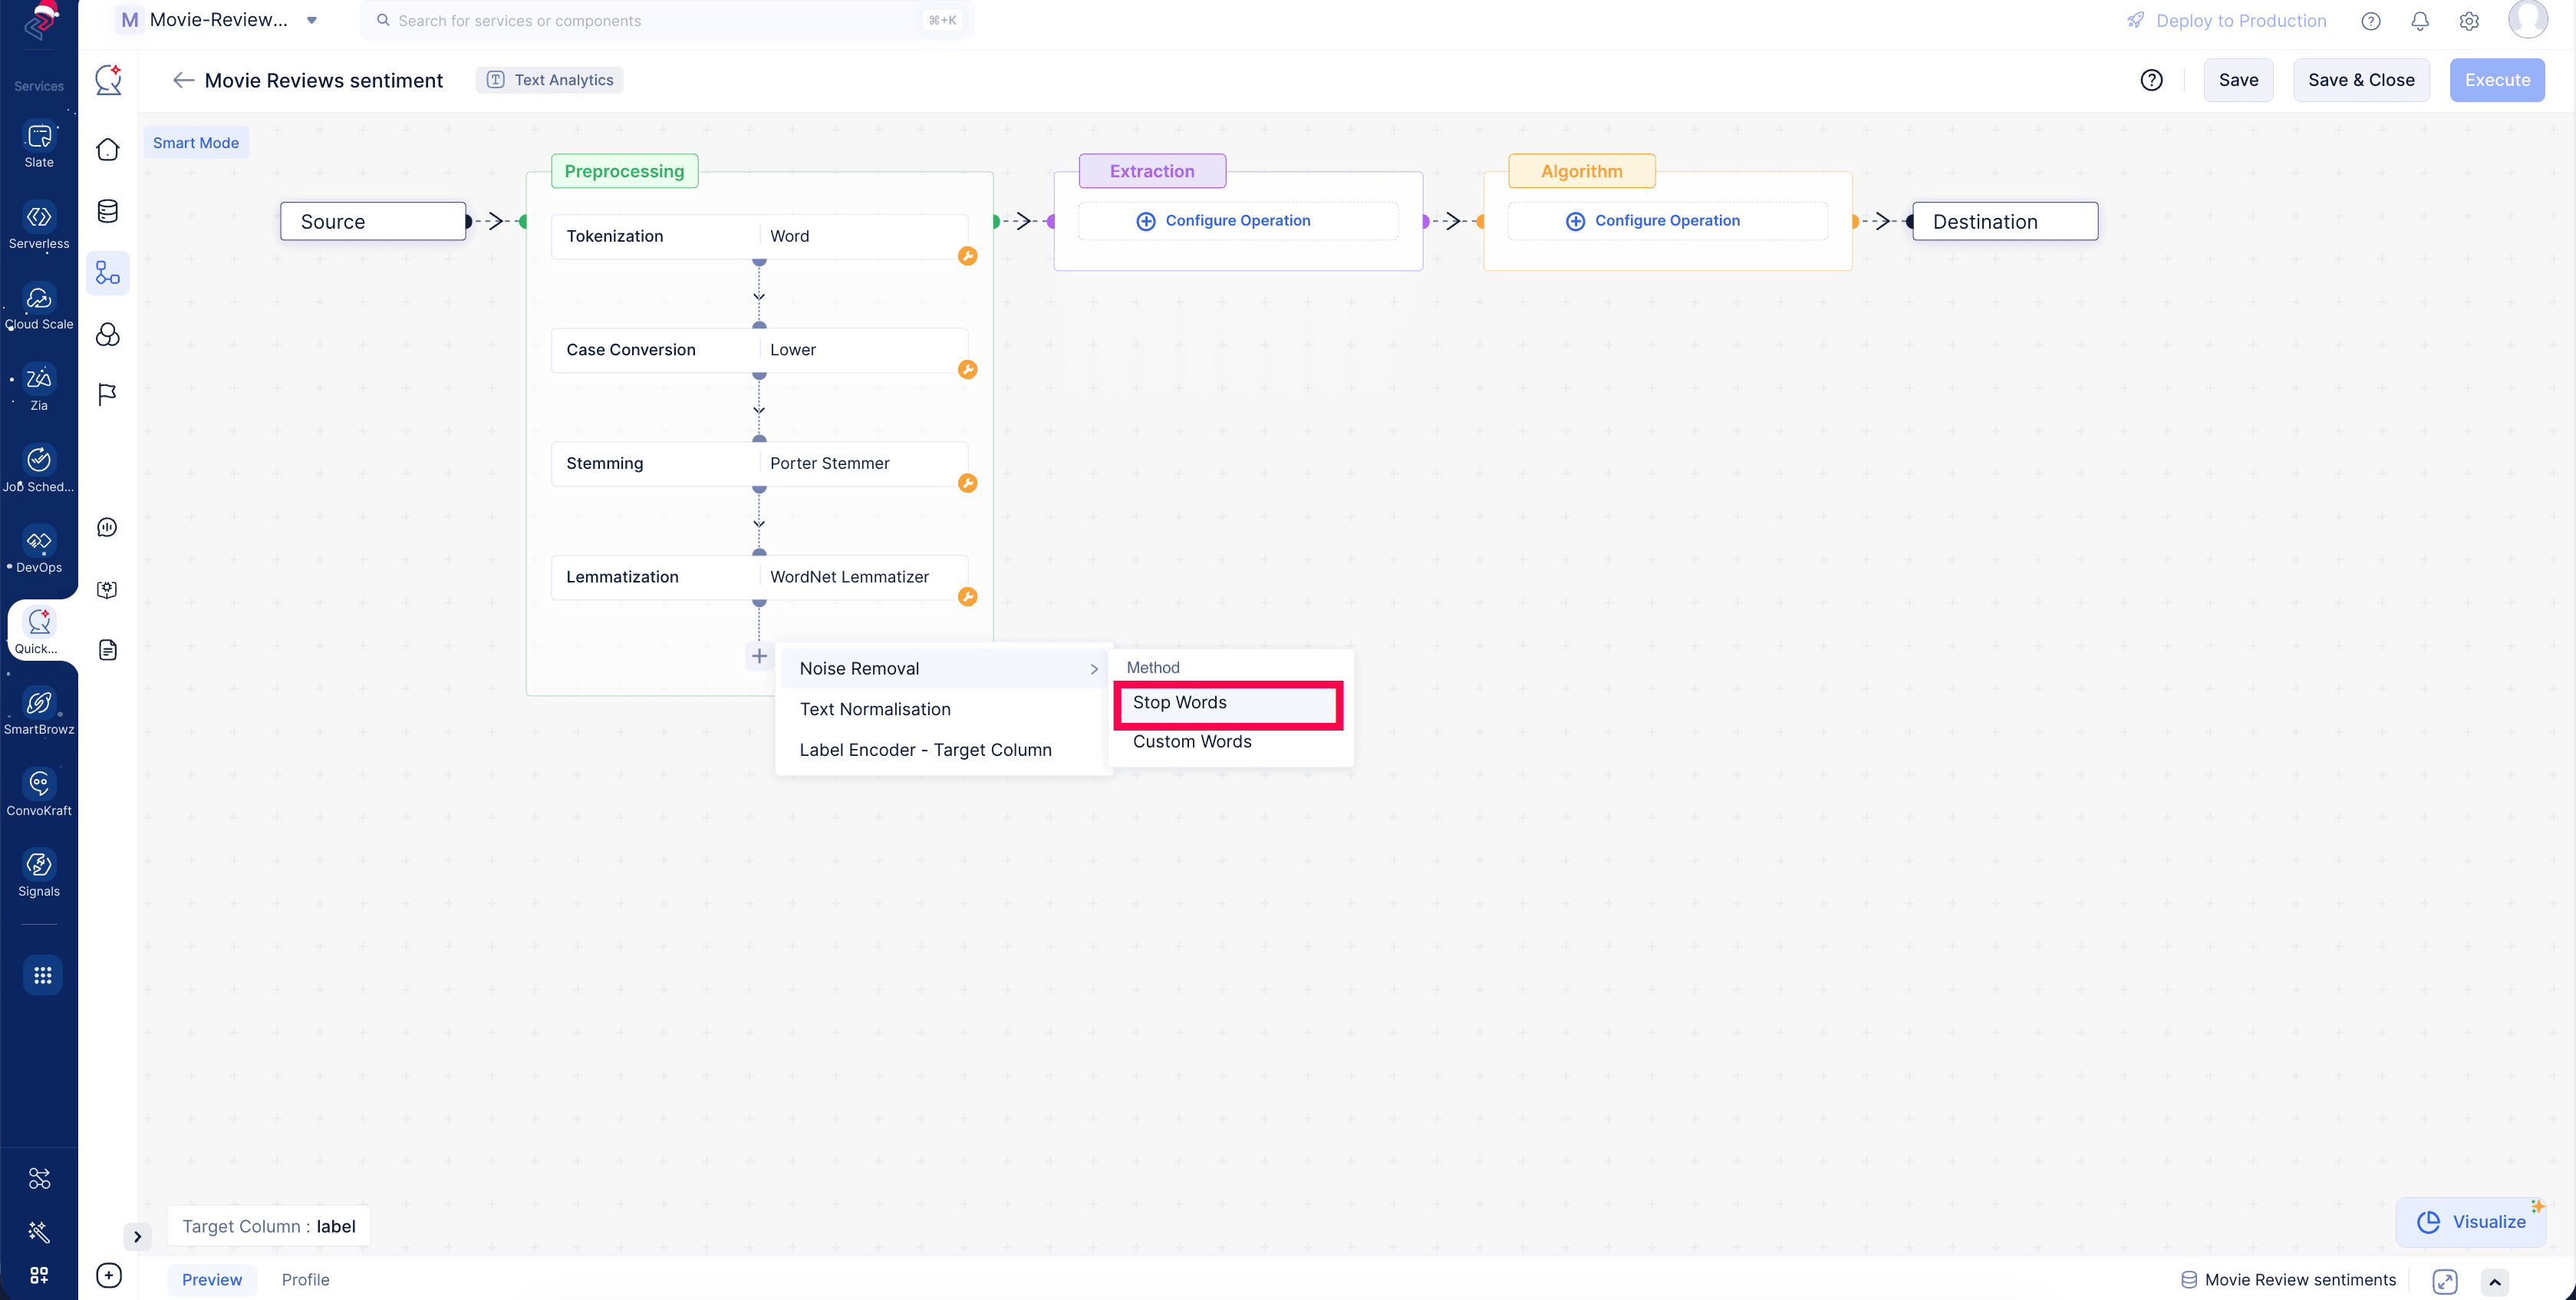
Noise Removal Noise removal removes unwanted words or parts of the sentences. Here, select the noise removal method as Stop Words, which fetches the unwanted words from its predefined library.
-
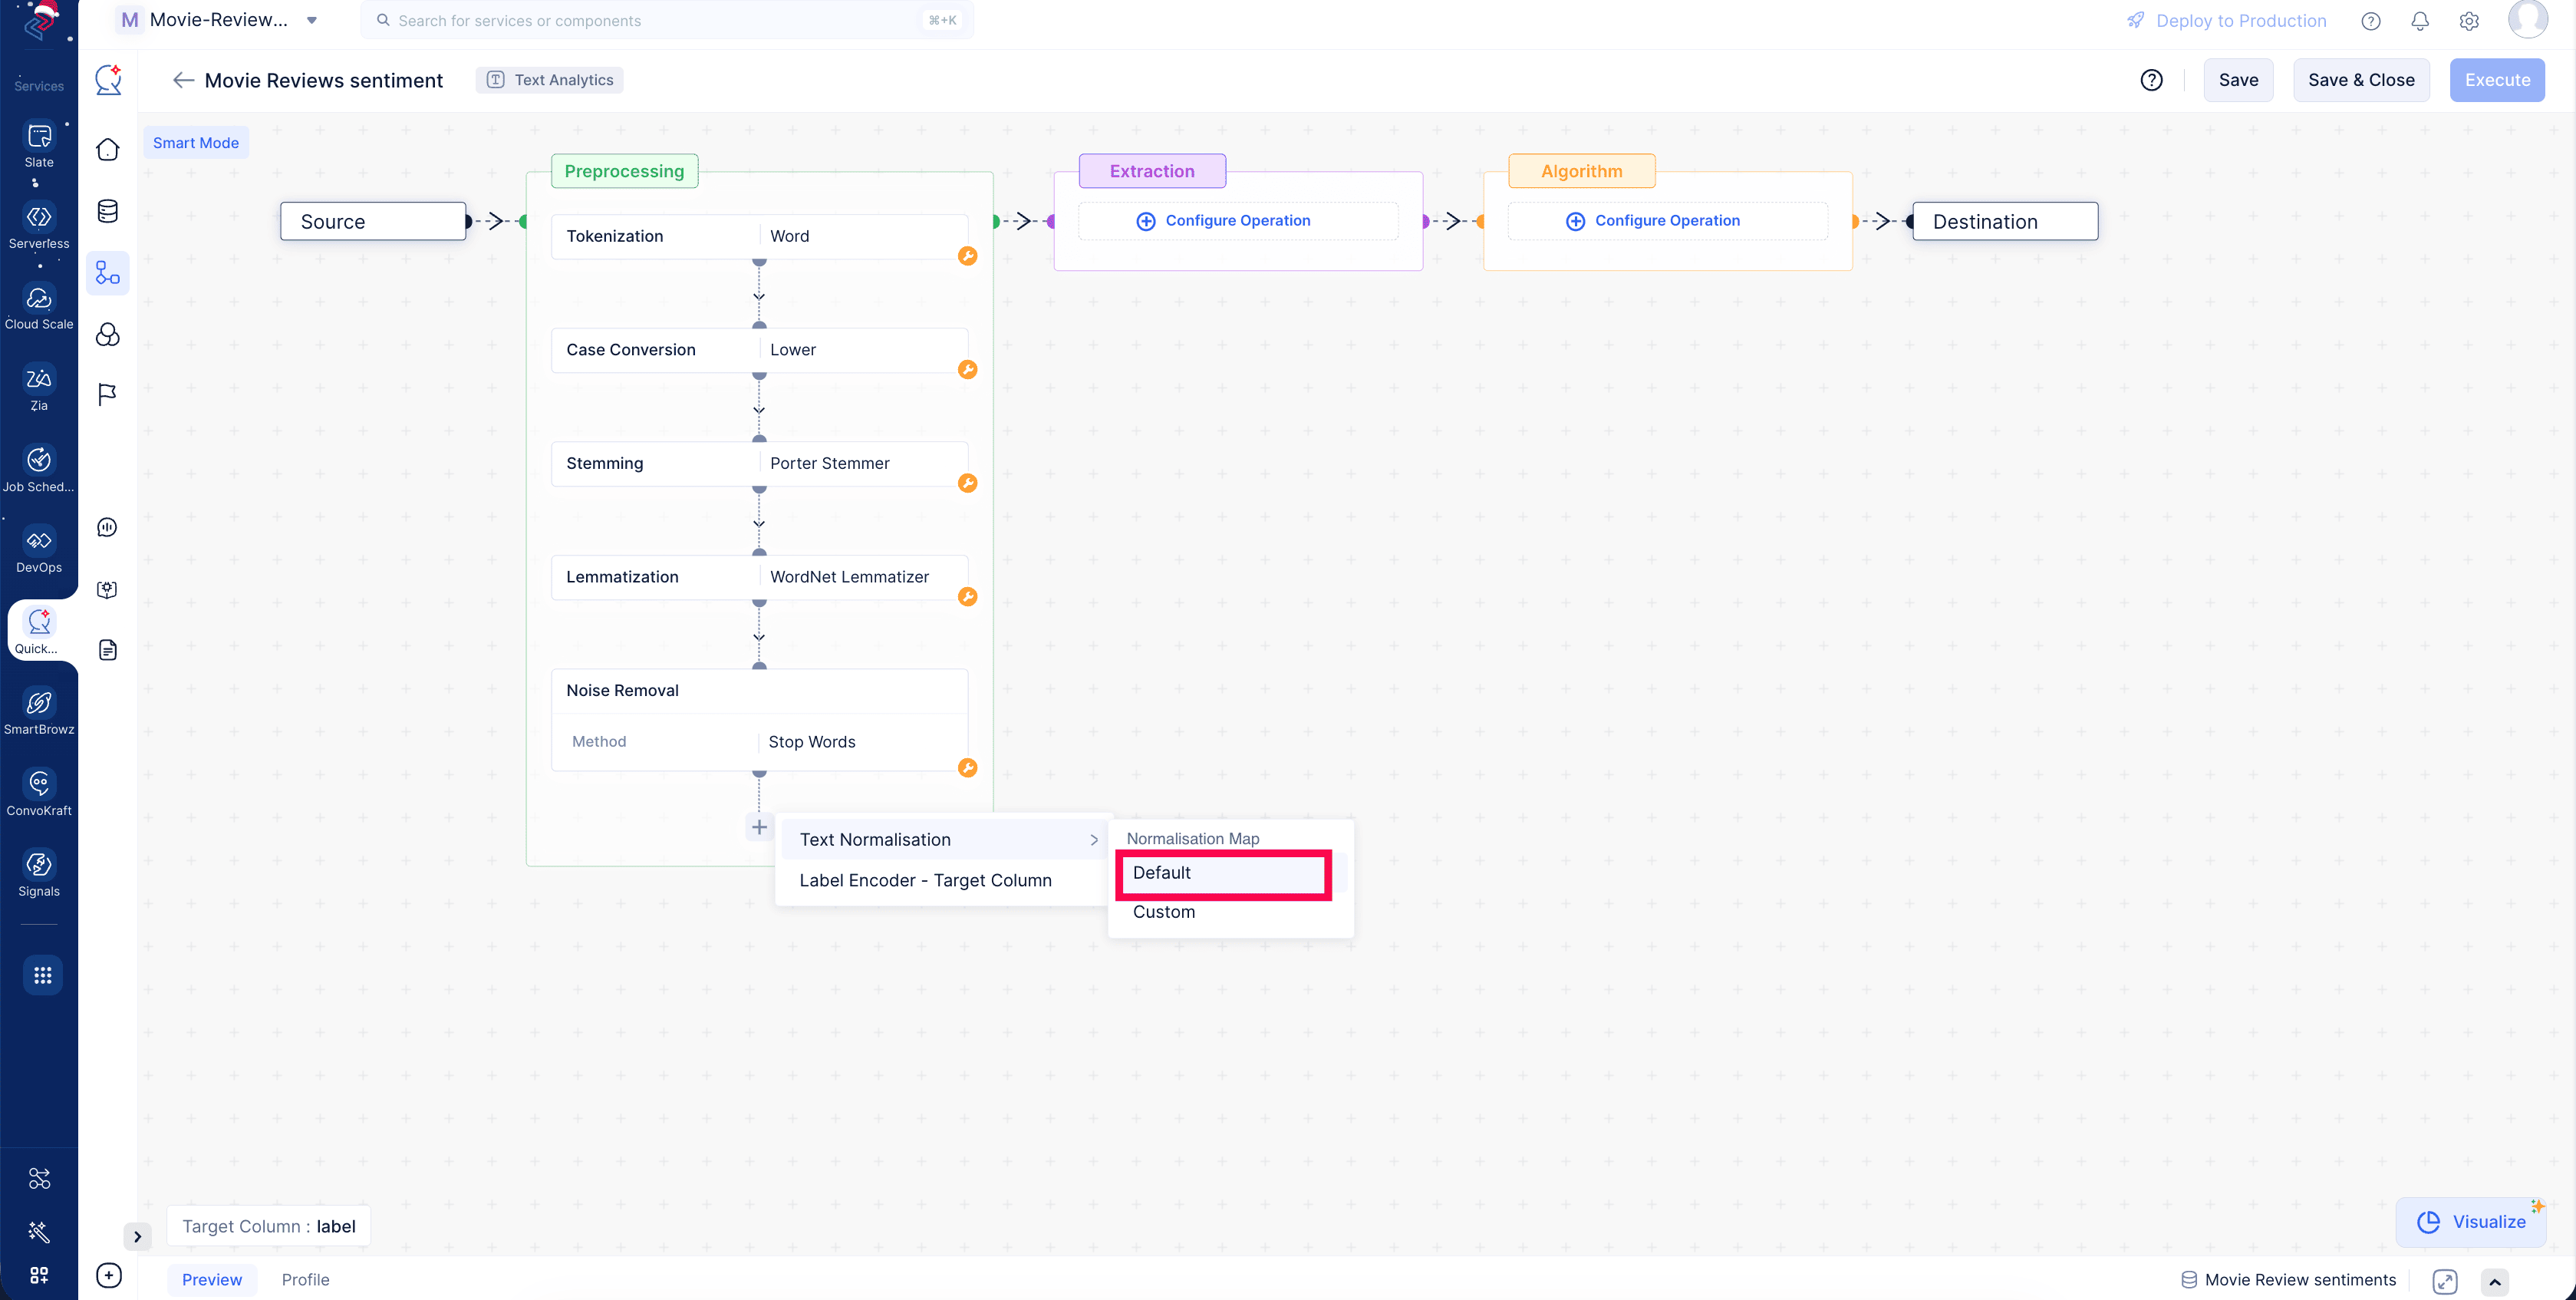
Text Normalization Text normalization converts different formats of text into a standard format using dictionary mapping. Here, set the text normalization operation to Default.
-
Label Encoder Label encoding is a method used to transform categorical variables into numerical values by assigning a unique integer to each category. In our movie reviews dataset, the target column Label contains the categorical values POSITIVE and NEGATIVE. These values need to be encoded in order to convert them to a numerical format.
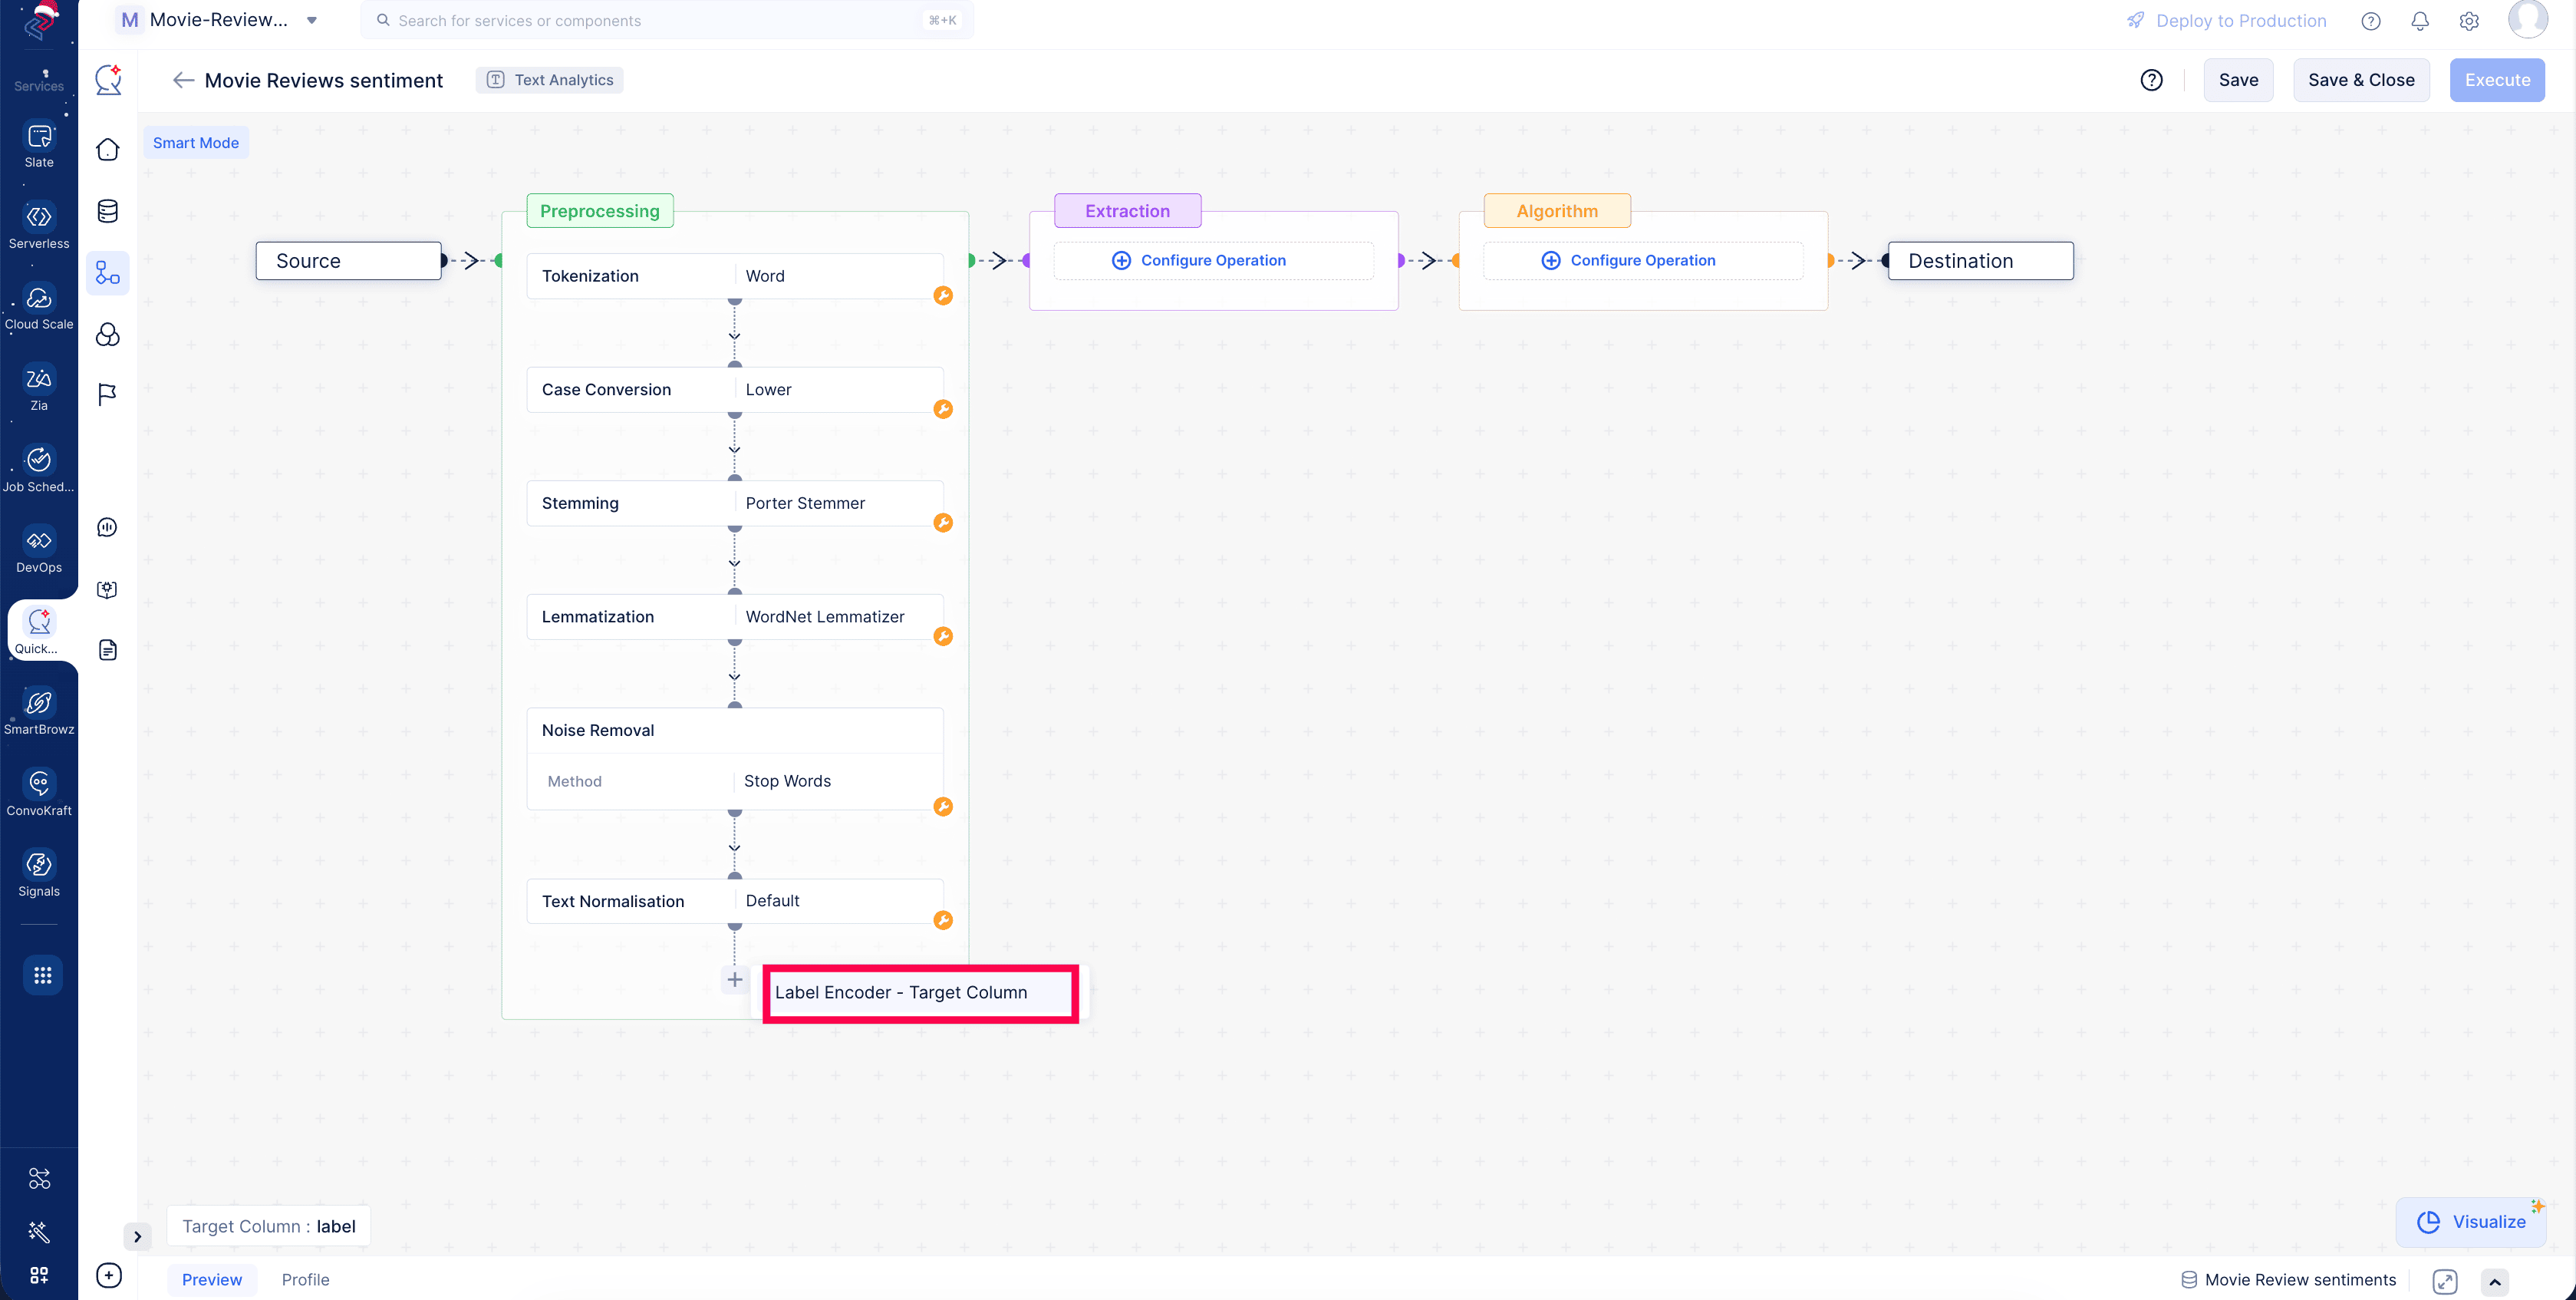
The pre-processing stage configuration is completed.
Pre-processing execution
Once all the pre-processing operations are configured, they need to be applied to the dataset.
Click Run (as shown in the image below) and wait for the execution to finish.
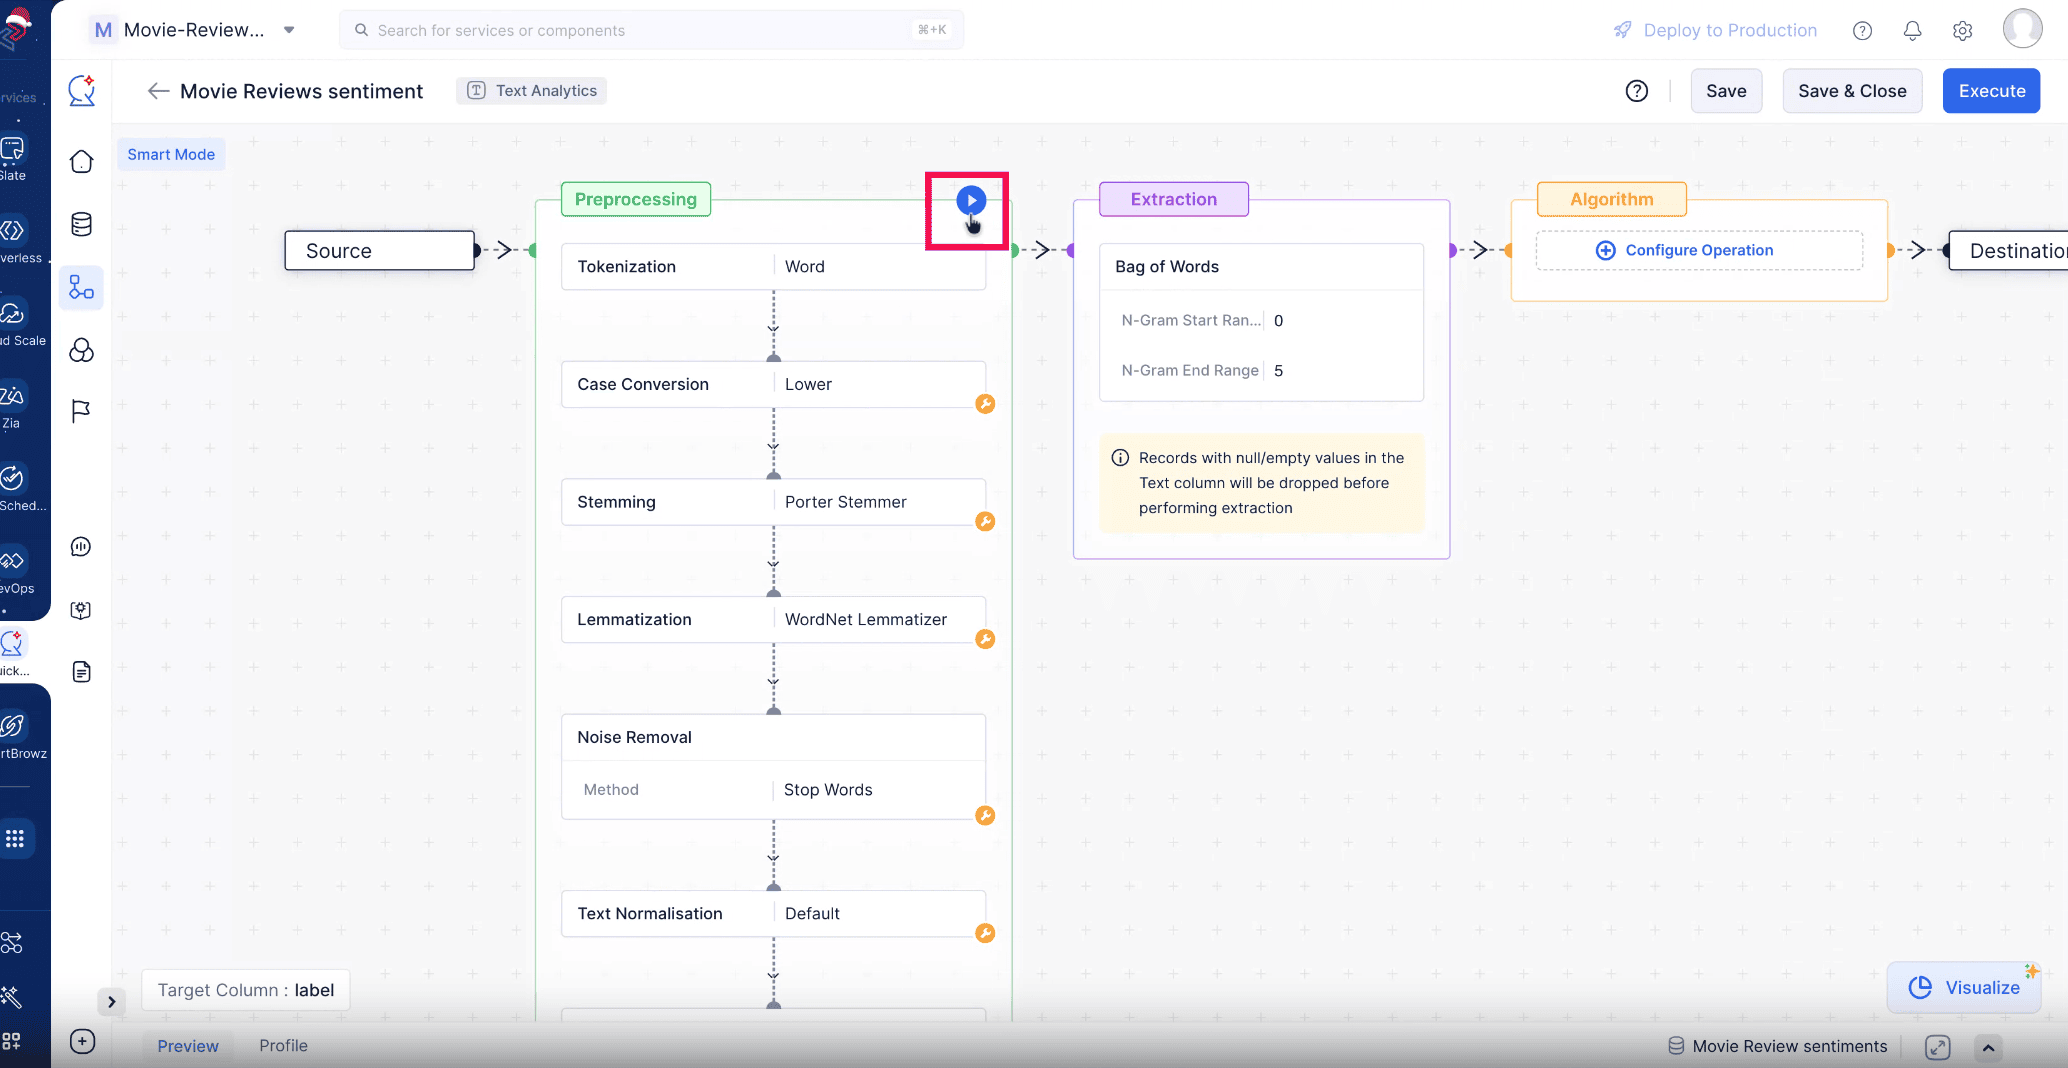
Upon completion, the operations are executed, and the pipeline is saved. Now, you can view the profile and preview for each operation in the pre-processing stage on sample data.
To generate a profile for the entire dataset (instead of just the sample data), go to the Profile tab, choose Whole Data in the Generate Profile pop-up, and click Generate.
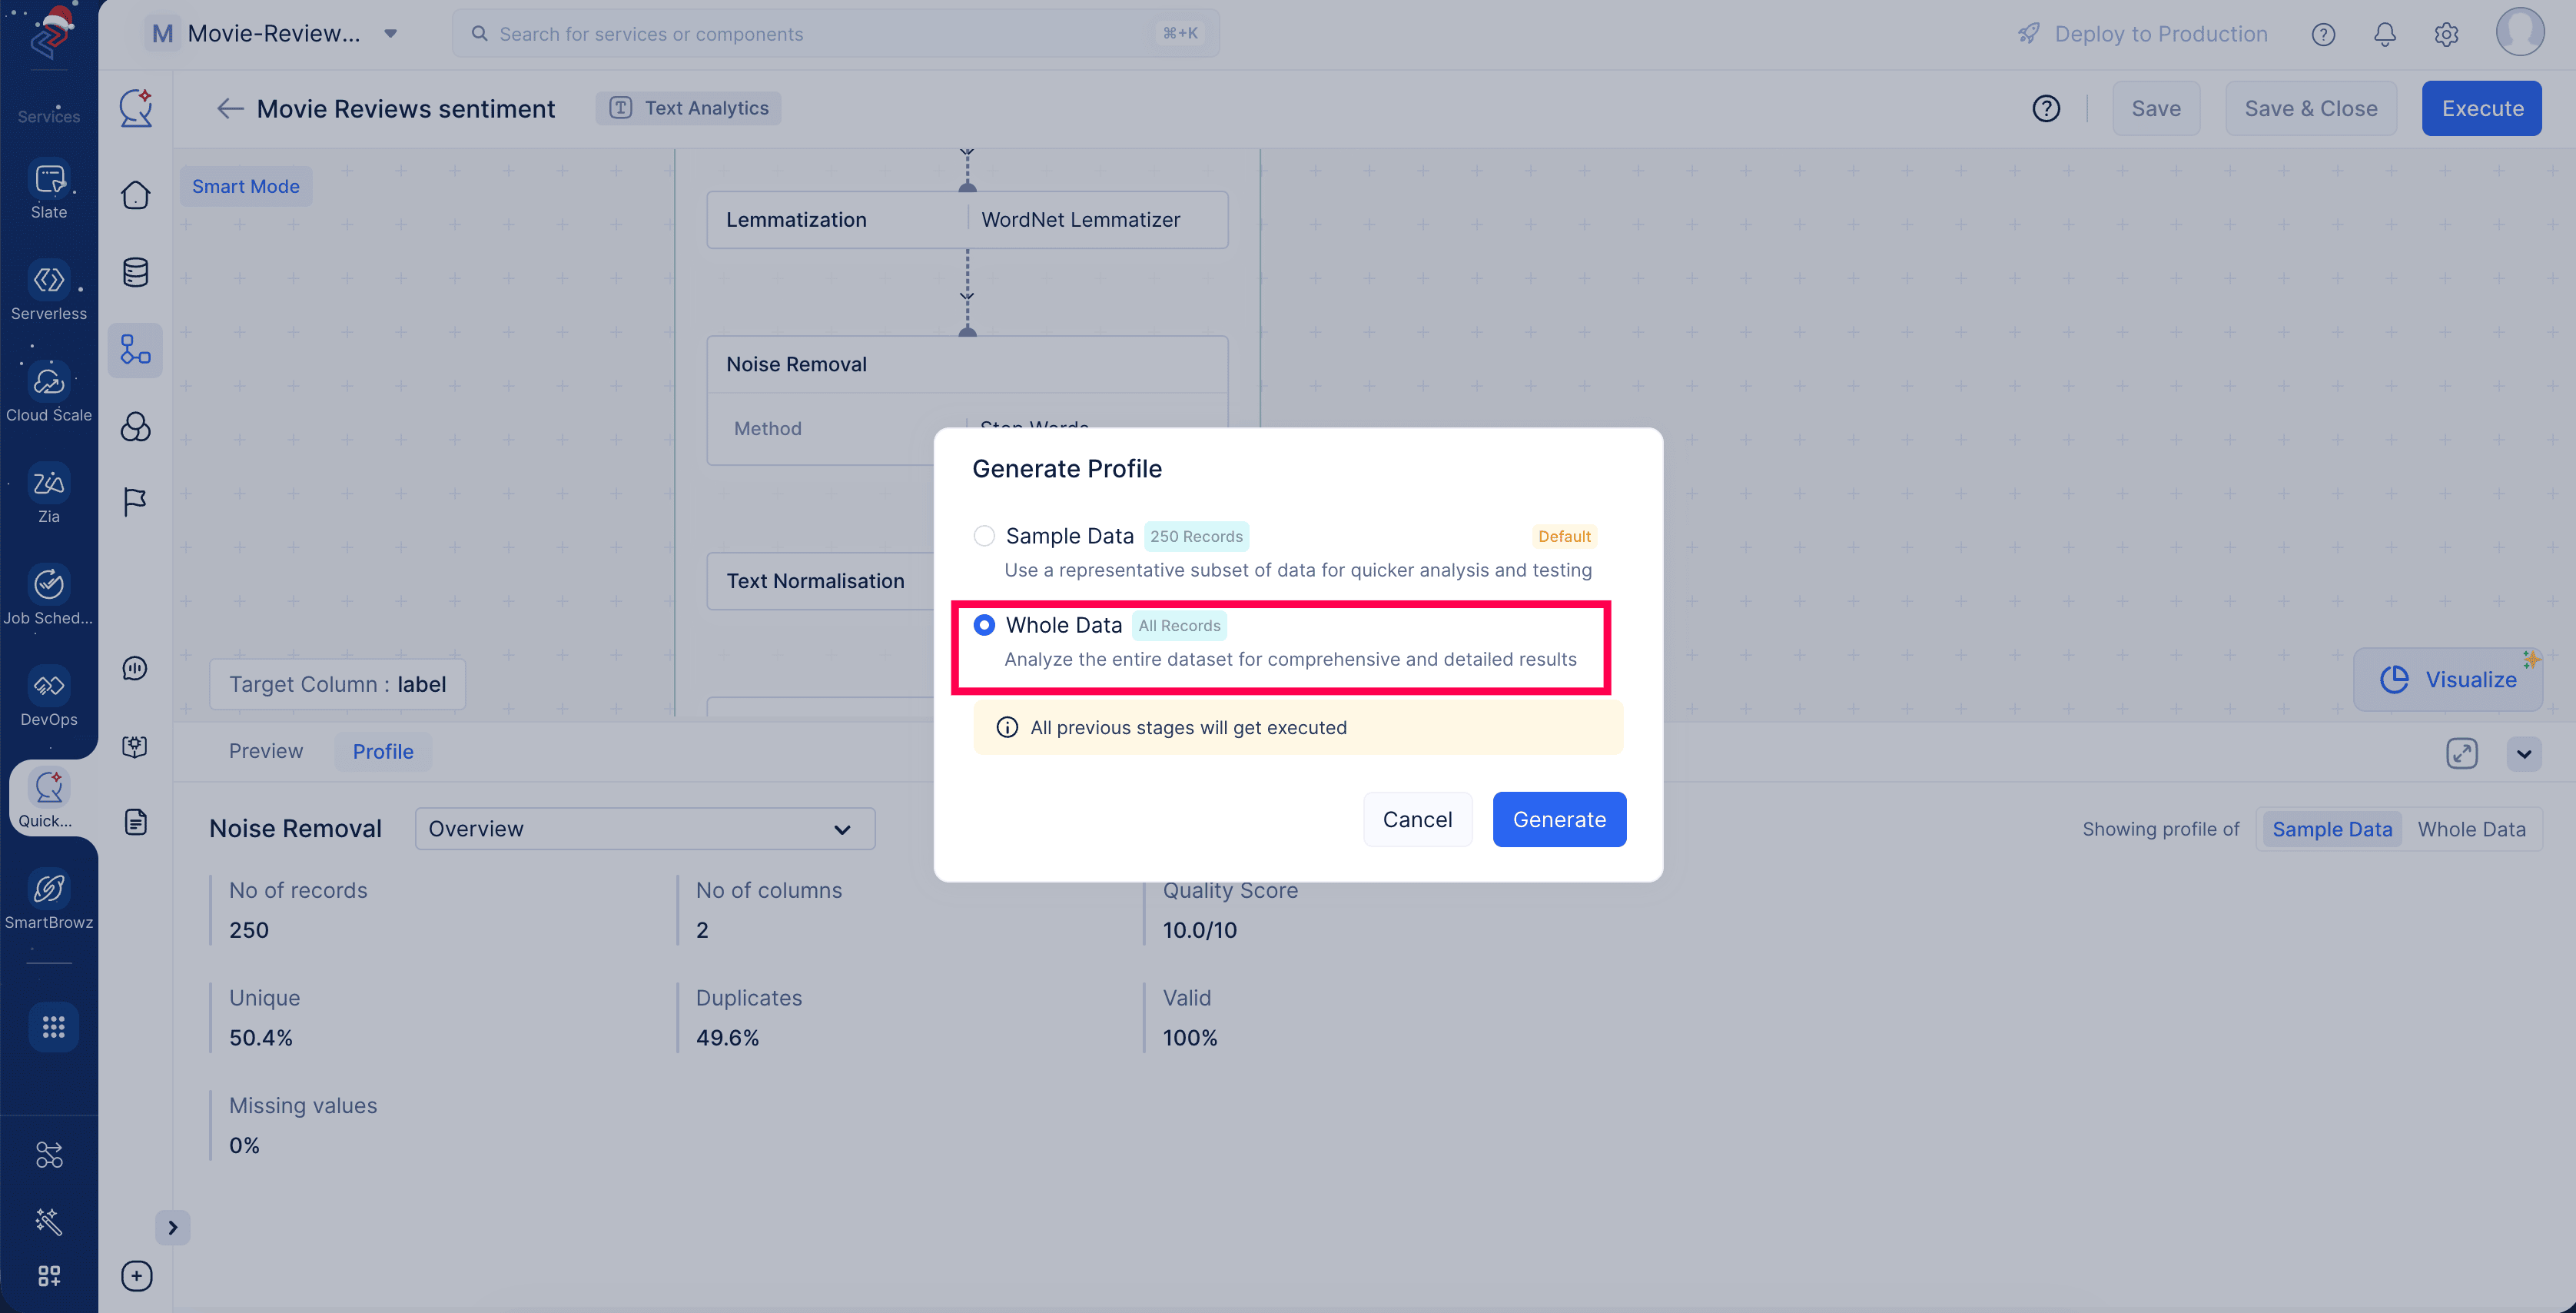
This will apply all the pre-processing operations configured to the whole dataset and generate a profile for each operation. For now we selected Noise Removal stage to view the whole dataset profile.
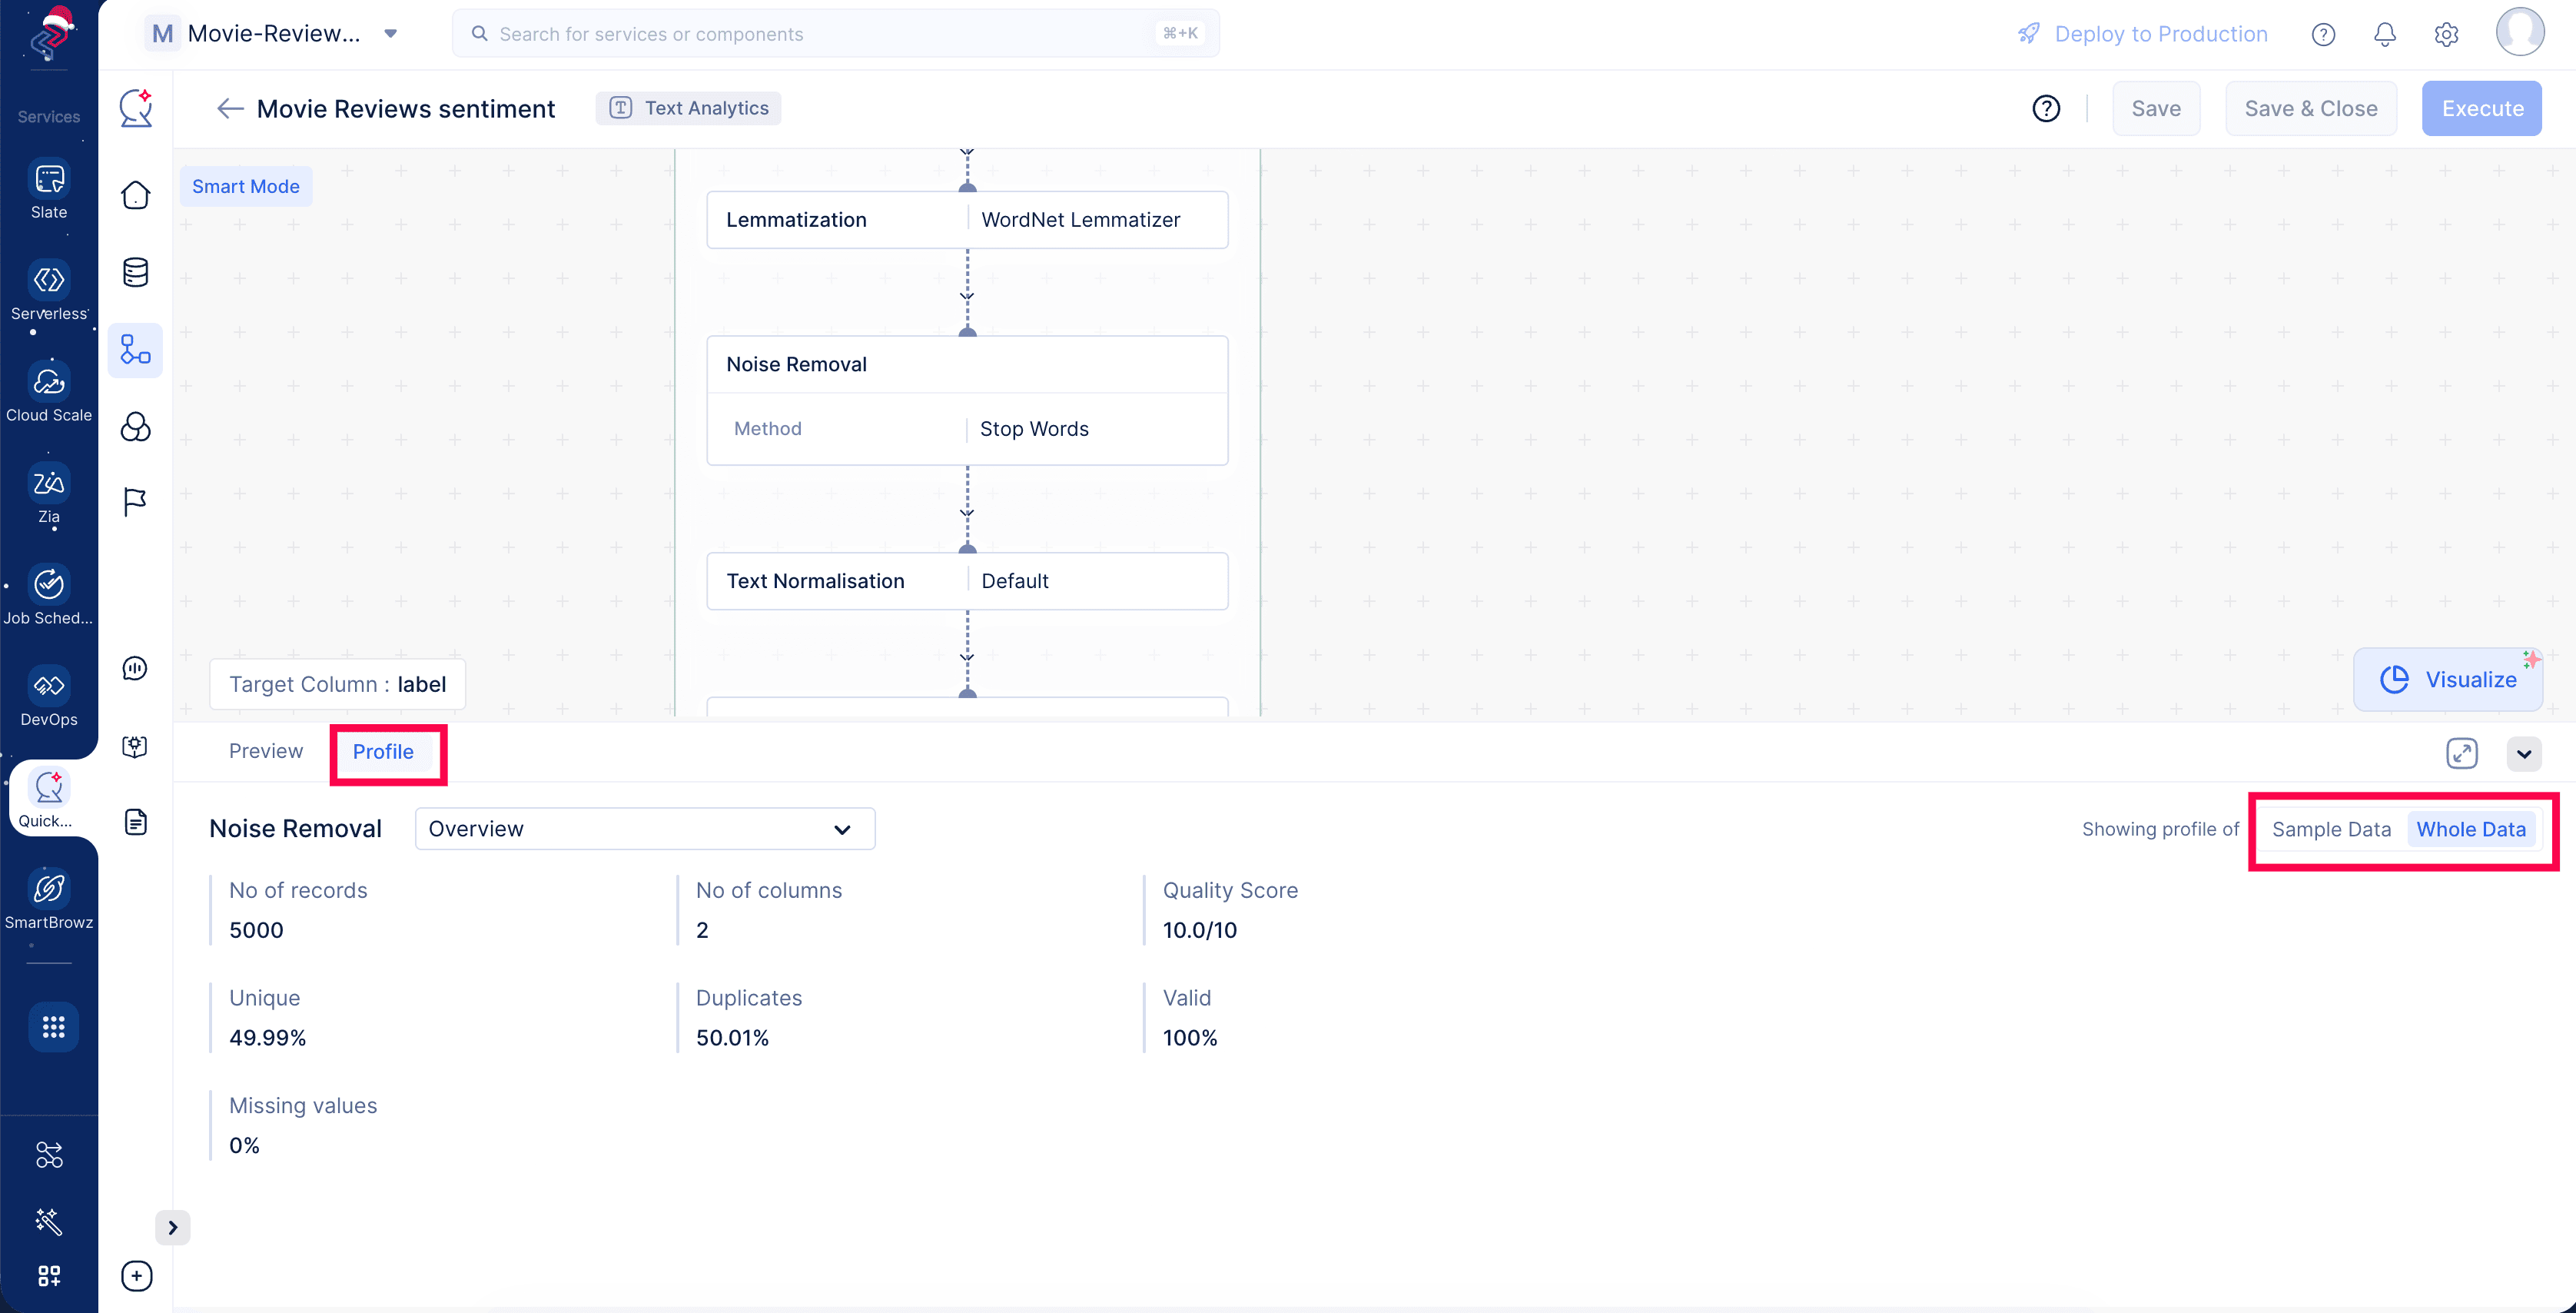
Now the pre-processing stage is configured and executed, and the data is transformed. Let’s configure the extraction stage.
Extraction configuration
Textual data can’t be fed directly into an algorithm; it must first be converted into a numerical format. The feature extraction stage, or extraction, contains several vectorization techniques that help us convert all the textual data in our Text column into numerical features. In this context, each word, sentence, or character presented to a model is treated as a feature.
In the extraction stage, click on Configure Operation and select the Bag of Words option.
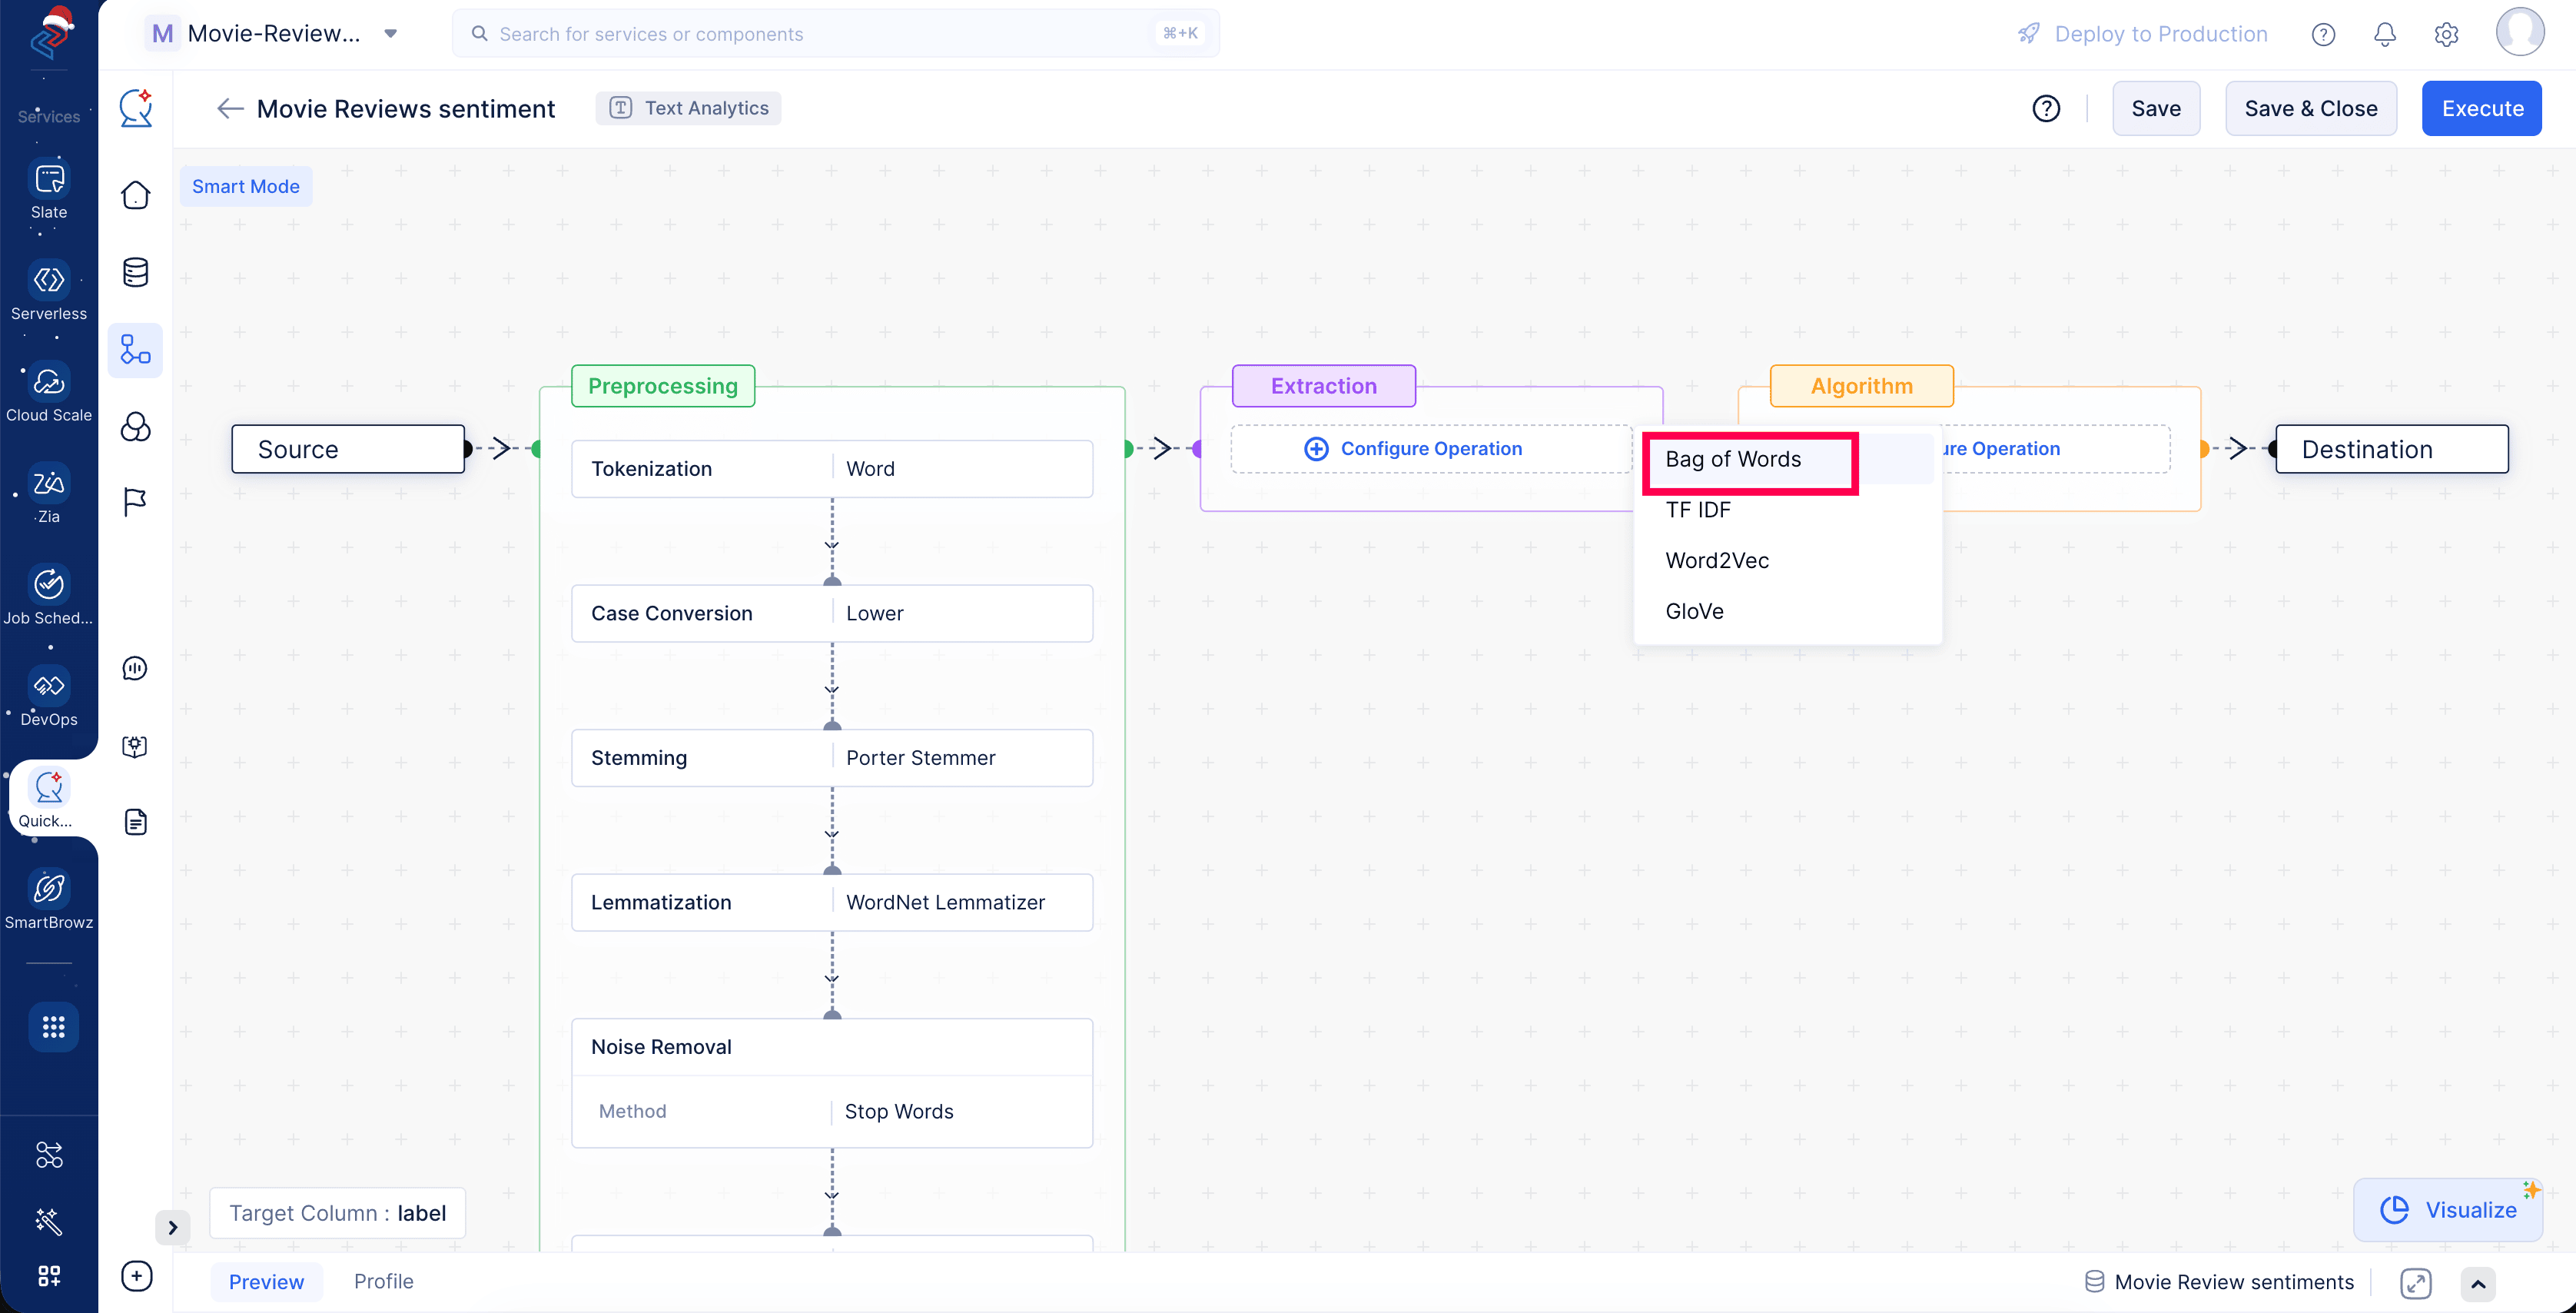
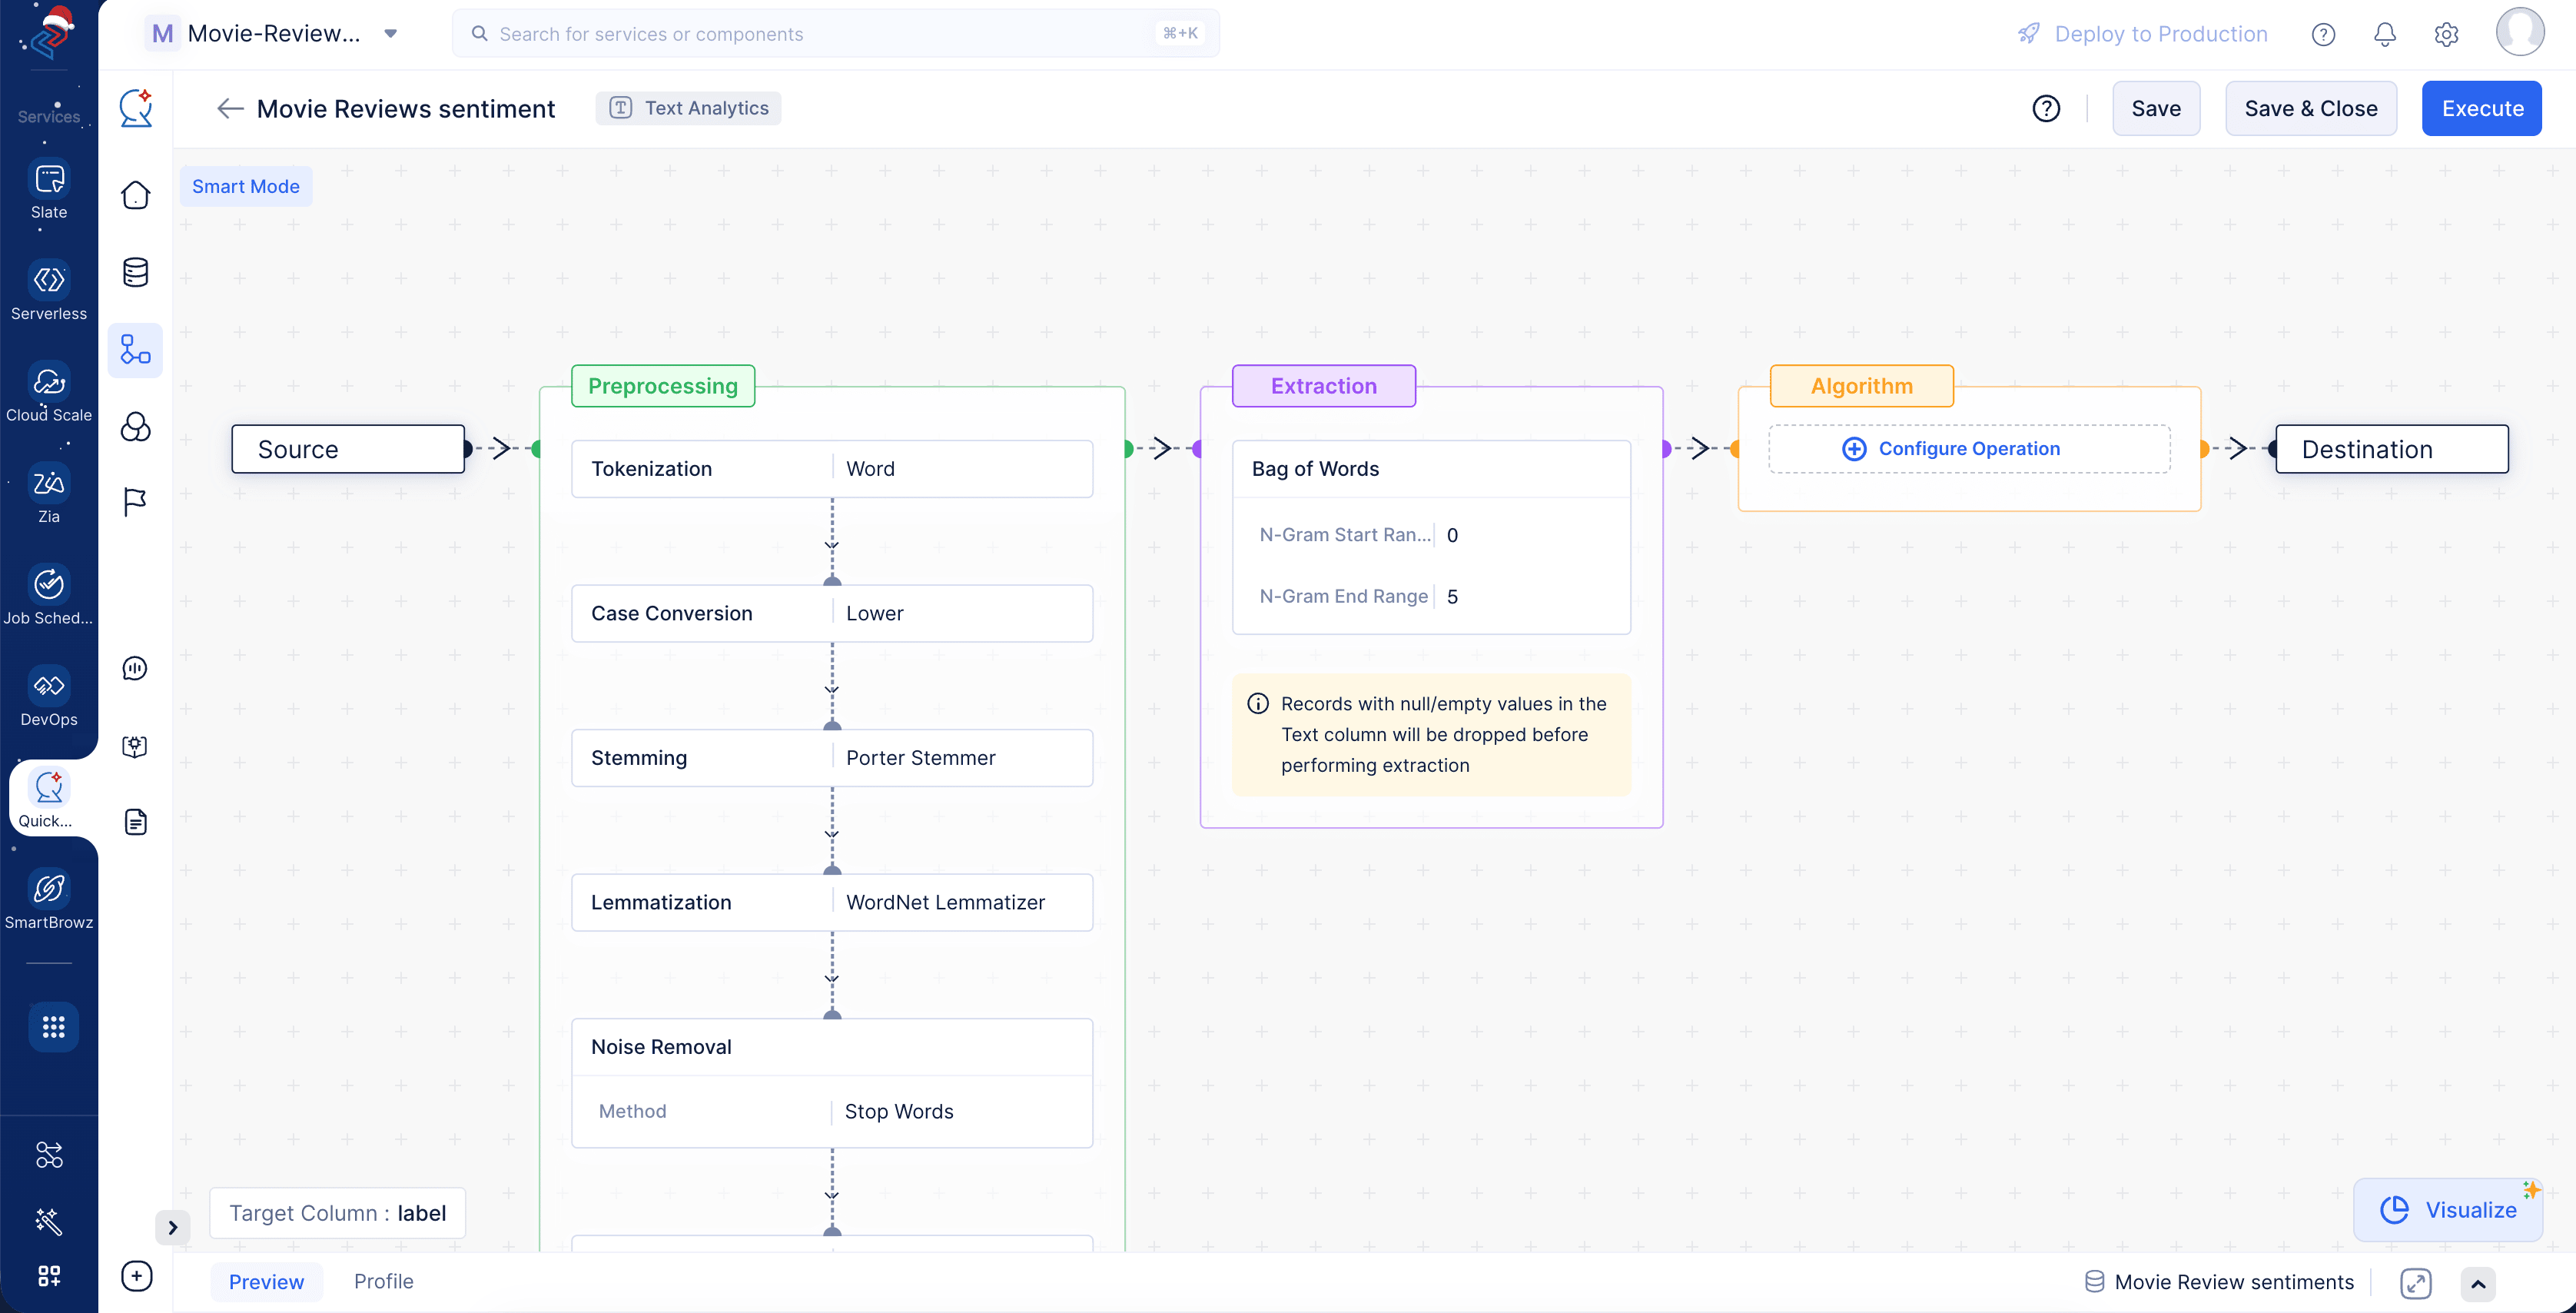
It will auto populate the default hyperparameter values for the selected operation. Adjust the desired hyperparameter values for any of the selected extraction operation
Algorithm selection
The final step in building a text analytics pipeline is selecting the algorithm.
Click on the Configure Operation button in the Algorithm stage and select Multinomial Naive Bayes Classification.
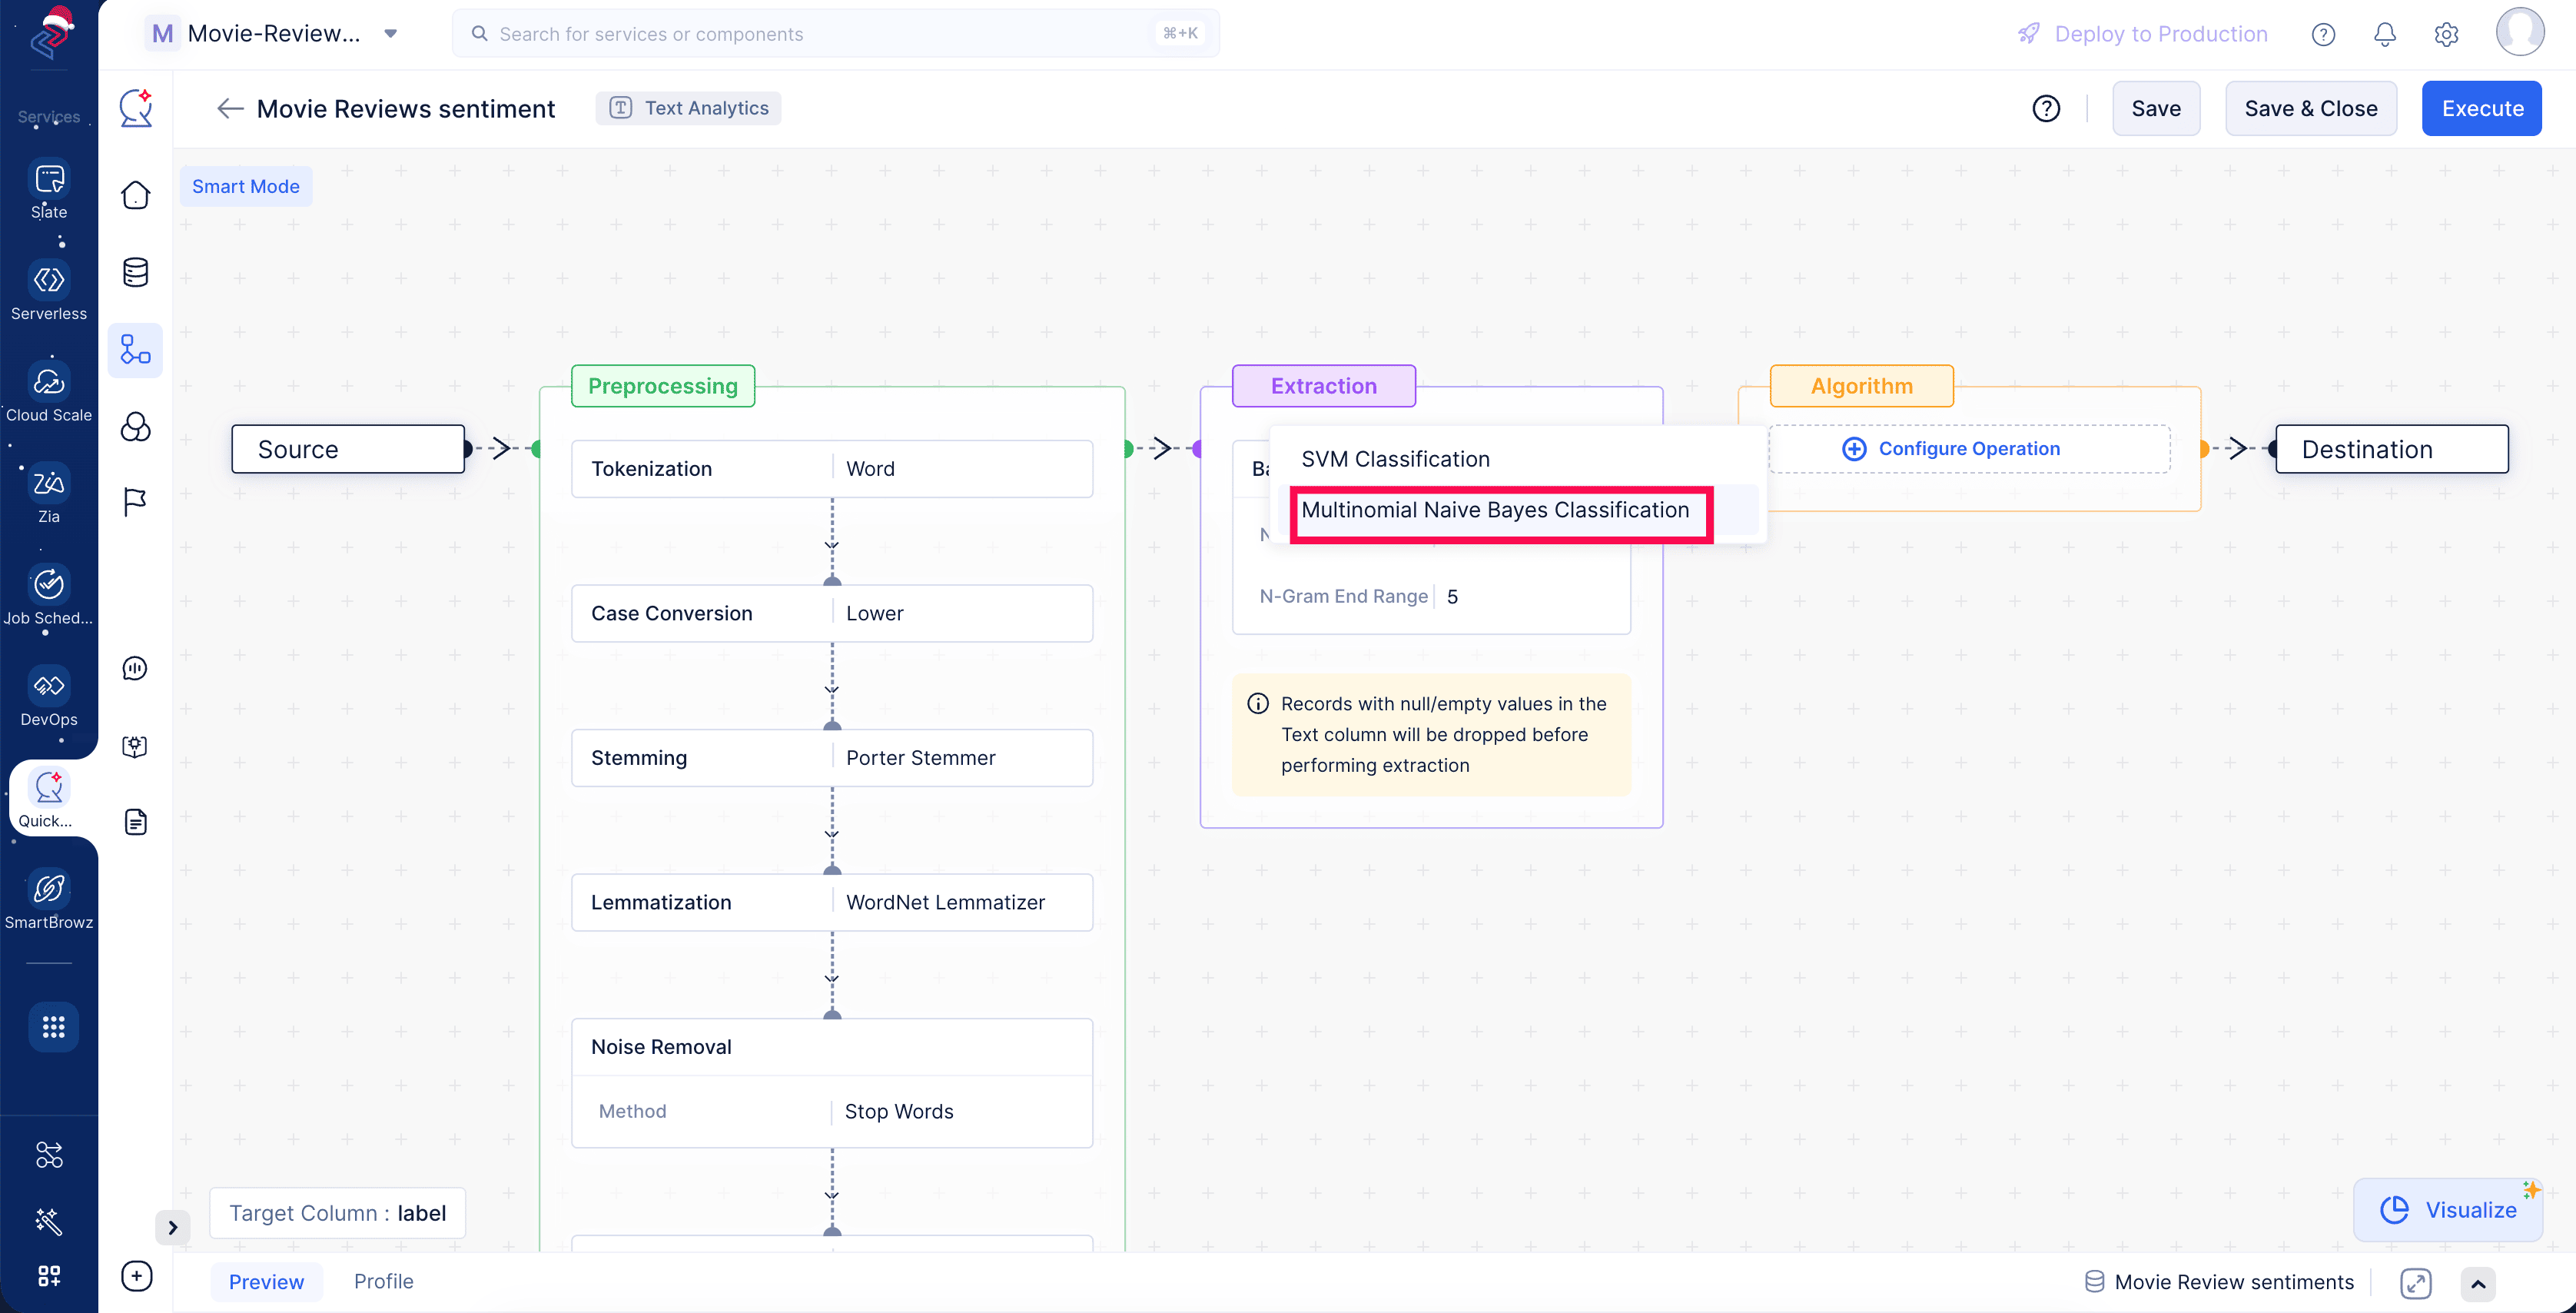
In order to make sure the model is optimized for our particular dataset, we can also adjust the tuning parameters; in our case, let’s just stick with the default settings. When everything is configured, save the pipeline and start executing it to generate your model.
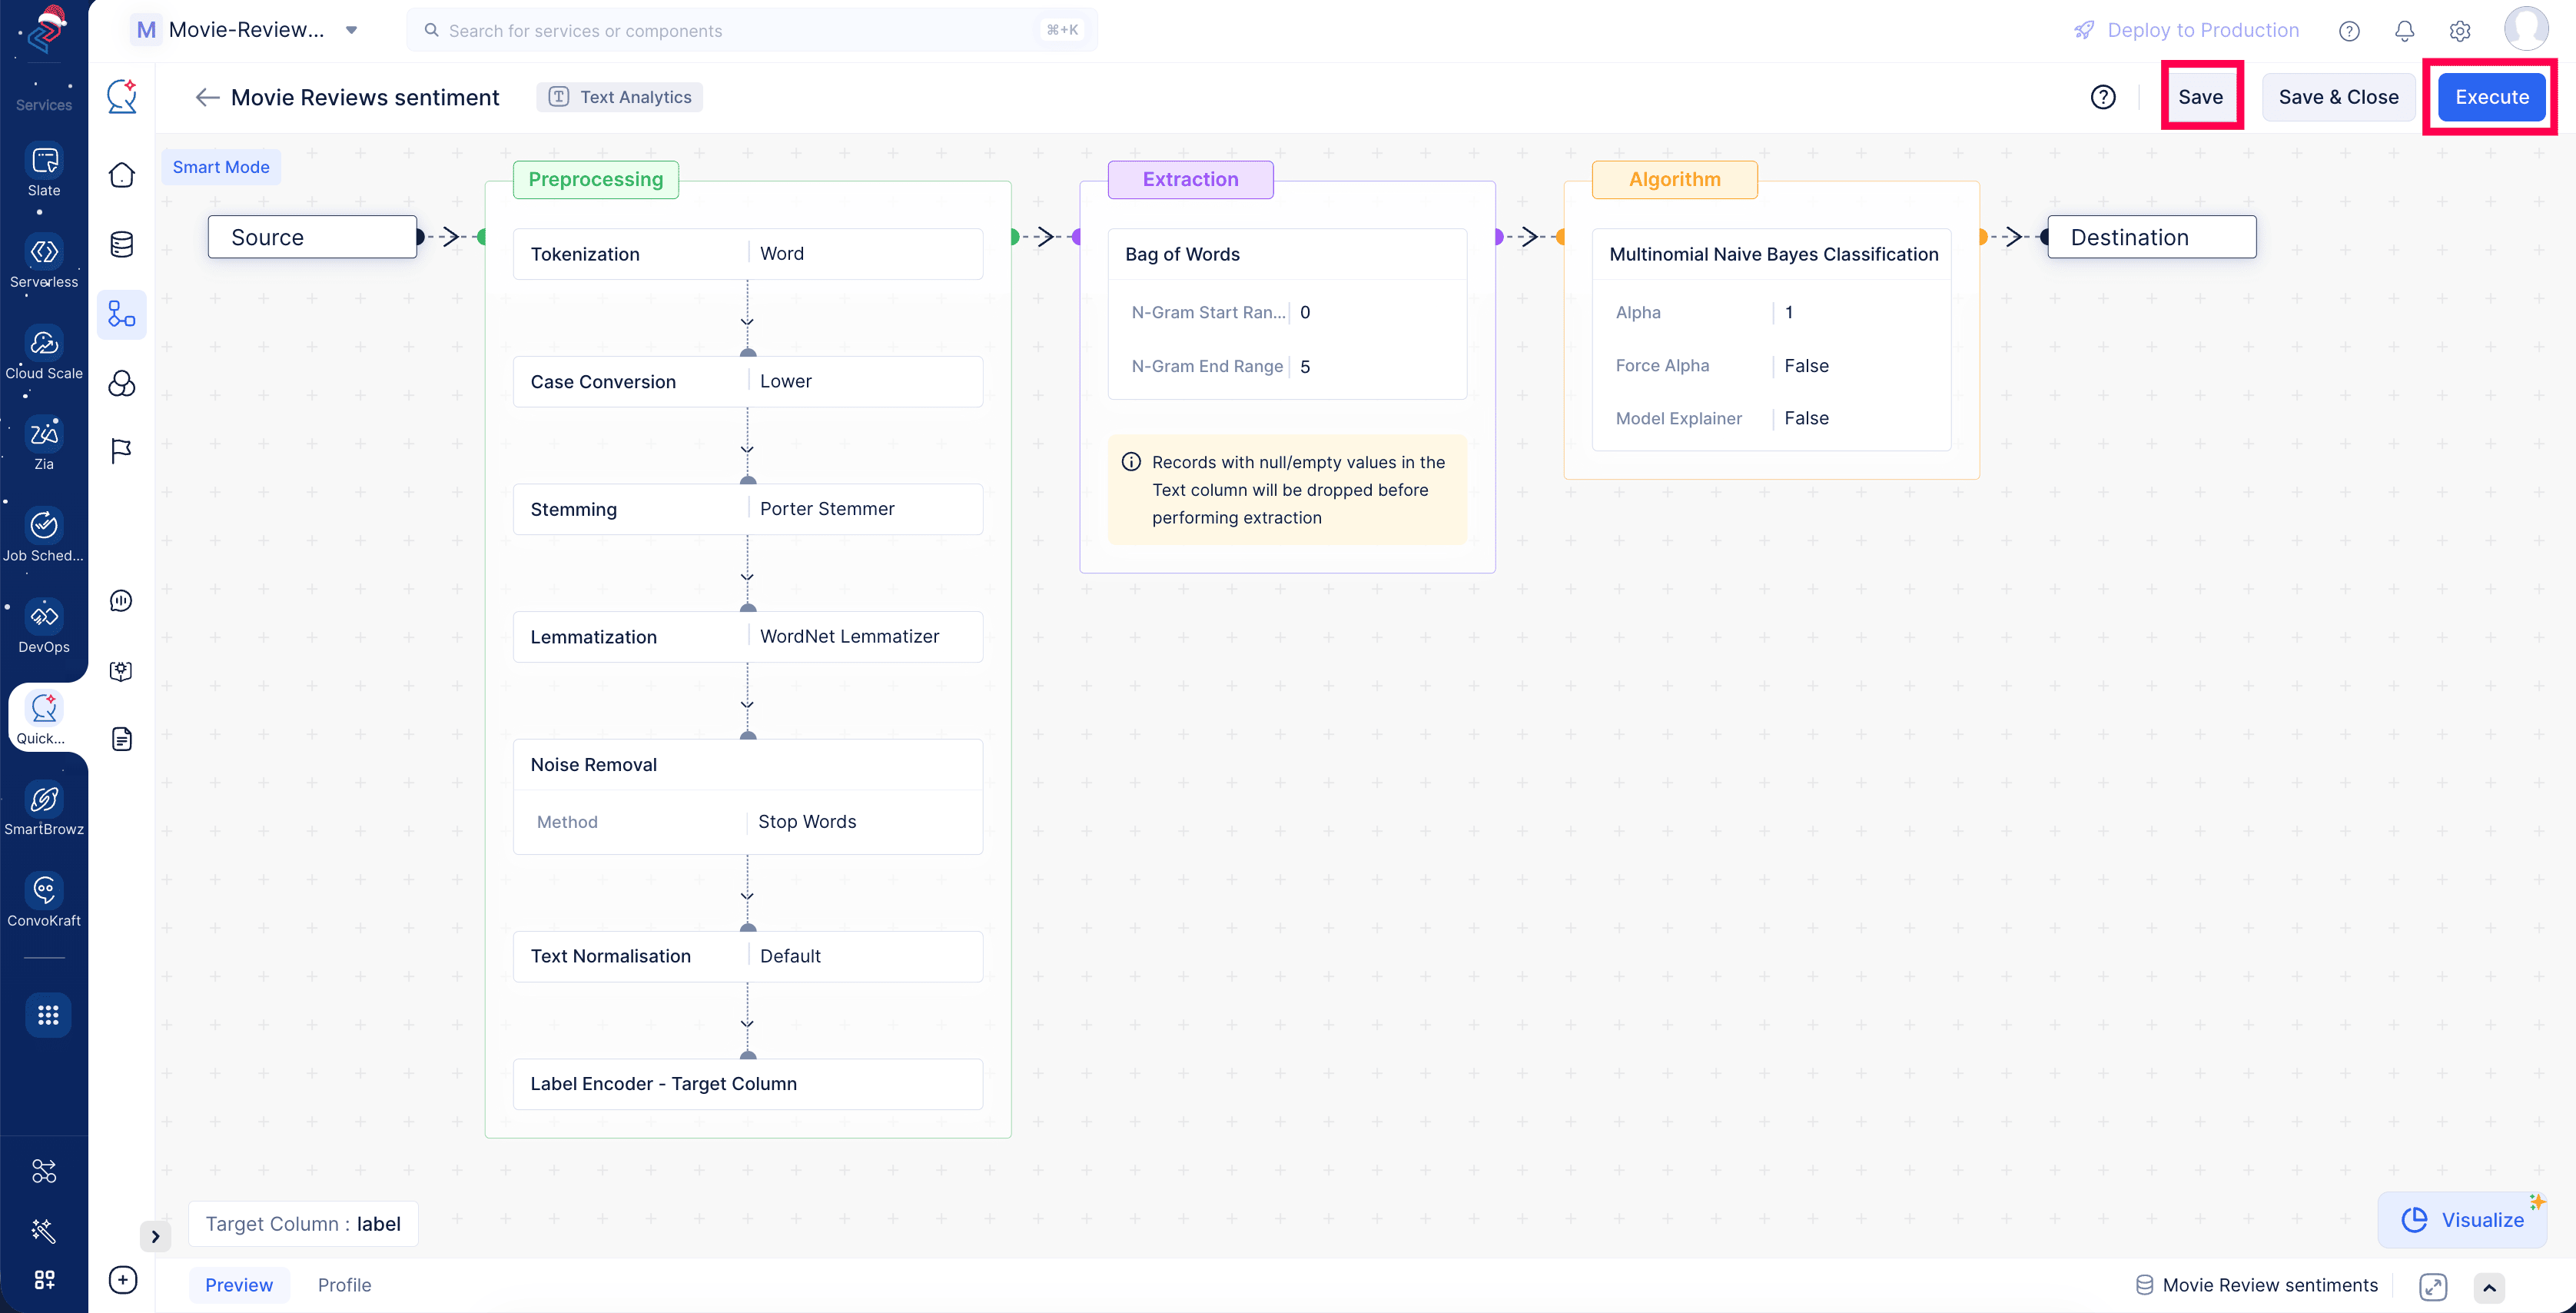
Click Save to save the pipeline and execute it by clicking Execute at the top-right corner of the pipeline builder page.
This will redirect you to the pipeline details page, which provides details about the executed pipeline with execution status. You can see that the pipeline execution is successful.
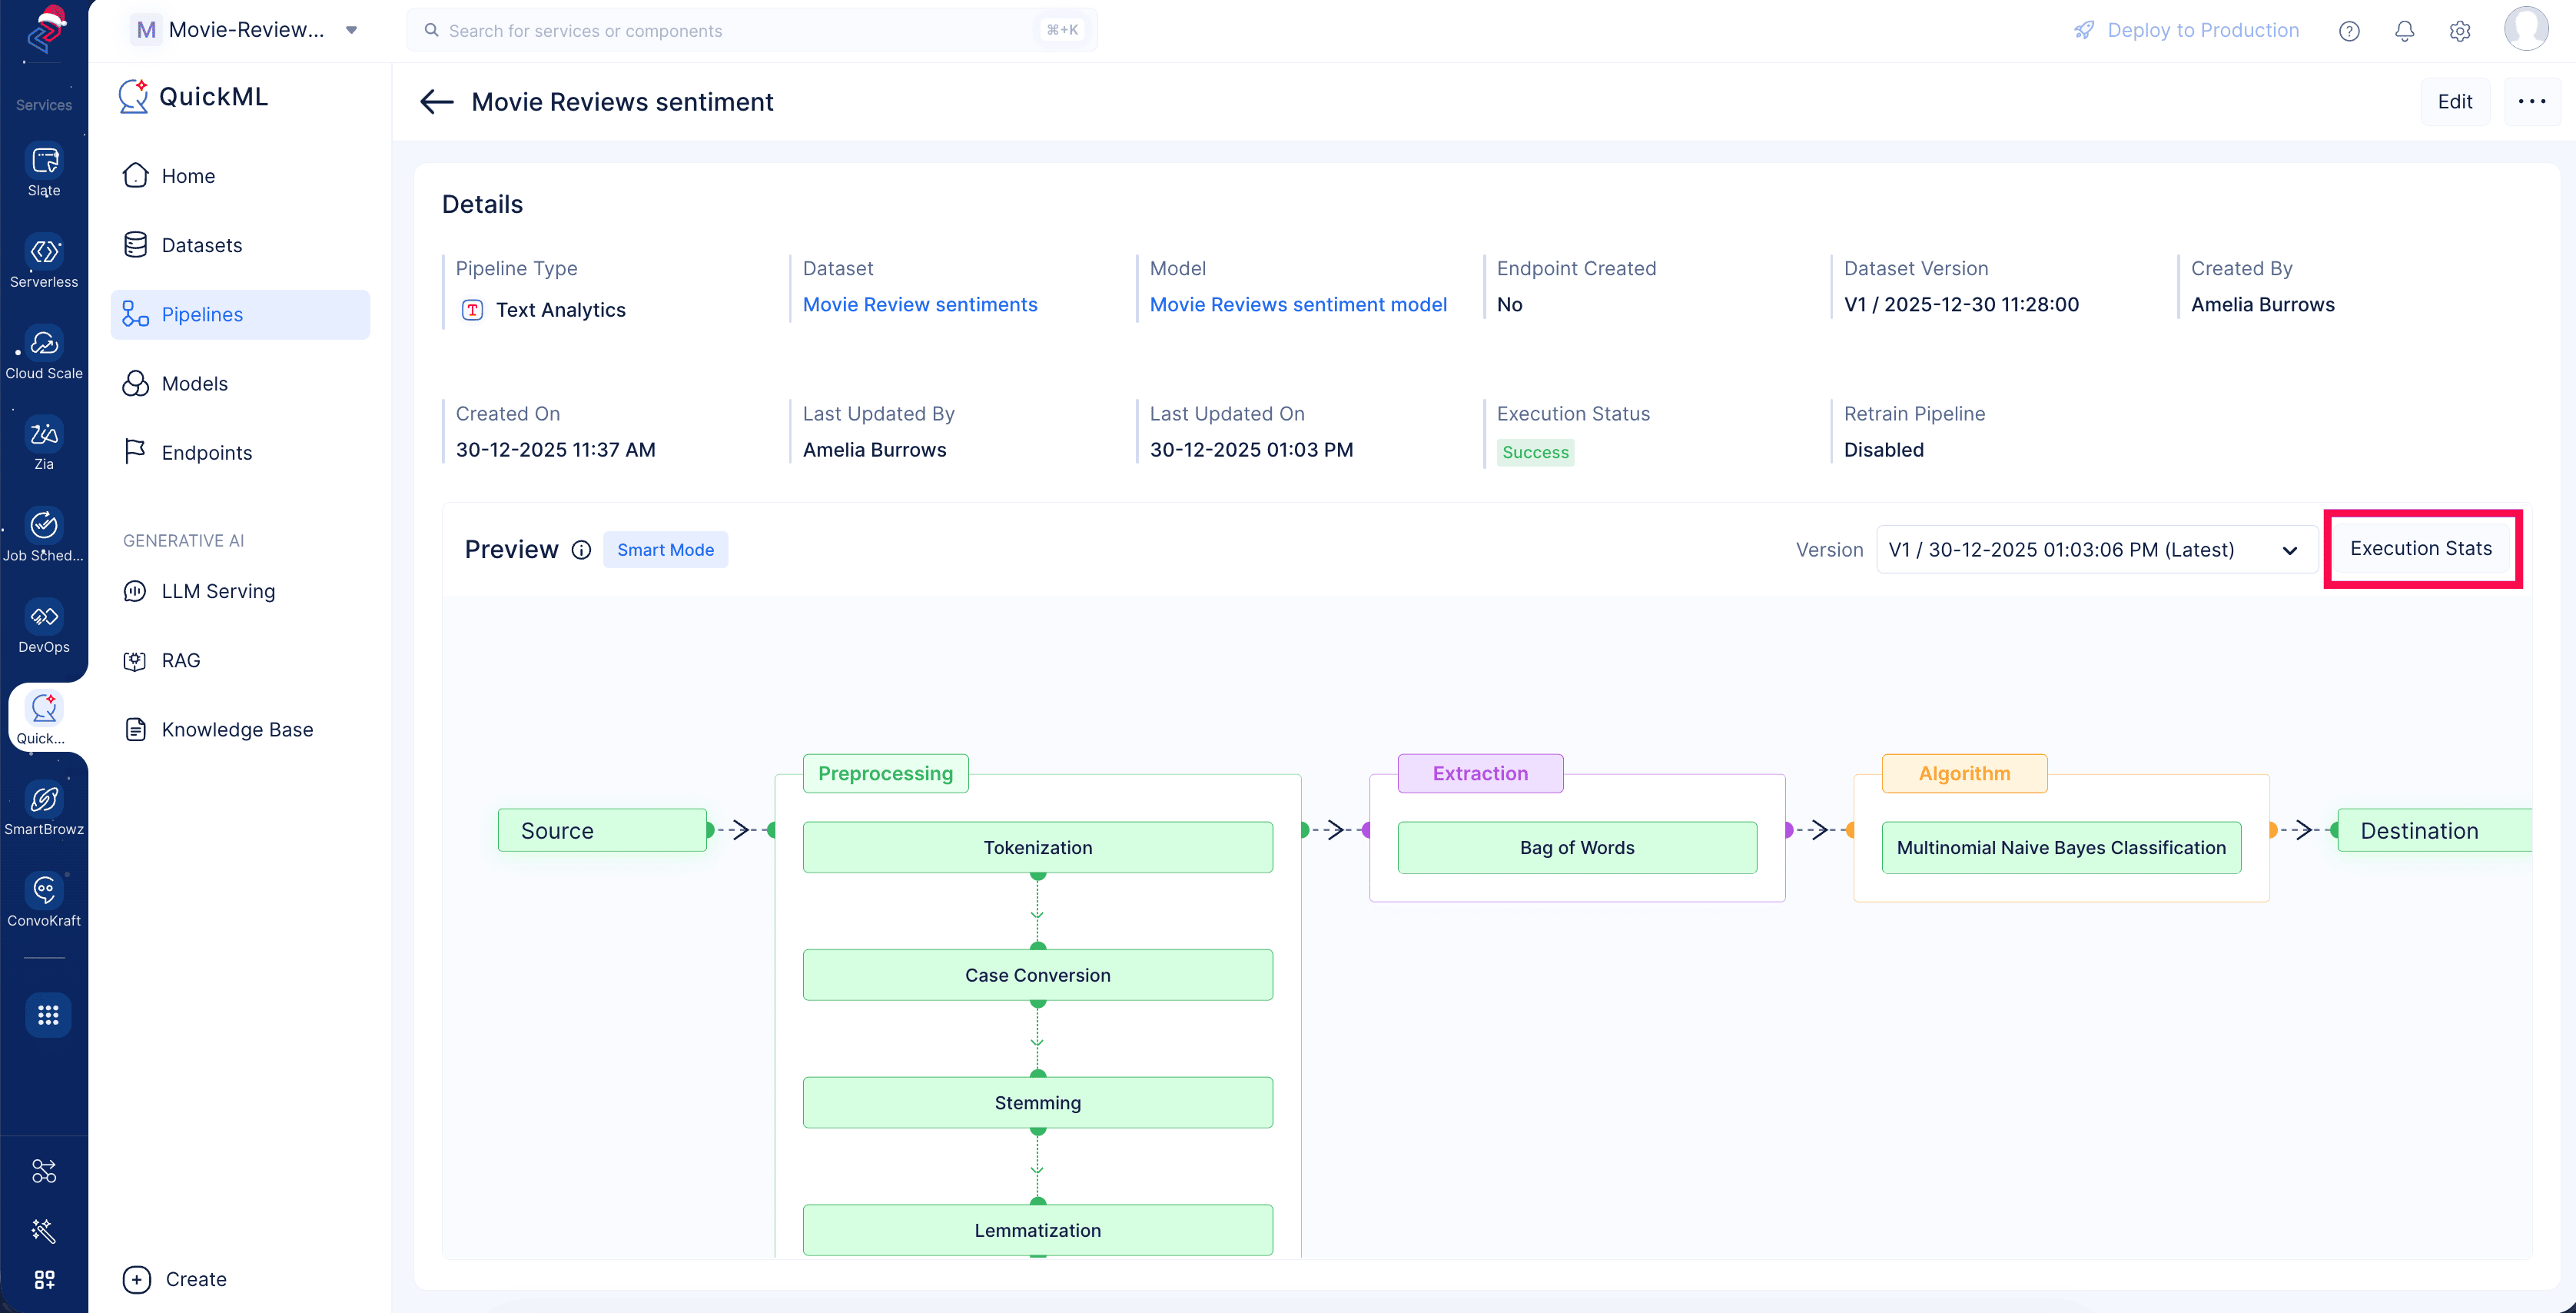
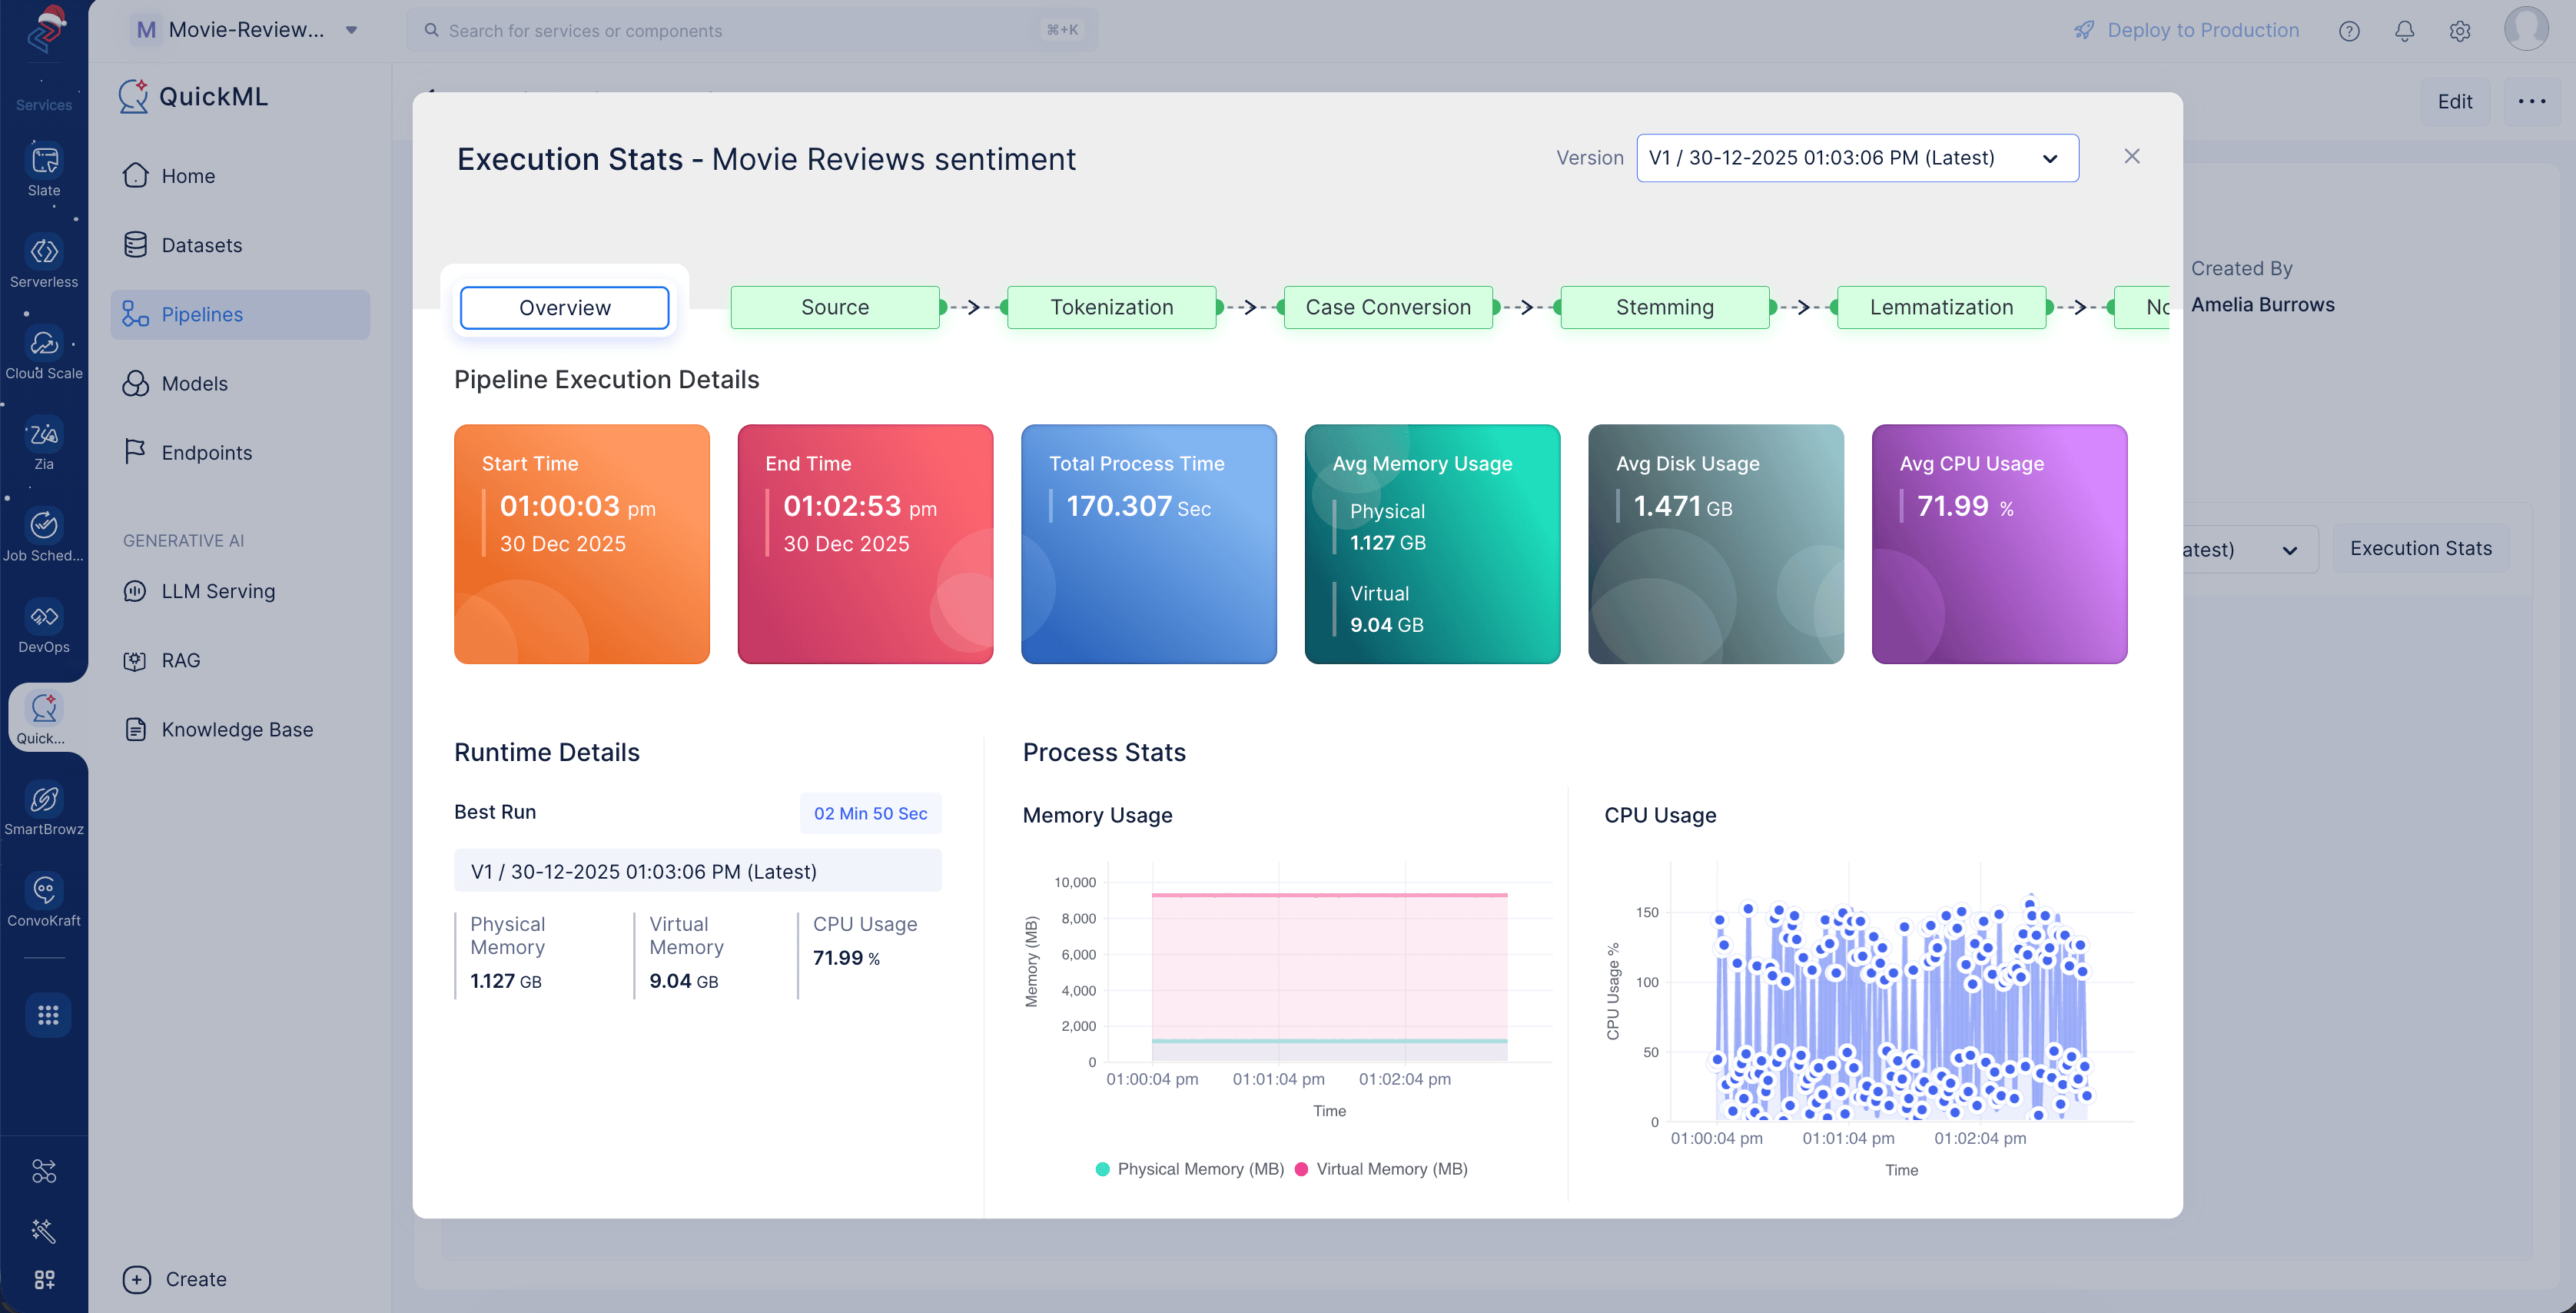
Click Execution Stats to view more details about each stage of the model execution.
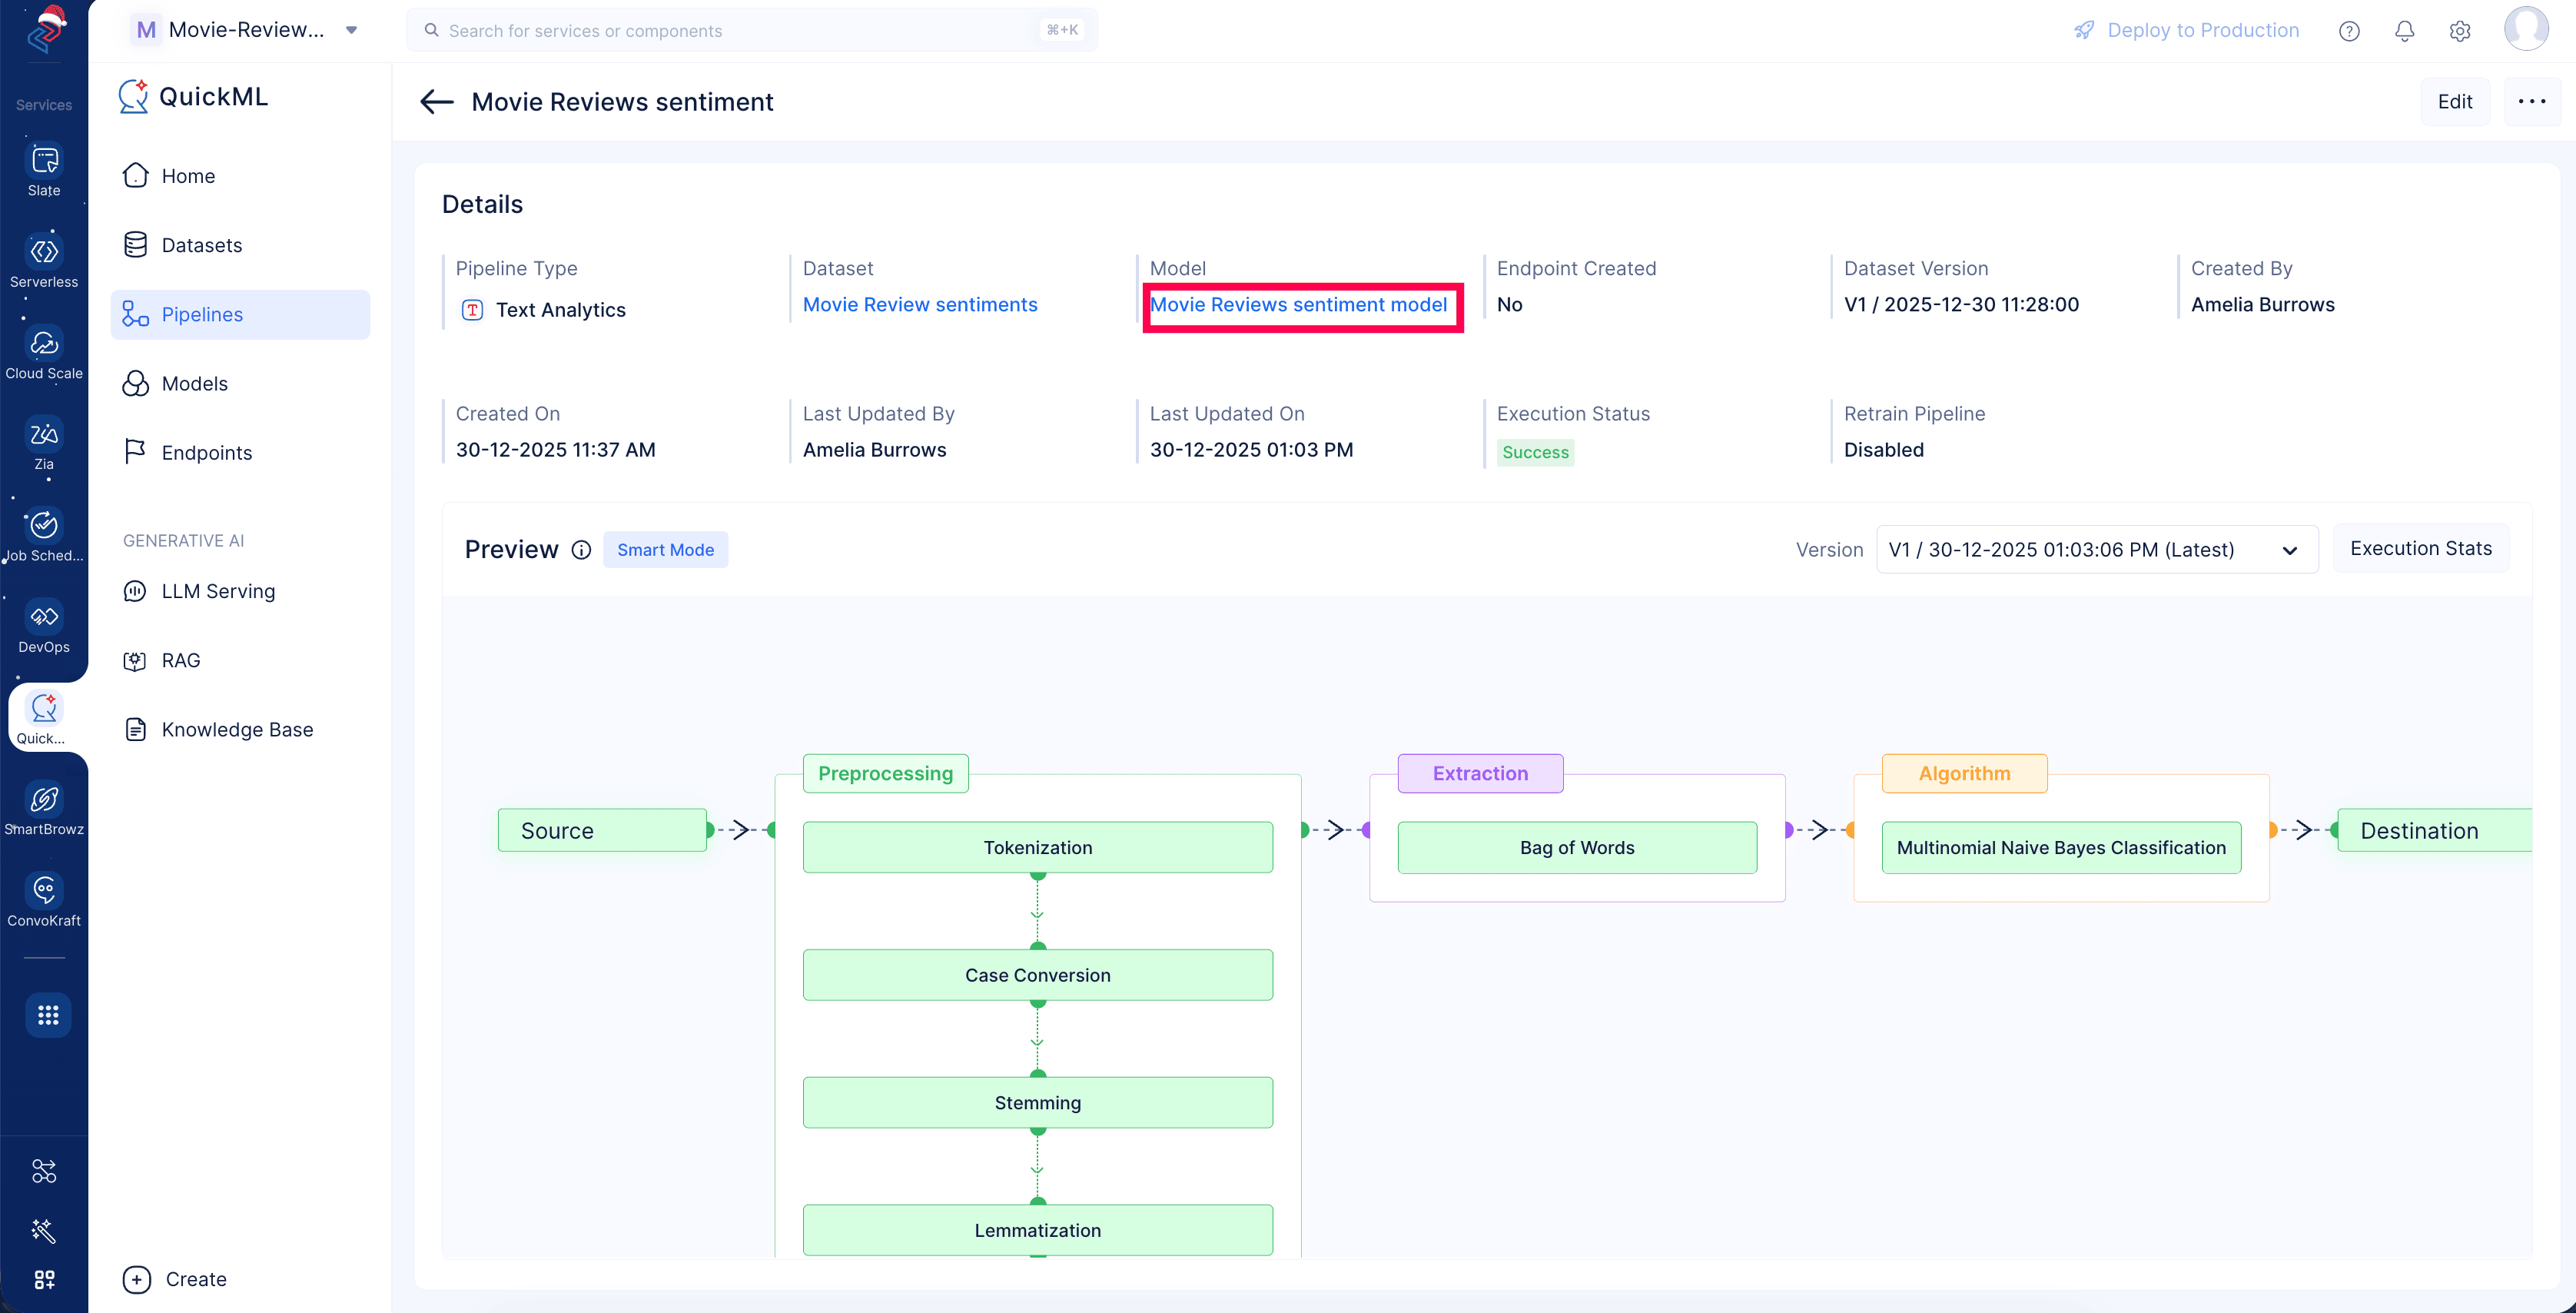
The Movie reviews Sentiment analysis model is now ready and can be used to identify the sentiment of each user review of movies. Our model and its details can be accessed under the Models module. (Click on Movie Review sentiments model after the pipeline is successful executed.)
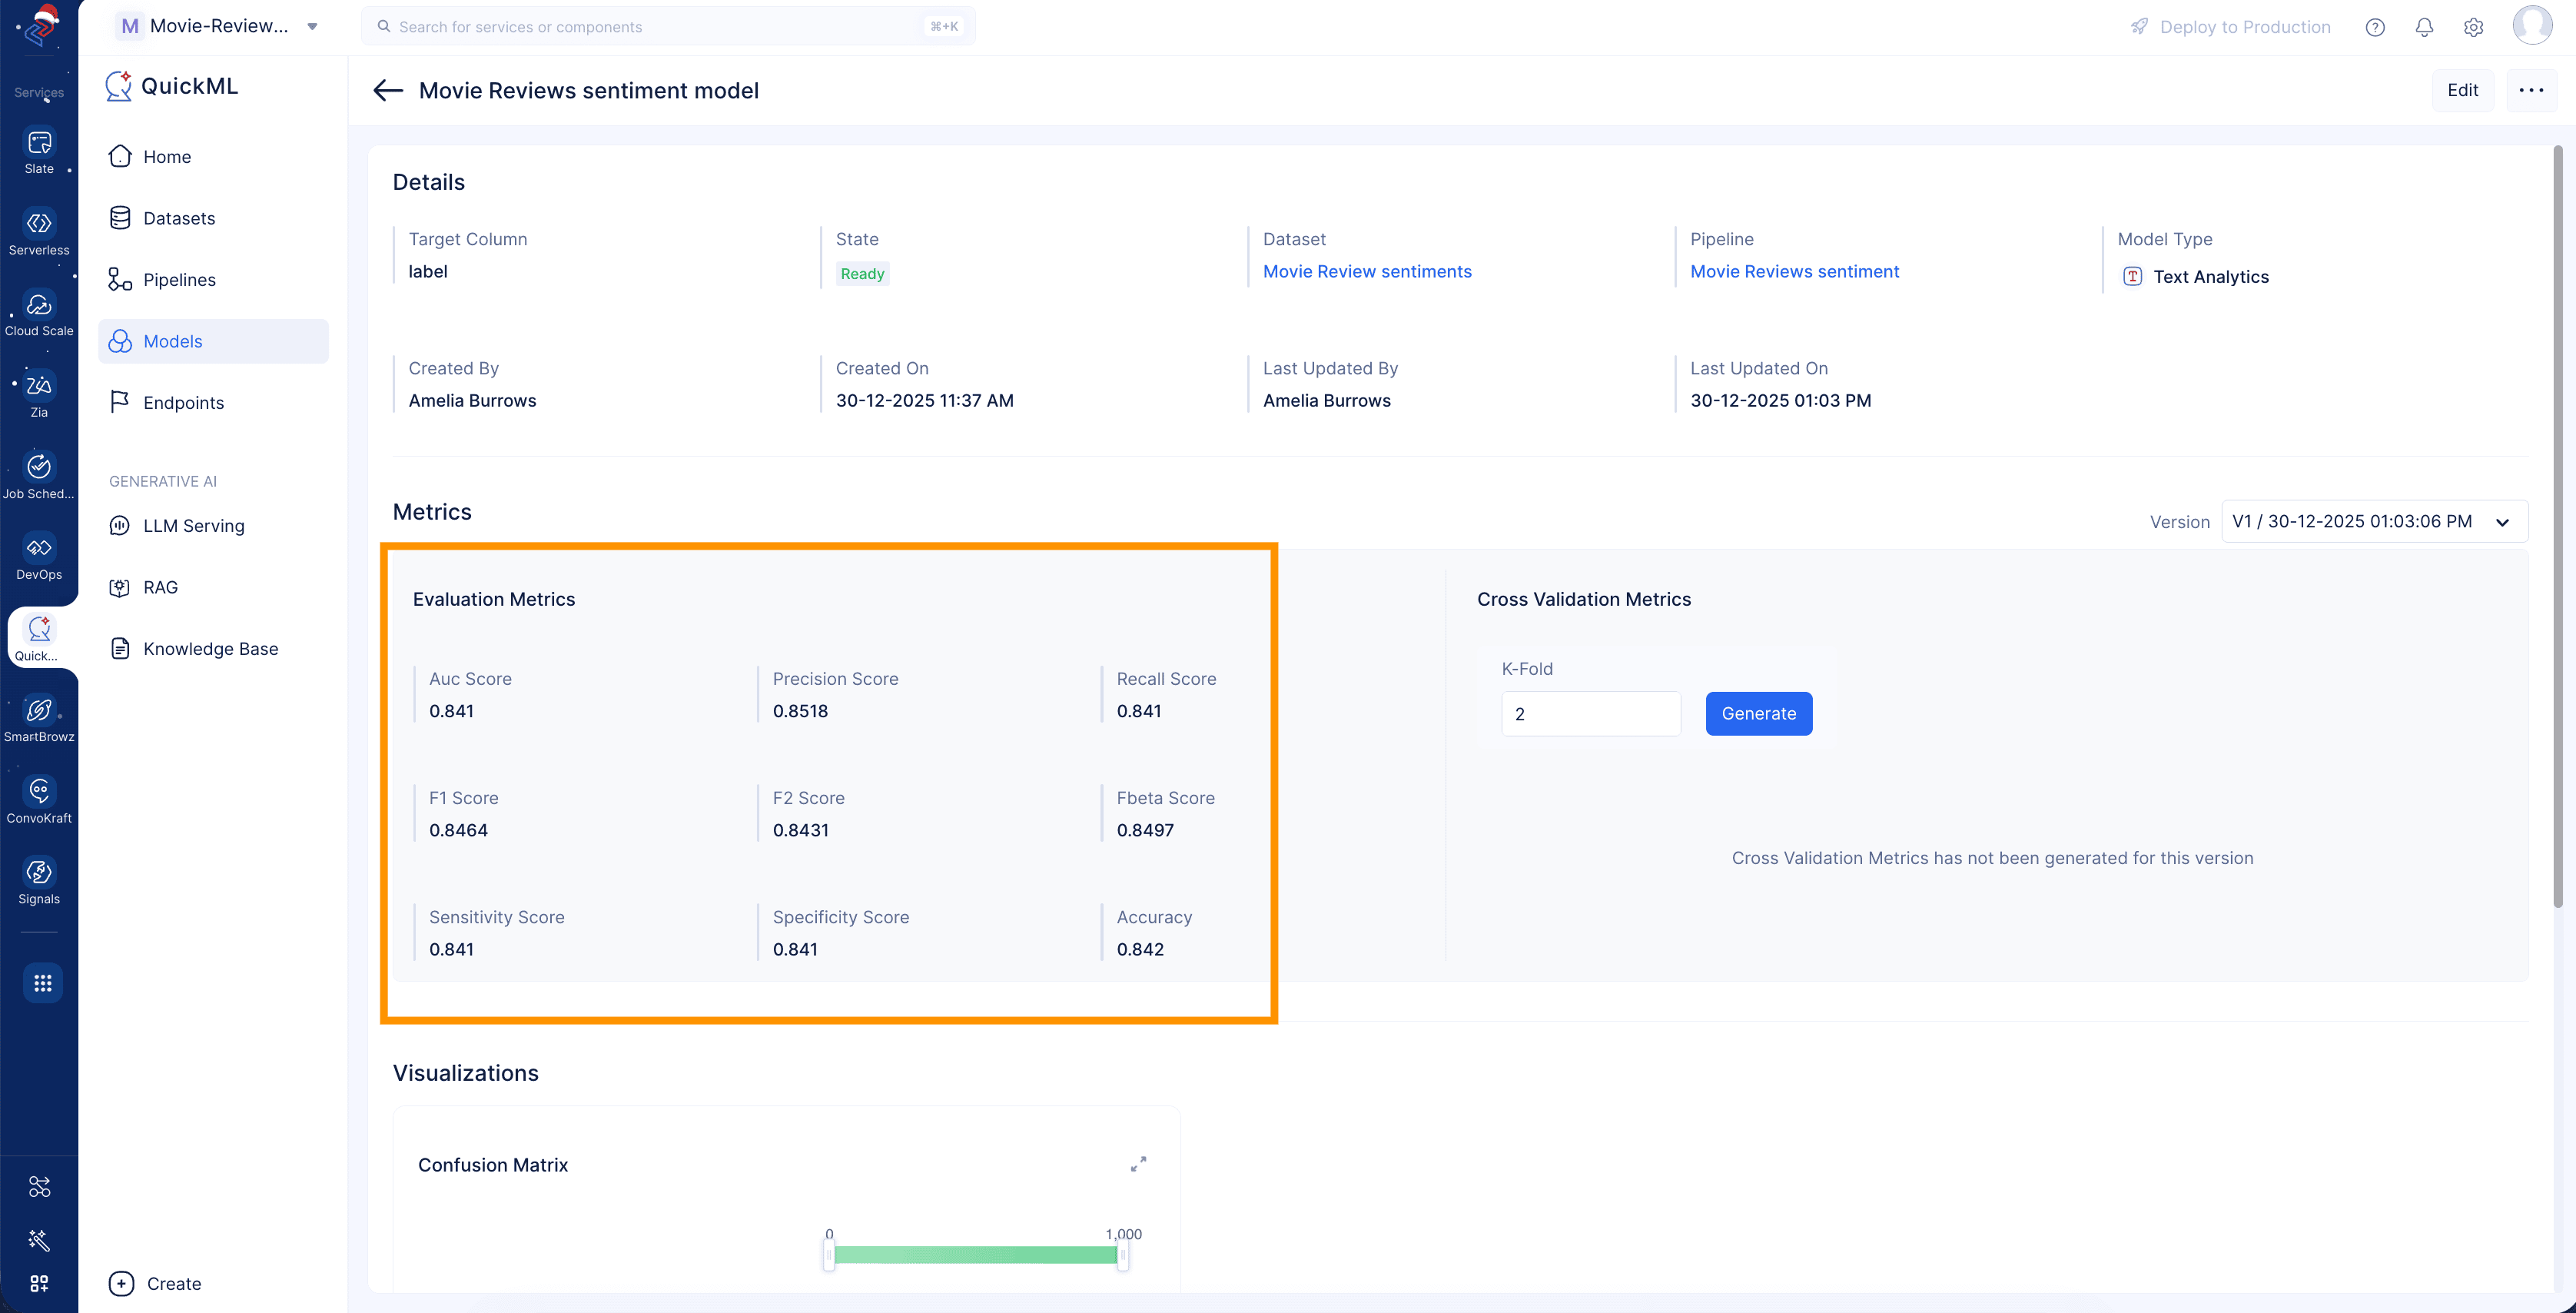
When you click the Movie Review Sentiment model button, its model details page will be opened with necessary information about evaluation metrics, and versioning details.
Model evaluation
The model details page contains evaluation metrics that help to understand performance during the training and validation process, cross validation metrics, and model versioning details. Model versions are used to track the improvement, degradation, and accuracy of the model.
You can view information about the model in the model details page.
Last Updated 2026-08-20 12:42:54 +0530 IST