Initialize the Project
You can now begin working on your Catalyst project from the CLI. The first step is to initialize the project in an empty directory. This will be the home directory of your project, and all of the project files will be saved in it.
You can learn more about this from the Project Directory Structure help page. You can learn about initializing a project in detail from the CLI help documentation.
For this application, you will be initializing the AppSail component alone. The AppSail component will be initialized in the Node.js programming stack.
-
Create a folder for the project on your local machine and navigate to it from the terminal.
-
Initialize a project by executing the following command from that directory:
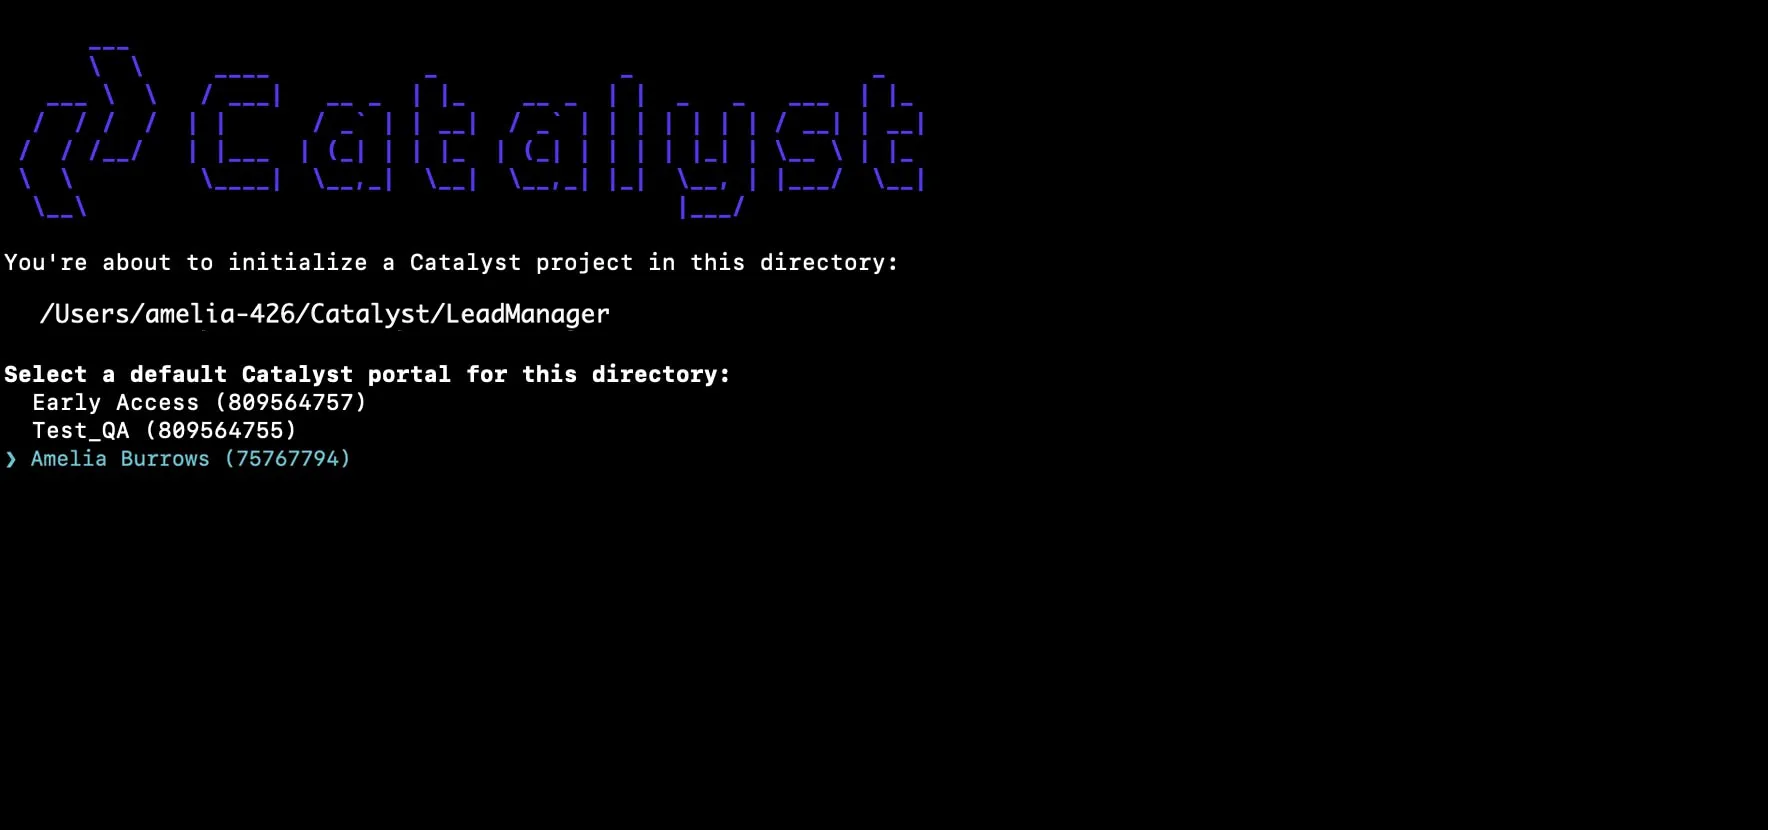
- Navigate using the arrow keys and select your preferred portal and click Enter. If you have no other organizations associated with the account, then the default will be selected automatically.
-
The CLI will now ask you to associate a Catalyst project with the directory. Associate it with the project that we created earlier from the console. Select LeadManager from the list and click Enter.

-
Select AppSail using the space bar, then click Enter to initialize.

-
The CLI will prompt you to choose between Catalyst-Managed Runtime and Docker Image. Because you are creating this project from one of the Catalyst-Managed Runtime, select Catalyst-Managed Runtime and click Enter.

-
The CLI will initiate the AppSail service.
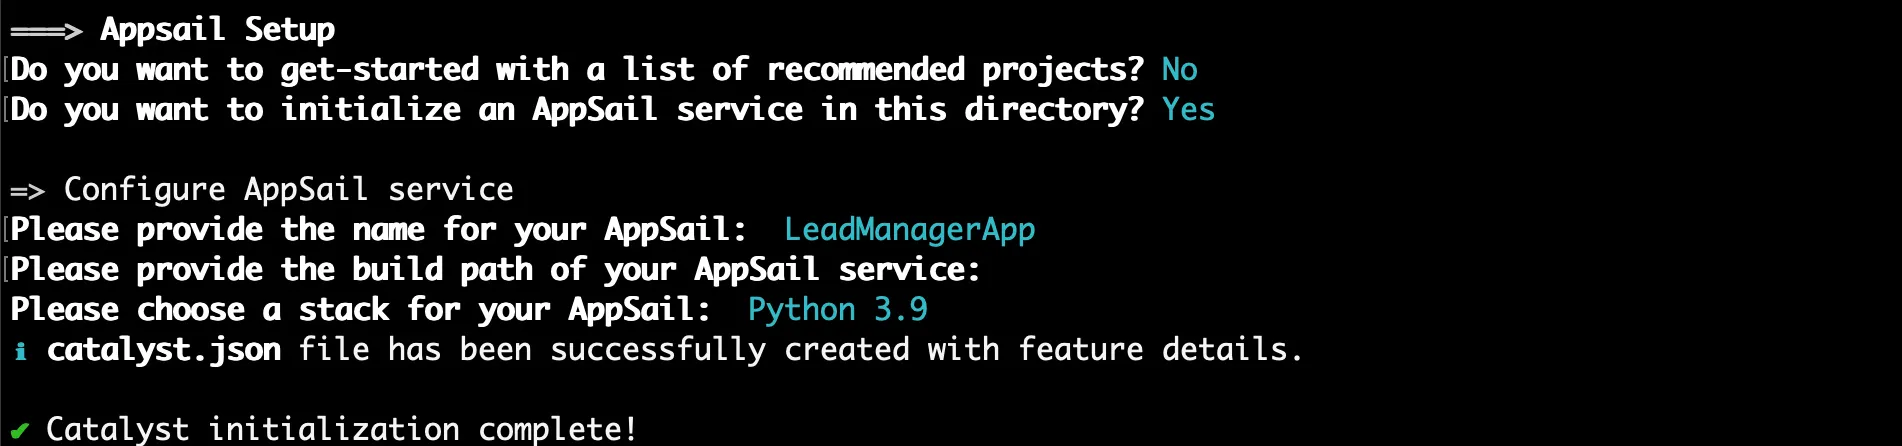
- As you are creating your own project, enter “n” and click Enter for the prompt asking if you wish to get started with a list of recommended projects.
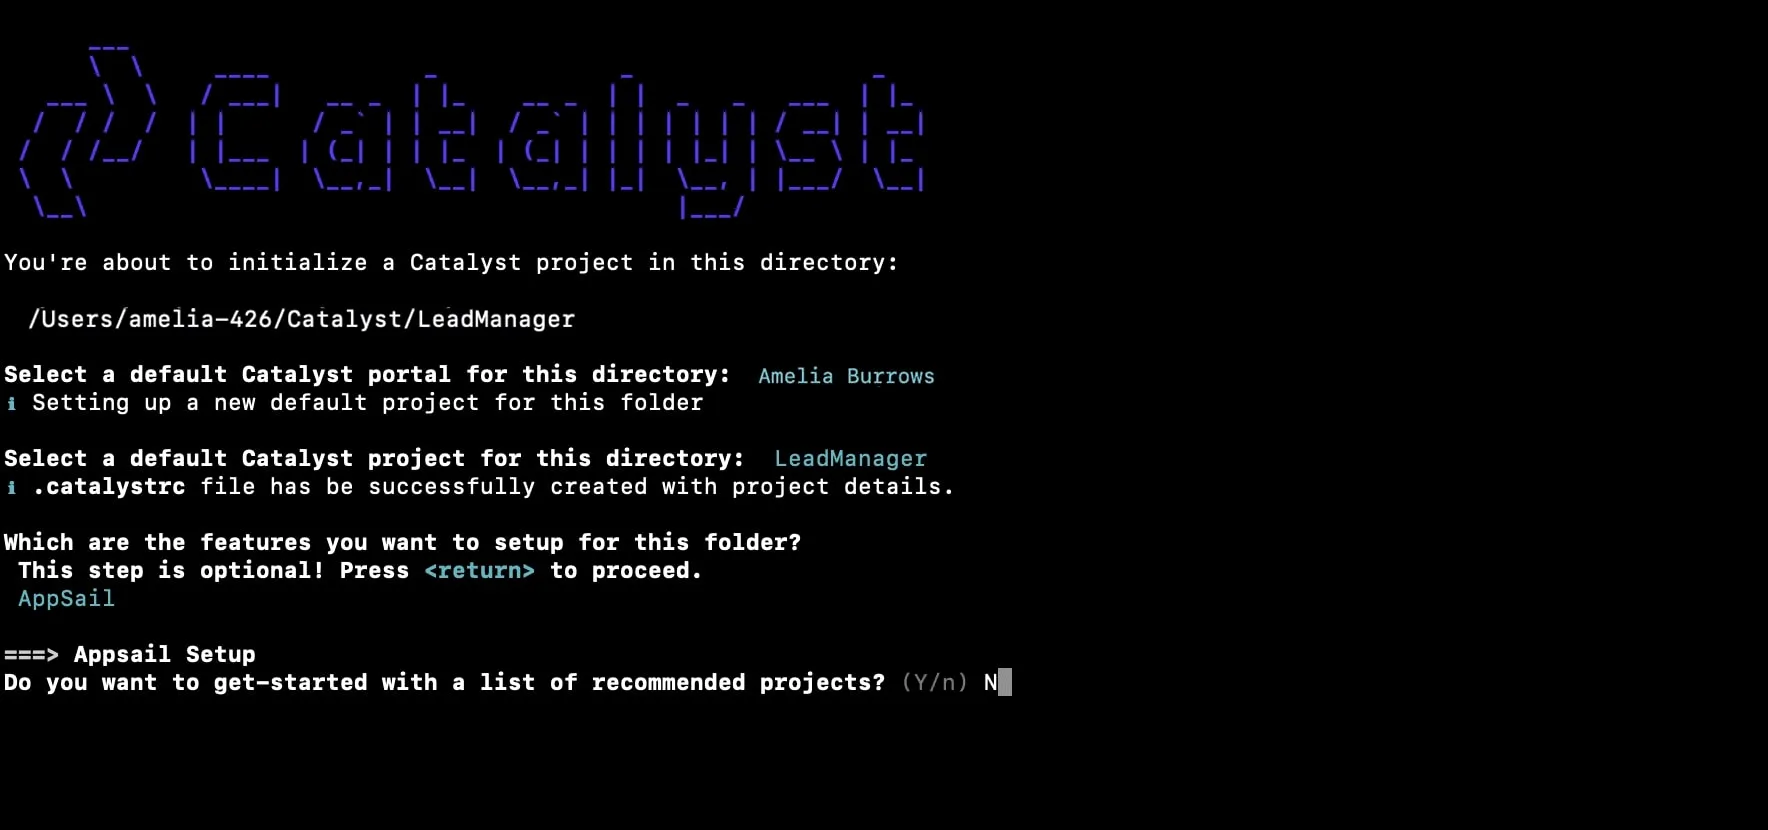
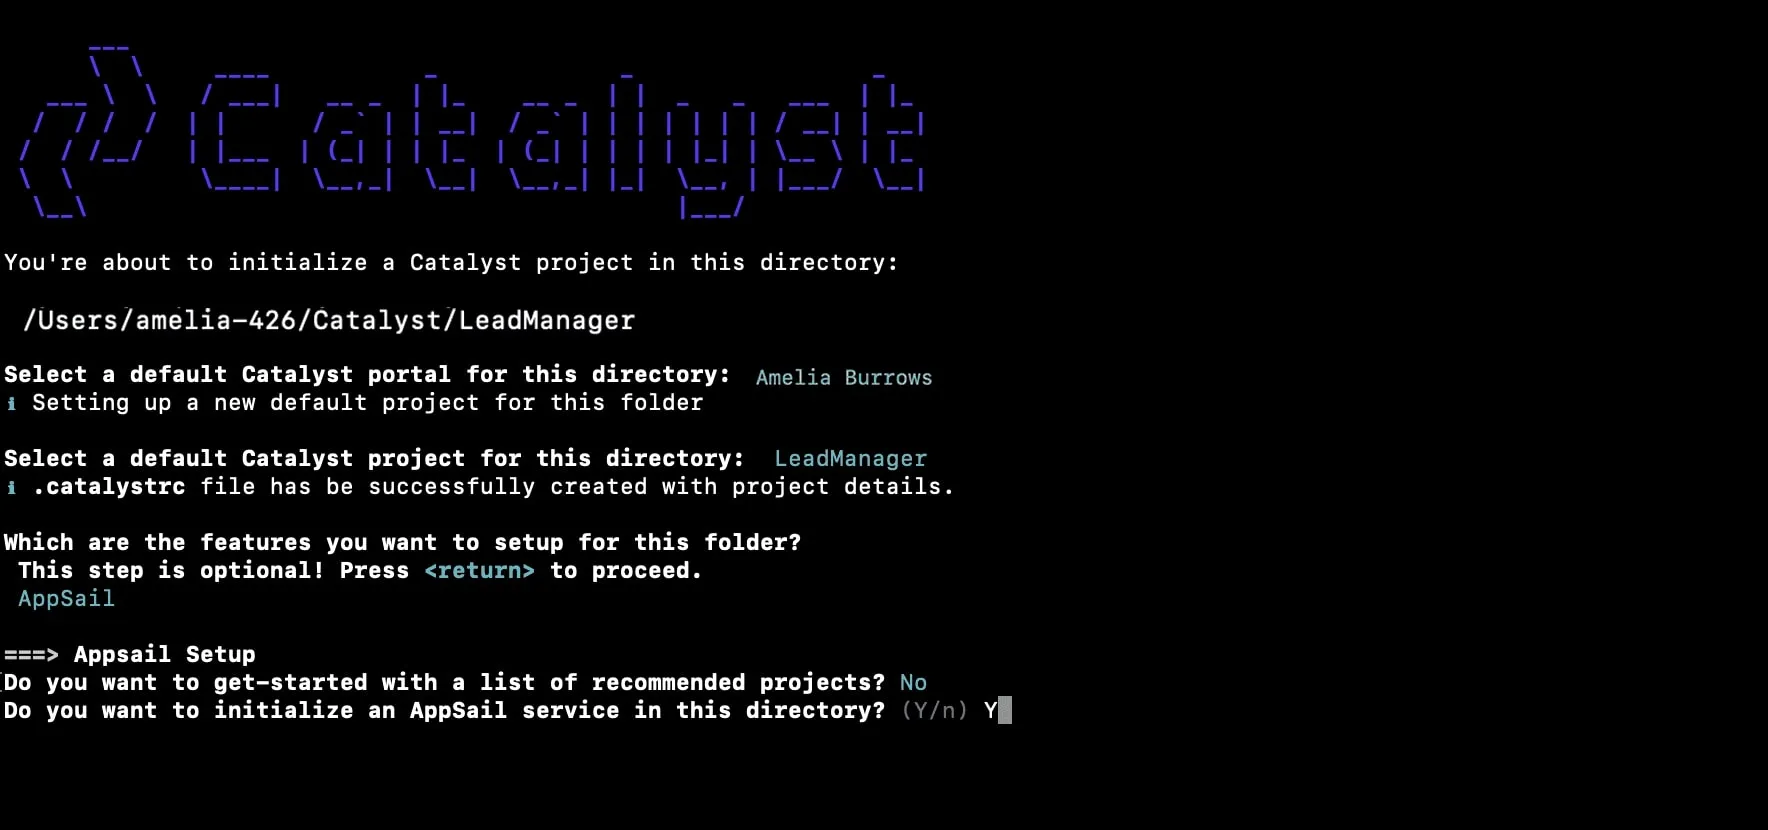
- Enter “Y” in the prompt to initialize the AppSail service in your current directory.
- As you are creating your own project, enter “n” and click Enter for the prompt asking if you wish to get started with a list of recommended projects.
-
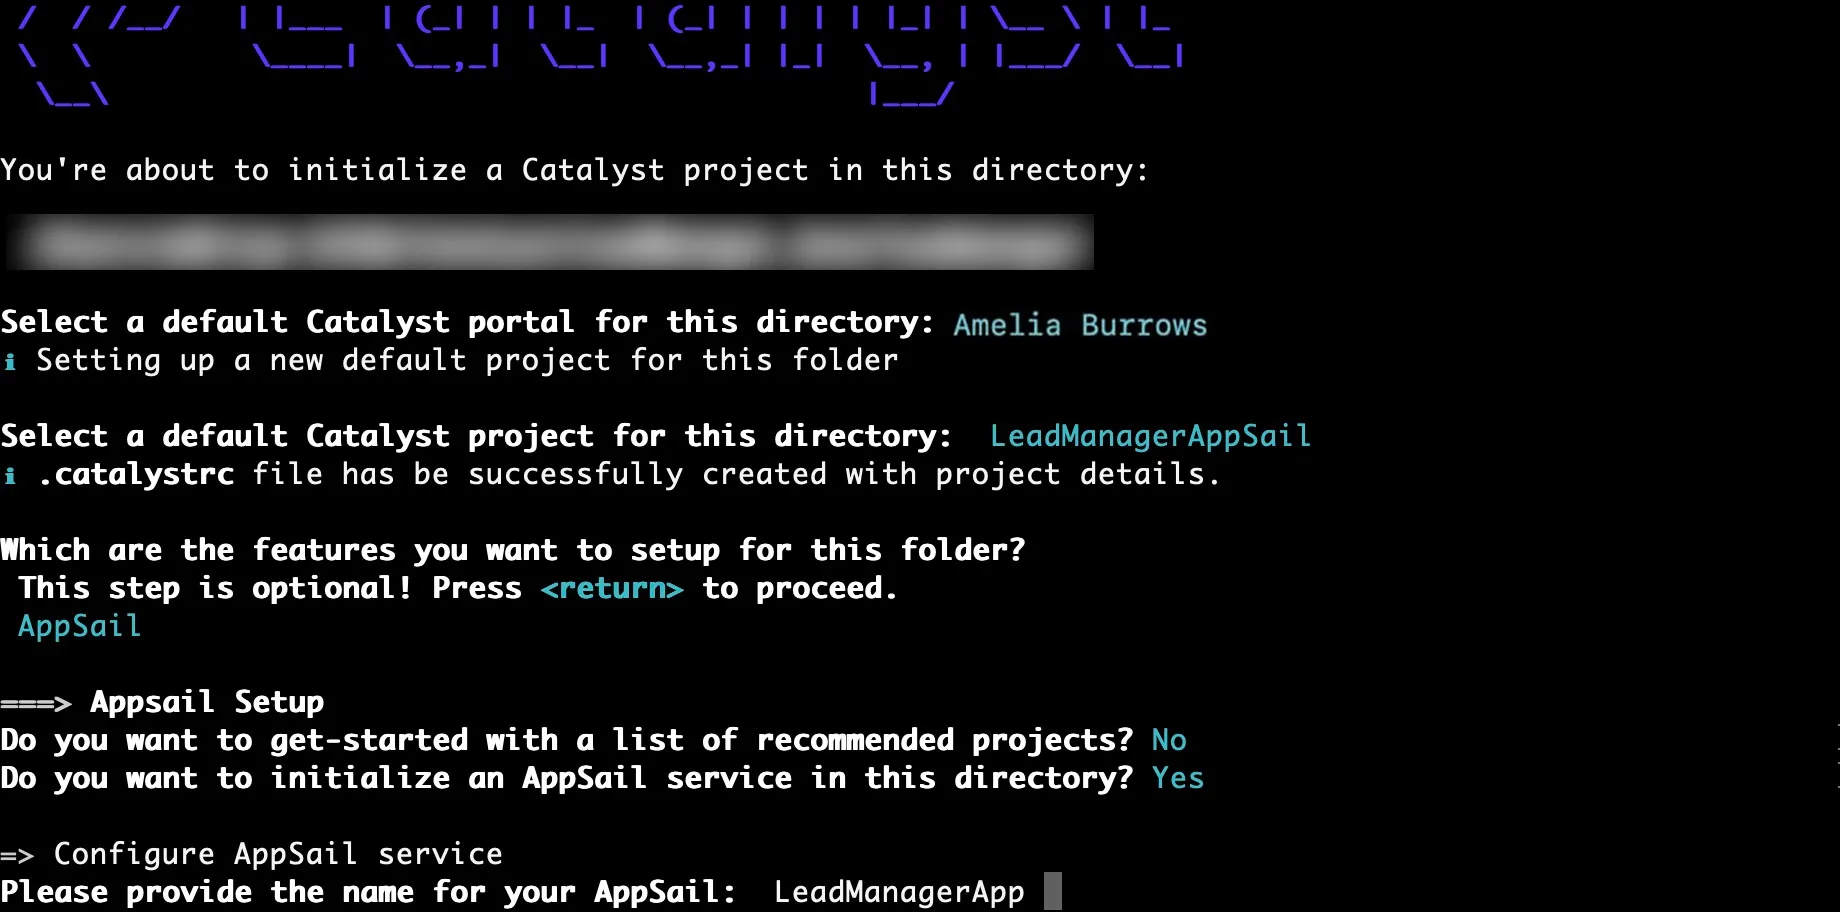
Enter “LeadManagerApp” as the name of your AppSail service, and enter your project directory path as the build path of your AppSail service.
-
Choose the latest runtime of Python as the programming stack, and click Enter.

The AppSail service has been initialized for your Lead Manager application.
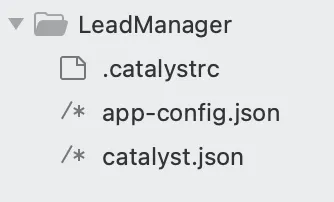
The directory will be created in the standard structure, and it will contain the app-config.json file which includes the configuration of your AppSail service , along with the standard project configuration files such as the catalyst.json file and a hidden .catalystrc file.
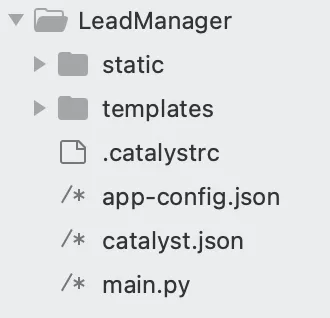
This is the structure of the LeadManager project’s directory initialized with the AppSail service.
Deploy the Application
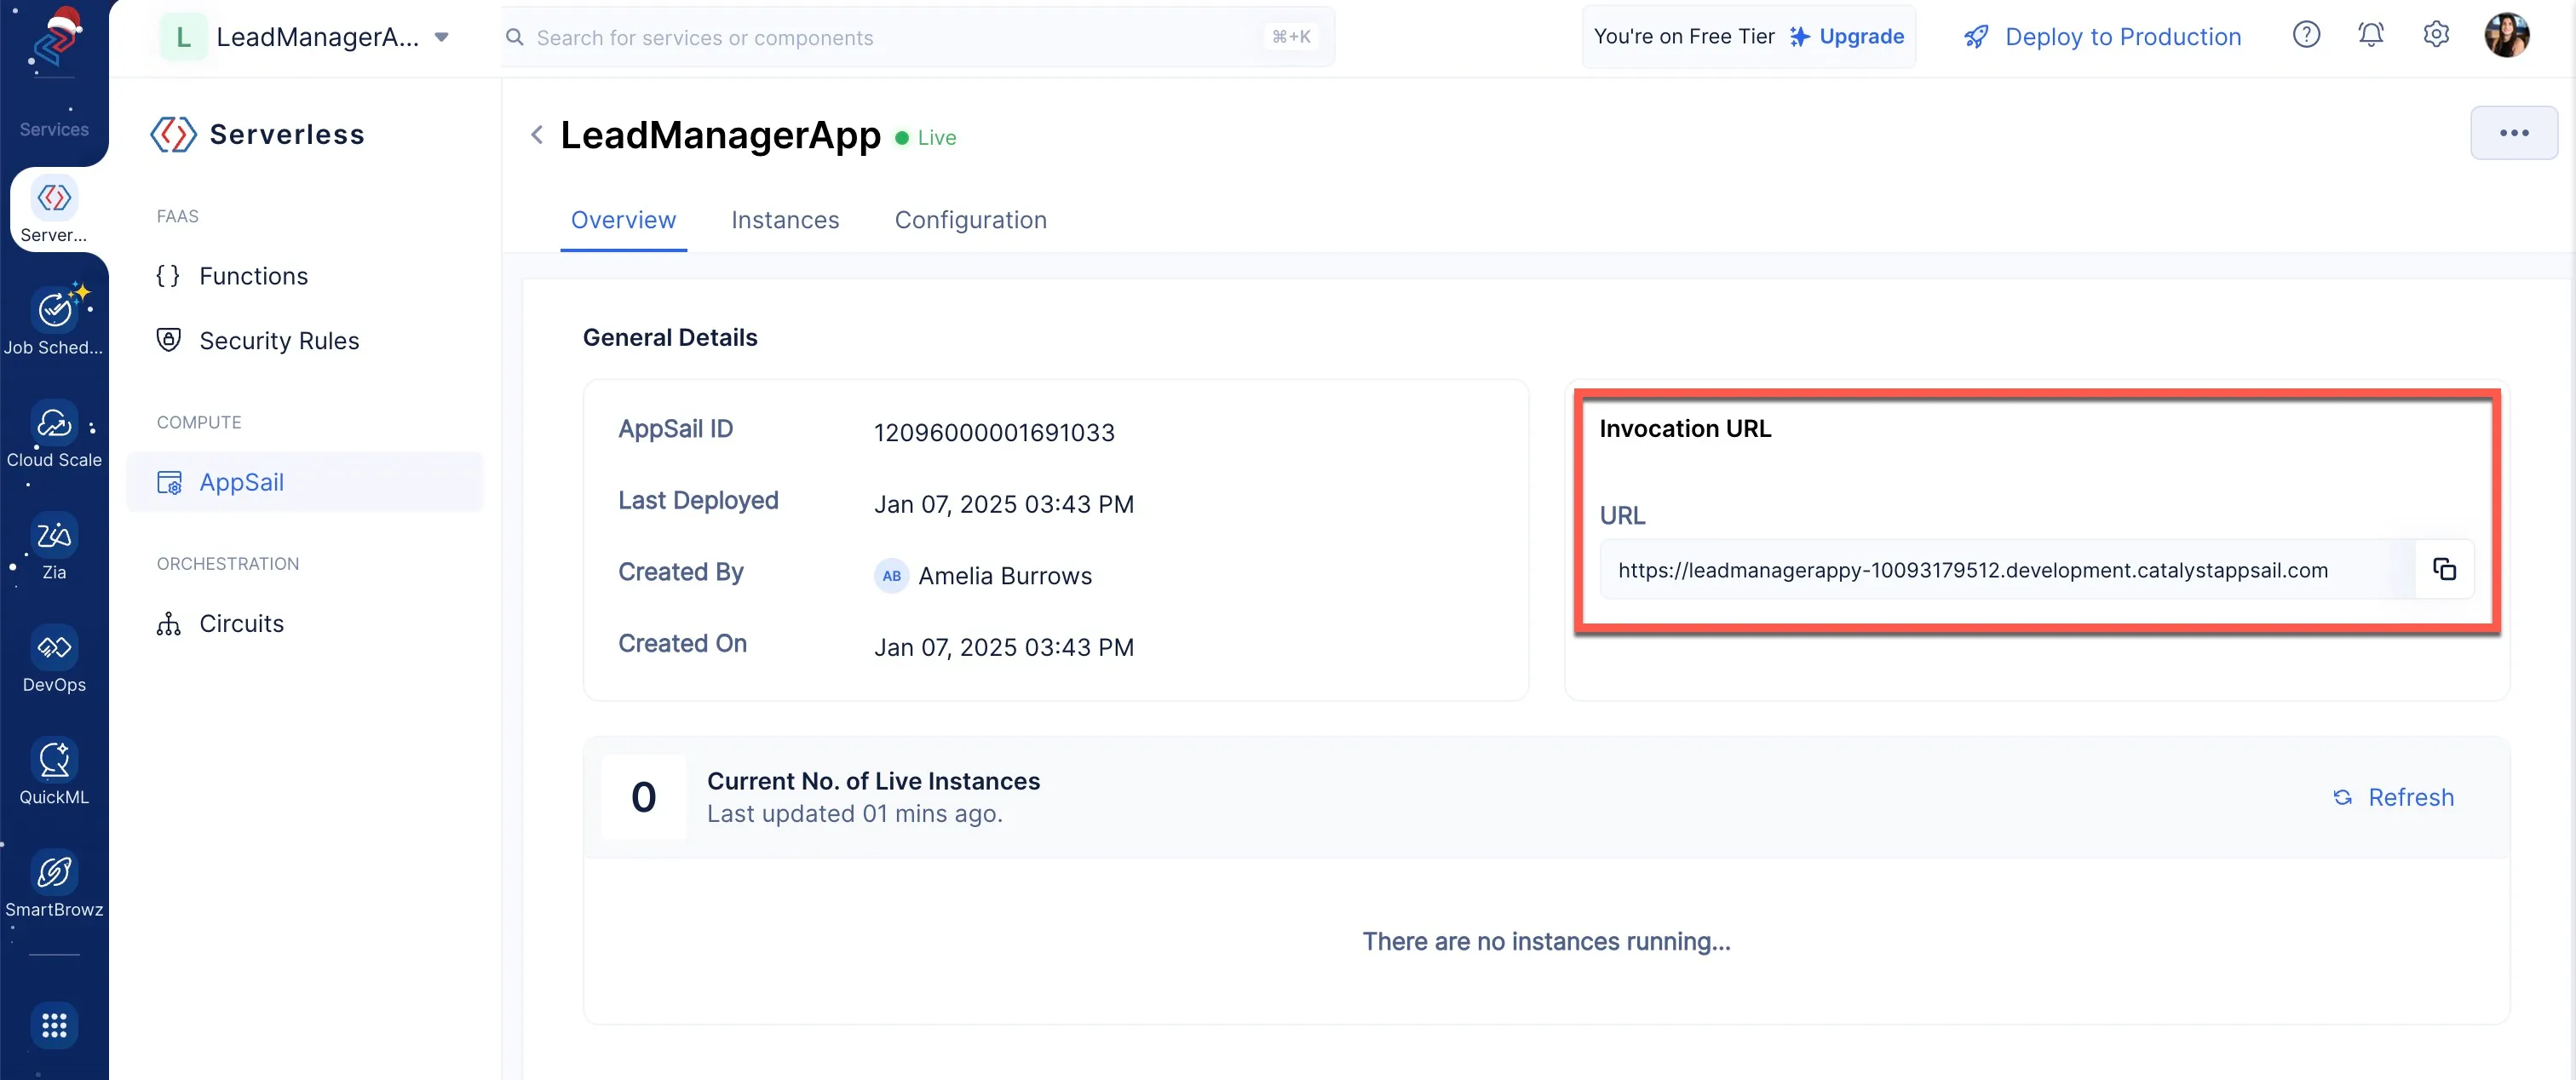
You need to deploy the application to the console to fetch the required application URL. We need this URL when we register the client in the Zoho API console to get the required Client ID and Client Secret values.
Enter the following CLI command to deploy the application:
Now, to acquire the application URL:
-
Navigate to the AppSail component present under the COMPUTE section of the Catalyst Serverless section of the console.
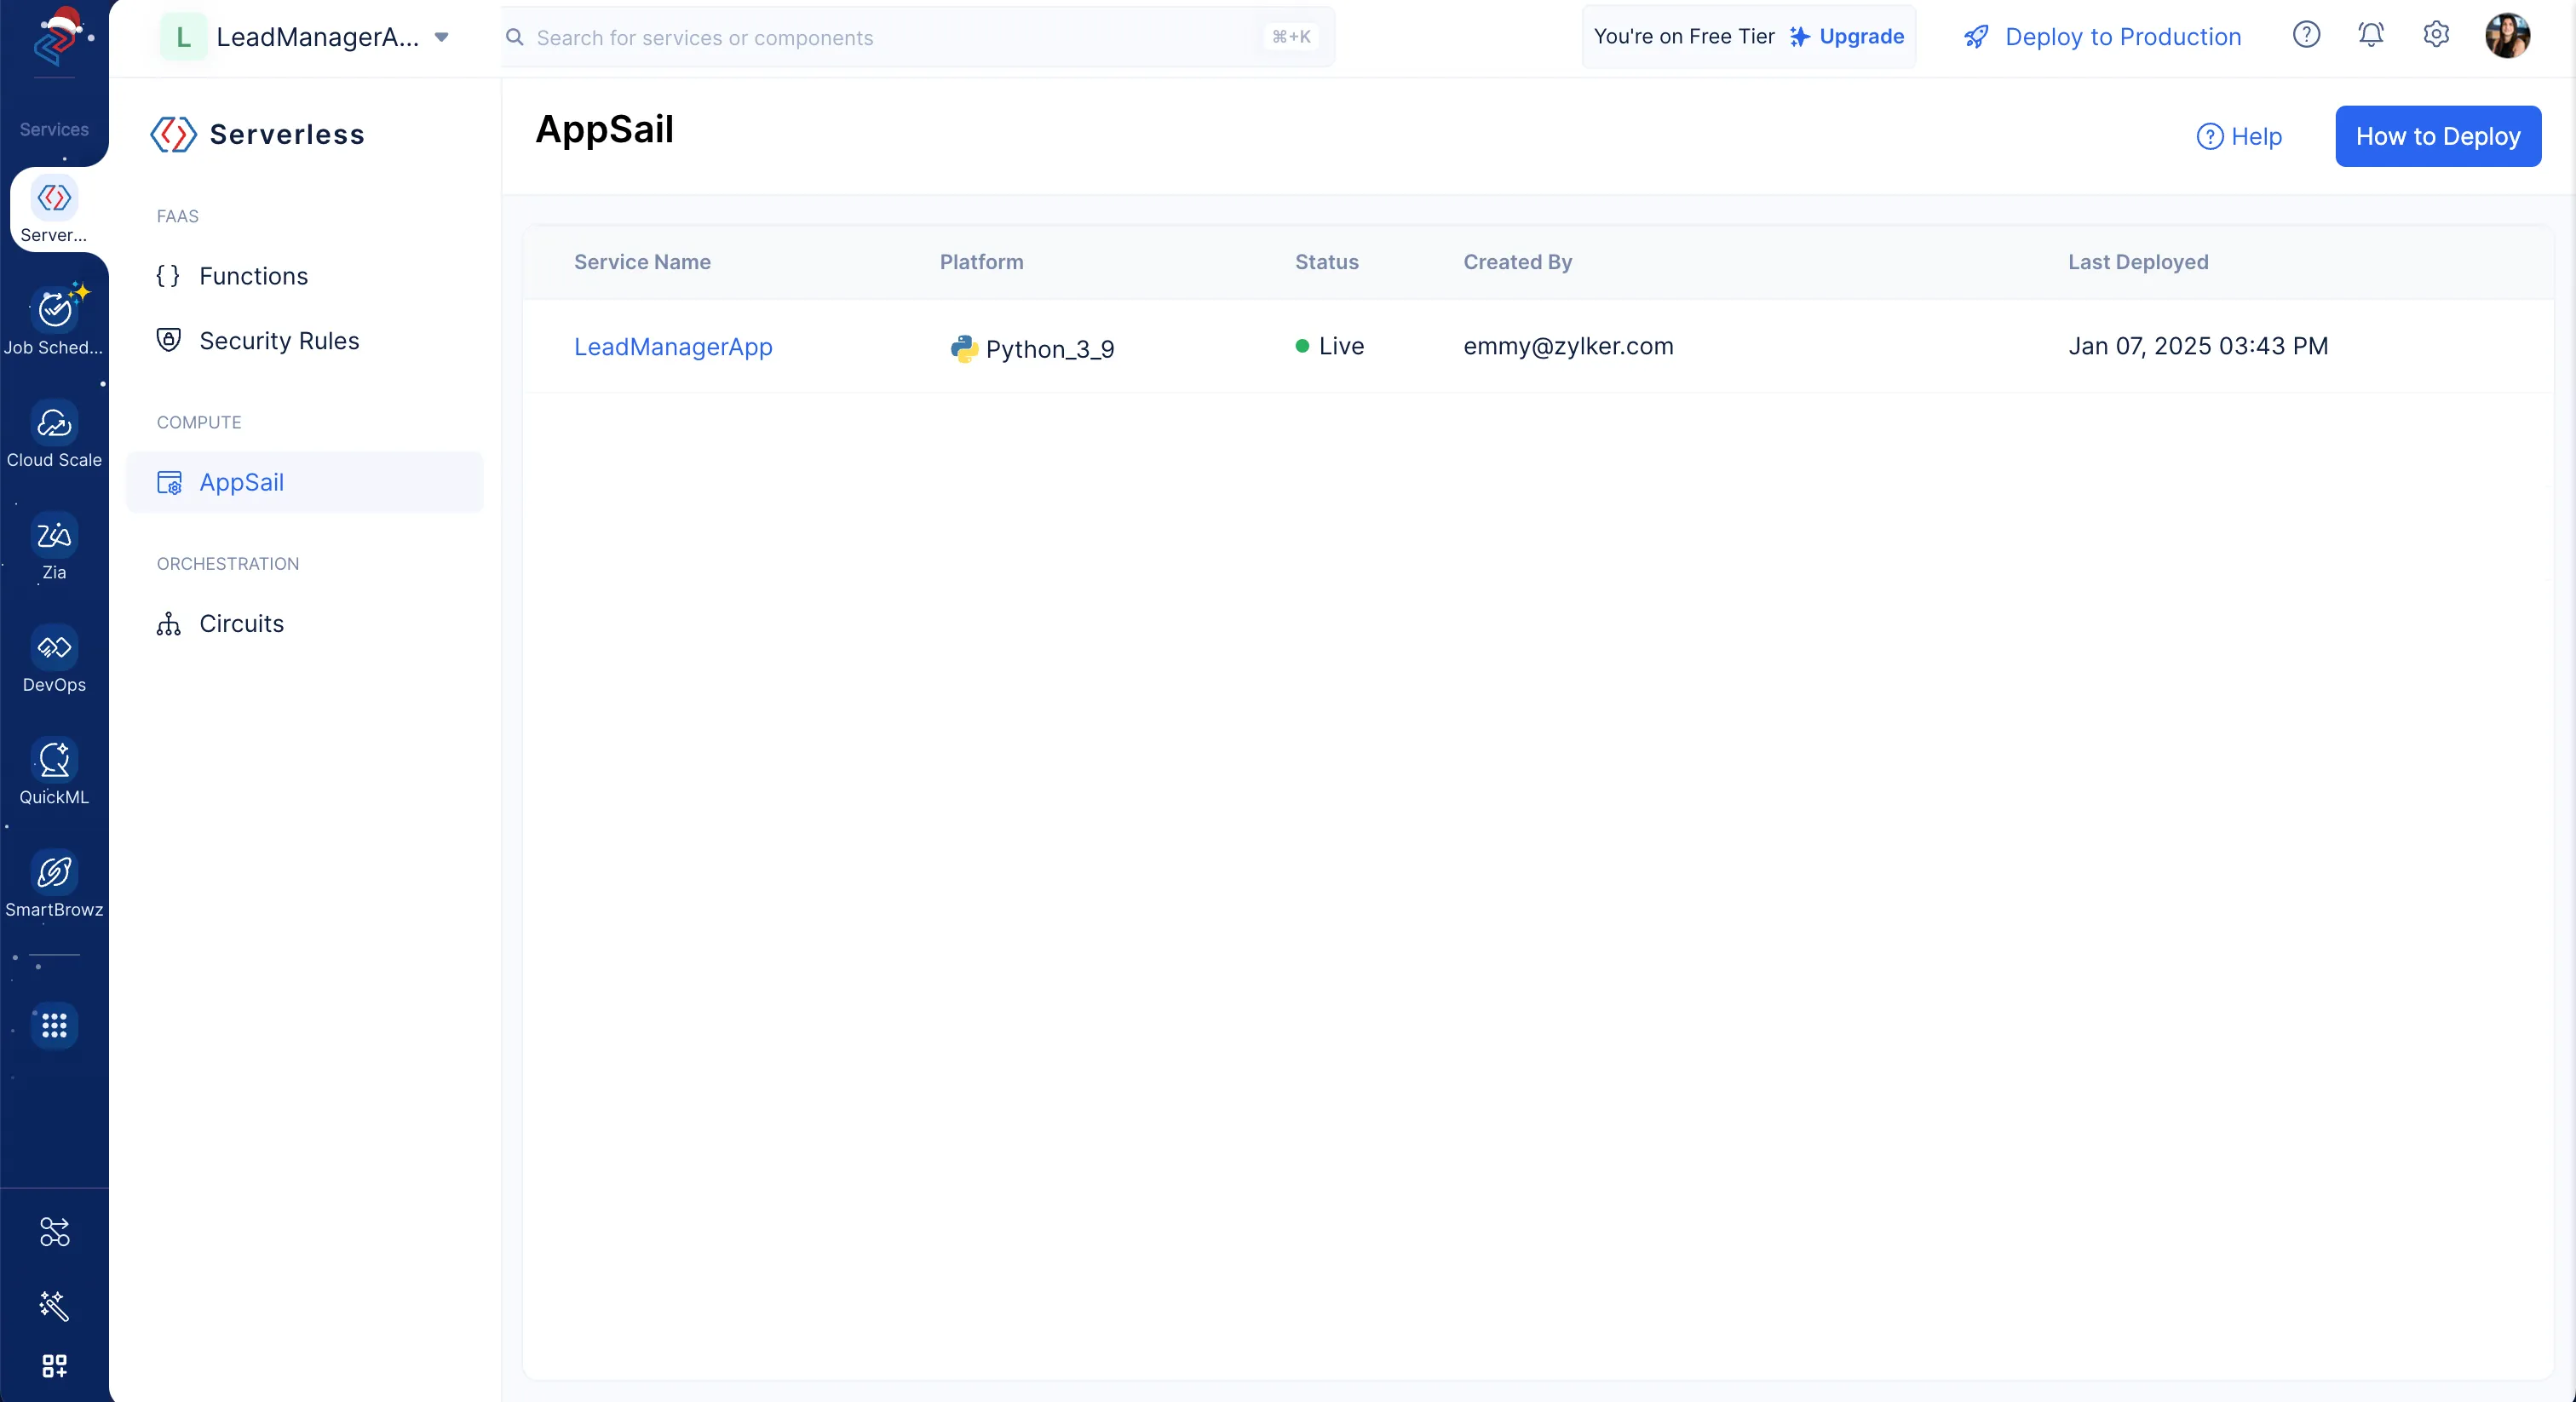
You will be able to view that your application has been deployed as an AppSail service. -
Now click your AppSail service, and you will be able to view the application URL.
Create Additional Folders & Files
You need to create two folders in the root directory to store your client code:
- static: Will contain the JS and CSS scripts required to complete the application
- templates: Will contain the HTML code of the app
You also need to execute the following command to create the “main.py” code file.
This file will be used to store your backend code.
This is the current structure of the LeadManager project’s directory:
Last Updated 2026-01-09 15:48:56 +0530 IST