Code Your Event Function
Let’s now configure the Event function, event_app, that will send automated onboarding emails to the user with a link to a form. This form enables the user to provide their personal details to register for the client application. This function will be executed when the event listener triggers it.
The functions directory, functions/event_app contains:
- The index.js main function file
- The catalyst-config.json configuration file
- Node modules
- package.json and package-lock.json dependency files
You will be adding code in the index.js file.
Copy the Node.js code and paste it in index.js in the functions/event_app directory of your project, and save the file. You can use any IDE of your choice to work with the application’s files.
const catalyst = require("zcatalyst-sdk-node");
const fs = require("fs");
const path = require("path");
module.exports = (event, context) => {
  try {
    const app = catalyst.initialize(context);
    let eventData = event.getRawData();
    let userEmailId = eventData.email;
    let email = app.email();
    let config = {
      from_email: "emmy@zylker.com", // Replace this with the email you configured
      to_email: userEmailId,
      subject: "We welcome you on board!",
      content: fs.readFileSync(path.join(__dirname, "invite.html")).toString(),
      html_mode: true,
    };
    let mailPromise = email.sendMail(config);
    mailPromise.then((mailObject) => {
      console.log(mailObject);
      context.closeWithSuccess();
    });
  } catch (err) {
    console.error(err);
    context.closeWithFailure();
  }
};
Deploy Your Project
You need to deploy your project to the Catalyst console to ensure the event function and the application URL are available to use while configuring the Rule.
To deploy the project to the console, enter the following command in your CLI and execute it.

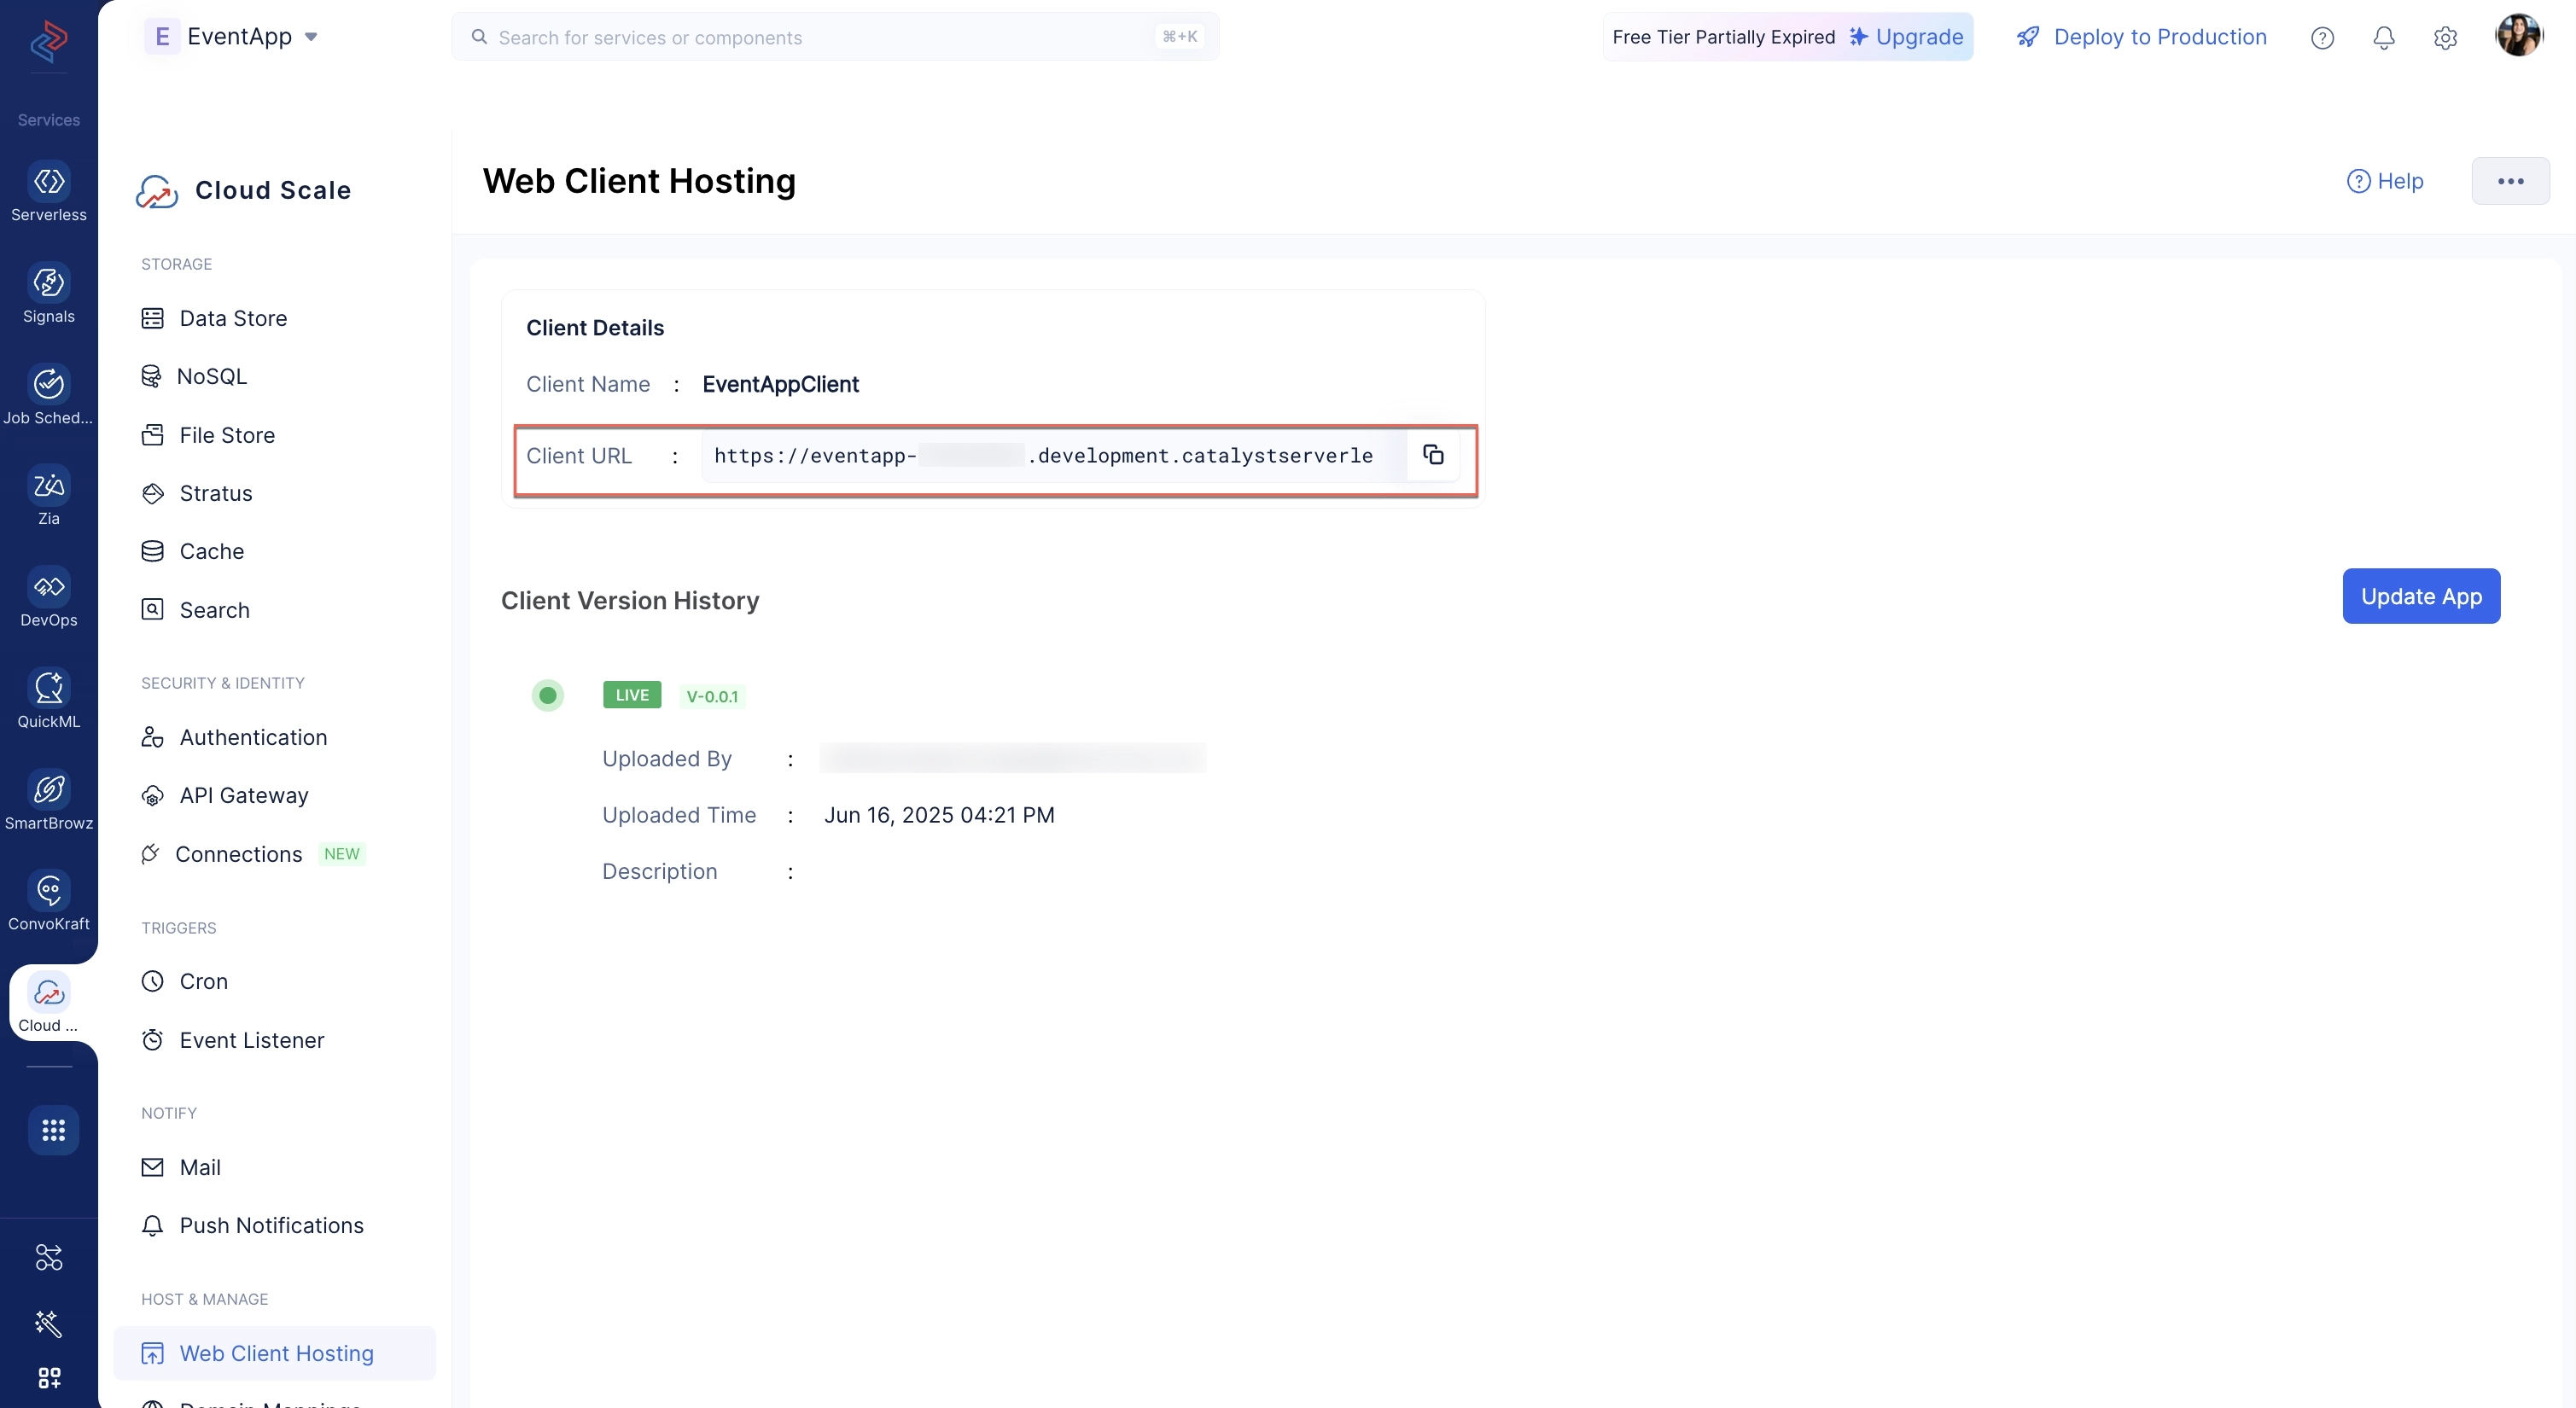
The project has been deployed to the console.
You can copy the application URL from the CLI, or you can copy it from the Web Client Hosting component.
Configure Your Product Tour
Now, create a html file in the functions/event_app directory and name it invite.html.
The invite.html page will contain the product tour.
Copy the following code and paste it in the invite.html file.
<div class="mT" style="background-color: #f2f2f2;padding: 4%;">
    <div style="width: 100%;max-width: 750px; margin: 0px auto;padding-bottom:10px;">
        <img src="" alt="">
    </div>
    <div
        style="width: 100%;max-width: 750px;font-size: 16px; margin: 0 auto;background: #fff; font-family: lucida grande,lucida sans,lucida sans unicode,arial,helvetica,verdana,sans-serif;">
        <table style="display: table;width: 100%;" cellspacing="0" cellpadding="0">
            <tr>
                <td style="background-color: #e80f28;height: 2px;width:25%;"> </td>
                <td style="background-color: #e80f28;height: 2px;width:25%;"> </td>
                <td style="background-color: #e80f28;height: 2px;width:25%;"> </td>
                <td style="background-color: #e80f28;height: 2px;width:25%;"> </td>
            </tr>
        </table>
        <div style="padding: 8% 5%;border: 1px solid #f3f3f3;line-height: 1.625em;">
            <div style="font-size: 0.8125em;color: #3c3c3c;">Hey there!</div>
            <br />
            <div style="font-size: 0.8125em;color:#5d5d5d; line-height: 1.625em;padding-bottom: 20px;">
            </div>
            Welcome to Event App! We have a range of interesting and innovative features for you to explore. Please take the time to read through our product tour document.
            <div style="font-size: 0.8125em;color: #5d5d5d;line-height: 1.625em;padding-bottom: 20px;">
            <a href="https://eventapp-779513891.development.catalystserverless.com/app/tour.html">Take the tour!</a> <!-- Replace here -->
            </div>
            <div style="font-size: 0.8125em;color: #5d5d5d;line-height: 1.625em;padding-bottom: 20px;">
                If the link doesn't work, please copy the following address and paste it in your browser.
            </div>
            <div style="font-size: 0.8125em; line-height: 1.625em; width: 100%; padding:10px 0px; background-color: rgb(241,241,241);border: rgb(253,253,253) solid 1.0px;margin: 0.0px auto;">
                <div style="margin: 0.0px 10.0px;color: rgb(0,0,255);">
                 <a href="https://eventapp-779513891.development.catalystserverless.com/app/tour.html"> https://eventapp-779513891.development.catalystserverless.com/app/tour.html</a> <!-- Replace here -->
                </div>
            </div>
            <br />
            <div style="font-size: 0.8125em;color: #5d5d5d;line-height: 1.625em;">
                <div>Regards,</div>
                <div>EventApp Team</div>
            </div>
        </div>
    </div>
</div>
The Event function is now configured.
Last Updated 2025-11-19 20:37:41 +0530 IST