Upload Dataset
Let’s begin by uploading the datasets in Catalyst QuickML using the available dataset connectors:
-
Navigate to the QuickML service in the Catalyst console and click Start Exploring.
-
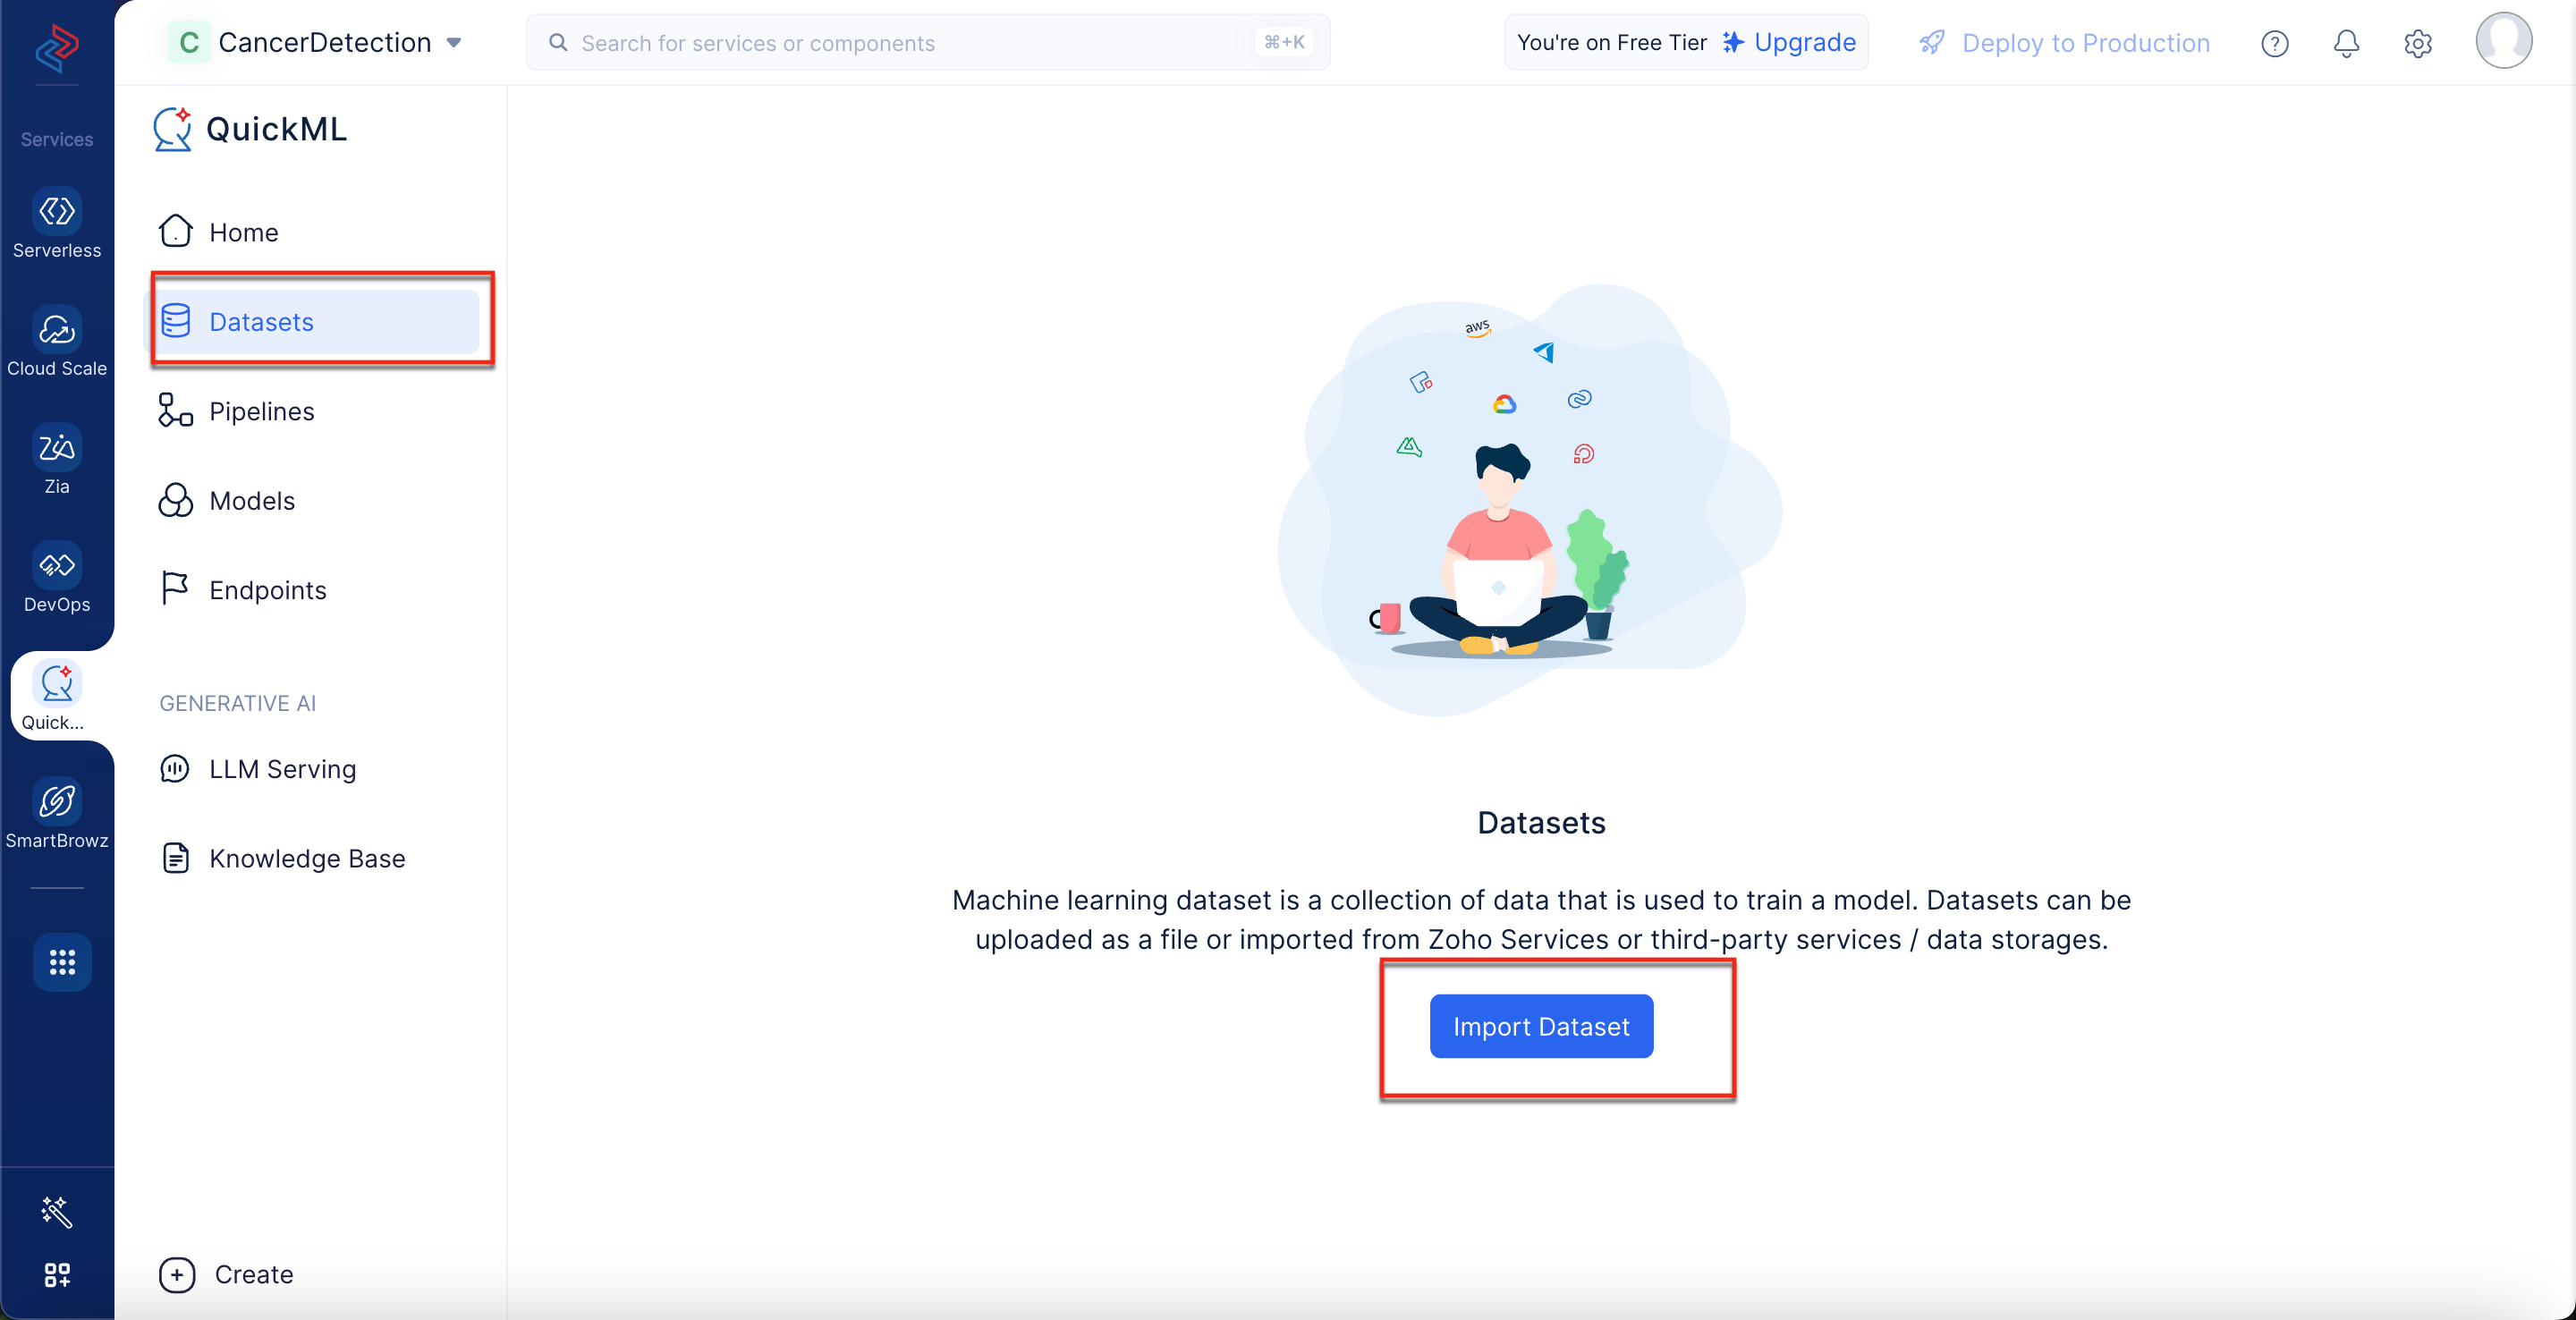
In the left panel, navigate to Datasets and click Import Dataset. An Import Dataset pop-up will be displayed.
-
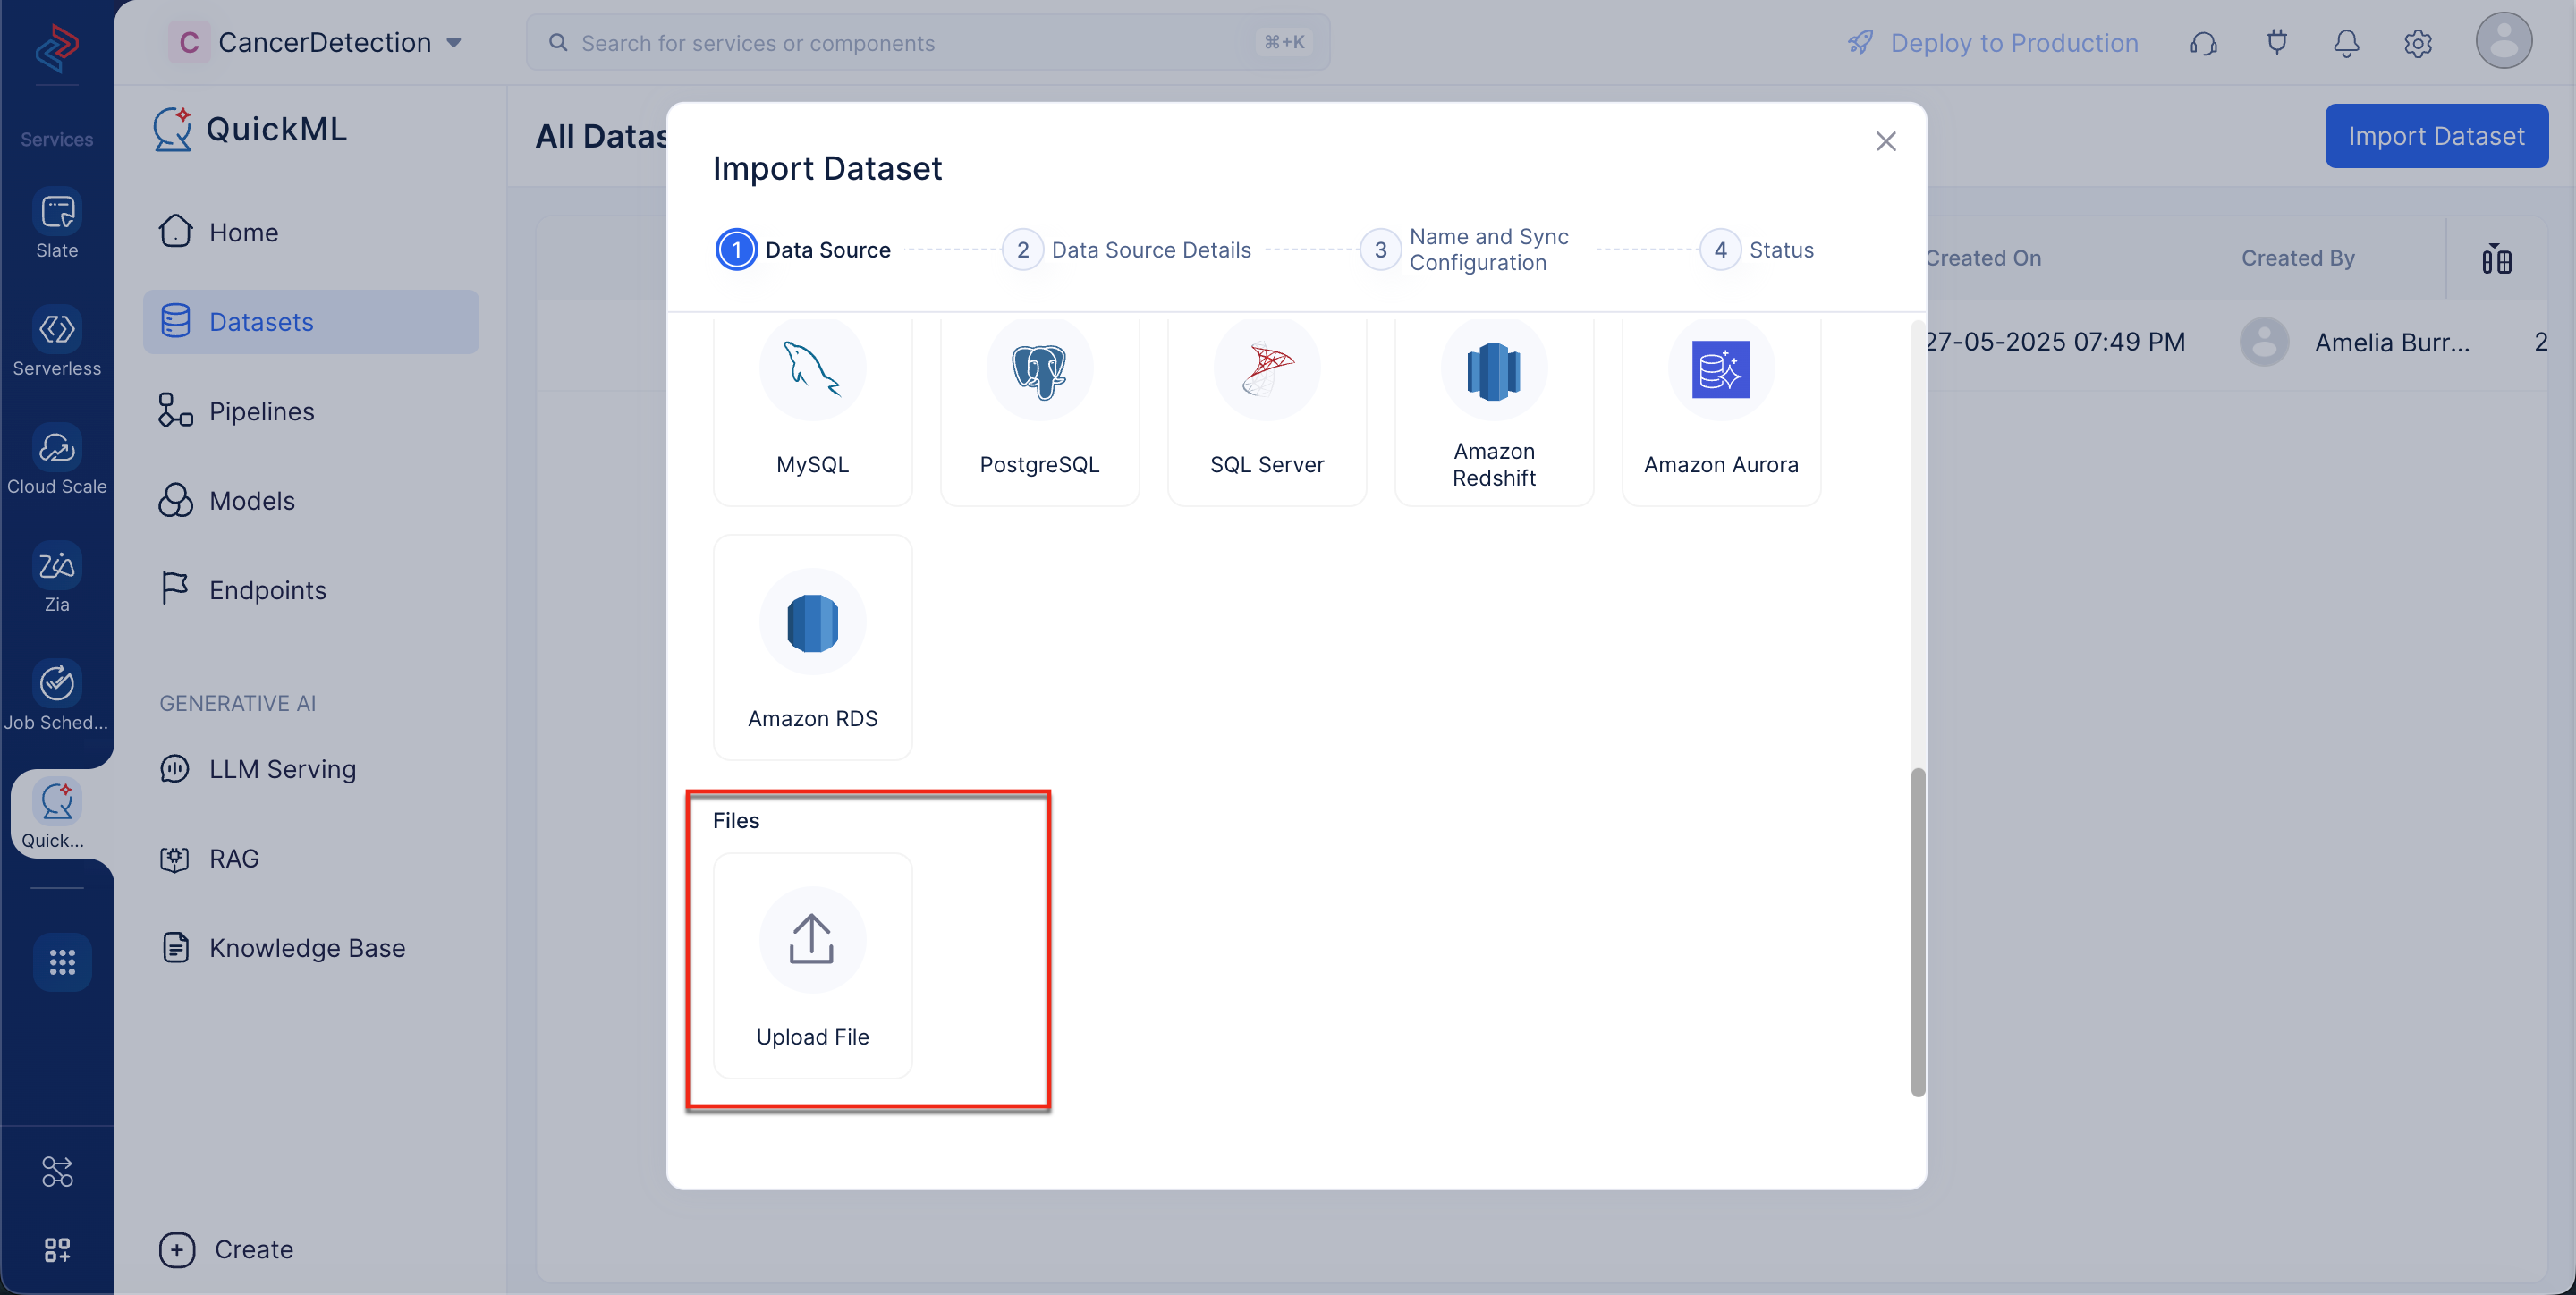
In the Data Sources step, scroll down to the Files section, and click Upload File.
-
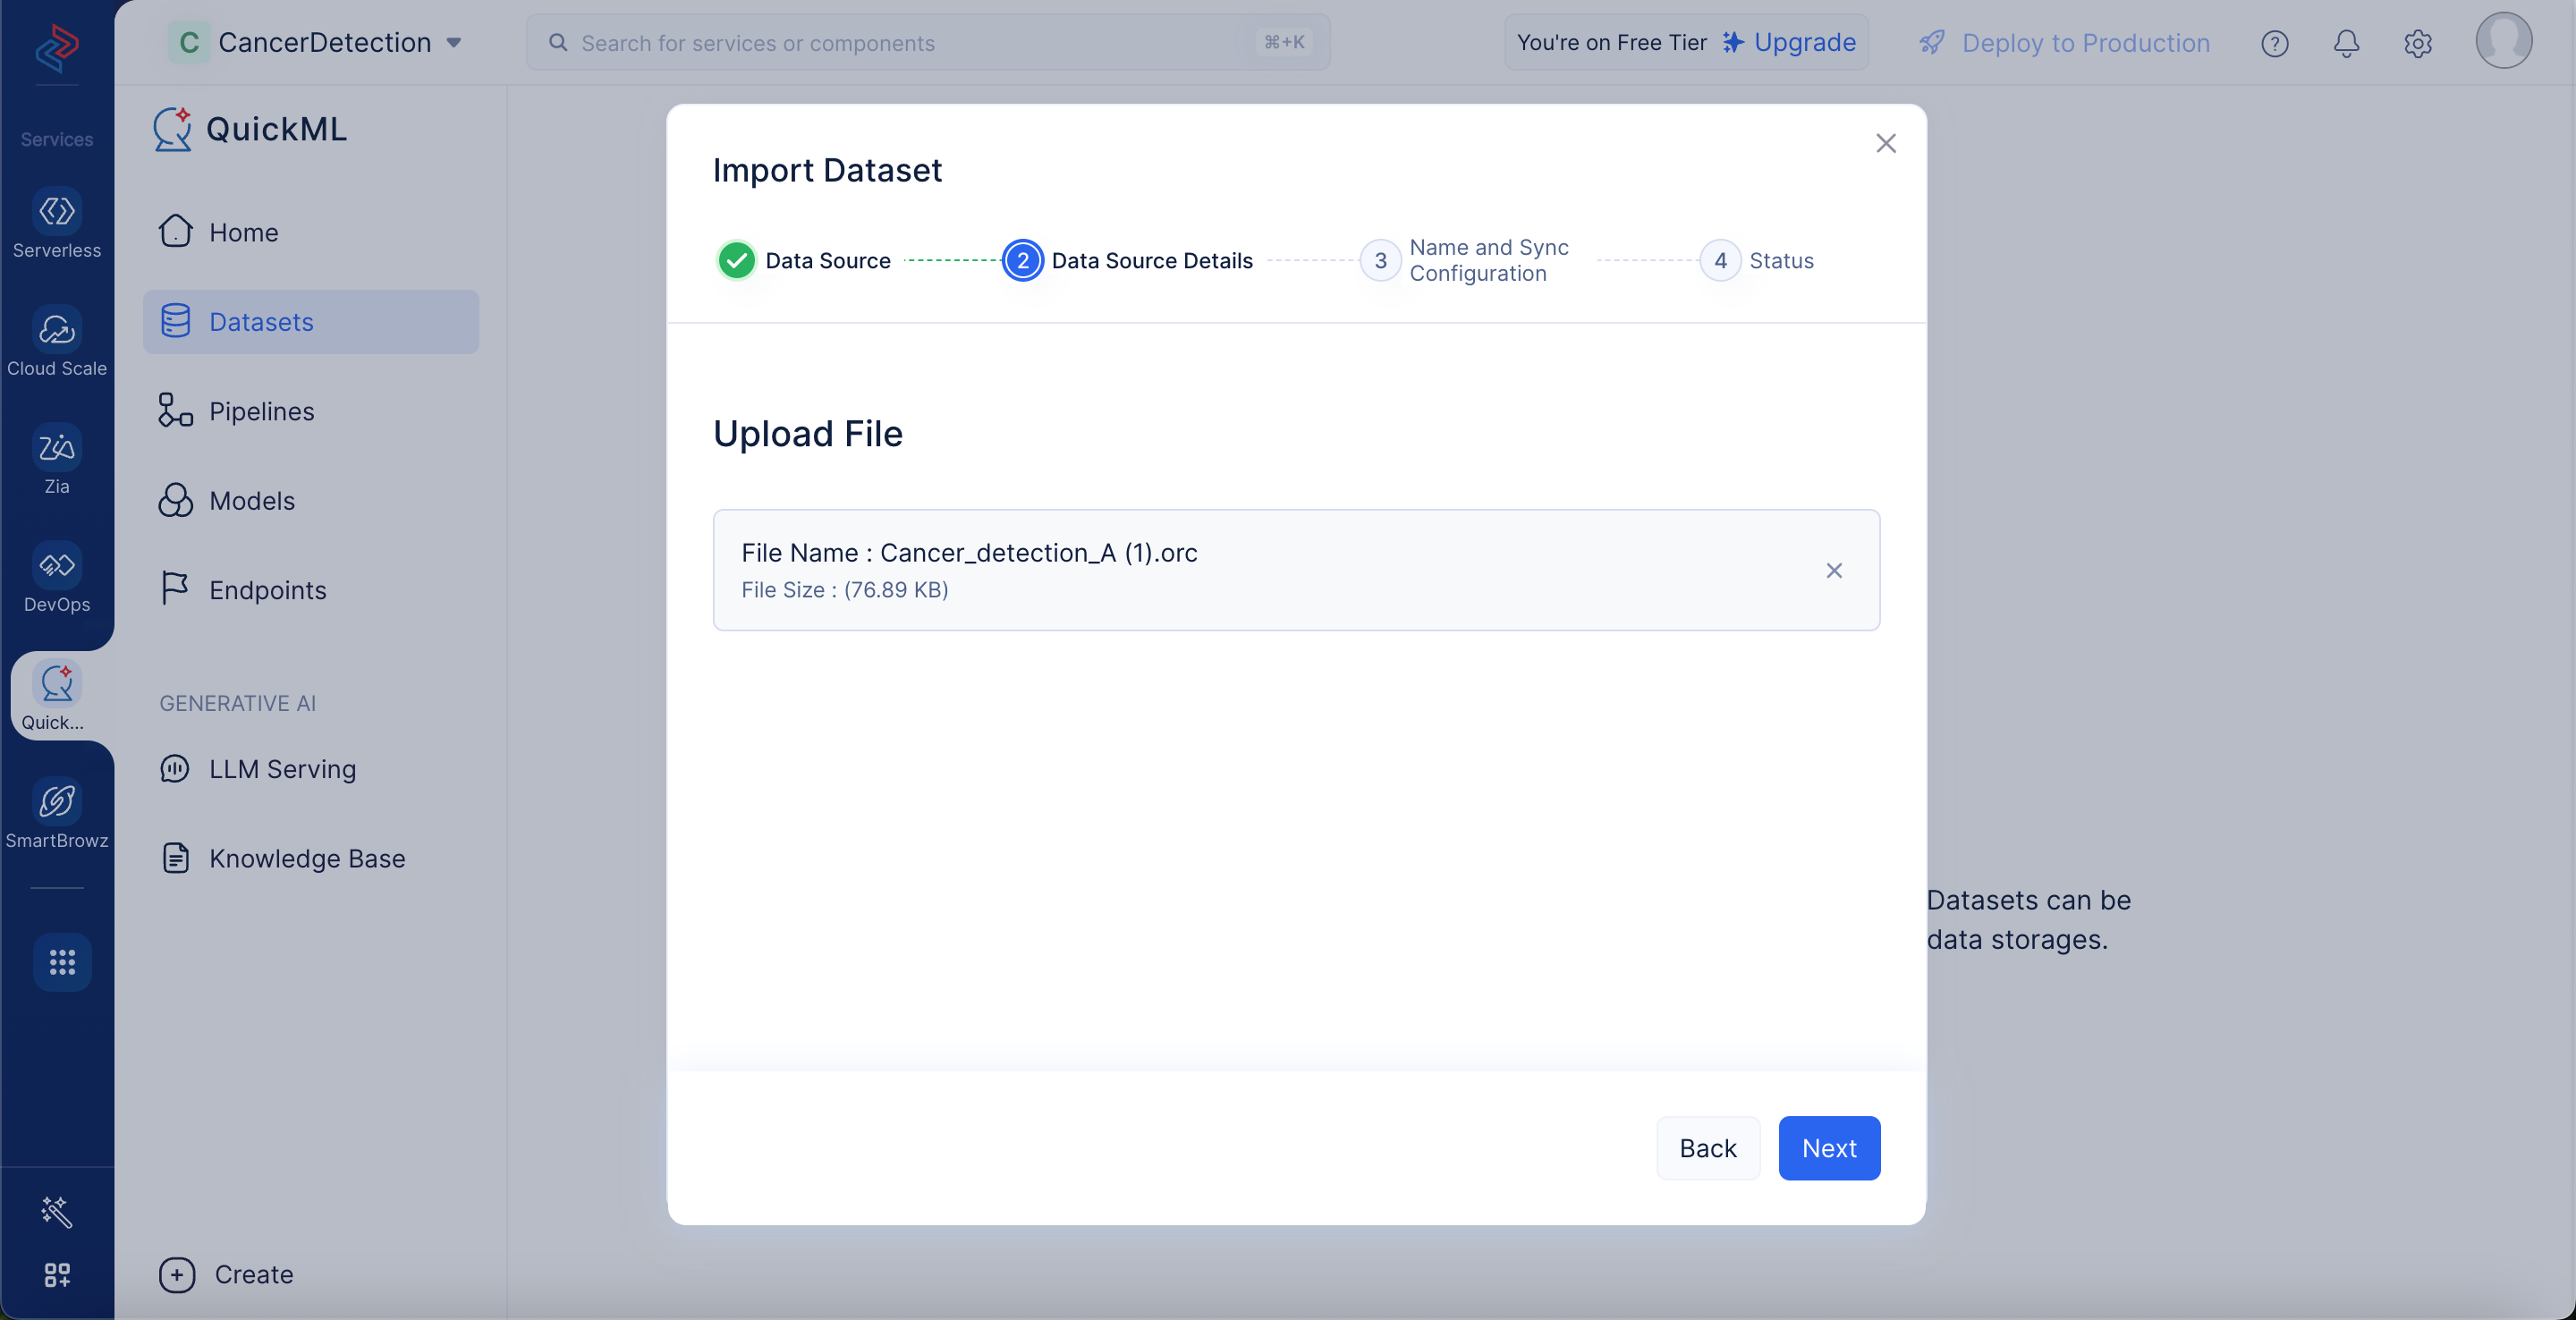
In the Data Source Details step, upload “Cancer_detection_A” dataset that you downloaded and click Next.
-
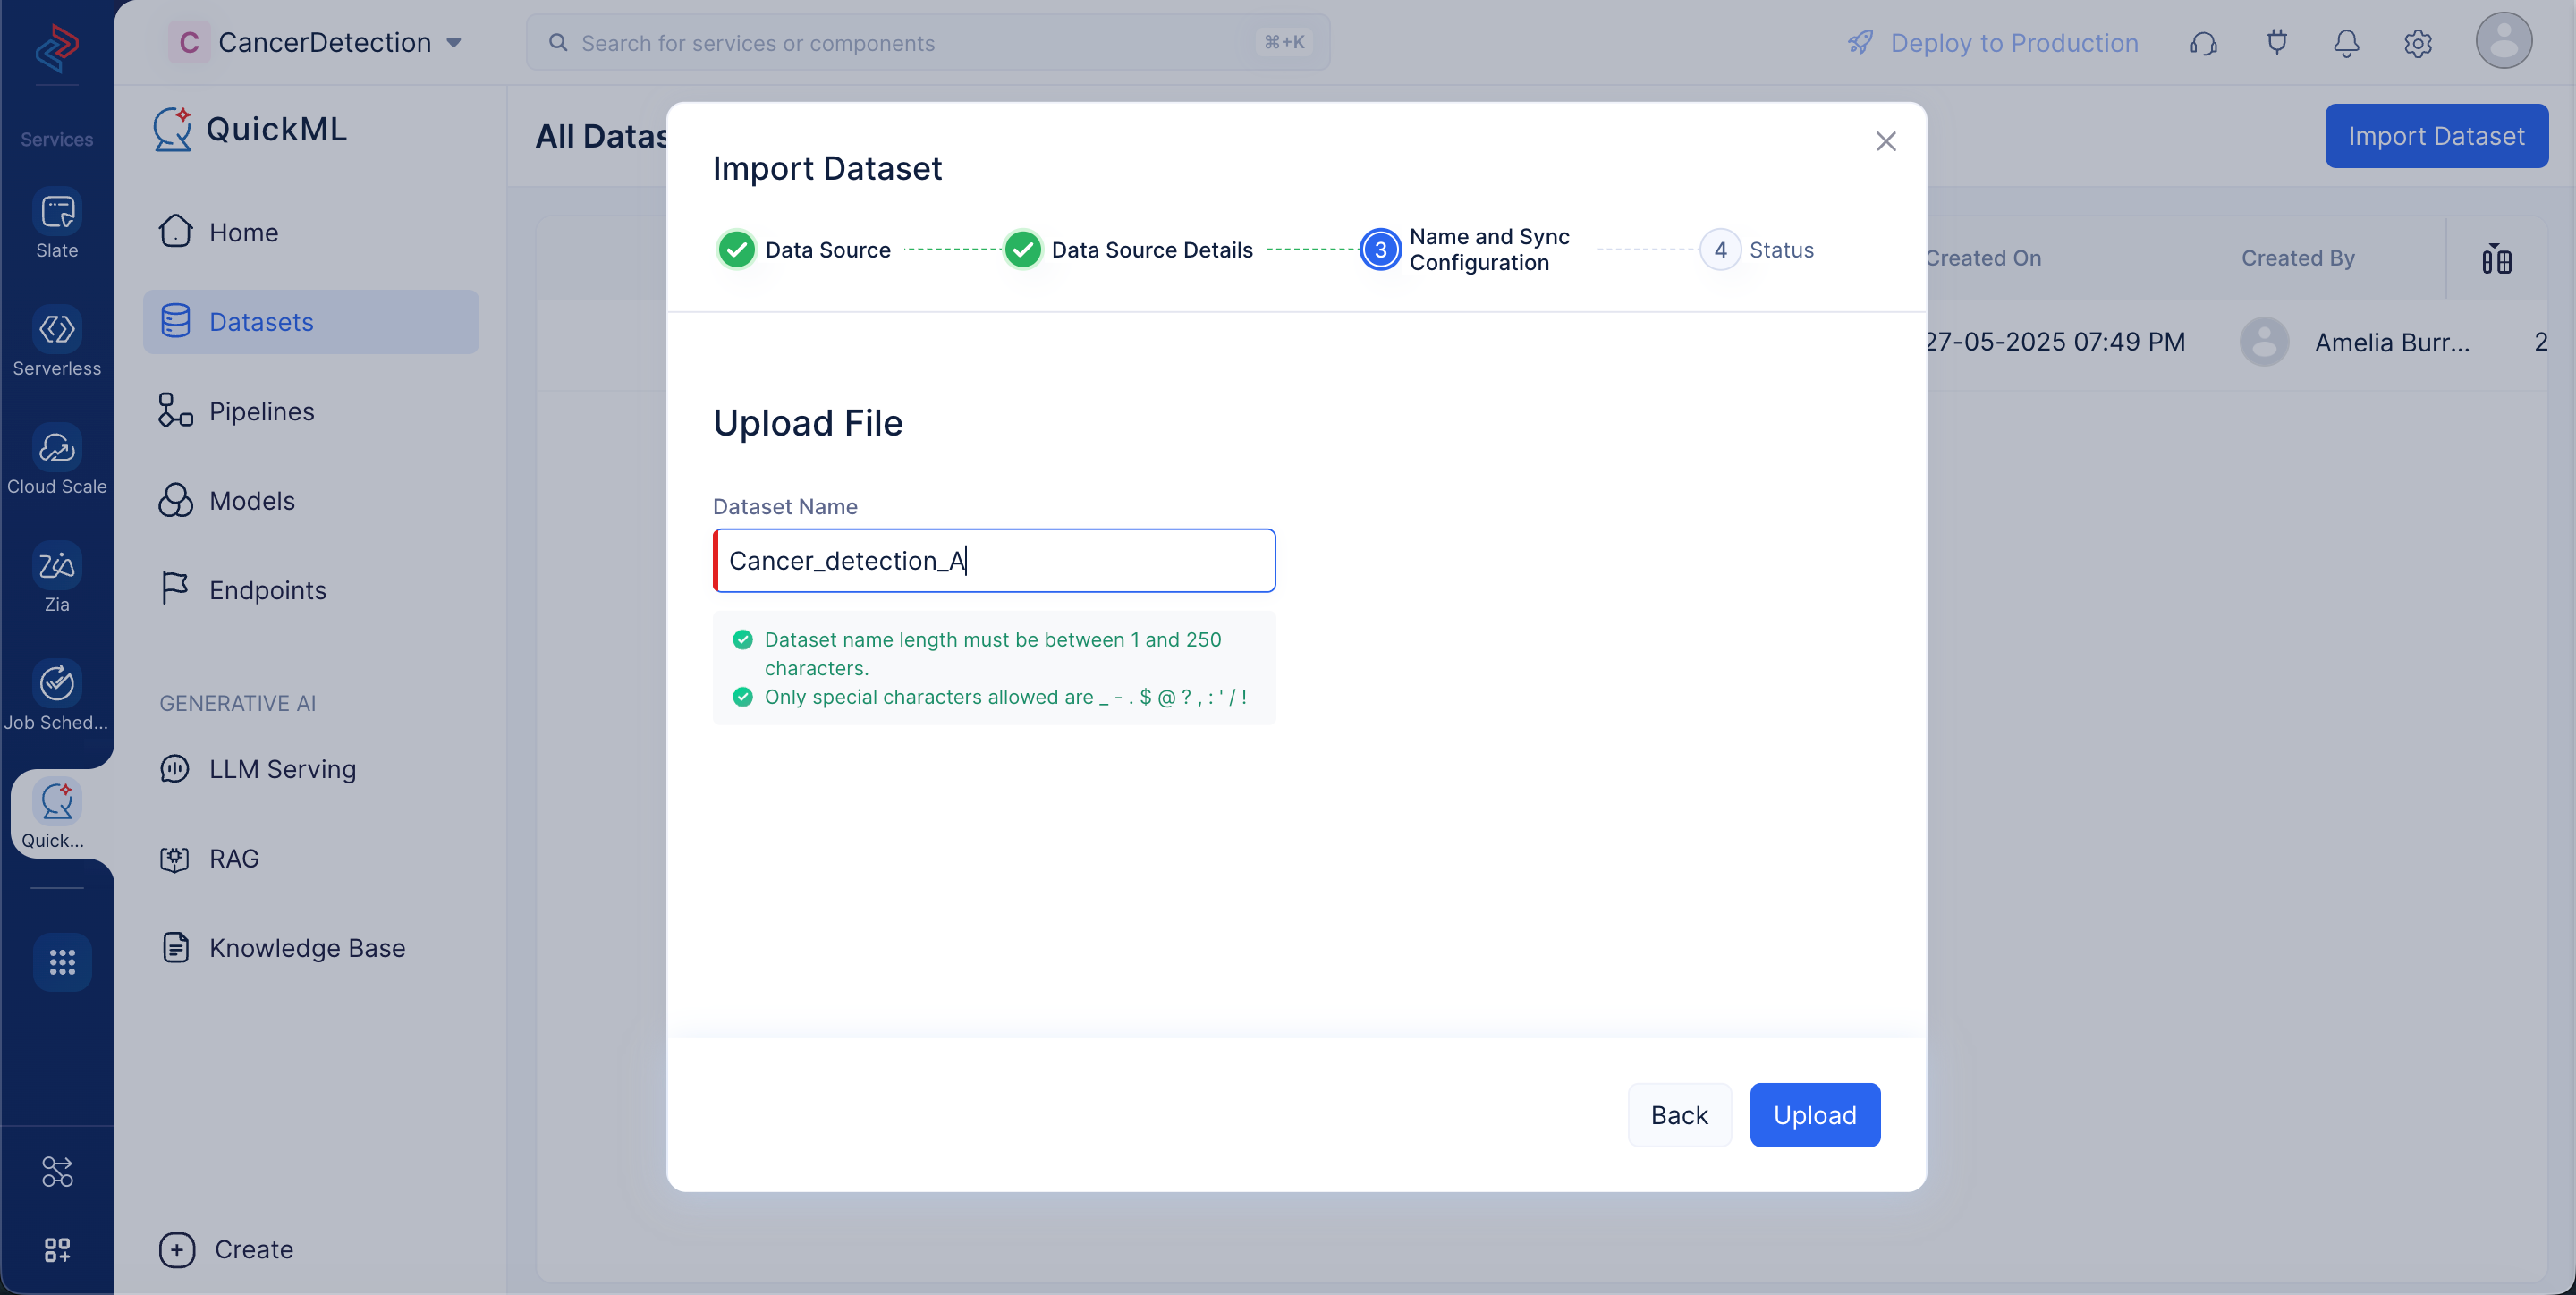
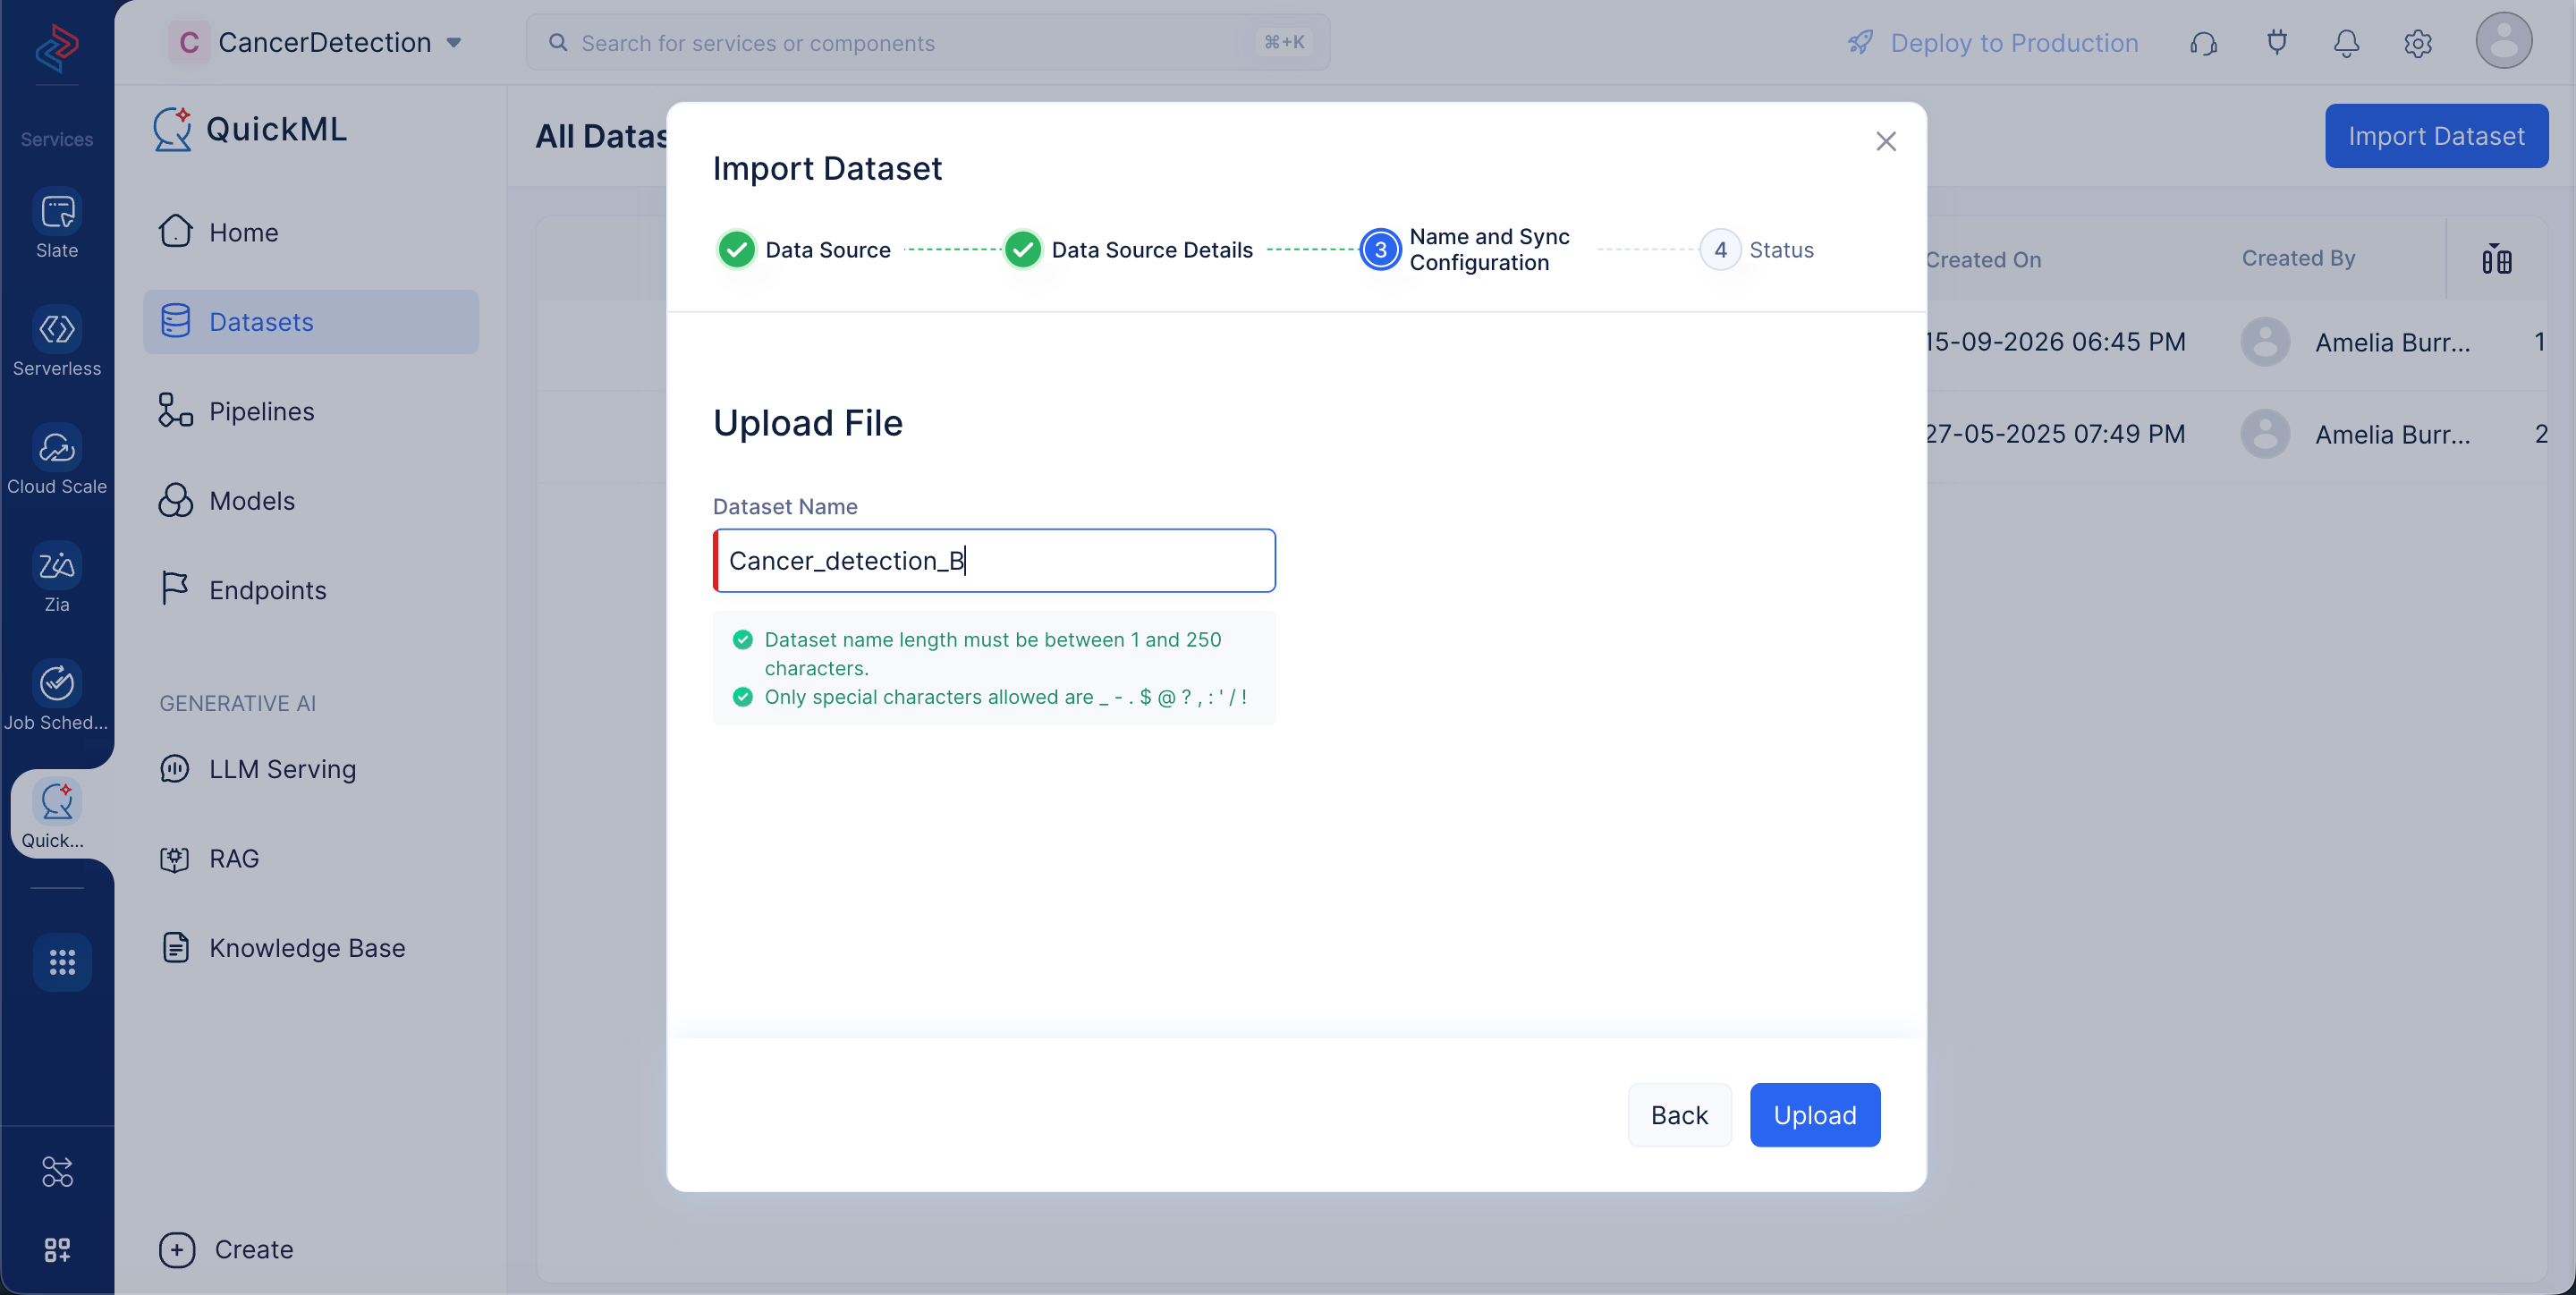
In the Name and Sync Configuration step, the dataset name will be automatically populated based on the uploaded file. You can modify it if needed. Then, click Upload.
Now, proceed with uploading the another dataset, “Cancer_detection_B” by repeating the same steps.
Because the datasets in this tutorial are related to health and medical data, here are some key terms to remember:
- Patient_id: Unique ID for each patient
- Patient_name: Name of the patient
- Diagnosis: (M = Malignant / B = Benign)
The dataset also contains information about the breast mass features, such as:
- Radius: Average distance from the center to the edge
- Texture: Standard deviation of gray-scale values
- Perimeter: Perimeter length
- Area: Area of the mass
- Smoothness: Variation in radius lengths
- Compactness: (Perimeter^2 / Area) - 1.0
- Concavity: How much the contour is indented
- Concave Points: Number of indentations on the contour
- Symmetry: How symmetrical the mass is
- Fractal Dimension: Measure of the complexity of the shape
For each image, we computed the mean, standard error, and worst (largest of the three largest values) of these features, resulting in a total of 30 features, including the mean radius, radius standard error, and worst radius.
Last Updated 2026-10-01 12:33:46 +0530 IST