Configure AppSail Service
Before we deploy your AppSail service to the console, you need to add the following files and code to your project directory:
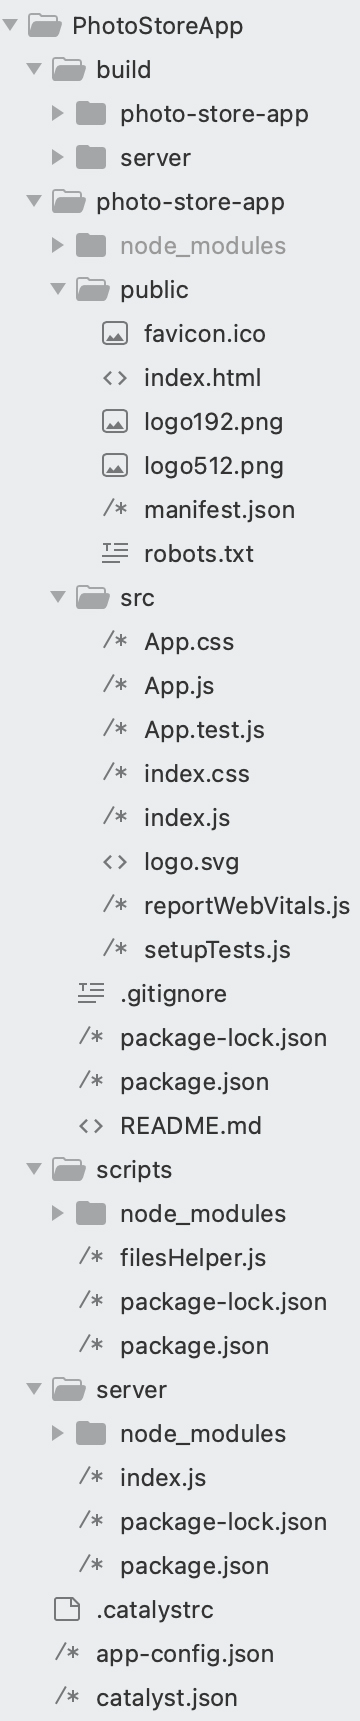
- Create a folder named server in your project root directory, and create the following files in them:
- index.js: This file will act as the proxy server to server your compiled react files.
- Create a folder named scripts, and add the following files to it:
- filesHelper.js: This file will be used to copy the files from the server and photo-store-app directories to the AppSail build path.
- Create a folder named build in your project’s root directory. This folder will contain the compiled react files of your client. You need to point this folder as your build path to start your application. Create the following folders in the build directory.
- server
- photo-store-app
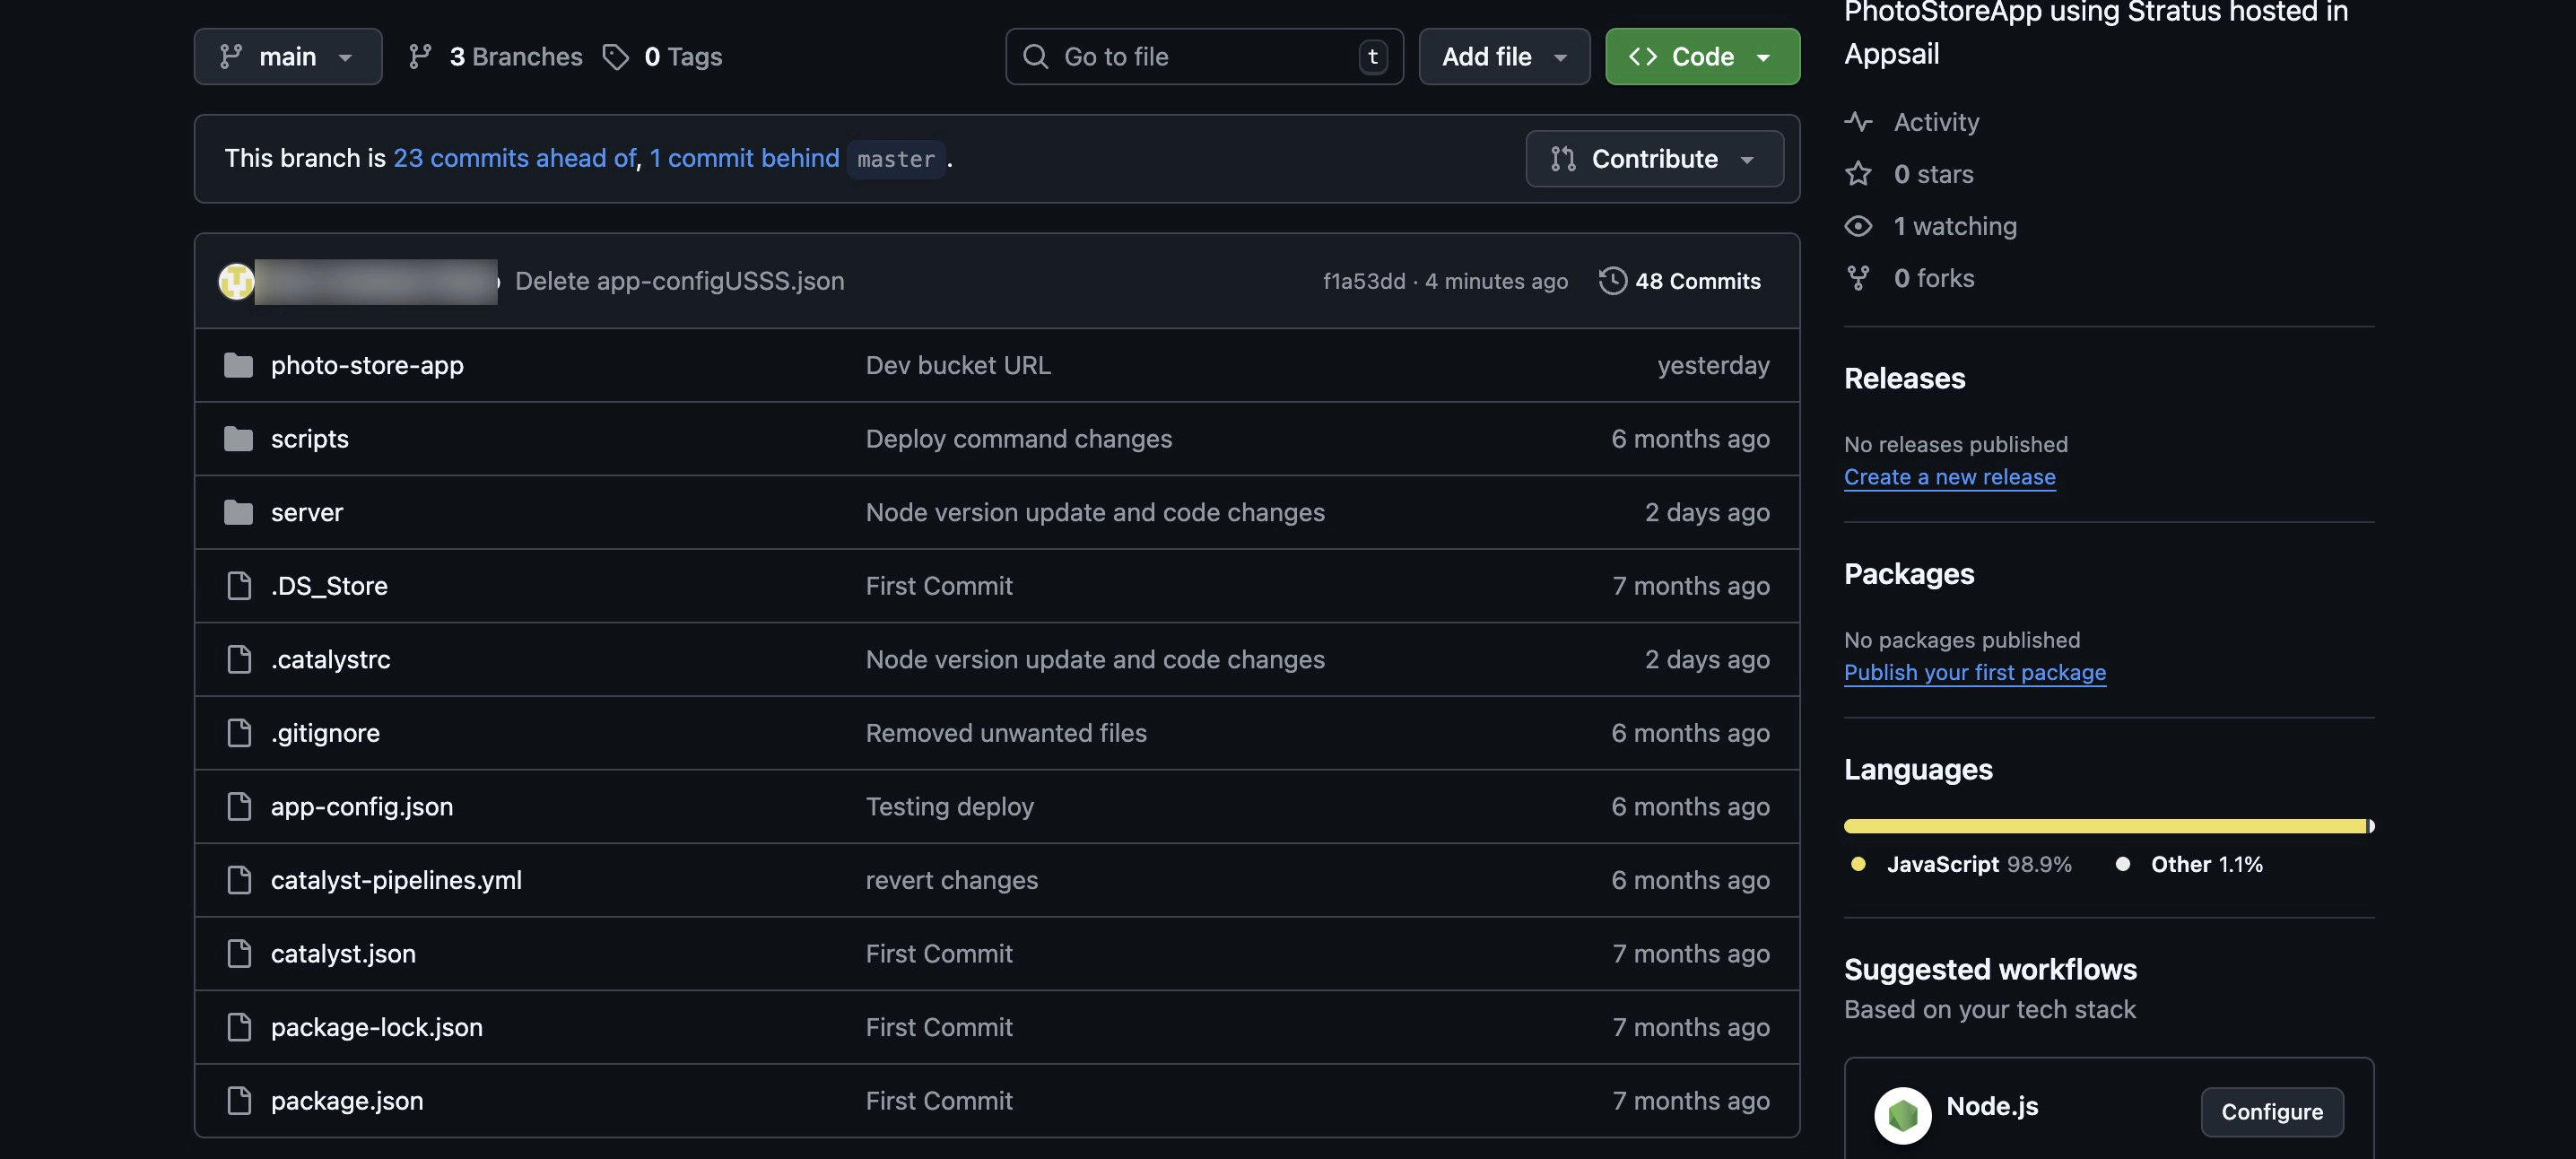
The application’s directory should now appear in the following manner:
Next navigate to the PhotoStoreApp/server/ directory and perform the following steps:
- Run the following CLI command from your terminal:
- Run the following command to install the Express package to handle HTTP requests and responses.

This will also create a node_modules folder in the PhotoStoreApp/server directory.
- Add the following code to your index.js file present in the PhotoStoreApp/server/ directory.
'use strict';
const express = require('express');
const path = require('path');
const app = express();
const appDir = path.join(__dirname, '../photo-store-app');
const port = process.env.X_ZOHO_CATALYST_LISTEN_PORT || 9000;
app.get('/', function (req, res) {
	res.sendFile(path.join(appDir));
});
app.use(express.static(appDir));
app.listen(port, () => {
	console.log(`Example app listening on port ${port}`);
});
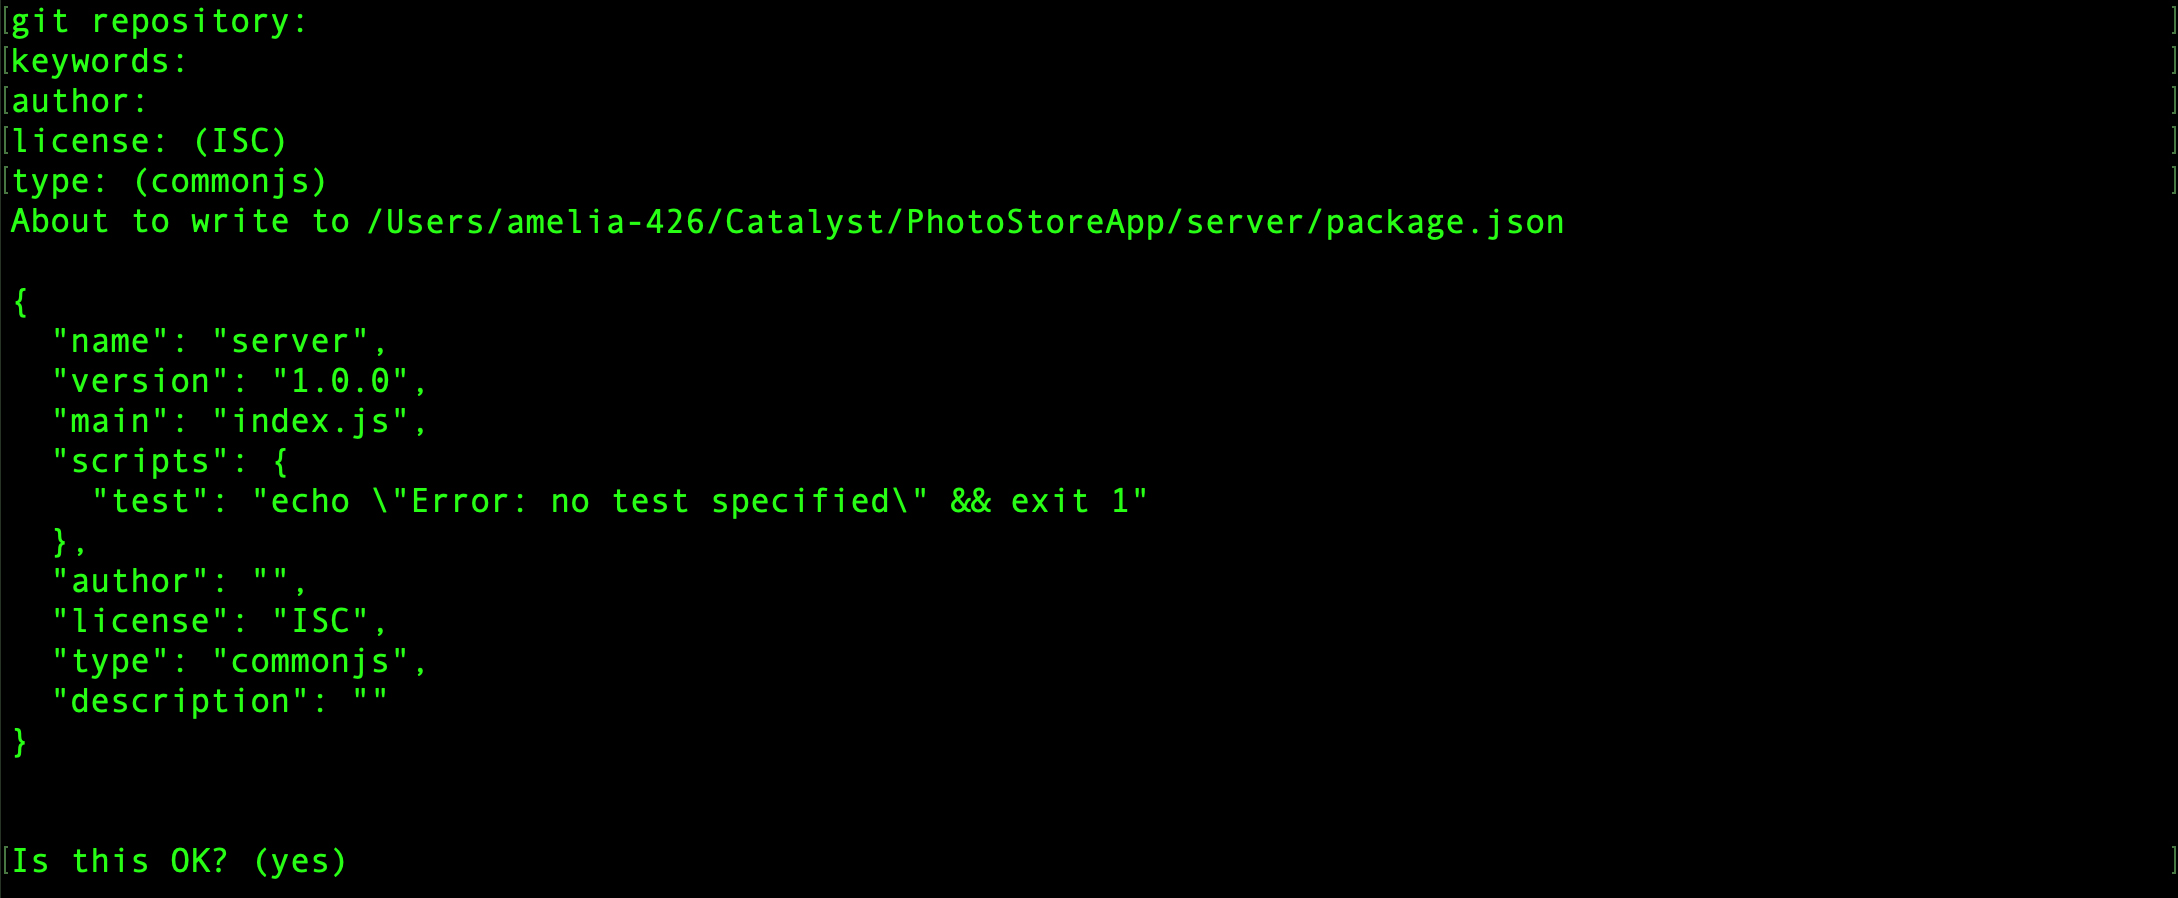
- Next, navigate to the scripts folder present in the PhotoStoreApp/scripts directory and execute the following command:
Ensure you enter the defaults, and this command will create a package.json file.

- Execute the following command in your scripts folder to install the required packages:

This command will install the following packages:
- path: This package will be used to handle file and directory paths.
- util: This package is required to use utilities like promisify, inherits, and so on.
- fs: This package is required to implement file system operations.
- Copy the following code and paste it in the filesHelper.js file present in the PhotoStoreApp/scripts directory.
const Path = require('path');
const { promisify } = require('util');
const Fs = require('fs');
const readdir = promisify(Fs.readdir);
const stat = promisify(Fs.stat);
const copyFile = promisify(Fs.copyFile);
const mkdir = promisify(Fs.mkdir);
const unlink = promisify(Fs.unlink);
const rmdir = promisify(Fs.rmdir);
if (process.argv.length < 4) {
	console.error('Usage: node copyAndDelete.js [-c|-d] <sourcePath> <destinationPath>');
	process.exit(1);
}
const operation = process.argv[2];
if (operation !== '-c' && operation !== '-d') {
	console.error('Invalid operation. Use -c for copy or -d for delete.');
	process.exit(1);
}
if (operation === '-c') {
	const sourcePath = Path.resolve(process.argv[3]);
	const destinationPath = Path.resolve(process.argv[4]);
	copyFolders(sourcePath, destinationPath)
		.then(() => {
			console.log('Copy completed successfully.');
		})
		.catch((err) => {
			console.error(`Error: ${err}`);
		});
} else if (operation === '-d') {
	const sourcePath = Path.resolve(process.argv[3]);
	deleteFolder(sourcePath)
		.then(() => {
			console.log('Delete completed successfully.');
		})
		.catch((err) => {
			console.error(`Error: ${err}`);
		});
}
async function copyFolders(source, destination) {
	try {
		await mkdir(destination, { recursive: true });
		const files = await readdir(source);
		for (const file of files) {
			const sourceFilePath = Path.join(source, file);
			const destFilePath = Path.join(destination, file);
			const fileStat = await stat(sourceFilePath);
			if (fileStat.isDirectory()) {
				await copyFolders(sourceFilePath, destFilePath);
			} else {
				await copyFile(sourceFilePath, destFilePath);
			}
		}
	} catch (err) {
		throw err;
	}
}
async function deleteFolder(destinationPath) {
	try {
		const files = await readdir(destinationPath);
		for (const file of files) {
			const filePath = Path.join(destinationPath, file);
			const fileStat = await stat(filePath);
			if (fileStat.isDirectory()) {
				await deleteFolder(filePath);
			} else {
				await unlink(filePath);
			}
		}
		await rmdir(destinationPath);
	} catch (err) {
		throw err;
	}
}
Now, navigate to the app-config.json file present in the project directory PhotoStoreApp/app-config.json and paste the following code.
{
  "command": "node ./server/index.js",
  "build_path": "./build",
  "stack": "node20",
  "env_variables": {},
  "memory": 256,
  "scripts": {
    "preserve": "cd photo-store-app && npm run build && cd .. && cd server && npm install && cd .. && cd scripts && npm install && cd .. && node ./scripts/filesHelper.js -c ./server/ ./build/server/ && node ./scripts/filesHelper.js -c ./photo-store-app/build/ ./build/photo-store-app/",
    "postserve": "node ./scripts/filesHelper.js -d ./build/server && node ./scripts/filesHelper.js -d ./build/photo-store-app",
    "predeploy": "cd photo-store-app && npm run build && cd .. && node ./scripts/filesHelper.js -c ./server/ ./build/server/ && node ./scripts/filesHelper.js -c ./photo-store-app/build/ ./build/photo-store-app/",
    "postdeploy": "node ./scripts/filesHelper.js -d ./build/server && node ./scripts/filesHelper.js -d ./build/photo-store-app"
  },
  "raw": {},
  "catalyst_auth": true,
  "login_redirect": "/index.html"
}
-
catalyst_auth key’s value needs to be set as true, to enable Catalyst Authentication for the AppSail service.
-
You need to set the value of login_redirect key as index.html to ensure proper redirection after authentication process.
Test and Deploy the AppSail Service
Next, navigate to your project’s root directory. To check if all the steps completed thus far are error free, we are going to serve the application from the CLI using the following Catalyst CLI command:
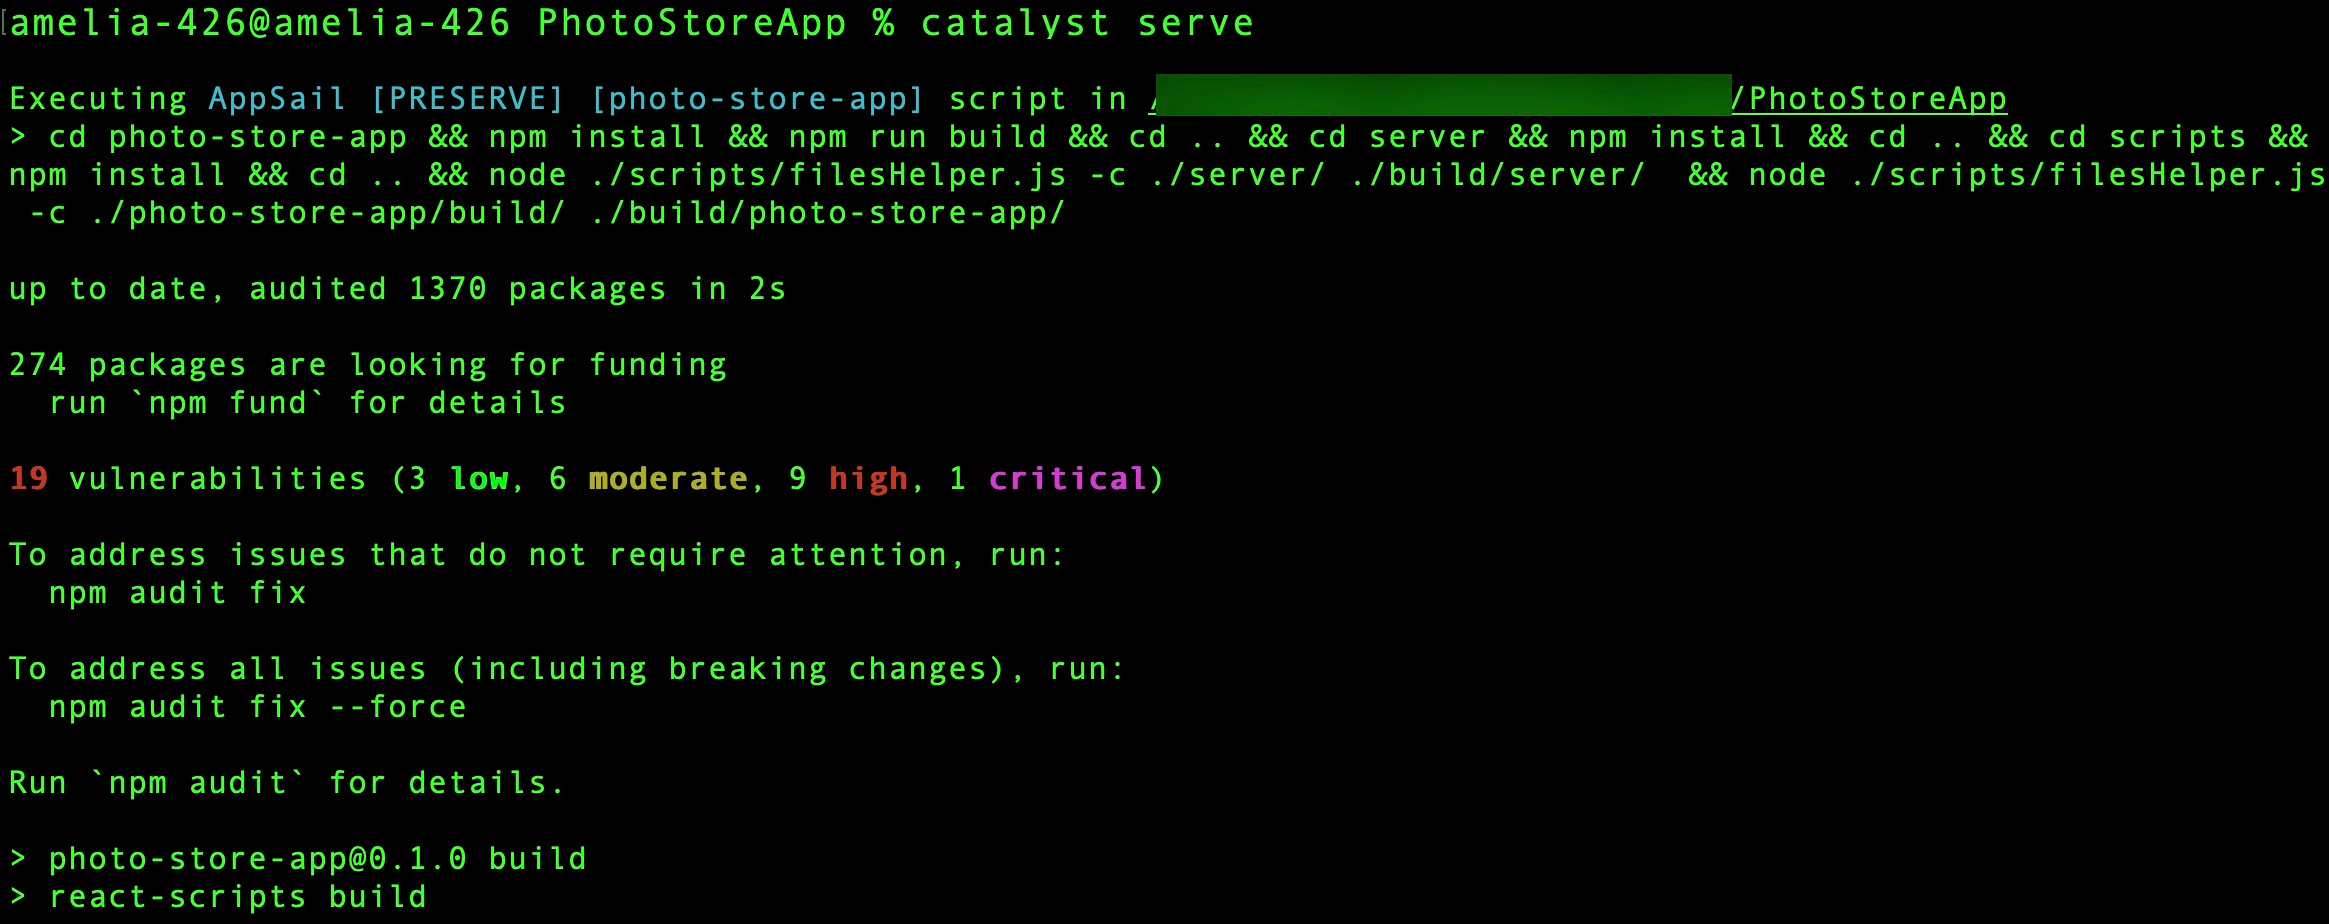
This command will serve the application on your localhost. The local endpoint URLs of the components are displayed.
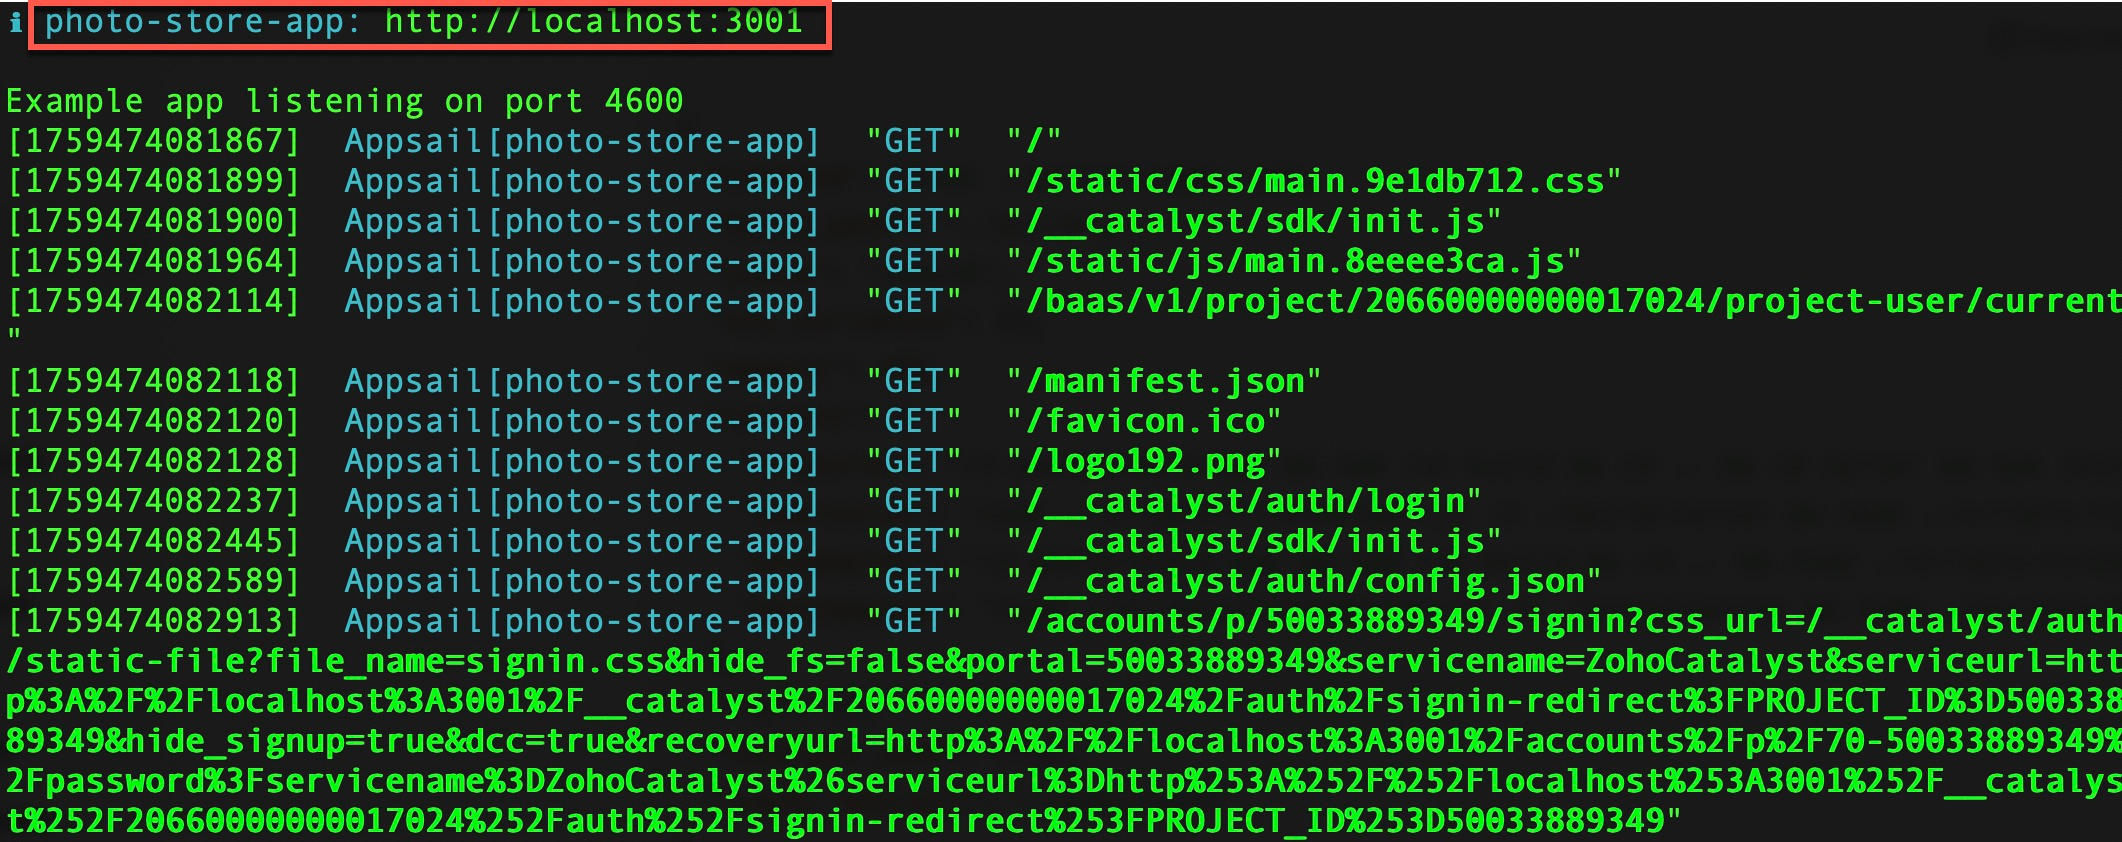
If the application is error free, the AppSail service will be successfully compiled and served typically on localhost:3001.
Once you ensure the application is running error free, you can deploy the application to the Catalyst console using the following Catalyst CLI command:

The application will now be deployed to the Catalyst console.
You can access the AppSail service in the console by navigating to the AppSail component present in the Catalyst Serverless section.
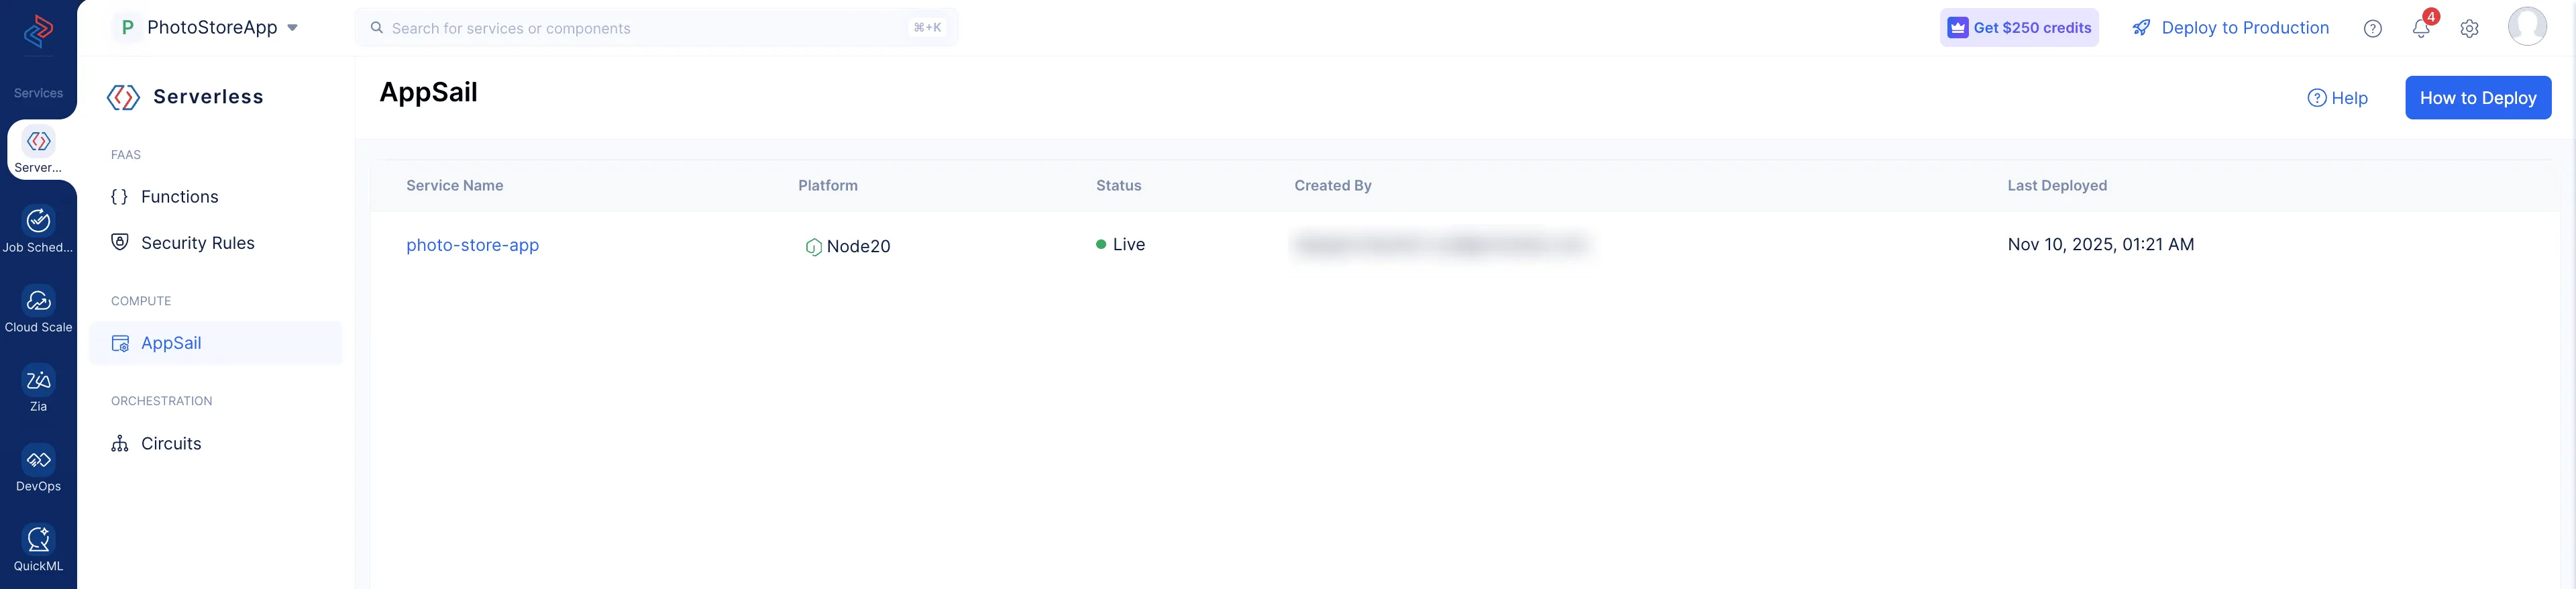
You can find more details about the AppSail service by clicking on the required service.
The AppSail service has been configured for your application.
Enable Bucket CORS
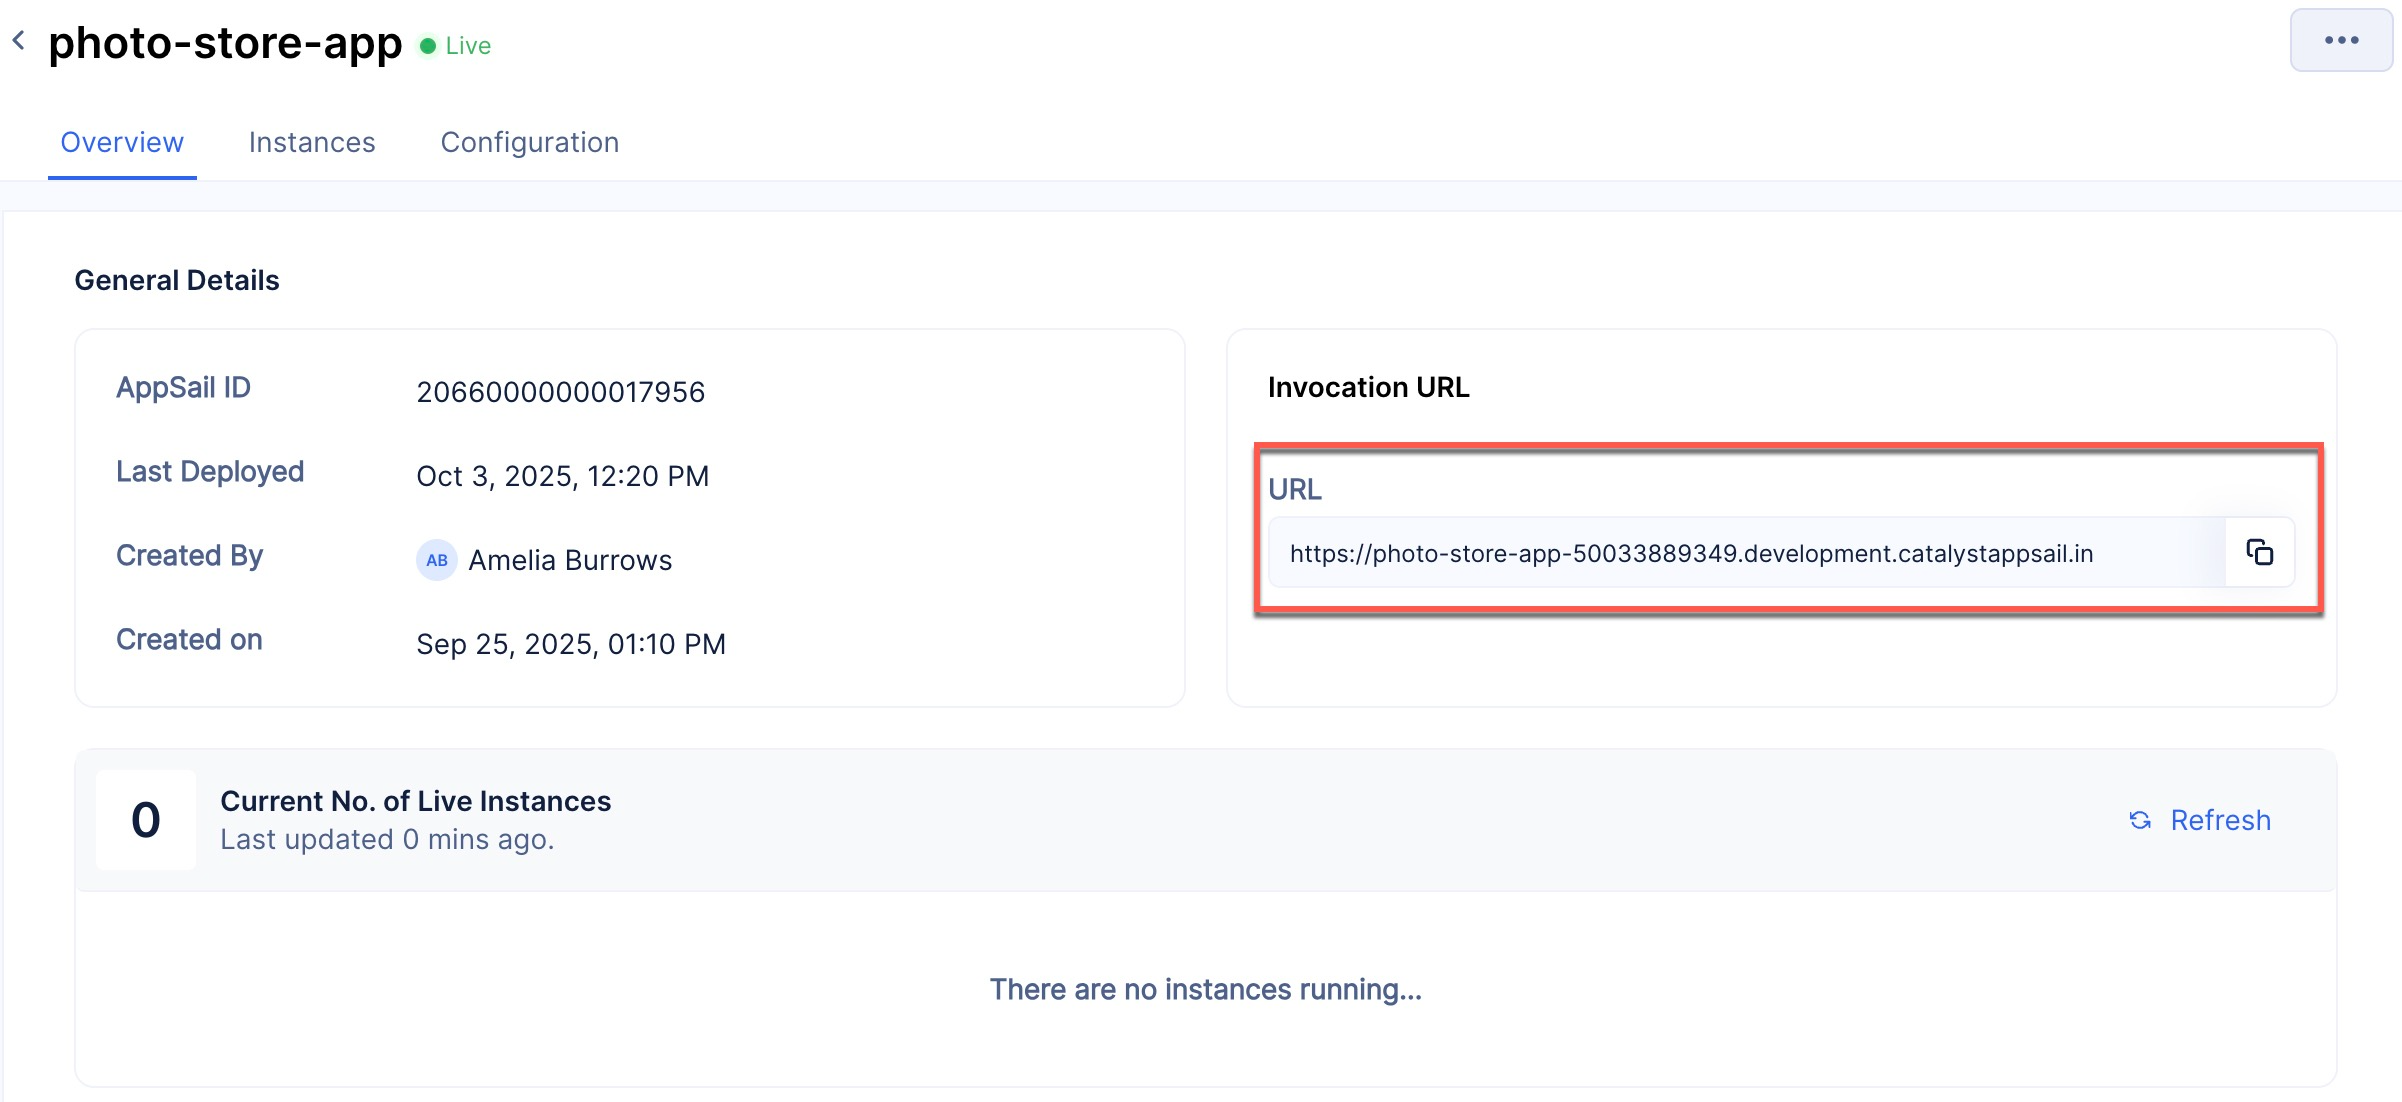
Once the AppSail service is deployed to the Catalyst console, we will have the application URL. Given that the domains for the bucket and the AppService are different, we need to enable Cross-Origin Resource Sharing (CORS) policy to authenticate and allow seamless interaction between the AppSail service and the Bucket.
To enable Bucket CORS:
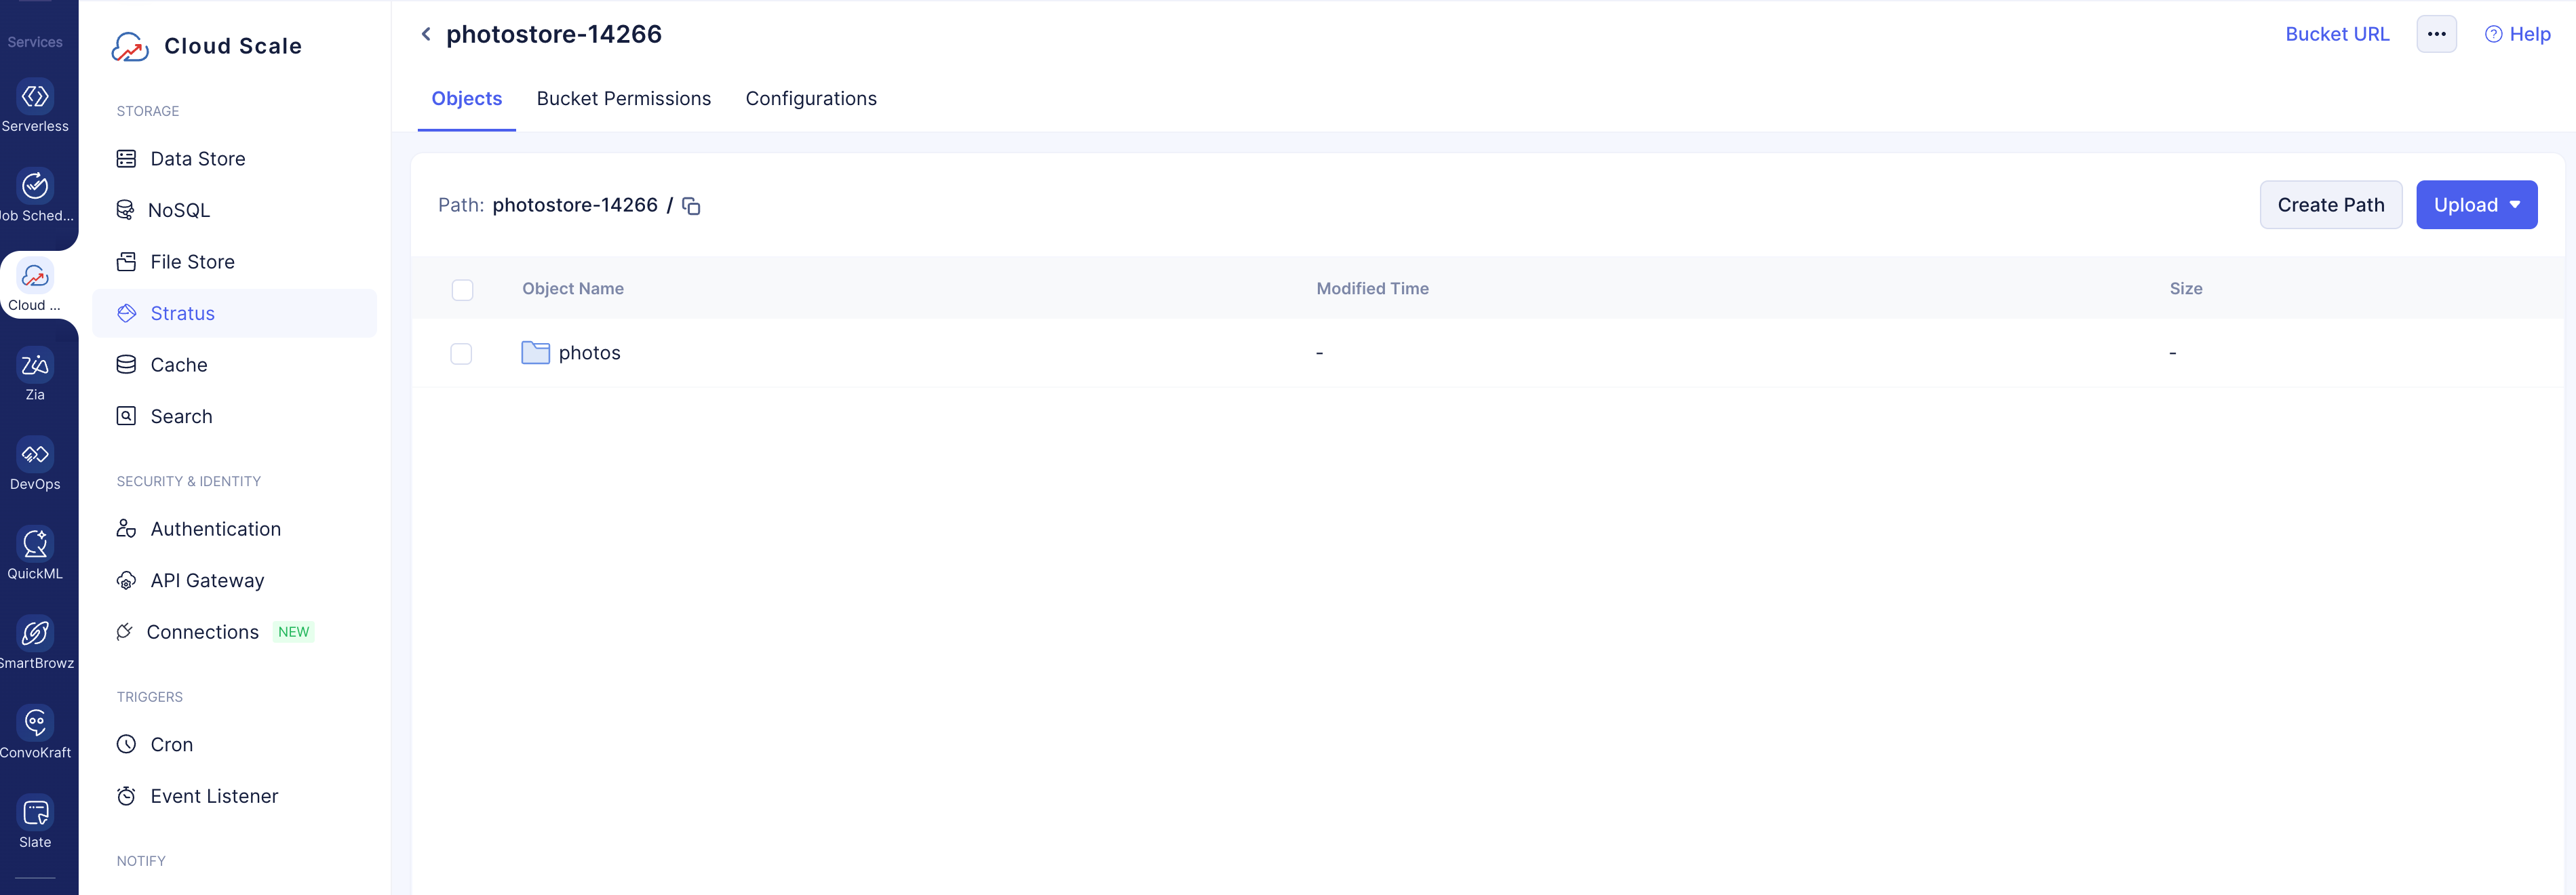
-
Navigate to your Bucket present in Stratus.
-
Navigate to the Bucket CORS section present in the Configurations tab, and click Add Domain.
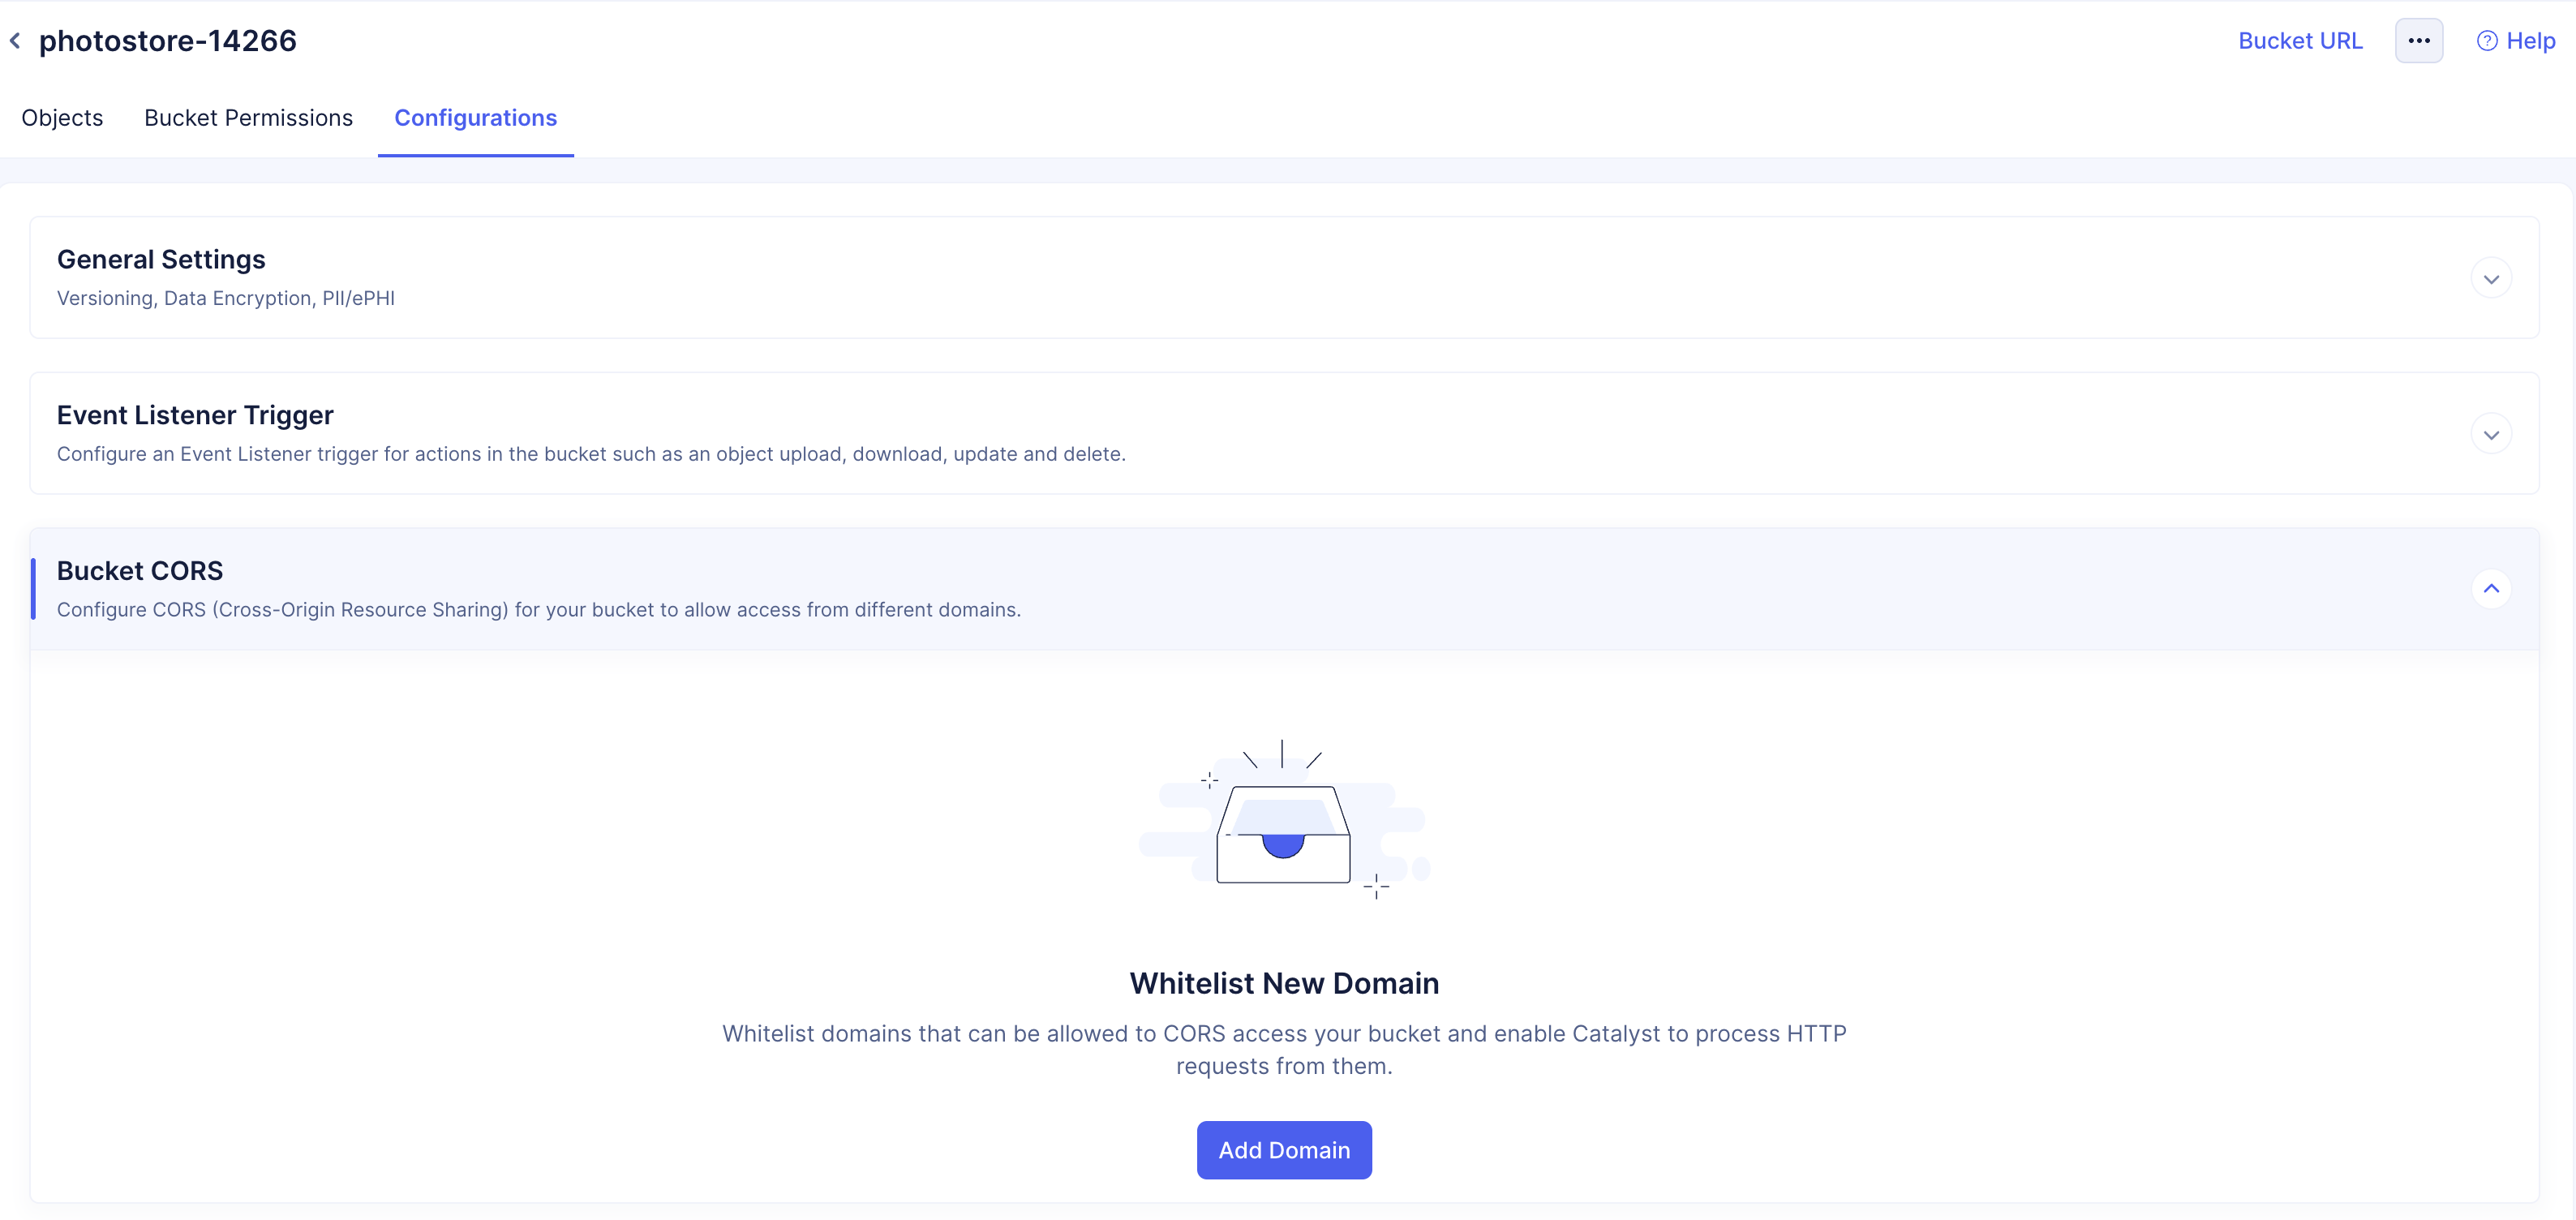
-
Select all Request Methods provided in the drop-down and paste the AppSail service’s URL generated in the previous step.
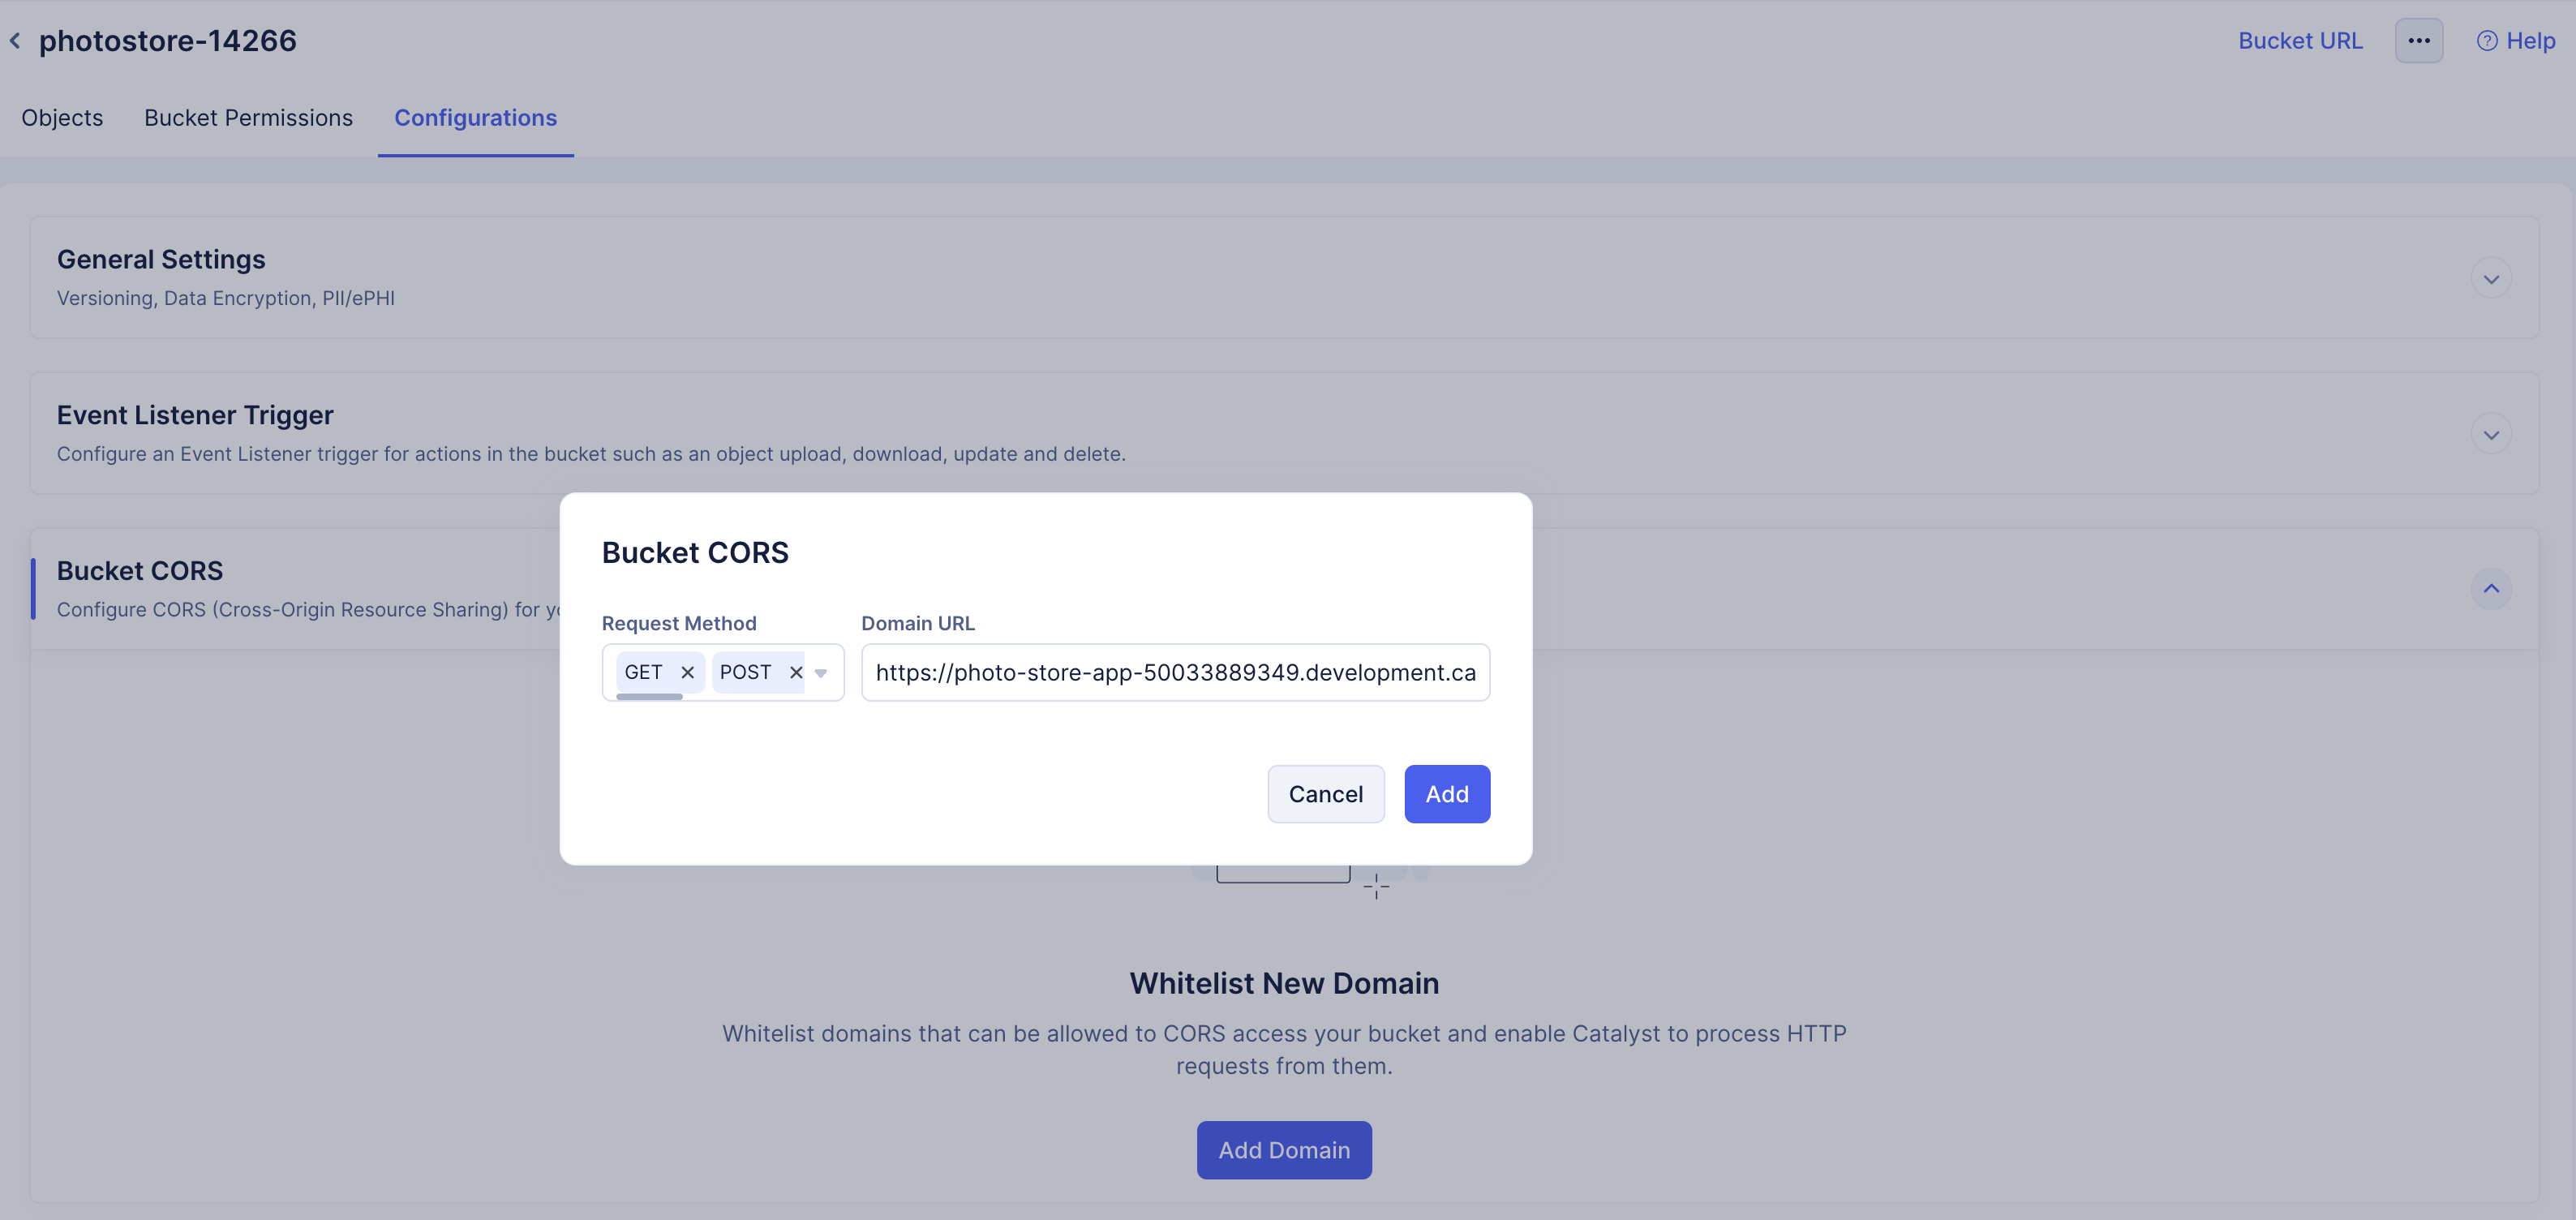
-
Click Add, and CORS will be enabled for the AppSail service, ensuring secure access.

Setup GitHub
With the application deployed to the Catalyst console, you need to ensure that you have pushed the application files to your GitHub account.
Last Updated 2025-12-16 11:54:44 +0530 IST