Create an Extension on Cliq
You can now configure the extension in Cliq. As mentioned in the introduction, this Cliq extension will bundle all the development components that we will require for this setup. You can learn about Cliq extensions in detail from the Cliq help documentation.
We will add the following Cliq components to be bundled in the extension:
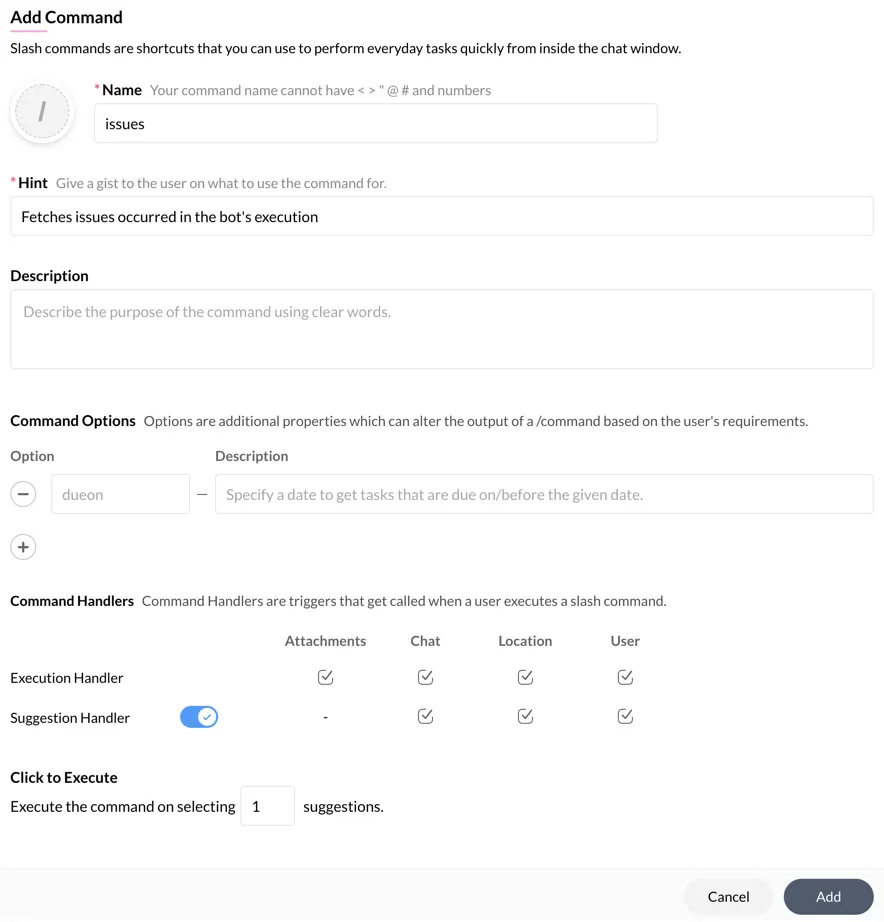
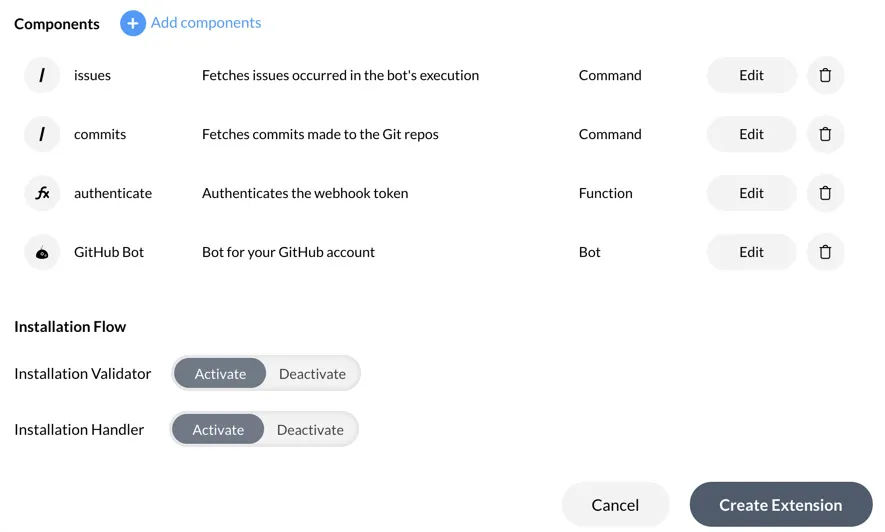
- Command for issues: A command handled by the CommandHandler.java class that fetches the last ten issues raised in a specific repository.
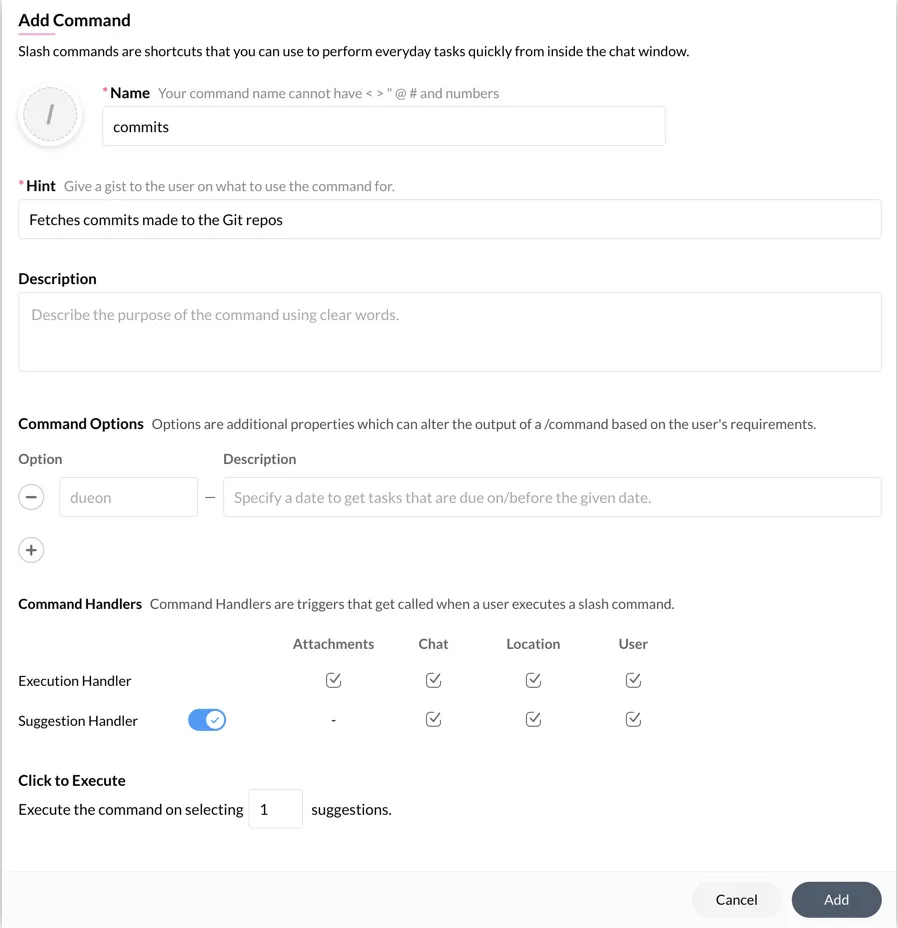
- Command for commits: A command handled by the CommandHandler.java class that fetches the last ten commits made in a specific repository.
- Button function to authenticate the webhook token: A function handled by the FunctionHandler.java class that is executed when a button is clicked in the chat bot. This function authenticates the webhook token for GitHub.
- GitHub bot: A chat bot handled by the BotHandler.java class that enables you to execute these commands. The bot also includes a menu action that lists your existing repositories, and enables you to select a repo to execute a command for.
You can configure the Cliq extension in the following way:
-
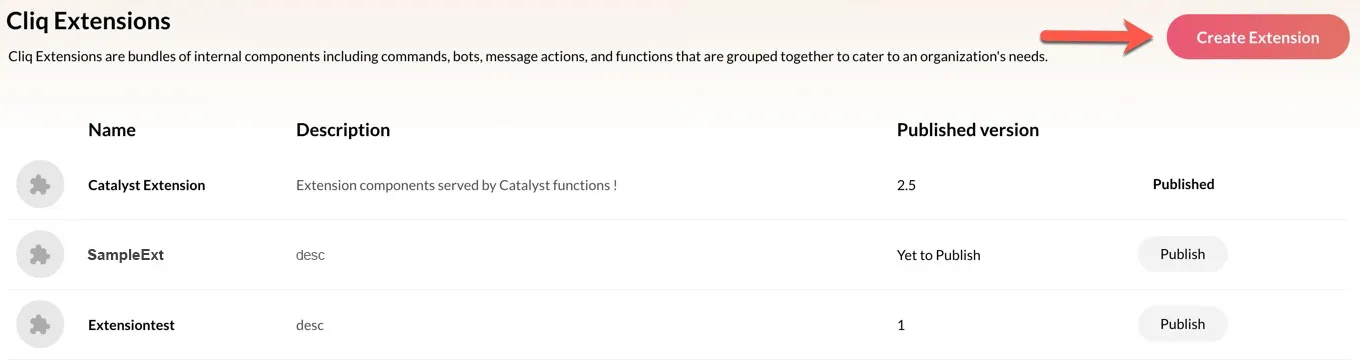
Log in to your Cliq account and open the Cliq developer console.
-
The index page contains all the extensions you develop in your Cliq account. Click Create Extension.
-
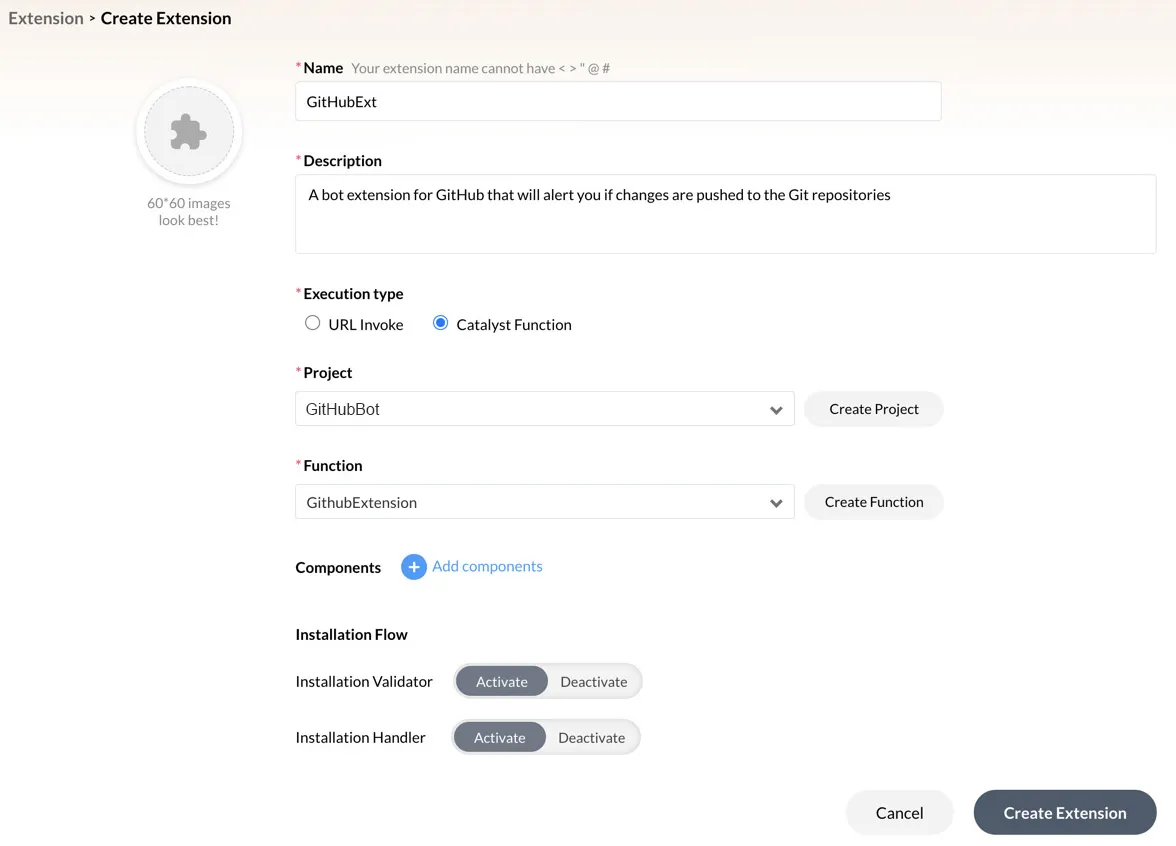
Enter the name of the extension as “GitHubExt” and enter a description for it.
-
Select the execution type as Catalyst Function. Select the Catalyst project GitHubBot that we created for this tutorial and the GithubExtension function from the dropdown lists.
This lets the extension invoke the function whenever any of the components in the extension are accessed.
We can now add the components that we will require for this extension. -
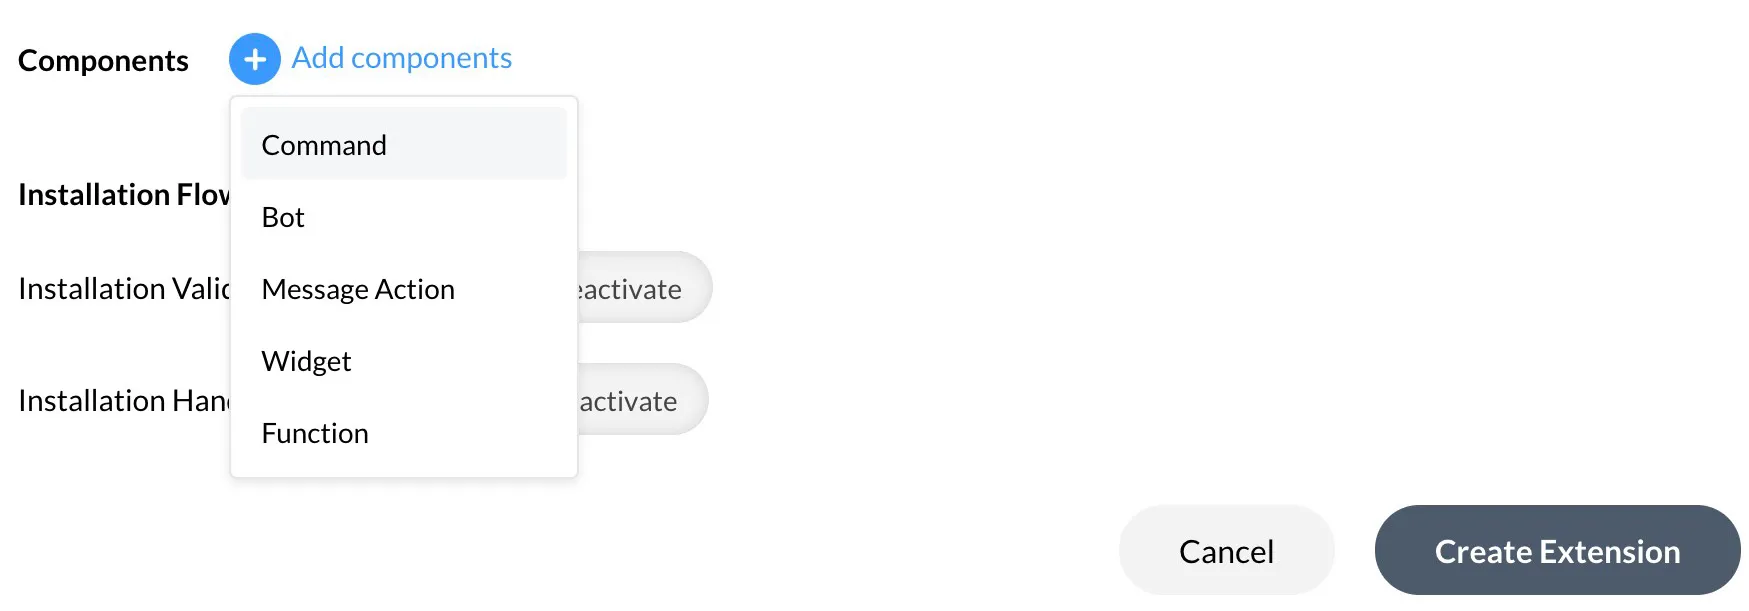
Click Add components, then click Command.
-
Enter the command’s name as “issues”. Configure it as shown in the image below. Click Add.
-
Similarly, click the Add components button in the extension configuration again, then click Command. Configure the command “commits” as shown below. Click Add.
-
Next, add a function component and configure the “authenticate” function as shown below.

-
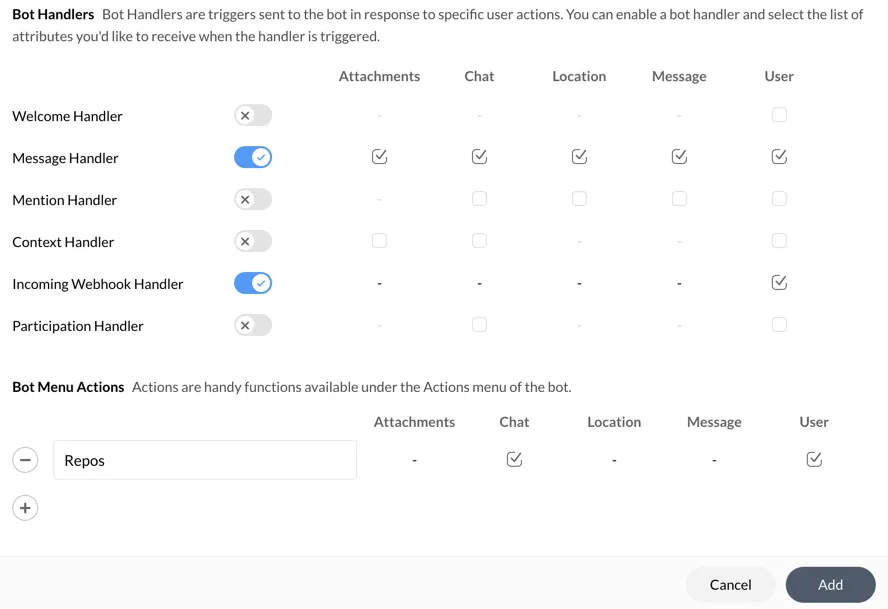
Finally, add a bot component and configure the “GitHub Bot” as shown below.

Enable the Message Handler and Incoming Webhook Handler, and select all the checkboxes. This will enable the bot to acknowledge messages in the chat and the webhook requests received from GitHub.
You must also add a bot menu action “Repos” that lists and select all the checkboxes.
All the required components have been added.
The extension will be created and listed in your developer console.
The Cliq bot will now be available in your Cliq account. The issues and commits commands, along with the Repos menu action will work in the bot.
Before you test these commands, you must also enable alerts to be received automatically whenever a commit is pushed to one of the repositories in the GitHub account using a webhook.
Last Updated 2025-02-19 15:51:40 +0530 IST