Initialize the Project from the CLI
You can now begin working on your Catalyst project from the CLI. The first step is to initialize the project in an empty directory. This will be the home directory of your project and all of the project files will be saved in it.
You can learn more about this from the Project Directory Structure help page. You can learn about initializing a project in detail from the CLI help documentation.
For this application, we will initialize a Basic I/O function, which will contain the logic for Custom User Validation and a Basic web app as the client component.
-
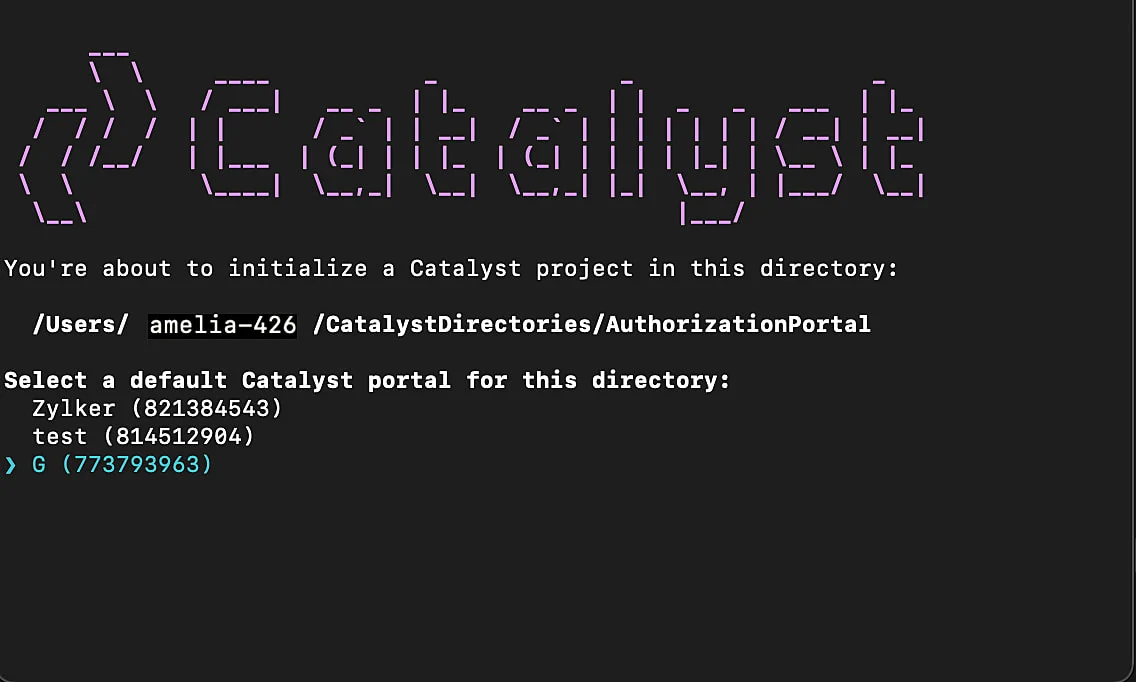
Create a folder for the project on your local machine and navigate to it from the terminal.
-
Initialize a project by executing the following command from that directory:
- Navigate using the arrow keys, select your preferred portal, and press the Enter key. If you have no other organizations associated with the account, then the default one will be selected automatically.
-
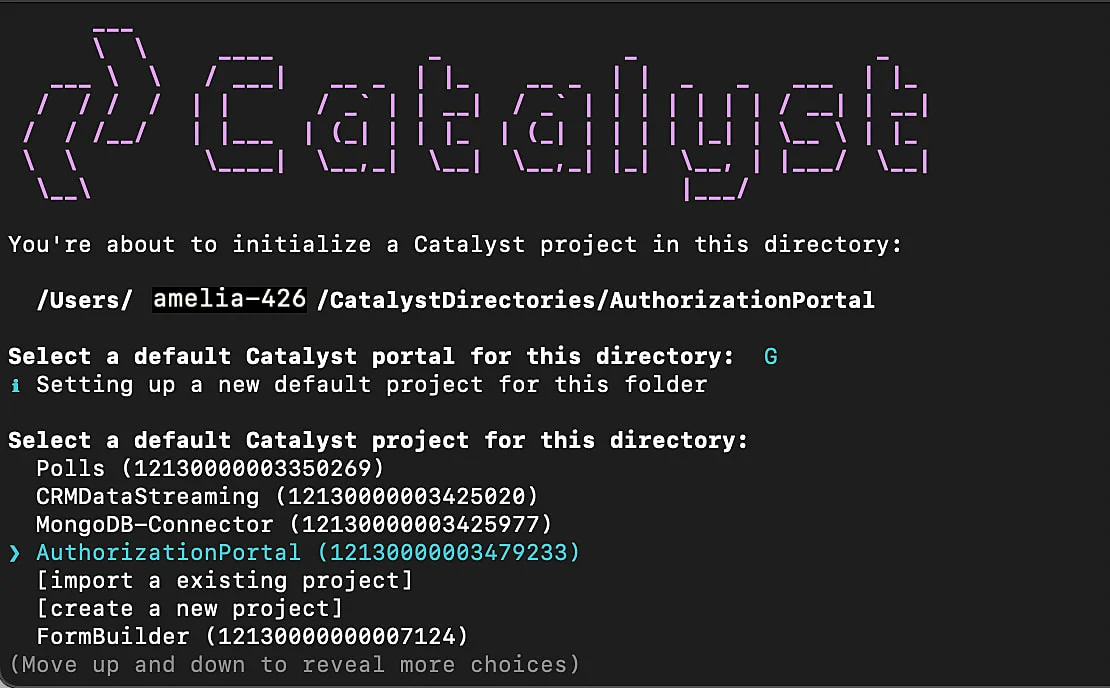
The CLI will now ask you to associate a Catalyst project with the directory. Associate it with the project that we created earlier from the console. Select AuthenticationPortal from the list and press Enter.
-
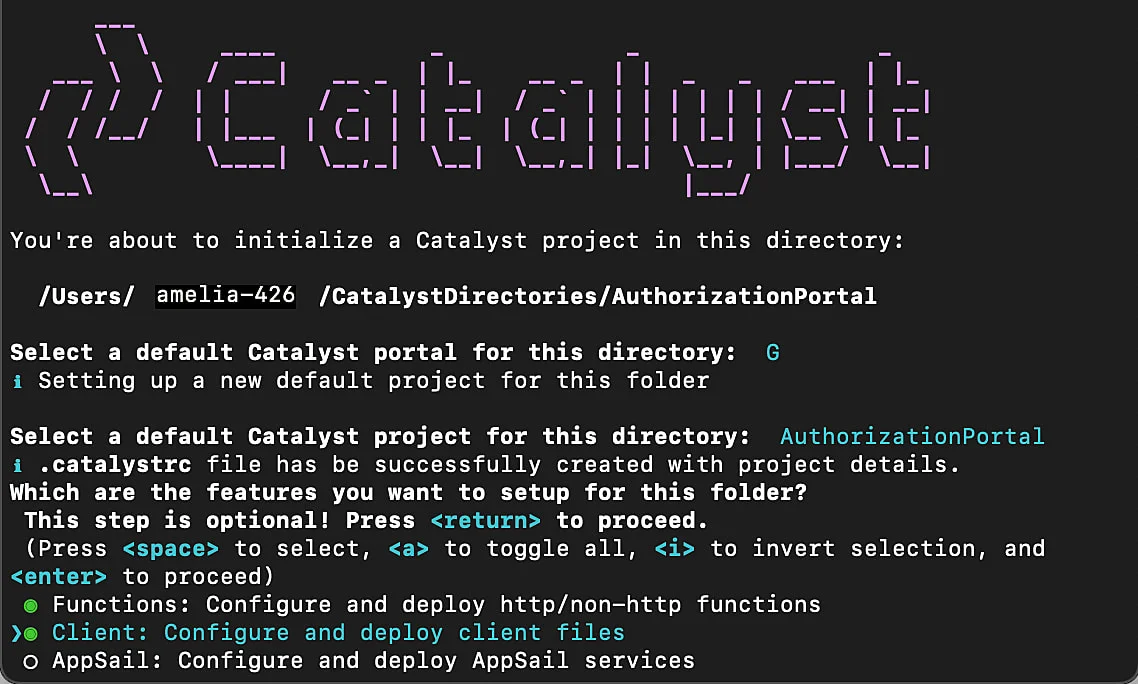
Navigate using the arrow keys and select Functions, Client using the space bar. Press Enter to initialize.
-
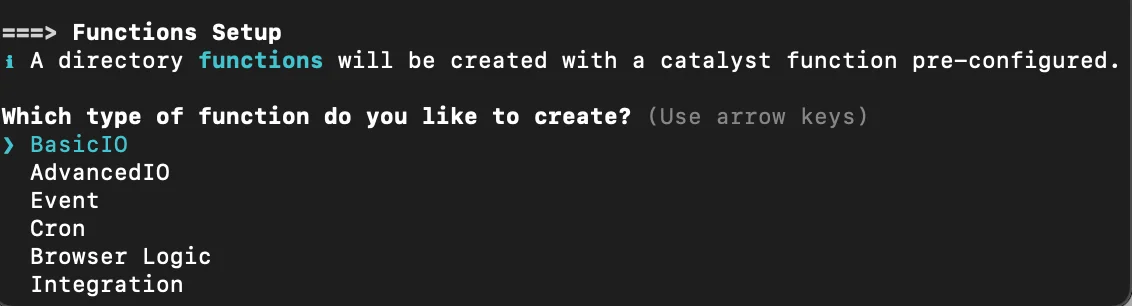
The CLI will initiate the function setup. Select Basic IO as the function type for your Custom User Validation function.
-
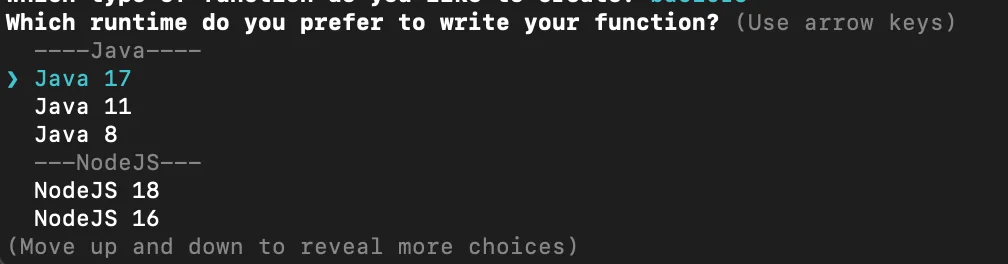
Select the latest runtime of Java as the function stack.
-
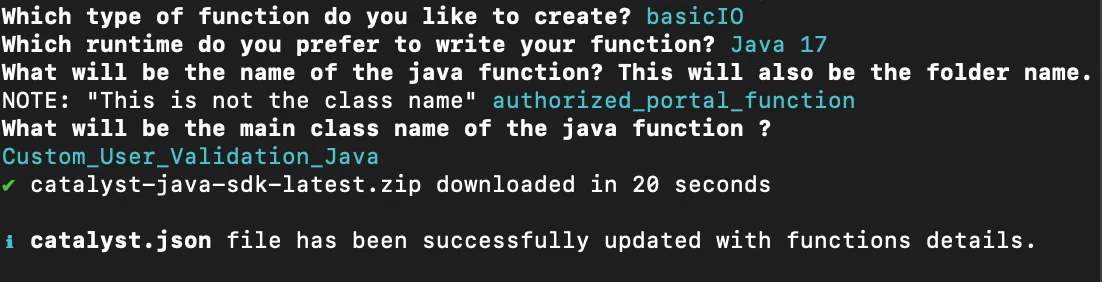
Enter “authorization_portal_function” as the folder name, “Custom_User_Validation_Java” as the class name, then press Enter. The functions directory will be created in your project directory with the configuration files and dependencies, along with the catalyst.json and a hidden .catalystrc file.
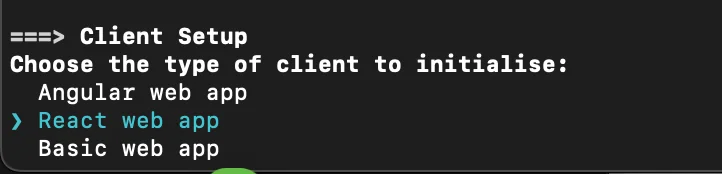
The CLI will now initiate the client setup.
-
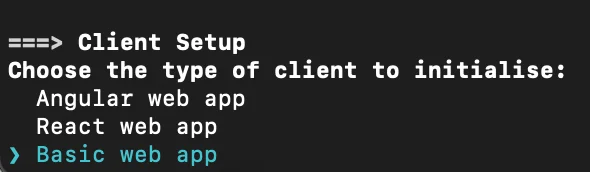
Select Basic web app and press Enter to initialize your client as a basic web app.
-
Enter a name for your client package and press Enter. For the purposes of this tutorial, we are naming our client package “zylkertechnologies”. You can use the same of provide a name of your choice.

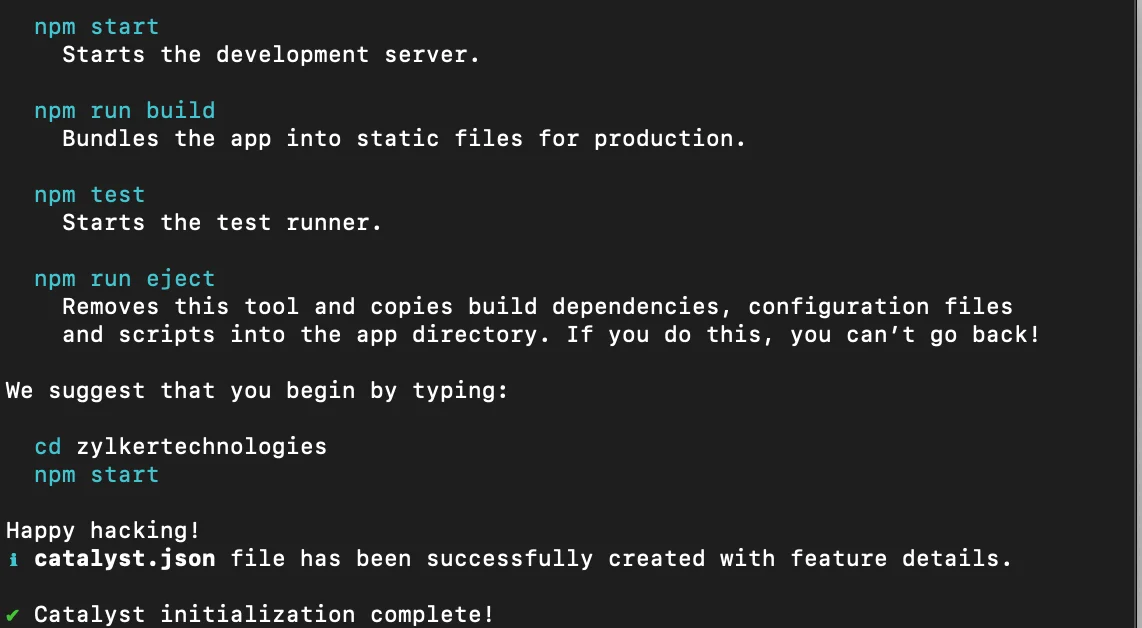
The Catalyst initialization is now complete.
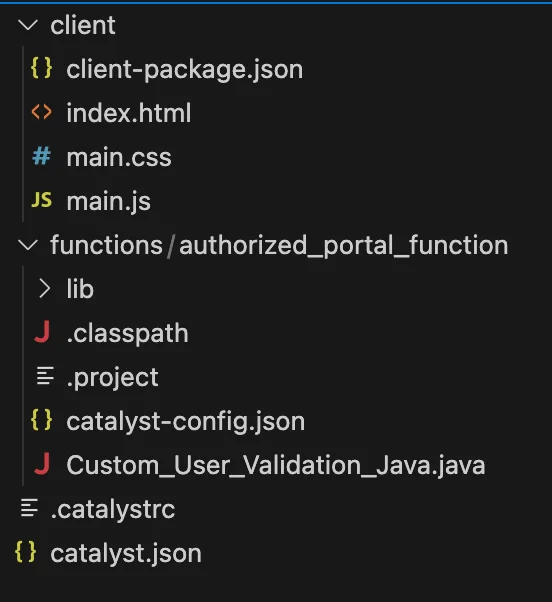
The project directory is now set up with the client directory and the functions directory along with configuration files and dependencies. The project directory also contains the catalyst.json configuration file and a hidden .catalystrc file.
The structure of your project directory should now appear as shown below:
-
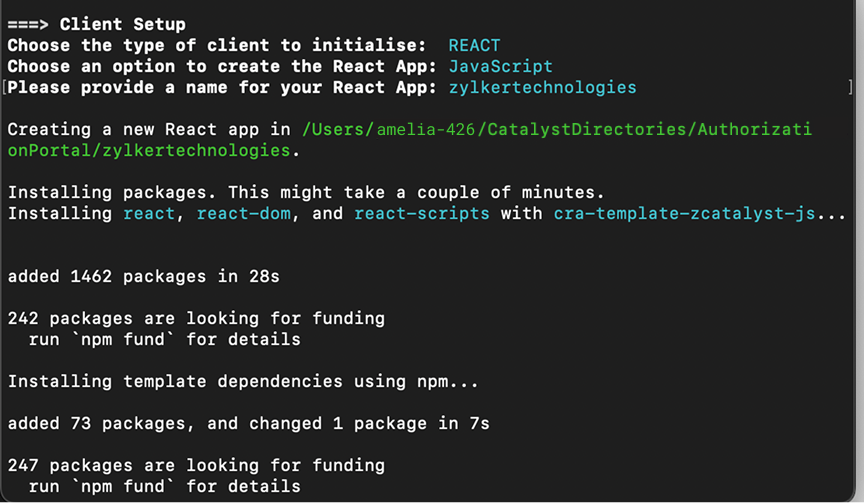
Select React web app and press Enter to initialize your client as a React web app.
-
Select JavaScript as the React app type and press Enter

-
Enter “zylkertechnologies” as the name of your client package and click Enter. You can also provide any name of your choice. All of the required React packages, such as “react,” “react-dom,” and “react-scripts” will be installed through the Catalyst React plugin (zcatalyst-cli-plugin-react).
The client directory will be created in the standard structure in the project directory.
This is the structure of the Authorization Portal project’s directory if the client is initialized as a React app.

Catalyst initialization is now complete.
Last Updated 2025-11-07 17:21:15 +0530 IST