Enable Custom User Validation
Code Your Custom Authentication Logic
Now, we will code our custom logic that needs to be employed when an end user tries to register to your application.
The functions directory, BirthdayGreetings/functions/basic_function/ contains:
- The index.js main function file
- The catalyst-config.json configuration file
- Node modules
- package.json and package-lock.json dependency files.
You will be adding code in the index.js file.
The function contains the following functionalities:
- The end-user’s details will be provided as a JSON input to the Custom User Validation function.
- The function is coded to implement a custom logic based upon which the end-user will either be authenticated or denied.
Copy the code given below and paste it in the index.js file in the BirthdayGreetings/functions/basic_function directory of your project, and save the file.
You can use any IDE of your choice to work with the application’s files.
const catalyst = require('zcatalyst-sdk-node')
module.exports = (context, basicIO) => {
    const catalystApp = catalyst.initialize(context)
    const requestDetails = catalystApp.userManagement().getSignupValidationRequest(basicIO)
    if (requestDetails) {
        if (requestDetails.user_details.email_id.includes('@zylker.com')) {
            basicIO.write(JSON.stringify({
                status: 'success',
                user_details: {
                    first_name: requestDetails.user_details.first_name,
                    last_name: requestDetails.user_details.last_name,
                    email_id: requestDetails.user_details.email_id,
                    role_identifier: 'App User',
                    org_id: ''
                }
            }))
        } else {
            // The user has failed authentication
            basicIO.write(JSON.stringify({
                status: 'failure'
            }))
        }
    }
    context.close()
}
-
Ensure that you change the domain name in line 6 with one that matches your requirement.
-
You can also use this SDK to code your own custom logic instead of the one implemented above.
Deploy the Function and Configure Custom User Validation
To apply this custom logic, we need to deploy this function to the console to ensure that it is available to enable the Custom User Validation option present in the console.
To deploy the function, execute the following CLI command to deploy the function component alone to the console.
catalyst deploy –only functions:function_name
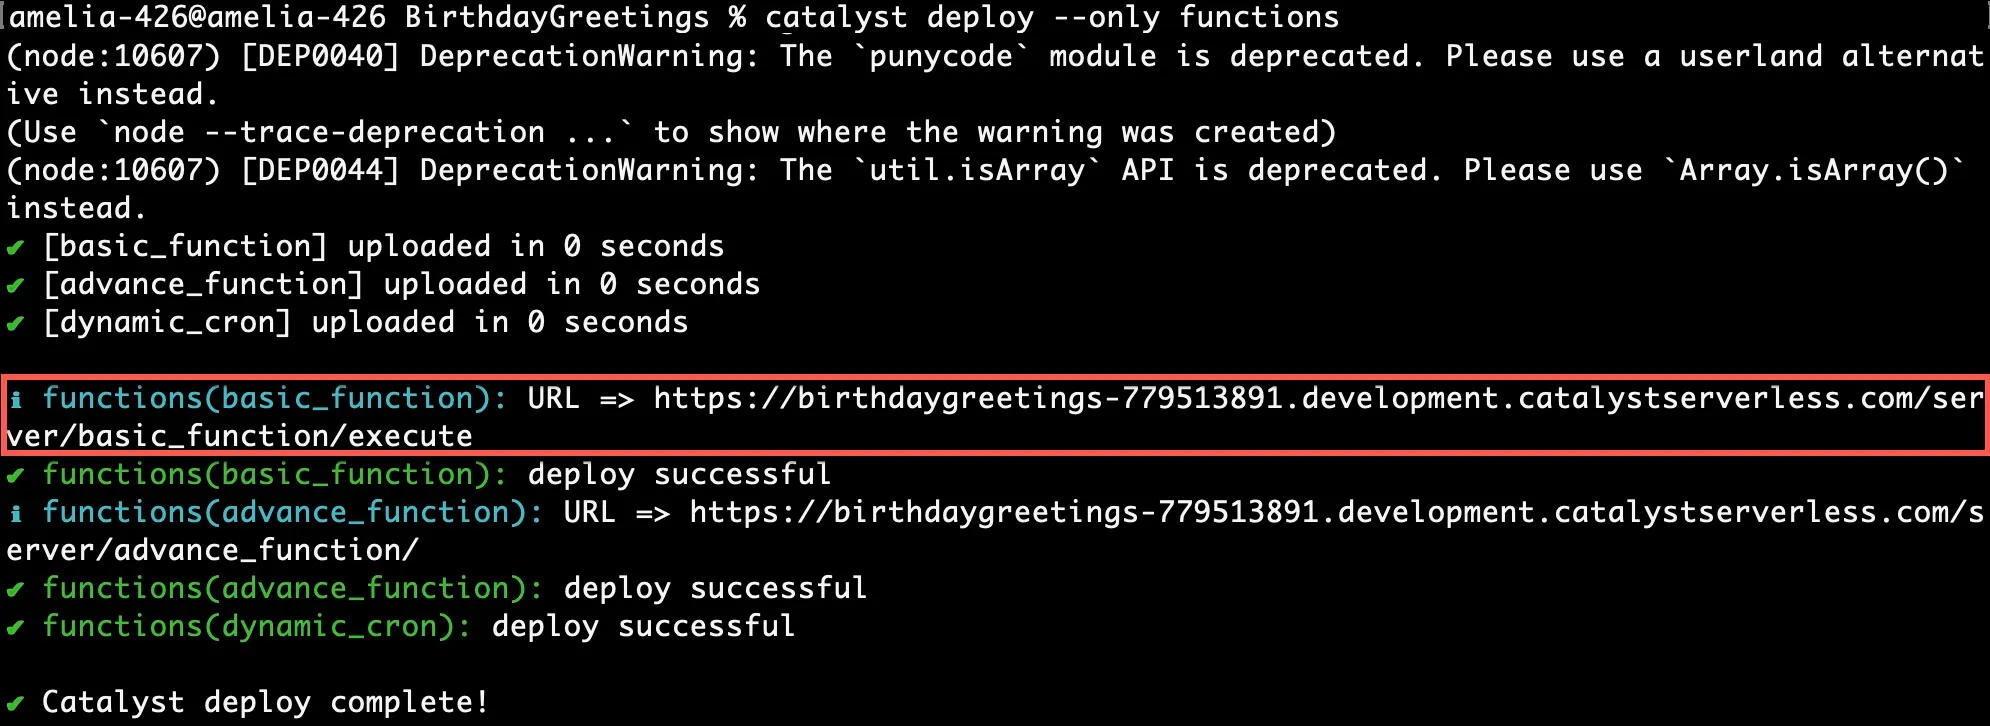
Function endpoints will be created for all of the functions. This will allow you to access the functions directly.
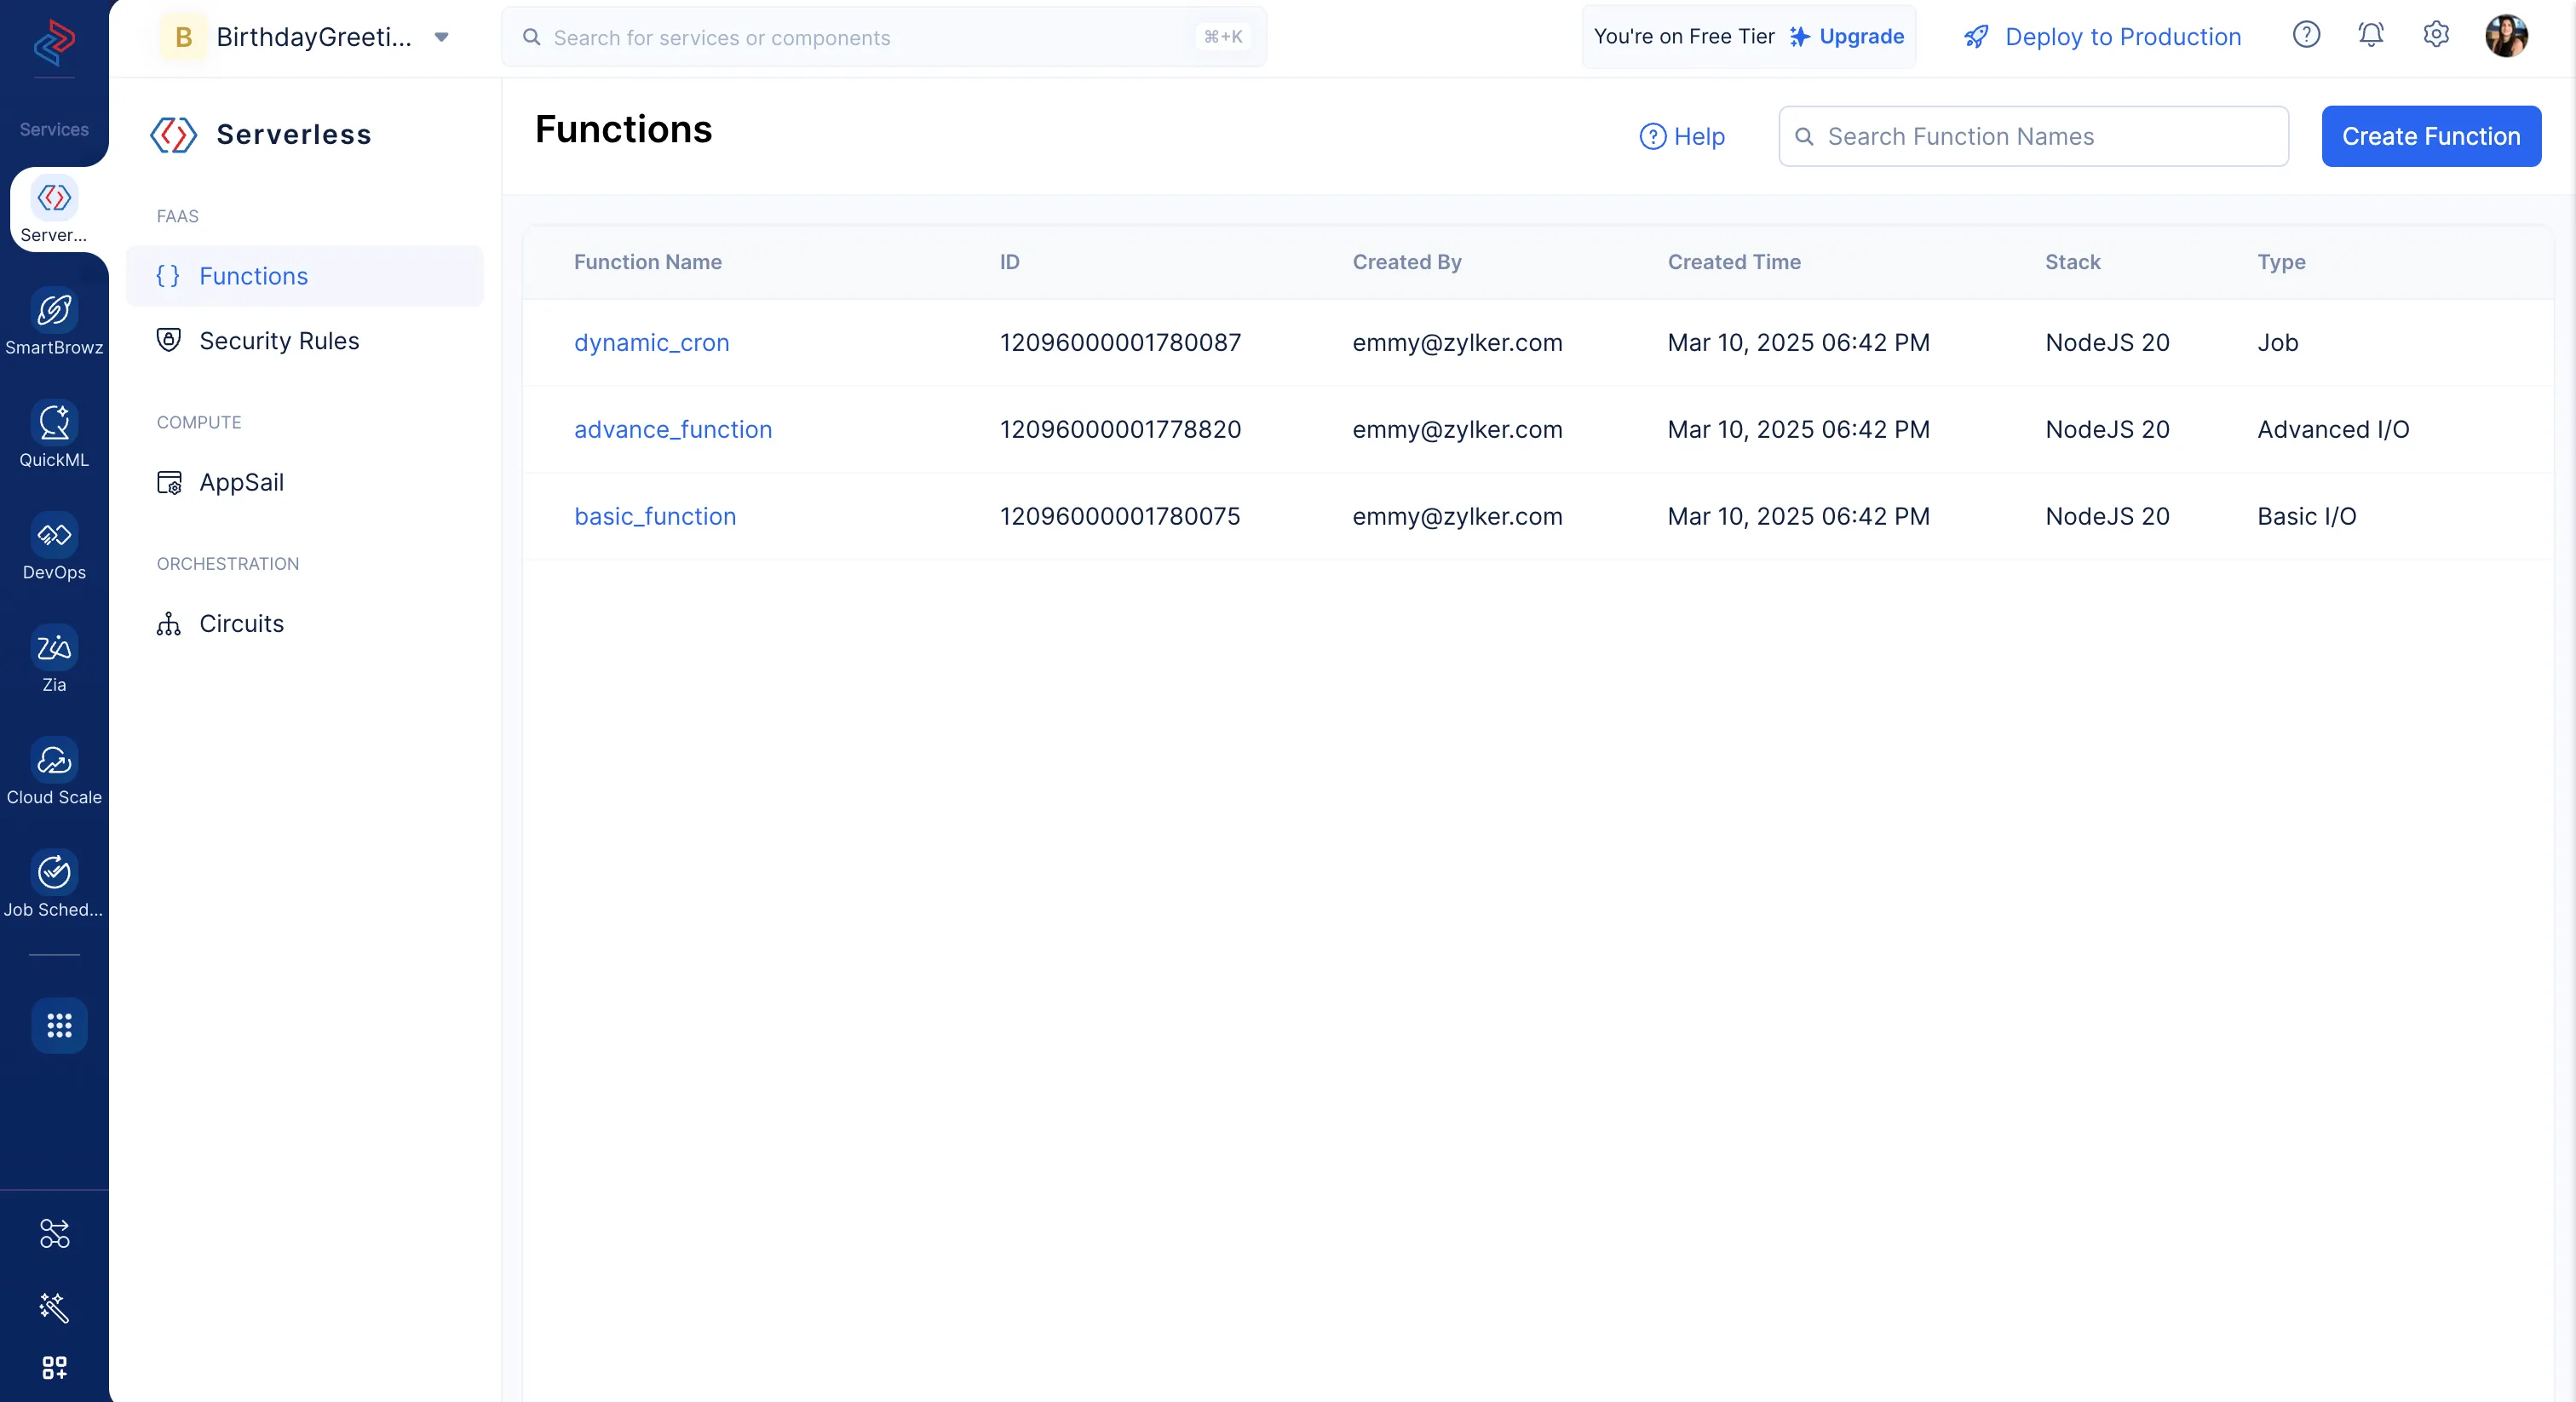
The functions will be deployed to the console. They can be accessed in the console using the Functions component in the Serverless section of the console.
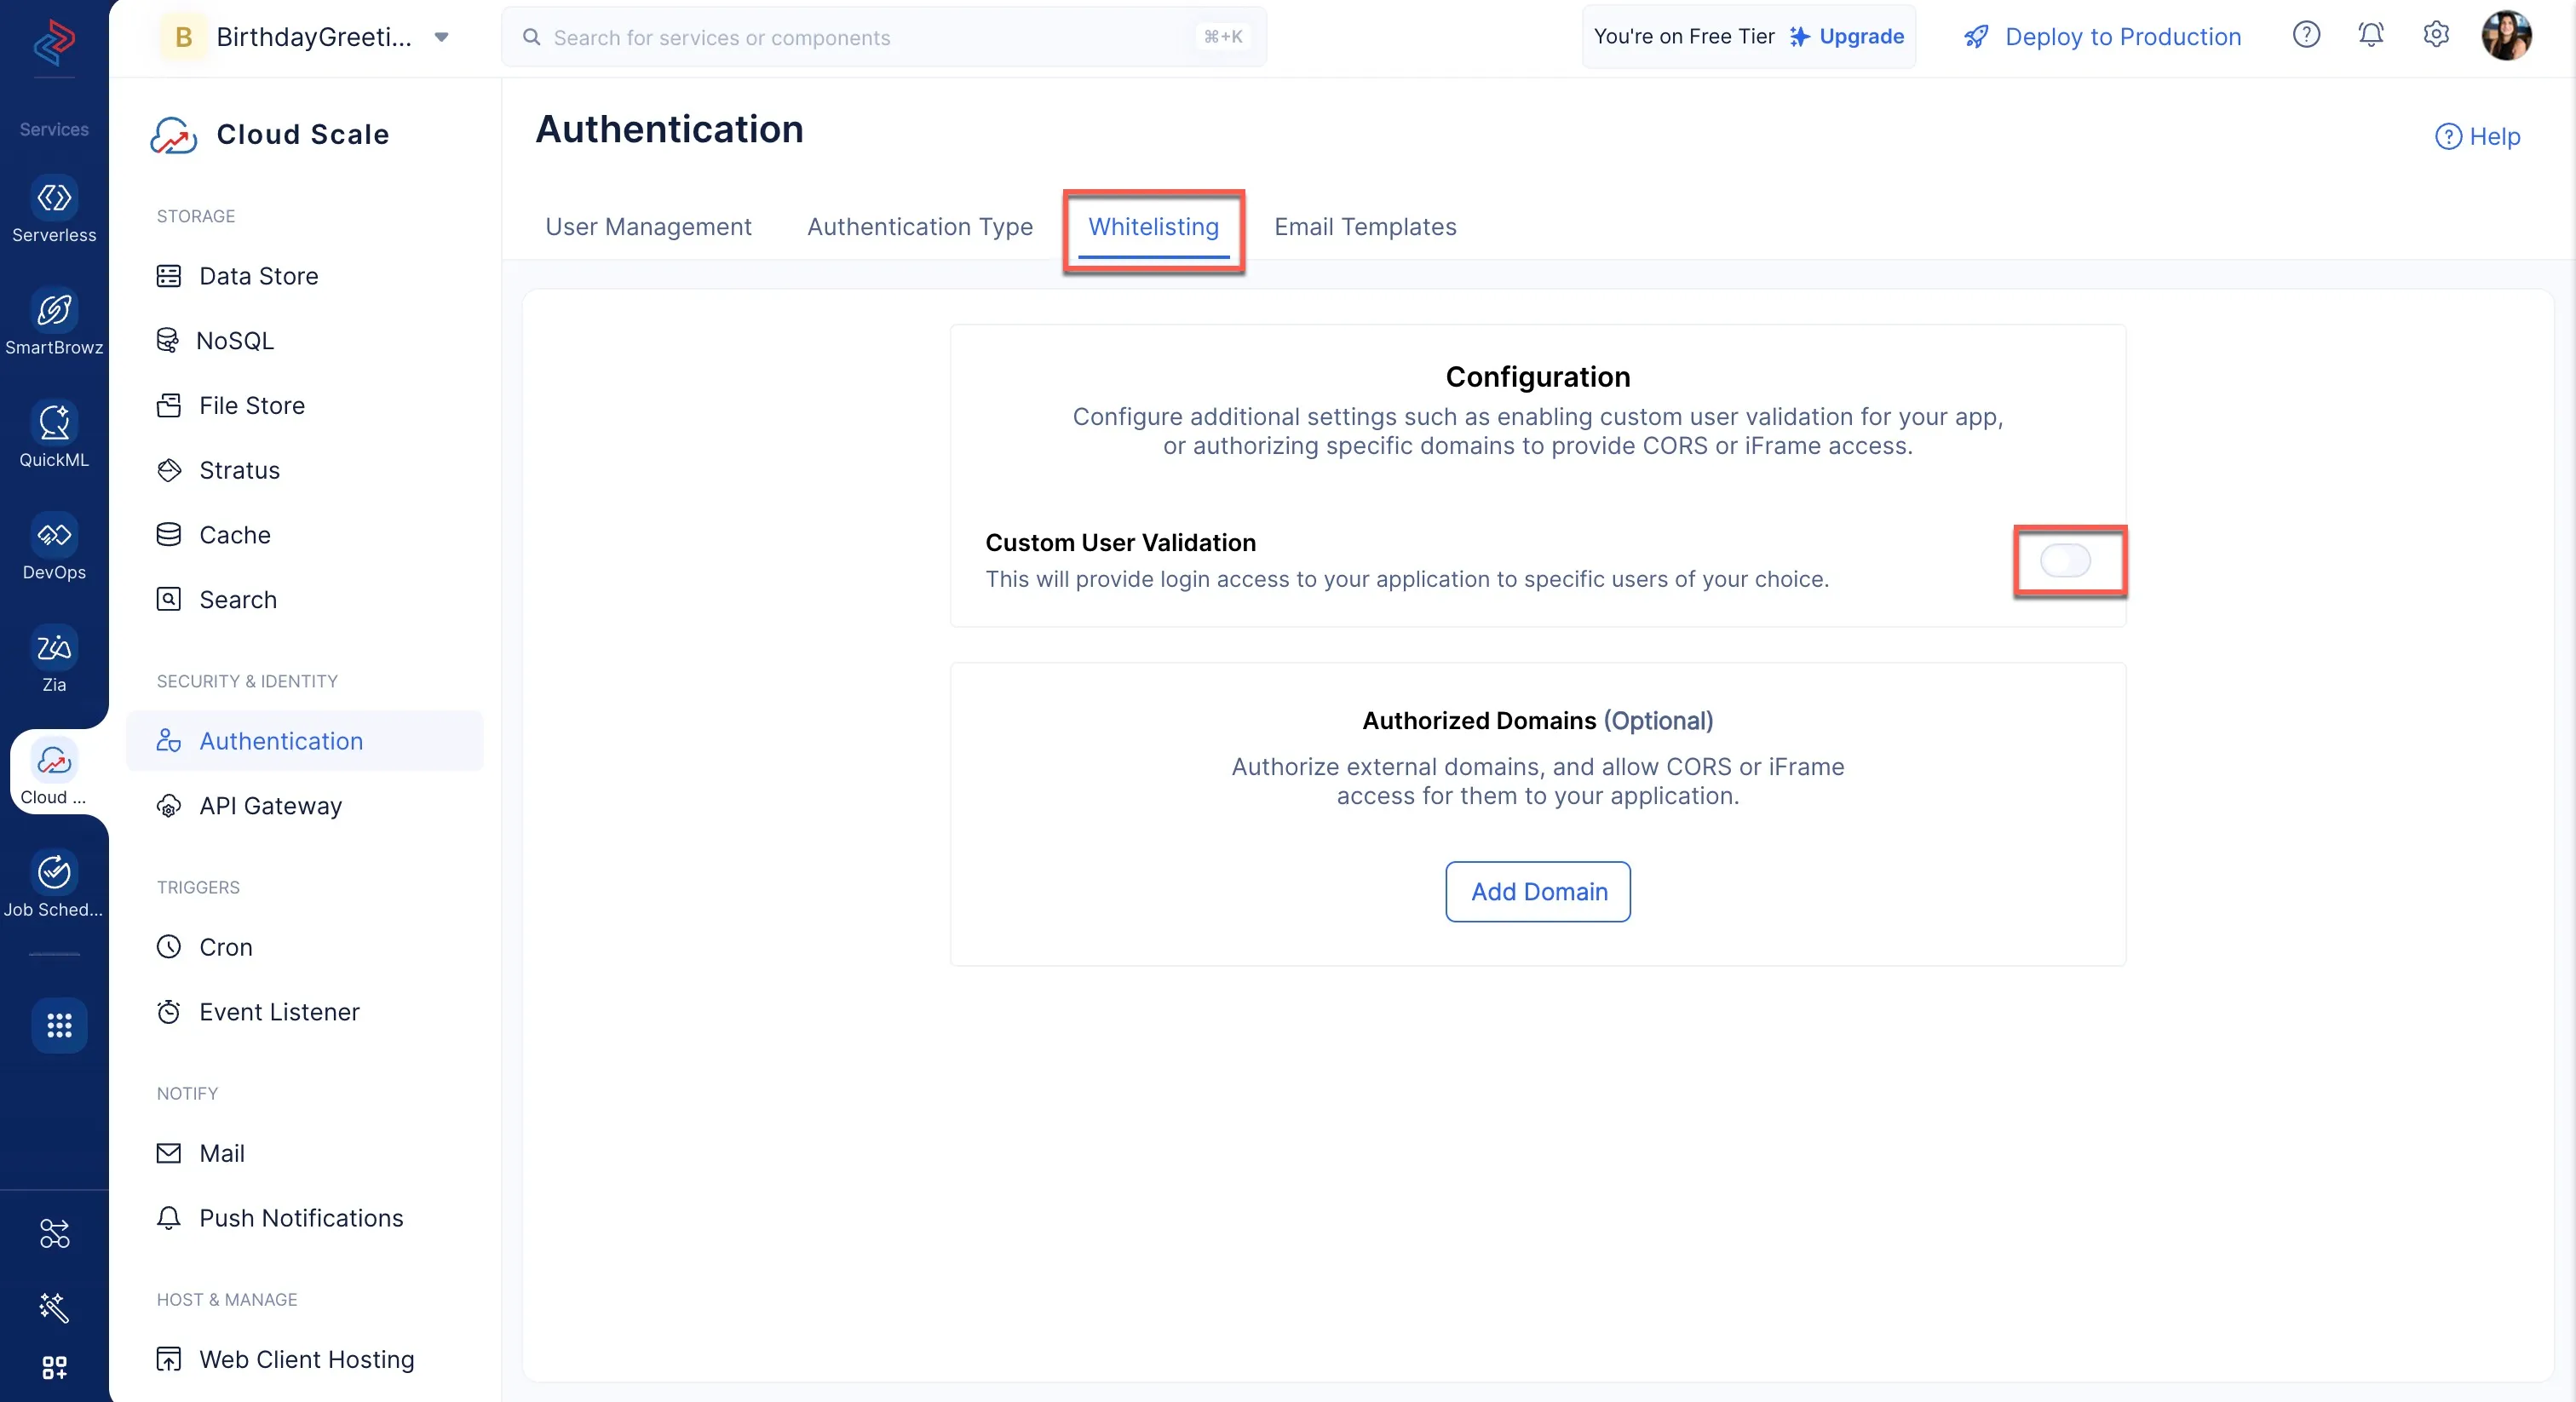
Now, go to the Authentication component present in the Cloud Scale section of the console and implement the following steps:
-
Navigate to the Whitelisting section in the Authentication component, and click the Custom User Validation toggle.
-
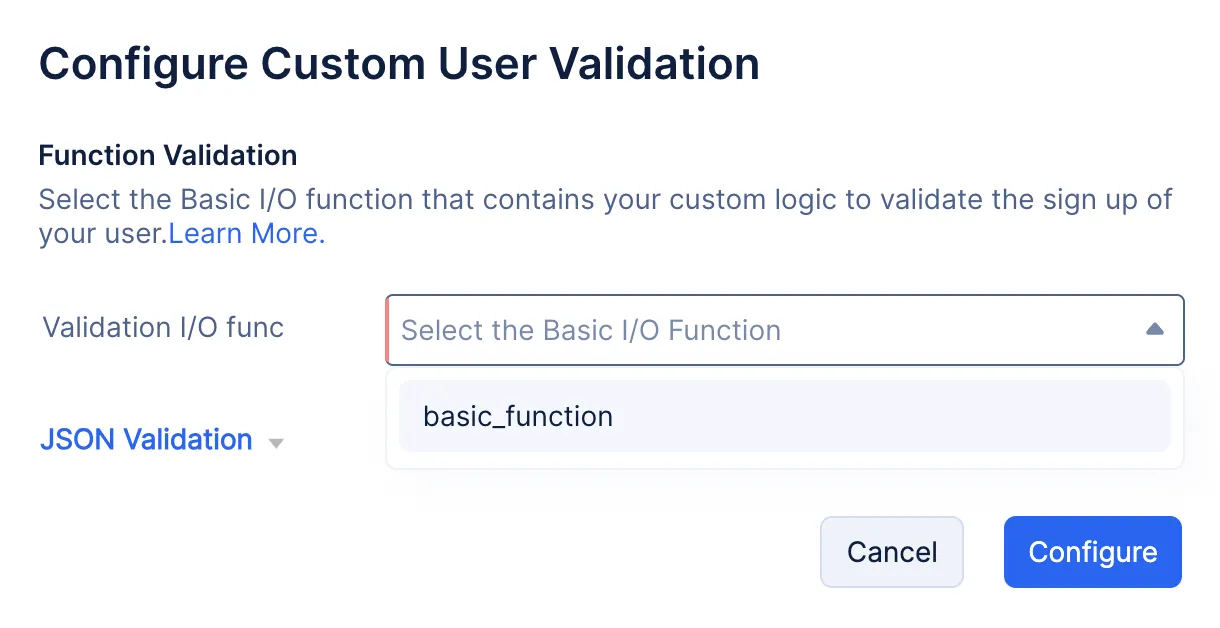
Select the Basic I/O function from the drop-down in the pop-up.
-
Click Configure.
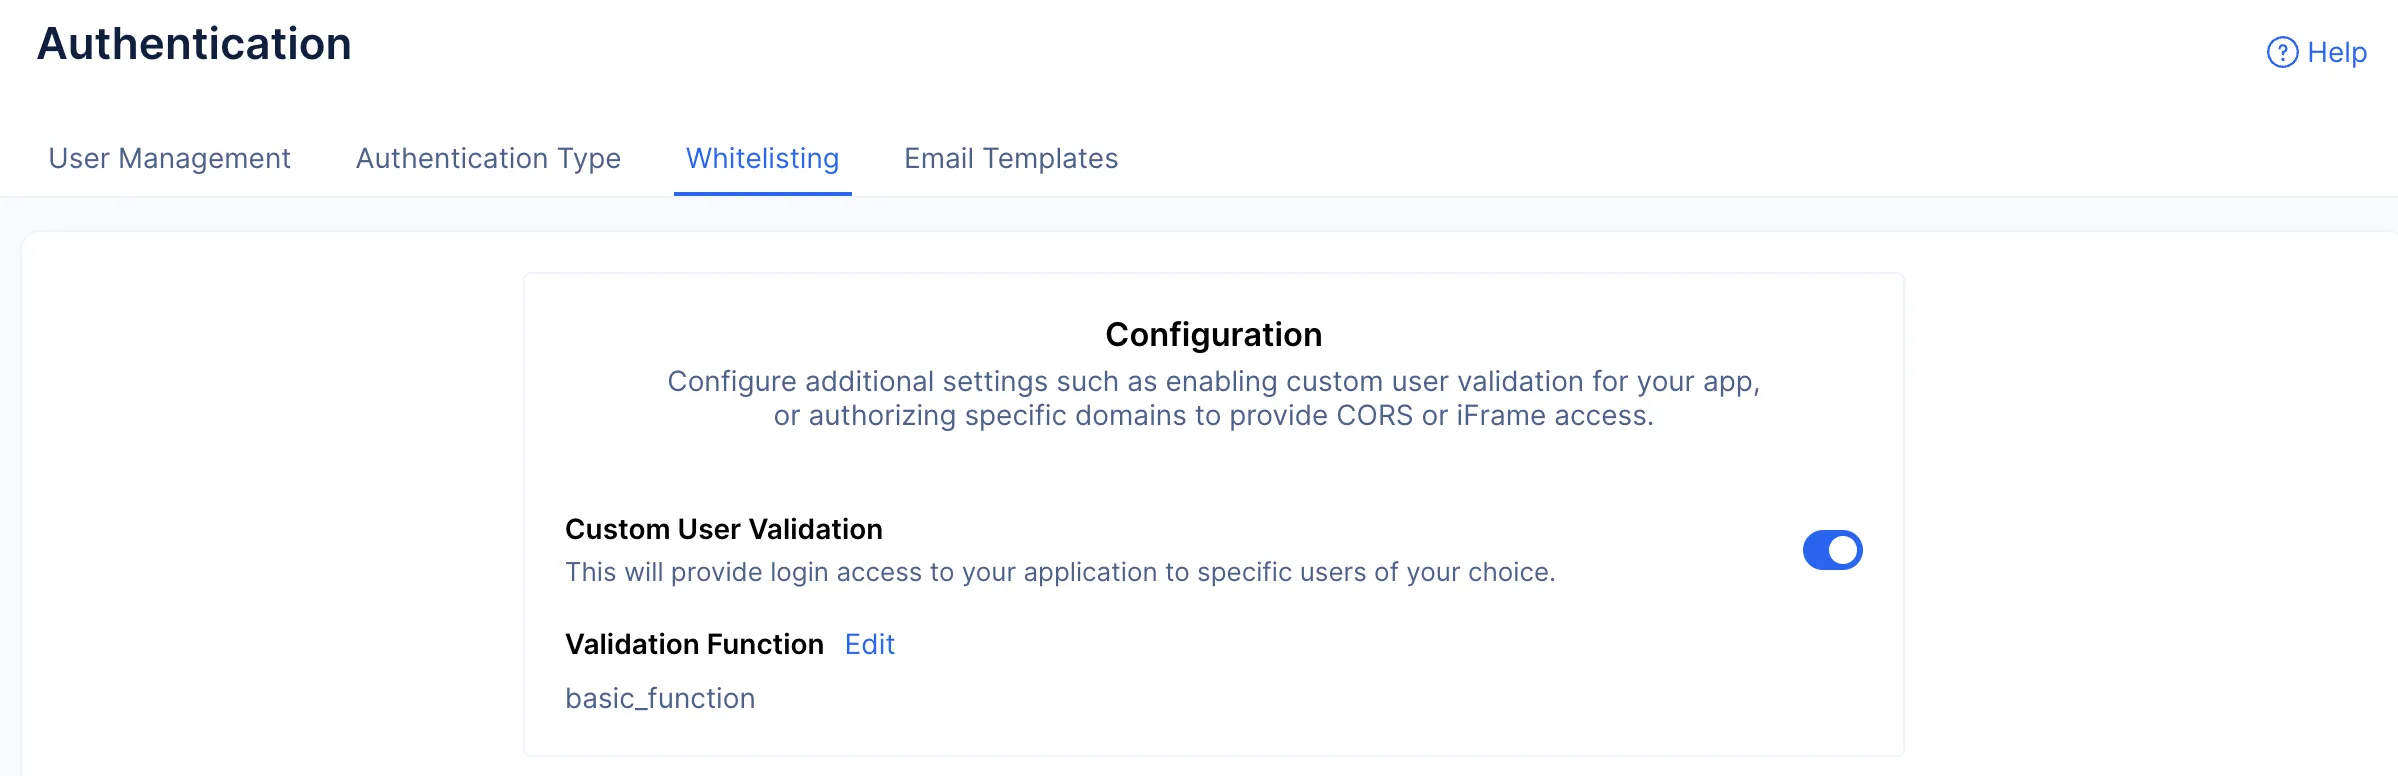
The Custom User Validation function has been enabled for the project, and the end-users signing up for your application will now be additionally authenticated using this function.
Last Updated 2025-11-19 20:37:41 +0530 IST