Deploy a Slate Template
Introduction
Catalyst Slate provides ready-made application templates which can be used to get a project up and running with minimal setup efforts required from your end. There’s a huge gallery of templates available for various use cases and configured using different client frameworks like Next.js, Angular, Astro, React, SolidJS, Preact, Svelte, Vue, Vite and Nuxt.
You can simply select a pre-built template from Slate’s Starter Template Gallery and deploy it to using Slate.
The key benefits of Slate templates include:
- Reduced Setup Time and Focus on Development:
Slate templates allow you to save time by eliminating the need to set up boilerplate code for new projects repeatedly and eventually spend more time on developing unique features rather than configuring the initial project setup.
- Rapid Deployment and Minimal Learning Curve:
Slate templates allow you to deploy fully functional applications in just a few clicks. New developers can learn from well-structured, pre-built projects that demonstrate how to set up and configure different types of applications using varied frameworks. Experienced developers can use templates as reference implementations for best practices in Slate deployments.
Steps to Deploy
You can leverage Slate templates by following the below steps:
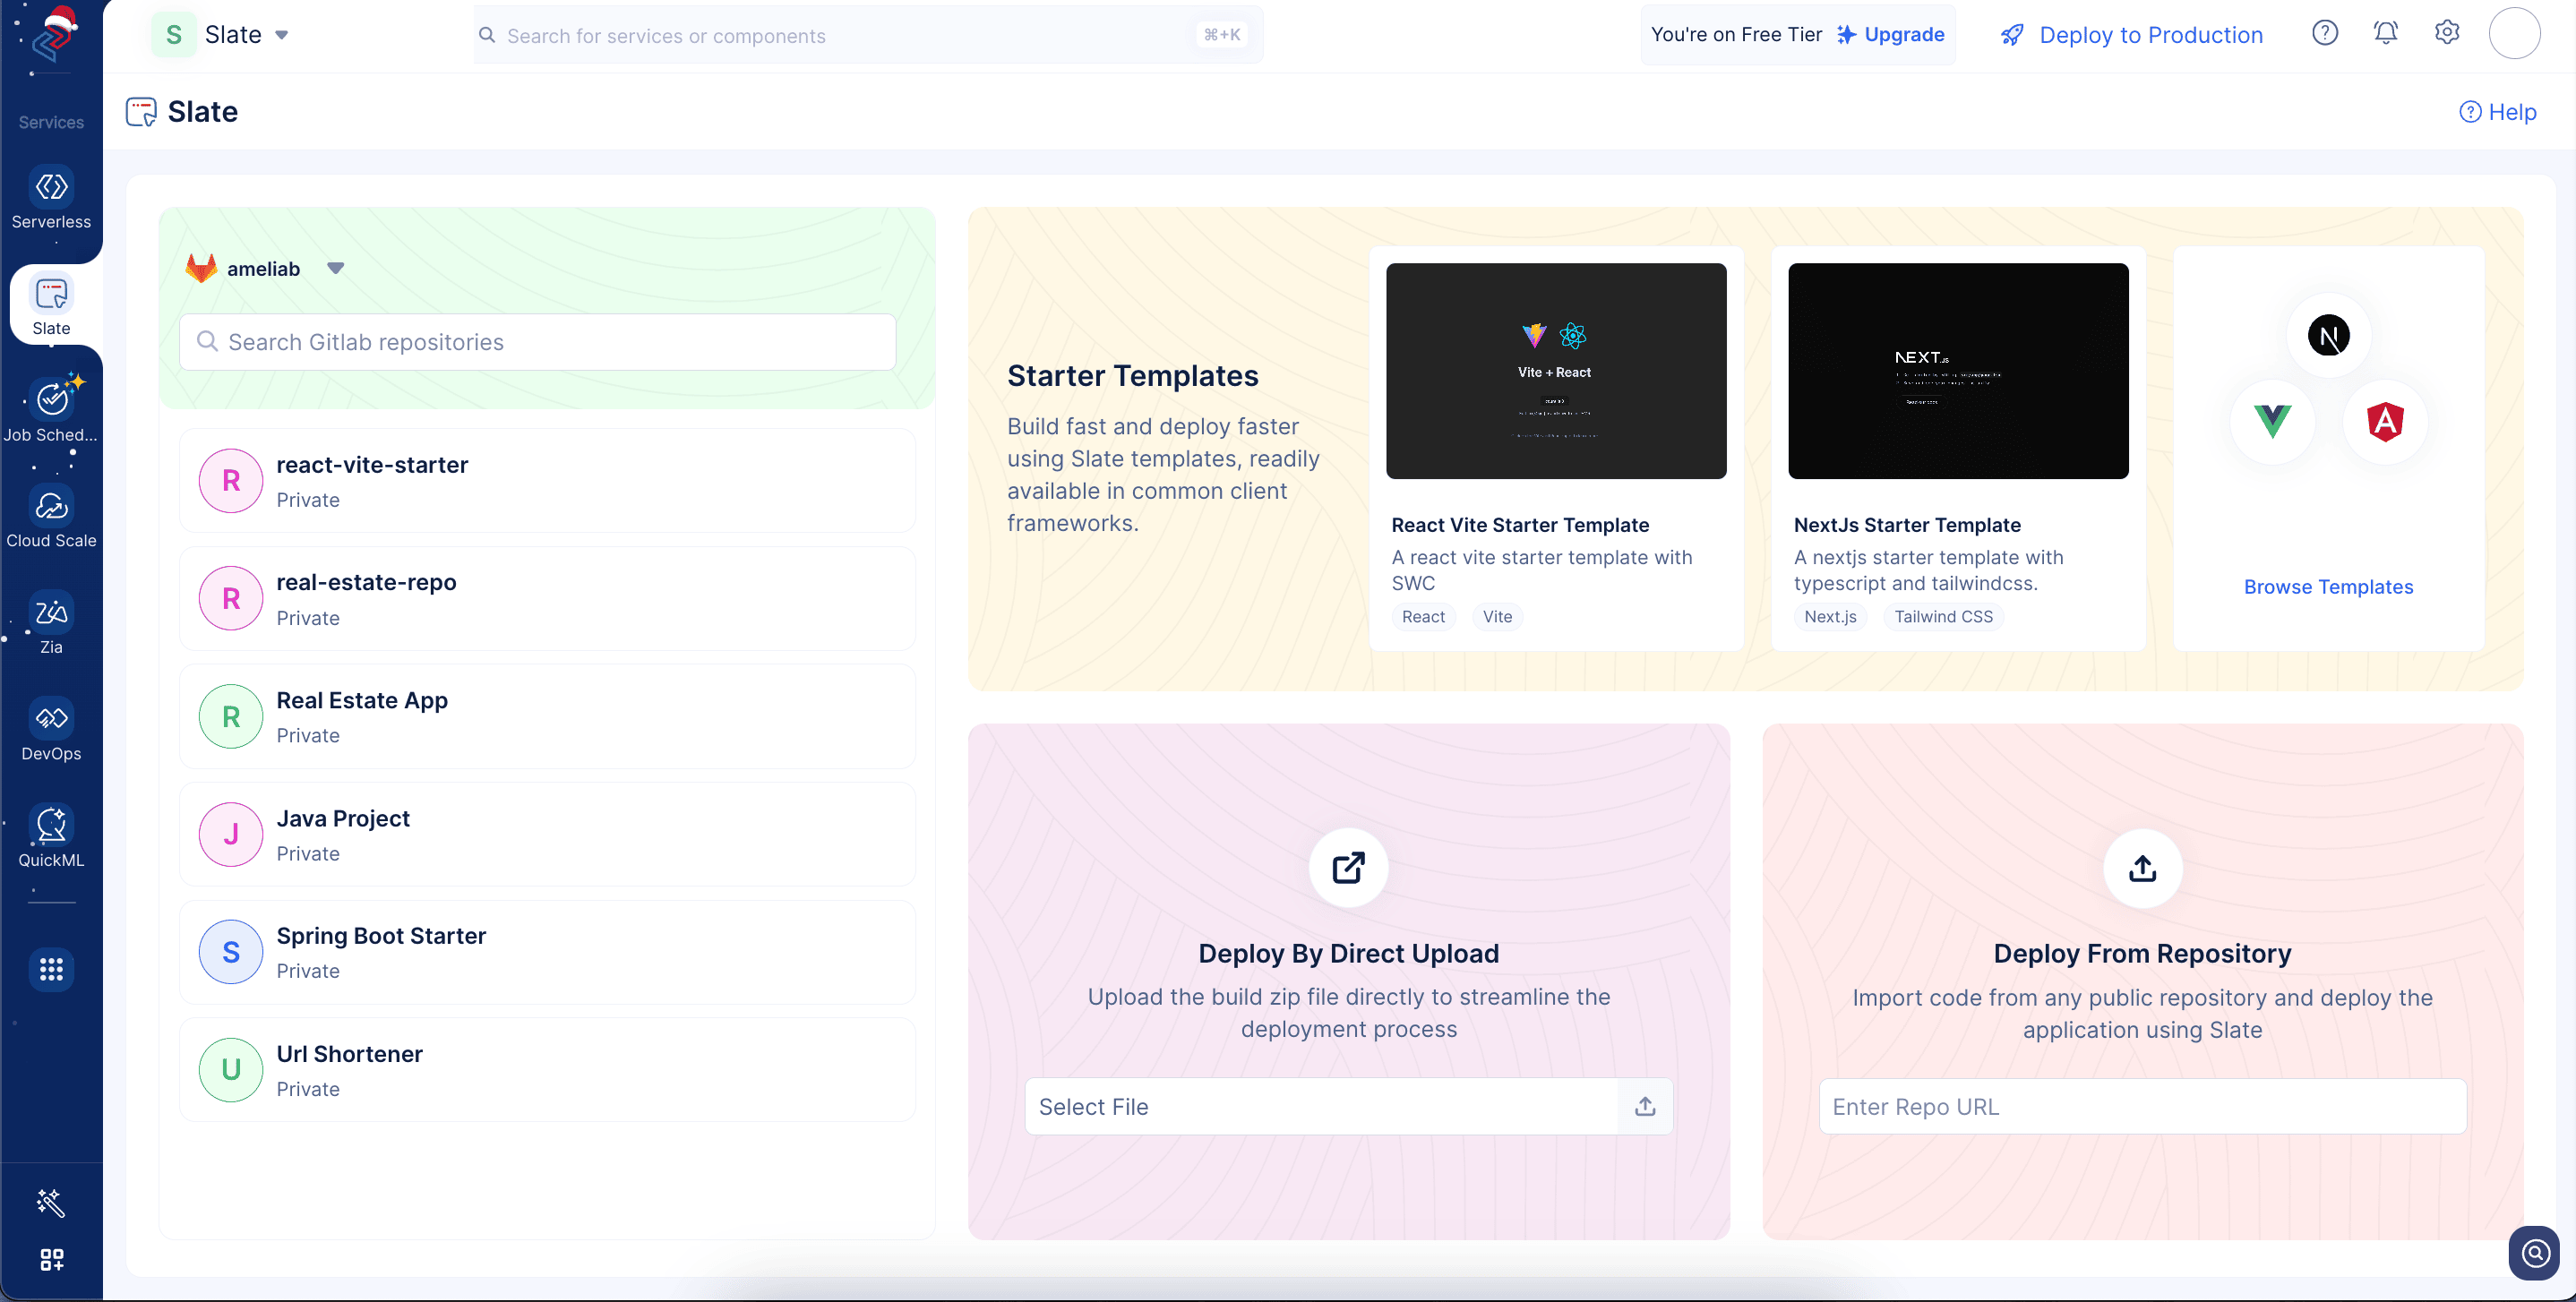
- Navigate to the Catalyst Slate service in the console. In the Starter Templates section, click Browse Templates.
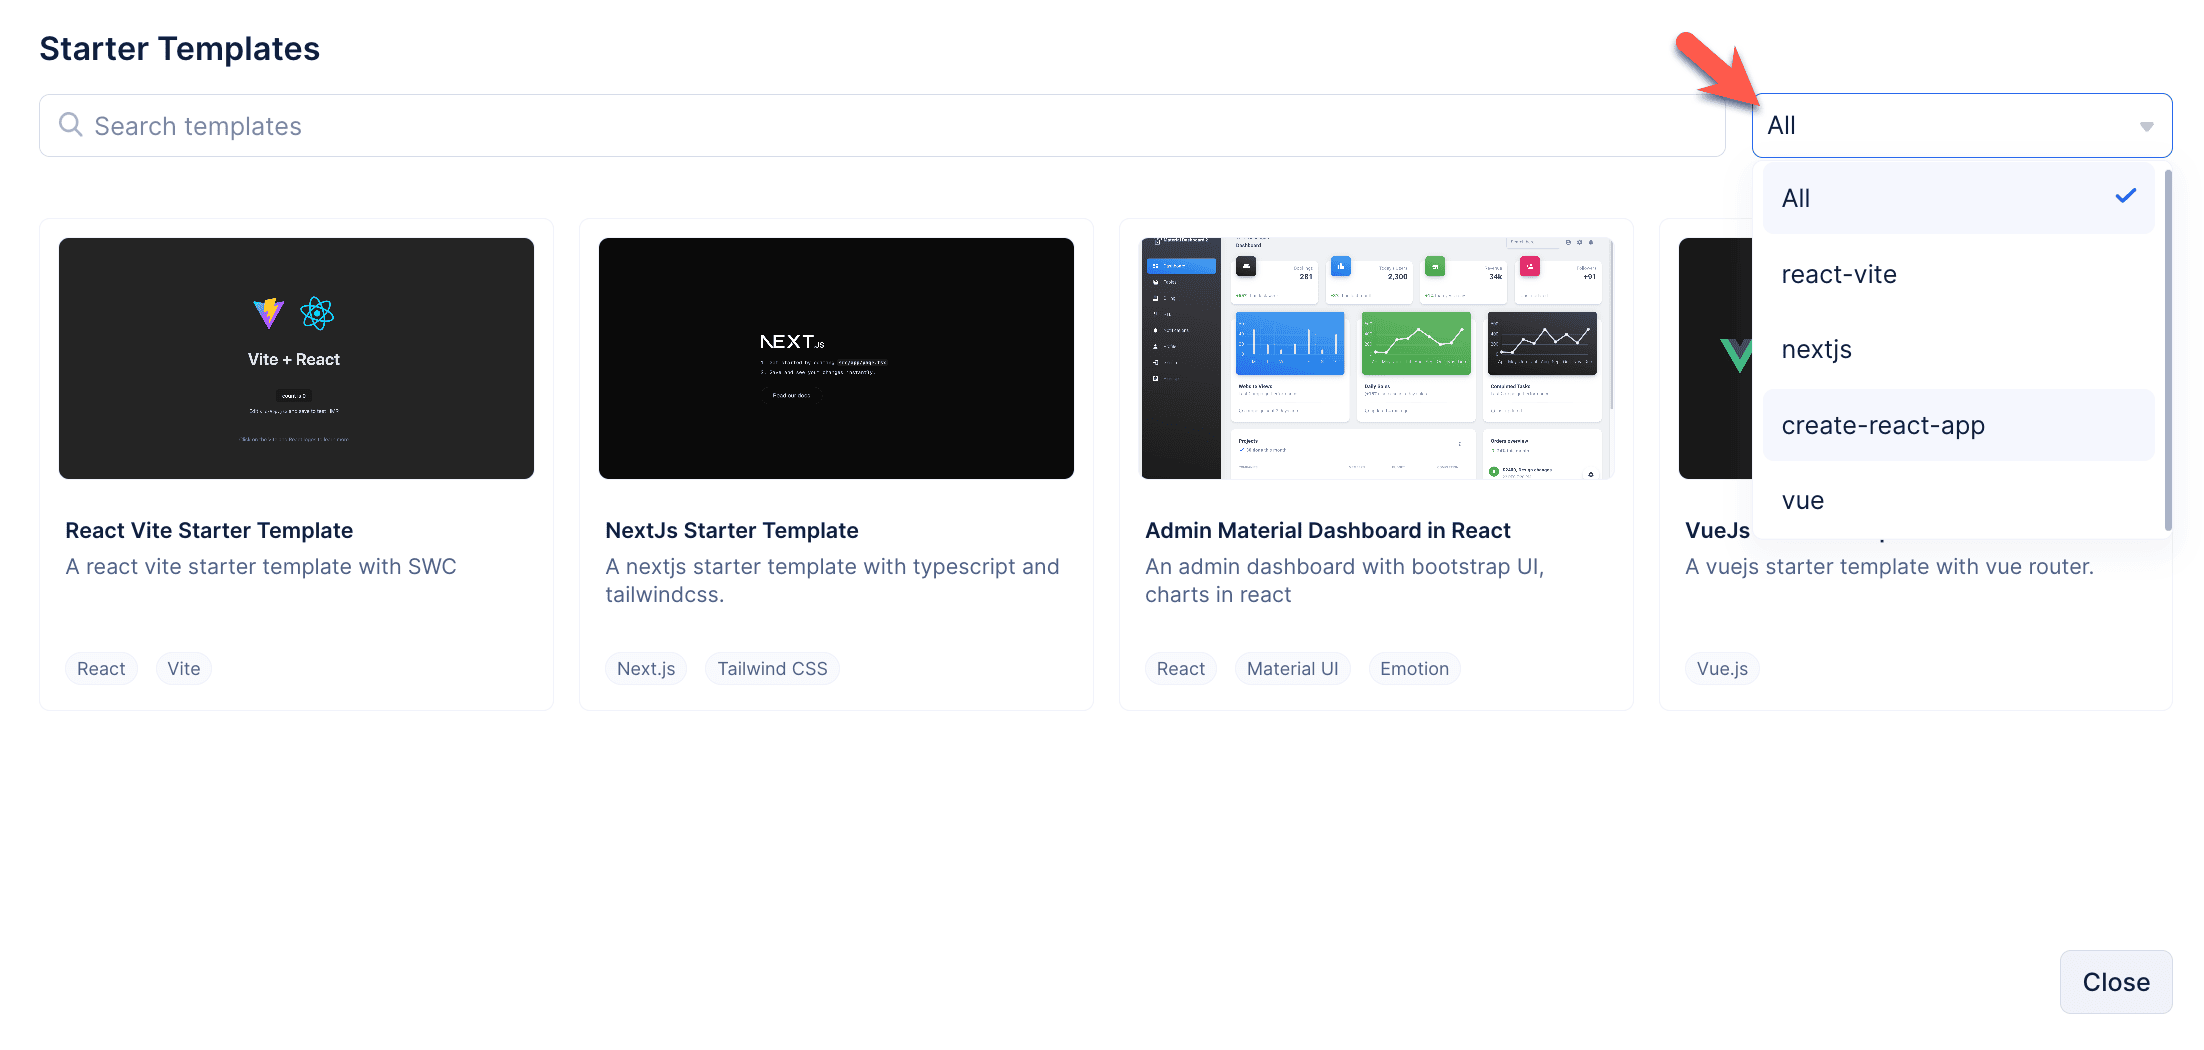
- You can browse through templates of varied use cases and frameworks and select the template of your choice.
- In the Create Deployment pop-up, select the required Git provider and authenticate your account.
The source code of the chosen Slate template will be pushed to a new repository in the integrated Git account.
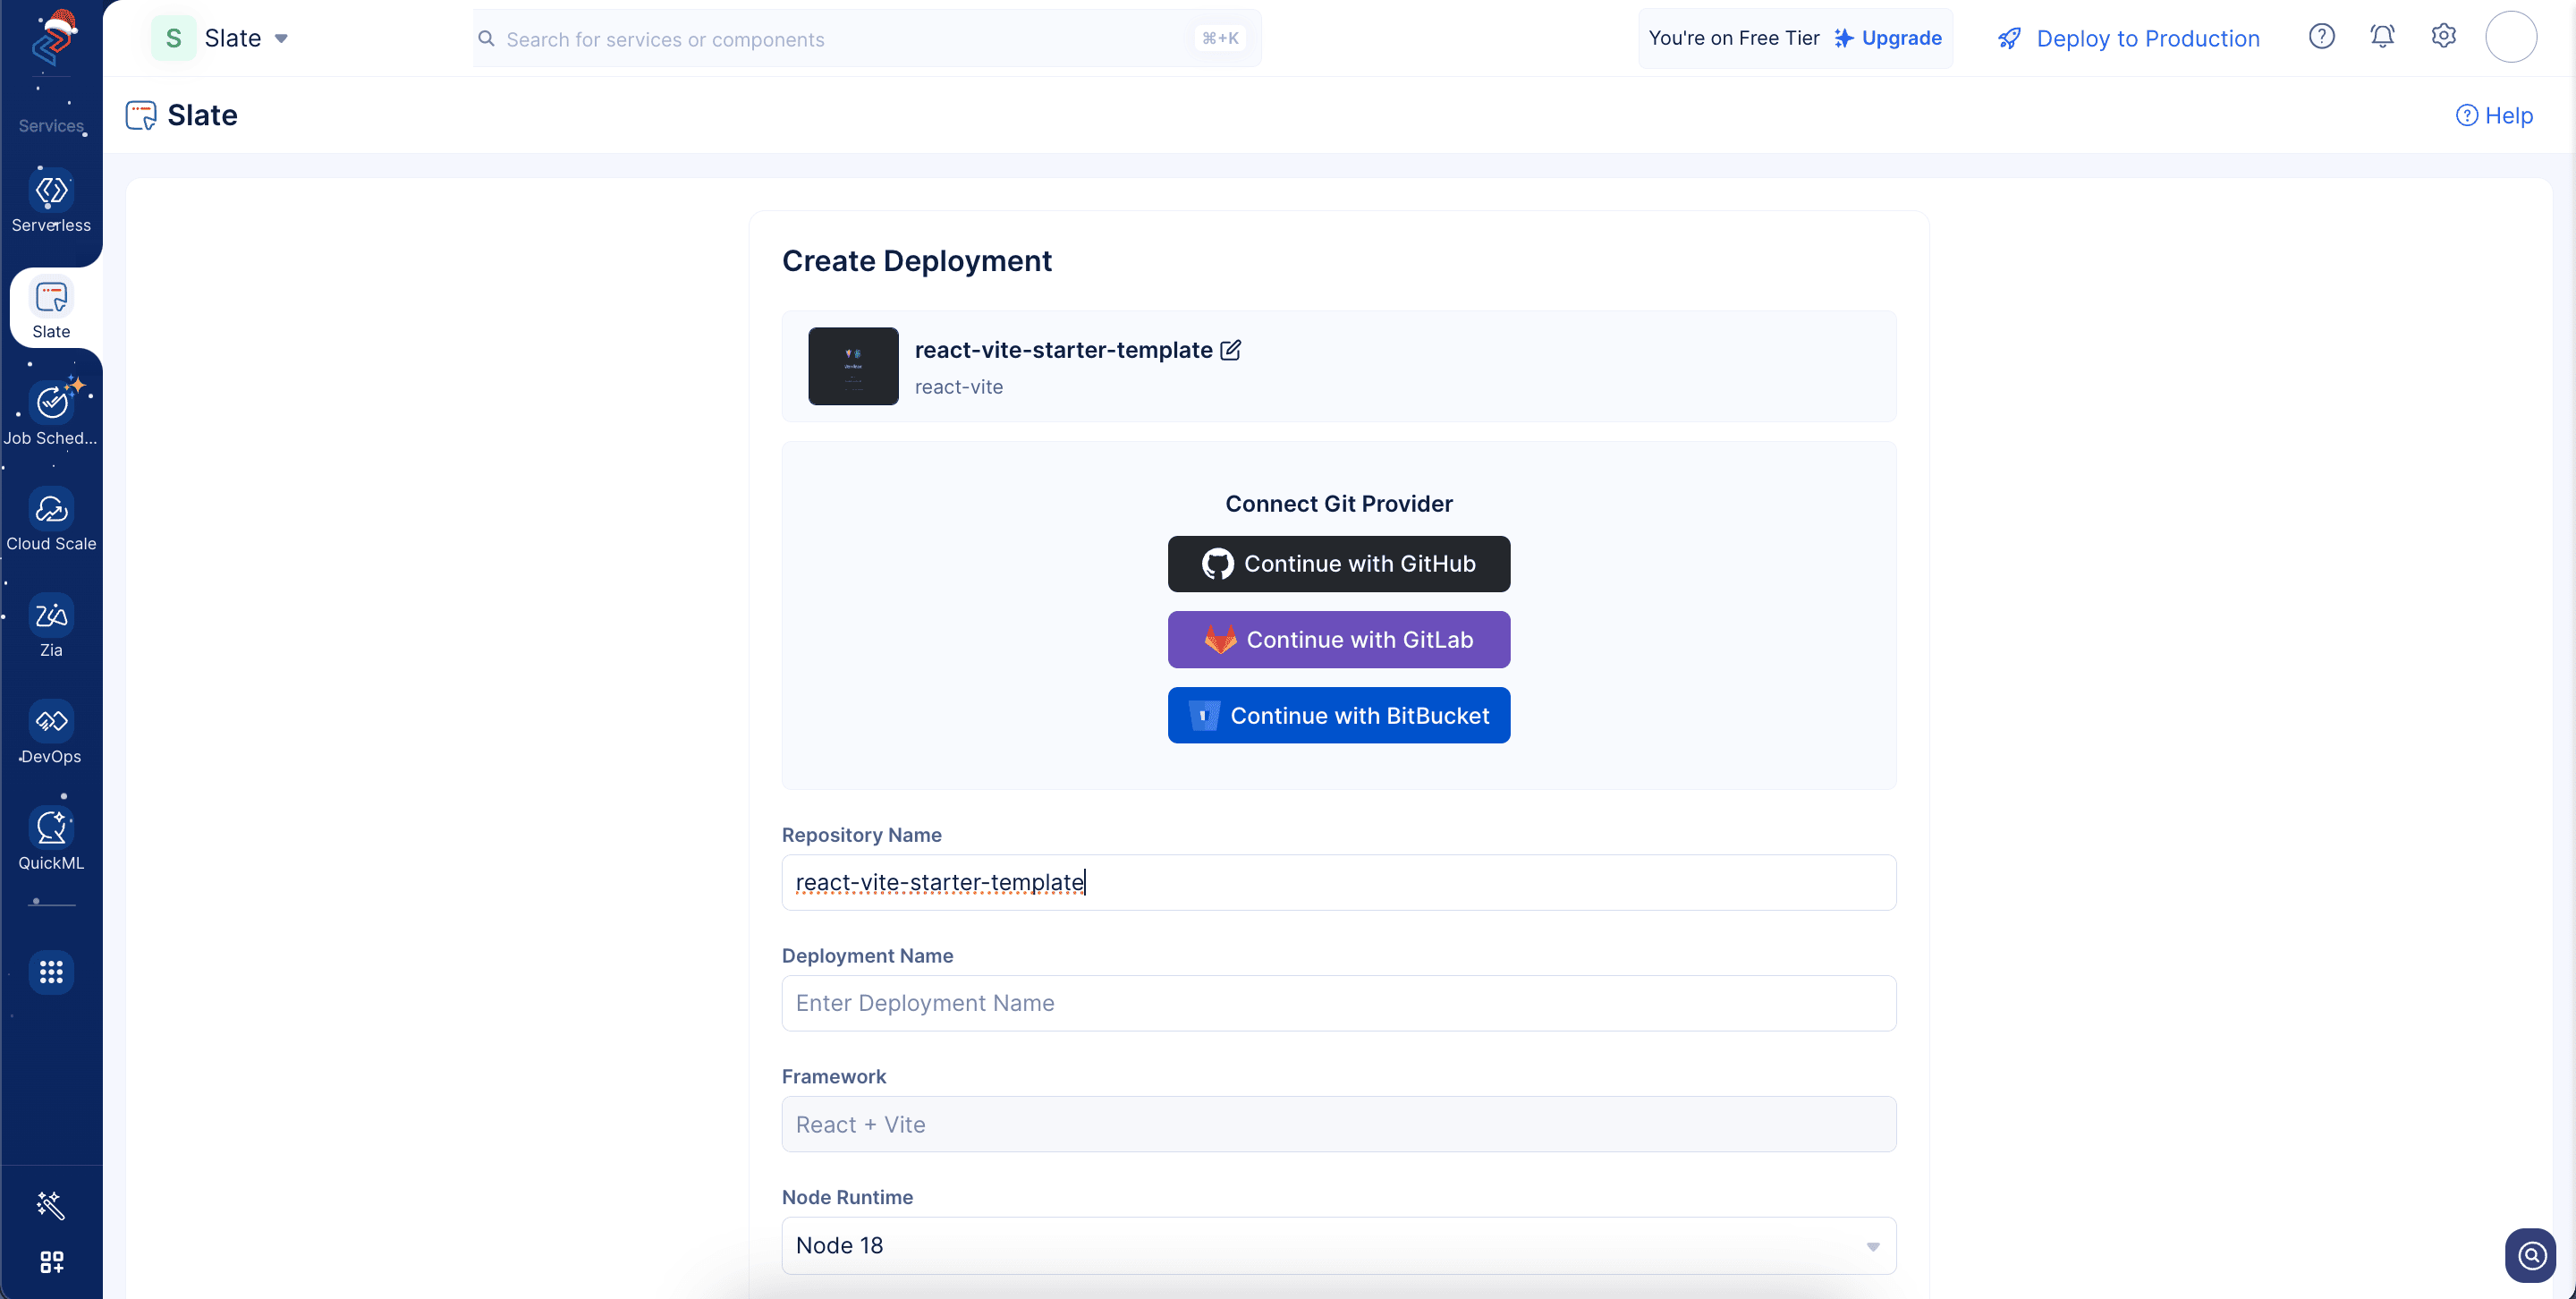
- The template name will be auto-populated as the repository name by Slate. You can edit it, if required.
Provide a deployment name of your choice.
- The framework and node runtime of the application will be automatically populated based on the chosen template. You can edit the node run time, if required.
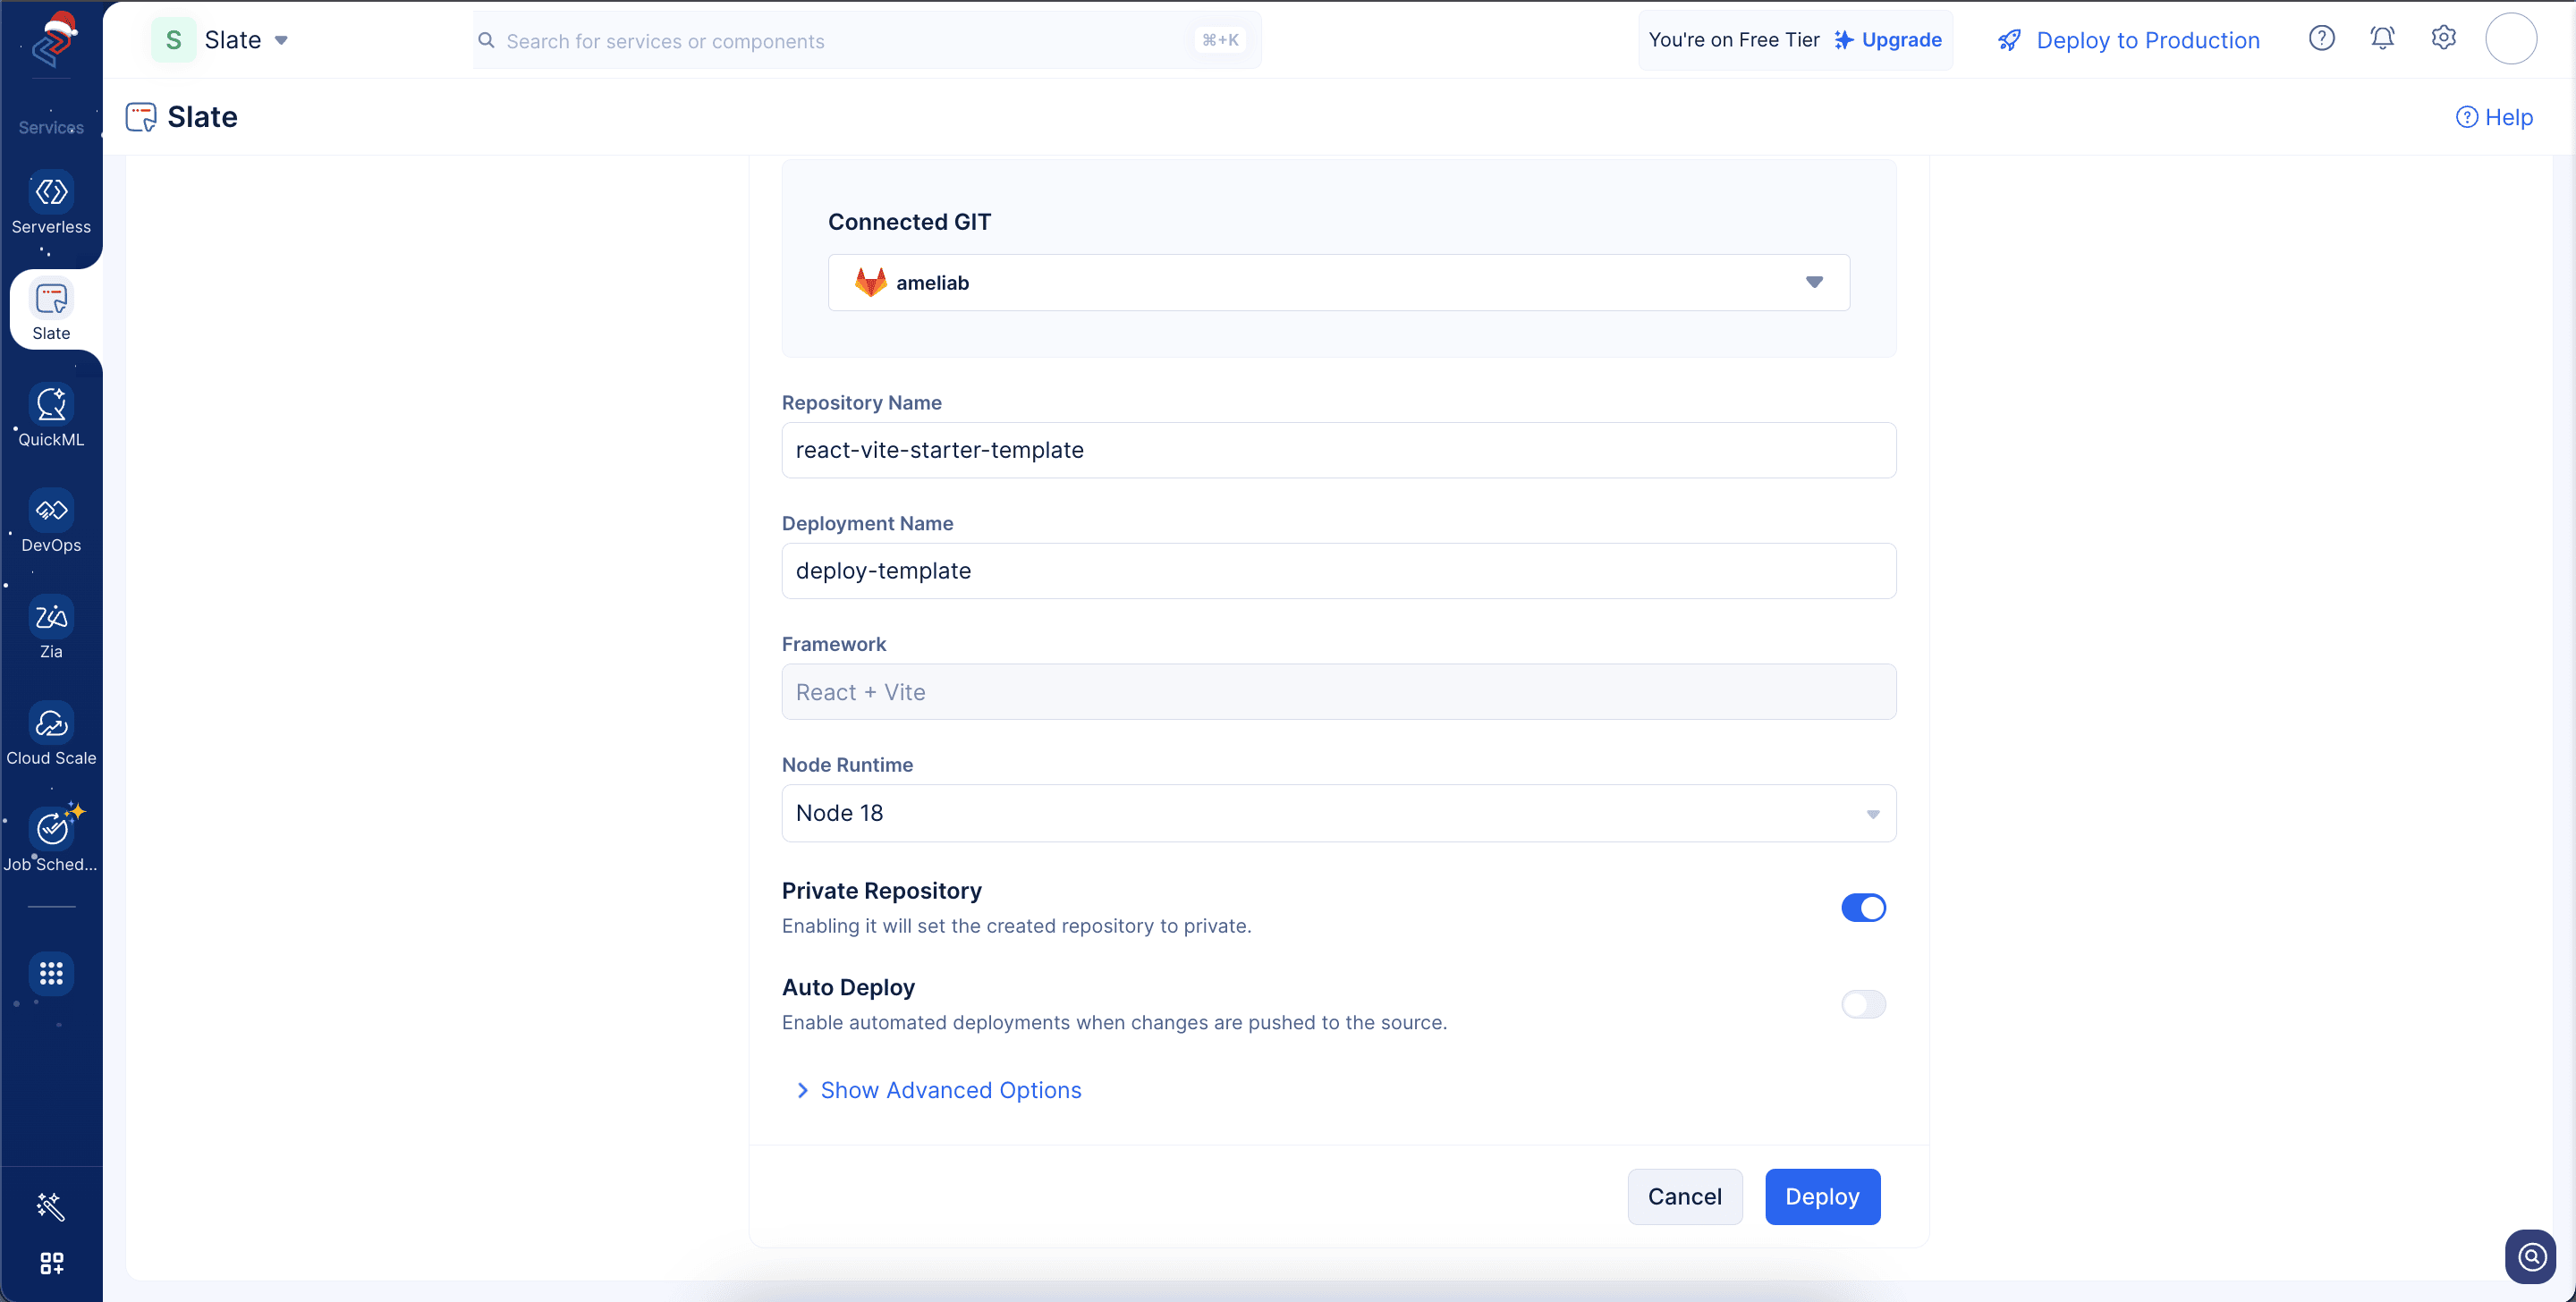
The Node.js runtime lets you run JavaScript code outside a web browser, like on a server or your computer. It helps you build websites and apps by giving JavaScript access to files, networks, and other system tools.
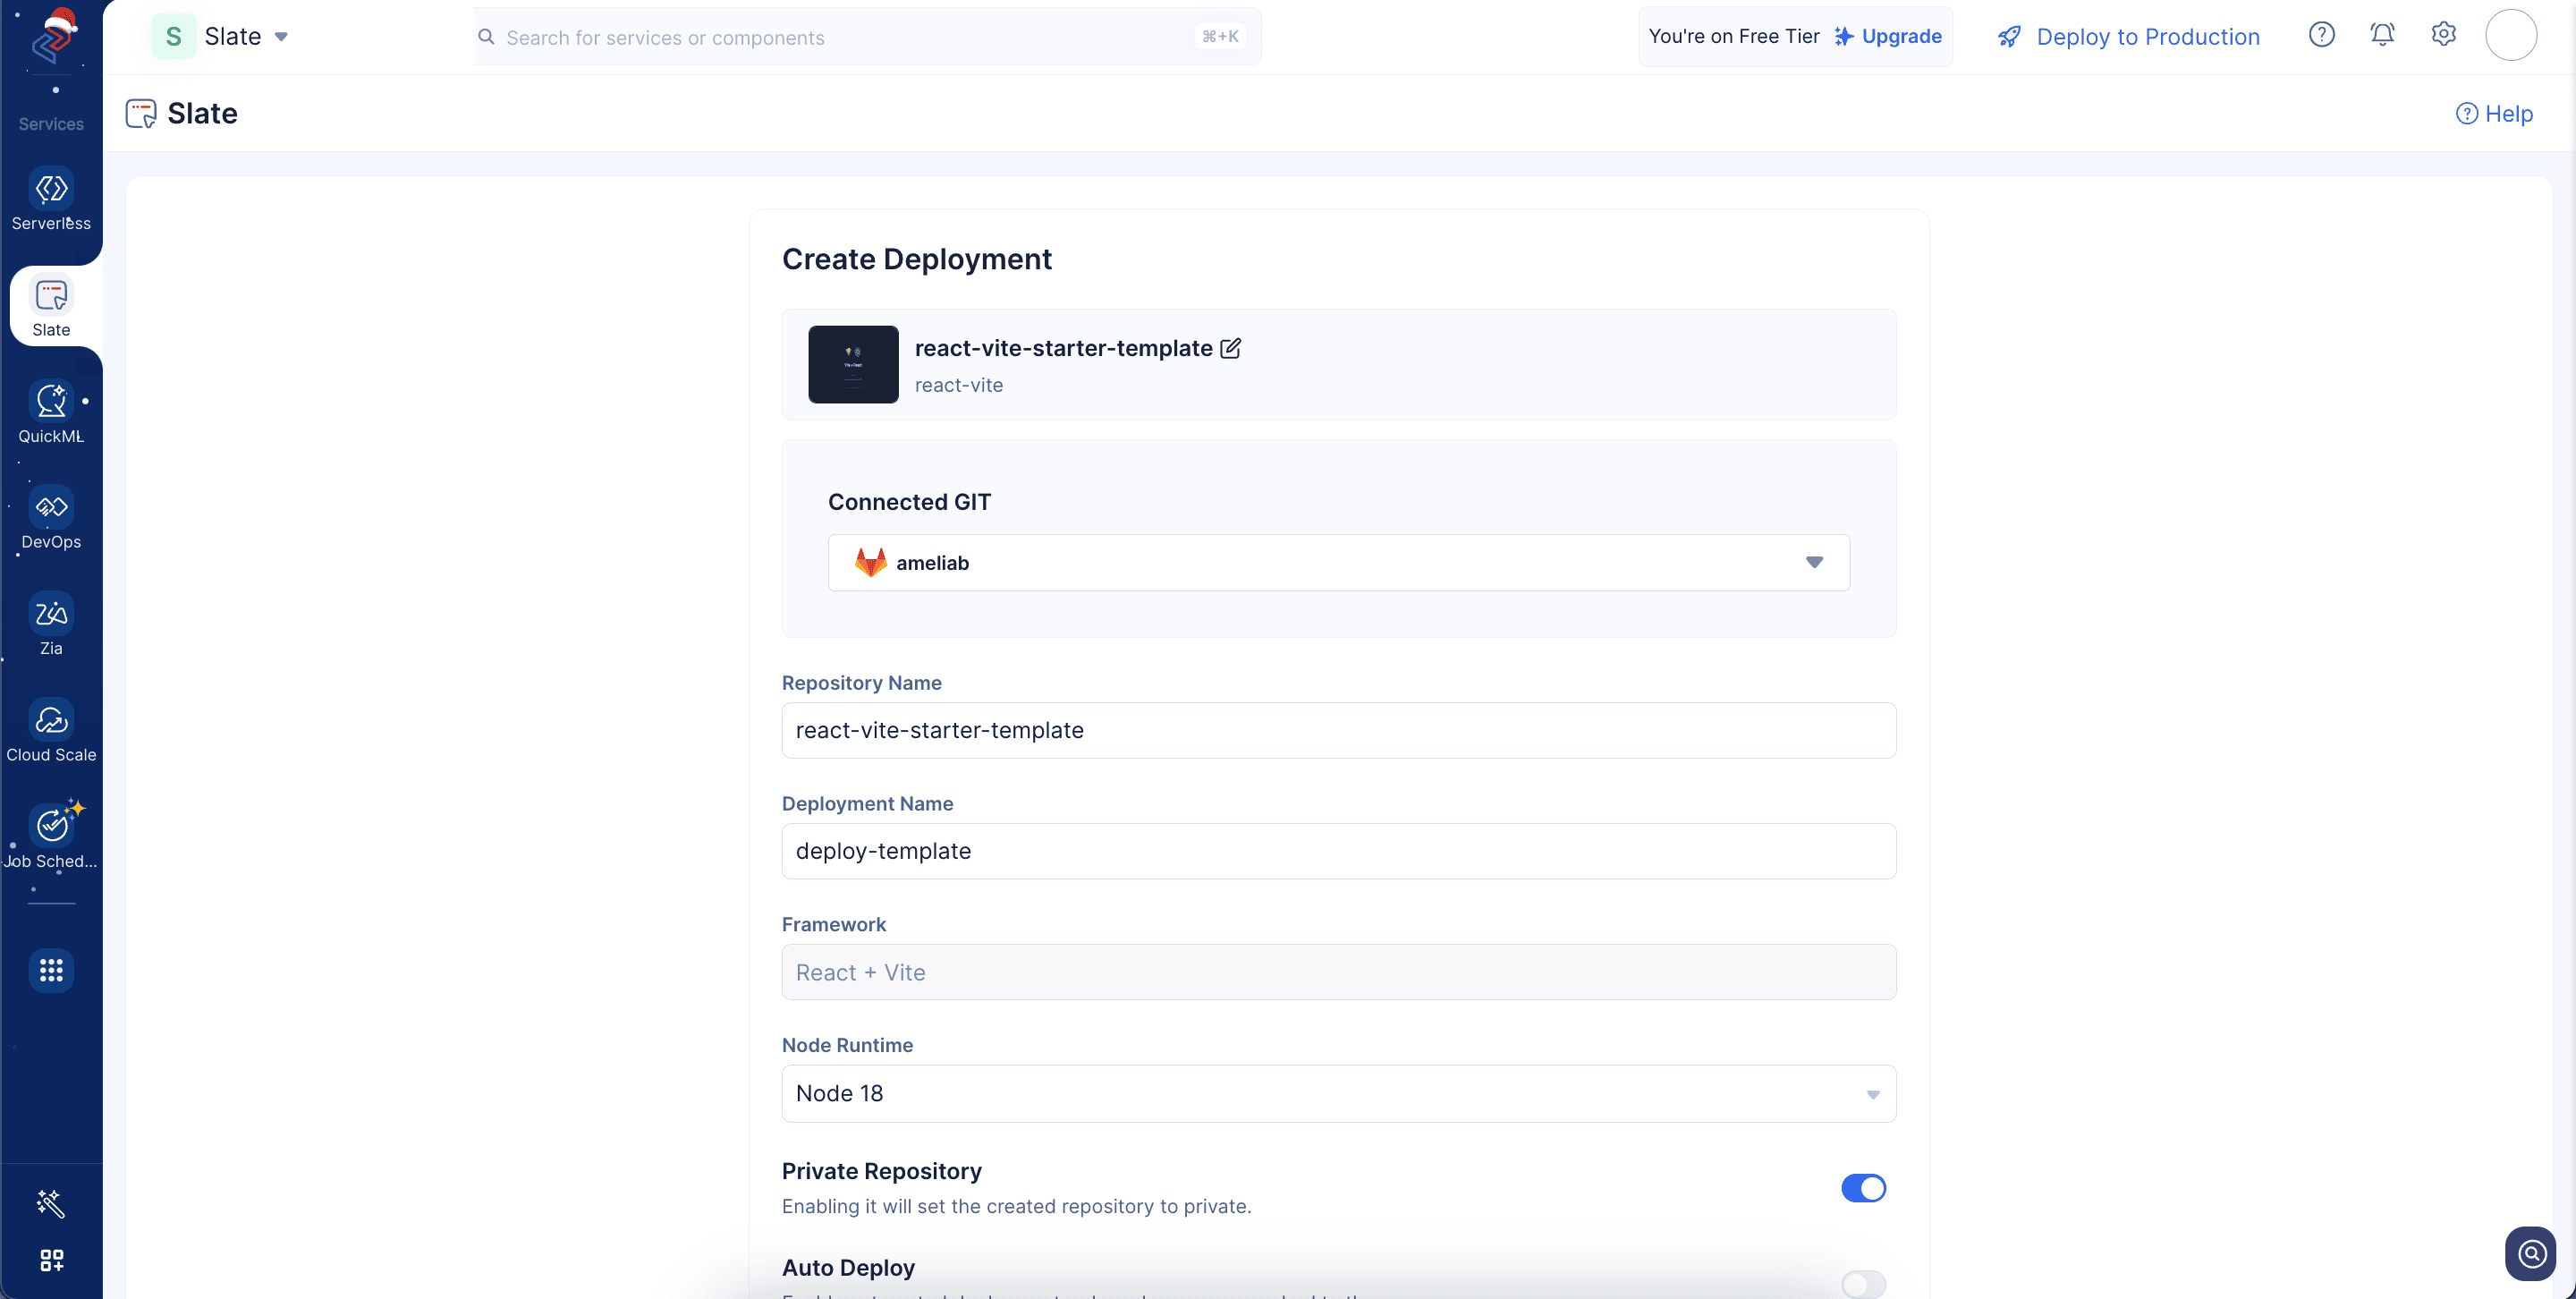
- In this deployment method, a new repository will be automatically created in your Git account, and the template code will be pushed into it.
You can toggle the button to create a private repository as shown in the screenshot below.

- Enable Auto Deploy, so that any code pushed to the repository will deployed automatically using Slate.
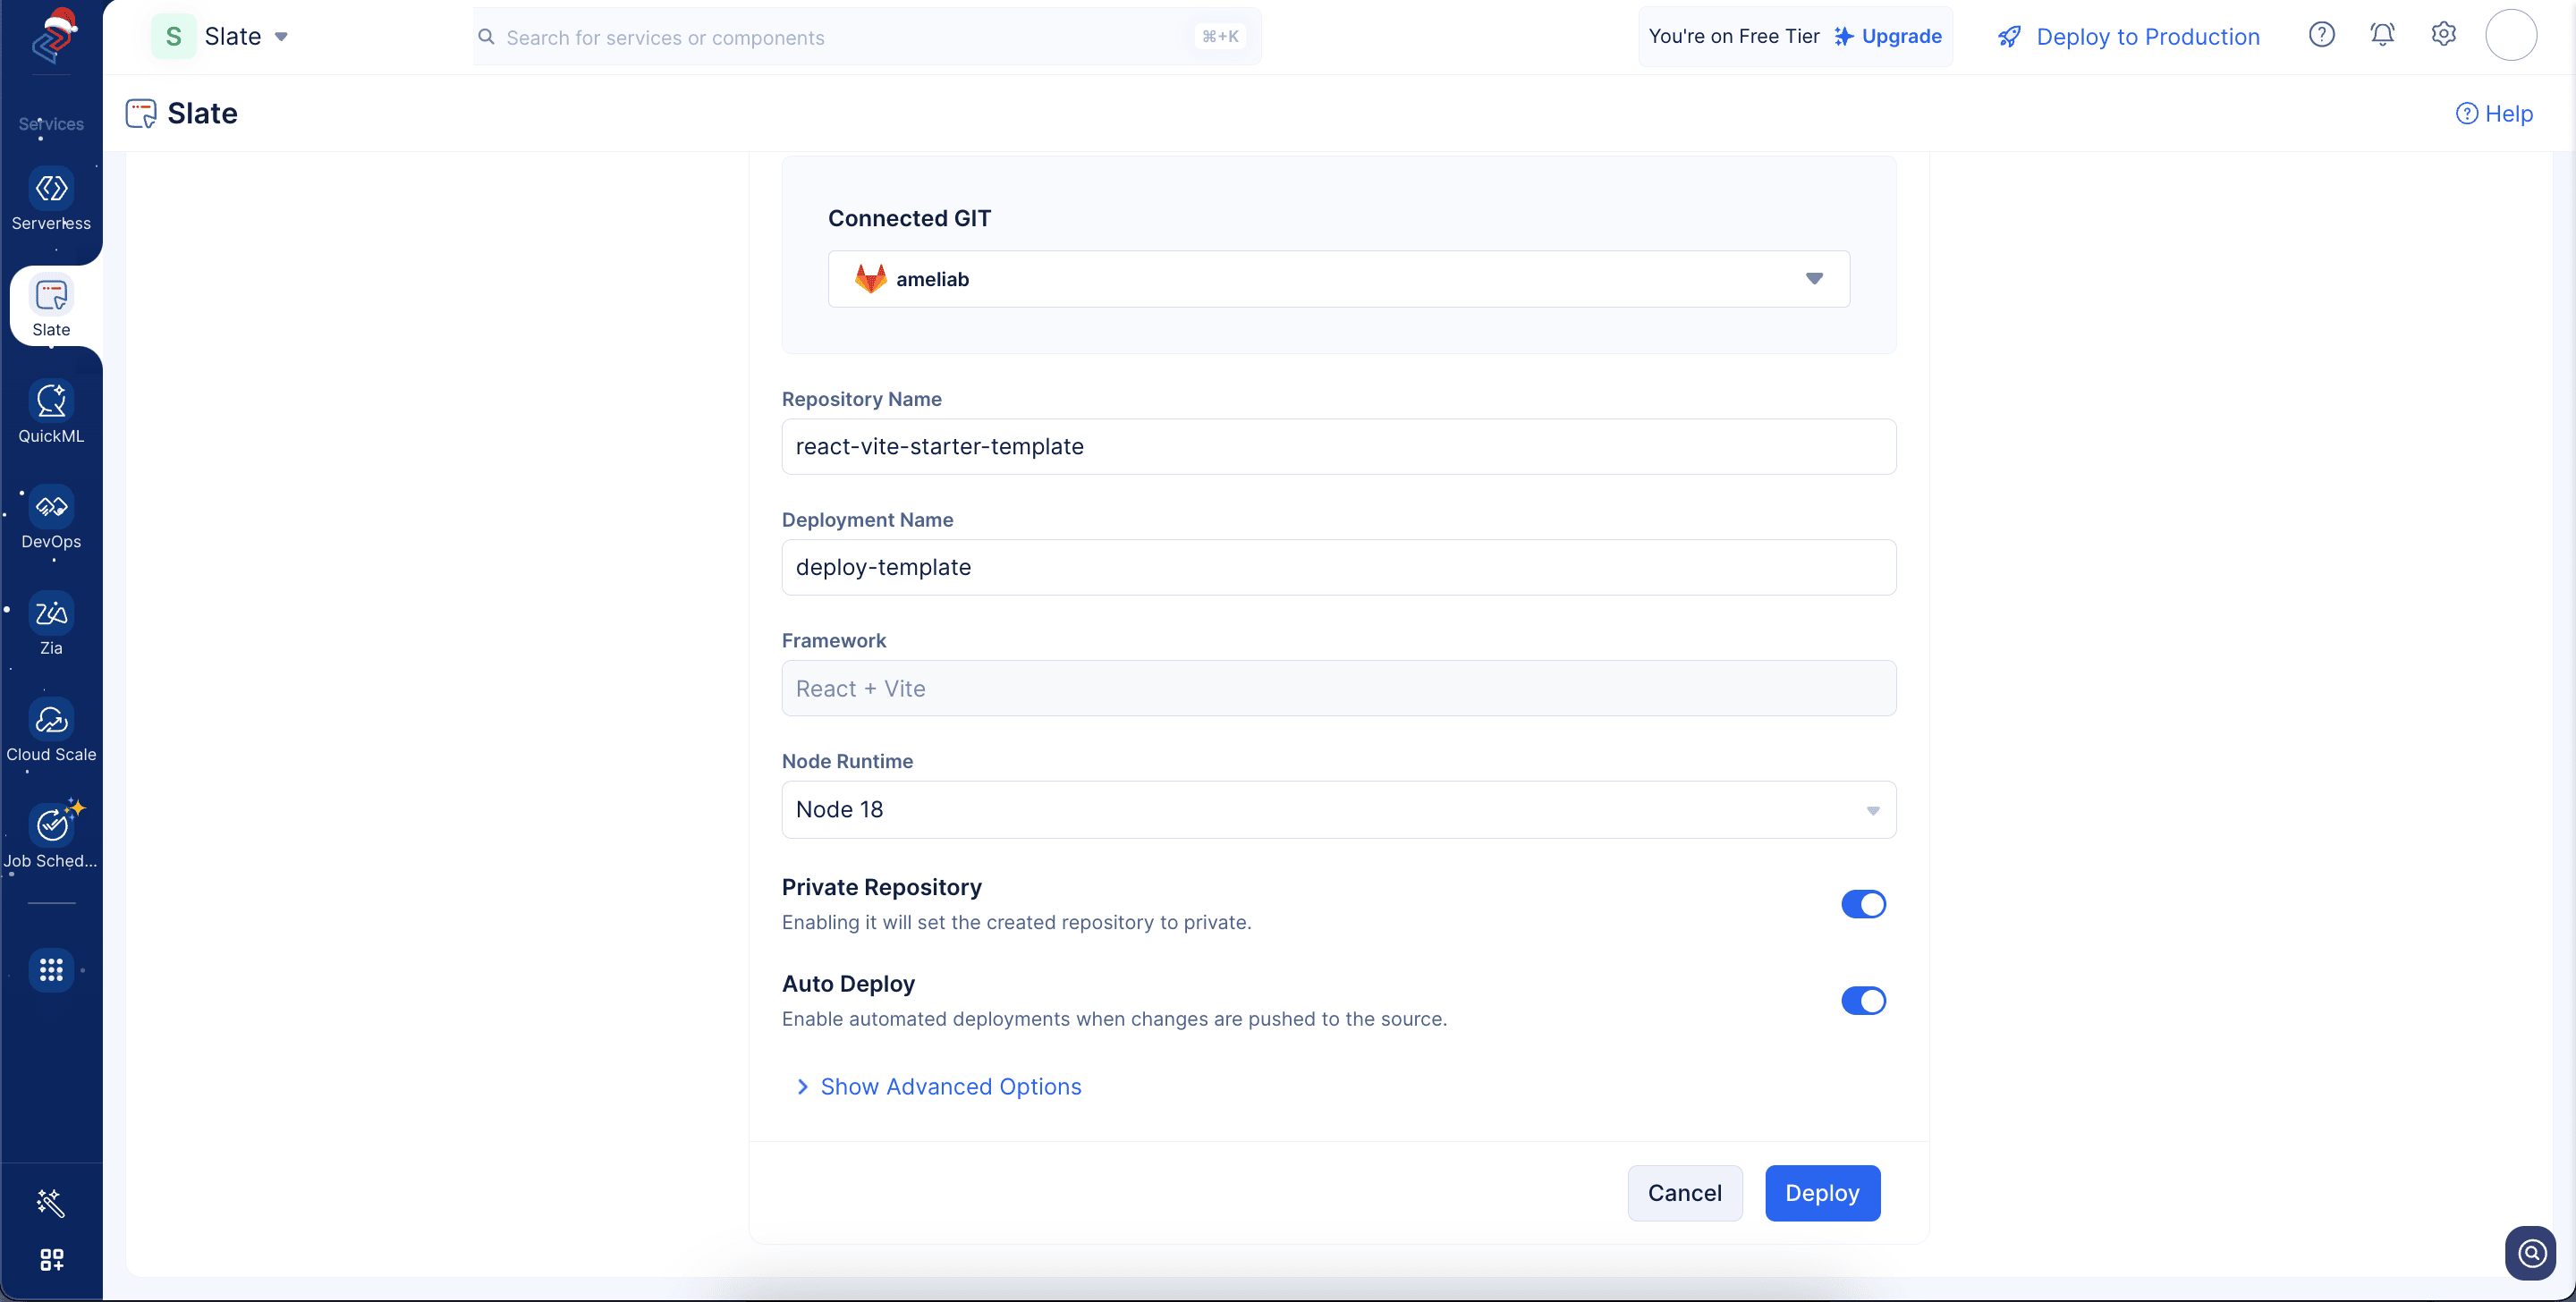
The Show Advanced Options tab shows the output path, build command, and start command for the application deployment, and these fields will be auto-populated.
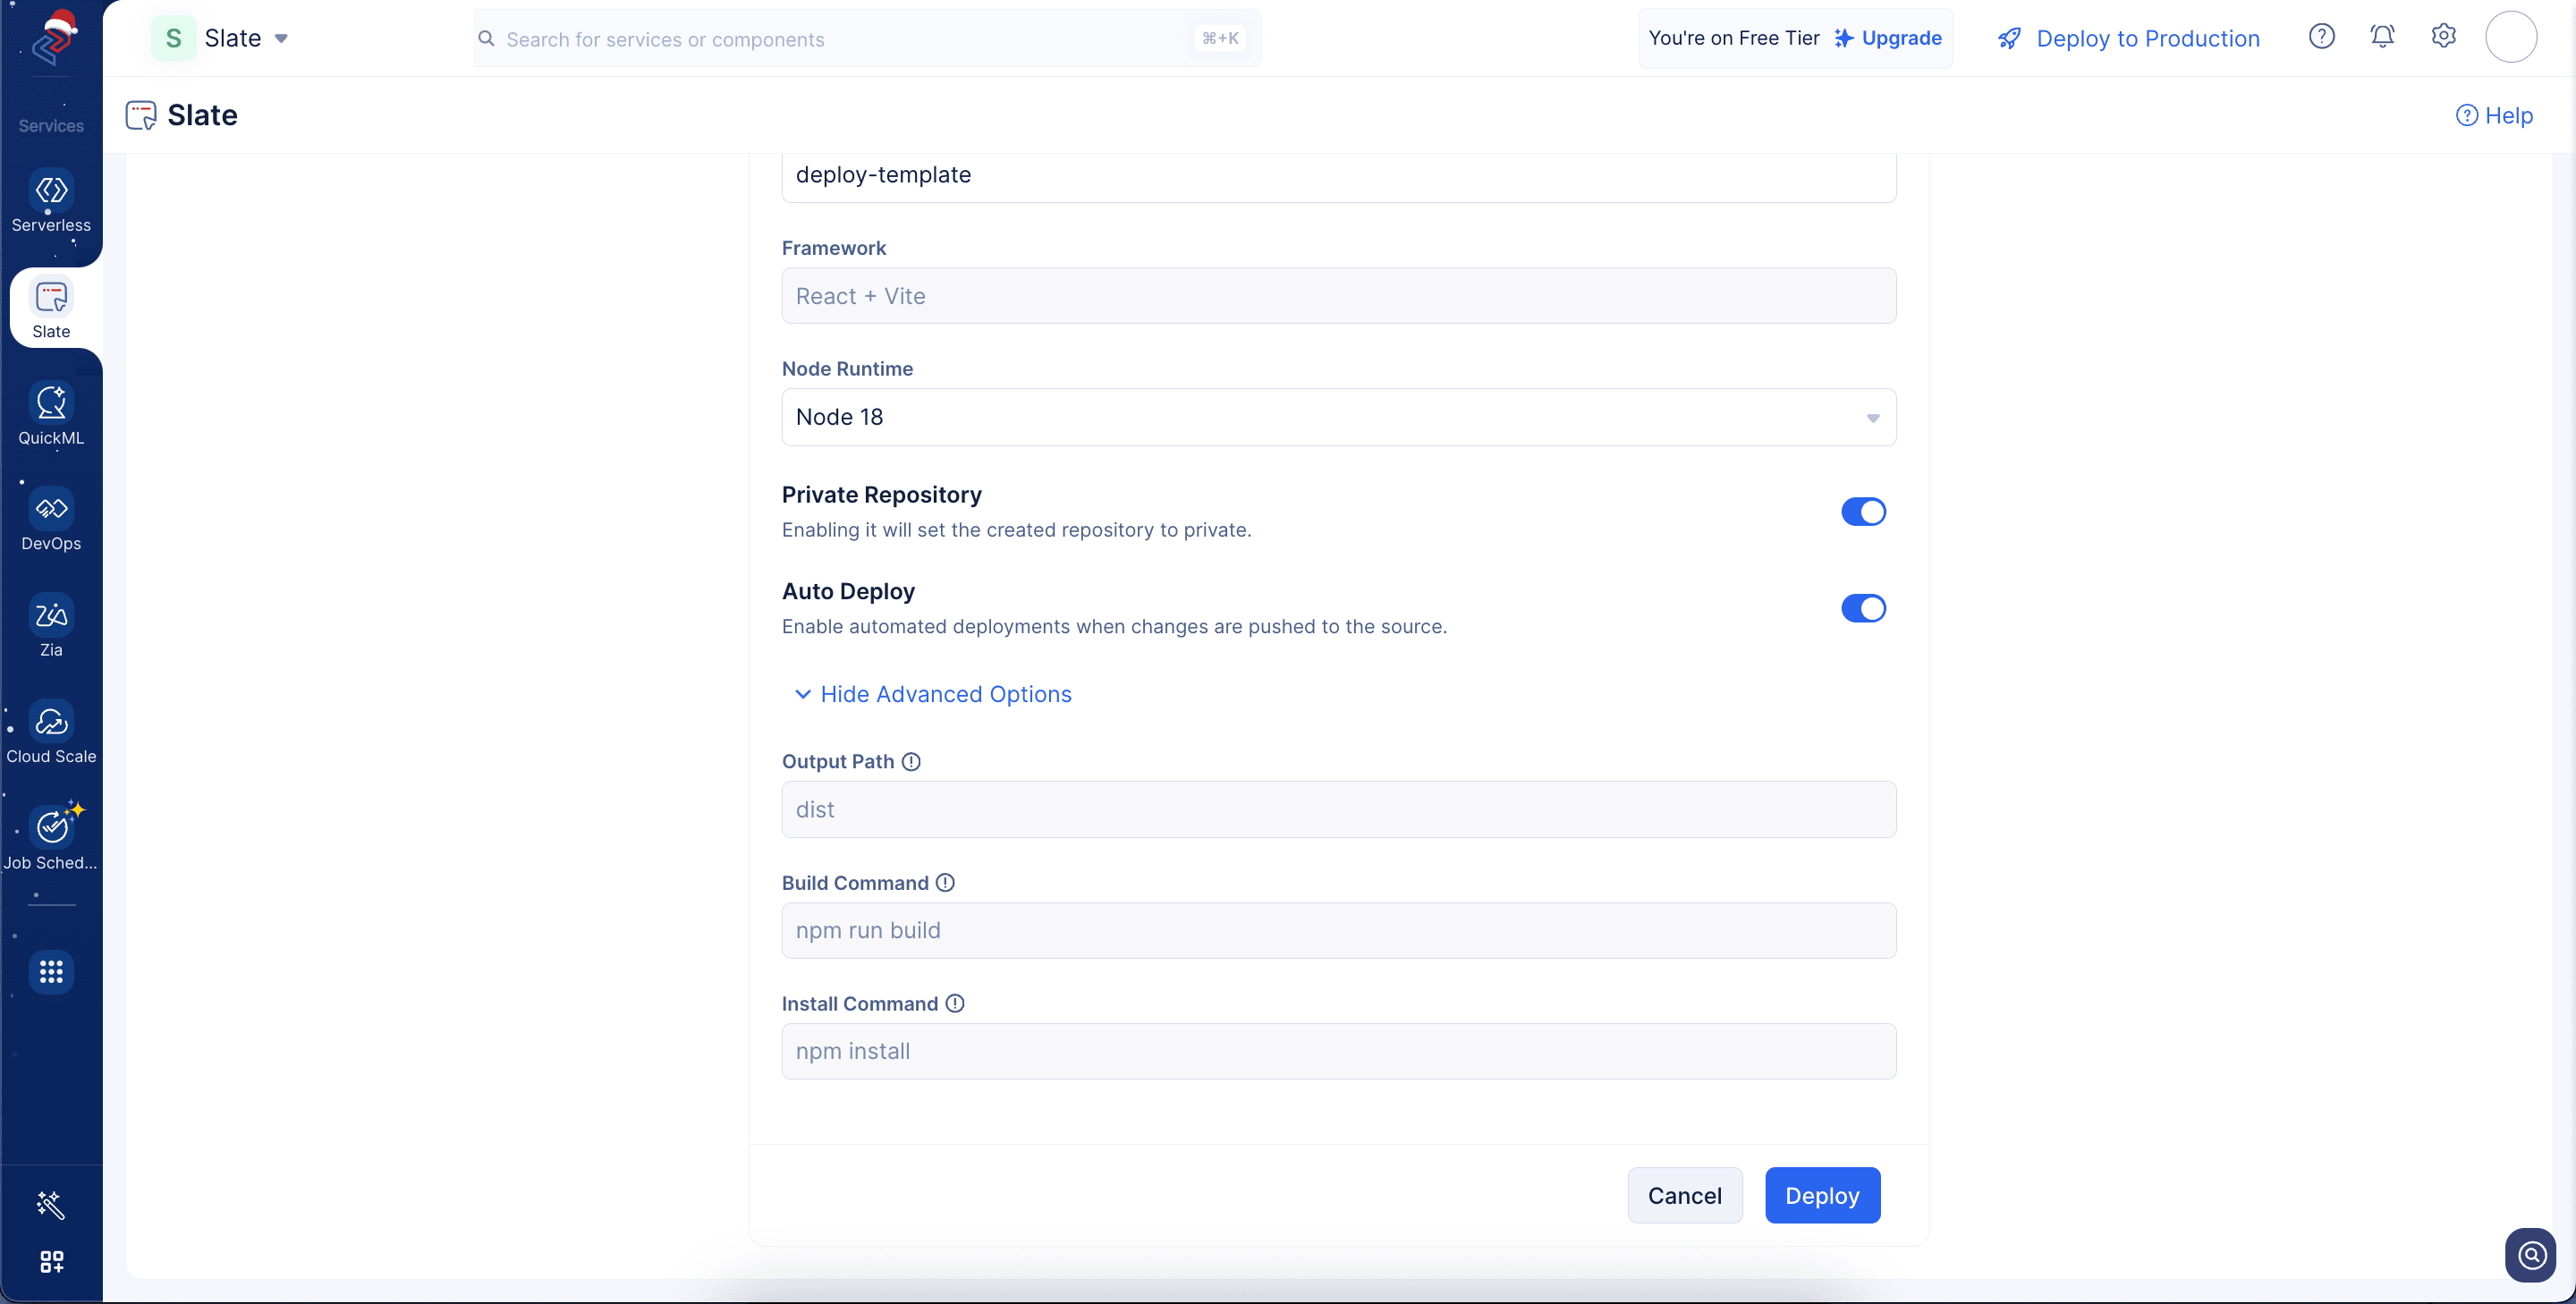
- Click Deploy to deploy the application to Slate.
-
The output path is the directory where your application gets compiled or built for production.
-
The build command is the script that transforms your development code into production code.
-
The install command fetches and installs all dependencies required for your project. For example, the install commands for various client-side frameworks are:
- React, Next.js, Vue, Angular, Svelte → npm install or yarn install
- Astro → npm install or pnpm install
- Vite → npm install or yarn install
- SolidJS → npm install or pnpm install
The deployment has been successfully completed, and you can view the detailed logs of the deployment as shown in the screenshot below.
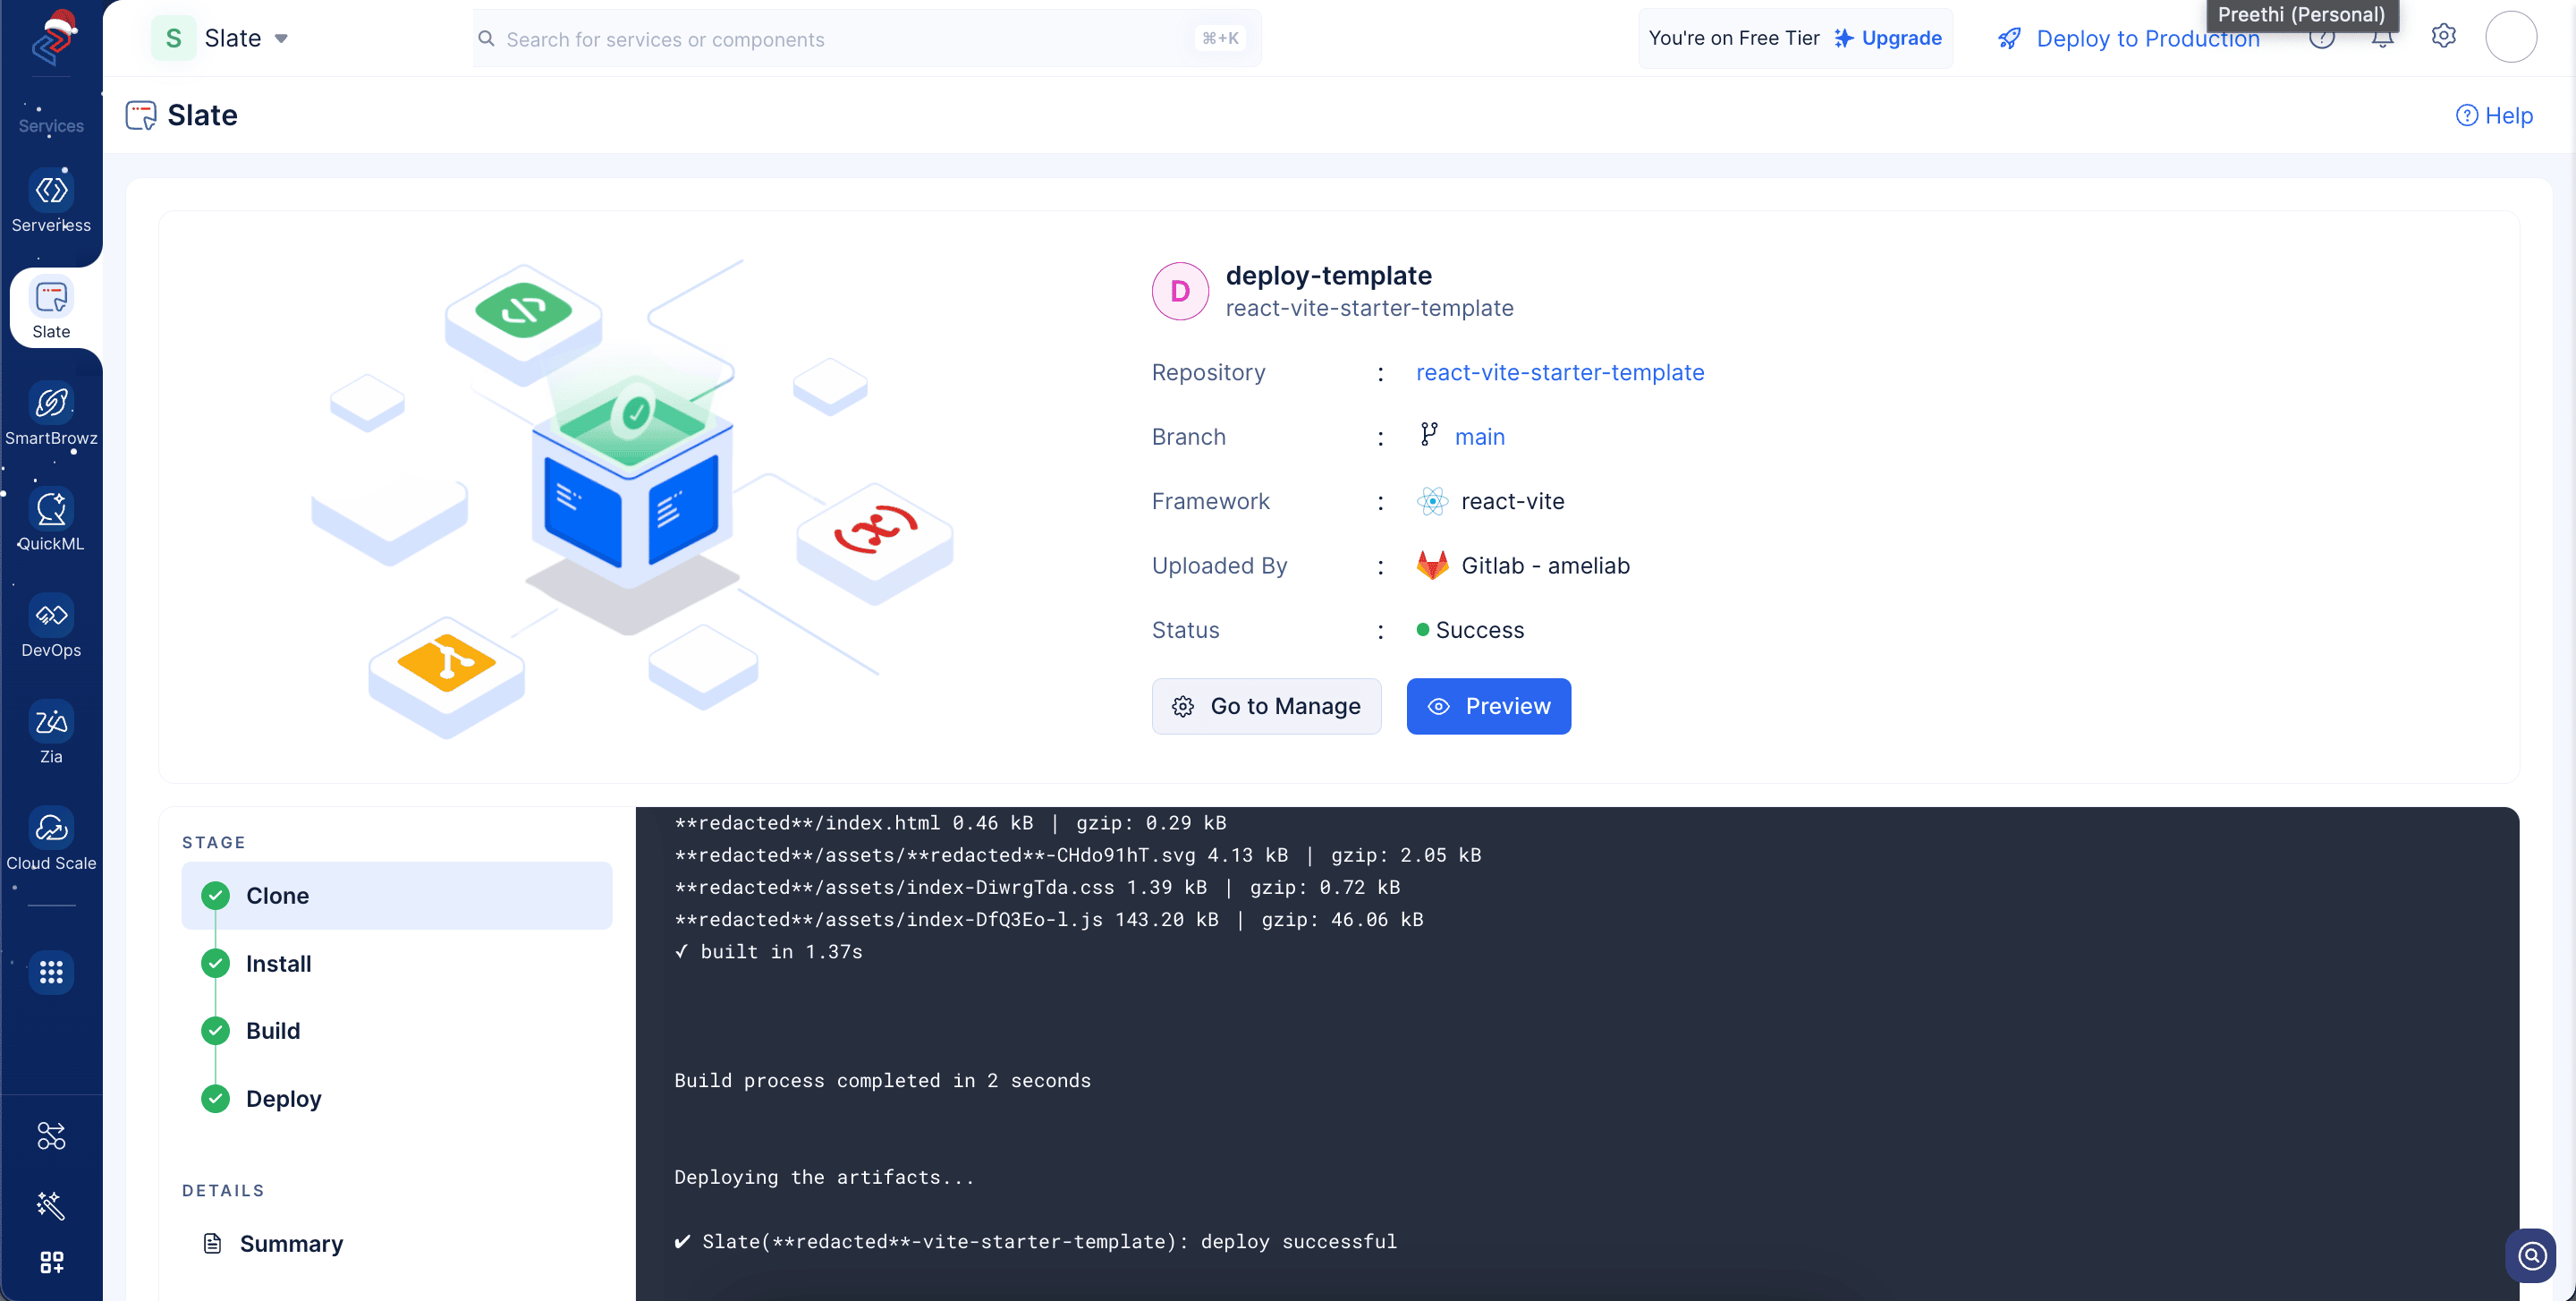
You can click Go to Manage to view the overview details of the deployment as shown in the screenshot below. Click Preview to view the deployed application.
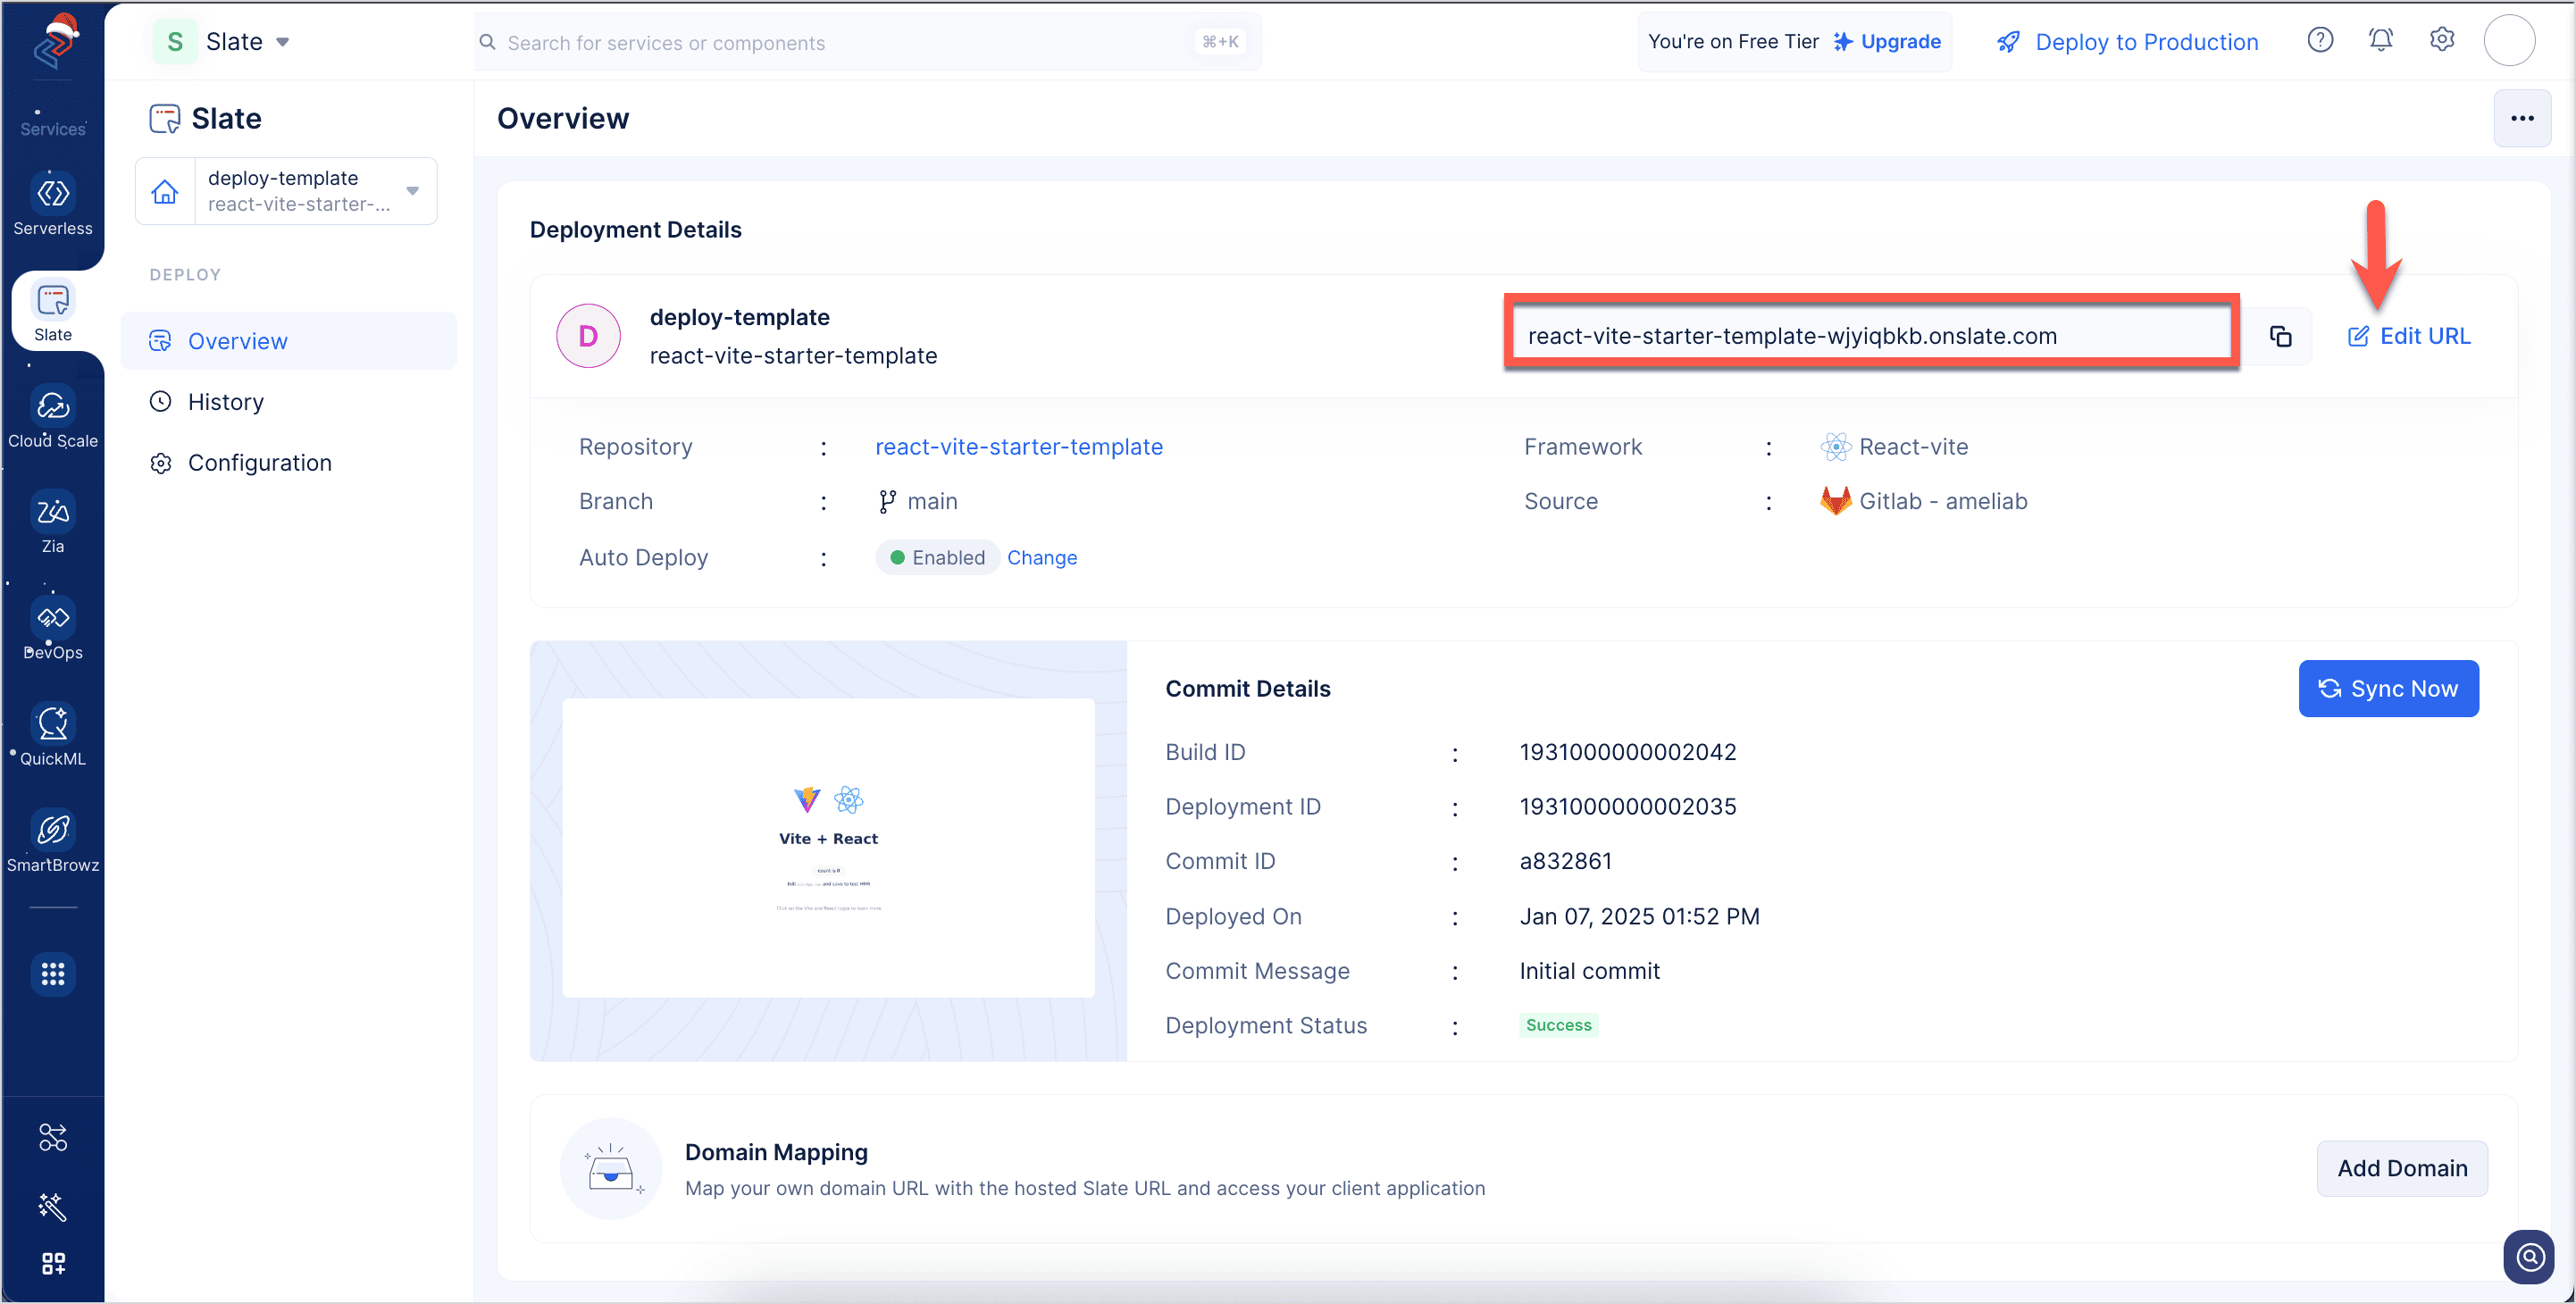
You can fetch the generated access URL of your application as shown in the screenshot above. You can edit the URL by clicking Edit URL.
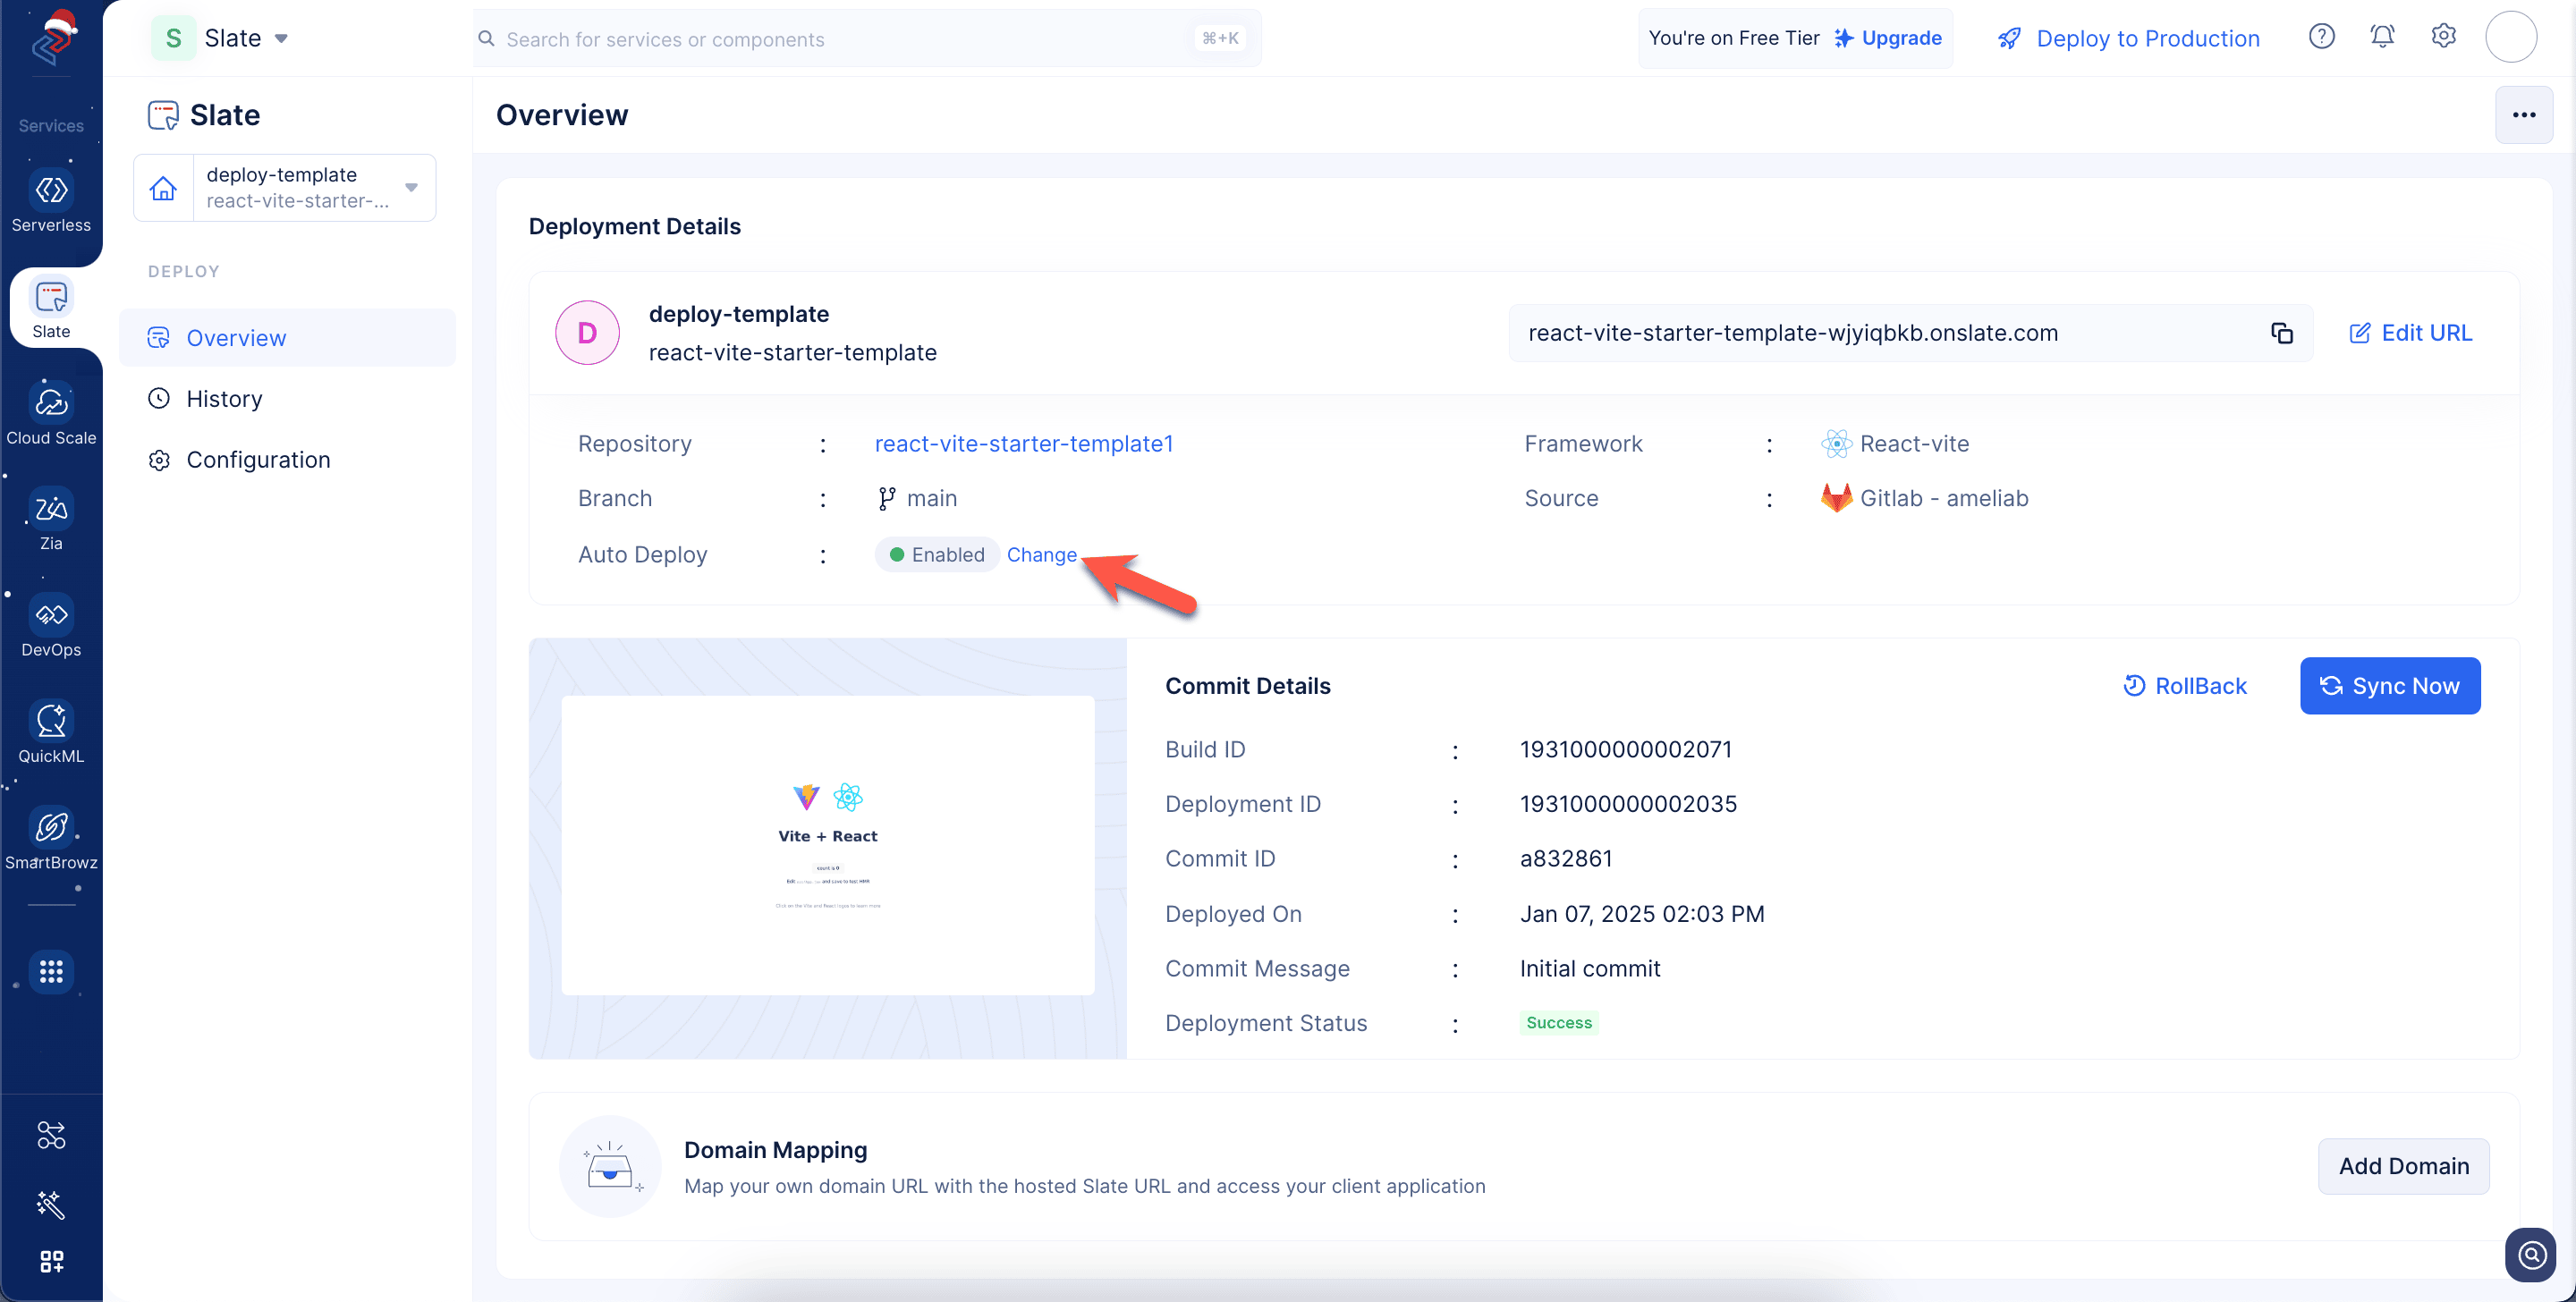
- You can disable Auto-Deploy for this deployment by clicking Change.
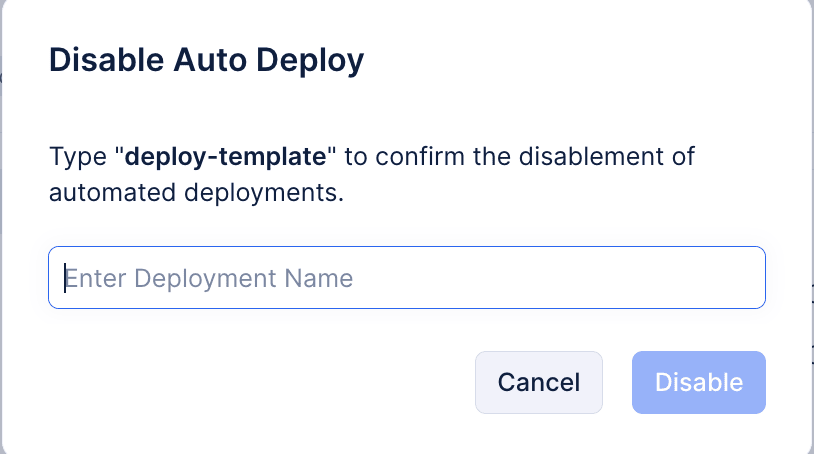
- Enter the deployment name and click Disable.
You can sync the latest commit with the current deployment by clicking on the Sync Now button. You can also map the generated Slate URL with your custom domain if required.
You can view the list of deployments made to your application by switching to the History tab in the left pane. Refer to this help section to learn more about it. You can enable cache for your deployment by navigating to the Configuration tab in the left pane. You also have the option to configure environment variables required for your deployment, if required.
Last Updated 2025-07-18 12:42:05 +0530 IST
Yes
No
Send your feedback to us