Deploy from Public Repository
To deploy code from any public Git repository to Slate, please ensure to follow the below-listed steps:
- Navigate to the Catalyst Slate service in the console. Provide the repository link in the Public Repository section. Click Proceed.
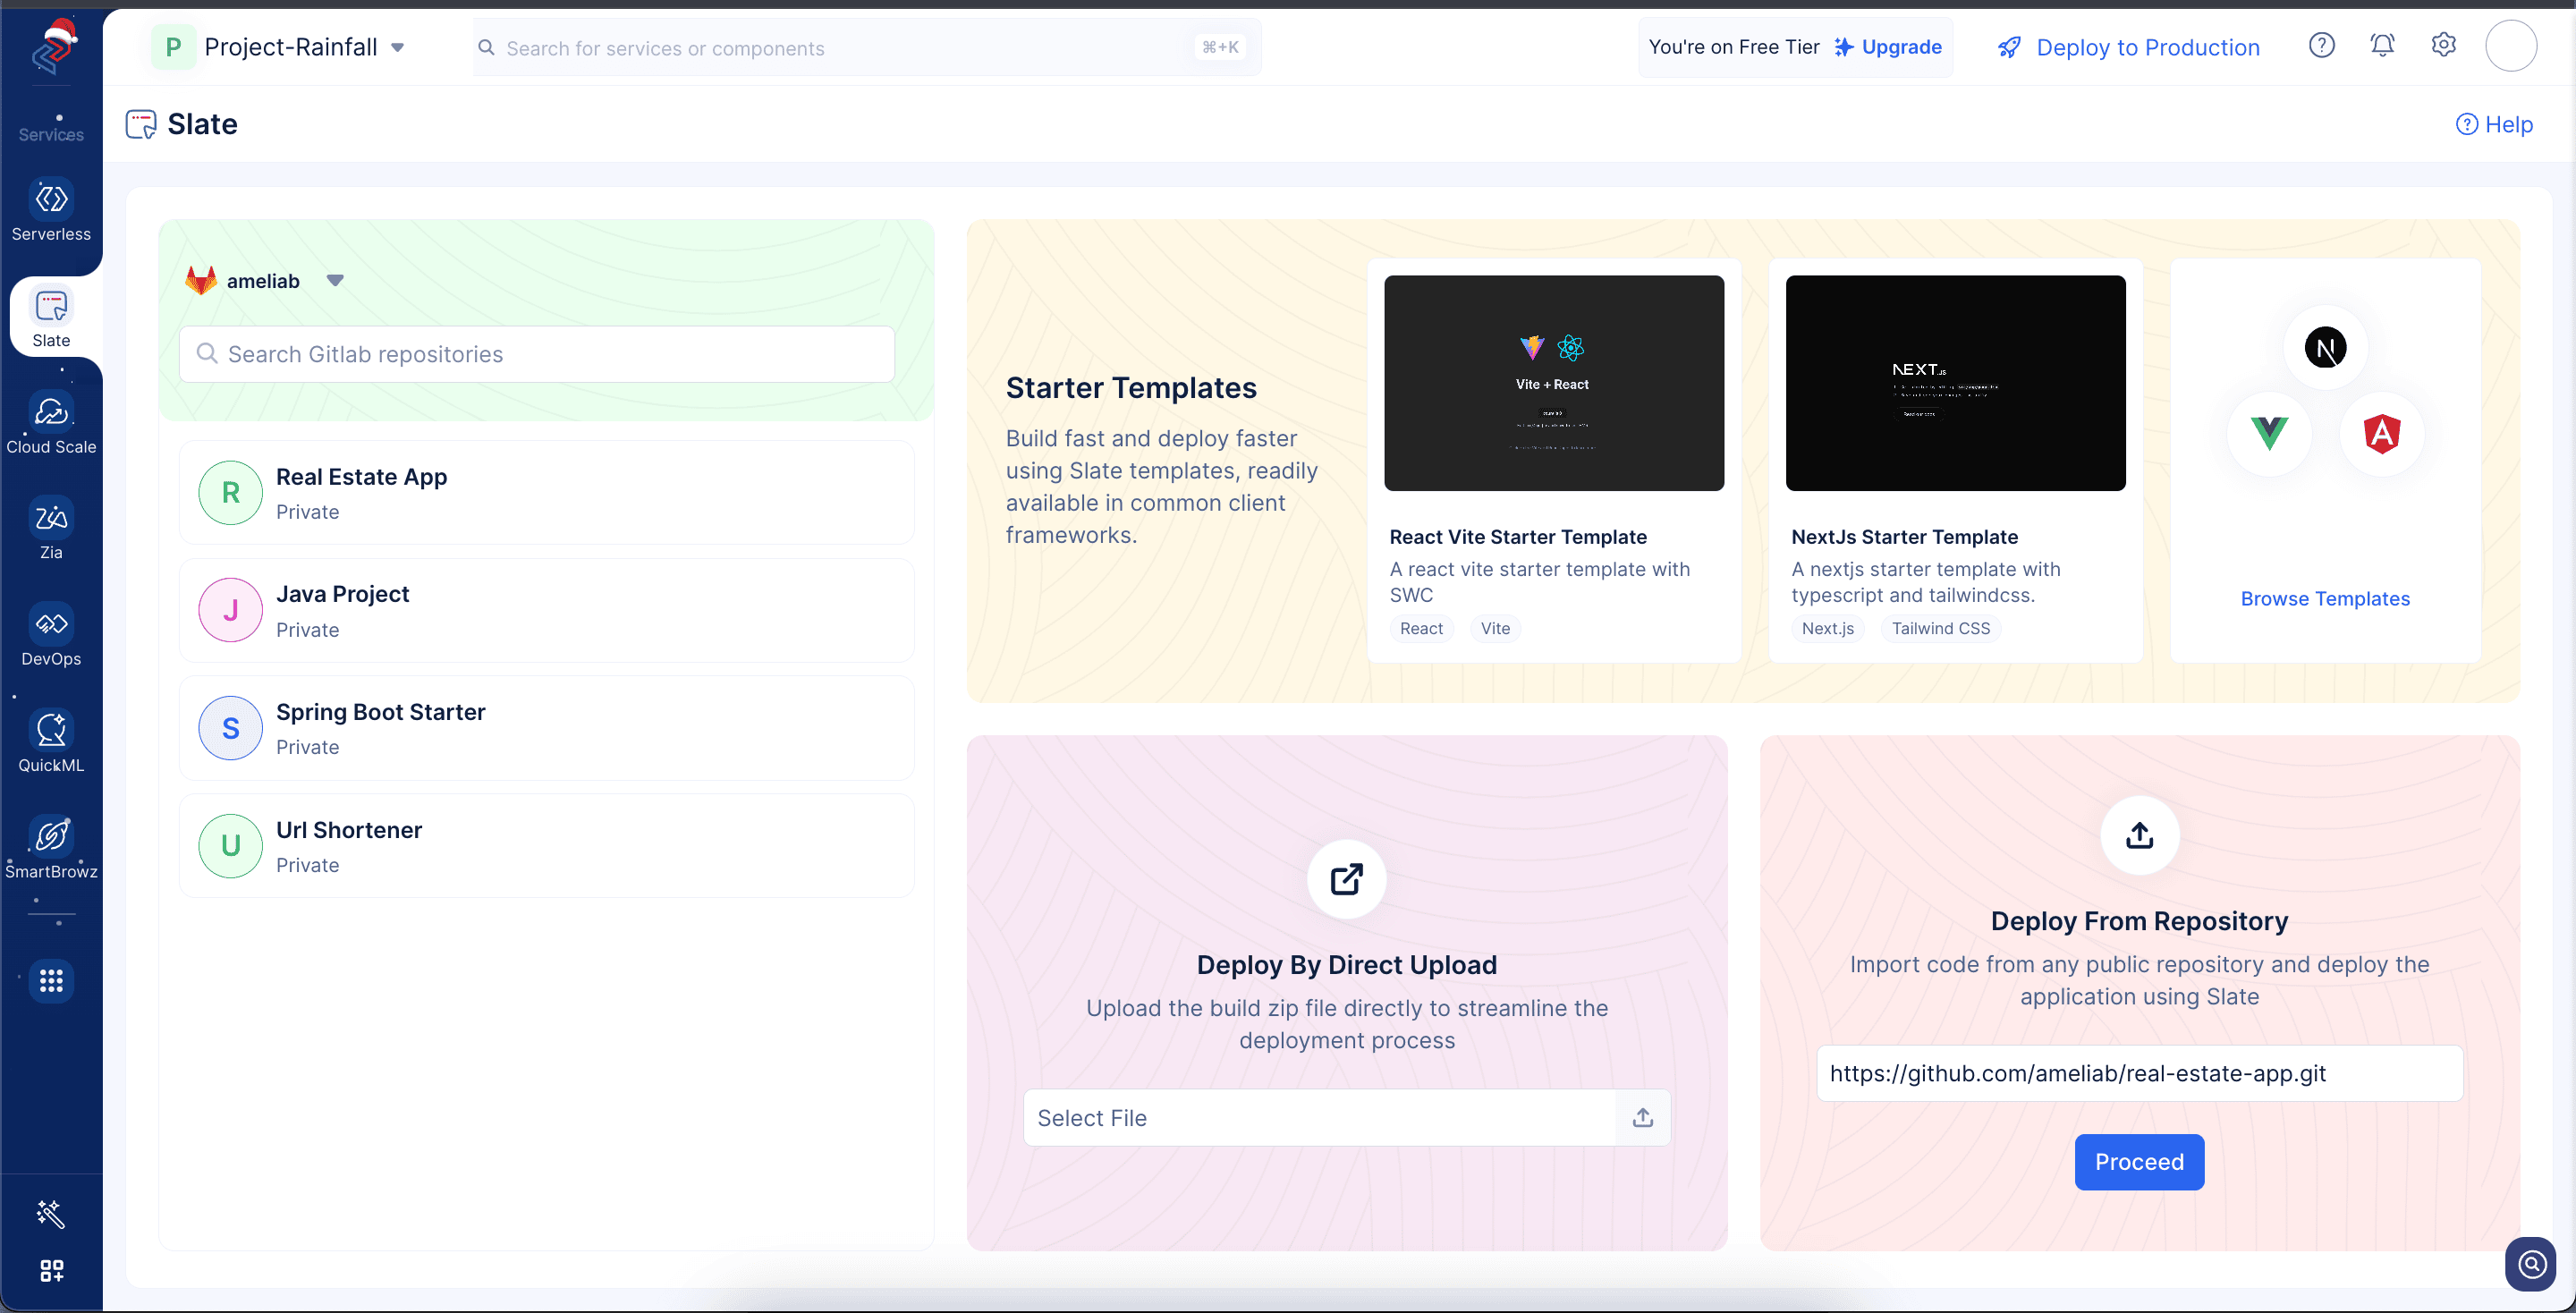
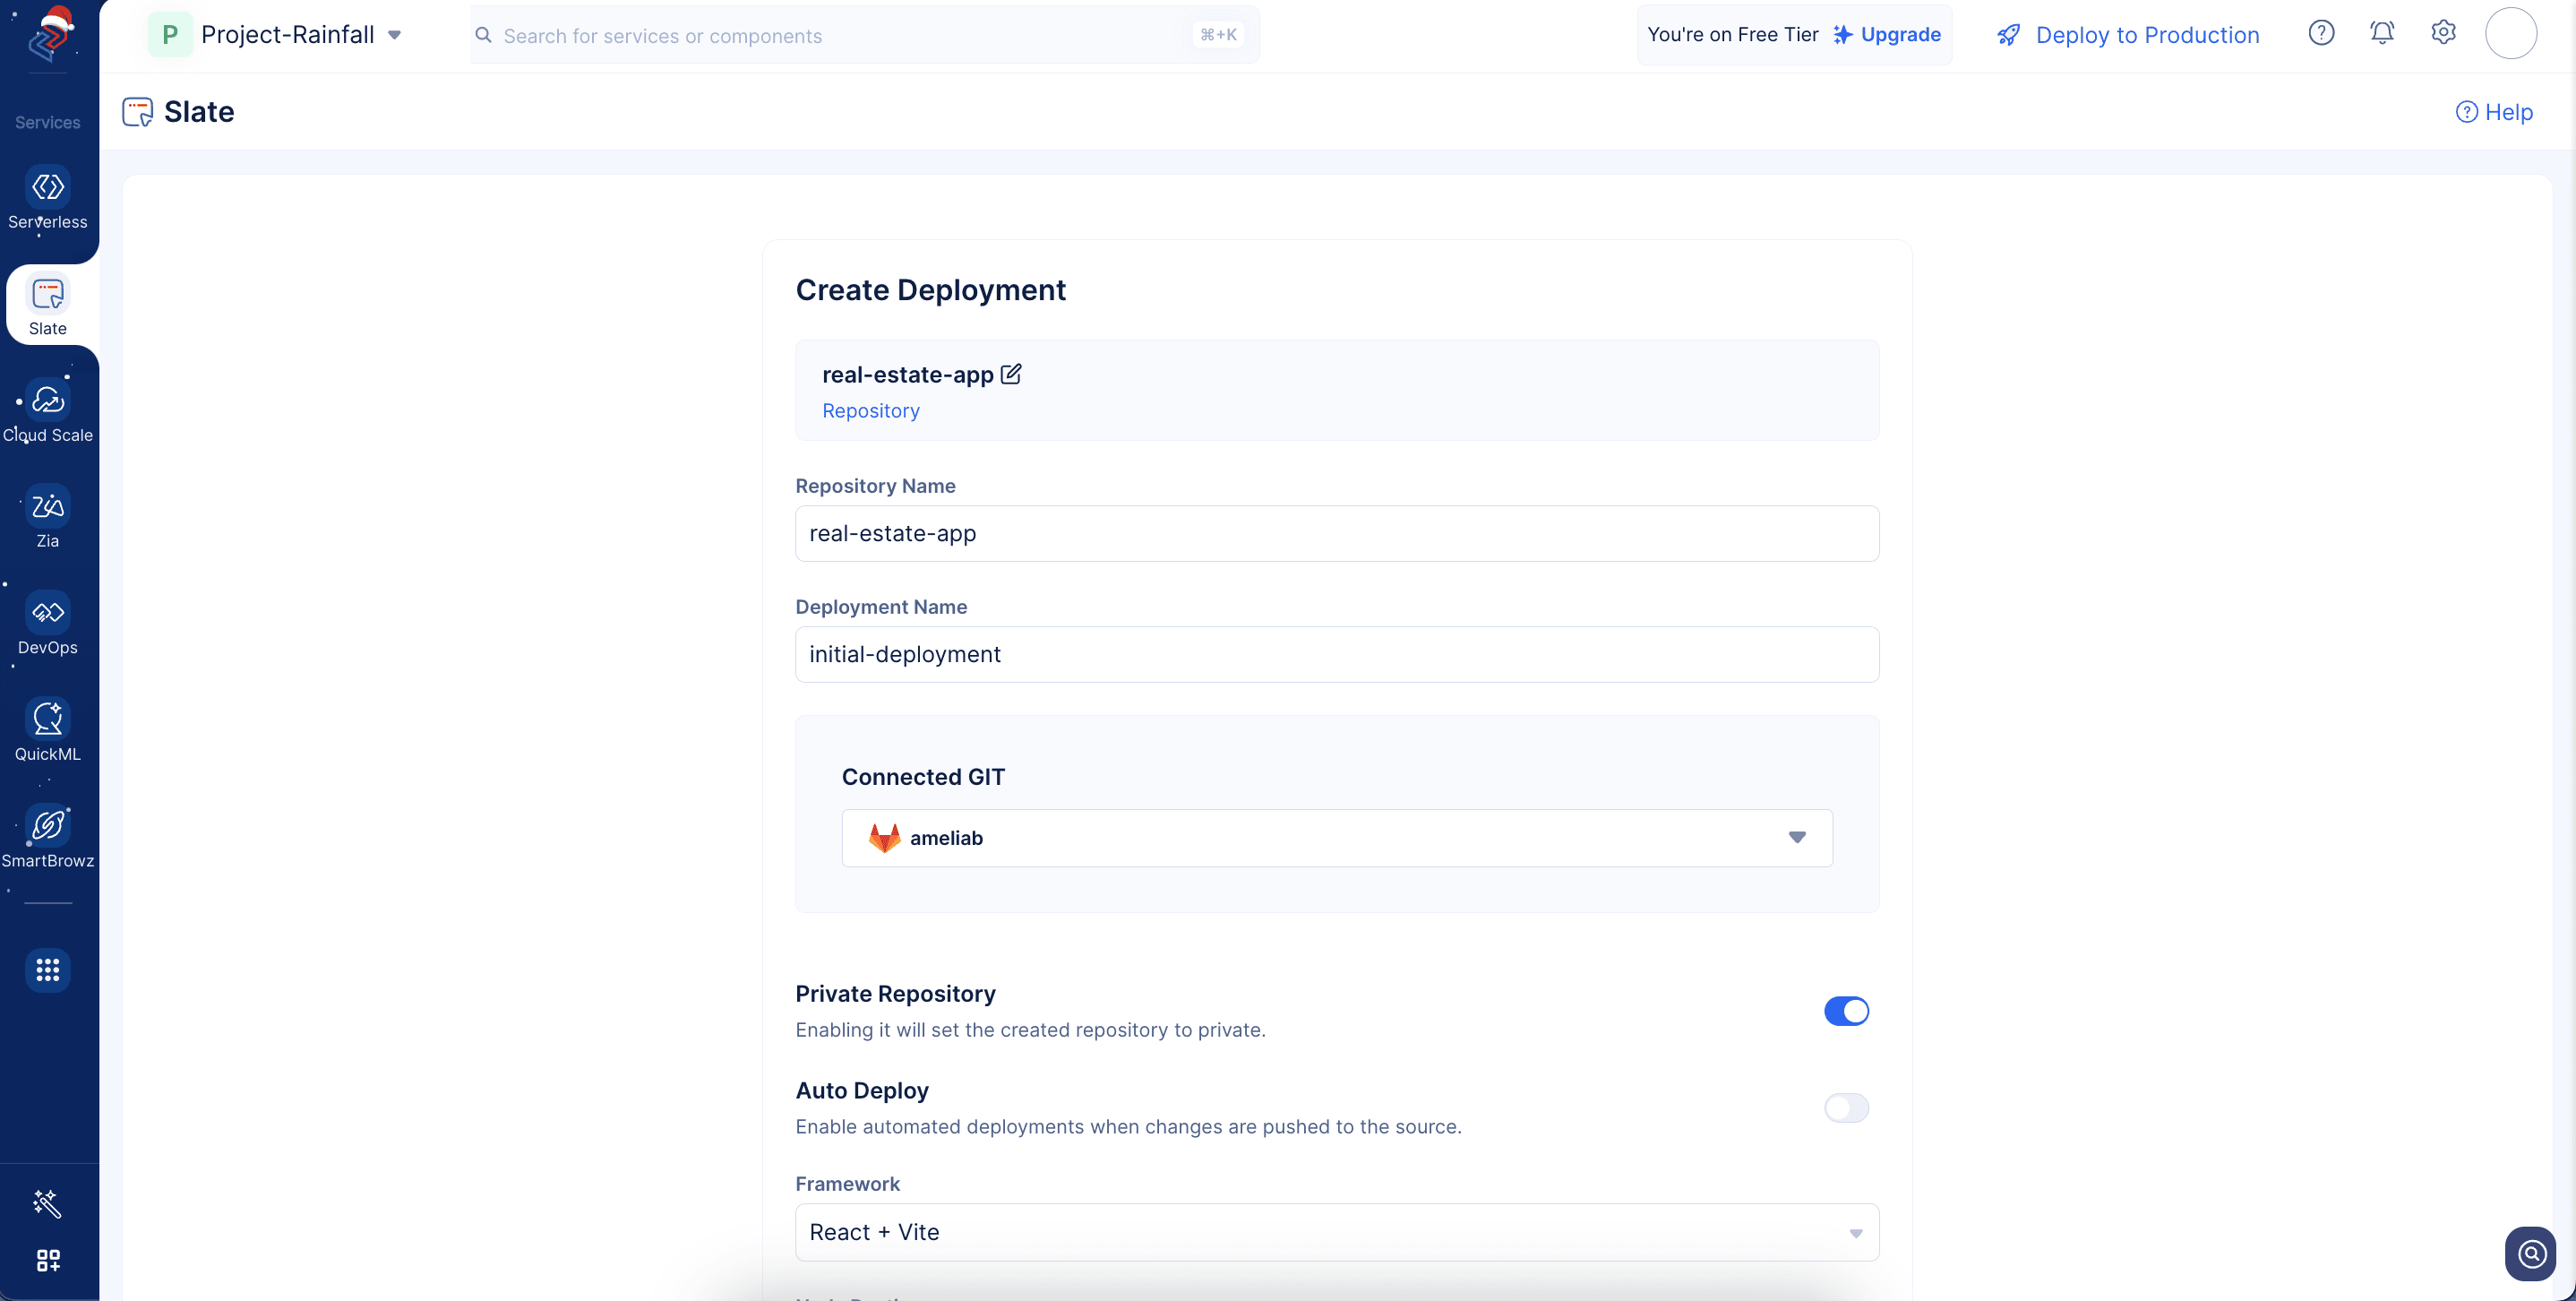
- In the Create Deployment popup, the app name will automatically be populated as the repository name.
You can give any deployment name of your choice.

- Connect with your preferred Git provider by simply clicking on the button, then authenticating your account.

- After you integrate your account, a new repository will be automatically created with the app name in your Git account.
Your new repository will be created by cloning the public one, and the deployment to Slate will happen from there.
You can choose to create a private repository by enabling the toggle as shown in the screenshot below.
- You can enable the Auto Deploy toggle, so that any changes pushed to the connected repository will automatically trigger a new deployment in Slate.
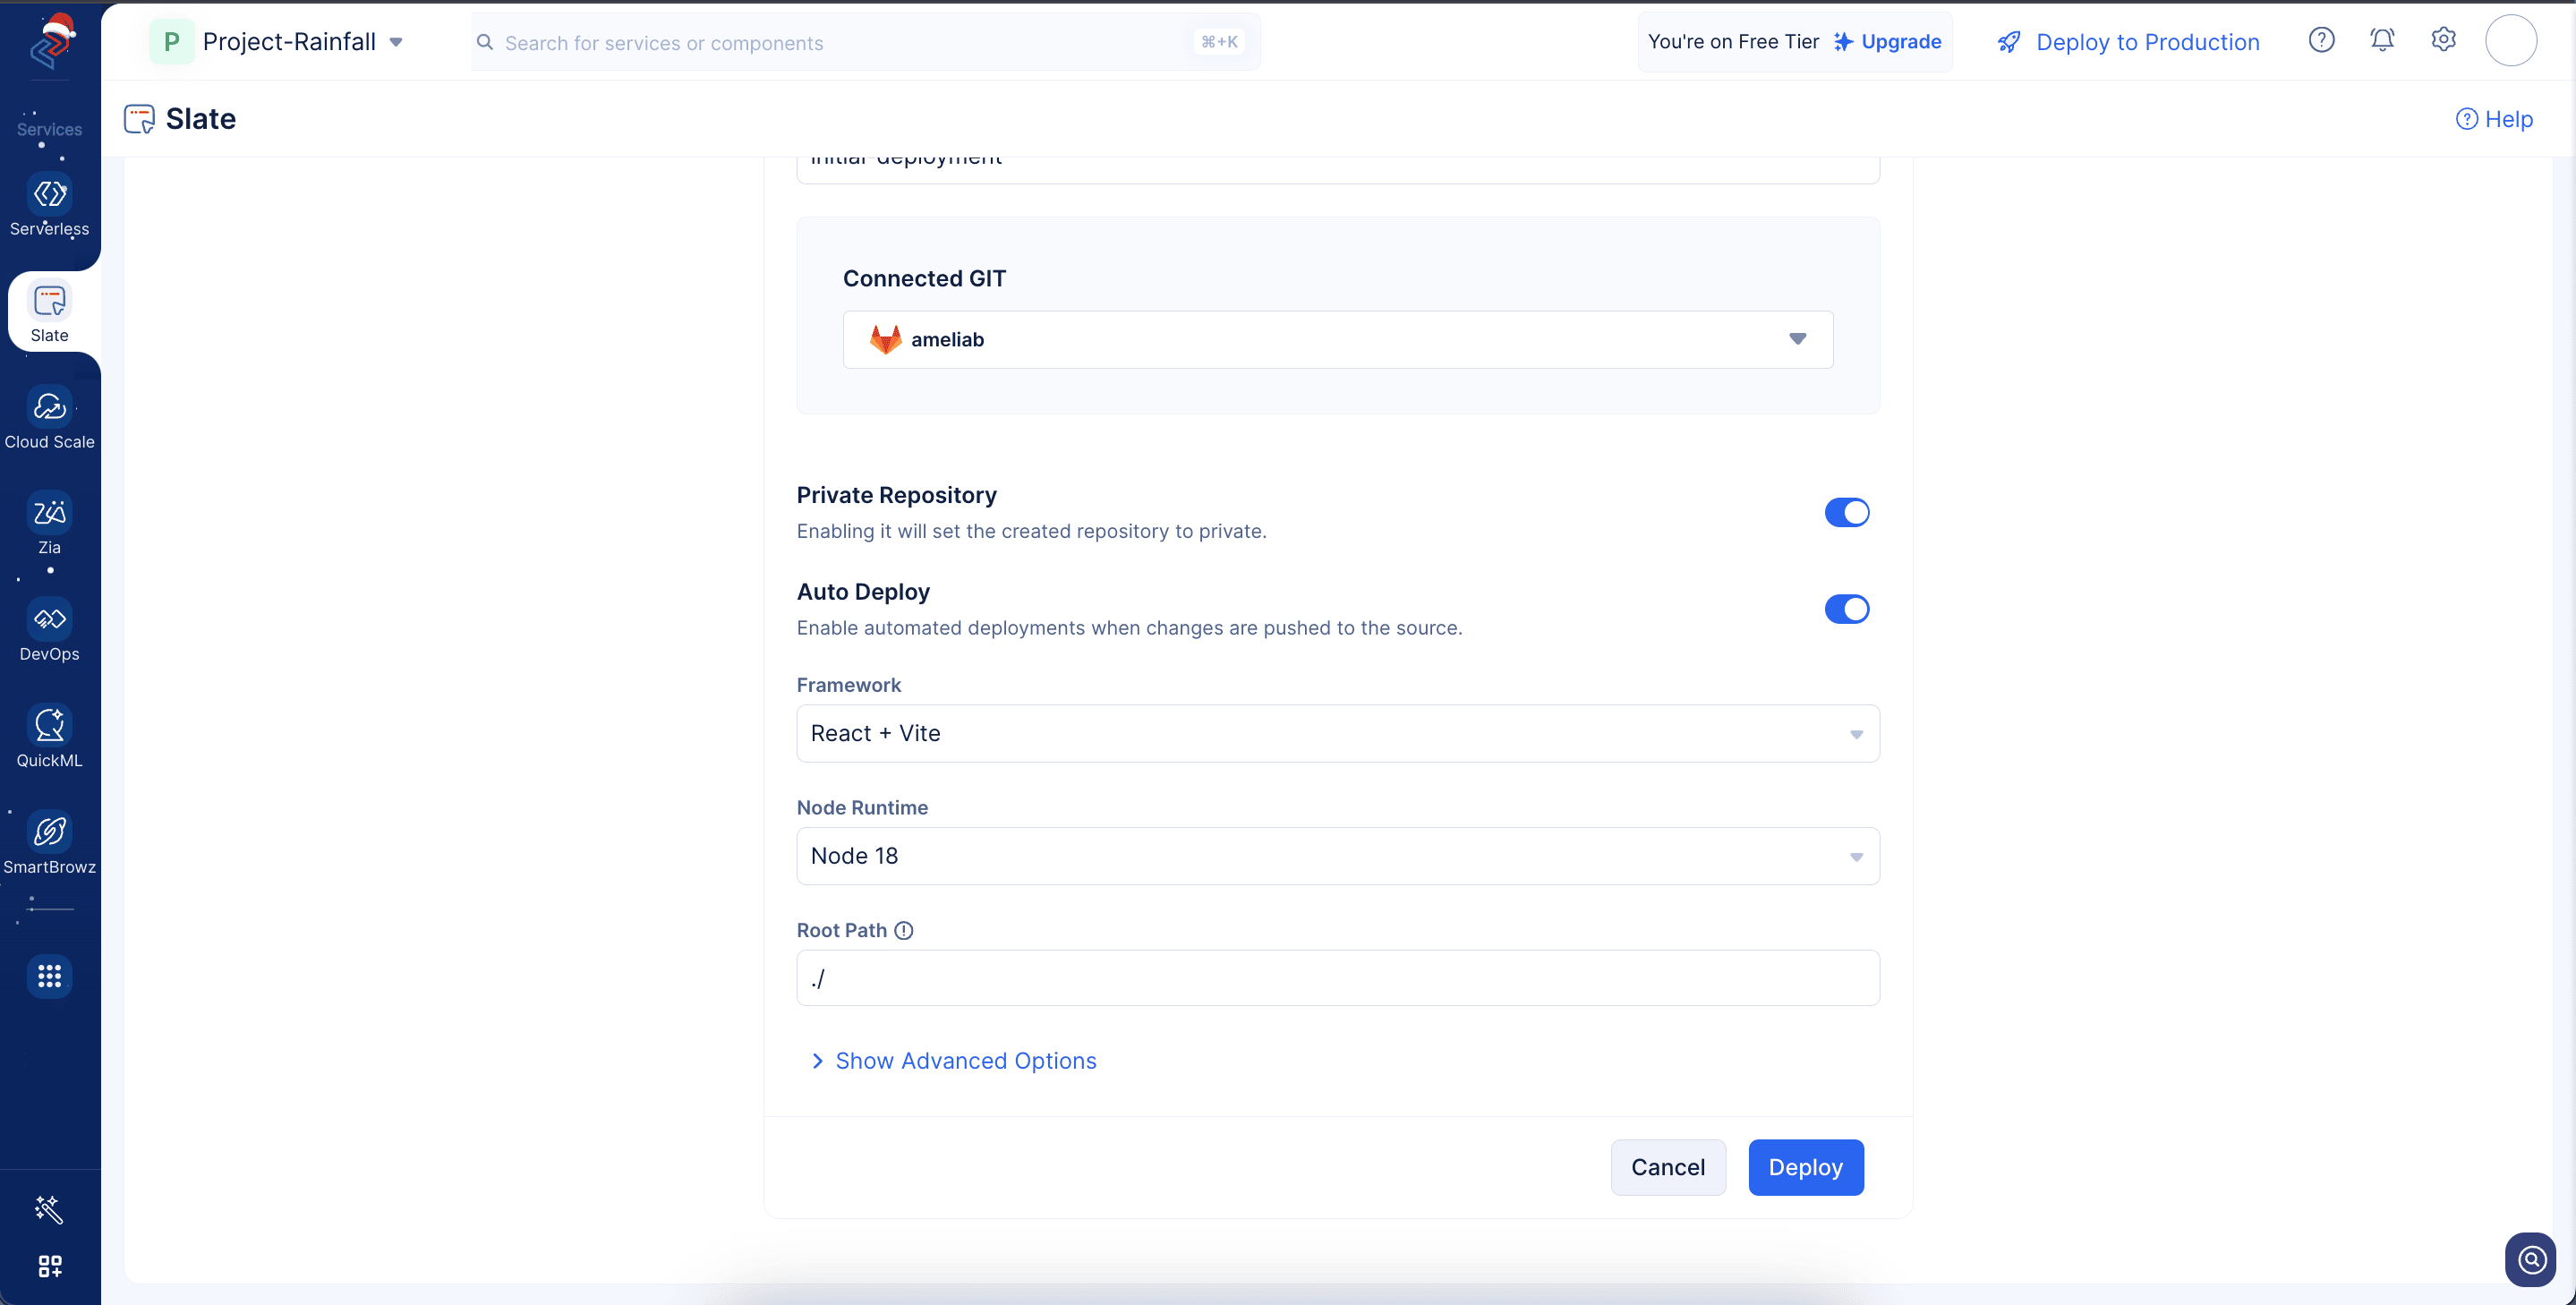
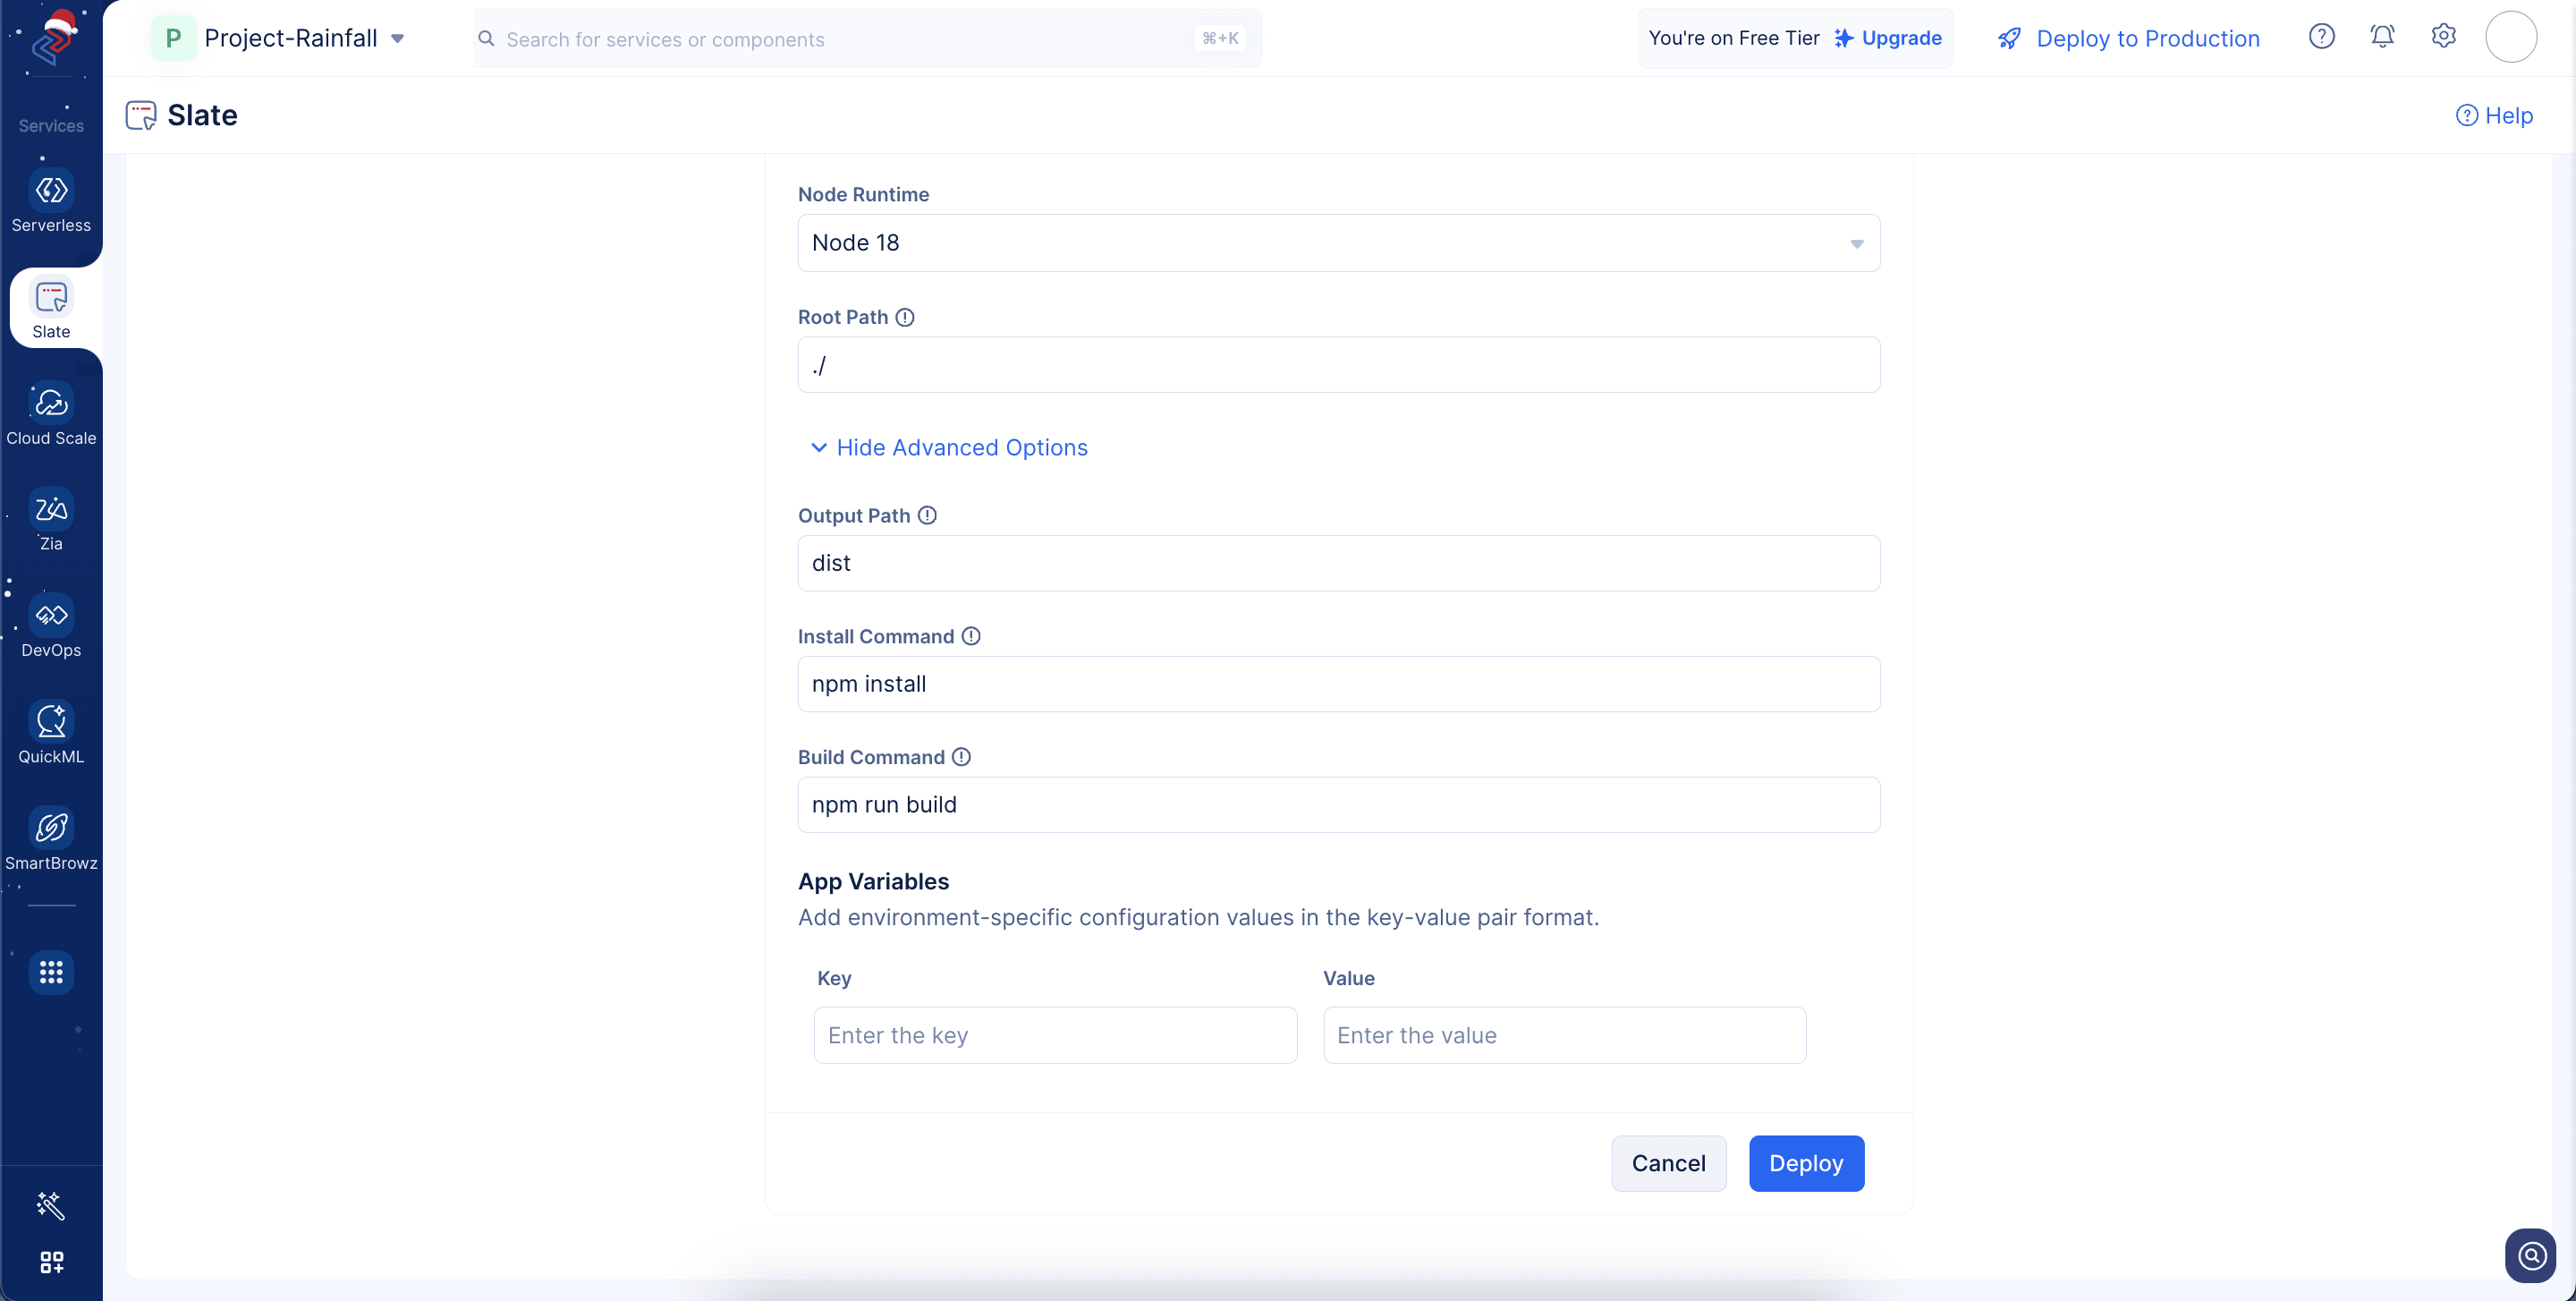
- The framework, node runtime, and the root path of the application will be automatically detected by Slate. You can also edit them, if required.
-
The Node.js runtime lets you run JavaScript code outside a web browser, like on a server or your computer. It helps you build websites and apps by giving JavaScript access to files, networks, and other system tools.
-
You should choose a runtime that matches the Node.js version your application is built with, as specified in your package.json file.
-
The root path (often written as “/”) refers to the base directory where your client application’s main files, including the source code, configuration files, and dependencies, are located.
- Click on Show Advanced Options. The output path, build command, and install command required for your application deployment will be auto-populated by Slate.
-
The output path is the directory where your application gets compiled or built for production.
-
The build command is the script that transforms your development code into production code.
-
The install command fetches and installs all dependencies required for your project. For example, the install commands for various client-side frameworks are:
- React, Next.js, Vue, Angular, Svelte → npm install or yarn install
- Astro → npm install or pnpm install
- Vite → npm install or yarn install
- SolidJS → npm install or pnpm install
You can also add the required app variables required for the deployment as key-value pairs and click Deploy.
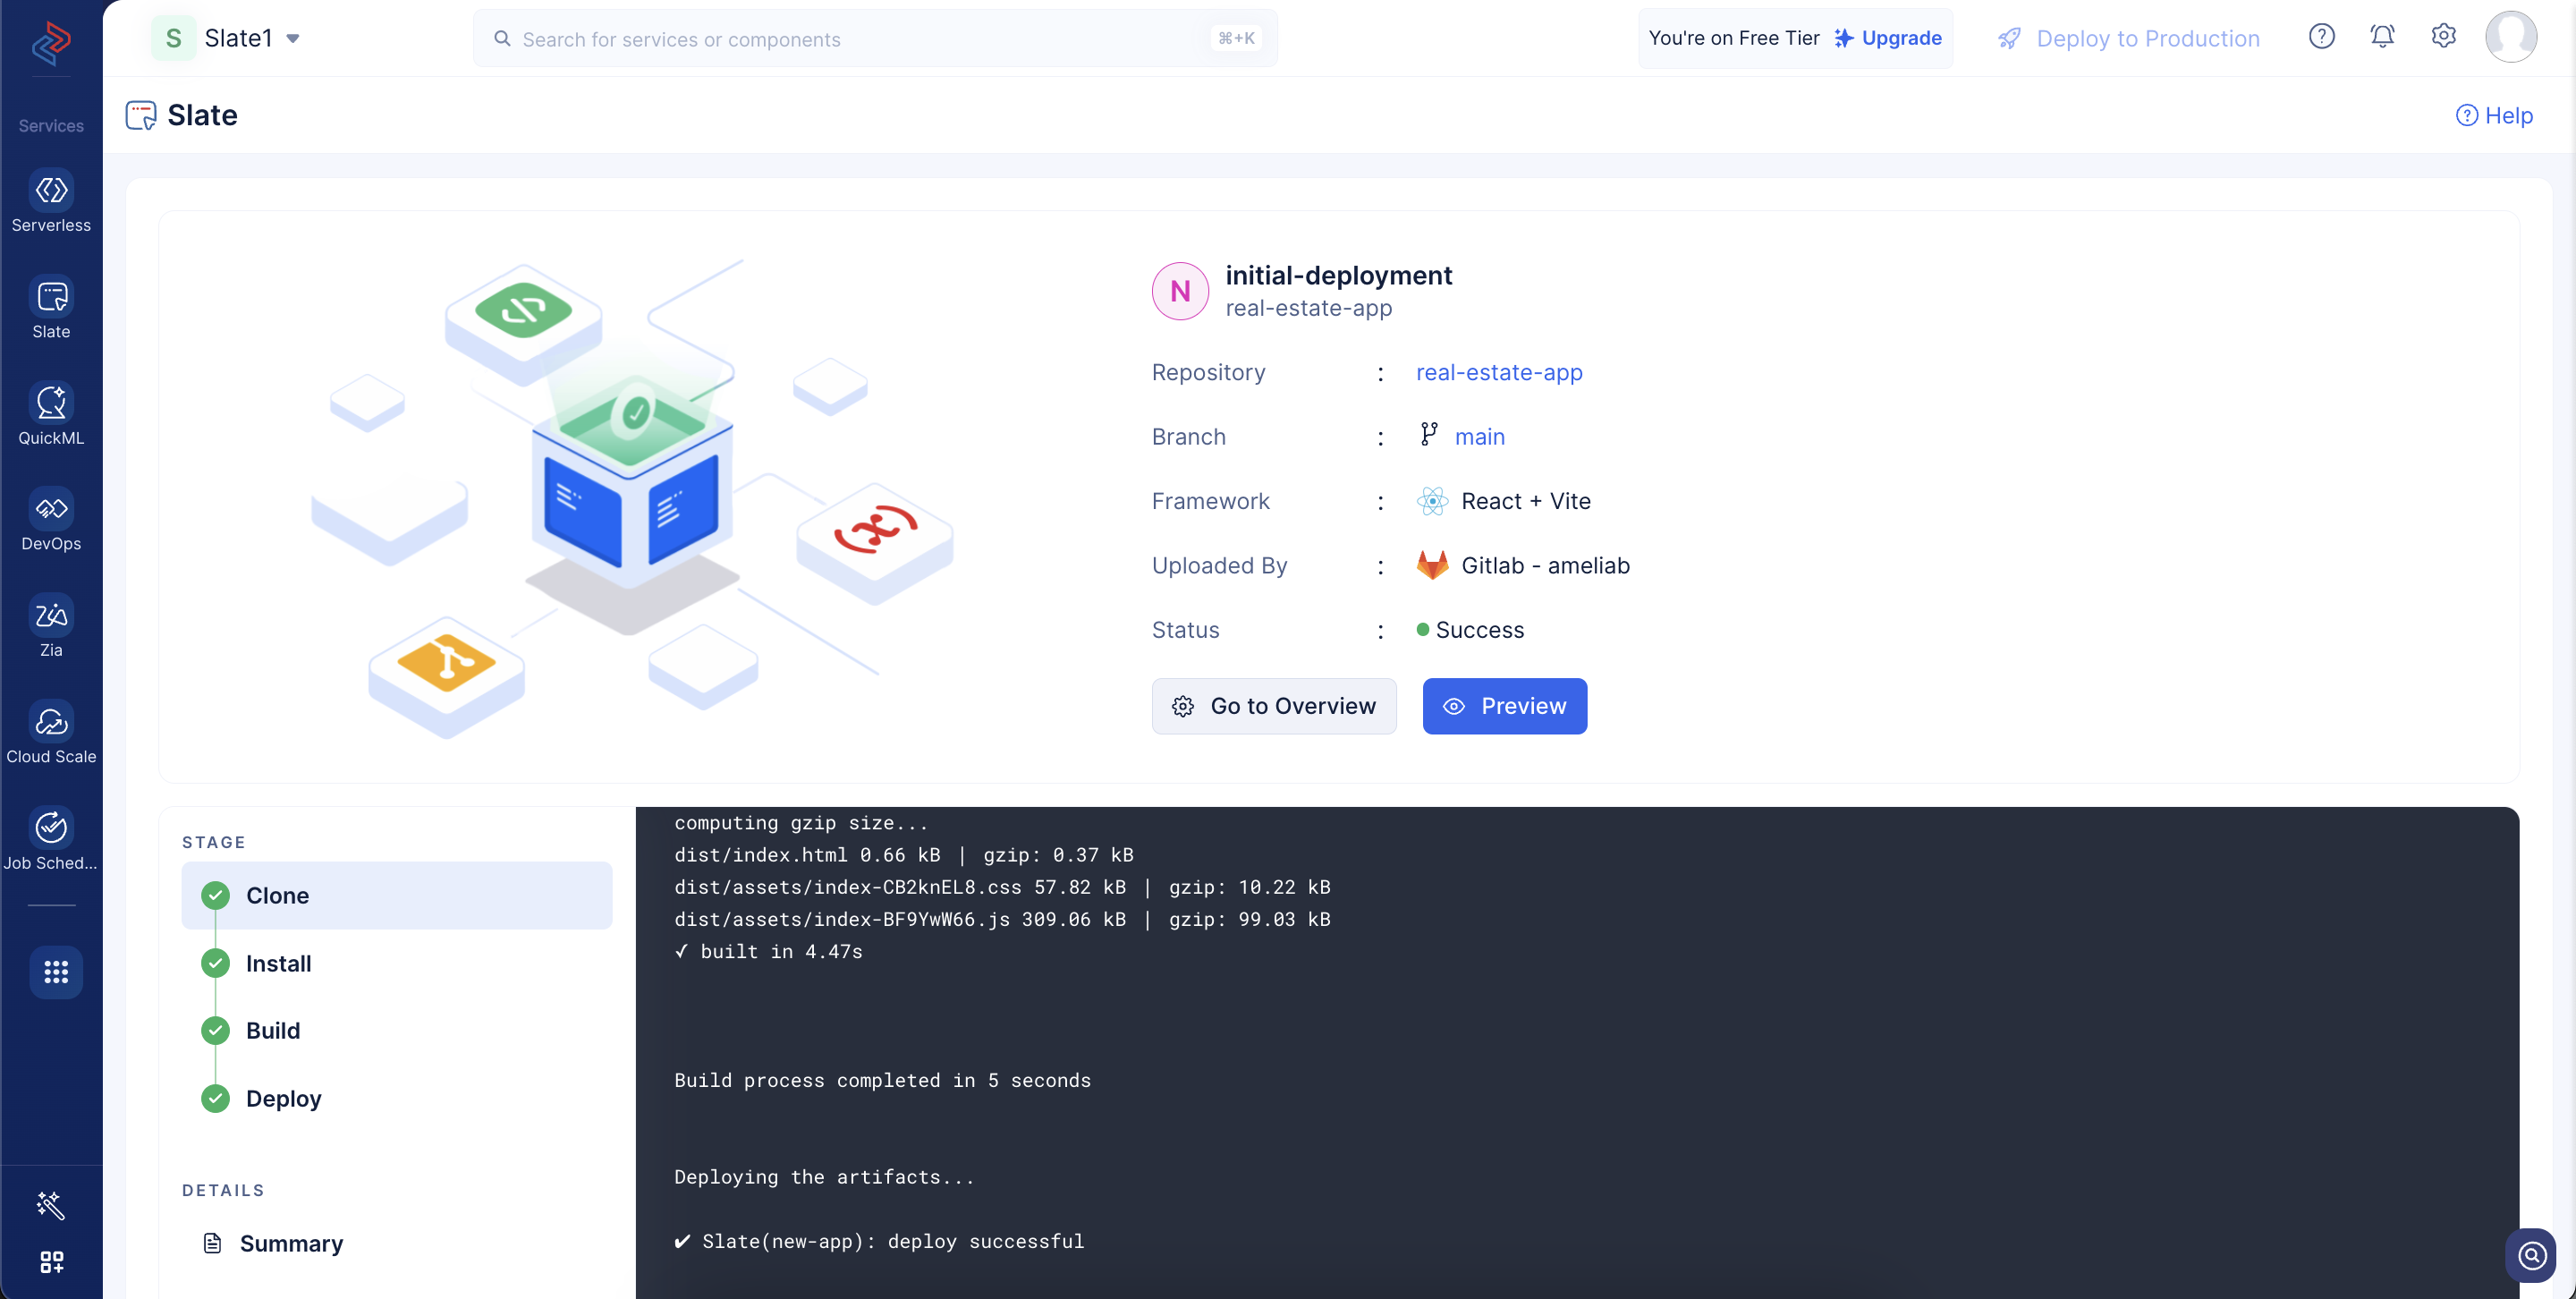
- The deployment is now completed successfully. You will be able to view the live logs of the deployment as shown in the screenshot below.
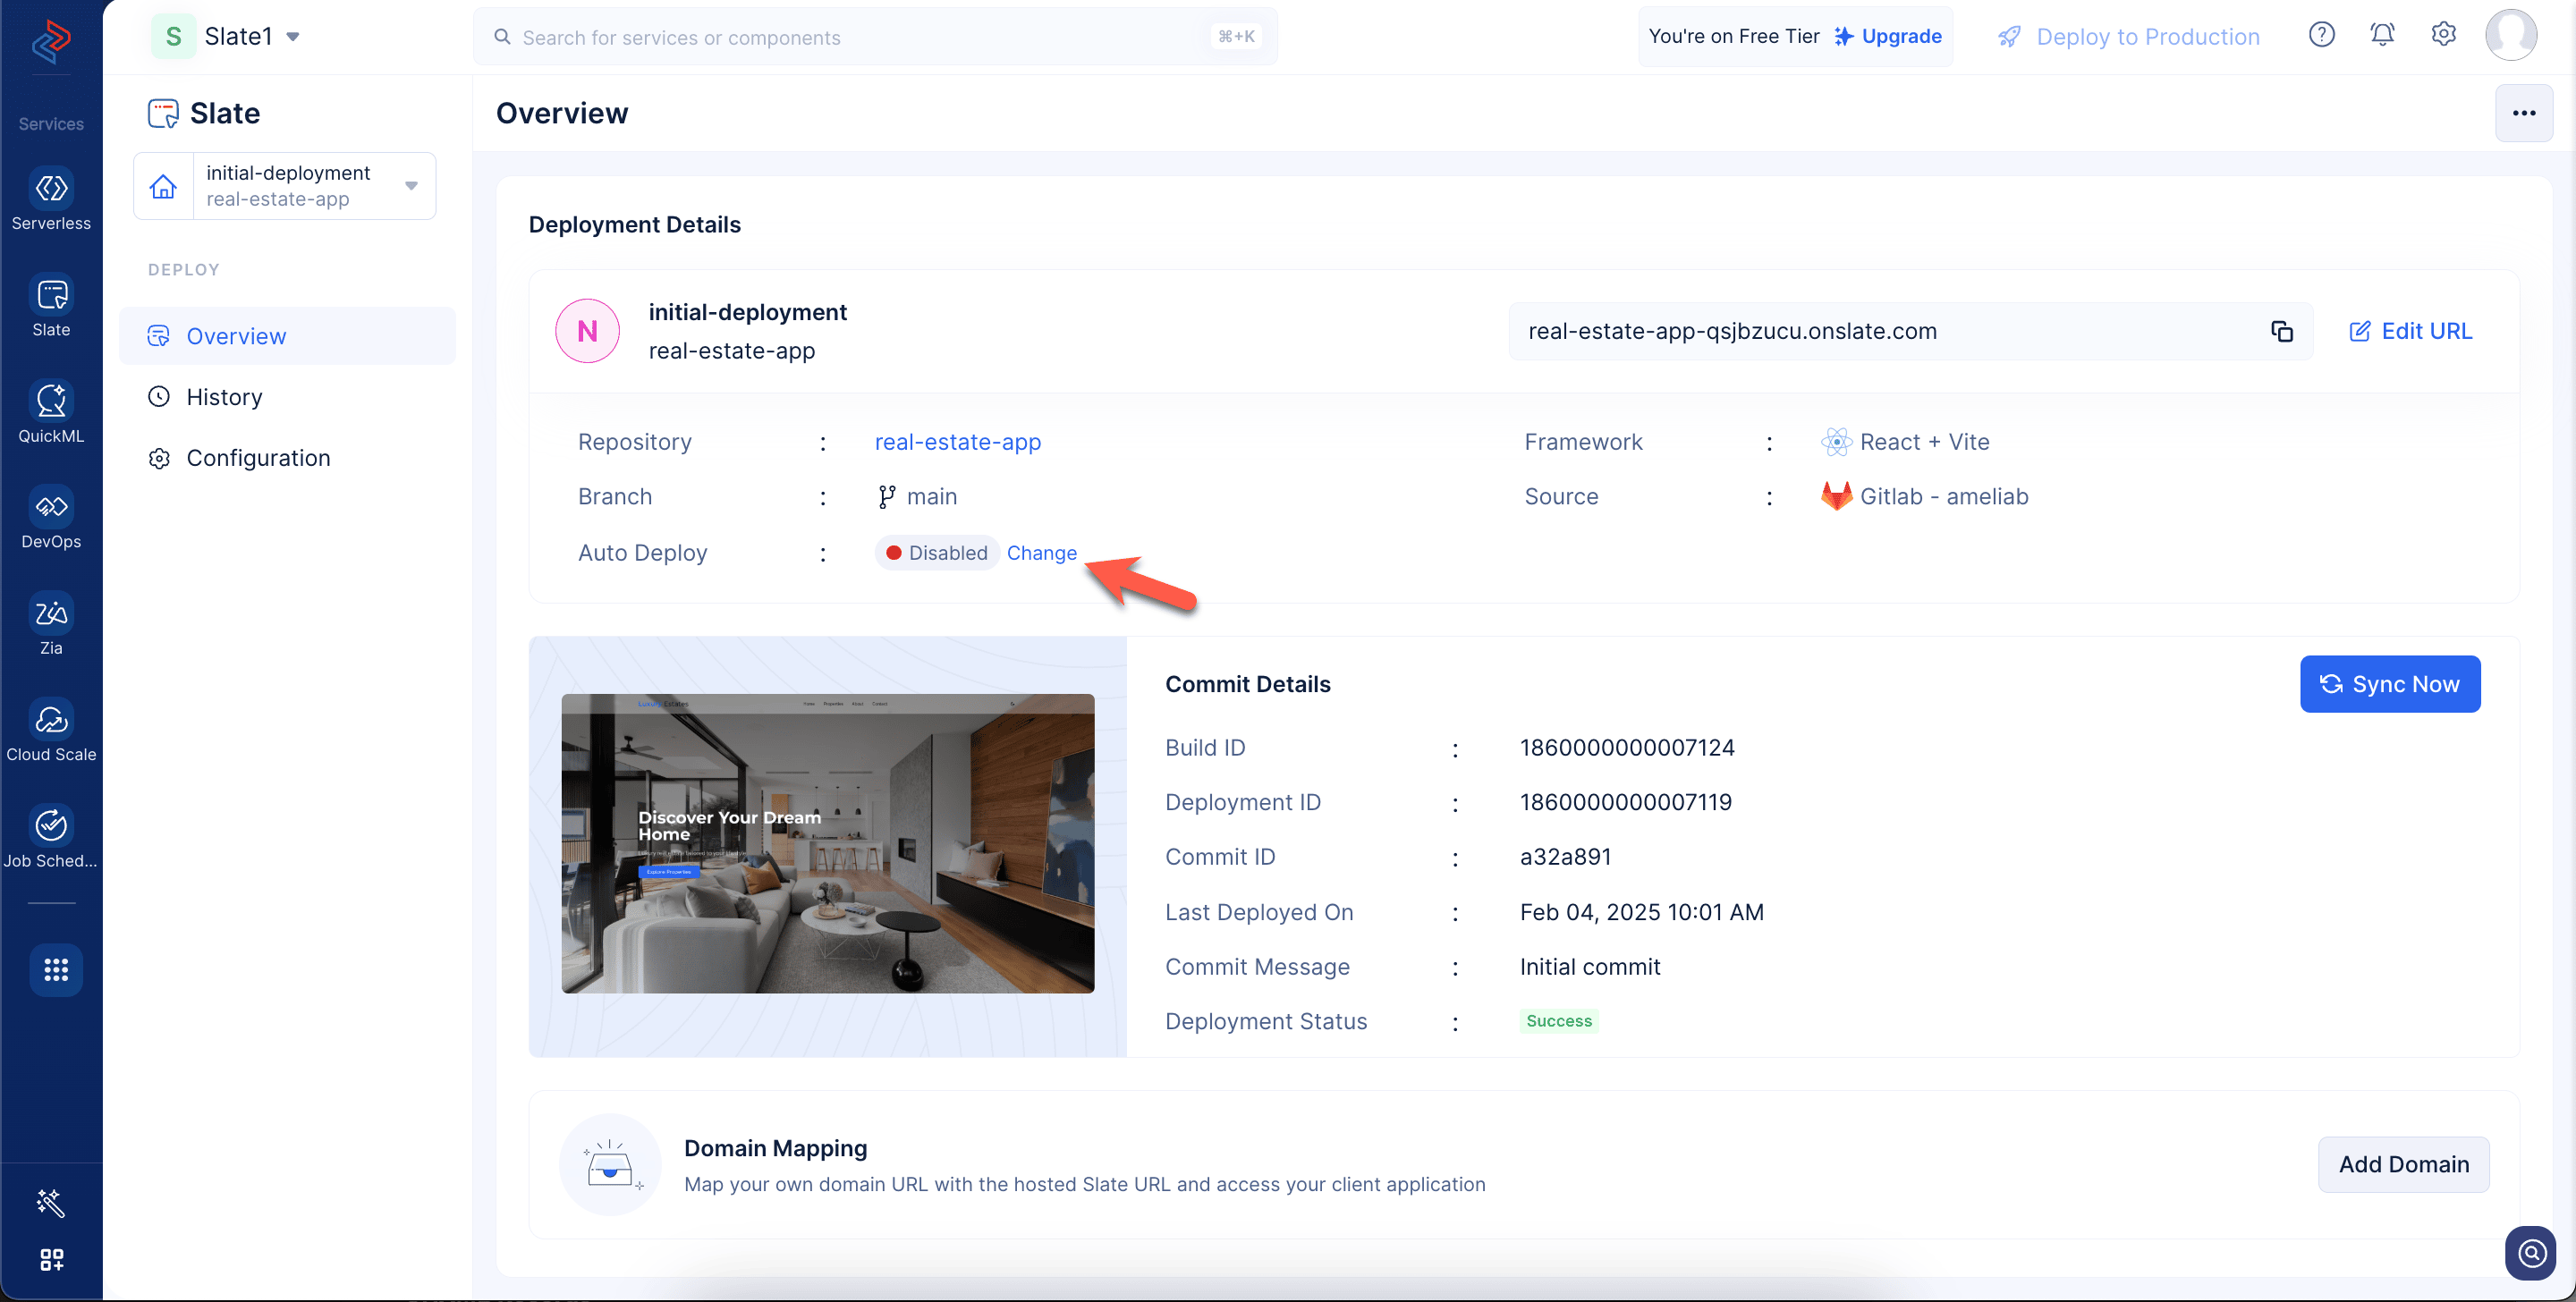
You can fetch the generated access URL of your application as shown in the screenshot below. You can edit subdomain part of the URL by clicking Edit URL.

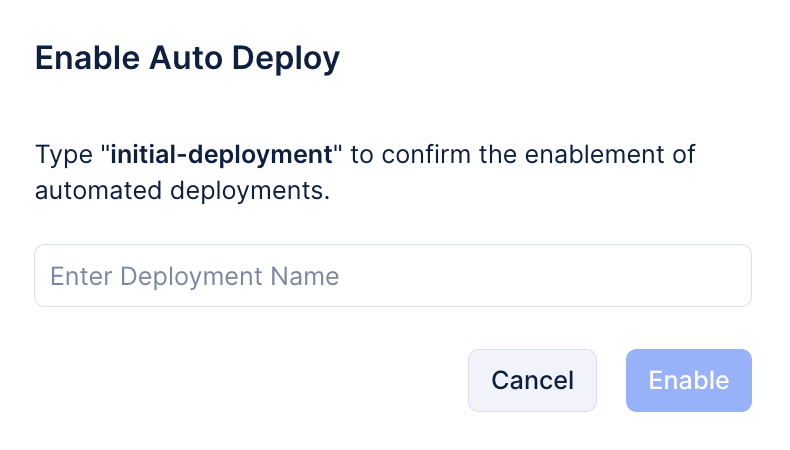
You can enable Auto-Deploy for this deployment by clicking Change.
Enter the deployment name and click Enable.
You can sync the latest commit with the current deployment by clicking the Sync Now button.
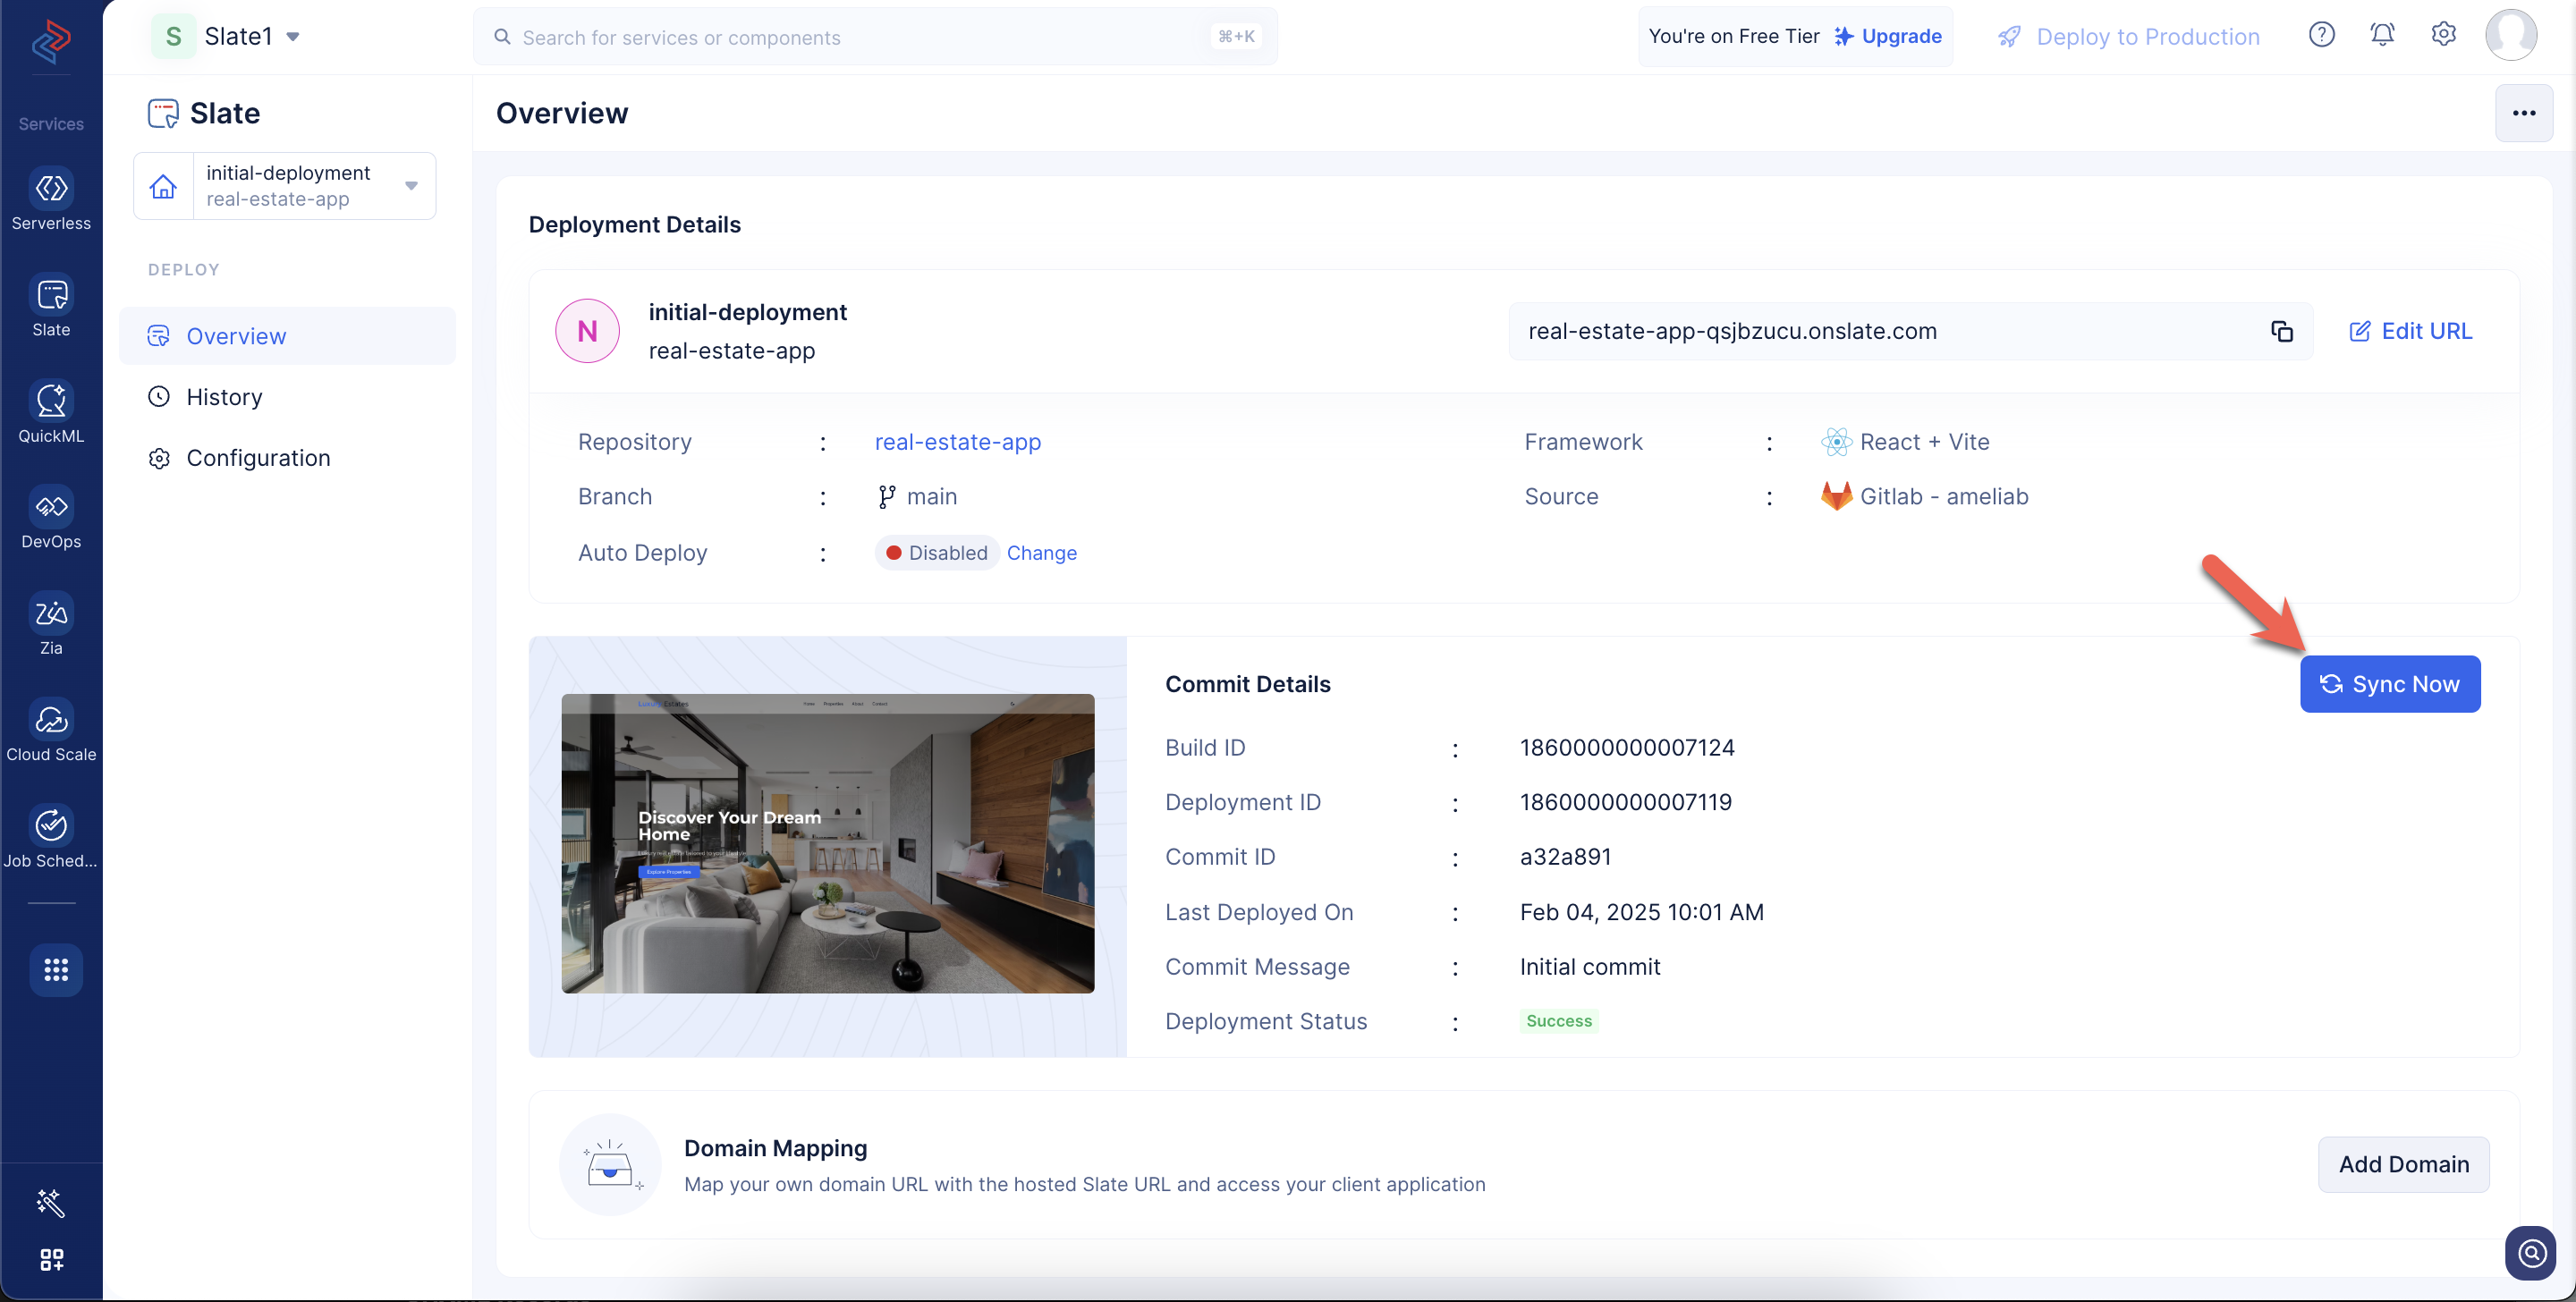
You can also map the generated Slate URL with your custom domain if required.
You can view the list of deployments made to your application by switching to the History tab in the left pane. Refer to this help section to learn more about it. You can enable cache for your deployment by navigating to the Configuration tab in the left pane. You also have the option to configure environment variables required for your deployment, if required.
Last Updated 2025-07-18 12:42:05 +0530 IST
Yes
No
Send your feedback to us