Create an Action
In this section, we will discuss the steps to create an action, configure the sample sentences and params for your ConvoKraft bot.
After you create a bot, you can add one or more actions to it. To add a new action in your ConvoKraft bot, follow the steps given below :
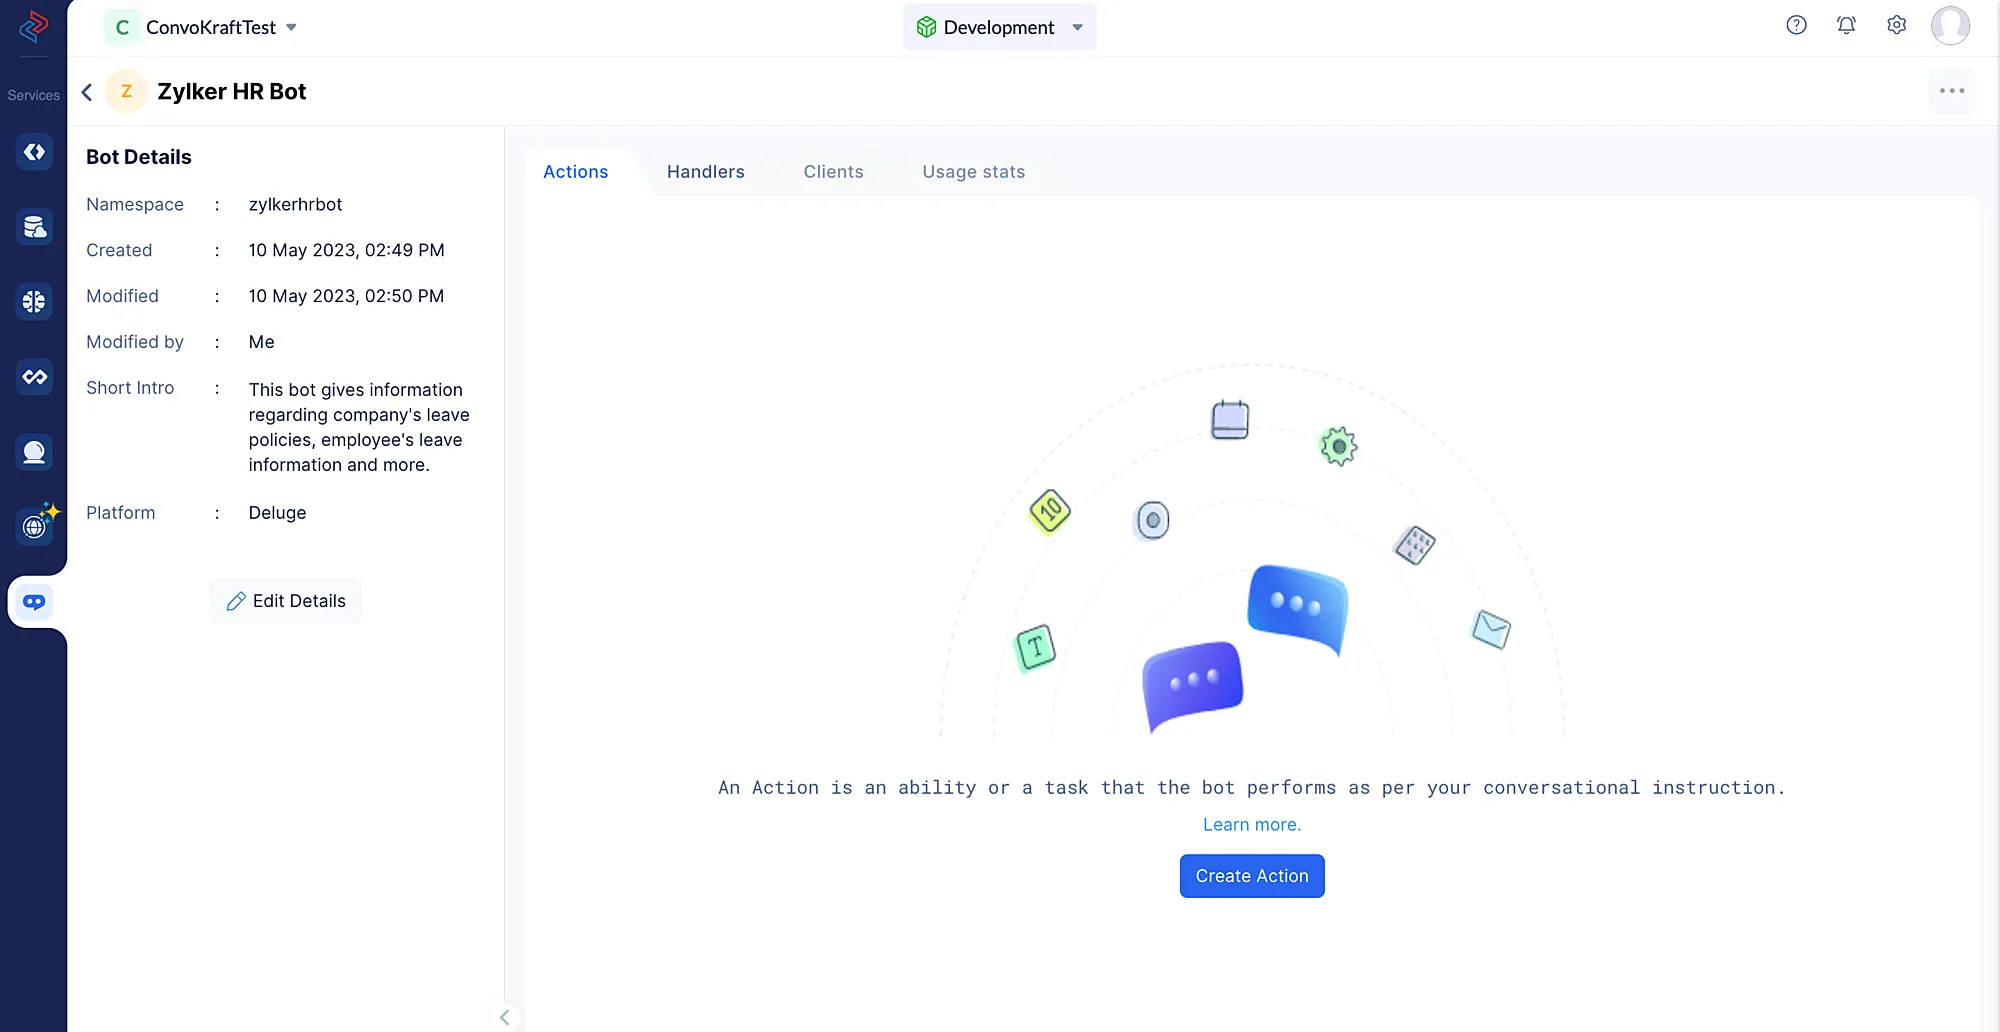
- After you create a new ConvoKraft bot or click on an existing bot, the bot’s details page will be displayed as shown in the screenshot below. Click Create Action.
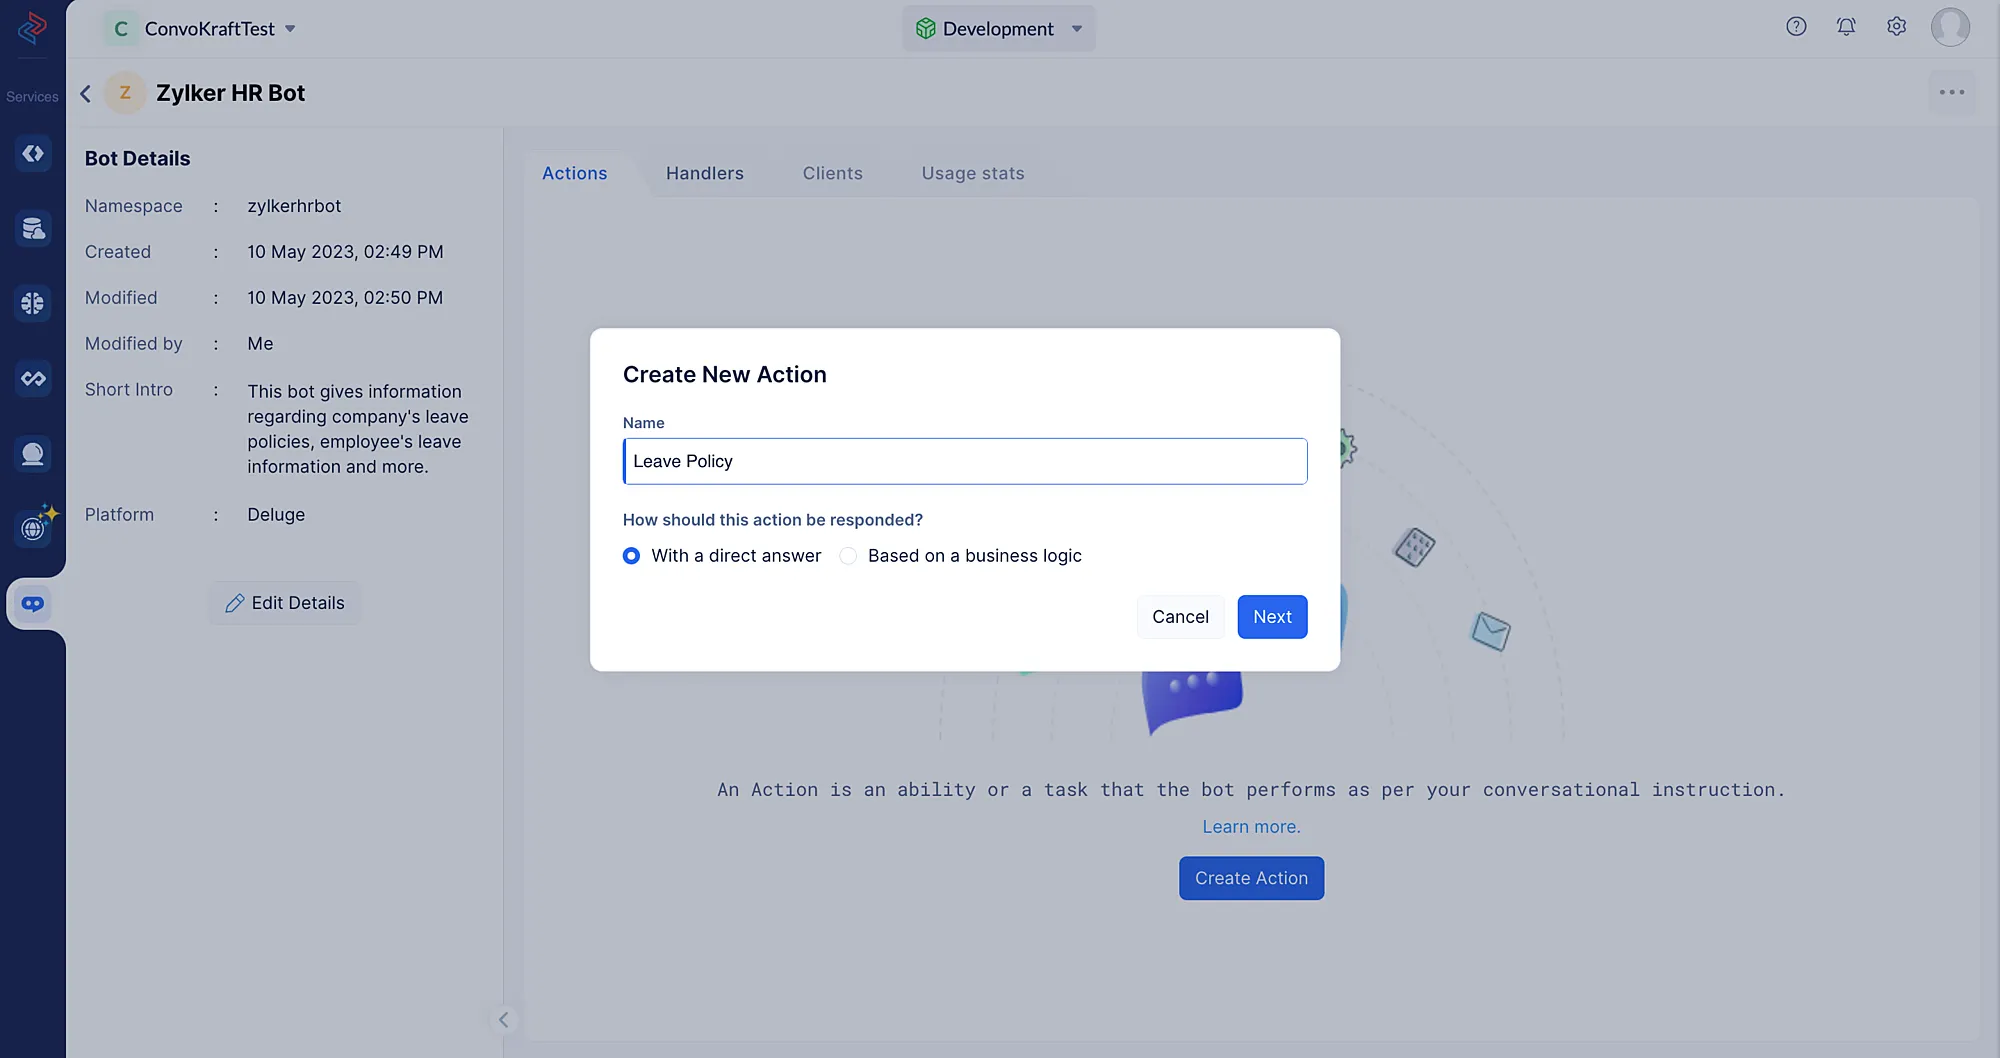
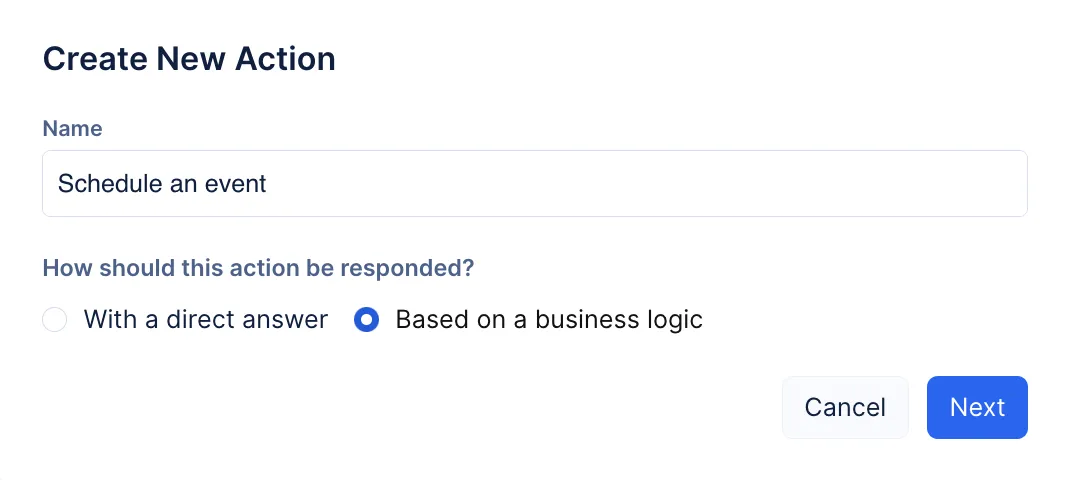
- Provide a meaningful name for the action in the pop-up that appears. You can choose to configure the response of the action with a direct answer or based on business logic. Make a selection and click Next.
Respond with a direct answer
If you choose to configure the response of the action with a direct answer, follow the steps given below:
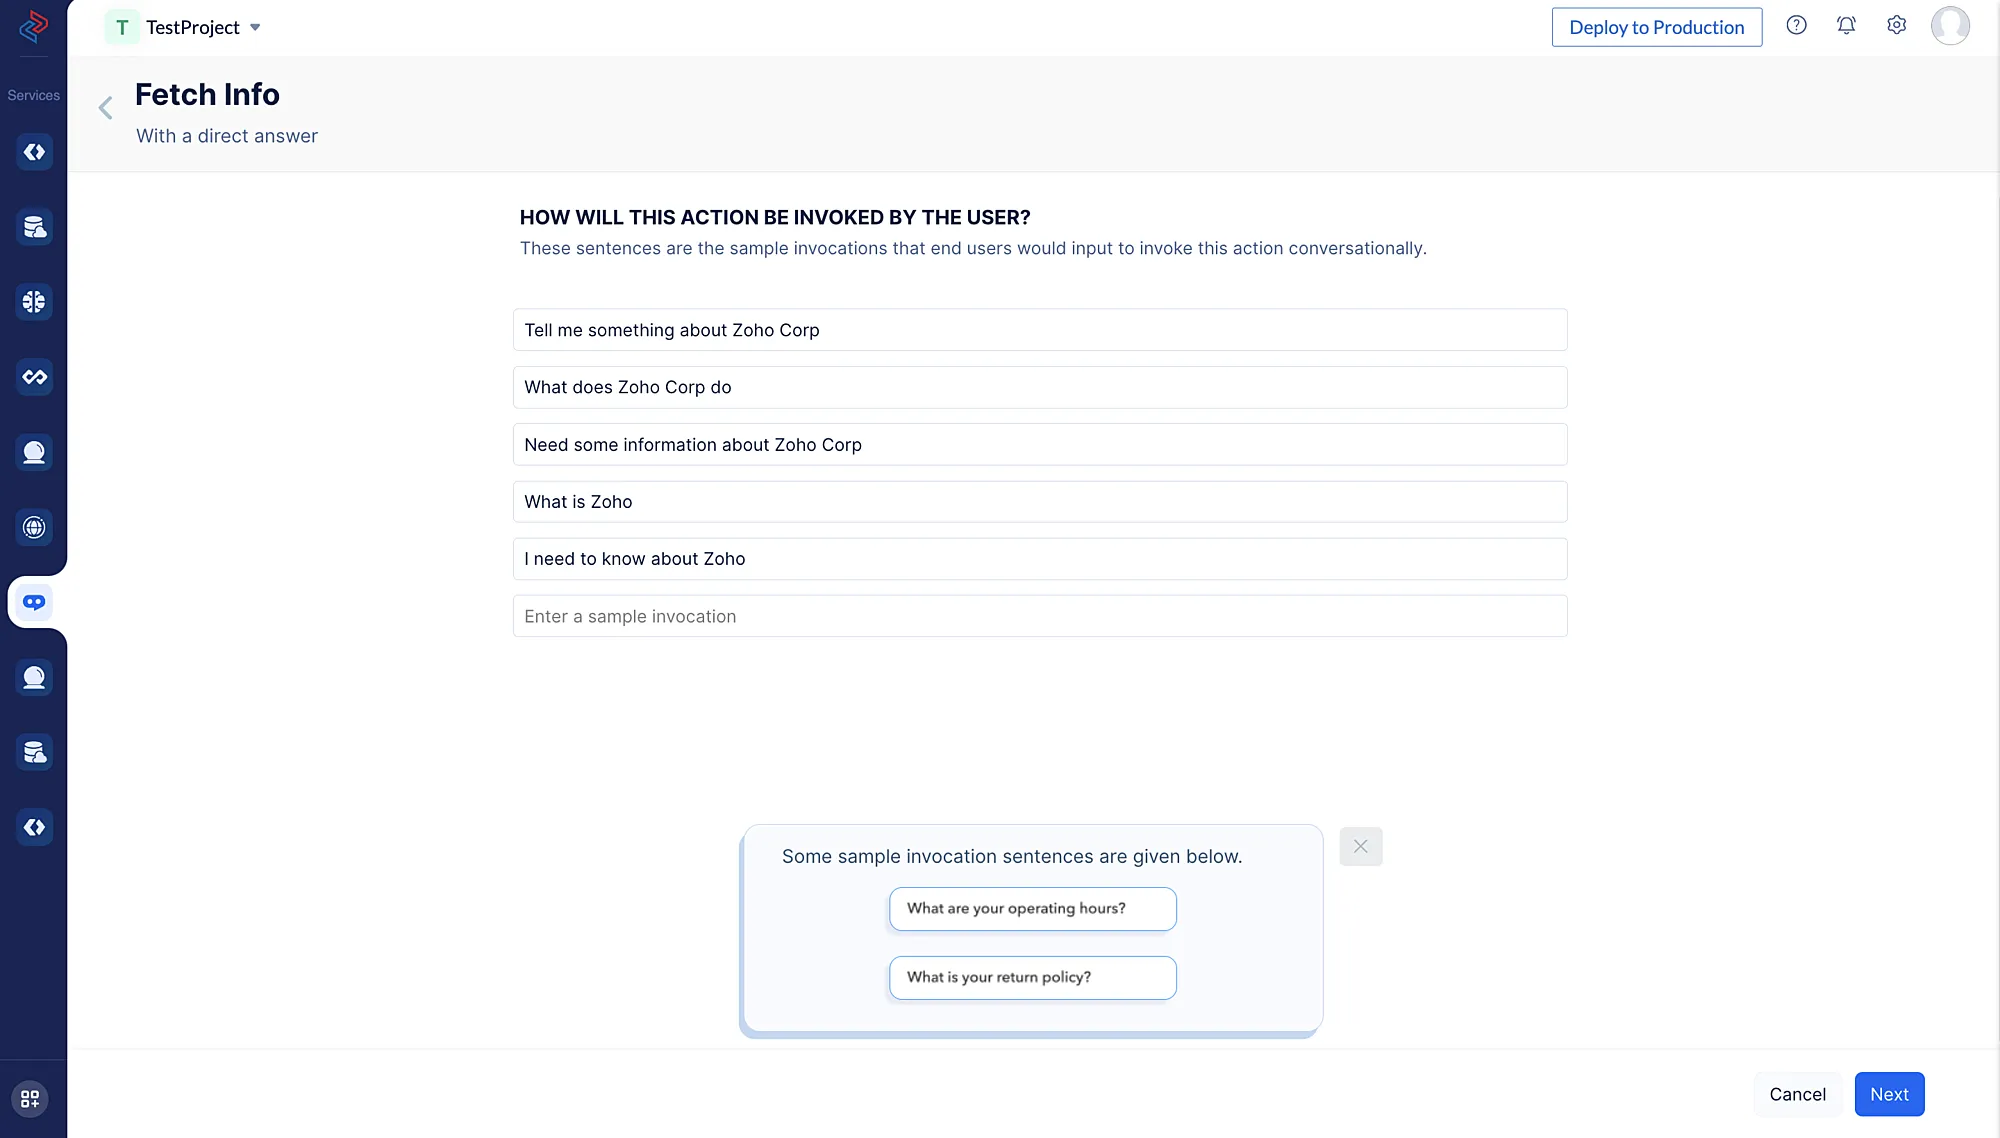
- Enter the appropriate sample sentences on how this question can be asked, that is the different possible variations of the question that the user is likely to use while conversing with the ConvoKraft bot. You can learn more about sample sentences from this page. Click Next.
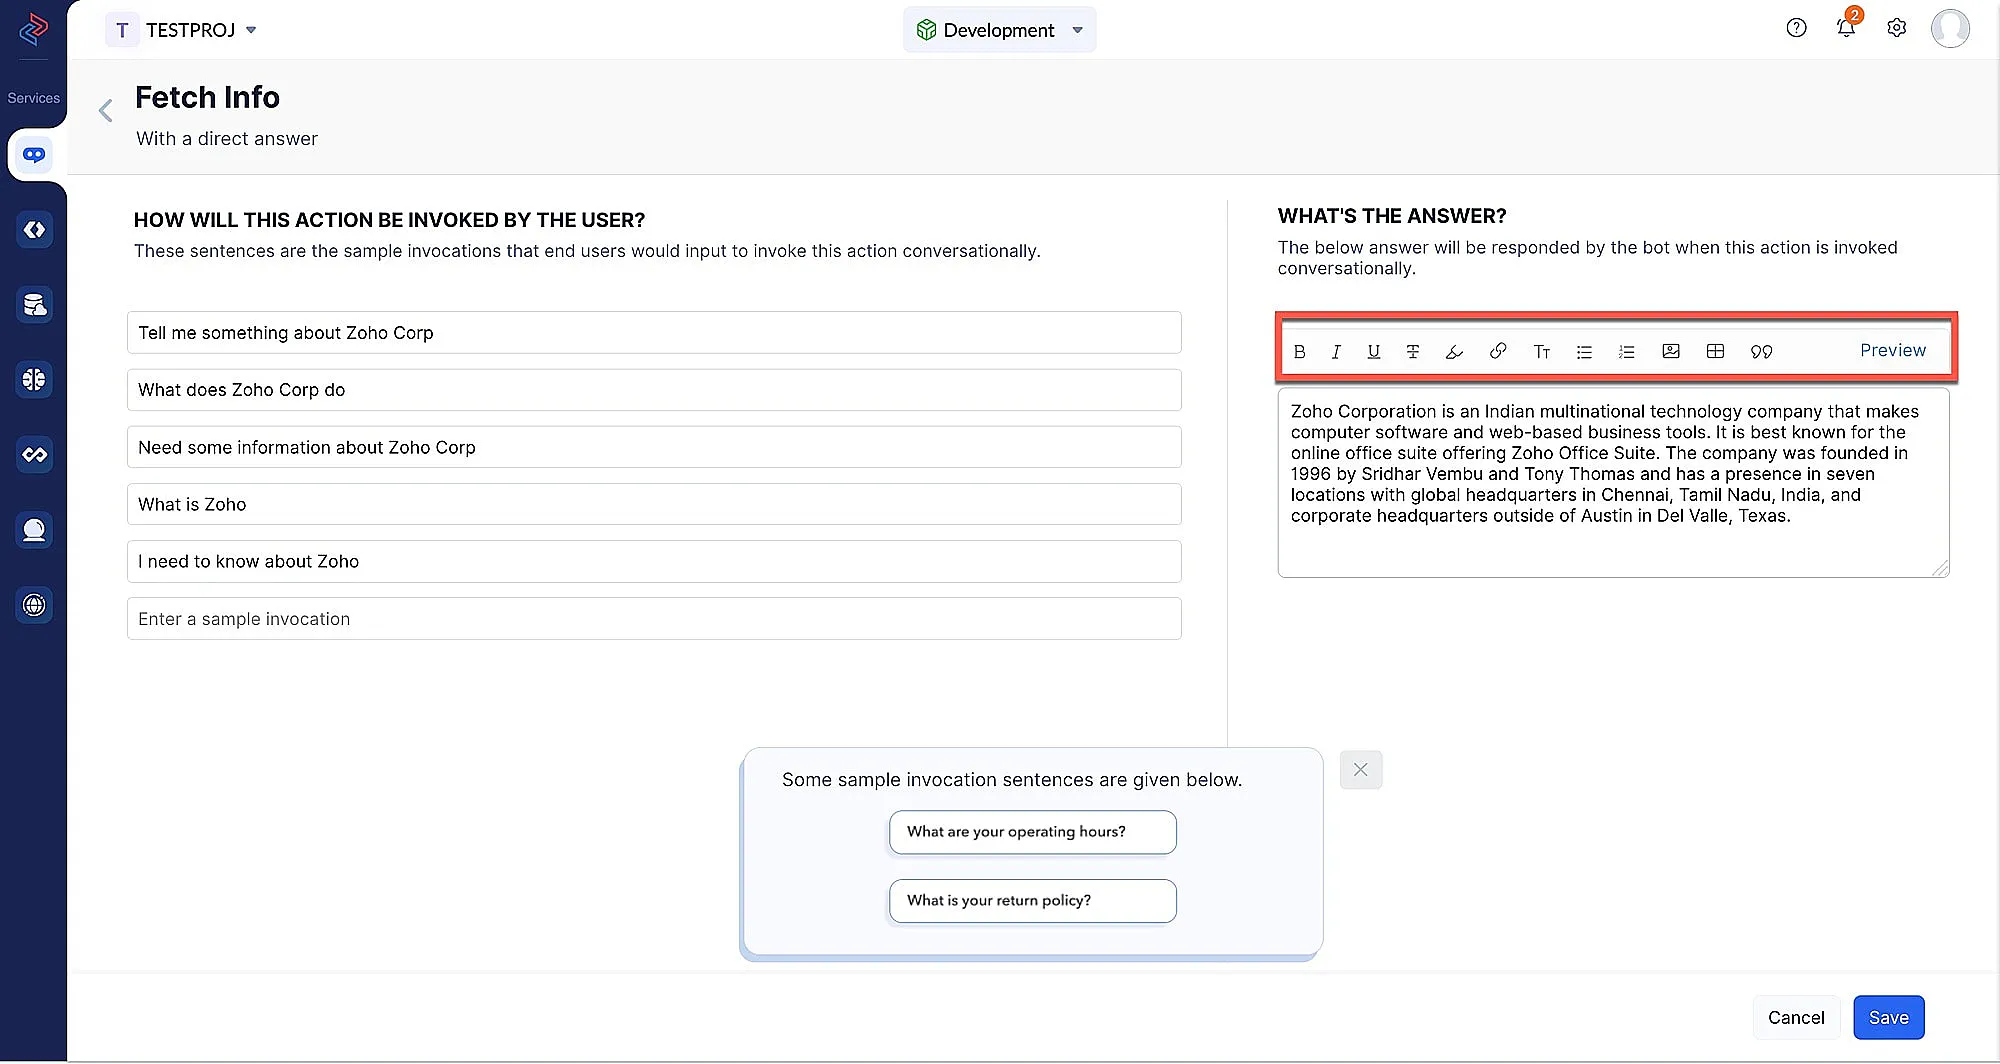
- Under What’s the answer section, enter the content that should be replied as an answer to the question. You can select a specific text in the answer and apply formatting styles to it by clicking the various formatting icon available in the toolbar. Learn more about the various formatting structures in detail from this section.
- Click the Preview option in the Markdown editor toolbar to view a live preview of the content with applied formatting styles. Click Save.
Constructing answer by executing business logic
If you choose to configure the response of the action based on the execution of a business logic, either by fetching data or performing any operation, please follow the steps listed below:
-
Define the sample sentences for your action.
-
Configure the required params for your action.
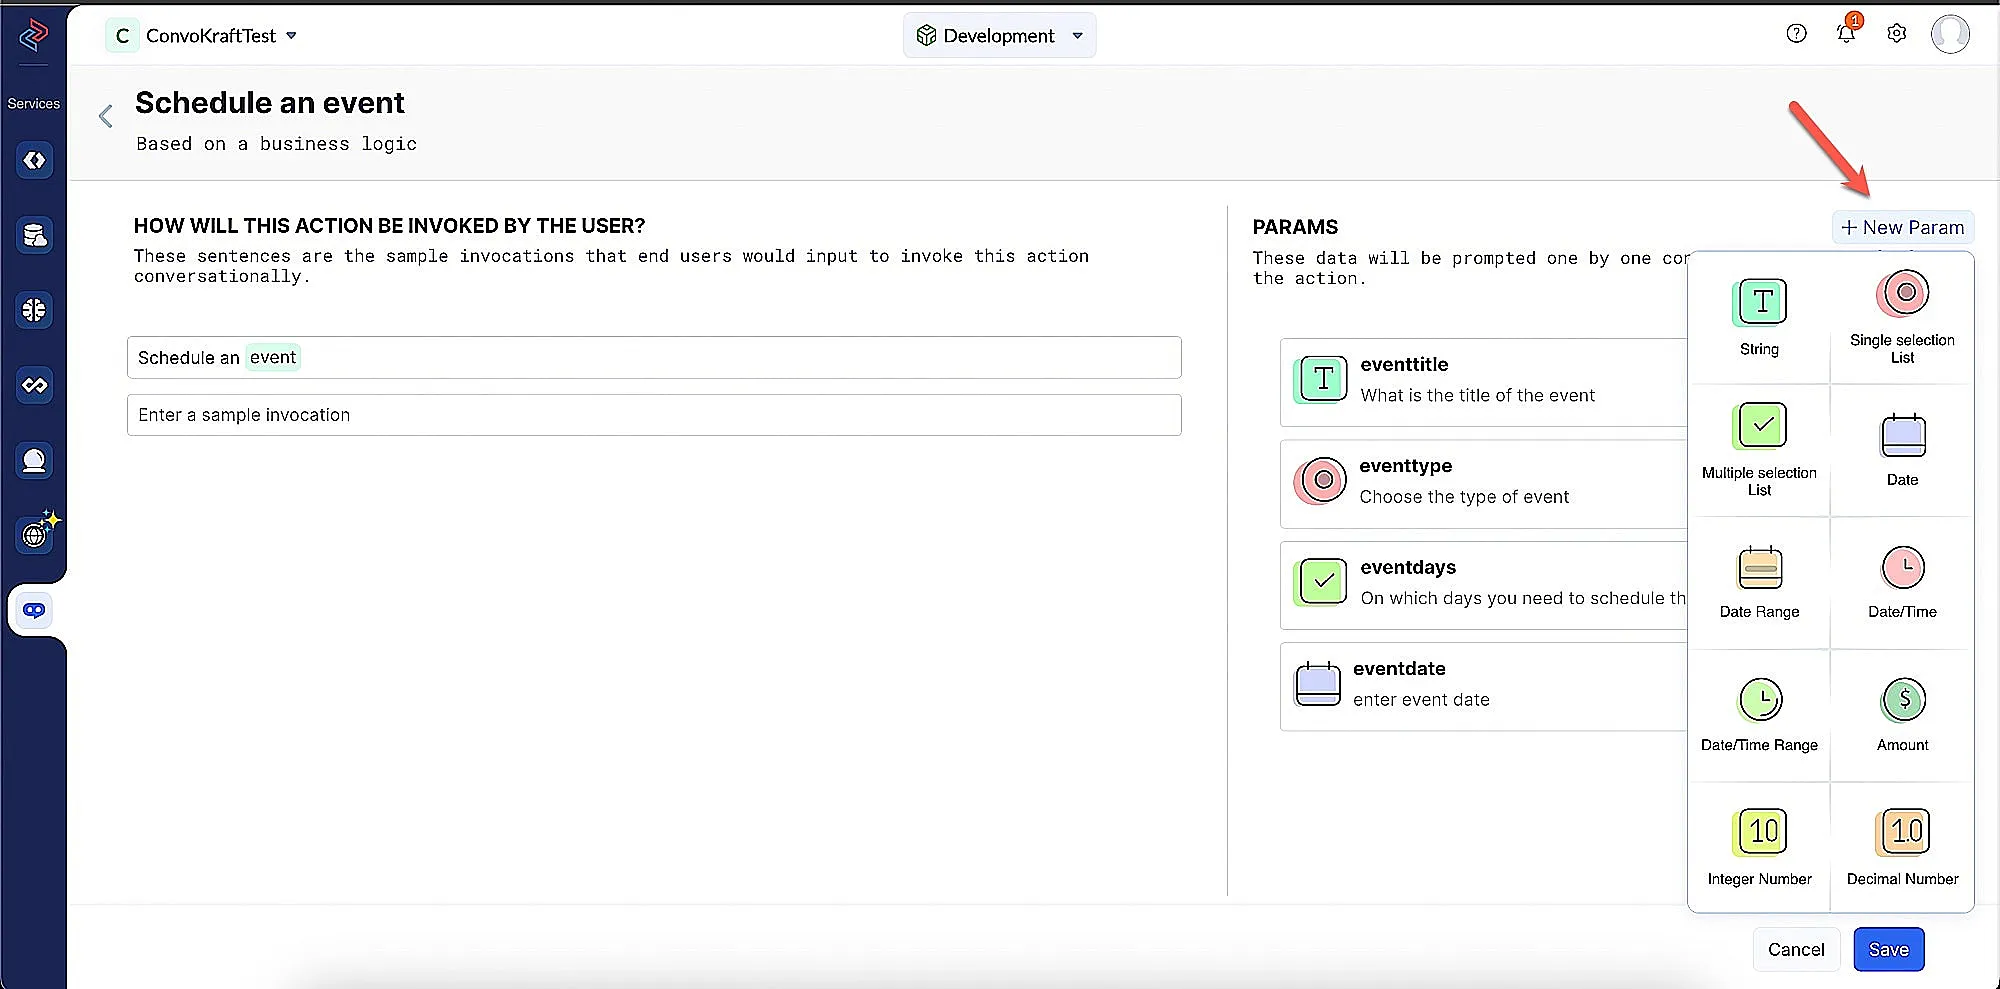
- To add a new param to an action:
Click the New Params option in the PARAMS section
- Choose the required param type from the list of data types supported by ConvoKraft and you will see a new dialog box to configure further details. Learn more about the attributes of each param type from params.
String
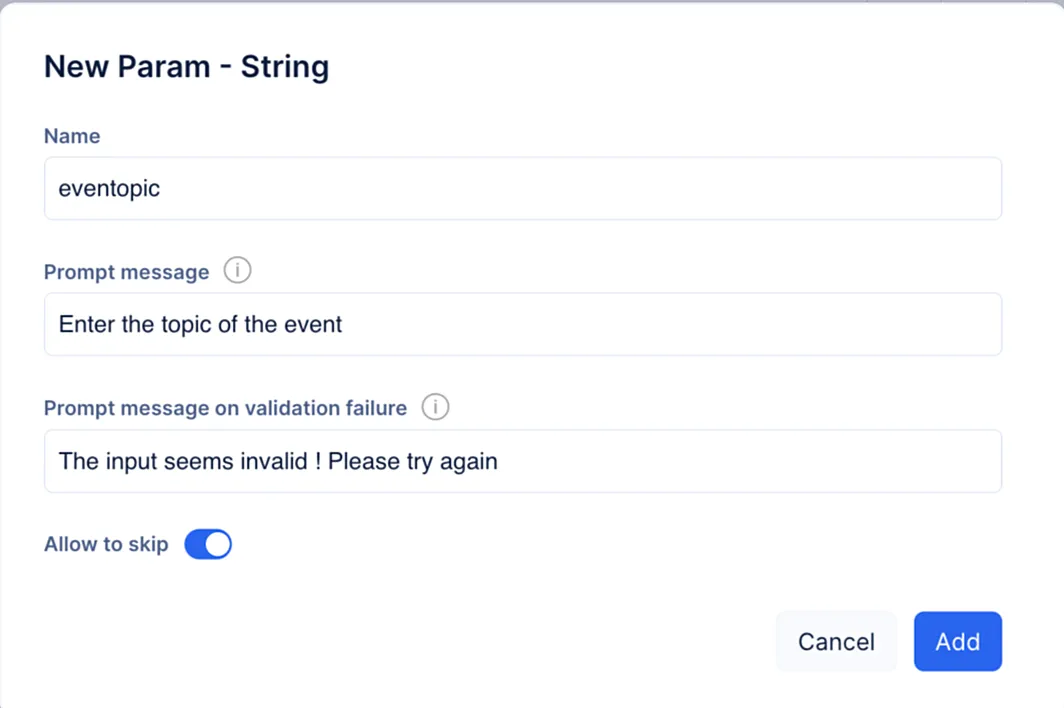
We will first create a new param of type String.
You can configure the following details for the params:
-
Enter the prompt message for user input and a failure message to display in case of invalid inputs.
-
Enable Allow to skip, if required.
Single/Multi selection list
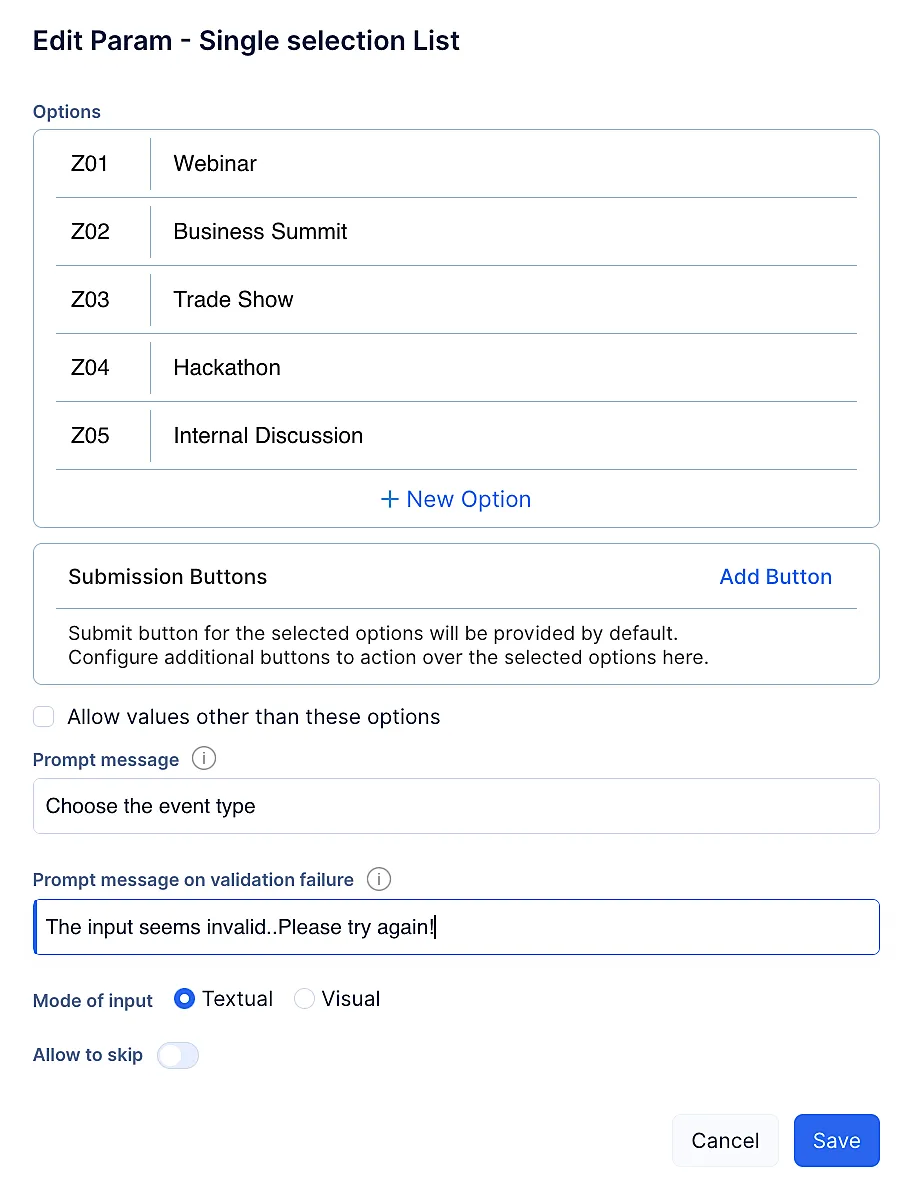
Next, we will create another param of type Single selection list :
- When you configure a single selection list/multi-selection list param, you can add the applicable options by clicking the New Option button as shown in the image below. To learn more about this param type, please refer to this page.
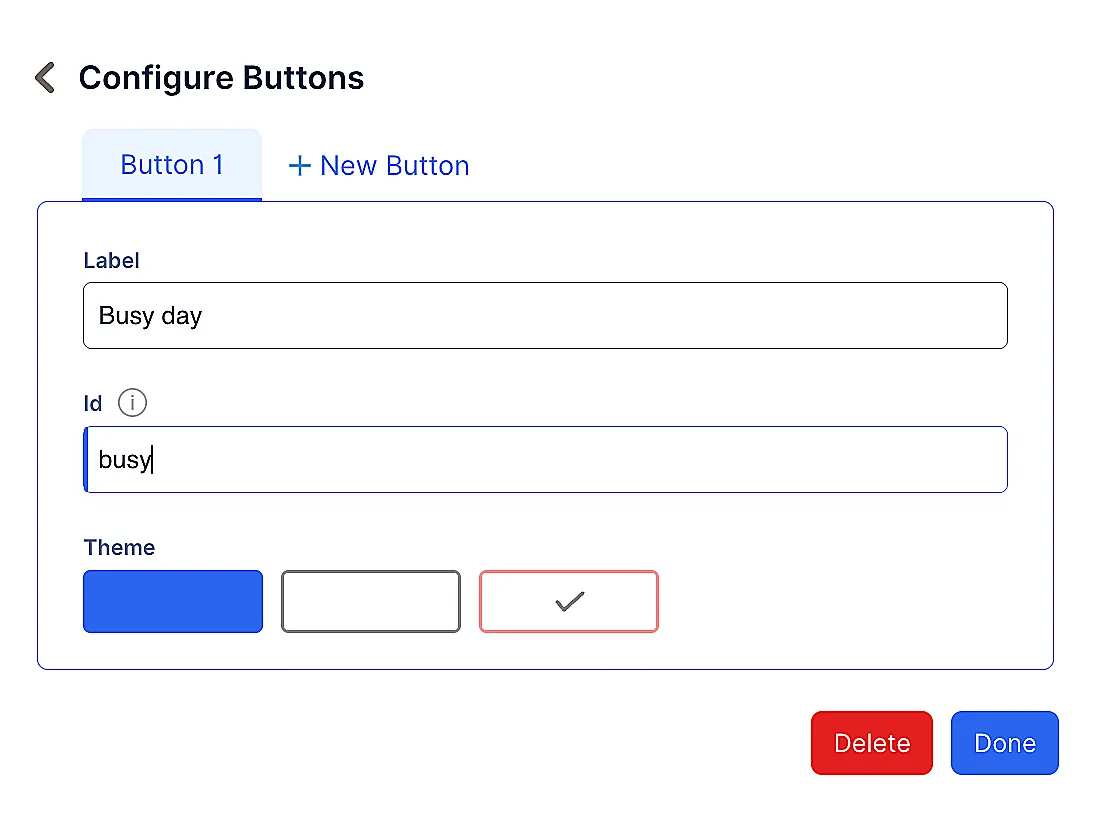
- You can also optionally configure custom button to perform further operations with the selected options by clicking the Add Button option beside the Submission Buttons label. The Configure Buttons screen will appear. Enter the values for required fields of each button. To learn more about these fields, please refer to this page.
To add another button, click New Button and once the required buttons are successfully added, click DONE.
- Choose the Mode of input as either Textual or Visual, based on your requirement.
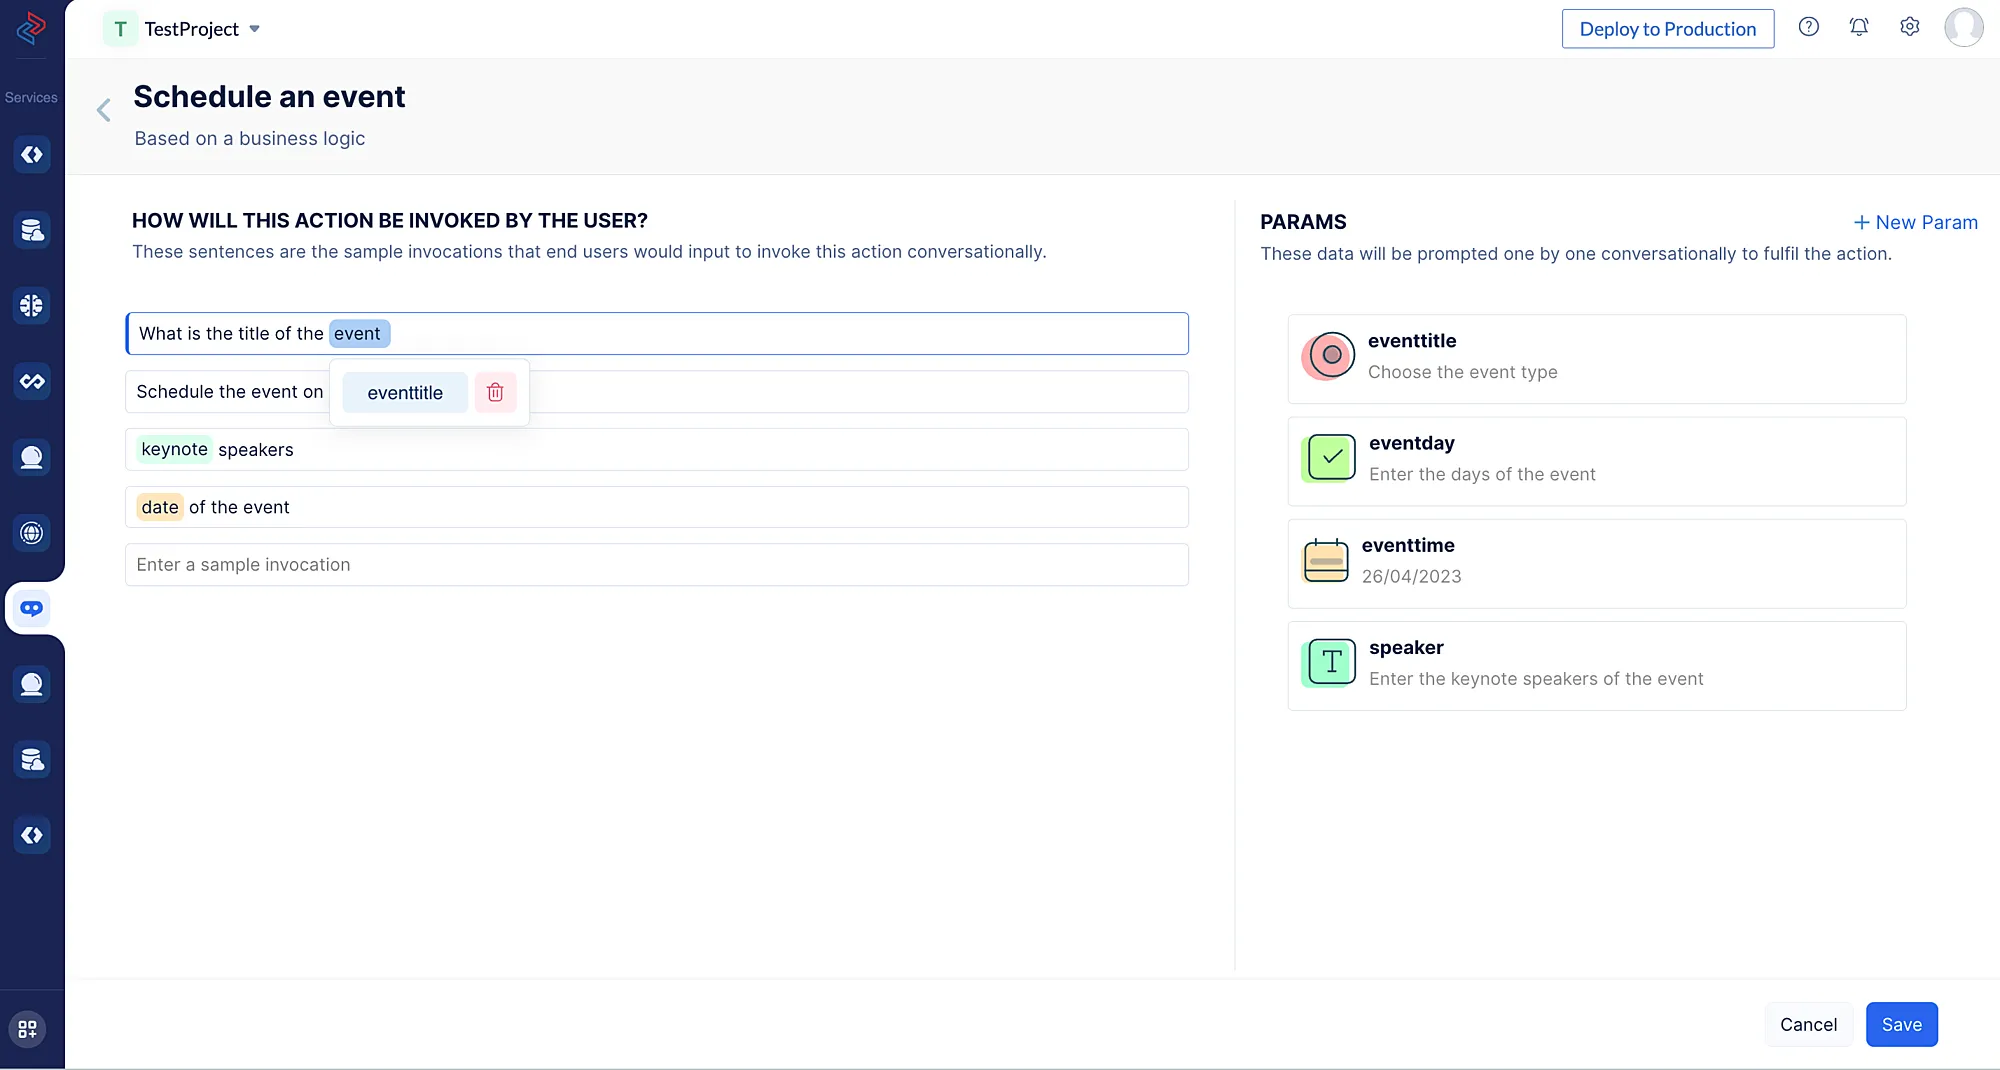
- Associate a param with specific phrases in the sample sentences by selecting the required text. Select one of the configured params from the list shown, and associate it with the text right away. You can also click New param to create a new param.
- After you configure the required sample sentences and params for the action, click Save.
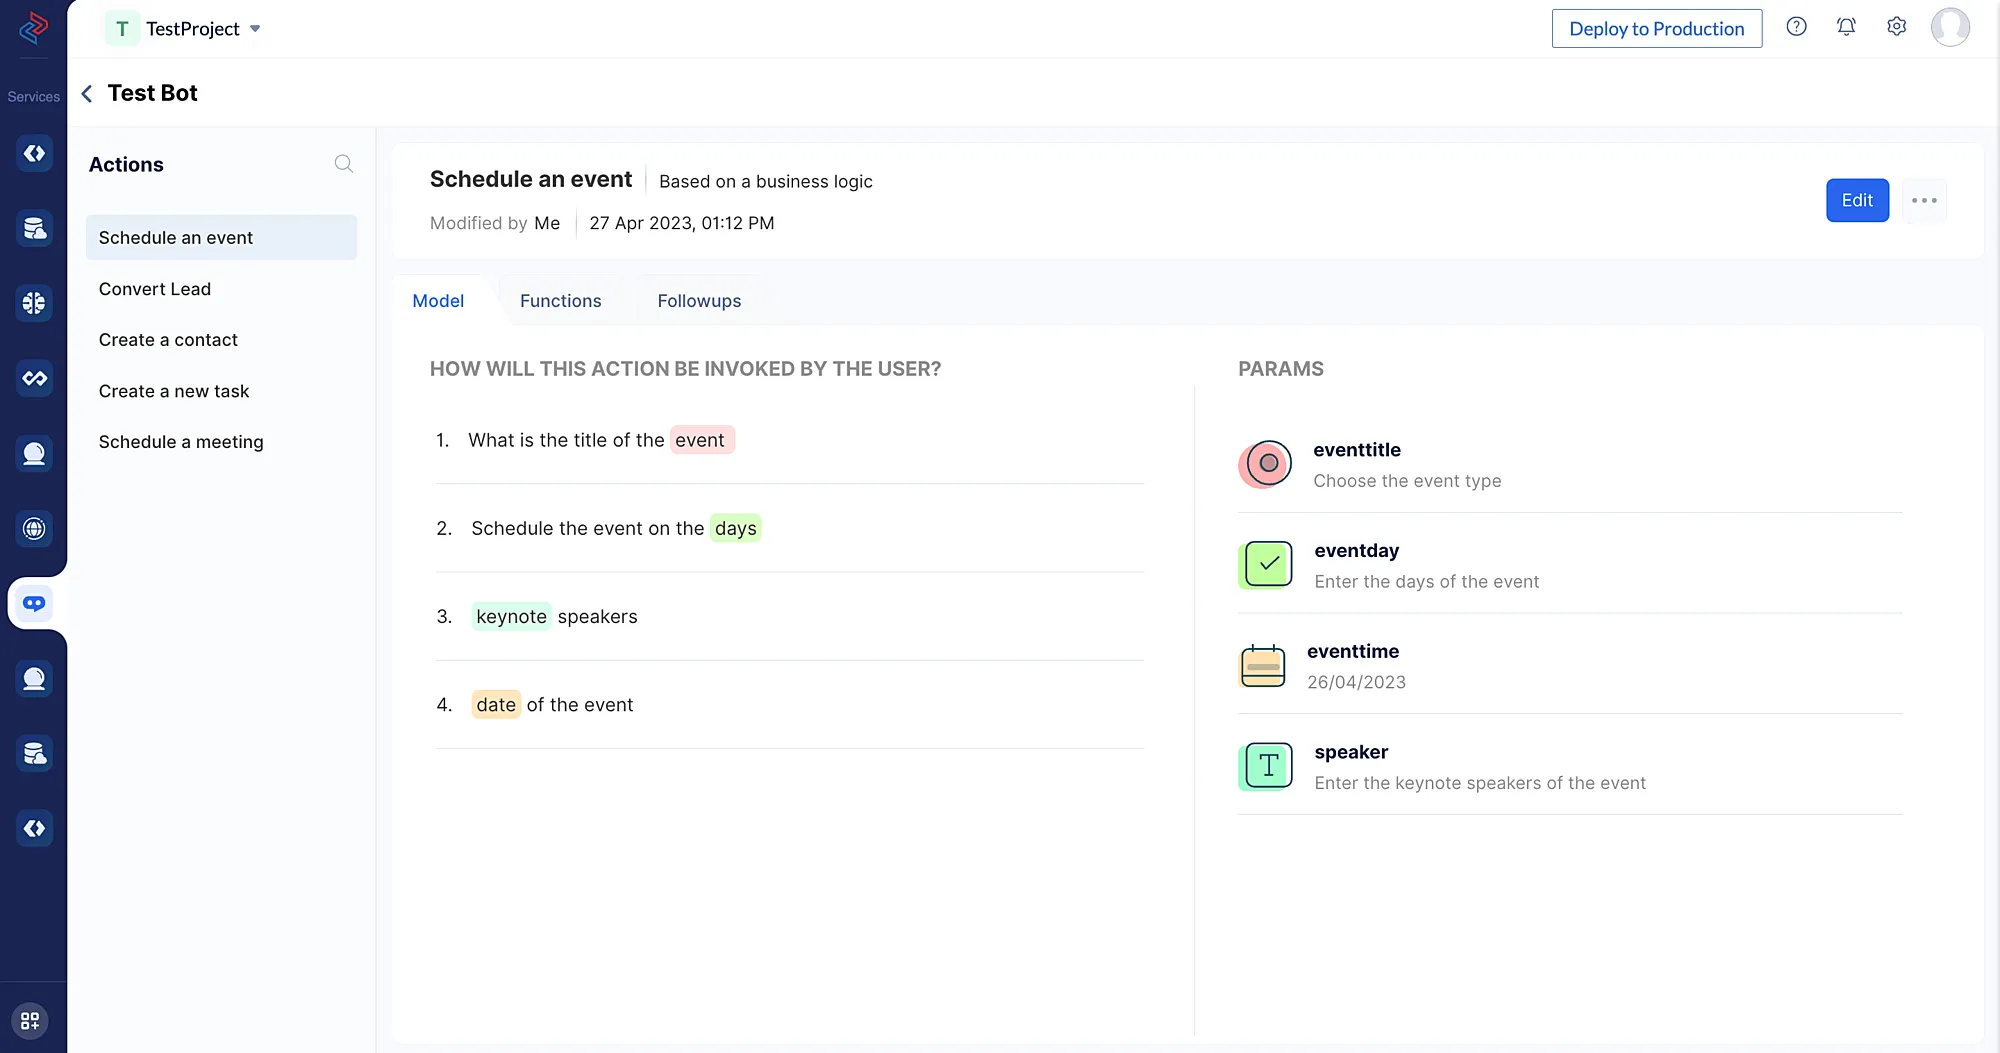
You can further edit the configurations by clicking on the Edit button. To learn more about viewing and managing an action, please refer to this page.
Last Updated 2025-03-06 20:18:17 +0530 IST
Yes
No
Send your feedback to us
