Initialize the Project from the CLI
You can now begin working on your Catalyst project from the CLI. The first step is to initialize the project in an empty directory. This will be the home directory of your project and all of the project files will be saved in it.
You can learn about initializing a project in detail from the Project Directory Structure help page.
For this microservice, we will initialize function component.
-
Create a folder for the project on your local machine and navigate to it from the terminal.
-
Initialize a project by executing the following command from that directory:
-
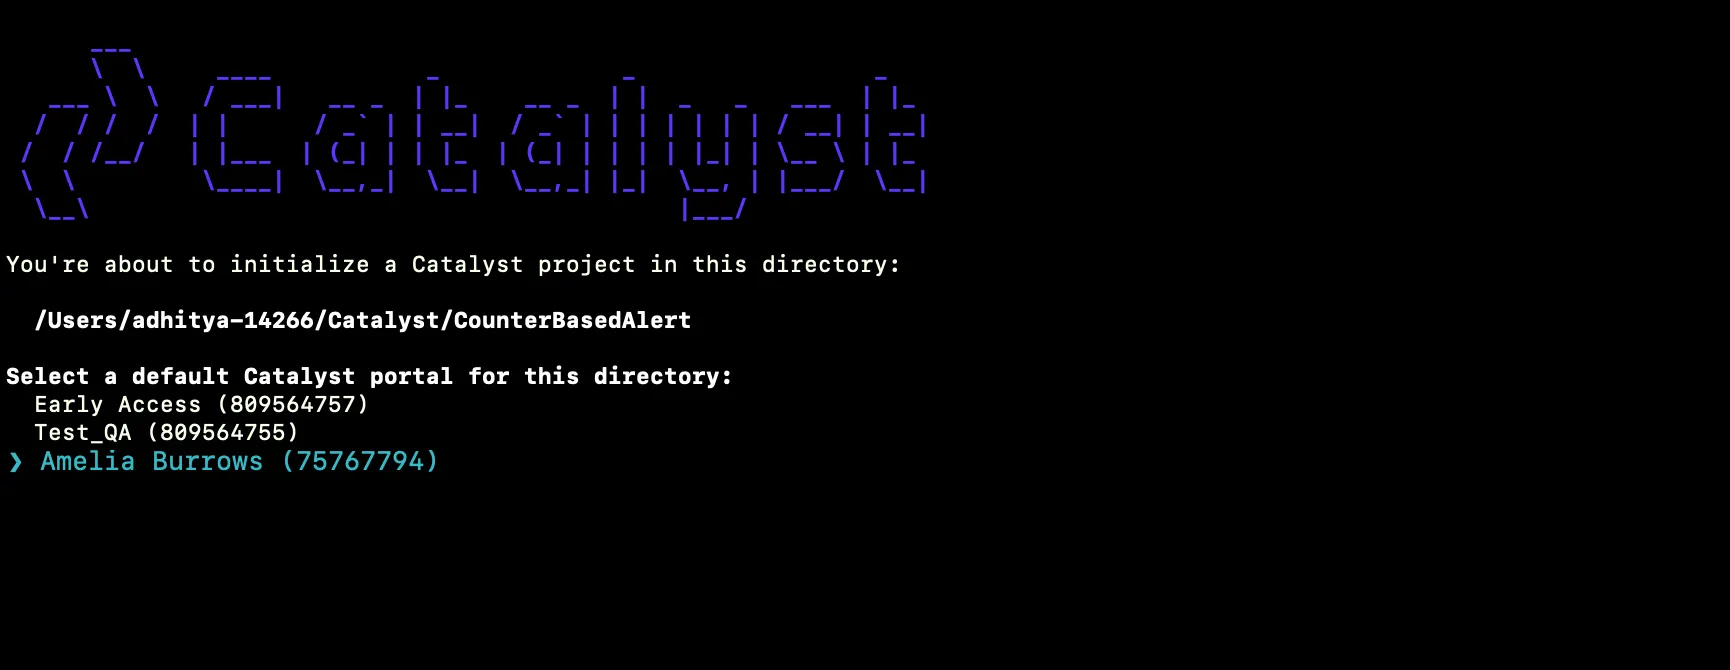
Select your preferred portal using the arrow-keys, and press Enter to select your preferred portal.
-
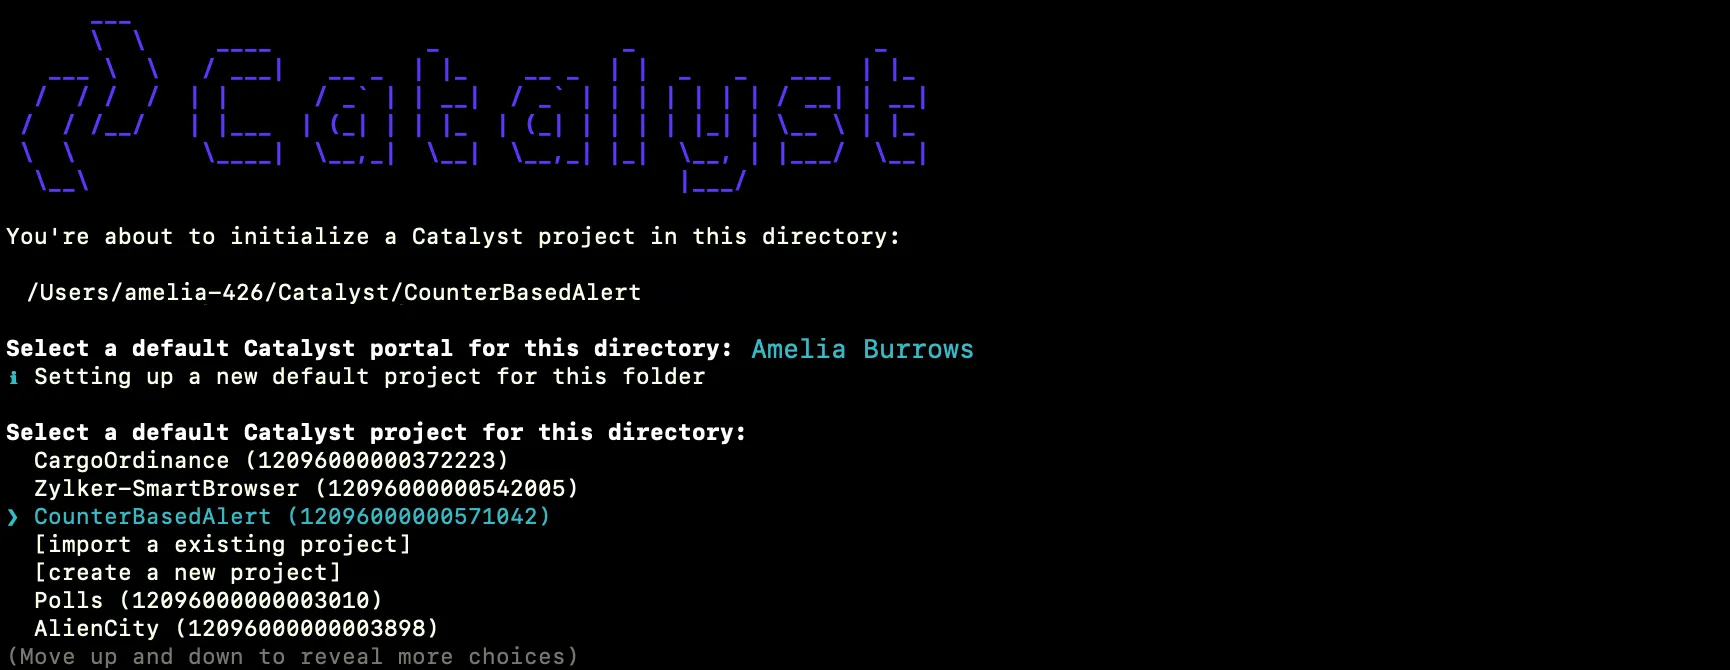
The CLI will now ask you to associate a Catalyst project with the directory. Associate it with the project that we created earlier from the console. Select CounterBasedAlert from the list and press Enter.
-
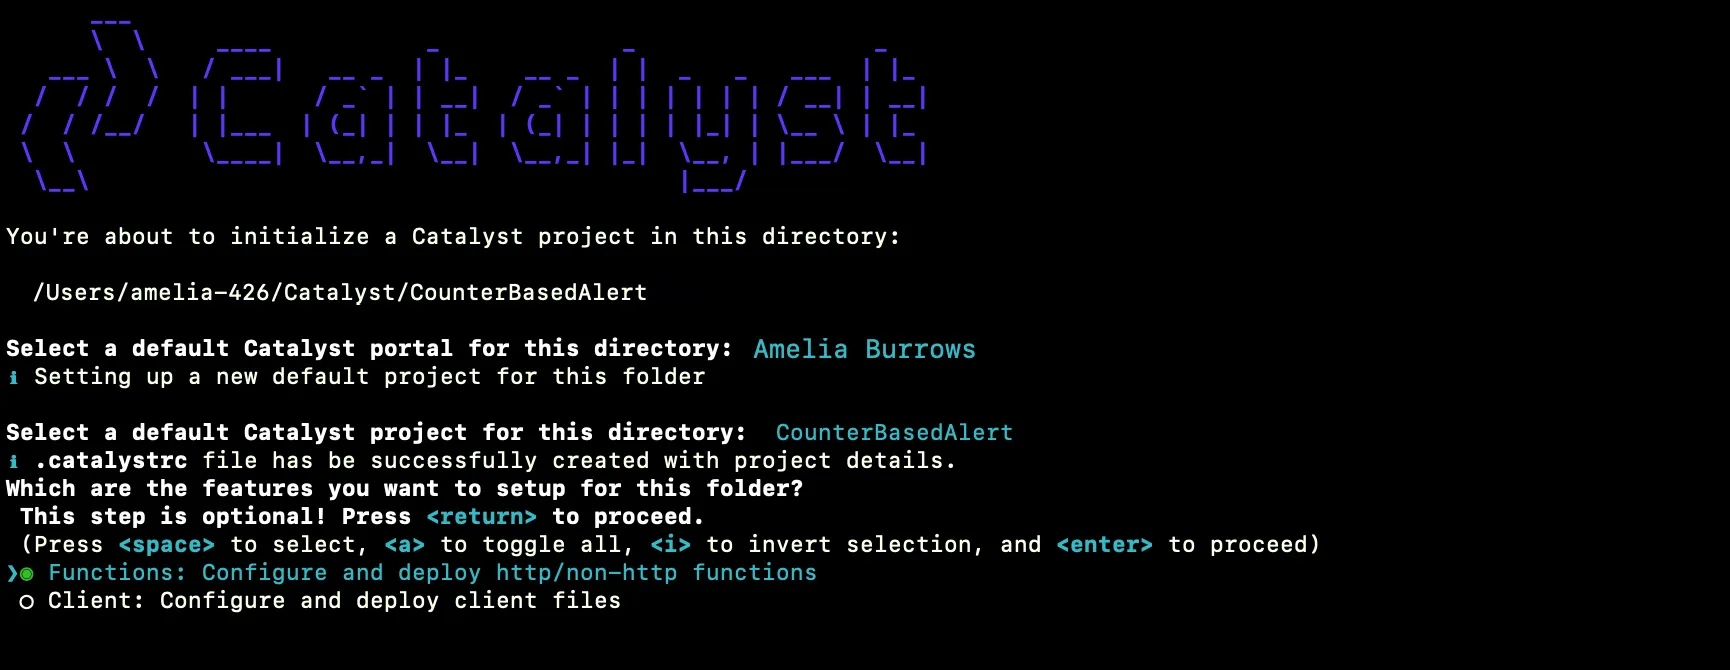
Select Functions using the space bar. Press the Enter key to initialize.
-
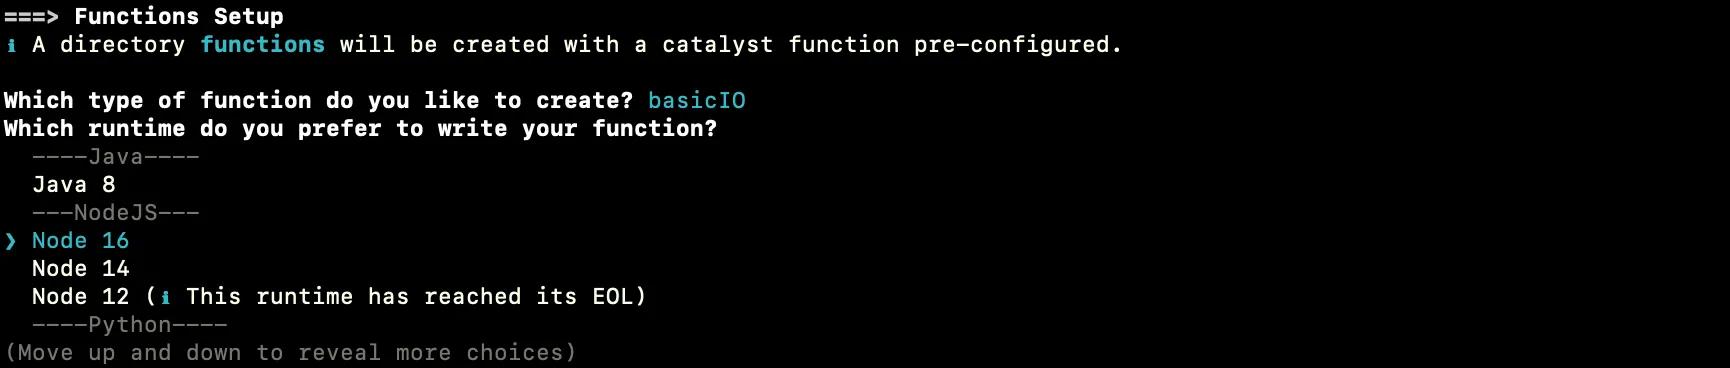
The CLI will initiate the functions set up. Select the BasicIO type from the list to set up and press Enter. You can learn about the function types from the Functions help page.

-
Select the latest runtime of Node.js as the stack and press Enter.
-
Enter “counter_based_alert_function” as the package name, “index.js” as the entry point, and your email address as the author and press Enter. You can alternatively press Enter without entering inputs to fill in the default values. The CLI will prompt the initialization of the Node dependencies. Press Y to confirm the installation, and press Enter to confirm your choice. The Node modules will be installed.
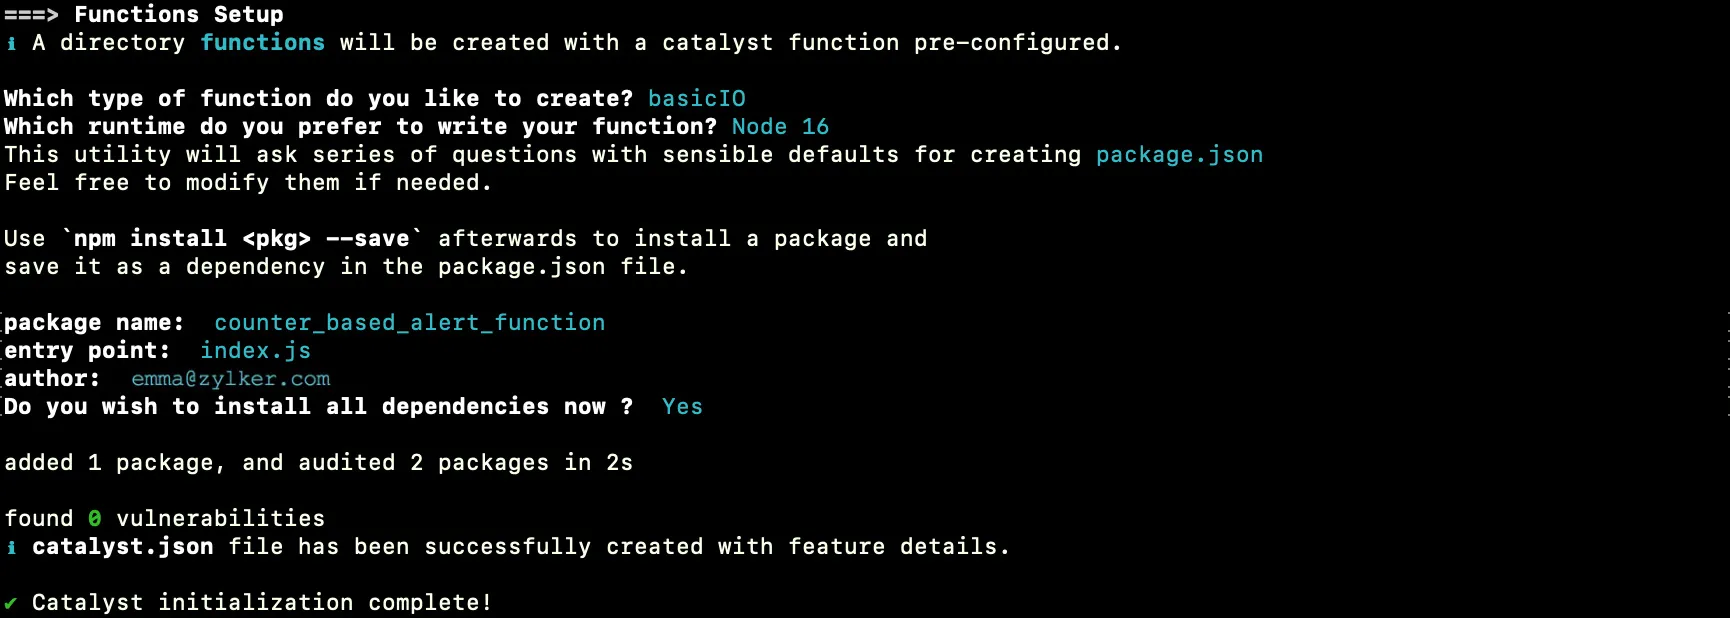
The project and function initialization is now complete.
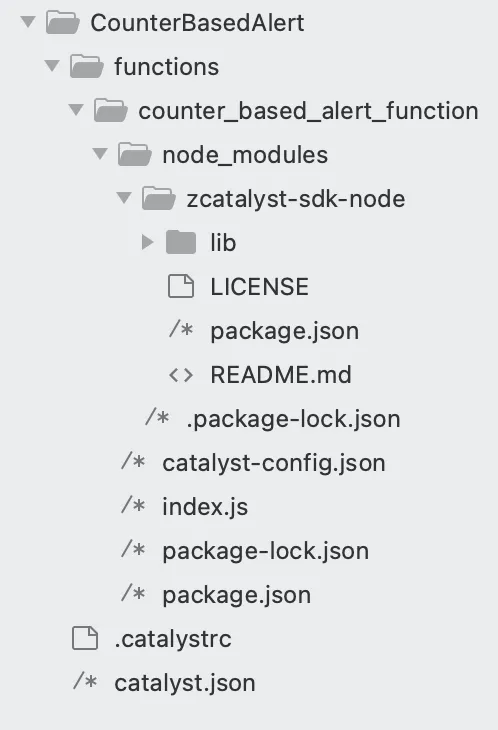
The functions directory will be created in your project directory with the configuration files and dependencies, along with the catalyst.json and a hidden .catalystrc file.
Last Updated 2025-10-29 12:32:36 +0530 IST