Initialize the Project from the CLI
After configuring the actions for a bot, we can proceed to configure the business logic of those actions. As mentioned earlier, we will be using Catalyst Integration functions to code the bot logic of the ecommerce bot.
In order to code the Catalyst functions, we will need to first initialize the project from the Catalyst CLI. The first step is to login to the CLI and initialize the project in an empty local directory. This will be the home directory of your project and all of the project files will be saved in it.
You can learn more about the project directory structure for all programming stacks supported by Catalyst from this page. You can learn about initializing a Catalyst project in detail from the CLI help documentation.
Please follow the steps listed below to initialize the project and create the required functions and client components:
-
Create a folder for the project on your local machine and navigate to it from the CLI terminal.
-
To initialize the project, please execute the following command:
-
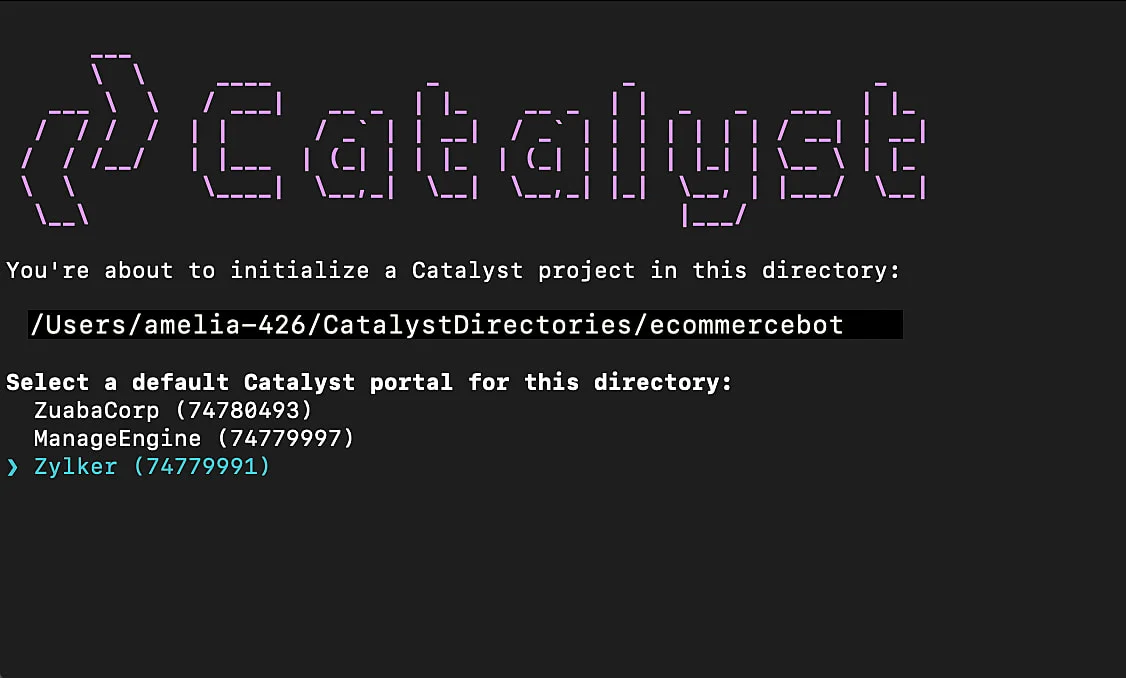
The CLI will now ask you to select the default Catalyst organization. Select the organization in which you created the project in the first step of this tutorial and press Enter.
-
You can associate the current project directory with the Catalyst project you created in this organization. Select Ecommerce and press Enter.
-
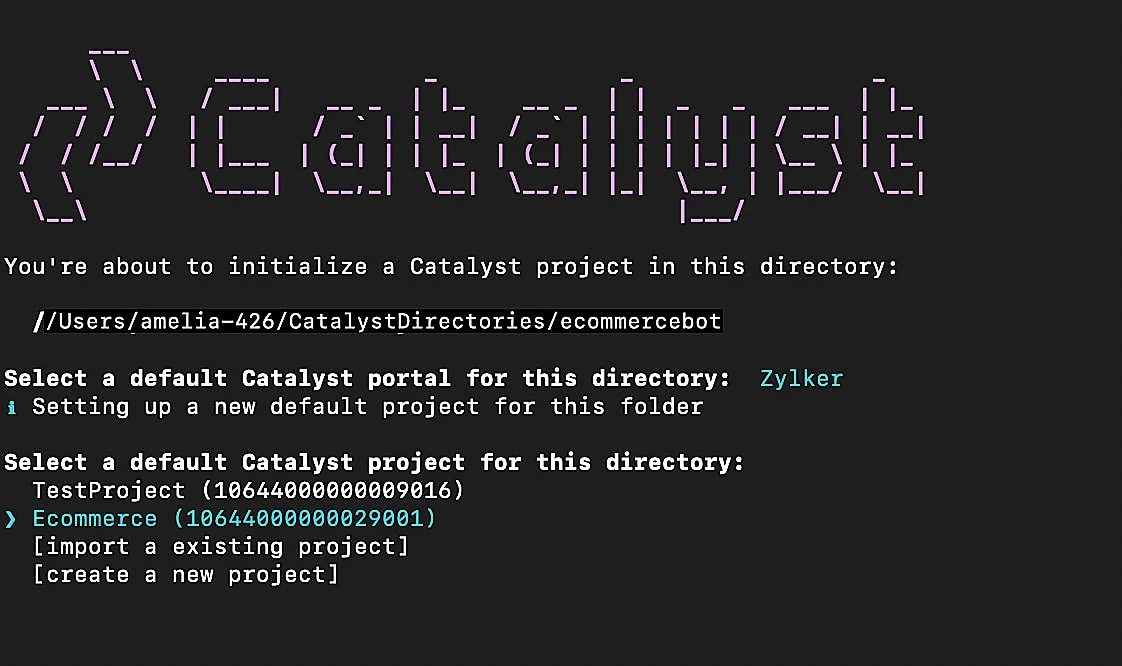
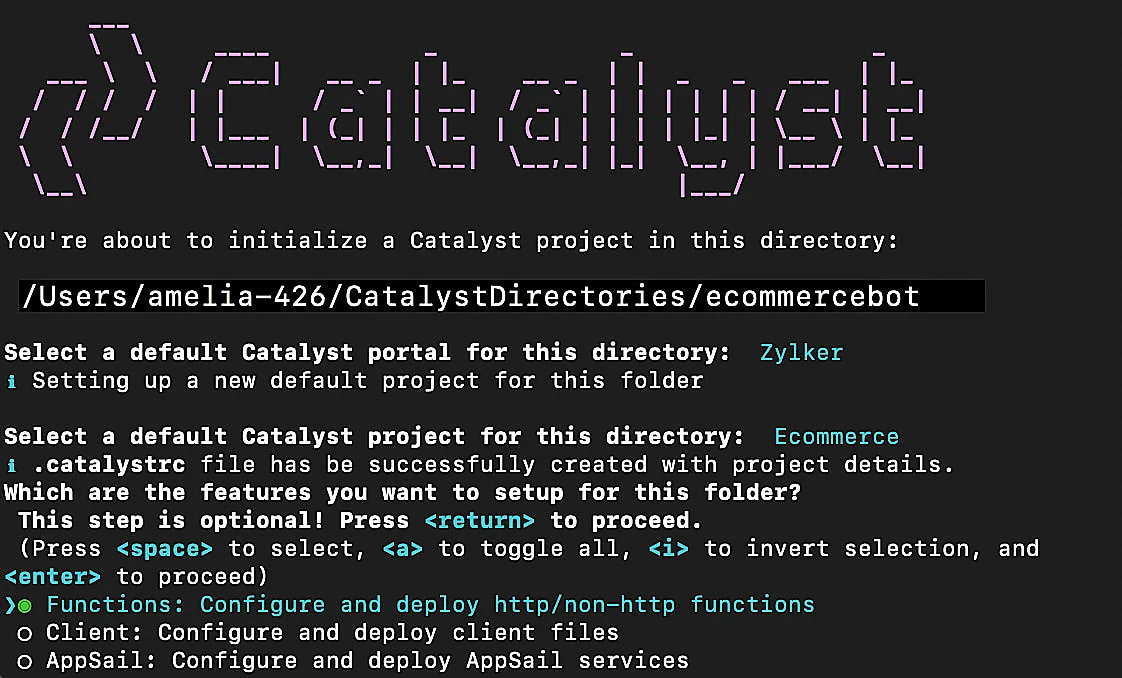
Select the components that you need to set up for your Catalyst application. Navigate through the options using the arrow keys and select them by pressing space bar. Select Functions and Client and press Enter to confirm your choices.
-
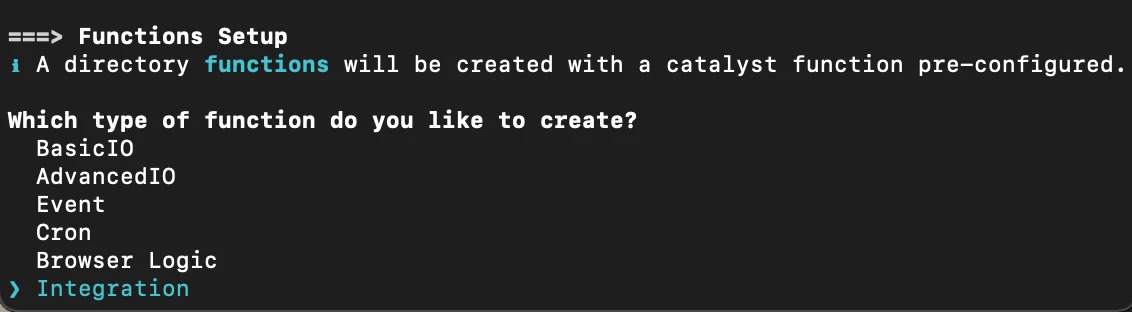
Select the type of function you would like to develop. For this tutorial, choose Functions and Client. In the Functions setup step, select Integration.
-
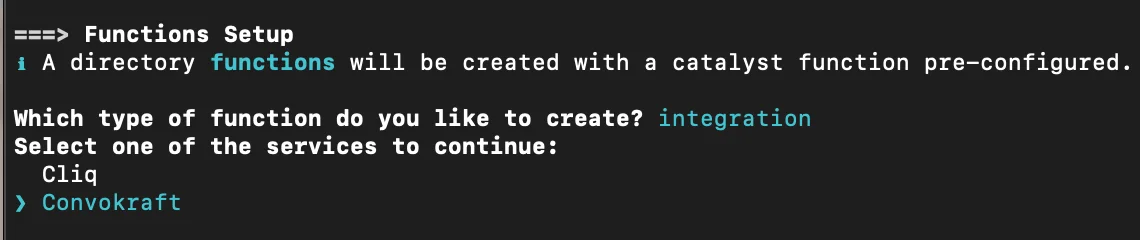
In the next step, select the service as Convokraft.
-
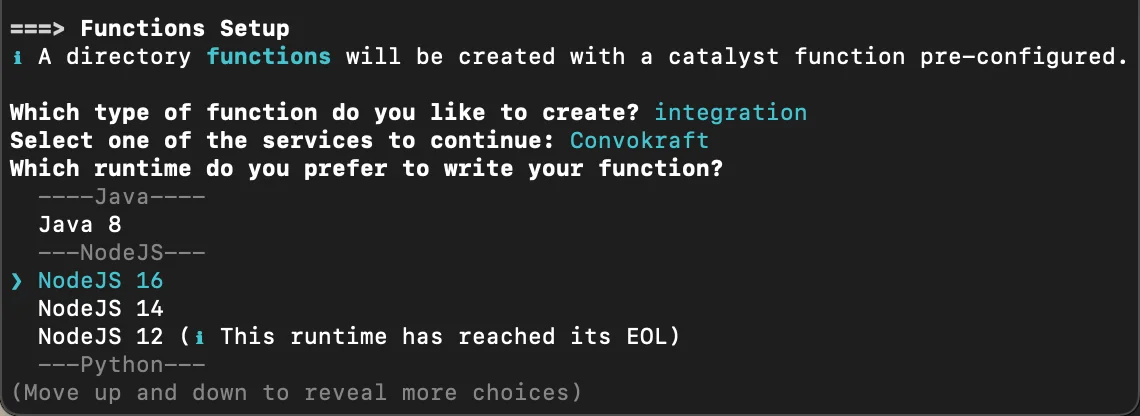
Select the preferred stack to develop the Catalyst Integration function and press Enter. For this tutorial, we will be coding the functions in Node.js 16.
-
Provide the package name as “ecommerce_function” for your Node function when prompted and press Enter. You must also define the entry point as index.js and author details in this step.
Note: Ensure that you enter the function's package name exactly as instructed, because the application's code contains the same name.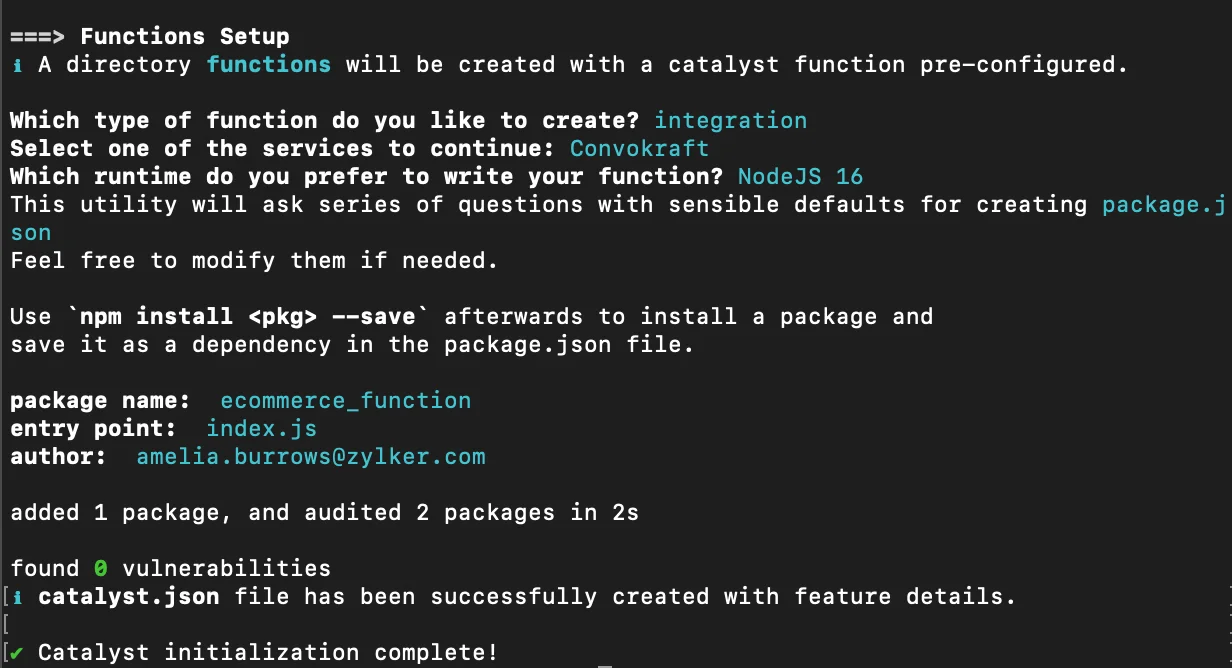
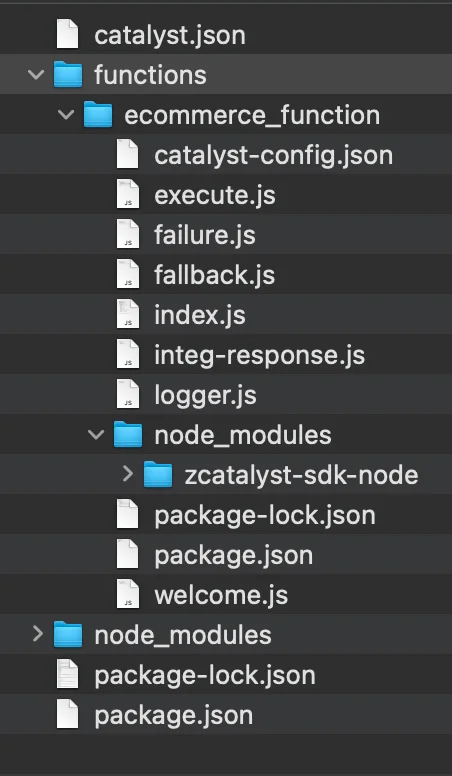
The function’s directory will now contain the initialized ecommerce_function, its handler function files and other configuration files. You can also learn about the project directory structure in detail, from this page.
-
The CLI will initiate the client setup next. Select Basic web app as your client type.

-
Enter ecommerceclient as the name of the client package and then press Enter. You can enter any name you need.

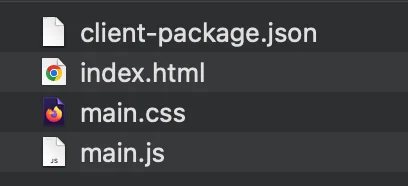
The client directory will be created in the standard structure and will look like this:
-
This Catalyst Node.js function requires express framework to perform routing operations. To install the express modules in the function’s directory, navigate to functions/ecommerce_function and execute the following command in the terminal:

The function’s directory will look like this:
Catalyst initialization is now complete. The project directory will contain the function and the client, as well as other project dependency files.
Last Updated 2025-10-21 12:04:01 +0530 IST