Create Table
Next, let’s create a table in the Data Store. This table is used to create the following columns to store the required details:
| Column Name | Data Type | Purpose |
|---|---|---|
| Name | Var Char | To store the name of the people you are going to send wishes to. |
| Message | Text | To store the custom message. |
| BirthDay | Date | To store the date of the birthday. |
| Var Char | To store the recipient's email address. | |
| AutoSend | Boolean | To choose to send the email automatically to the required person at the scheduled time. The default value will be True. |
To create a table:
-
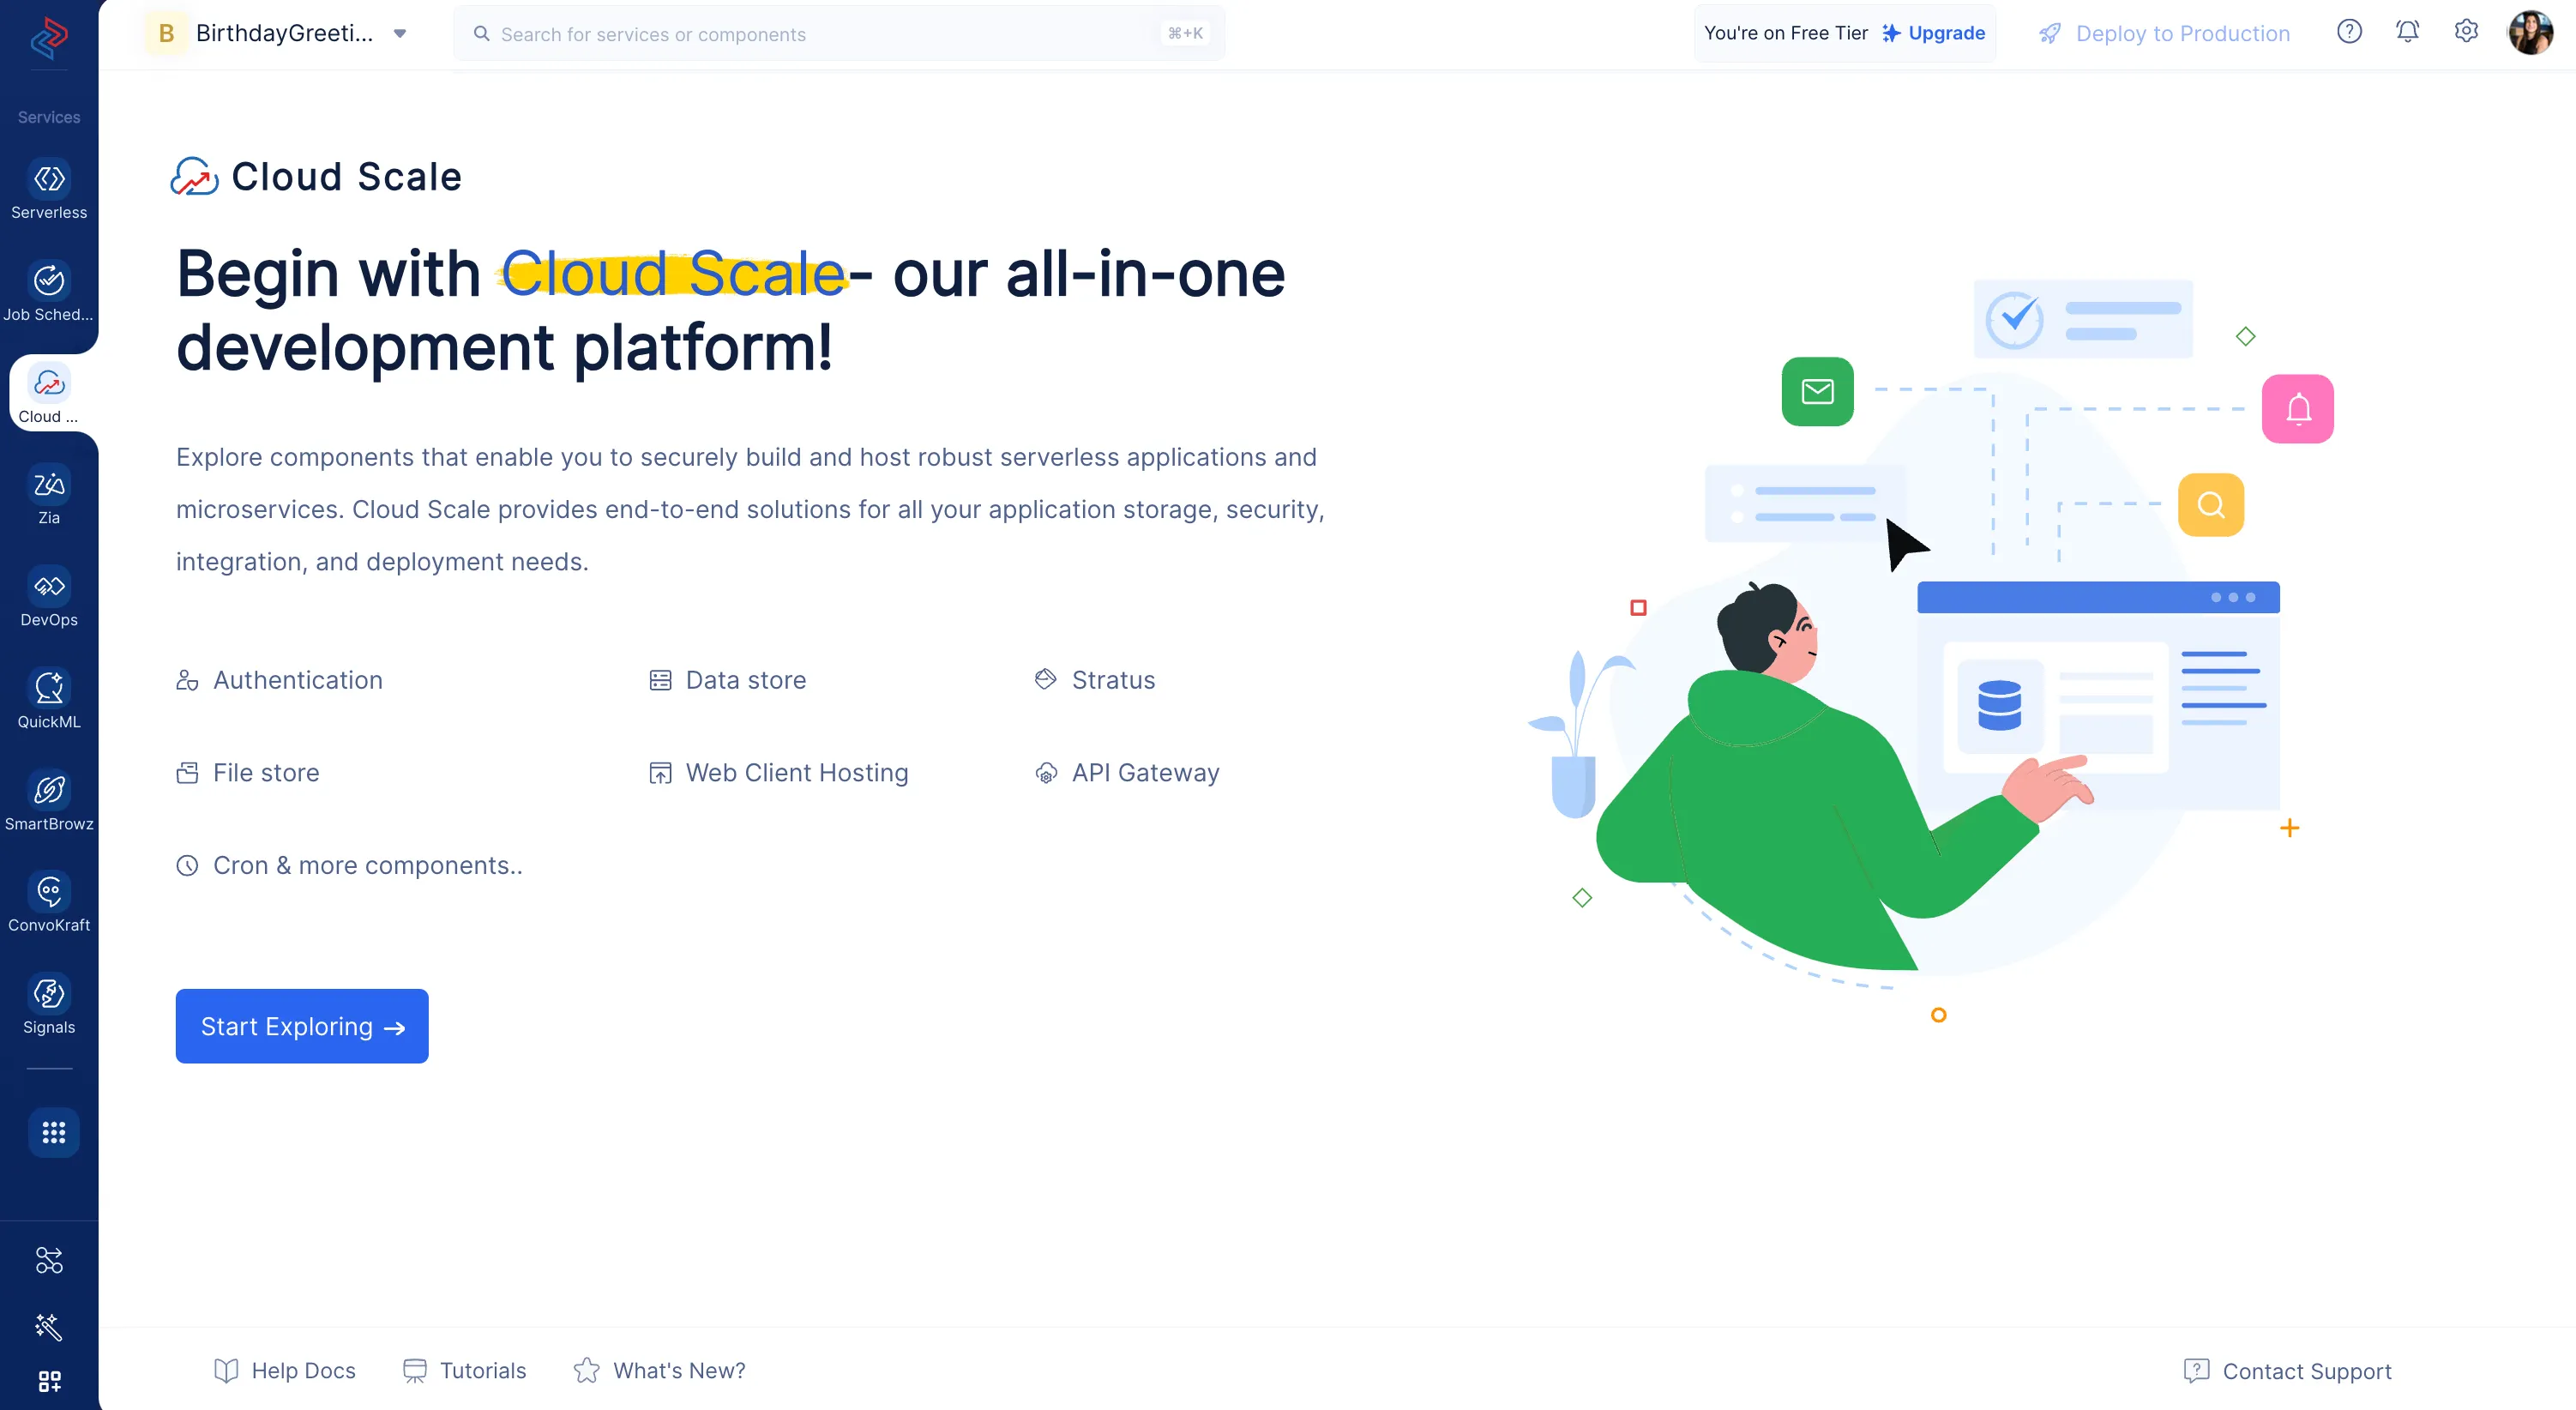
Navigate to the Catalyst Cloud Scale service section in the console and click Start Exploring.
-
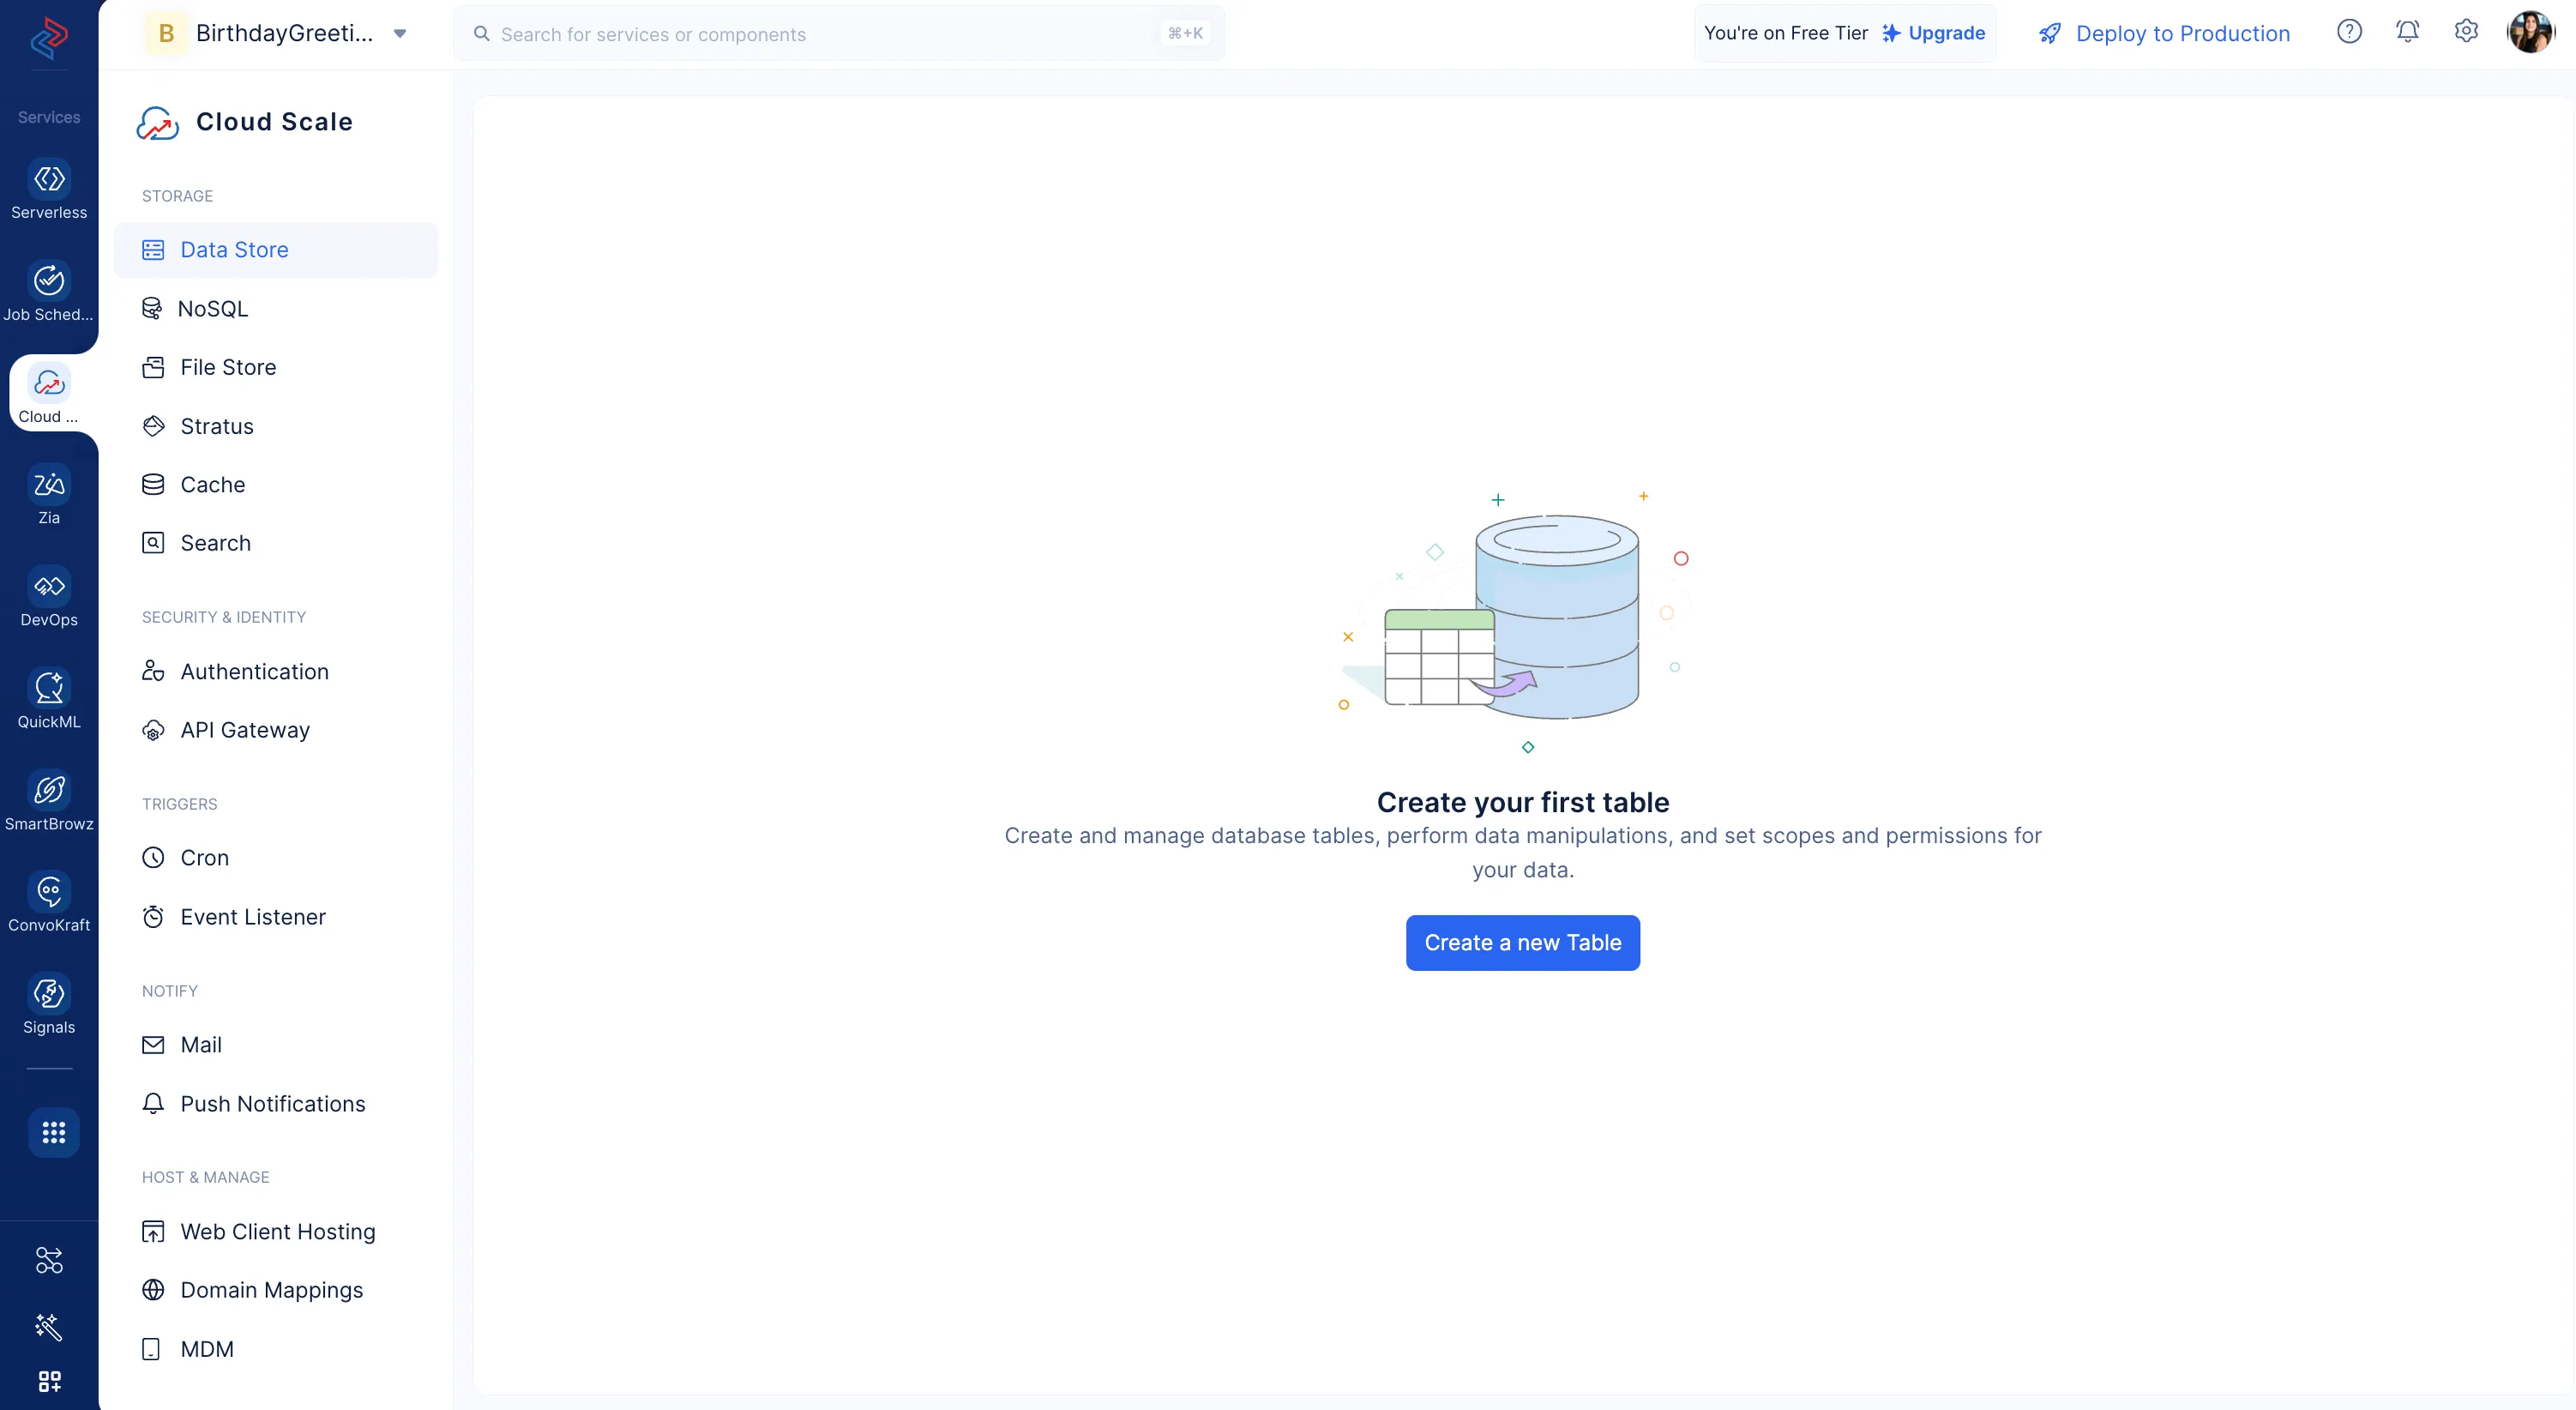
Navigate to the Data Store component under the STORAGE section and click Create a new Table.
-
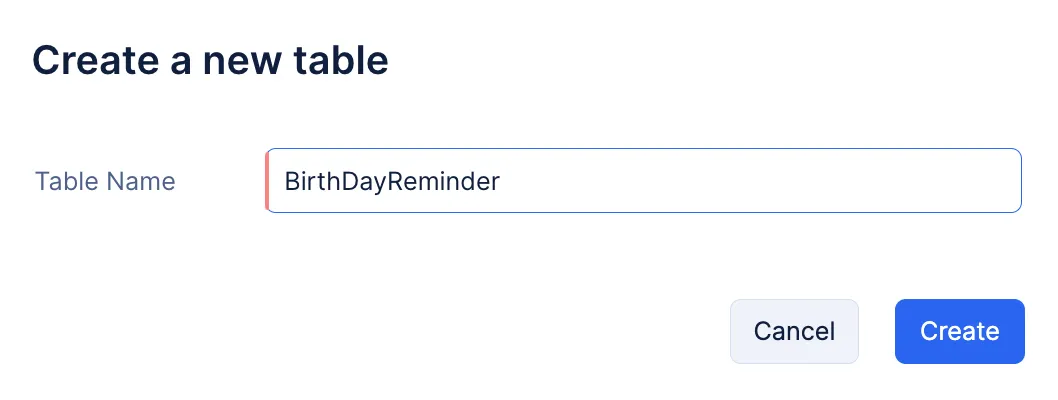
Enter the table’s name as “BirthDayReminder” and click Create.
Now, let’s create the required columns.
-
Click New Column in the Schema View section.
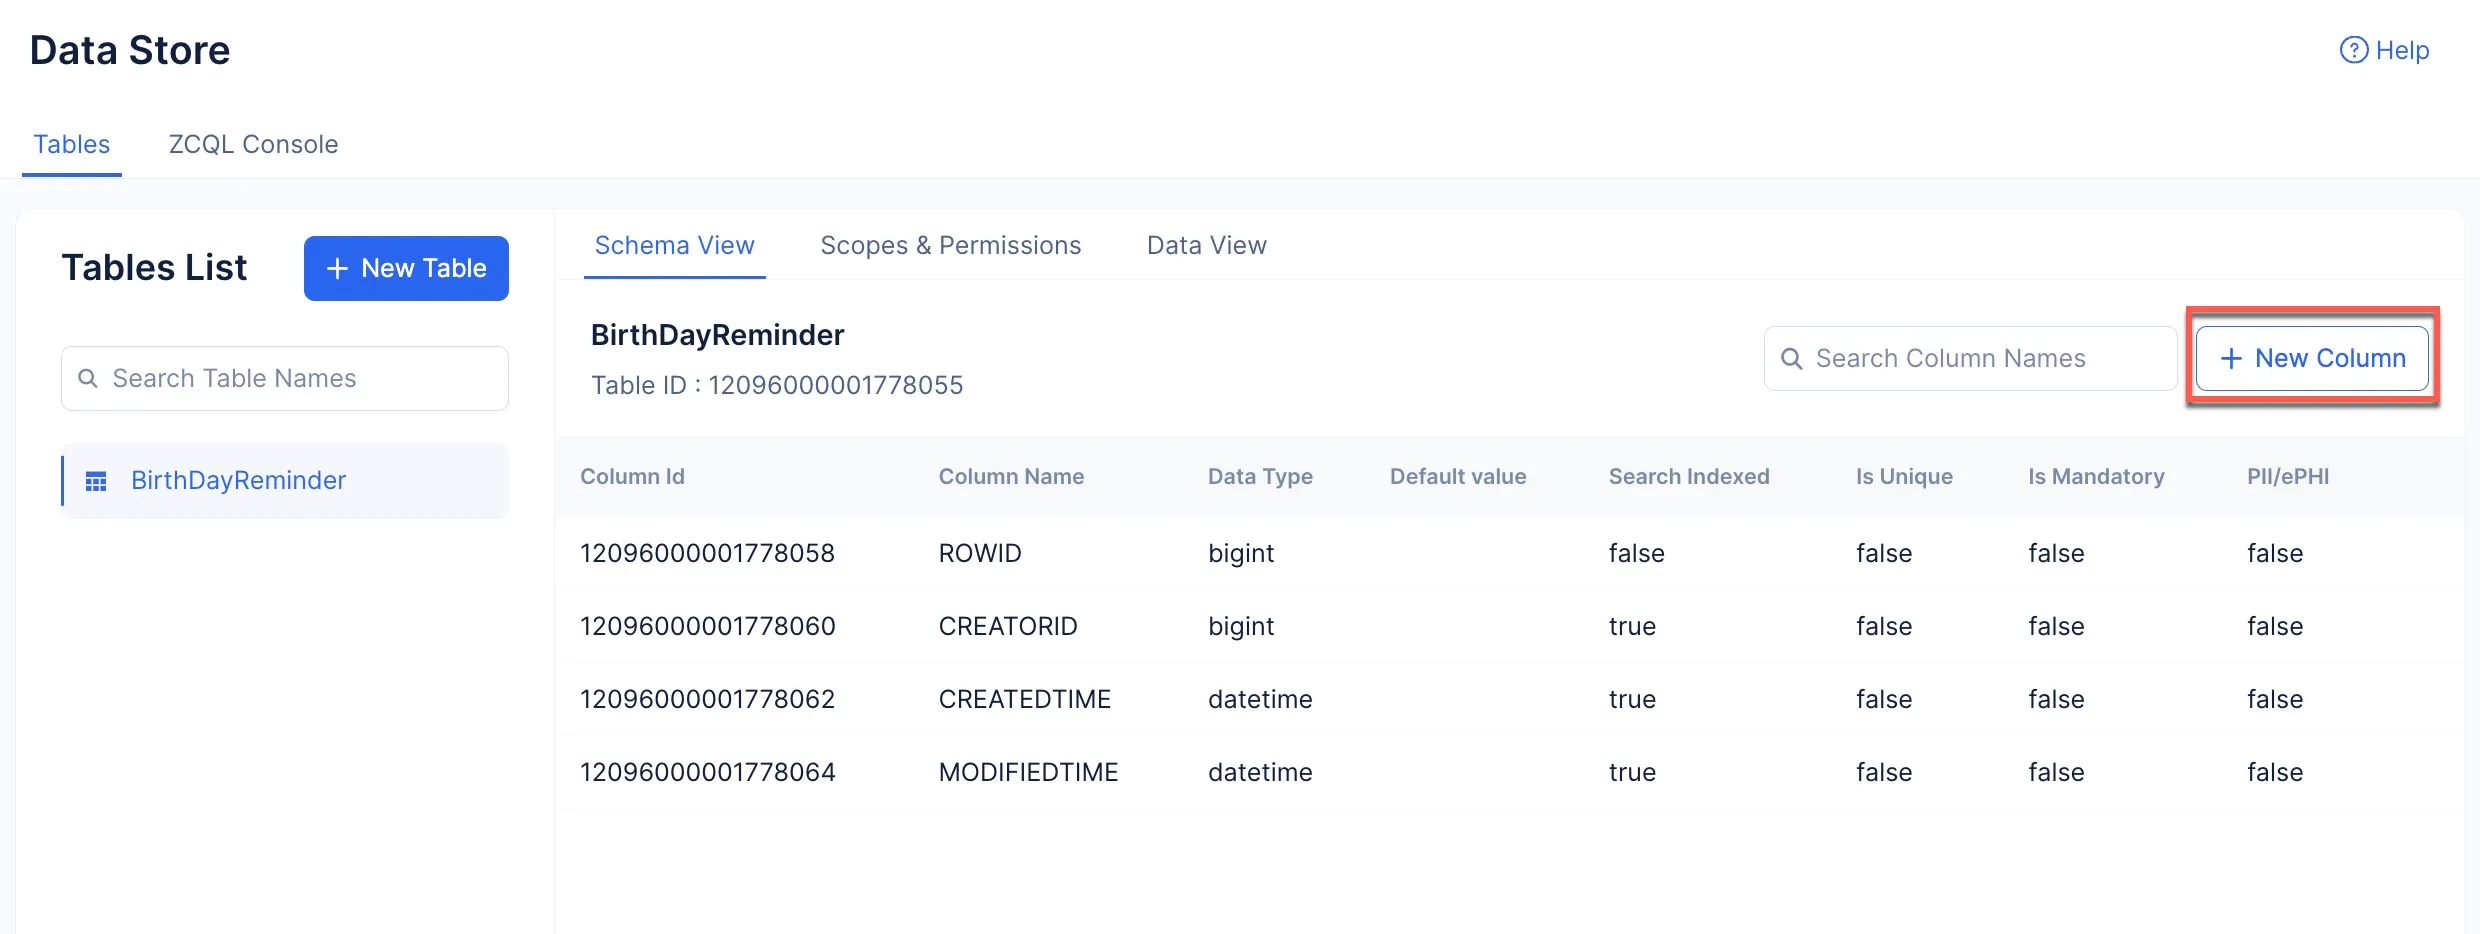
-
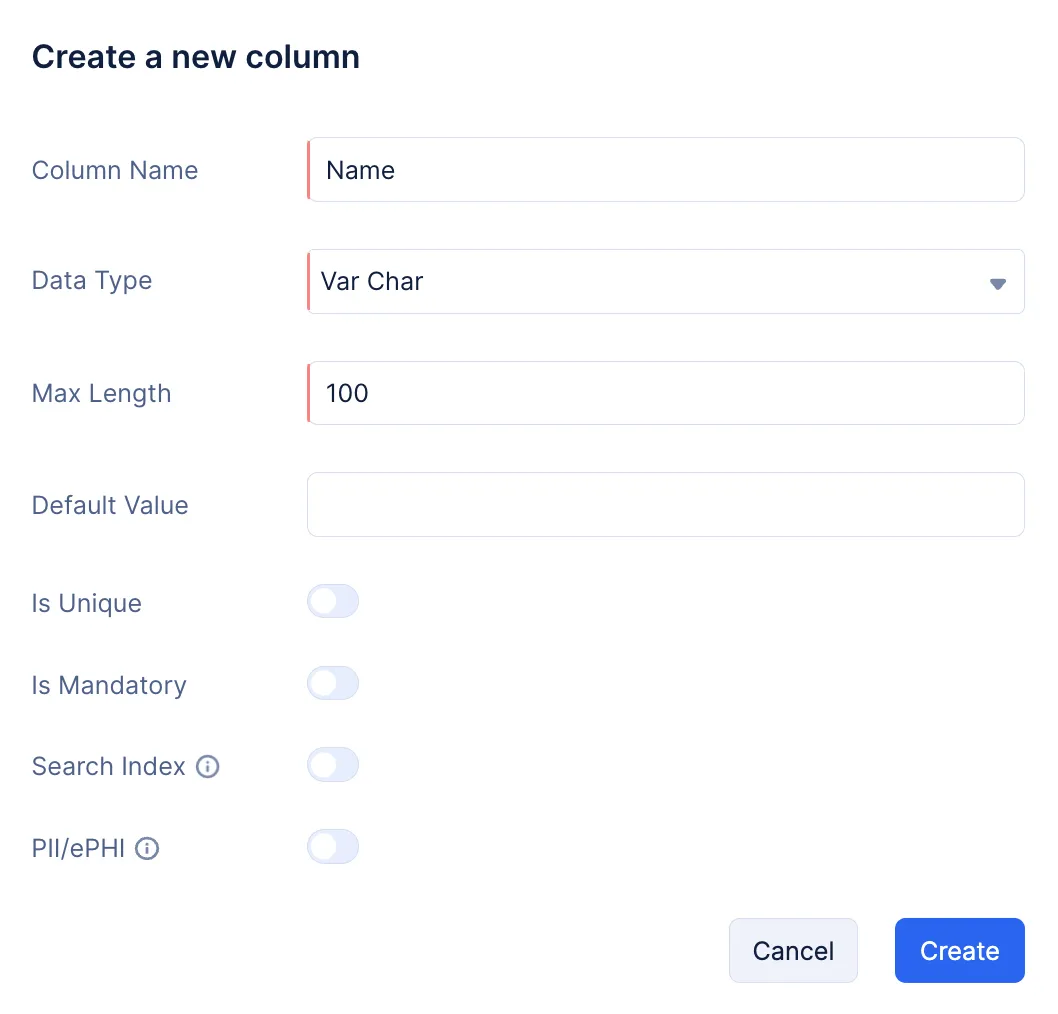
Enter the column’s name as “Name”. Select the data type as Var Char, and enter “100” as the Max Length.
-
Click Create.
-
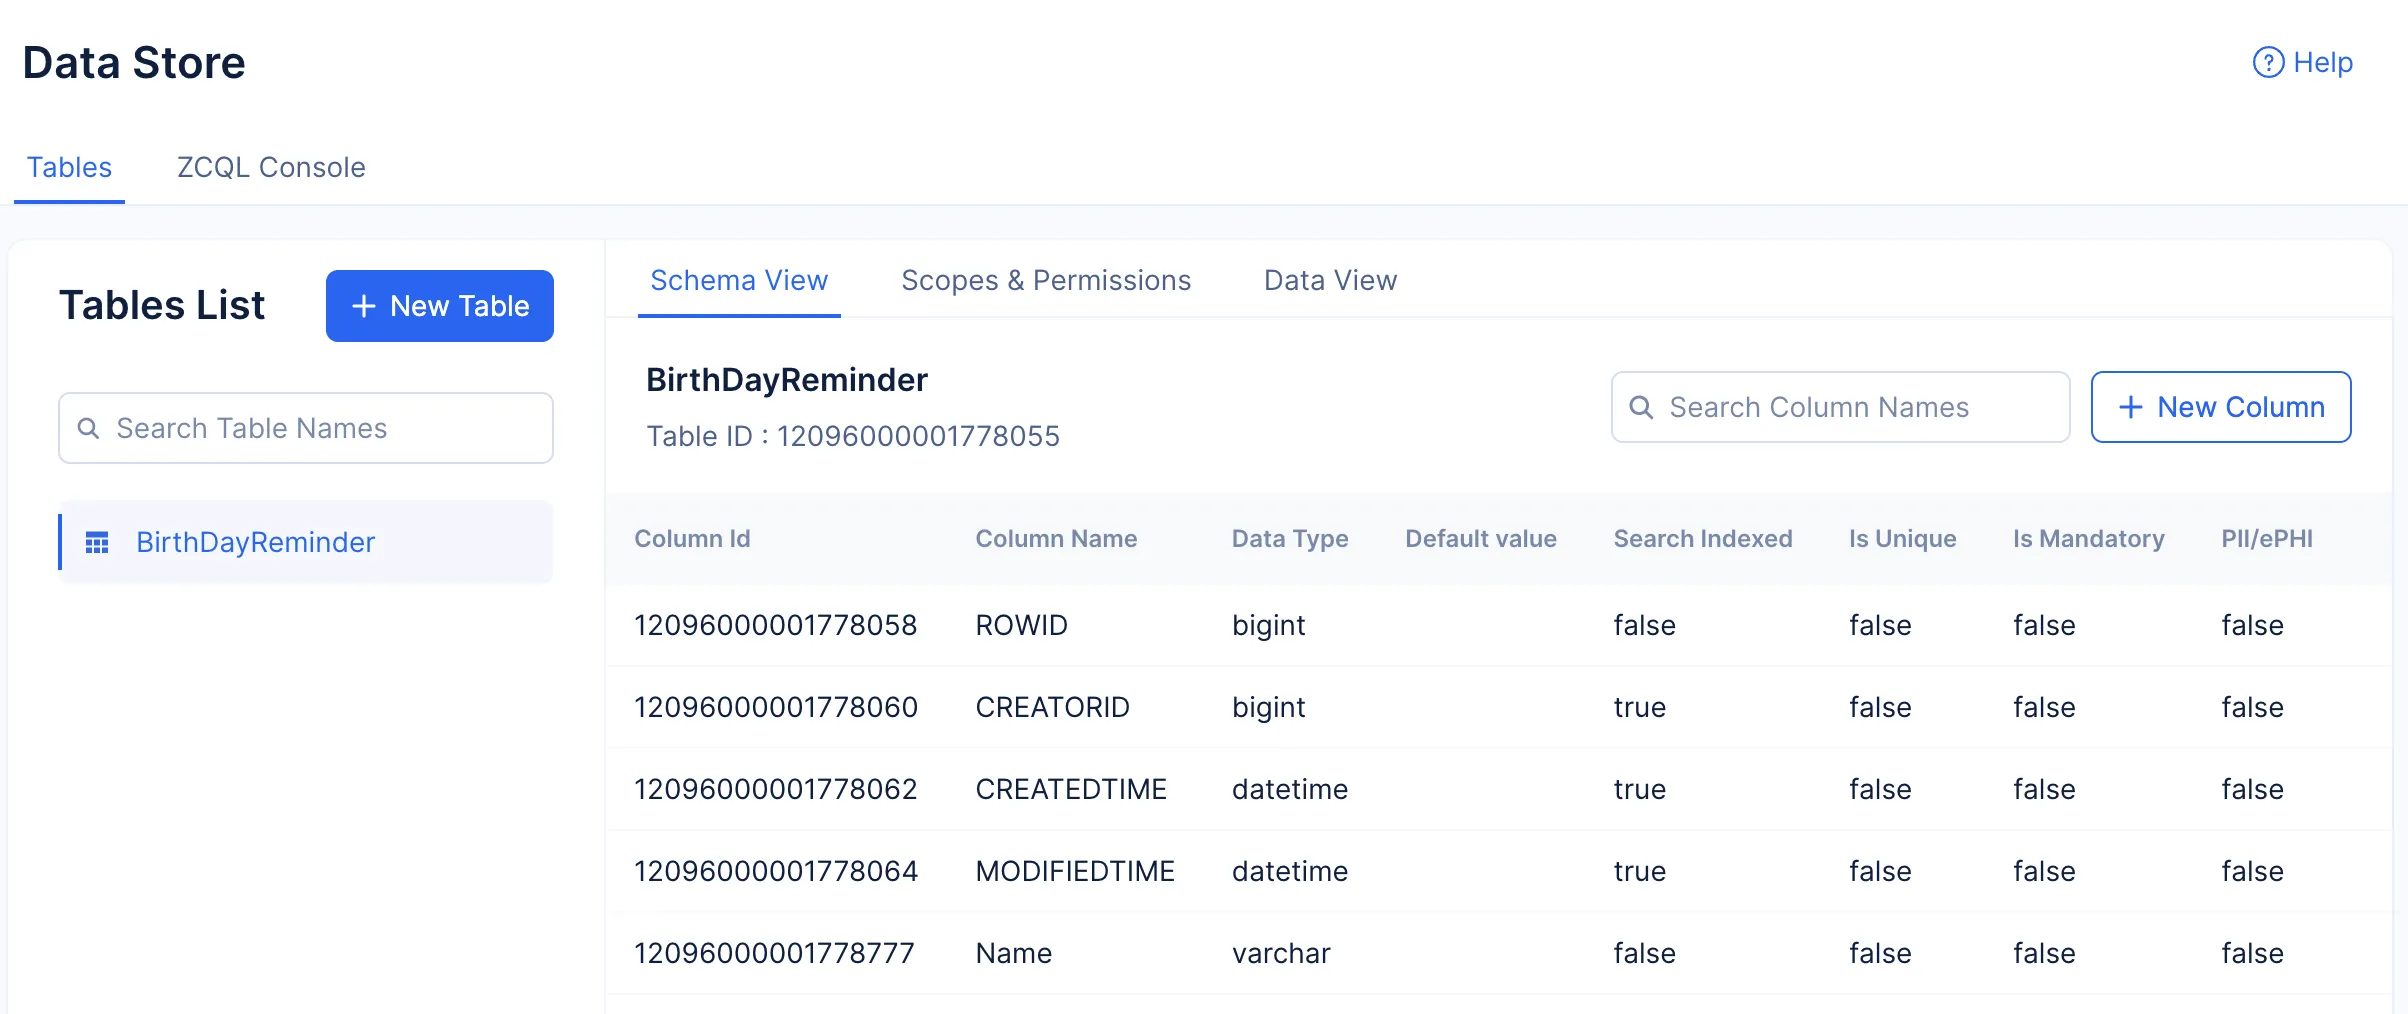
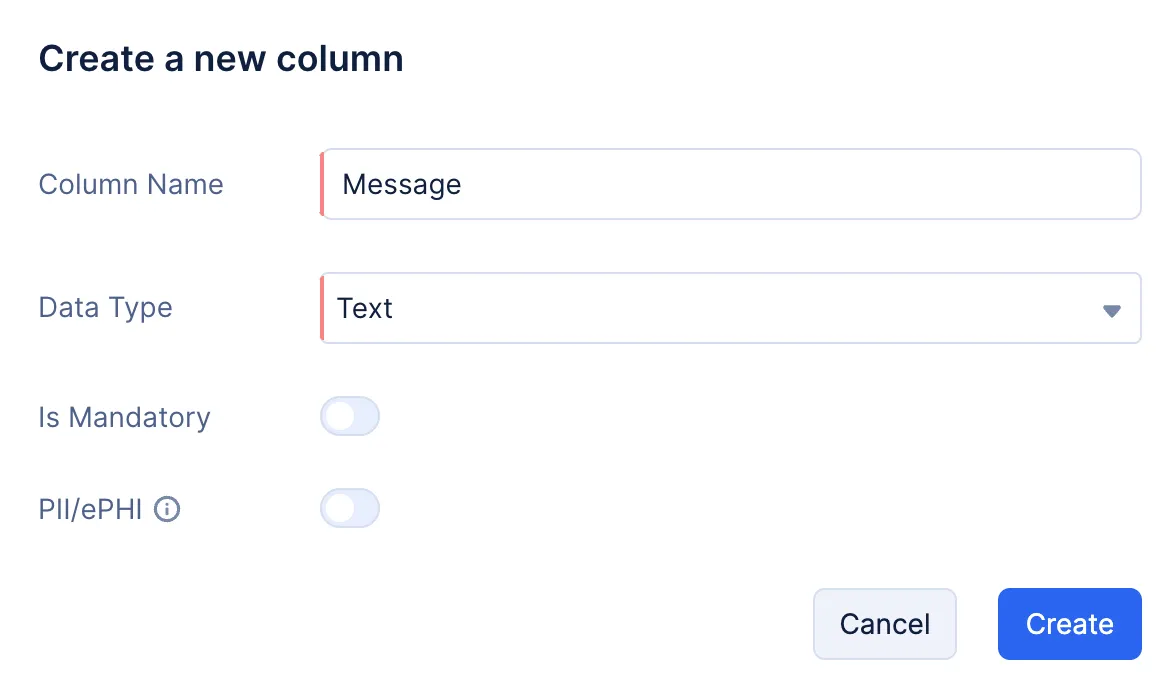
Click the New Column button again to create the second column. Name it “Message”, select Text as its data type, and click Create.
-
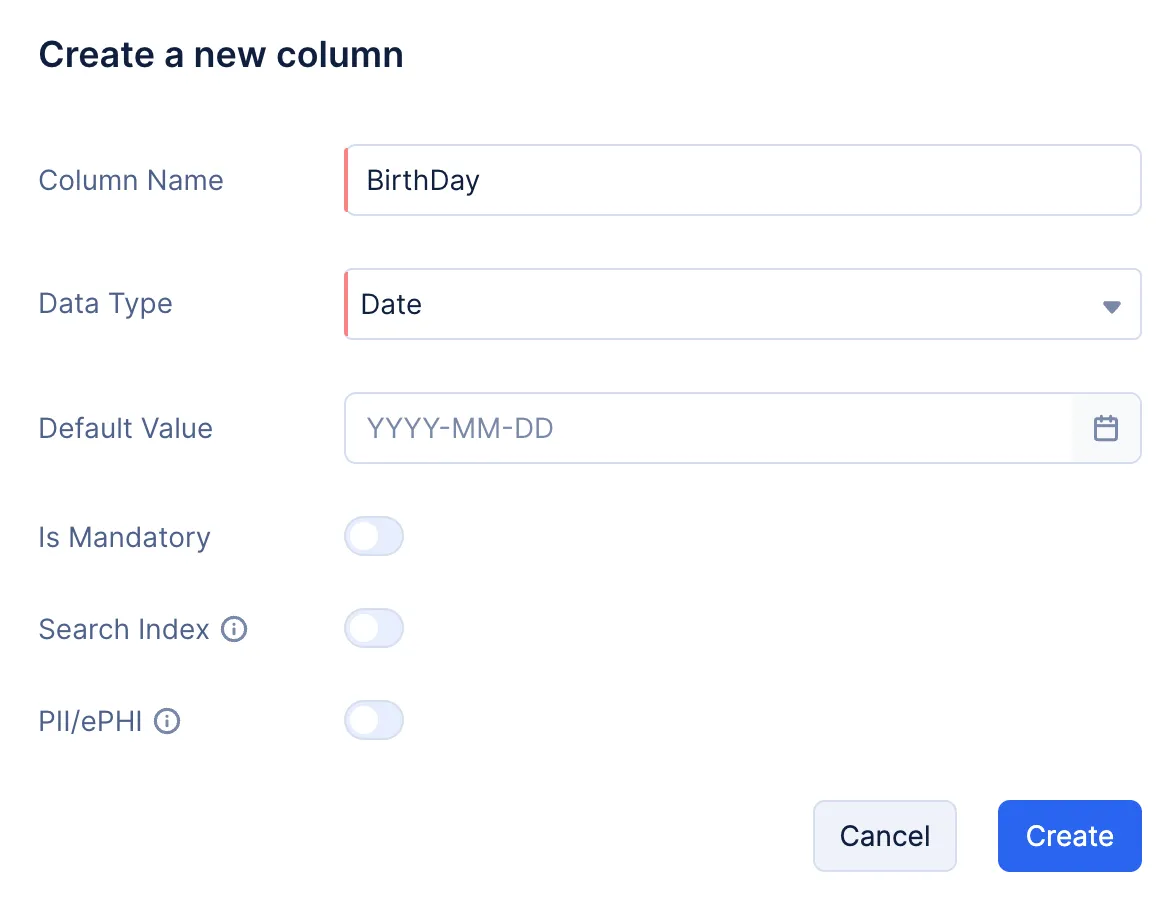
Click the New Column button again to create the third column. Name it “BirthDay”, select Date as its data type, and click Create.
-
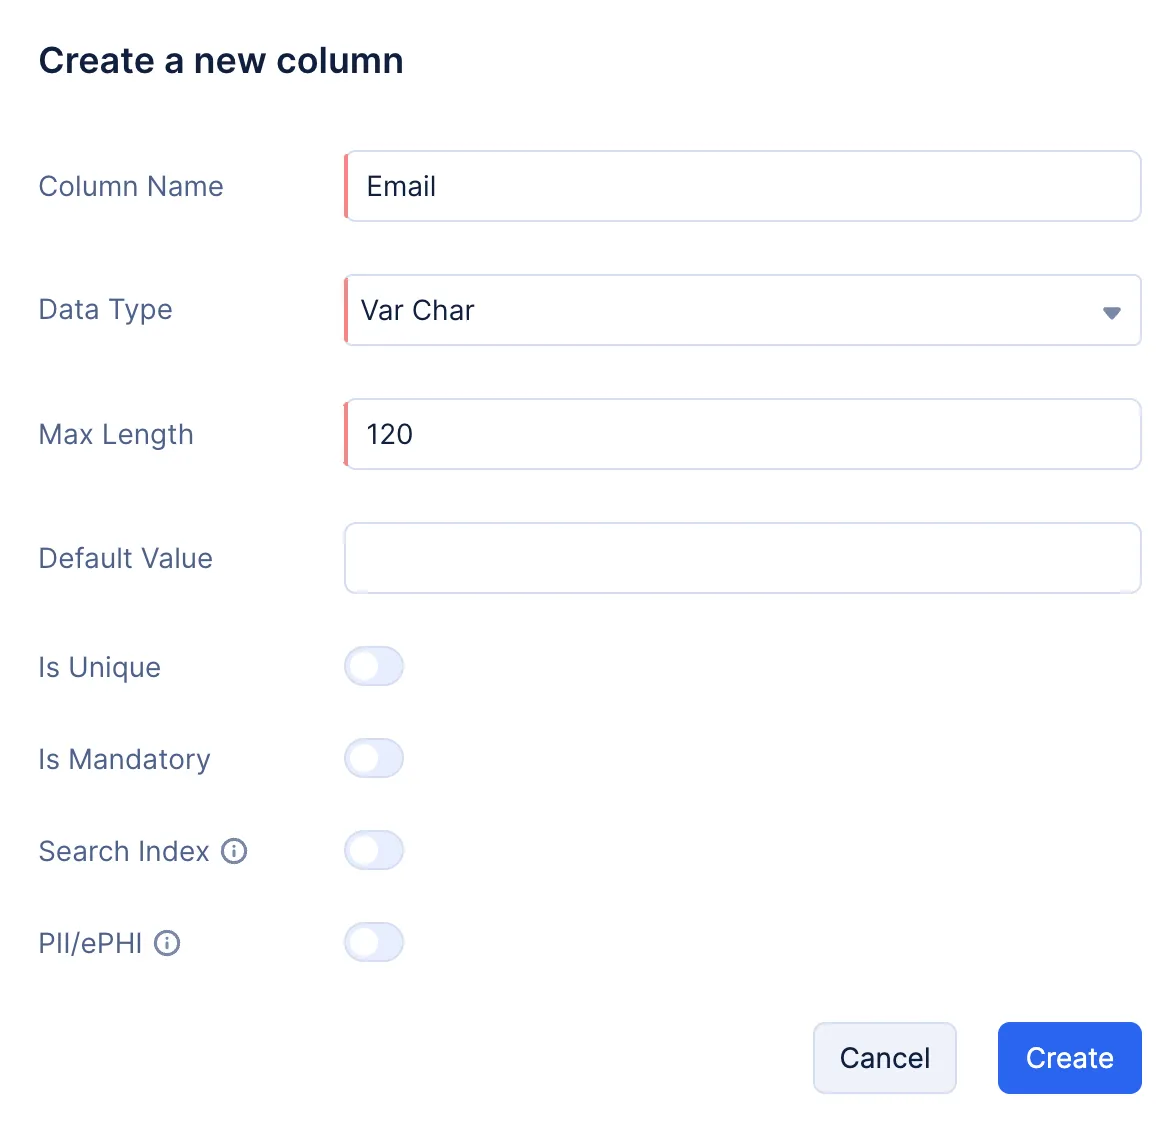
Click the New Column button again to create the fourth column. Name it “Email”, select Var Char as its data type, enter “120” as the Max Length, and click Create.
-
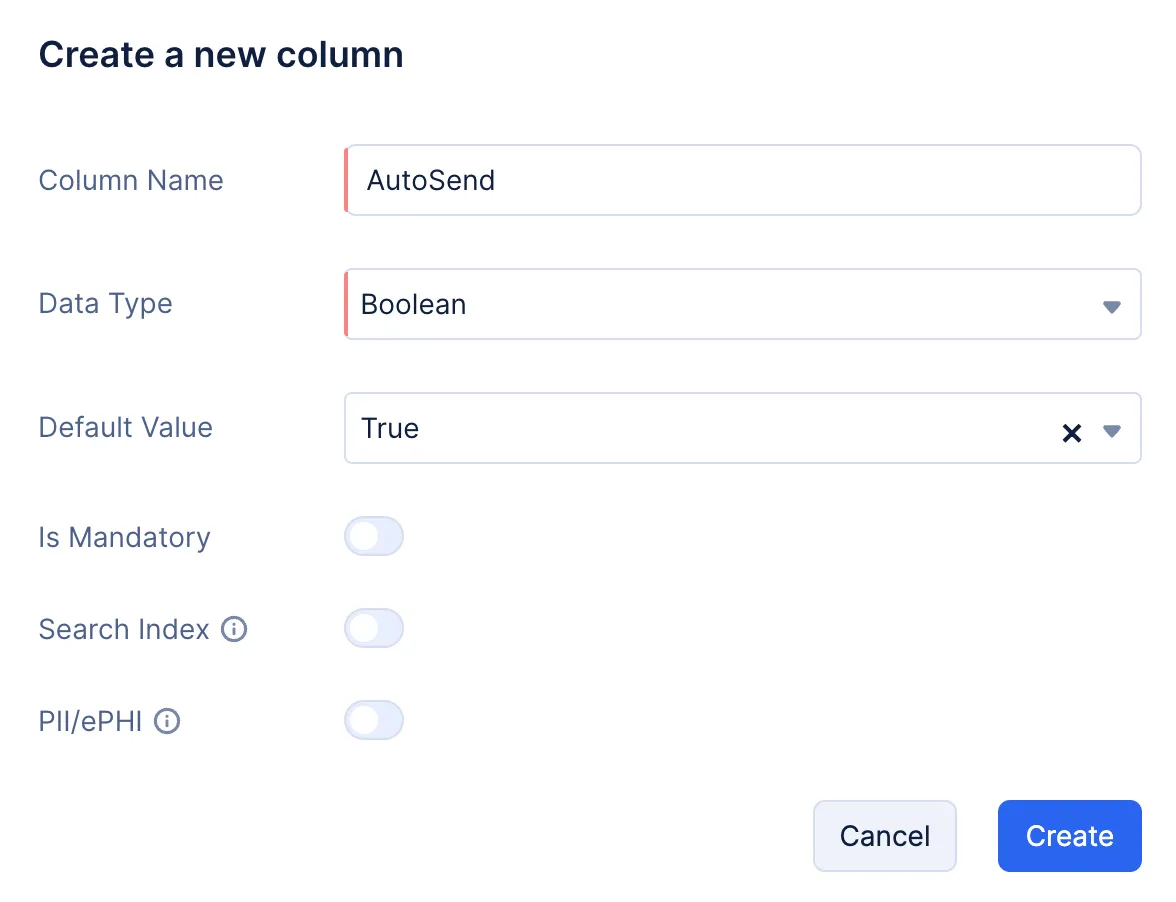
Lastly, click the New Column button again to create the fifth column. Name it “AutoSend”, select Boolean as its data type, select True as the Default Value, and click Create.
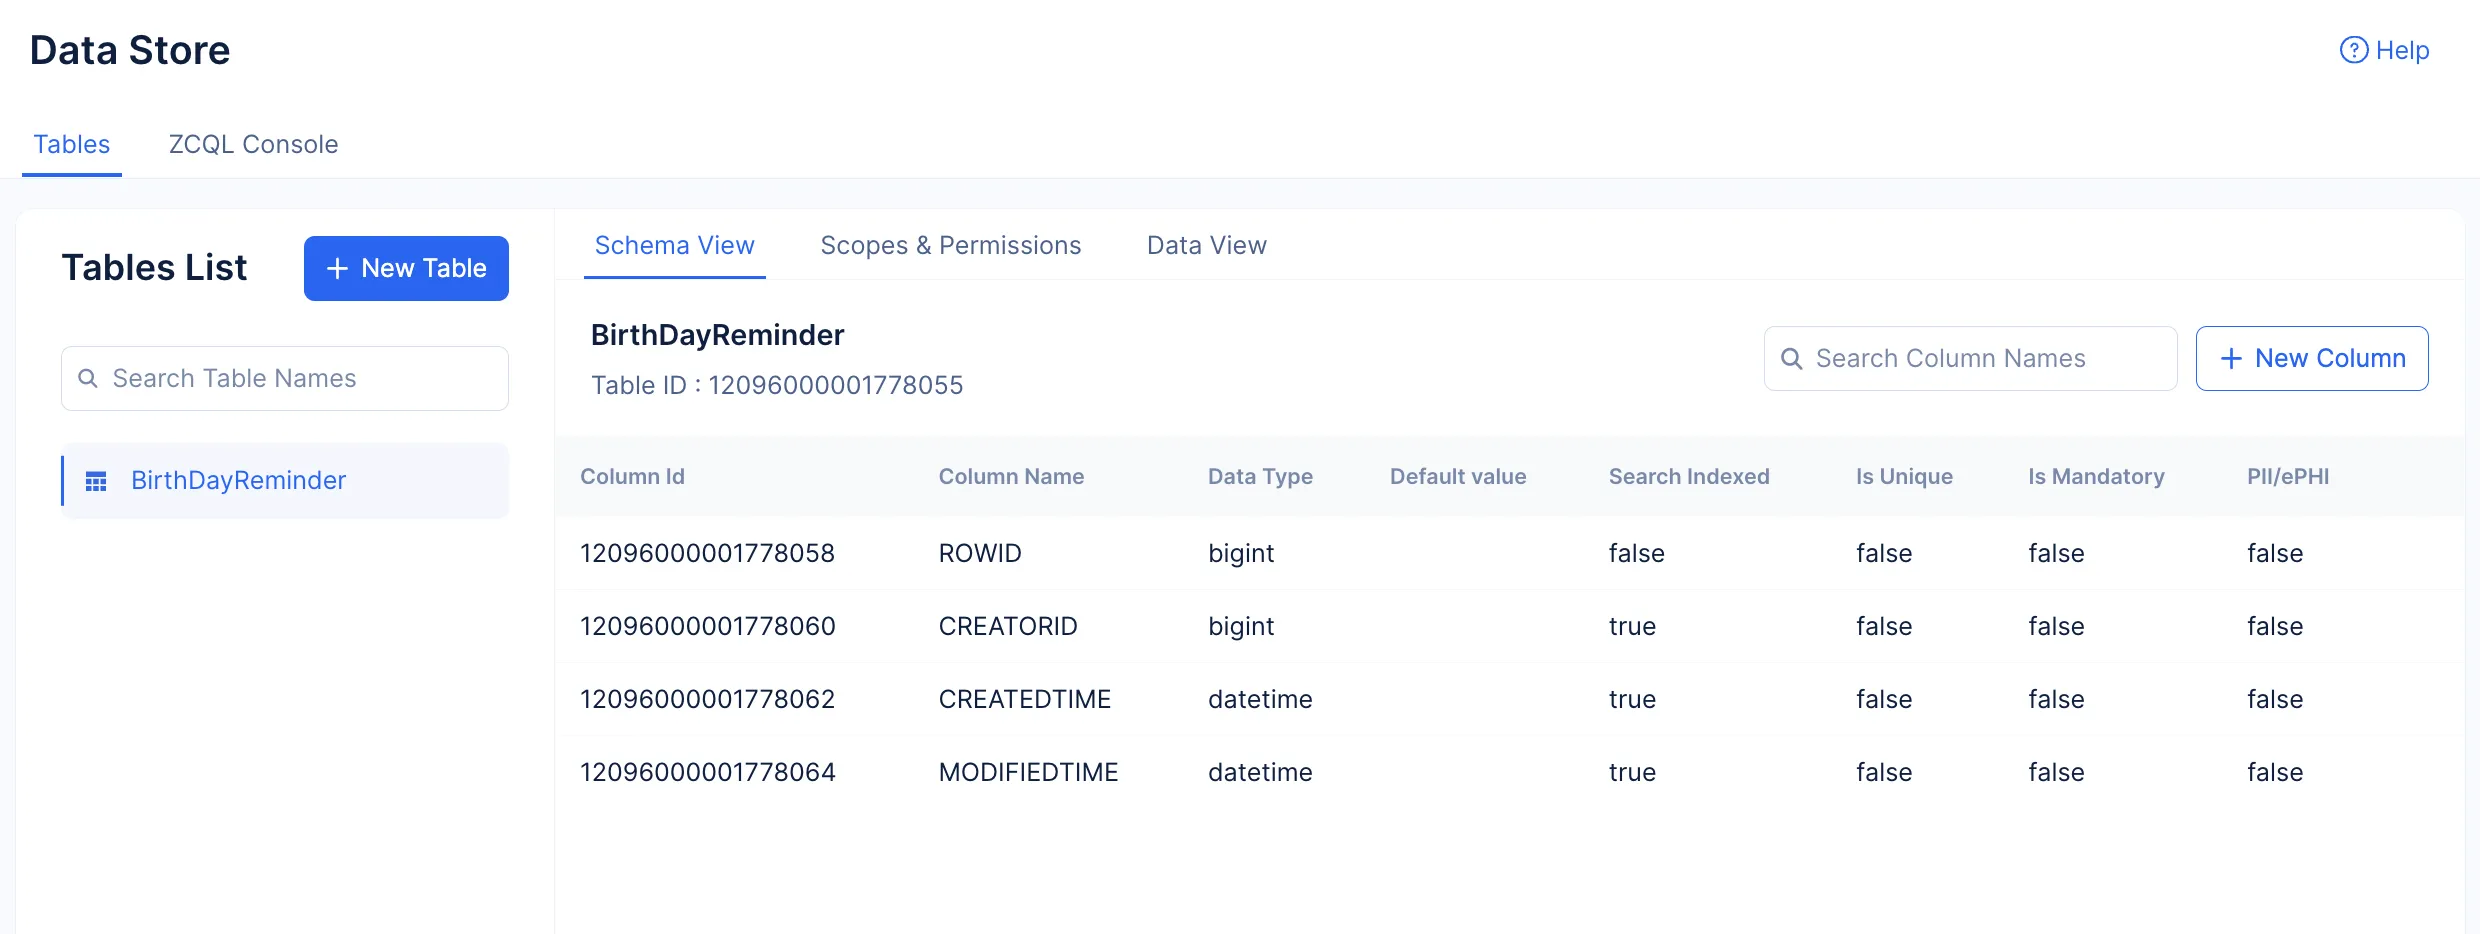
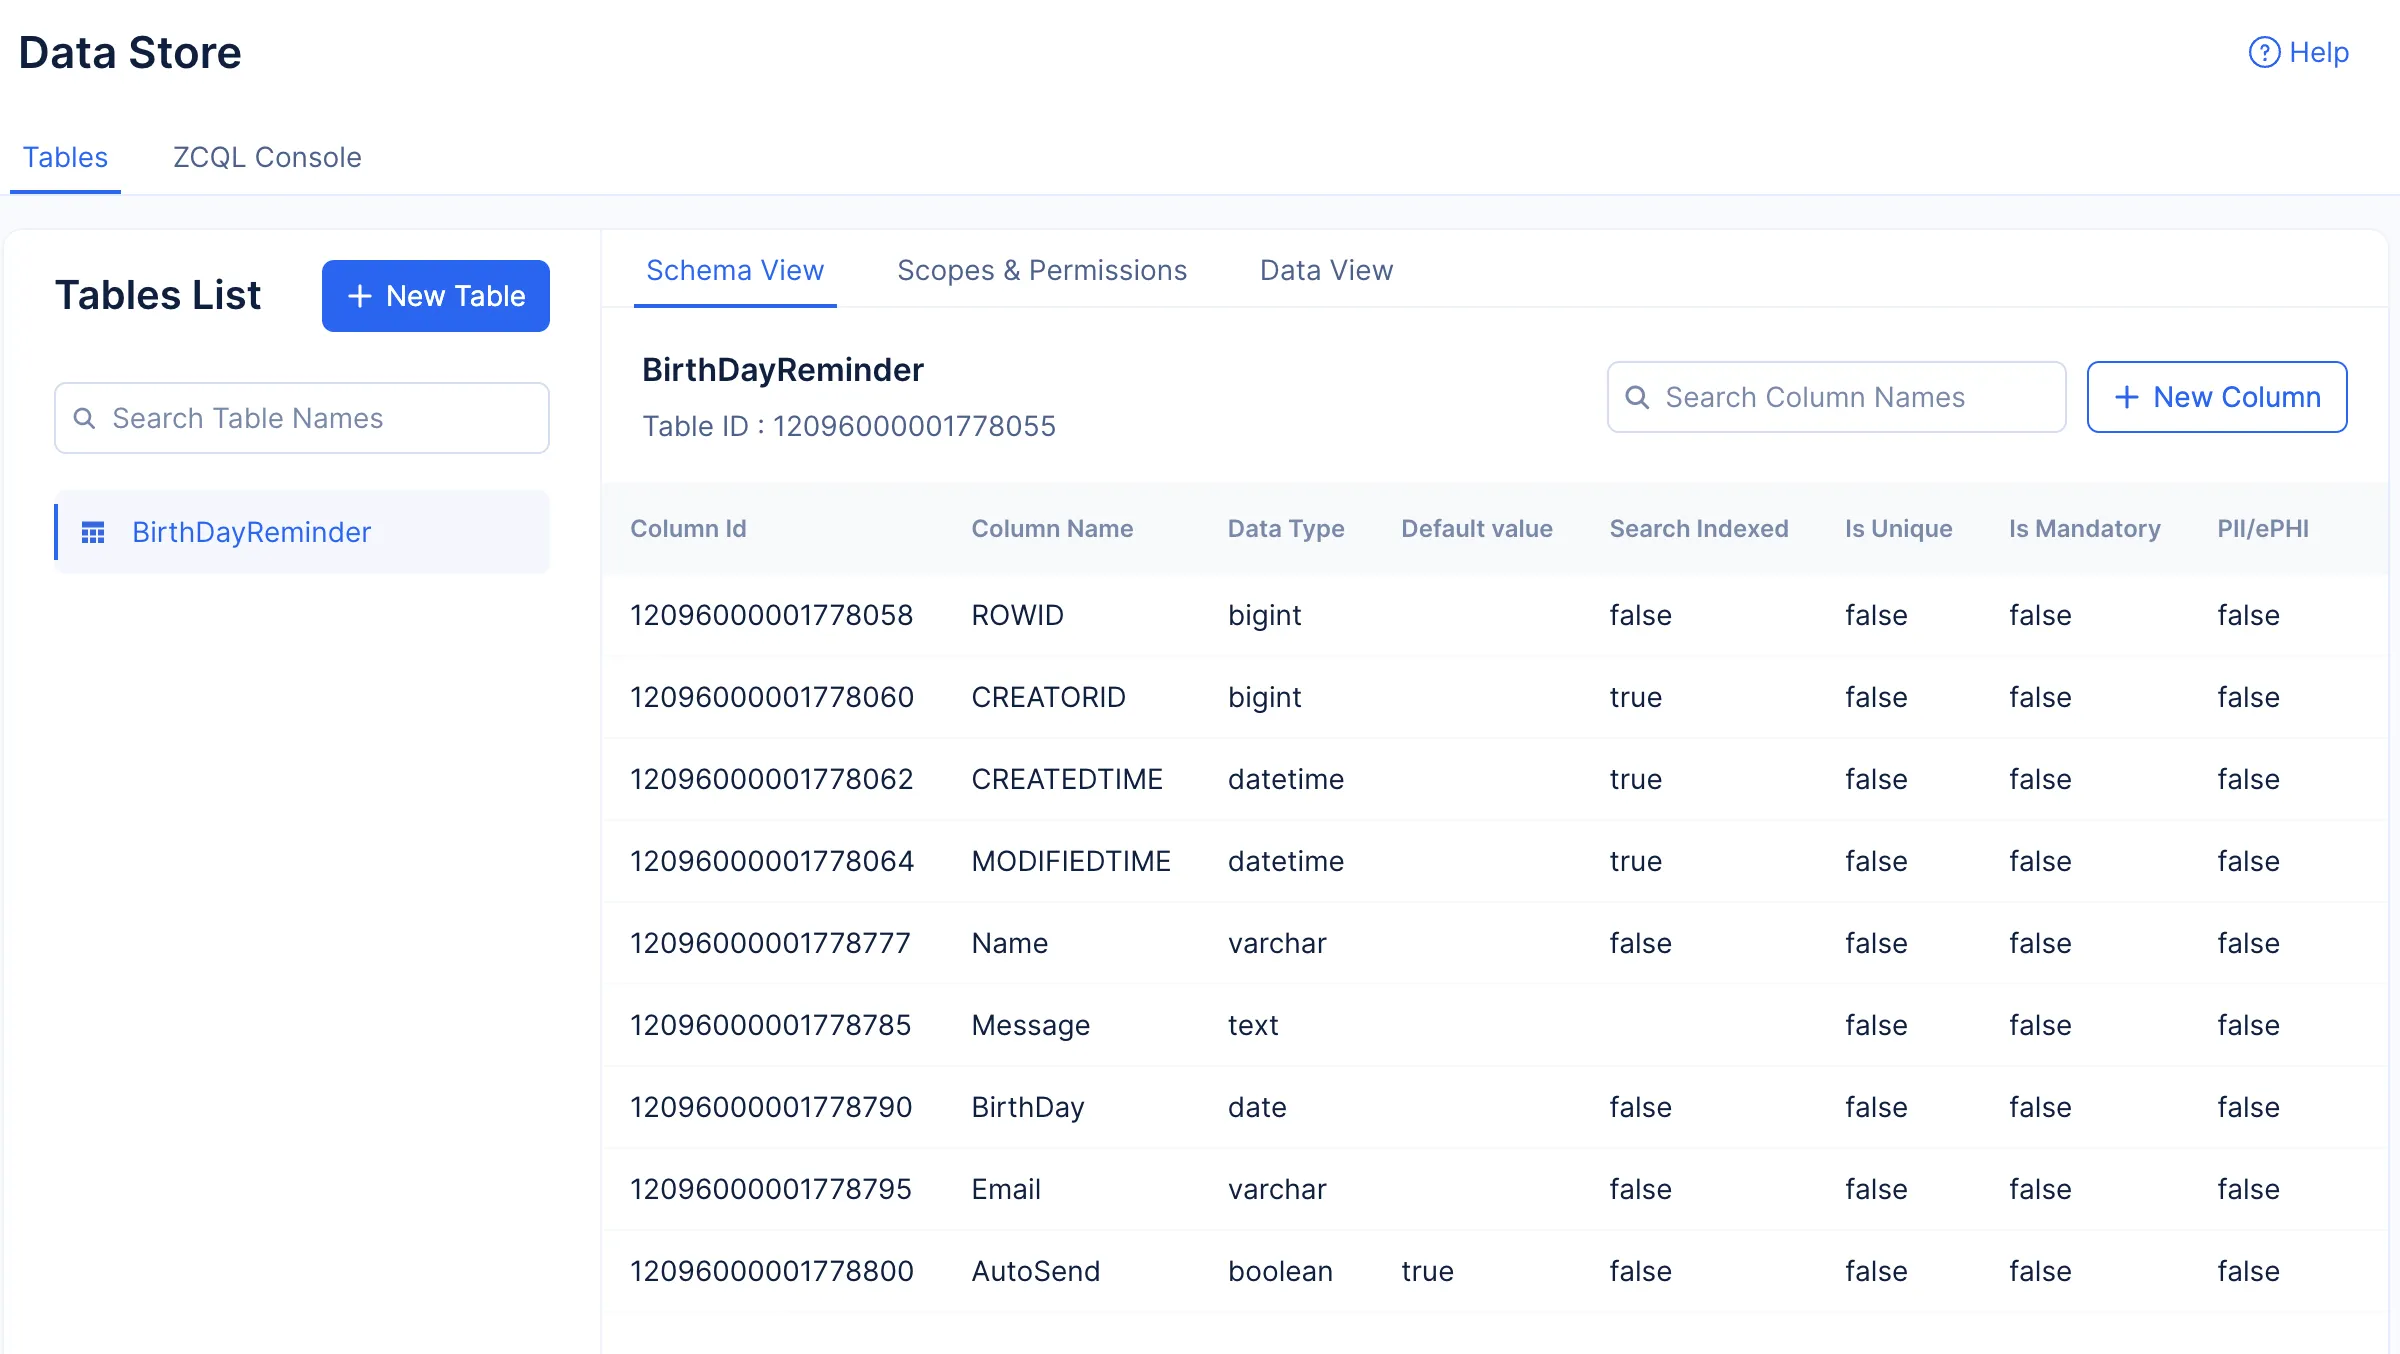
All of the required columns have been created.
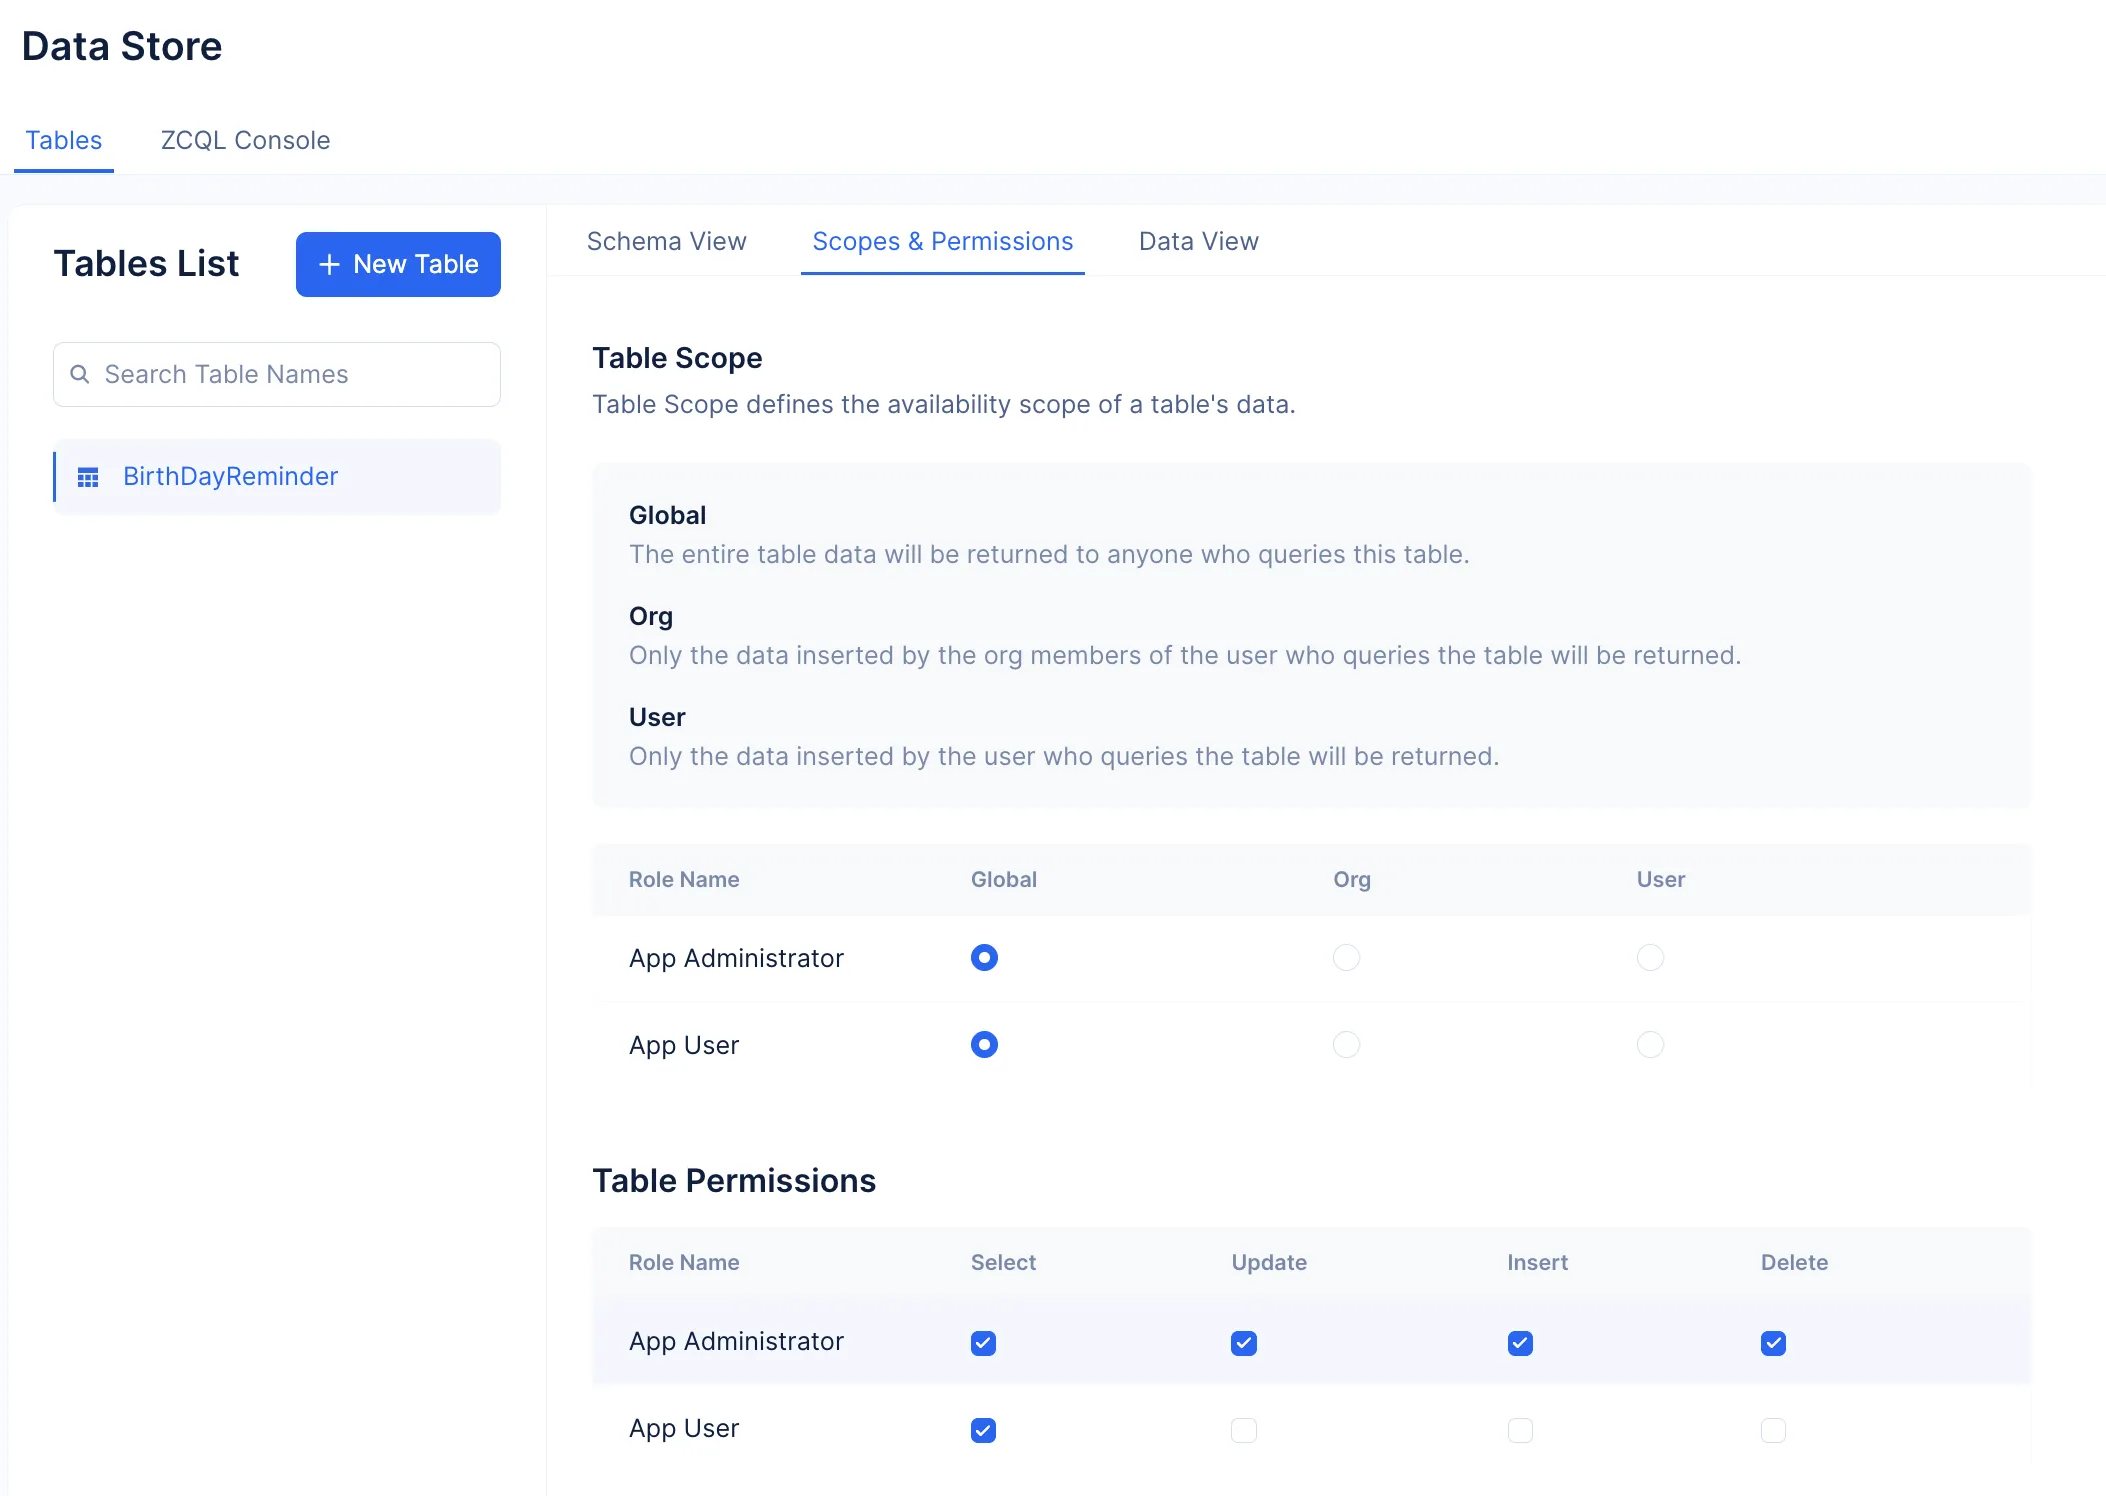
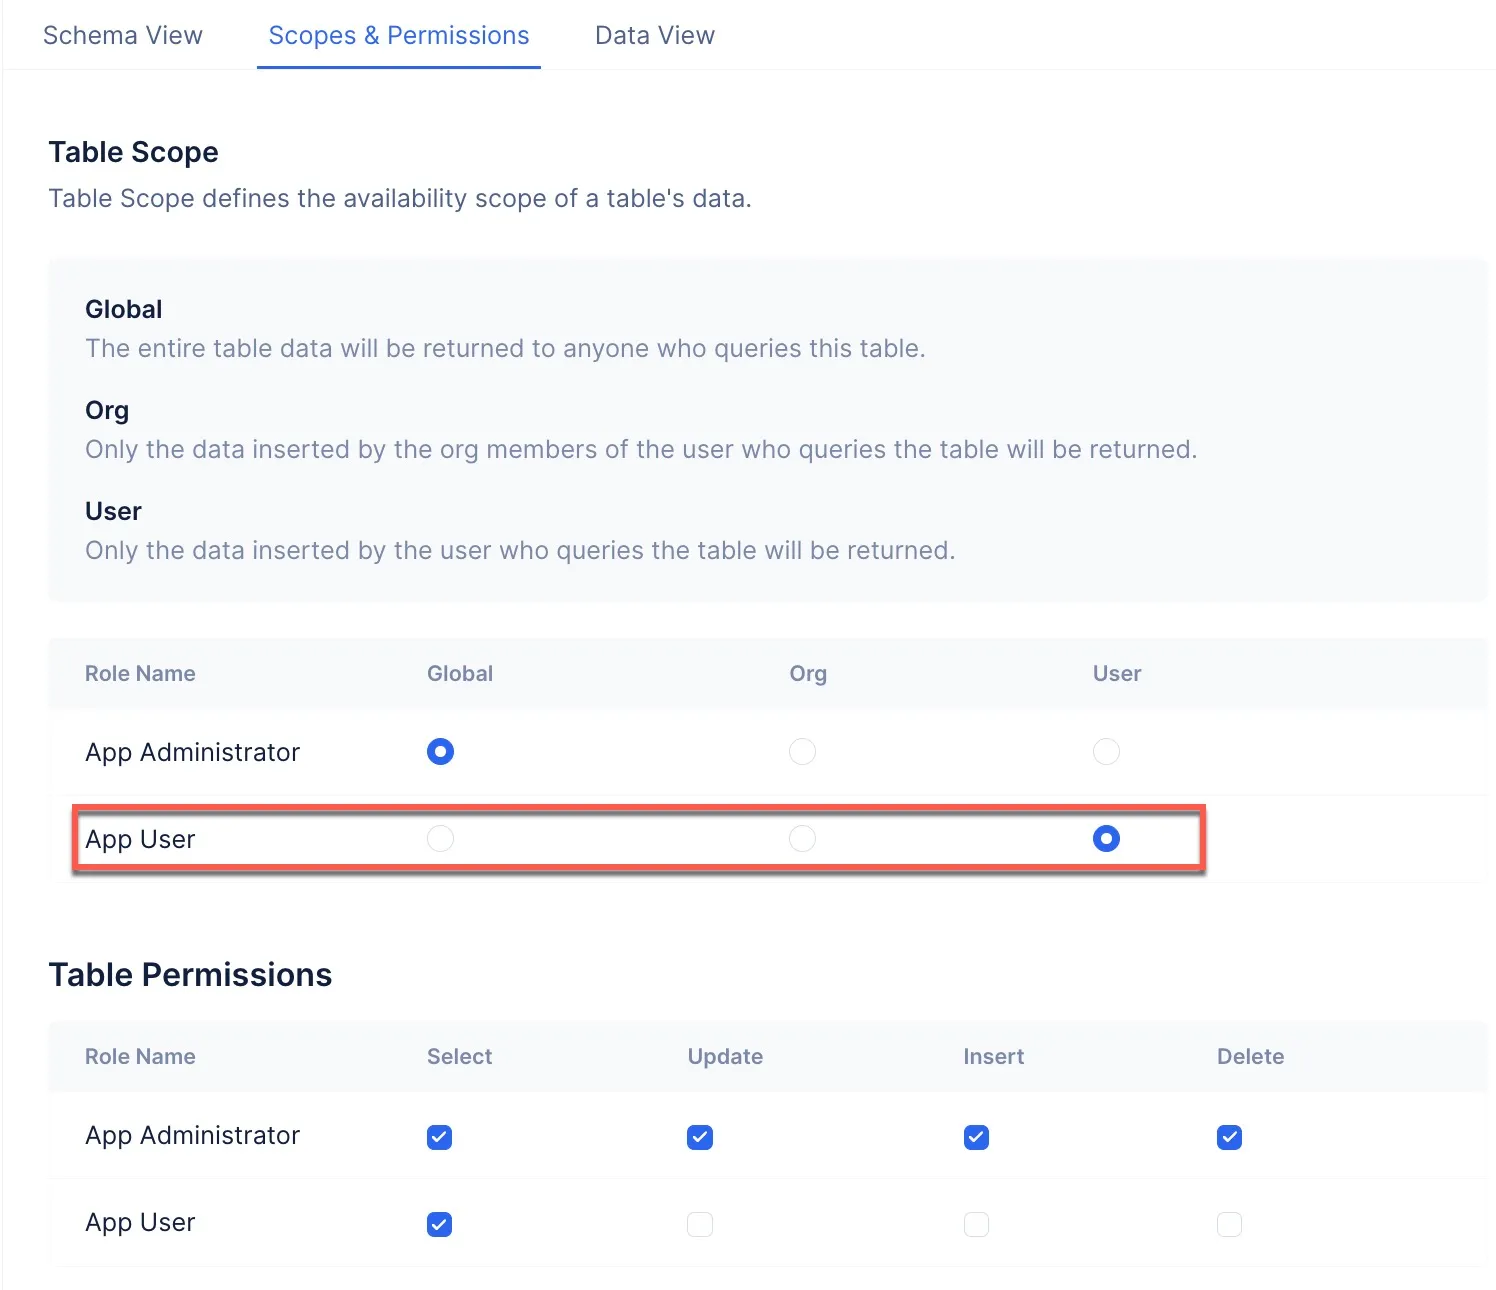
Configure Scopes and Permissions
To allow any user of the Birthday Greetings application to create and manage birthday messages from the client application, you must enable CRUD operations for the App User profile and set its role as User.
To enable the required permissions:
-
Click the Scopes & Permissions tab.
-
Select the User profile for the App User role.
-
Select the Update, Insert, and Delete permissions for the App User by clicking the respective check boxes. Ensure that you do not change any other permission setting.
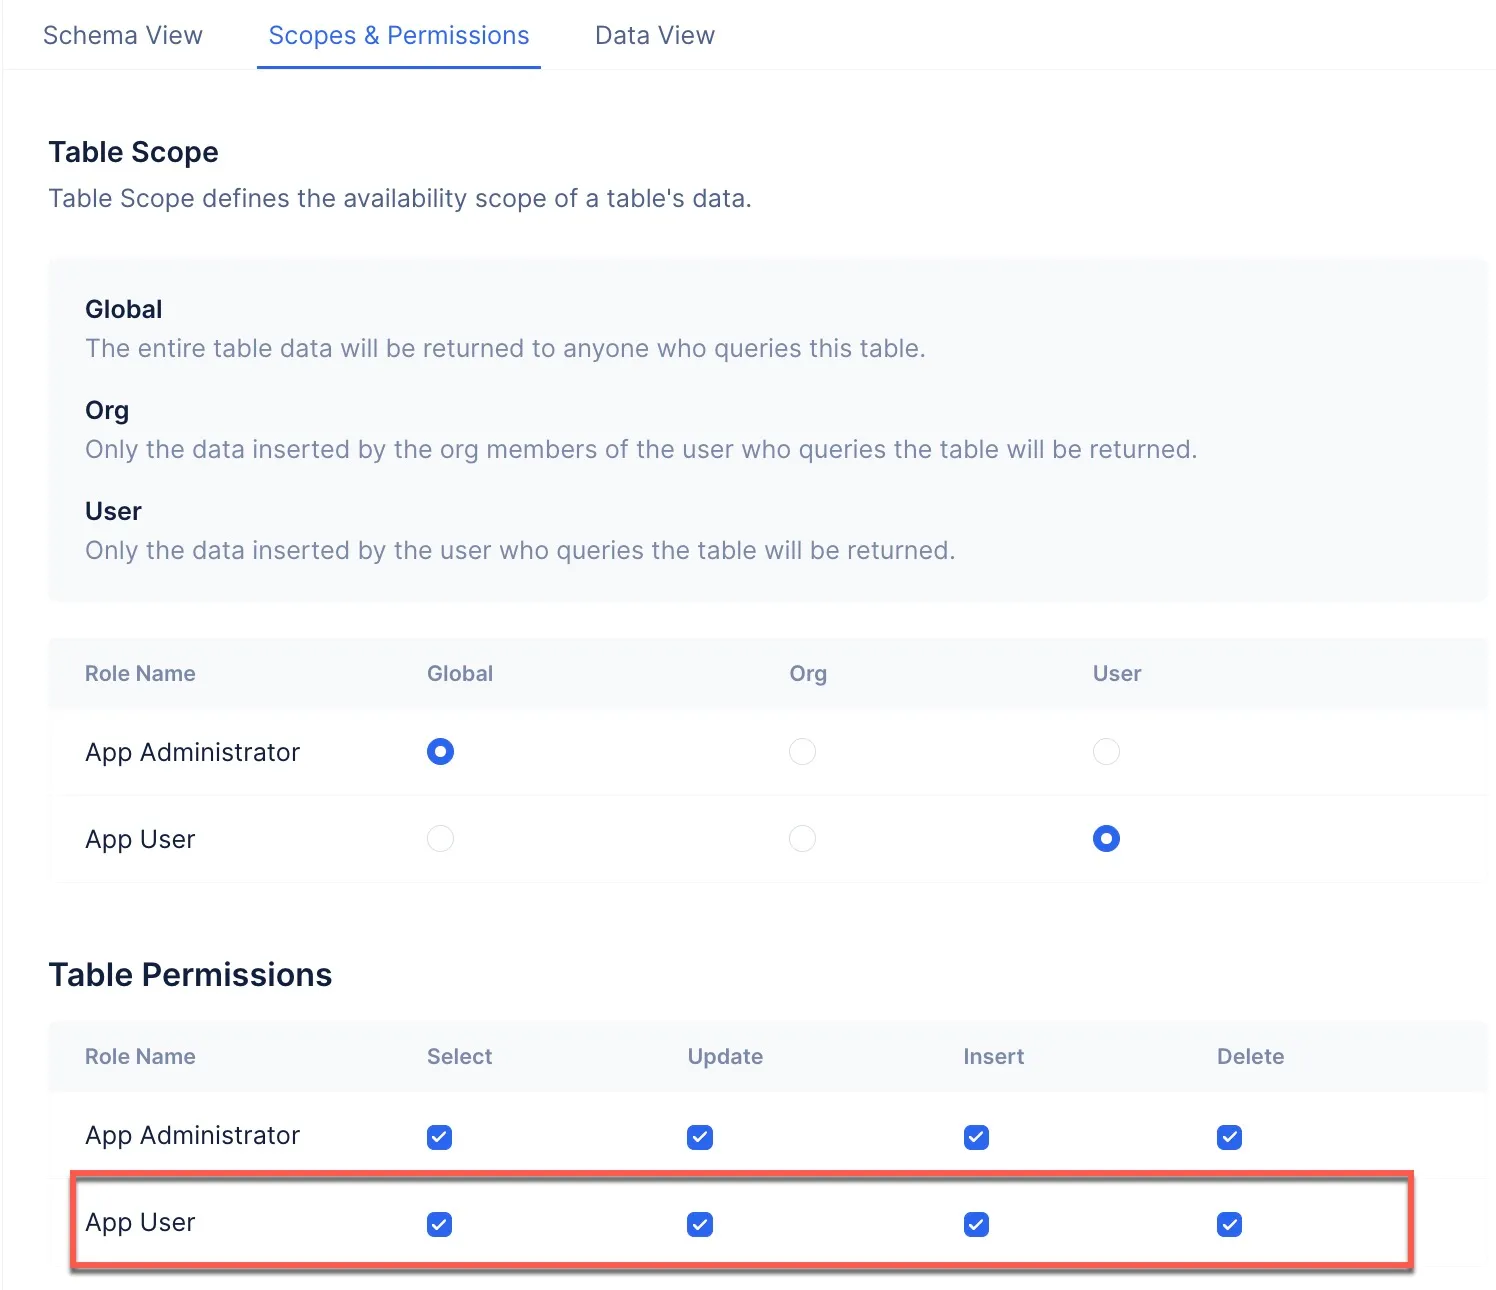
The Data Store component is now configured for the application.
Last Updated 2025-10-08 16:27:14 +0530 IST