Submit a Job to the Job Pool Using a Pre-Defined Cron
A Pre-Defined Cron allows you to schedule job submissions to the job pool based on pre-set conditions. In this help section, we are going to go over the steps required to schedule the submission of a job to the job pool using a Pre-defined Cron.
Before you create a pre-defined cron, depending on your job pool type, make sure the following components are configured and present in the Catalyst console:
- Function Job Pool: The Job Function, if initialized through Catalyst CLI needs to be deployed to the Catalyst console.
- Webhook Job Pool: Ensure the URL of the third-party URL is a valid one.
- Circuit Job Pool: Ensure that the Circuit and its associated functions are created and present in the Catalyst console.
- AppSail Job Pool: Ensure you have deployed your AppSail service to the catalyst console.
Configure the Pre-Defined Cron
To create and configure a Pre-Defined Cron:
-
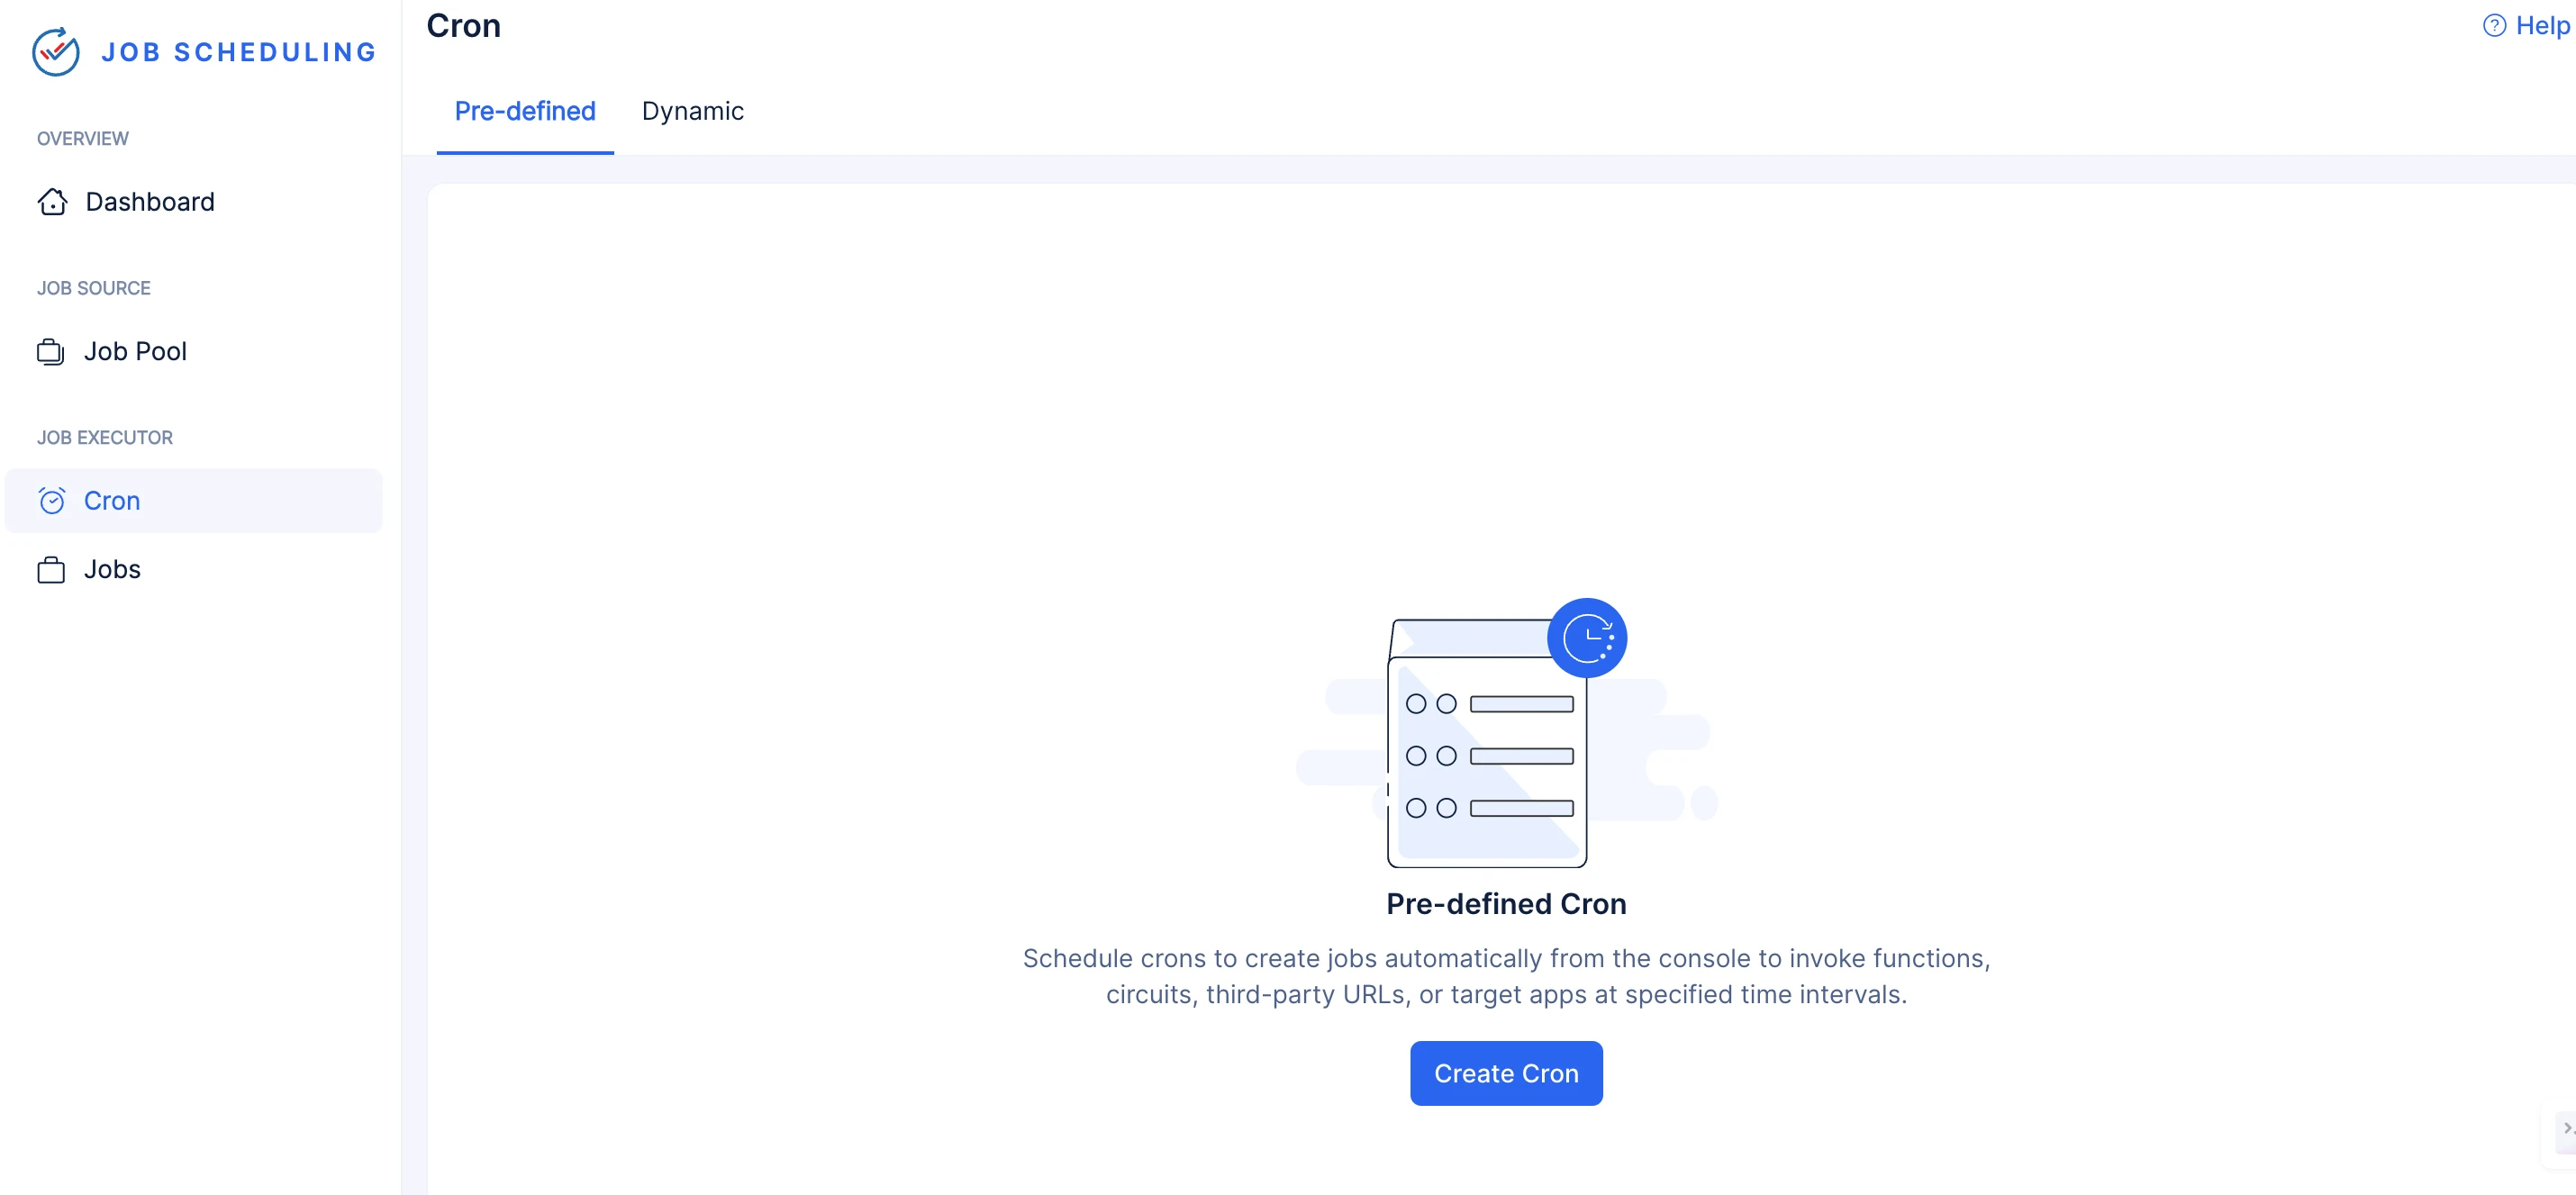
Navigate to the Job Scheduling service section of the Catalyst console and click Start Exploring.
-
Access the cron component by clicking Cron under JOB EXECUTOR, and click the Create Cron button present in the Pre-defined tab.
-
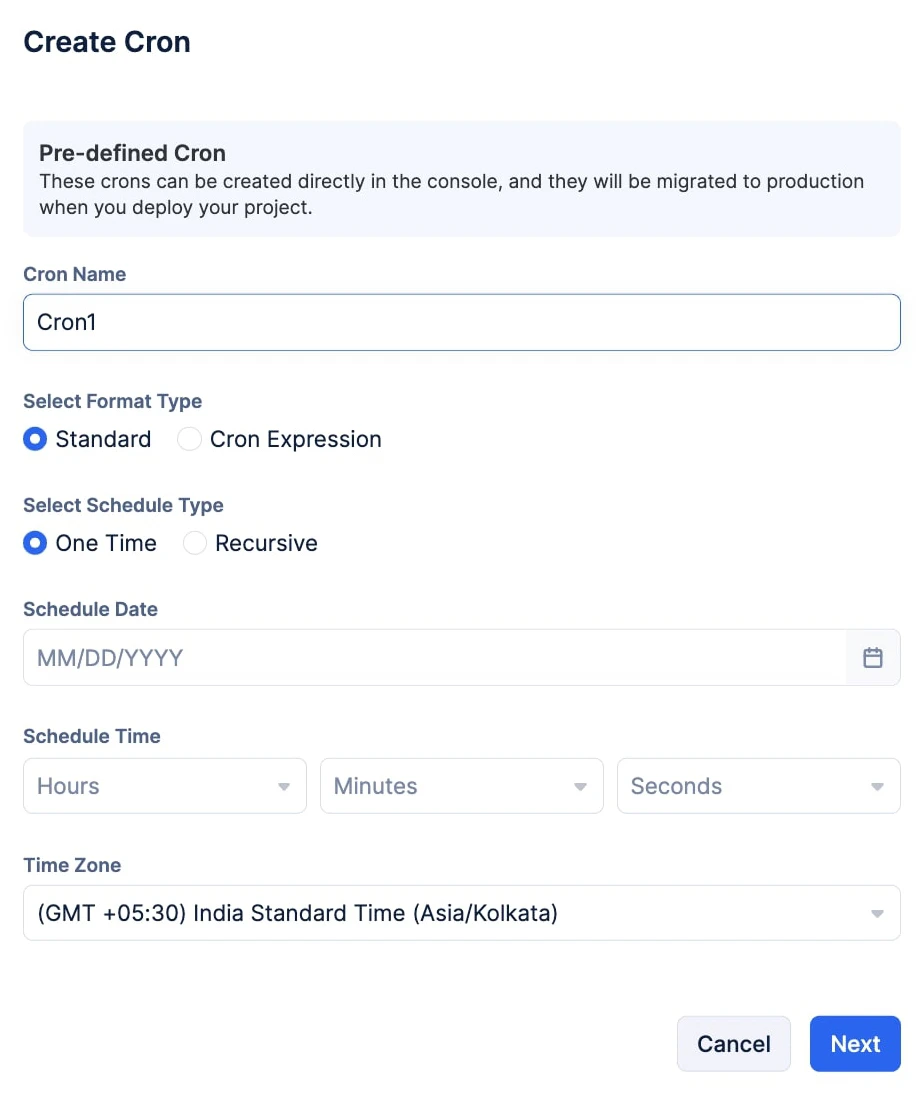
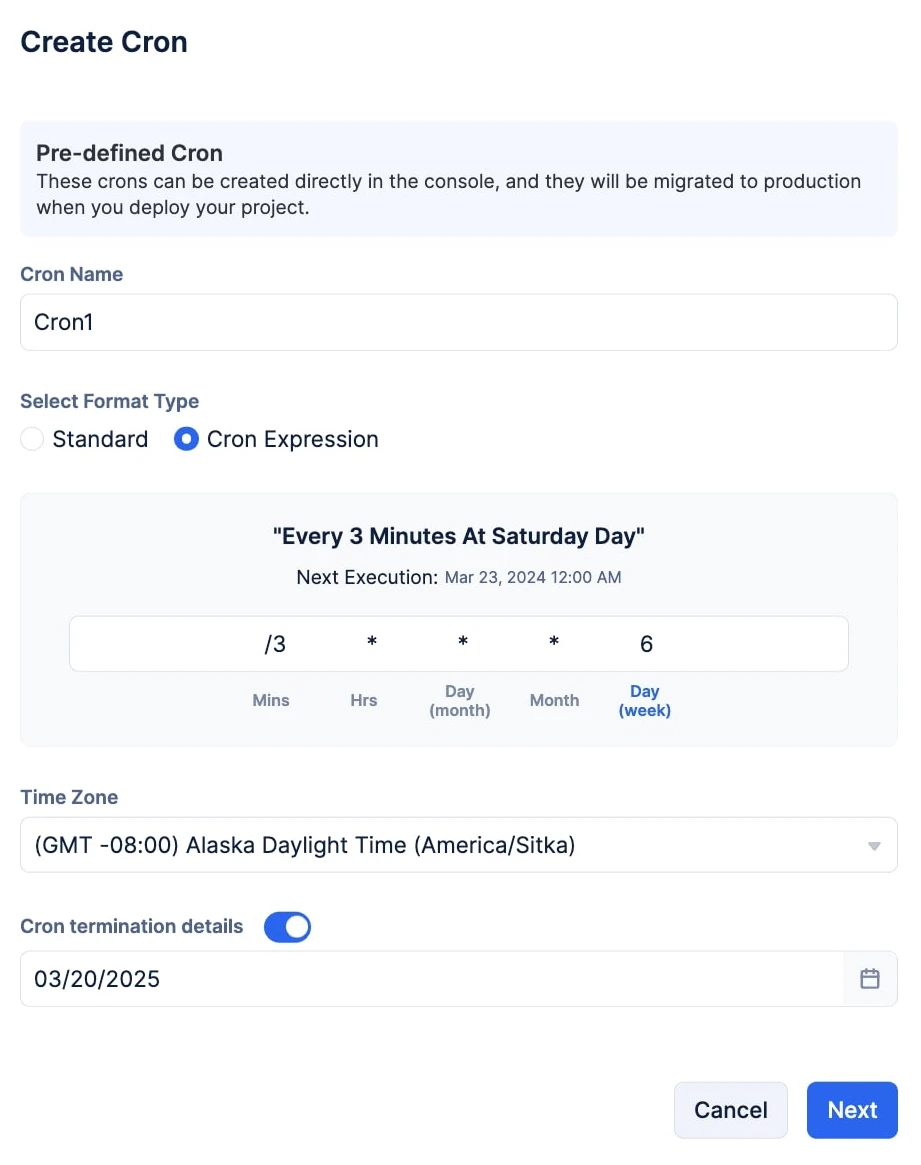
Provide a name for your cron in the Cron Name input field.
-
Choose a format type under Select Format Type:
Standard Format
- Select a Schedule Type:
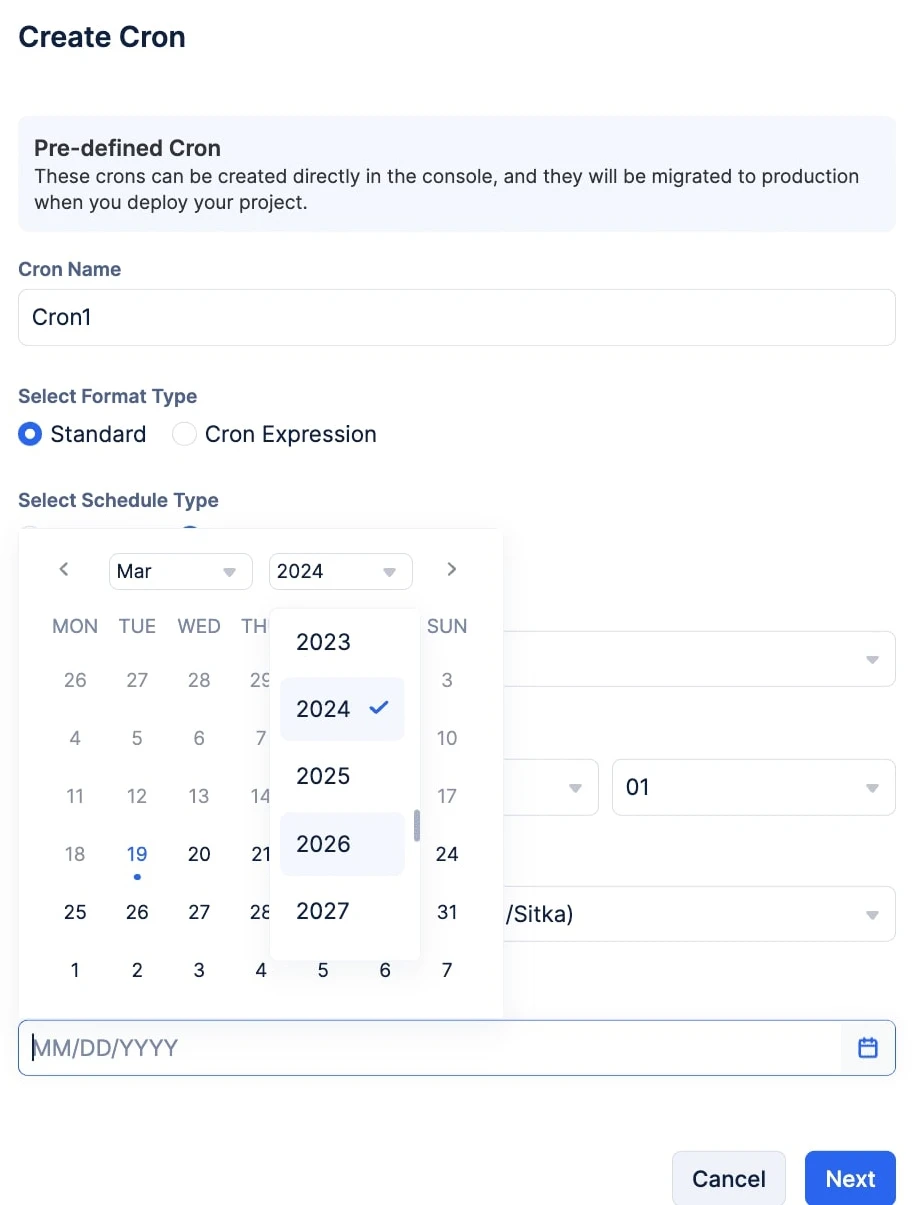
One-Time Schedule Type
-
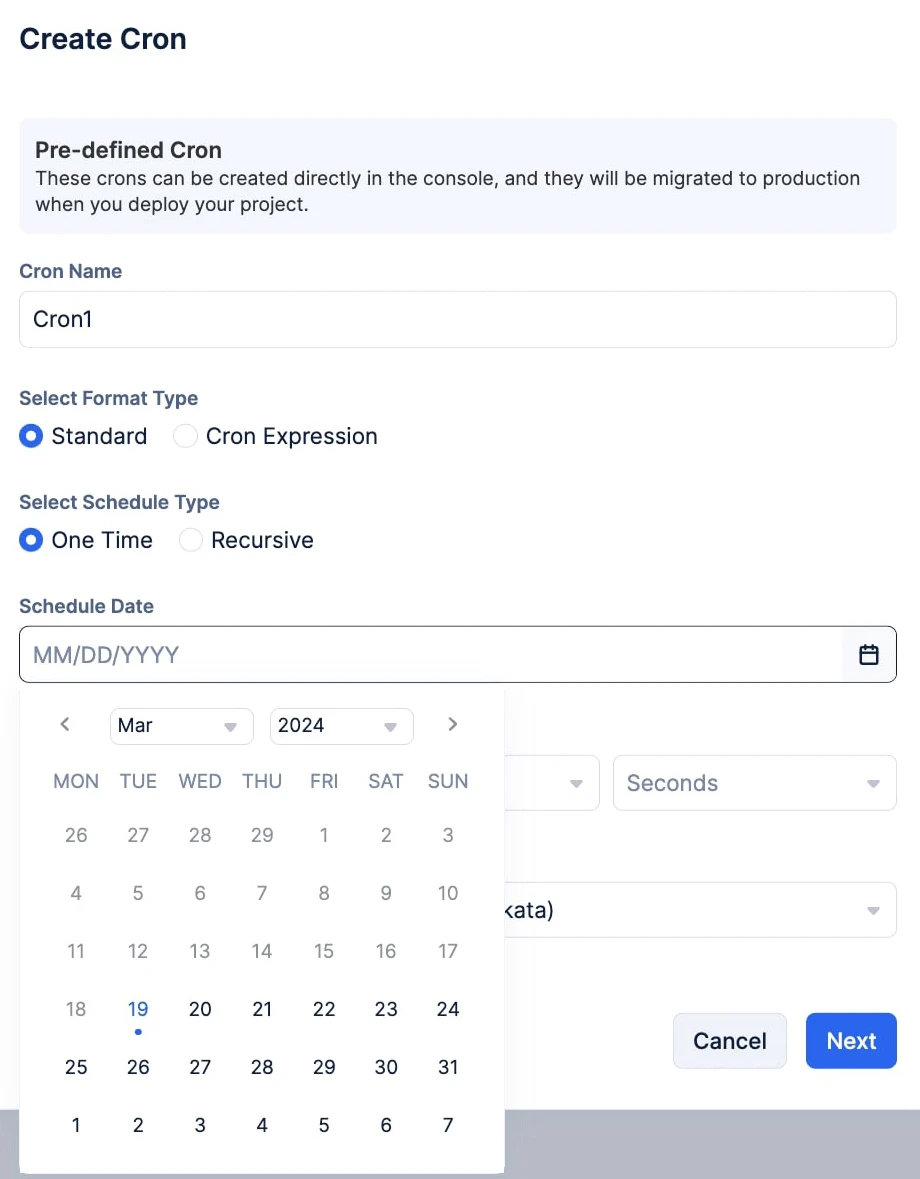
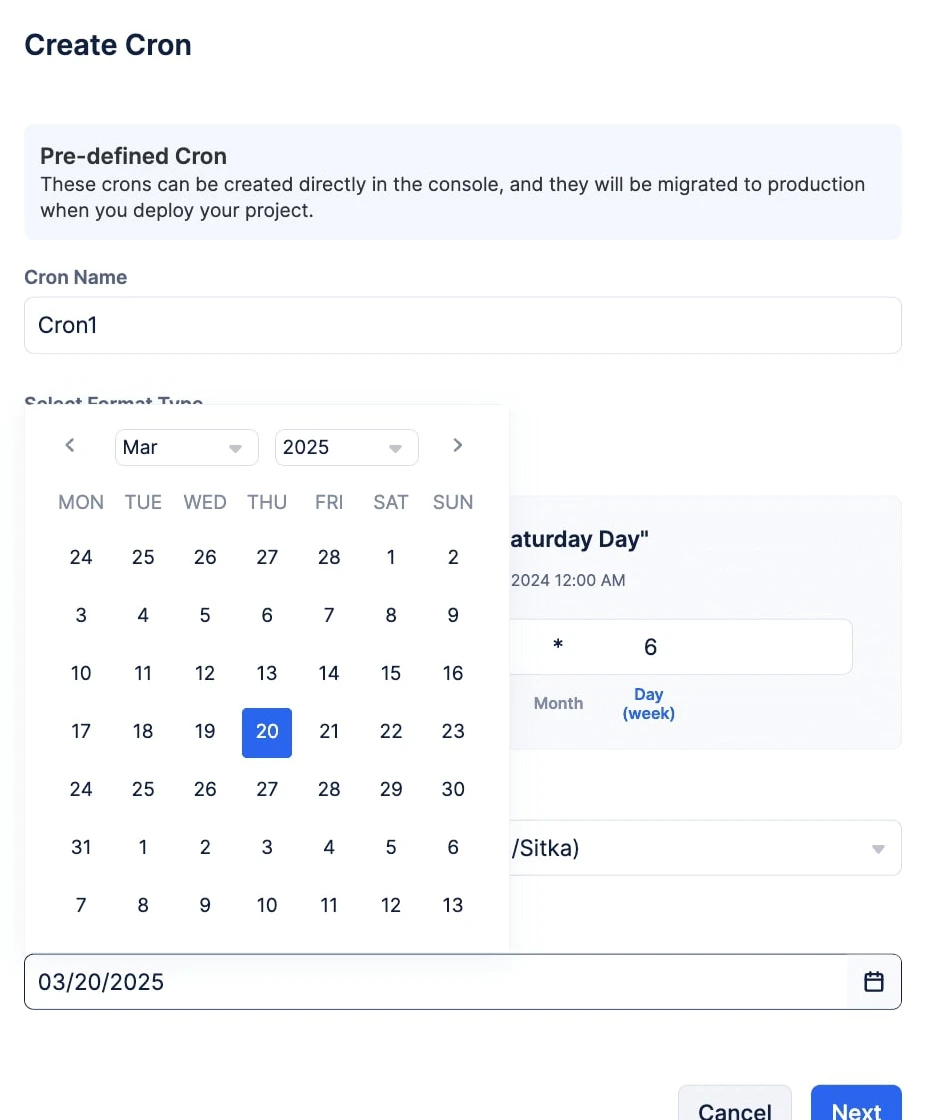
Select the required date by clicking the calendar icon.
-
Provide the time for your cron’s execution using the individual Hours, Minutes, and Seconds drop-downs under Schedule Time.
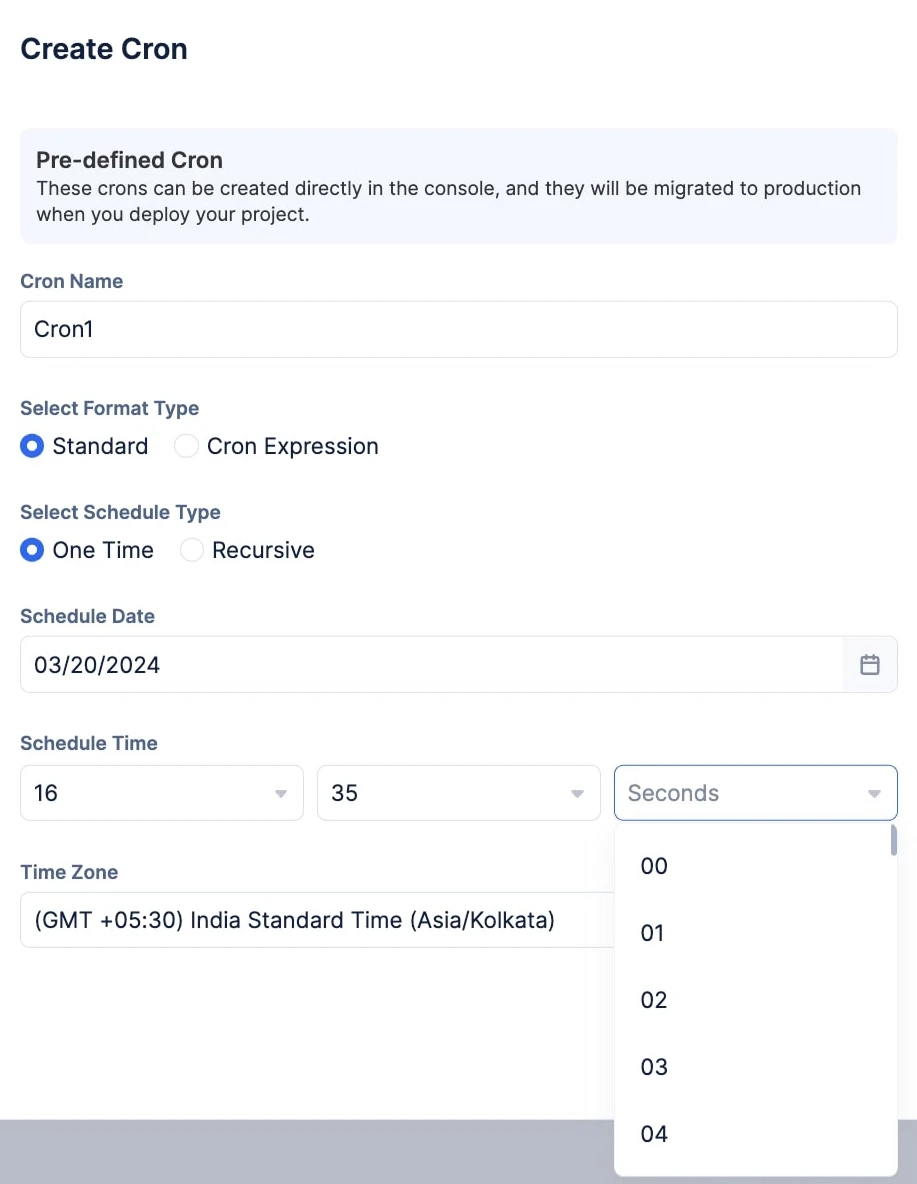
Note: Provide the Schedule Time in the 24-hour time format, and you cannot leave the Hours, Minutes, or Seconds input fields empty.- Select your required time zone from the Time Zone drop-down.
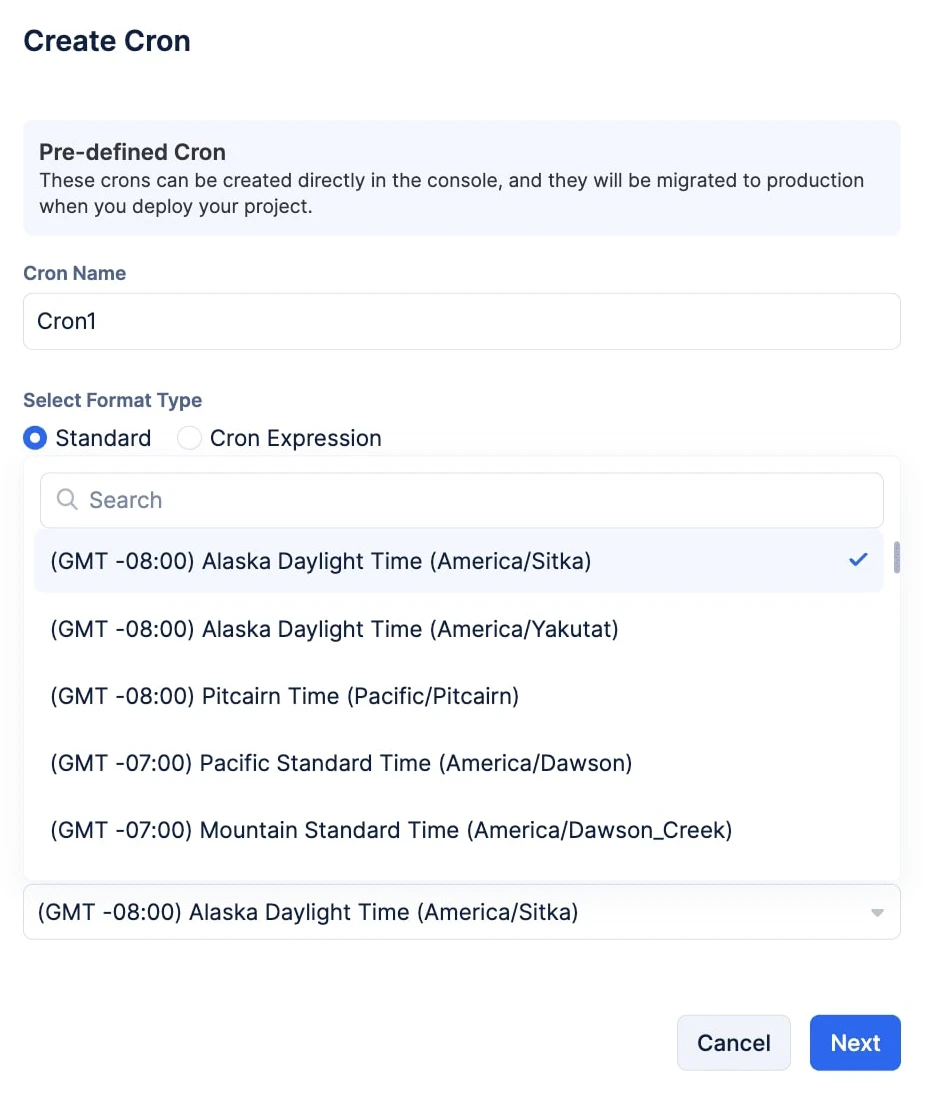
Note: The time zone you are currently present in will be automatically populated. If you require any other time zone to configure your cron, click the View all time zones option and make your selection from the drop-down.- Confirm your configurations and click Next.

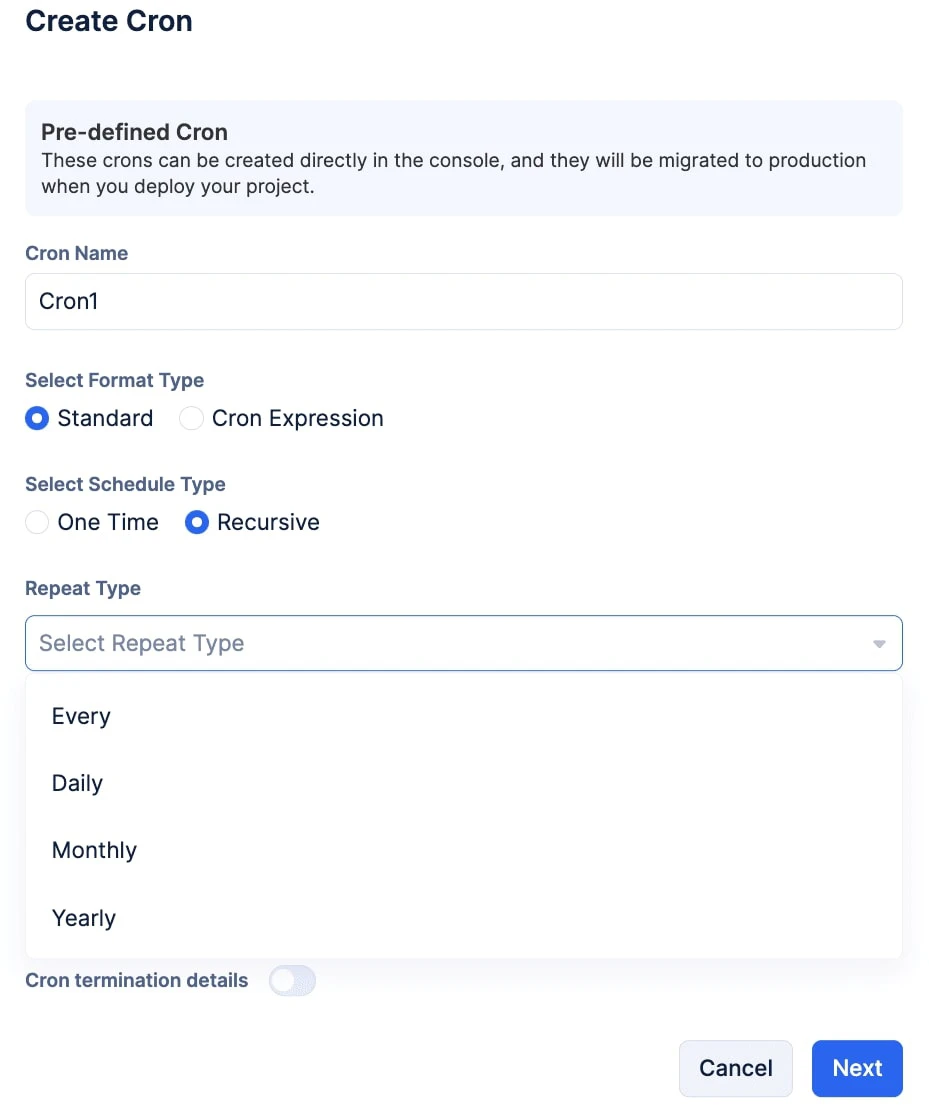
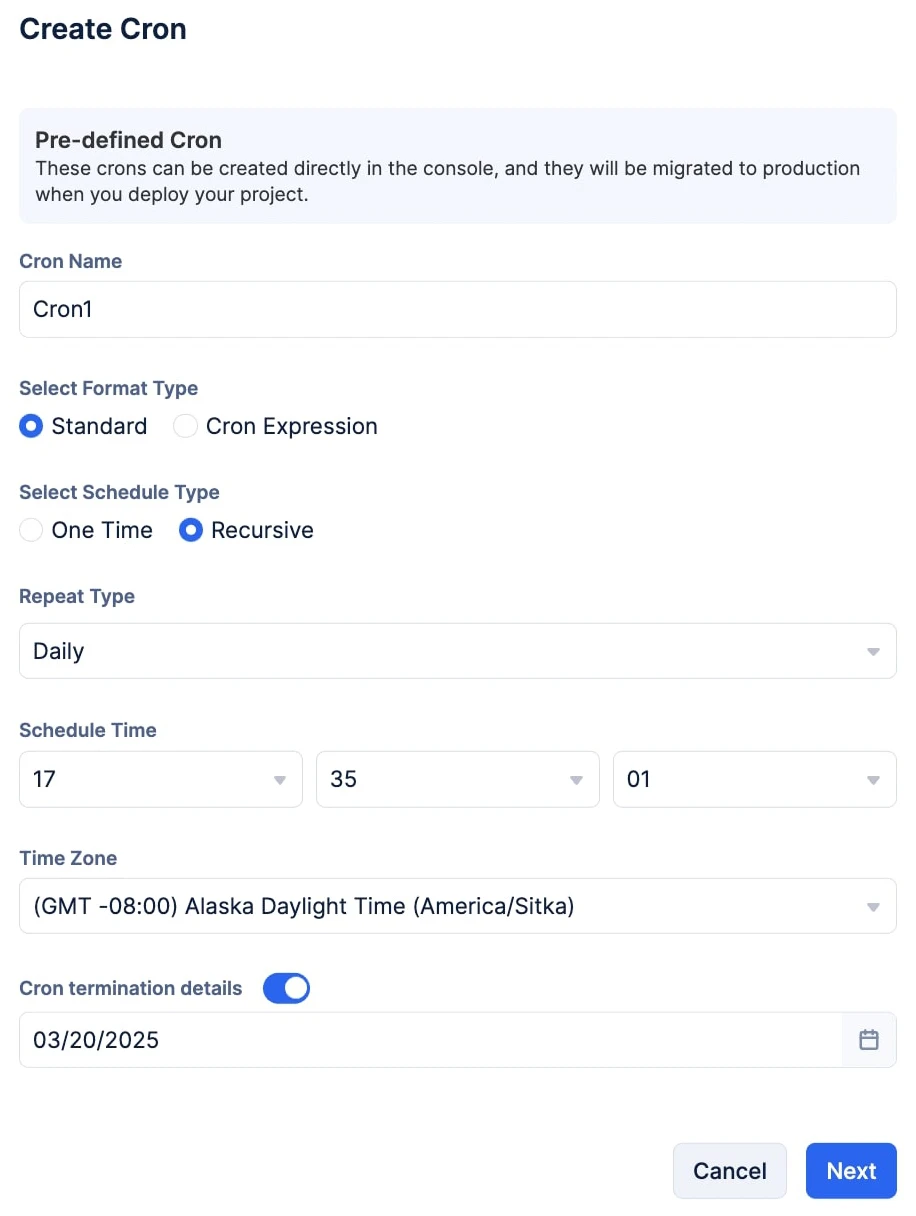
Recursive Schedule Type
-
Select the required recurring frequency from the Repeat Type drop-down:
-
Provide the time for your cron’s execution using the individual Hours, Minutes, and Seconds drop-downs present under Schedule Time.
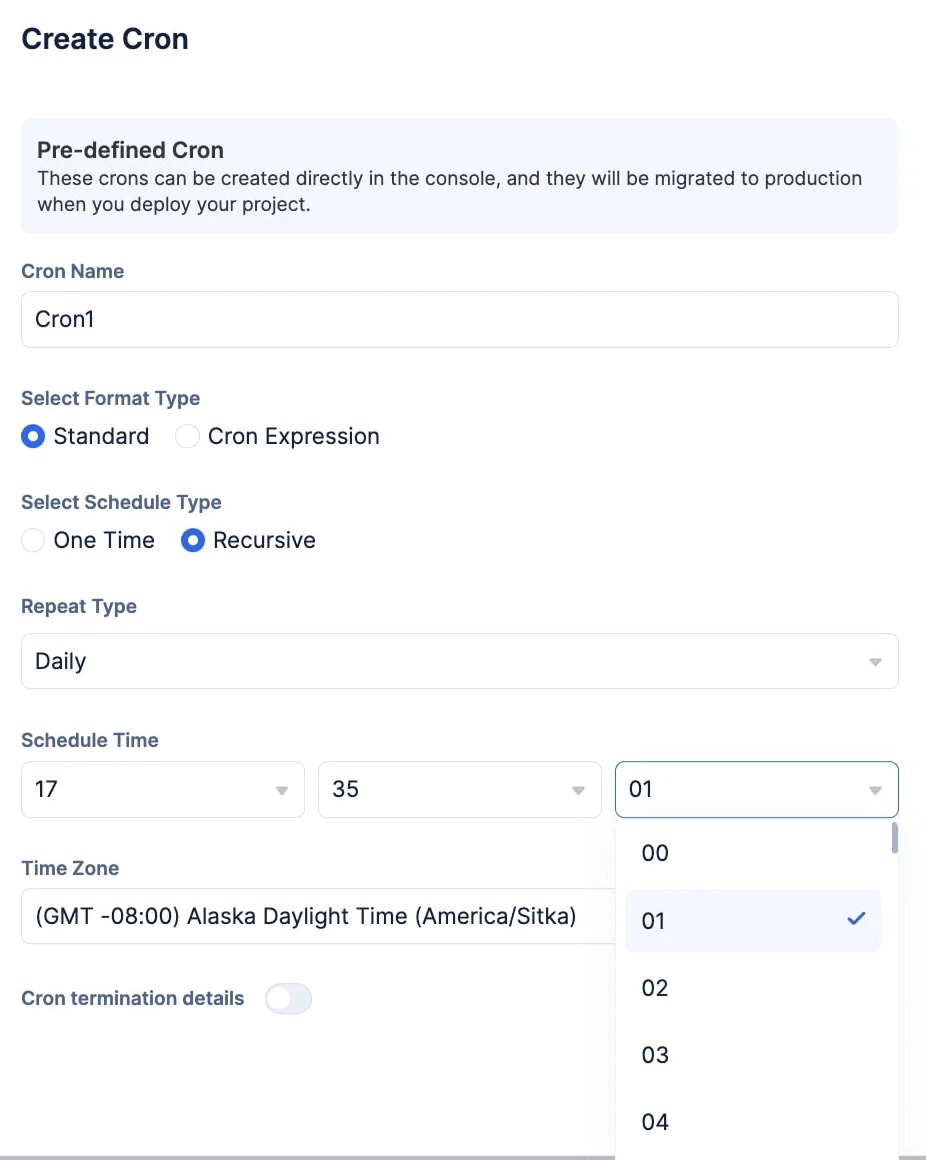
Note: Provide the Schedule Time in the 24-hour time format, and you cannot leave the Hours, Minutes, or Seconds input fields empty.- Select your required time zone from the Time Zone drop-down.
Note: The time zone you are currently present in will be automatically populated. If you require any other time zone to configure your cron, click the View all time zones option and make your selection from the drop-down.Optionally, if you wish to terminate the cron schedule eventually, enable the Cron termination details toggle and select the end date using the calendar icon.
- Confirm your configurations and click Next.
Cron Expression Format
- Input your Cron Expression in the input field.
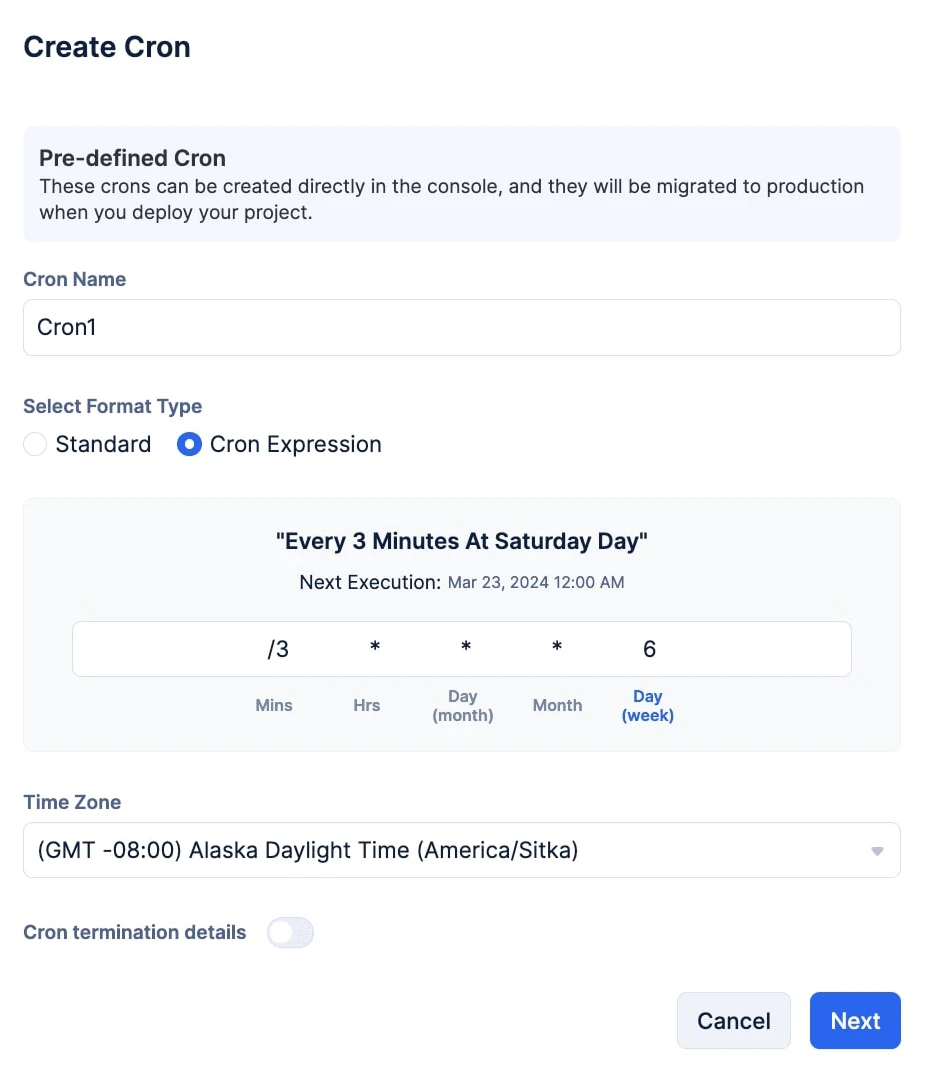
Note: You can find the steps to configure cron expressions from this section.- Select your required time zone from the Time Zone drop-down.
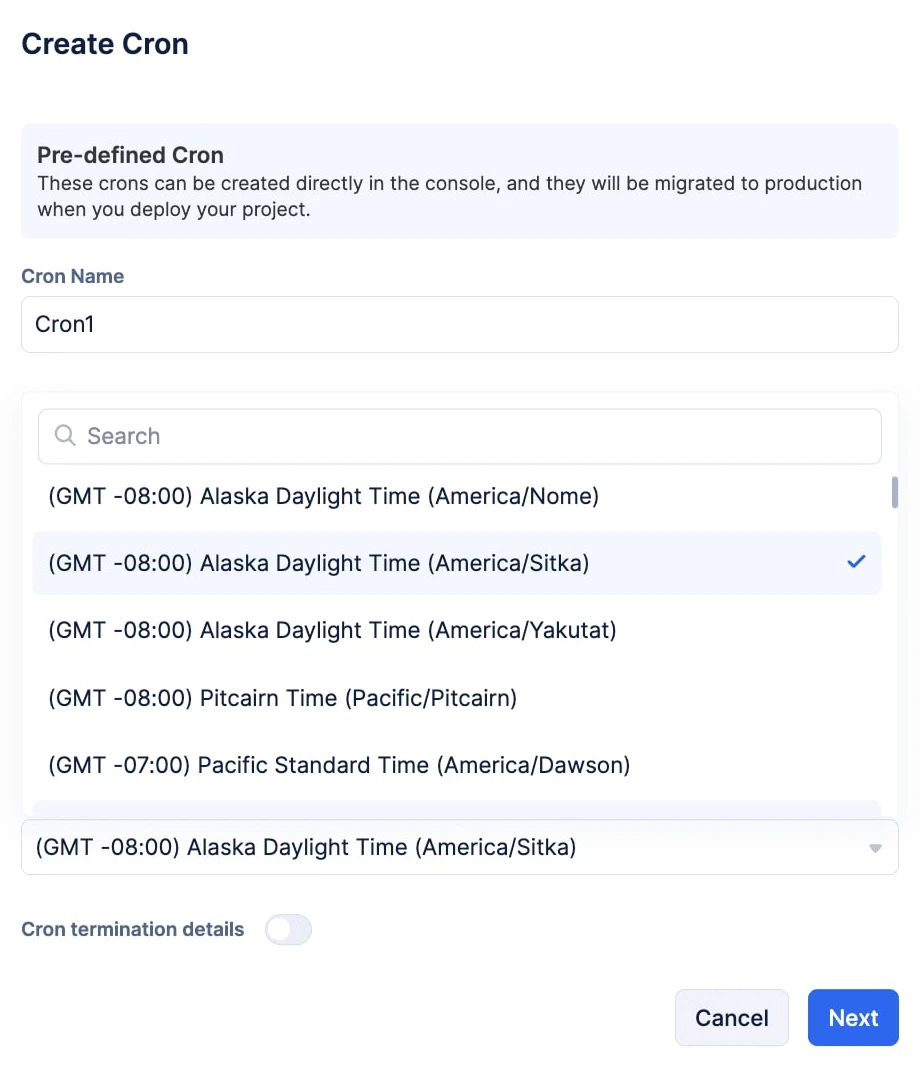
Note: The time zone you are currently present in will be automatically populated. If you require any other time zone to configure your cron, click the View all time zones option and make your selection from the drop-down.-
Optionally, if you have defined the schedule of your cron to in a recurssive manner, and if you are required to terminate the cron schedule eventually, enable the Cron termination details toggle and select the end date using the calendar icon.
-
Confirm your configurations and click Next.
We have now completed configuring the Pre-Defined Cron. Now we are going to configure the job that the Pre-Defined Cron will submit to the job pool at the scheduled time, to trigger the required target type.
Configure the Job
Once you click Next after configuring the Cron, you will be directed to create the job that the configured cron must submit.
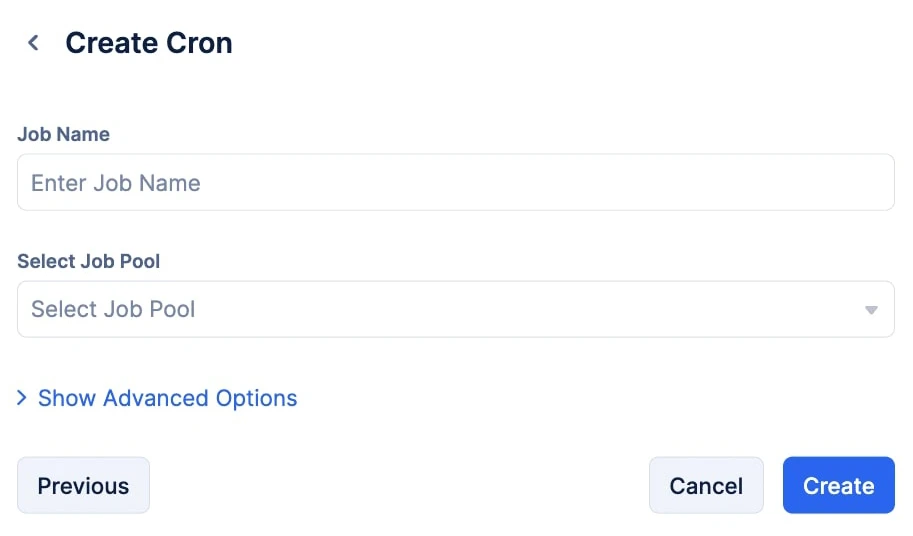
To create the required job:
-
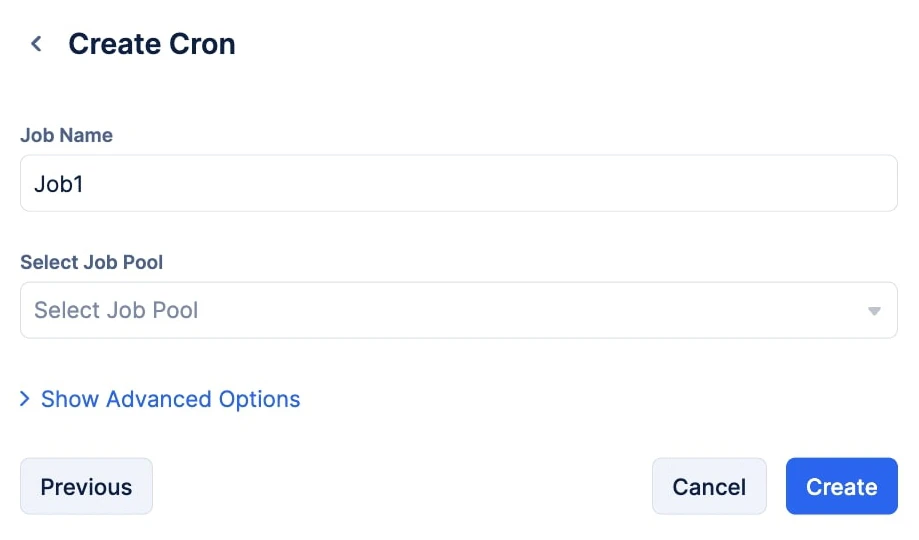
Provide a name for your job in the Job Name input field.
-
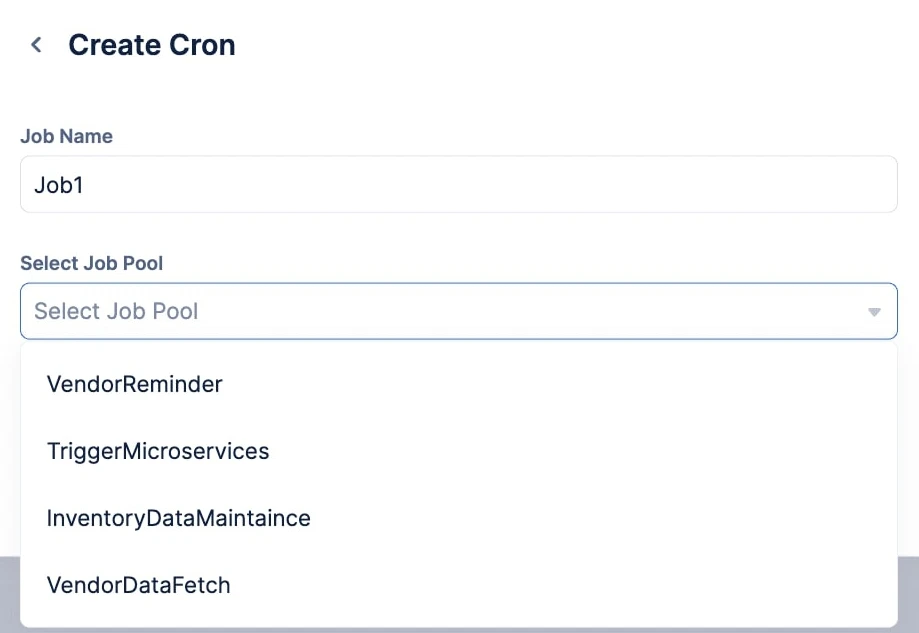
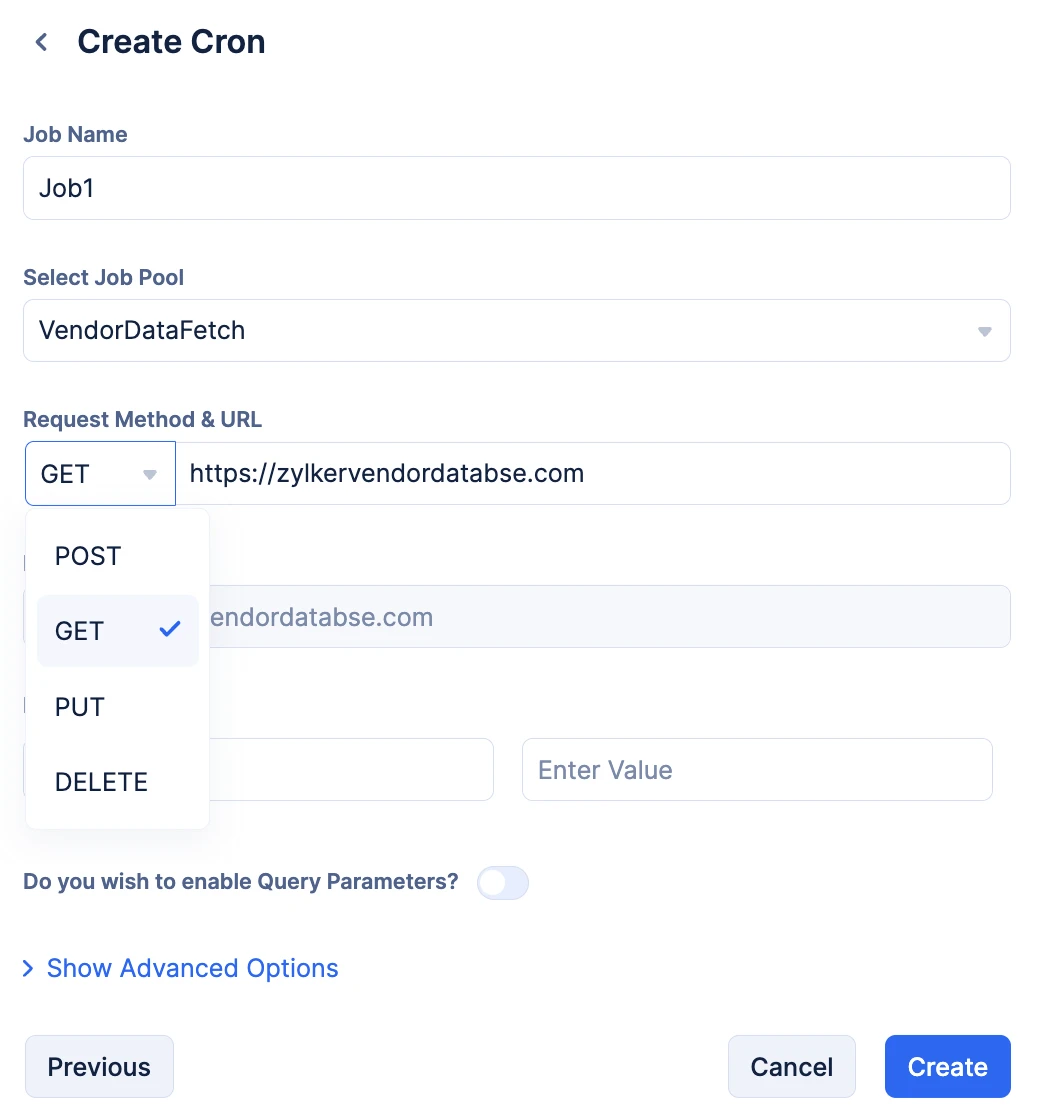
Select the Job Pool you need your Cron to submit the job to, using the Select Job Pool drop-down.
-
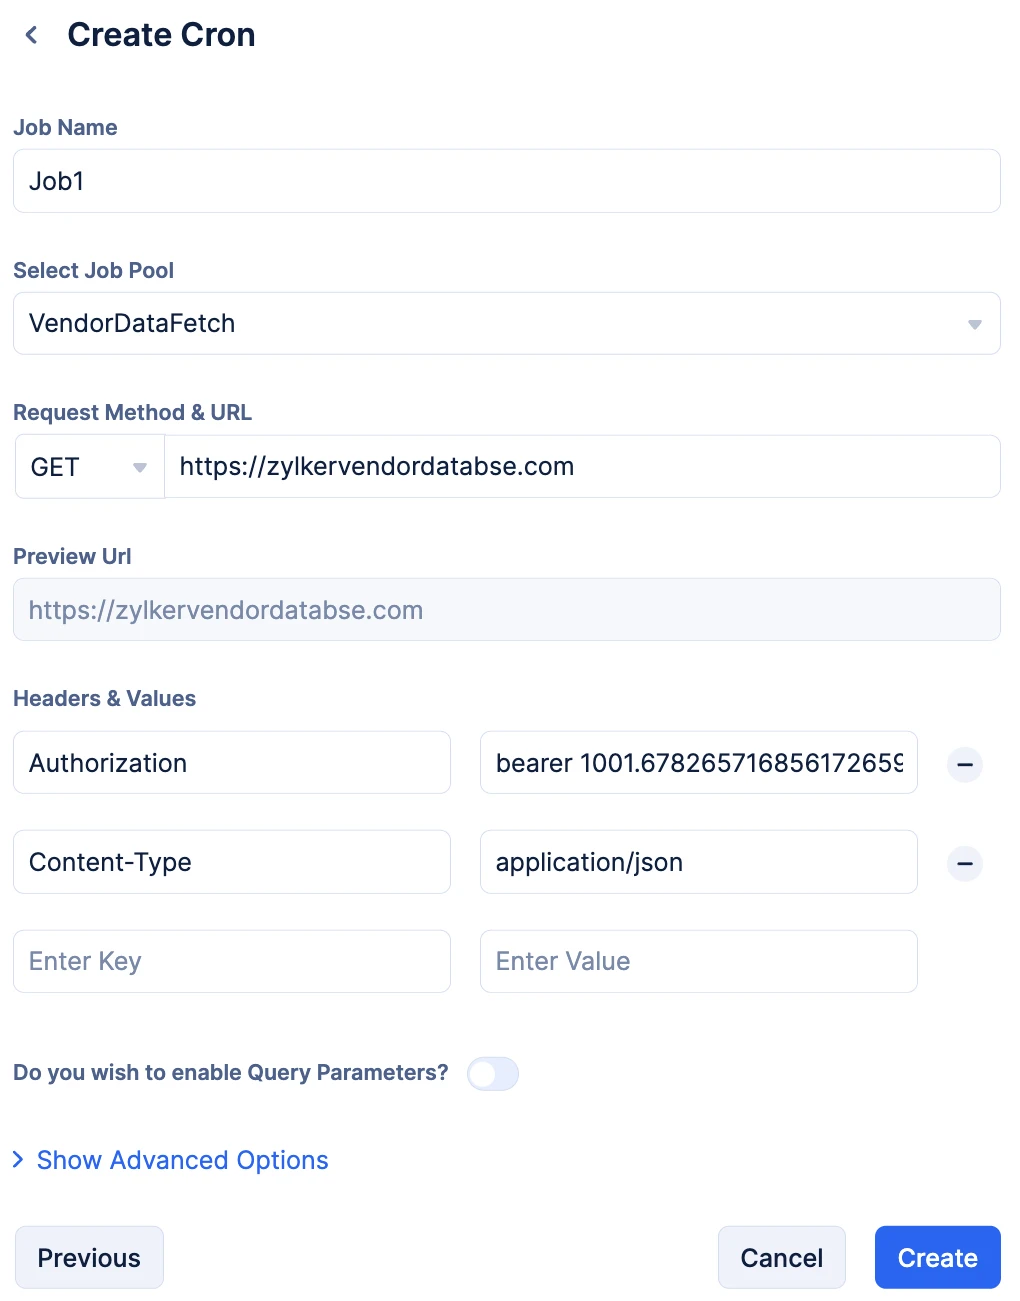
Enter the complete URL of the webhook you wish to trigger in the input field and select the Request Method from the drop-down.
-
You can provide Headers & Value in a key-value pair format.
-
Enable the toggle to input Query Parameters and provide the Params in a key-value format.
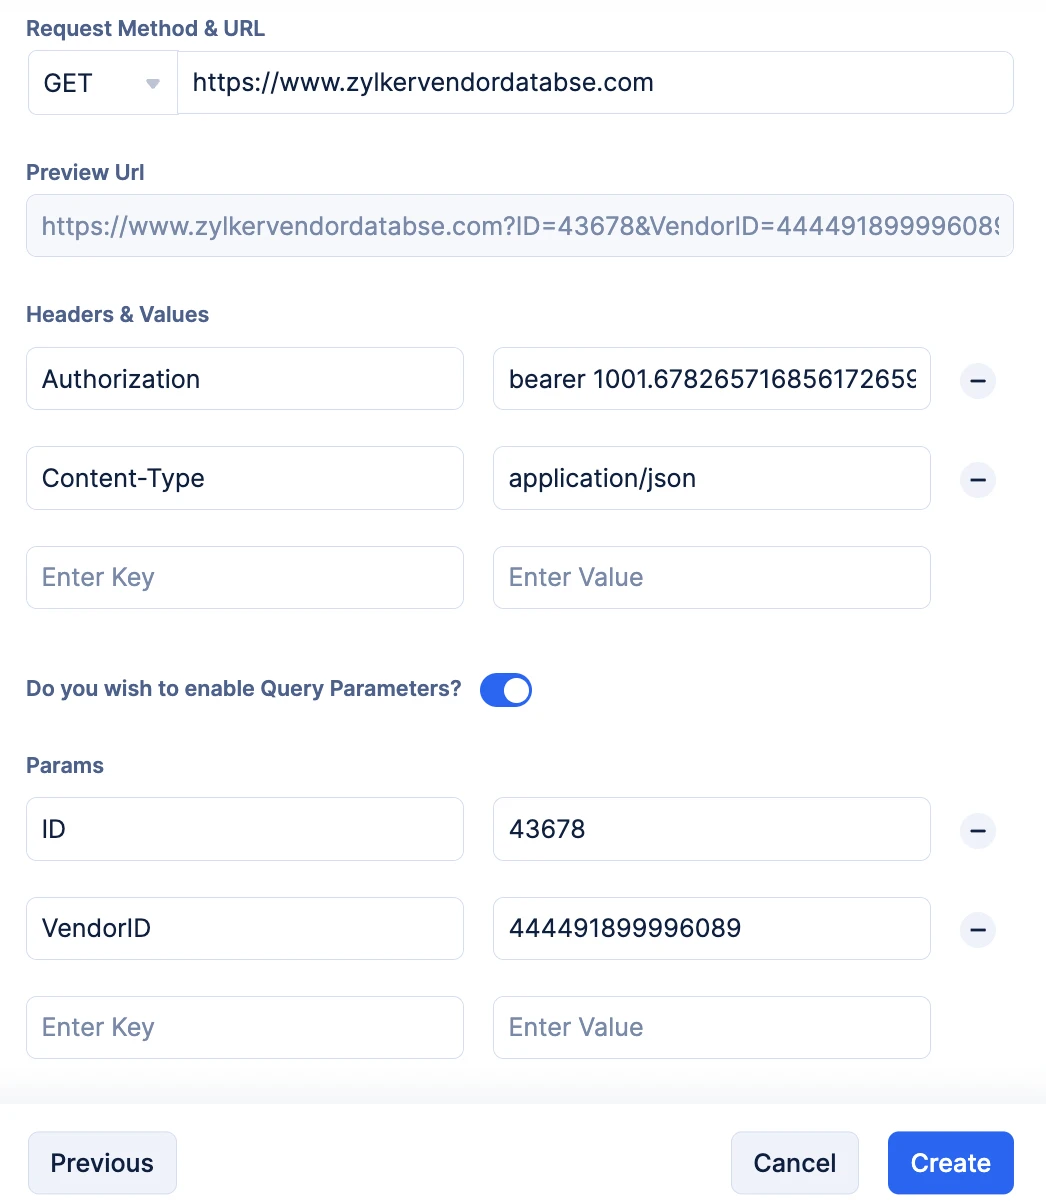
You can verify your Query Parameters in the Preview URL section. This section will be automatically populated when you input them.
- Optionally, you can click the Show Advanced Options to provide resubmission instructions.
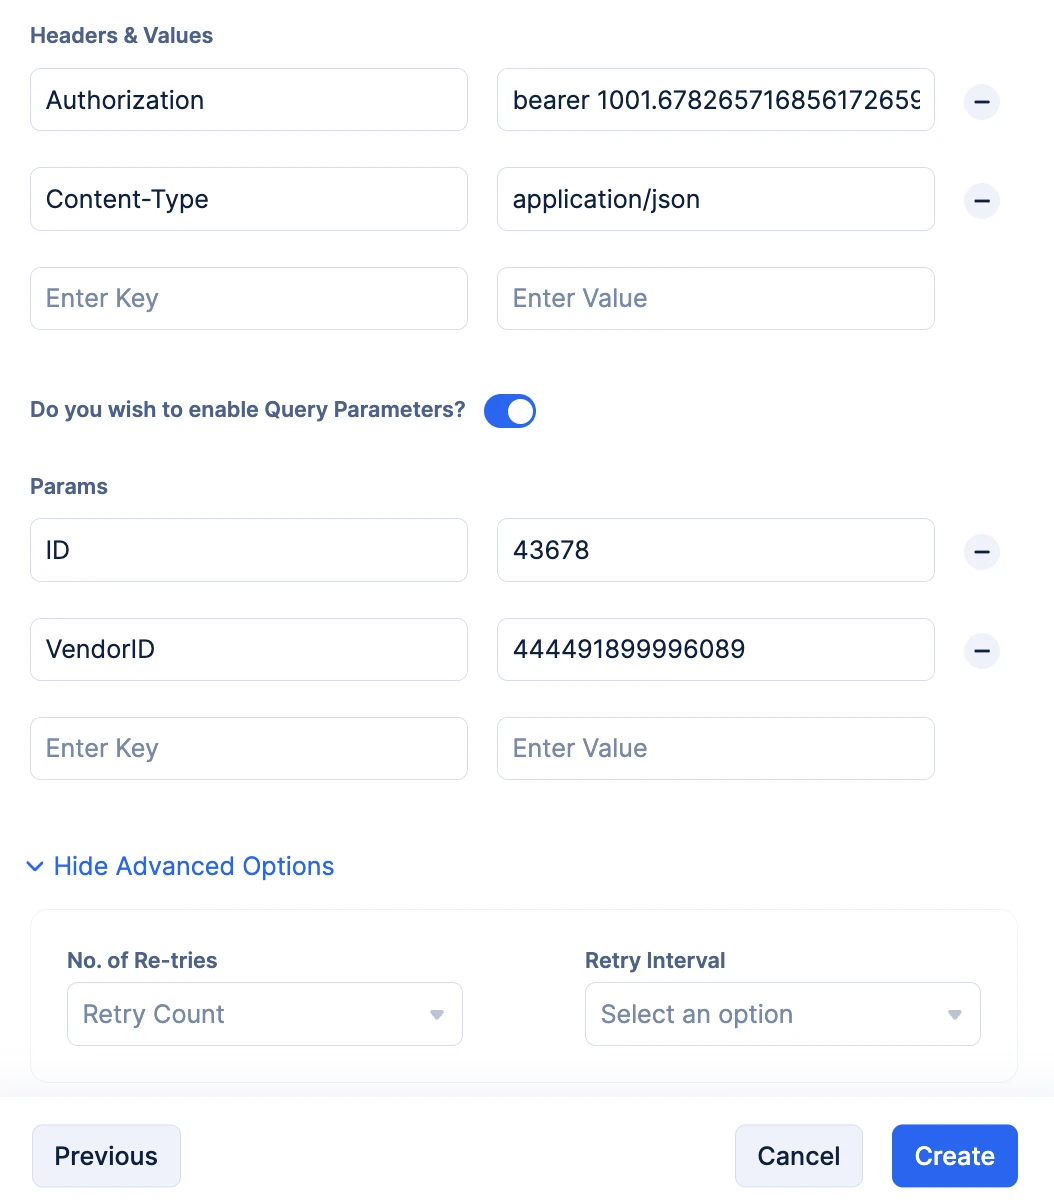
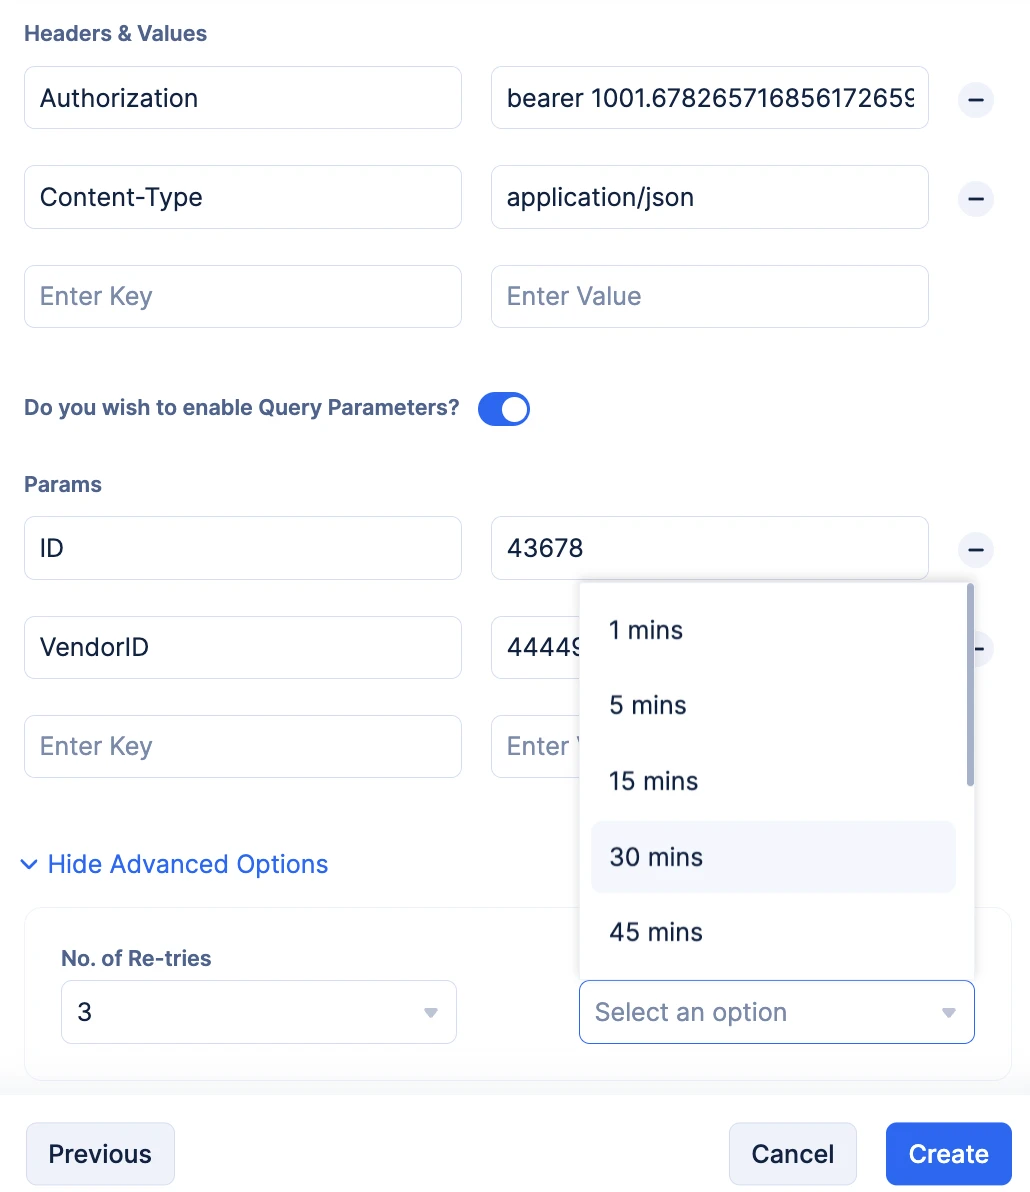
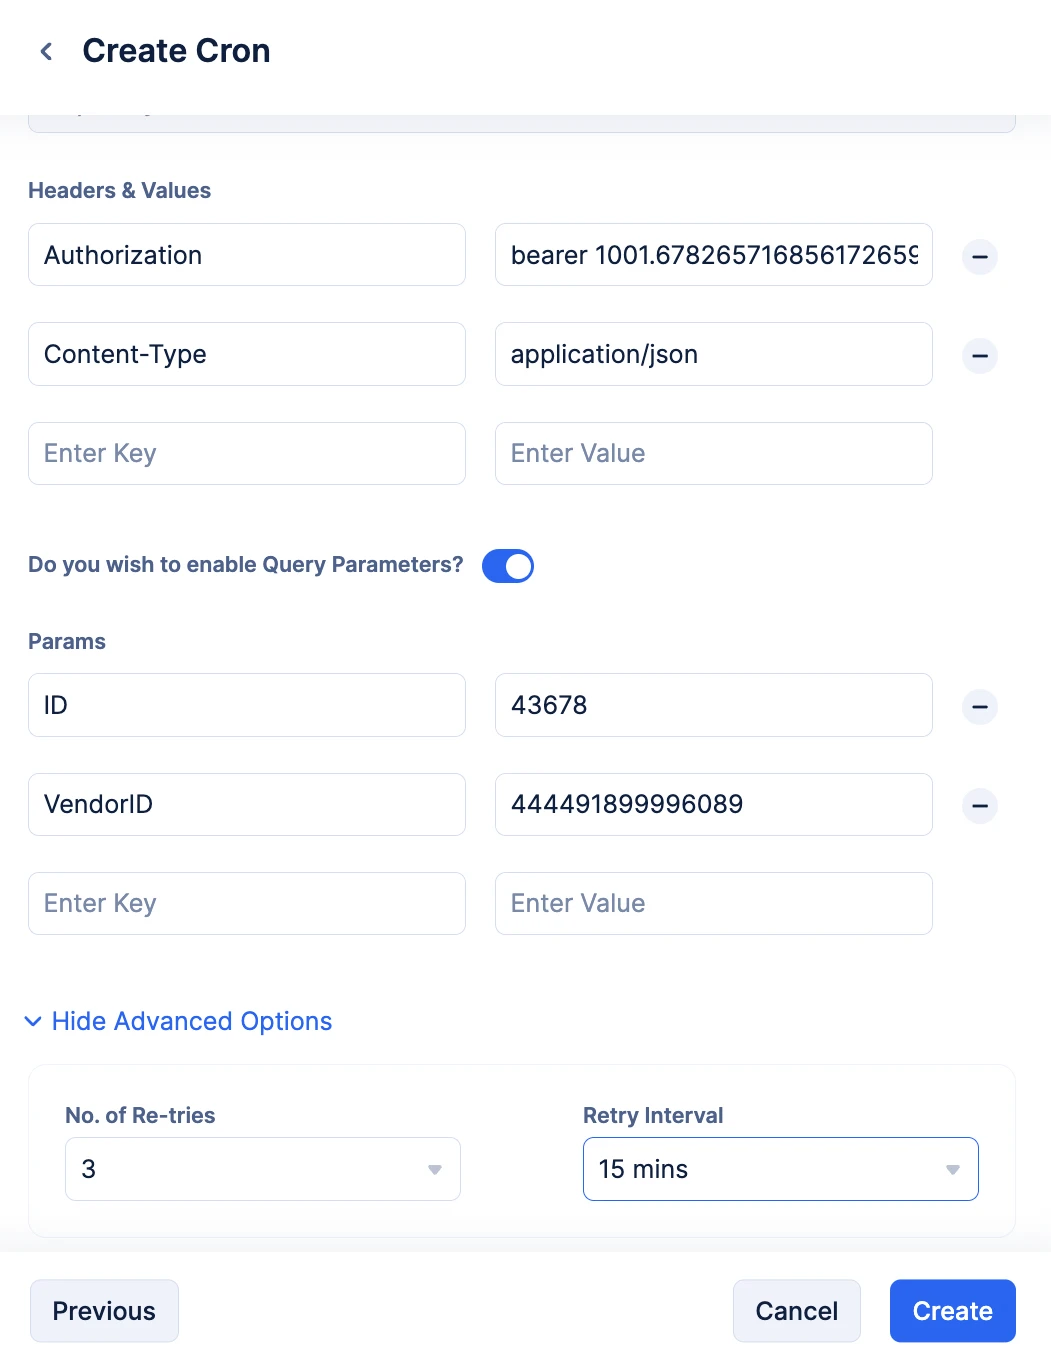
- You can choose the number of retries you wish to attempt from the No. of Retries drop-down, and you can choose the time interval between each retry attempt using the Retry Interval drop-down.
- Confirm your configurations, then click Create.
The Pre-defined Cron will be created, with a unique Cron ID generated by Catalyst. The job the cron is configured to submit will also be created along with its unique Job ID generated by Catalyst. Upon clicking Create, you will be able to view all the details about the created cron and its configurations.
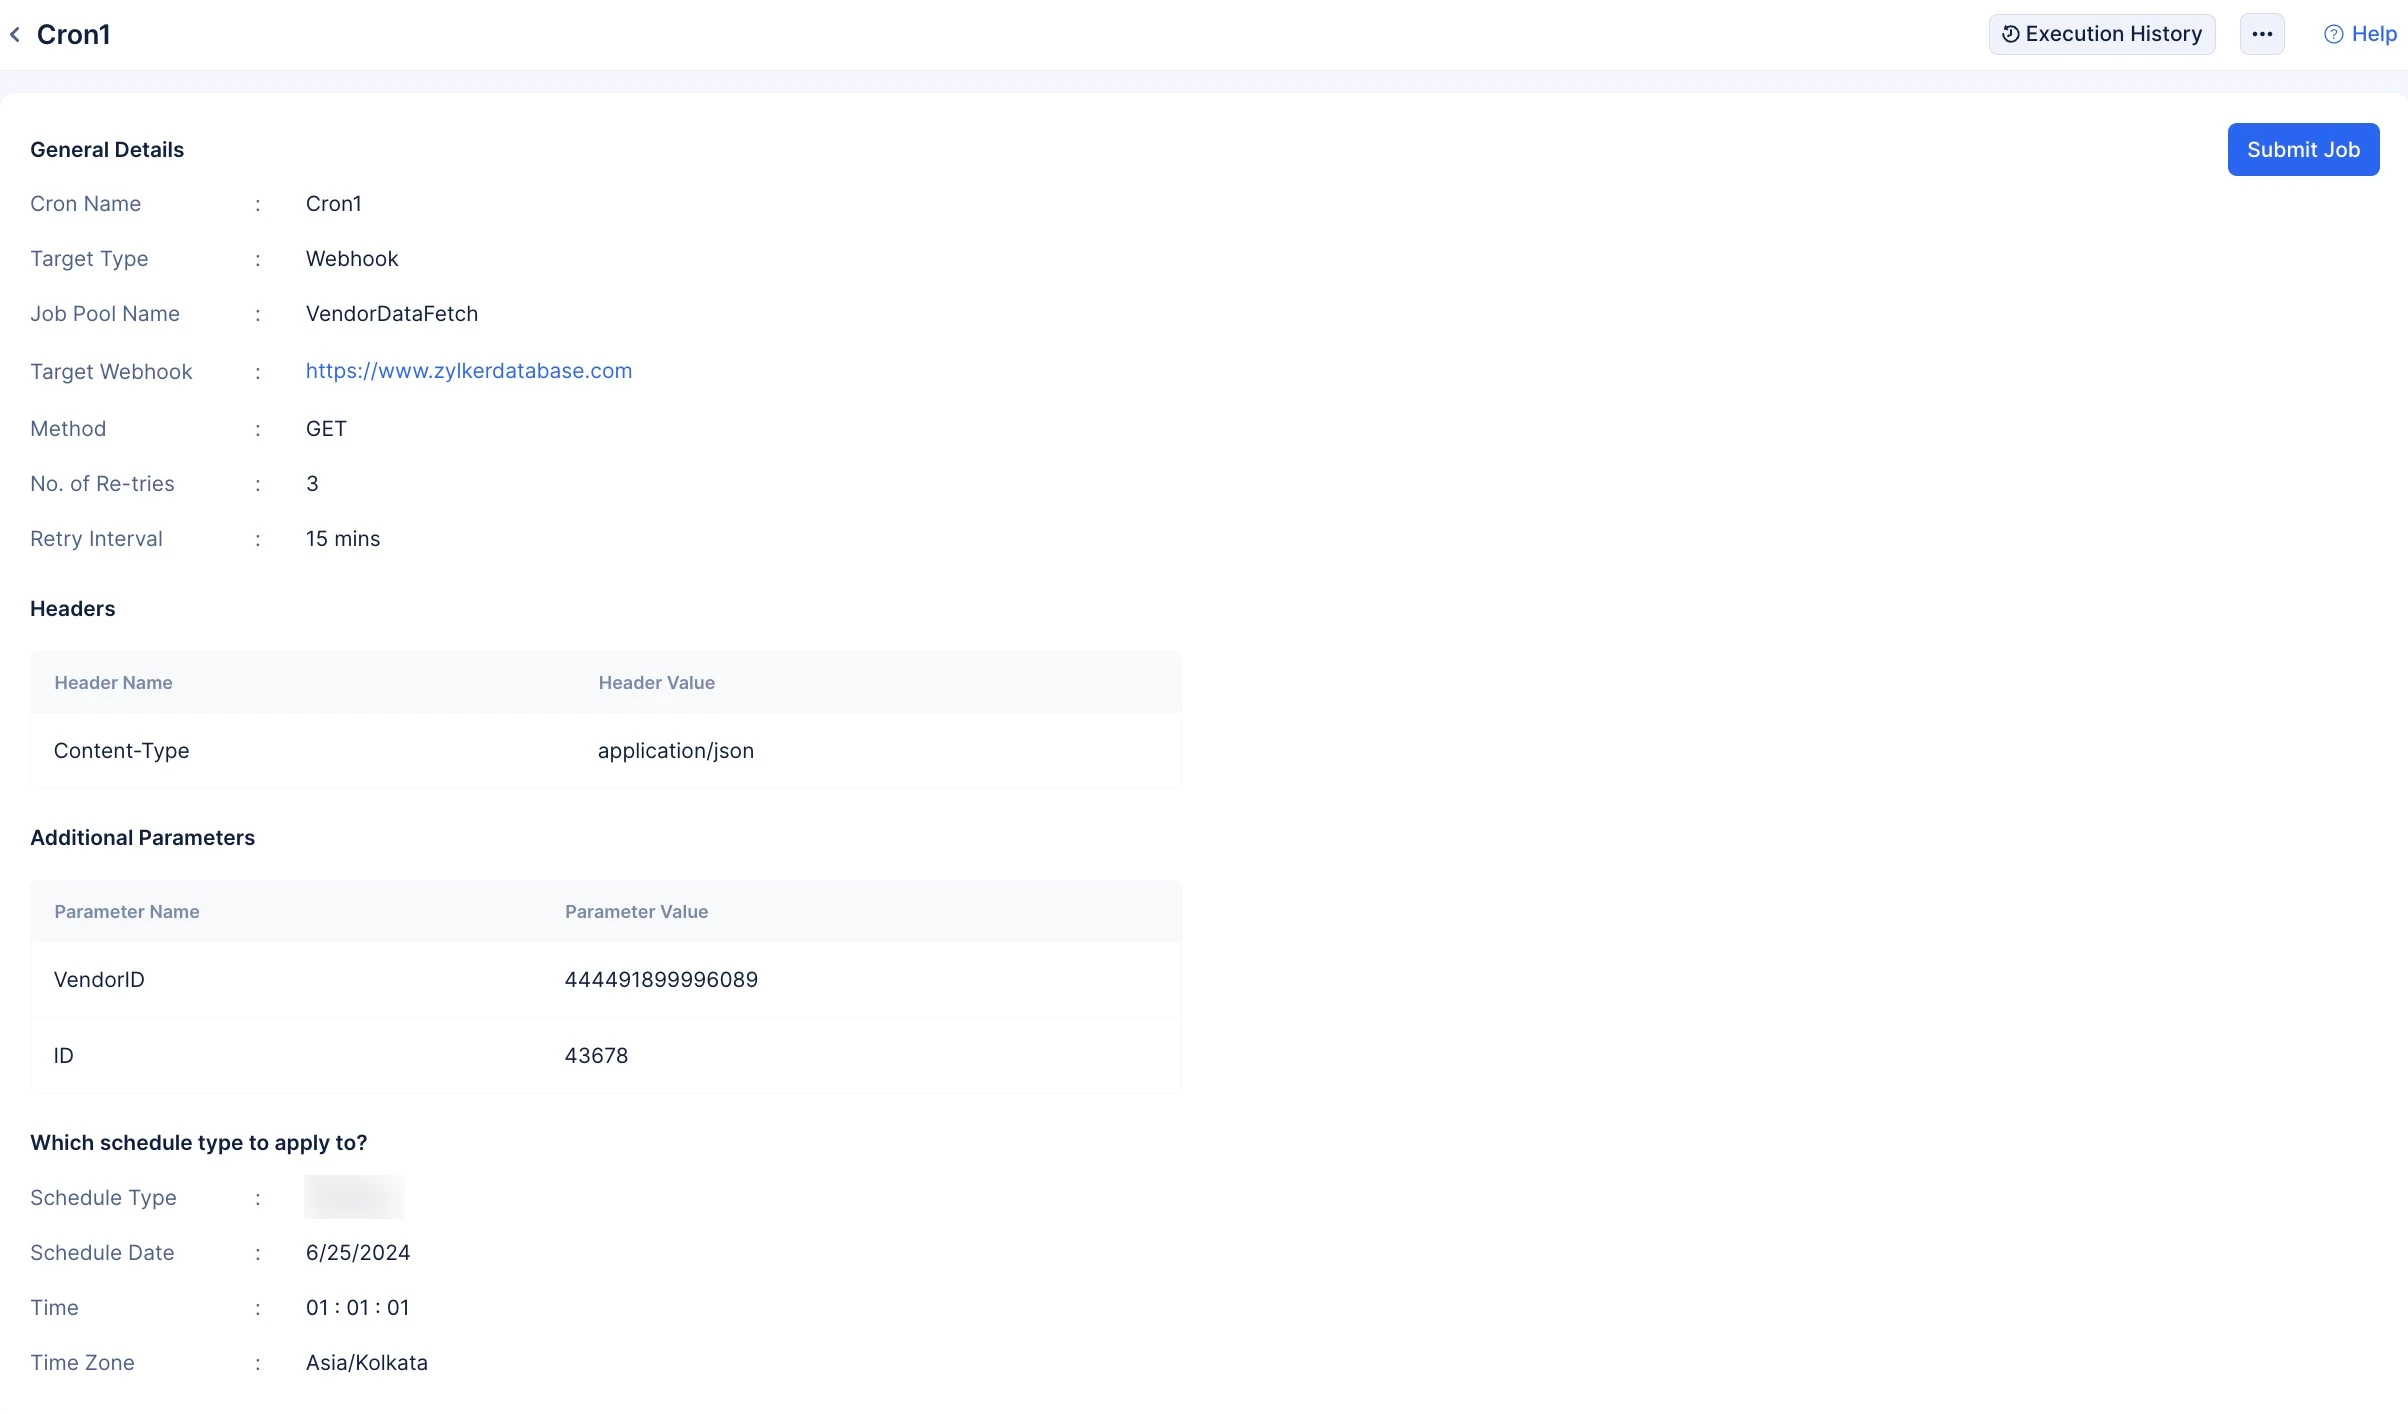
If you wish to test the cron and not wait for the scheduled time, you can submit an immediate job to the job pool by clicking the Submit Job button.
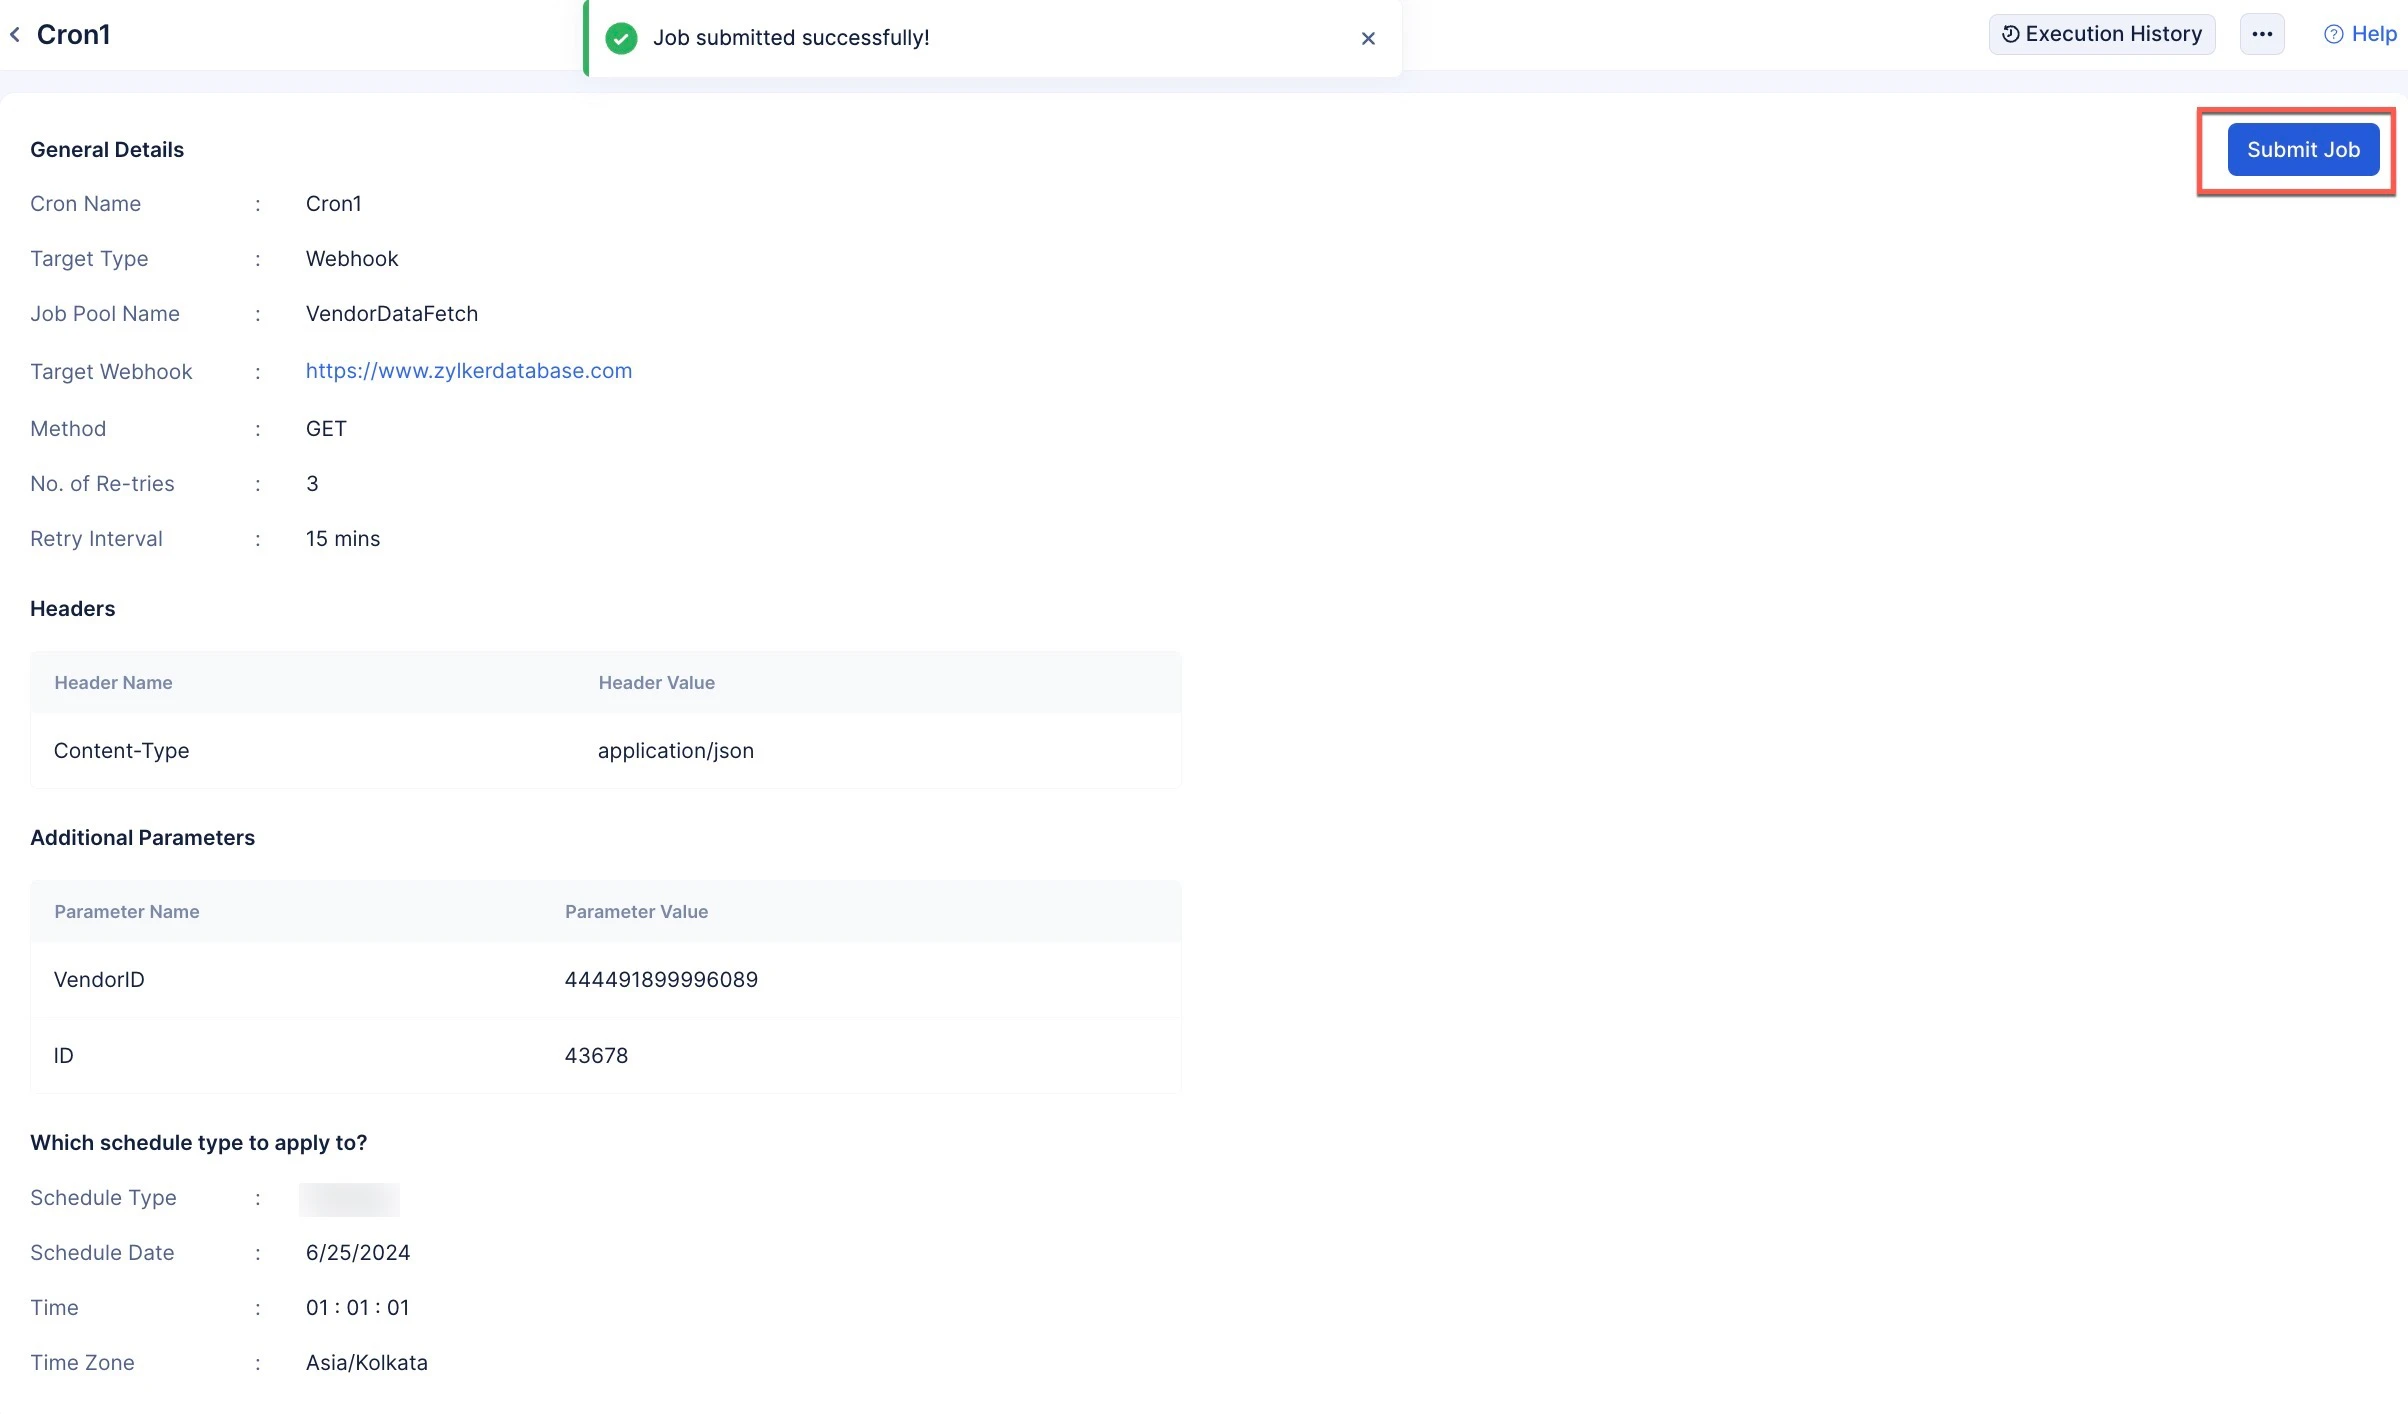
A job will be submitted immediately. The configurations of the job will be the one you configured while creating the cron.
You can view the execution status of the job you submitted by clicking the Execution History button.
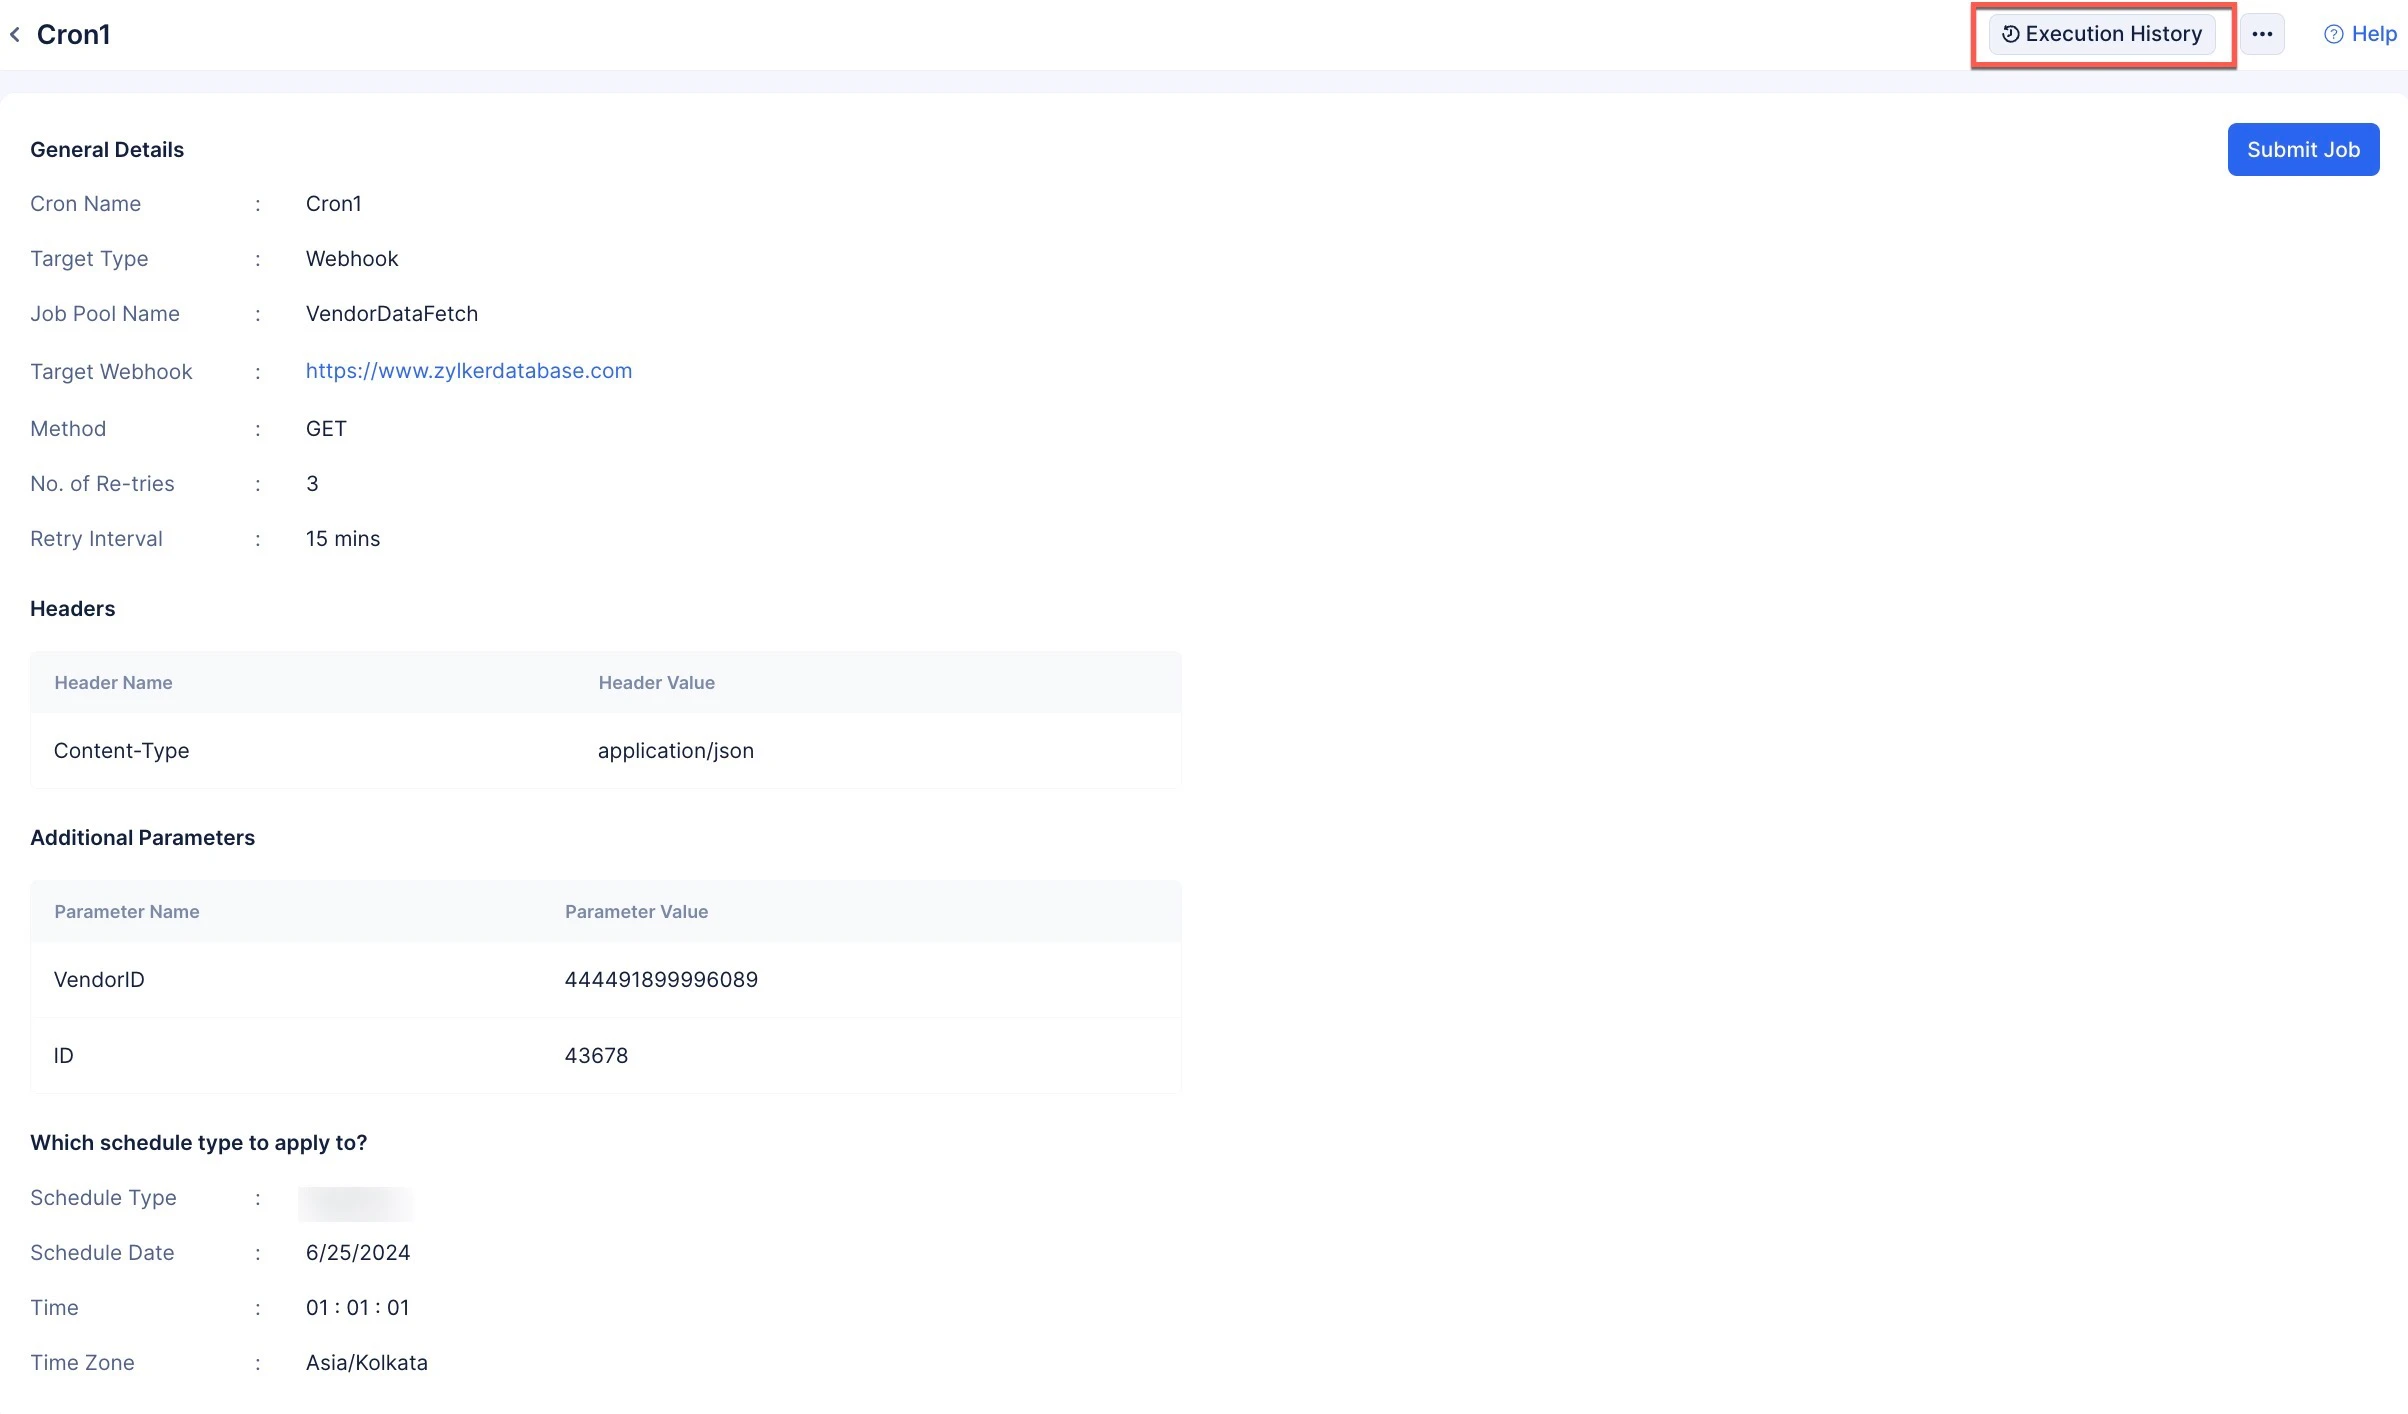
The jobs will be listed in the latest order of execution. You can also perform search and filter options on the Execution History operations.
Last Updated 2025-06-03 18:19:55 +0530 IST
Yes
No
Send your feedback to us