Connect Catalyst On-Demand MCP Server to an MCP Client
To connect with an on-demand MCP server to an LLM, you need to first generate an MCP URL, by creating and configuring a Catalyst MCP server.
Create an MCP Server
To create an MCP server:
- Go to Zoho MCP console.
- Click Create MCP Server.
- Provide a name for your MCP server, then click Create.
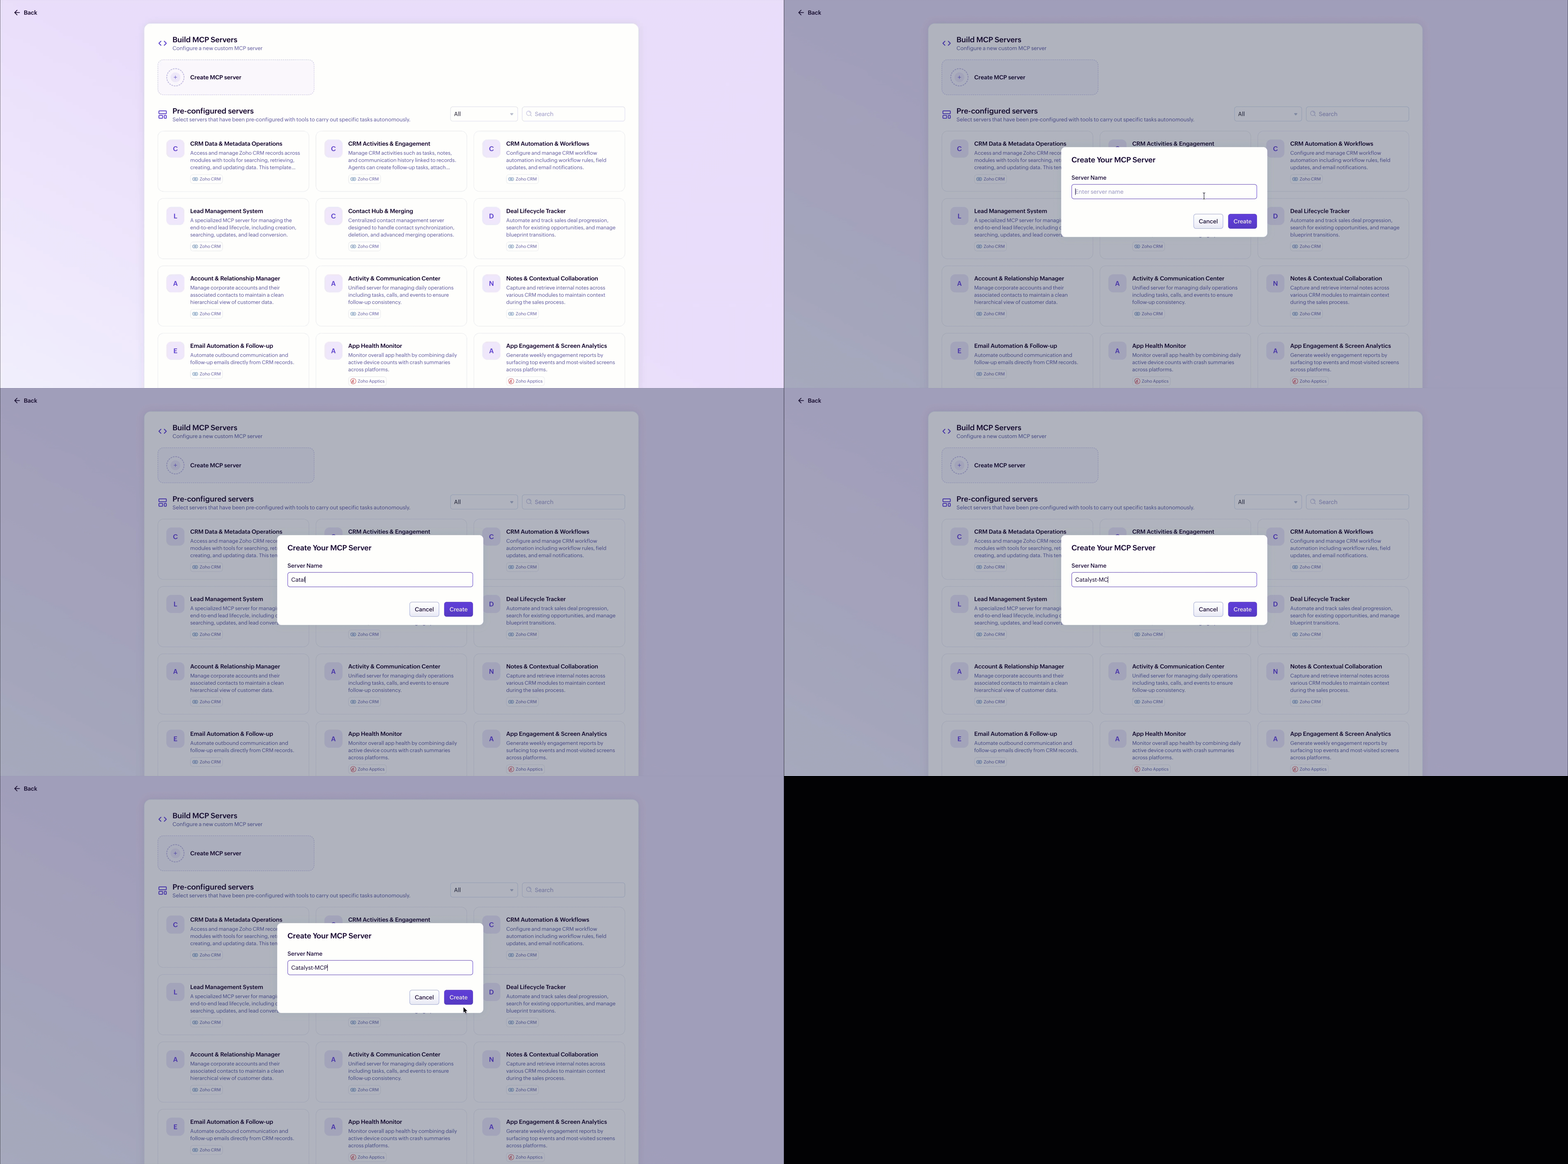
Your MCP server will be created.
Configure MCP Server with Catalyst’s MCP Tools
To configure your Catalyst on-demand MCP server:
- Click Add Tools.
- Search for Catalyst by Zoho.
- Add your required tools.
- Click Add Now.
The required tools will be added to your Catalyst MCP server.
Get MCP URL
To get the MCP URL:
- Click Connect present in the side-panel of the MCP console.
- Copy the MCP Server URL.
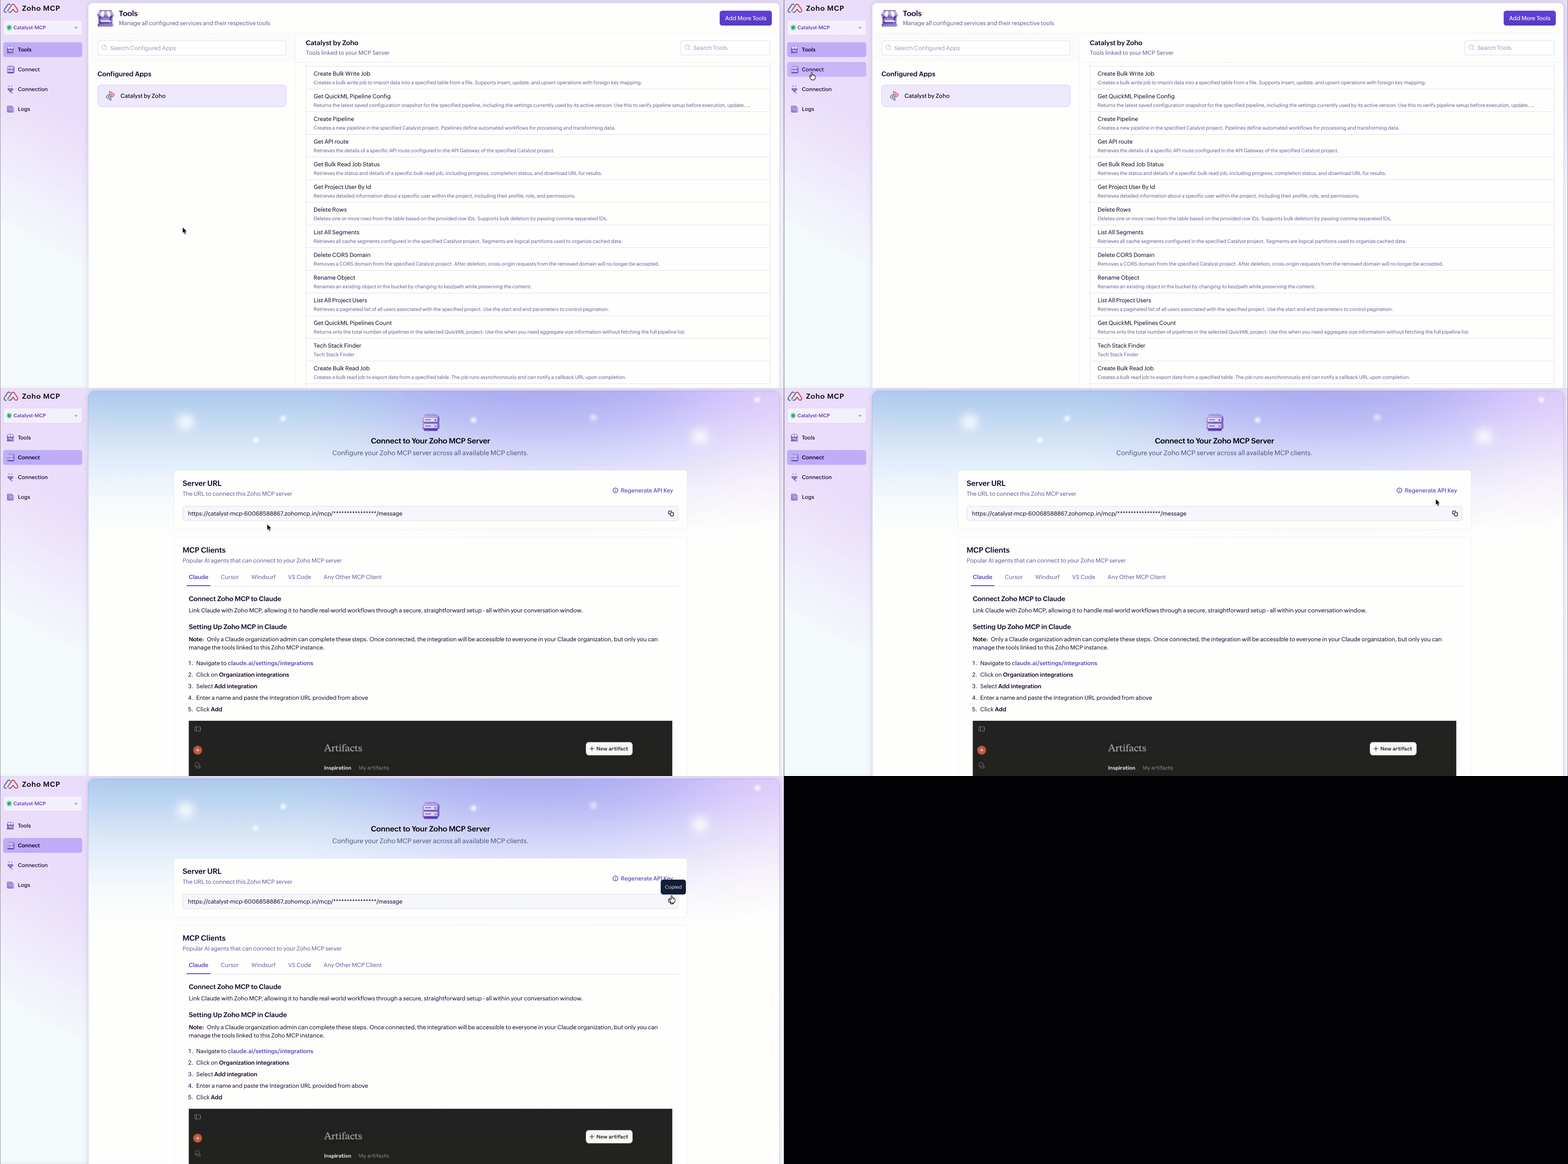
Your Catalyst on-demand MCP Server is now ready to be connected with your preferred MCP Client.
Connect Catalyst On-Demand MCP Server
Use the MCP URL to connect your server to your preferred MCP client. The configuration process may vary depending on the client used.
Connect Catalyst On-Demand MCP Server to Claude.ai
To connect your Catalyst MCP server to Claude.ai:
- Navigate to the Connect section present in the MCP Console.
- Copy the MCP URL.
- Go to http://claude.ai/settings/integrations.
- Click the Add drop-down.
- Click Add Custom Connectors.
- Provide a name for the MCP server, and paste your MCP URL.
The MCP server is now added to your MCP Client. To complete the connection, you need to authorize the MCP Server connection to Claude.
- Access your MCP server from the list of Connectors and click Connect.
- Follow the authorization process, and your MCP server will be connected and ready to use.
You can now leverage the artificial intelligence of Claude.ai through the Catalyst On-Demand MCP Server, which equips Claude with the required context it needs to understand and execute your operations on the Catalyst console.
Connect Catalyst On-Demand MCP Server to ChatGPT
To connect your Catalyst MCP server to ChatGPT:
To connect your Catalyst Global MCP Server to ChatGPT:
- Navigate to the Profile > Settings > Apps section in ChatGPT, then click Create App.
- Provide a name and description for you server.
- Paste your MCP Server URL.
- Select OAuth as the authentication type.
- Click Create.
You will be directed to the Zoho MCP authorization screen in your local host.
- Click Allow.
Follow the authorization process, and your MCP server will be connected and ready to use.
You can now leverage the artificial intelligence of ChatGPT through the Catalyst On-Demand MCP Server, which equips ChatGPT with the context it needs to understand and execute your operations on the Catalyst console.
Connect Catalyst On-Demand MCP Server to Cursor
Unlike other MCP Clients that require manual steps to add MCP servers, Cursor offers you automatic configuration, in addition to manual configuration.
To connect your MCP server to Cursor using automatic configuration:
- Navigate to the Connect section in the MCP console.
- Select Cursor from the list of MCP Clients.
- Click Add to Cursor.
The required configurations to add your MCP server to Cursor will be automatically handled.
However, for Cursor to access your MCP server and the tools configured in it, you need to connect and provide the required authorizations.
To connect your Catalyst MCP server to Cursor:
- Navigate to the Connect section present in the MCP Console.
- Copy the MCP URL.
- Navigate to the Tools & Integrations tab in the Settings section in Cursor, and click Add Custom MCP.
- You will be directed to the mcp_config.json file.
- Paste the following code snippet in the file and replace Your-MCP-URL with the MCP URL you copied:
{
  "mcpServers": {
    "ZohoMCP": {
      "command": "npx",
      "args": [
        "mcp-remote",
        "Your-MCP-URL",
        "--transport",
        "http-only"
      ]
    }
  }
}
Once you click Save, you will be directed to the Zoho MCP authorization screen in your local host.
- Click Allow.
Follow the authorization process, and your MCP server will be connected and ready to use.
You can now leverage the artificial intelligence of Cursor’s AI models through the Catalyst On-Demand MCP Server, which equips them with the context they need to understand and execute your operations on the Catalyst console.
Connect Catalyst On-Demand MCP Server to CoPilot
Unlike other MCP Clients that require manual steps to add MCP servers, VS Code offers you automatic configuration in addition to manual configuration.
To connect your MCP server to VS Code using automatic configuration:
- Navigate to the Connect section present in the MCP console.
- Select VS Code from the list of MCP Clients.
- Click Add to VS Code.
The required configurations to add your MCP server to VS Code will be automatically handled.
However, for VS Code to access your MCP server and the tools configured in it, you need to connect and provide the required authorizations.
To manualy connect your Catalyst MCP server to CoPilot:
- Navigate to the Connect section present in the MCP Console.
- Copy the MCP URL.
- Ensure GitHub Copilot is installed, active, and set to Agent mode.
- Access the VS Code Command Palette.
- On Mac: ⇧ + ⌘ + P
- On Windows: Ctrl + Shift + P
- Search for “MCP:Add Server…”.
- Choose the “HTTP (HTTP or Server-Sent Events)” option, then press Enter.
- In the Server Key input field, paste the MCP URL you copied, then press Enter.
- Provide a name for your MCP server and press Enter.
You will be directed to the Zoho MCP authorization screen in your local host.
- Click Allow.
Follow the authorization process, and your MCP server will be connected and ready to use.
You can now leverage the artificial intelligence of the AI models present in CoPilot through the Catalyst On-Demand MCP Server, which equips them with the context they need to understand and execute your operations on the Catalyst console.
Connect Catalyst On-Demand MCP Server to Windsurf
To connect your Catalyst MCP server to Windsurf:
- Navigate to the Connect section present in the MCP Console.
- Copy the MCP URL.
- Navigate to Windsurf’s Settings.
- Search for “mcp” in the Settings search bar, and click Manage Plugins.
- Click View Raw Config.
- You will be directed to the mcp_config.json file. Paste the following code snippet in this file and replace Your-MCP-URL with the MCP URL you copied:
{
  "mcpServers": {
    "ZohoMCP": {
      "command": "npx",
      "args": [
        "mcp-remote",
        "Your-MCP-URL",
        "--transport",
        "http-only"
      ]
    }
  }
}
Once you click Save, you will be directed to the Zoho MCP authorization screen in your local host.
- Click Allow.
Follow the authorization process, and your MCP server will be connected and ready to use.
You can now leverage the artificial intelligence of Windsurf’s AI models through the Catalyst On-Demand MCP Server, which equips them with the context they need to understand and execute your operations on the Catalyst console.
Connect Catalyst On-Demand MCP Server to a Custom MCP Client
To connect your Catalyst MCP server to a custom MCP client, ensure:
- It is compatible to accept remote MCP servers.
- It supports connection through HTTP or Streamable Transport.
Once you confirm the fulfillment of the above requirements:
- Navigate to the Connect section present in the MCP Console.
- Copy the MCP URL.
- Ensure Agent mode or its equivalent mode is enabled in your tool.
- Create a mcp_config.json file or search and find the appropriate file in your AI tool.
- Paste the following code snippet in the file and replace Your-MCP-URL with the MCP URL you copied:
{
  "mcpServers": {
    "ZohoMCP": {
      "command": "npx",
      "args": [
        "mcp-remote",
        "Your-MCP-URL",
        "--transport",
        "http-only"
      ]
    }
  }
}
Follow the authorization process, and your MCP server will be connected and ready to use.
If you are facing further difficulties, reach out to Catalyst Support.
Last Updated 2026-07-30 12:32:16 +0530 IST
Yes
No
Send your feedback to us